 Skip to content

Your first fabric project can begin on an ordinary table with a few well-chosen tools. You do not need a sewing machine, a wall of thread, or a cutting system before making a felt bookmark or decorating a ready-made pouch. Start with something small enough to arrange, join, and inspect comfortably. The most useful beginner tools for DIY fabric crafts help you complete five jobs: measure, mark, cut, hold, and connect. Everything else earns its place when a particular project calls for it.
Good results depend on how the materials behave together. A sharp pair of scissors cannot prevent a loose template from shifting, and a strong adhesive cannot make an unsuitable fabric combination invisible or washable. This guide explains what to prepare, how to practice without wasting your best fabric, and how to recognize a finished piece ready for use. The measurements below are practical examples, while product waiting times are attributed to their manufacturers. Neither should be treated as a guarantee for every fabric or design.
1. What Tools Do Beginners Need for DIY Fabric Crafts?
Most small fabric crafts need fabric scissors, a ruler, a paper template or removable marking tool, and a way to hold the pieces still. Add suitable fabric glue or a hand-sewing needle and thread for joining. Keep matching scraps for practice. A rotary cutter, iron, and sewing machine become useful when the design requires their particular cutting, pressing, or stitching functions.
Start with a Small, Practical Tool Kit
Choose tools around the first finished object you want to make. For a flat bookmark, a straight ruler is more useful than a dressmaking tape measure, and a reusable paper template can replace repeated measuring. Comfortable handles matter because you need to guide the tool without squeezing excessively or changing your wrist position. Left-handed makers should check whether the scissors actually cut comfortably in their left hand. Try available tools on a scrap before replacing them, and buy individual items when a large set mostly contains unfamiliar accessories.
| Tool or supply | Practical starting specification | Main job | When to add more |
|---|---|---|---|
| Fabric scissors | 1 sharp pair suited to your hand | Cut straight edges and curves | Add small detail scissors for repeated tiny shapes |
| Straight ruler | A 30 cm or 12 in ruler is useful for these examples | Measure templates and placement | Add a flexible tape for curved measurements |
| Paper template or fabric marker | 1 reusable template or tested removable marker | Repeat shapes and mark positions | Add specialist marking tools for particular fabrics |
| Sewing clips or suitable pins | Enough to hold the actual layers without crowding | Keep edges aligned | Increase quantity for longer edges or batch work |
| Working surface | Flat, well lit, and appropriately protected | Support cutting and assembly | Add a cutting mat whenever using a rotary cutter |
| Needle and thread or fabric adhesive | Match the fabric and joining method | Connect the pieces | Change the method when use or washing demands change |
The quantities and ruler size above are starting suggestions for the projects in this guide, not an industry minimum. Fabric, thread, glue, and decorations are consumables; scissors and rulers are reusable tools. Separating those categories makes shopping easier. Keep a small box for the reusable equipment and a separate bag for clean offcuts. A scrap from the actual project fabric is more informative than an unrelated test cloth when checking a marker, adhesive, or cutting technique.
- Reference and printable download: Utah State University Extension separates basic, optional, and advanced sewing supplies in its Basic Sewing Supplies PDF. Use it to understand tool functions, then select items appropriate to your project.
Choose Supplies for No-Sew, Hand-Sewn, or Machine-Sewn Projects
An easy way to avoid unnecessary purchases is to decide how the pieces will be joined before choosing a kit. A no-sew decoration needs a compatible adhesive and reliable positioning. A hand-sewn item needs a needle, thread, and access to both sides of the seam. A machine-sewn project also needs a suitable machine needle, thread path, and handling method. These routes can overlap: you might sew a pouch and glue a decorative letter onto it, provided the adhesive is suitable for the surface and eventual care.
- No-sew route: scissors, ruler or template, clips, matching scraps, and a suitable permanent adhesive or fusible material.
- Hand-sewn route: the same measuring and cutting tools, plus a suitable needle, thread, and a thimble if helpful.
- Machine-sewn route: add the machine’s specified accessories and learn its threading and operating instructions before sewing the project fabric.
Add Specialist Tools Only When Your Project Needs Them
A rotary cutter makes sense when you repeatedly cut strips or geometric panels, but it needs a compatible cutting mat and an appropriate ruler. Buying the cutter alone leaves the task unfinished. An iron is useful for pressing seams or activating suitable fusible materials, although its temperature must also suit the fabric. A hot glue gun is not a universal starter requirement for fabric crafts. Choose it only for an application supported by the adhesive and materials, rather than assuming any fast-setting glue will withstand bending or washing.
2. How Do You Measure, Mark, and Cut Fabric Accurately?
Accurate cutting starts with a stable template, clear measurements, and fabric lying comfortably on a flat surface. Decide whether the pattern includes seam allowances, check the direction of any print, and test the marking method on a scrap. Cut a practice piece before committing the main fabric. Scissors suit many small shapes; a rotary cutter helps with repeated straight cuts when used with its supporting equipment.
Make a Paper Template Before Cutting Your Fabric
Make the first version of a new shape in paper or thin card so you can check the size without sacrificing fabric. Write the cutting dimensions and required quantity on the template, particularly when the project uses matching pairs. For a simple 20 x 5 cm bookmark, place the paper inside the intended book and check its proportions before cutting. If you print a downloaded pattern, check its scale square with a ruler; a printer’s fit-to-page setting can change every measurement even when the picture looks correct.
Before laying out washable woven fabric, follow the project, fabric, and adhesive instructions for any required prewashing. Let it dry fully and flatten wrinkles using a method permitted by its care instructions. Do not assume felt, coated cloth, or an unidentified old garment should receive the same treatment. Examine the usable area for holes, worn patches, or distorted edges. Place directional motifs consistently, and leave enough room for every required piece before cutting the first one out.
- Confirm the template’s cutting dimensions and whether allowances are included.
- Place every required piece on the usable fabric area.
- Check print direction, folds, and any pattern grainline.
- Secure the template without stretching the fabric.
- Cut one practice piece and compare it with the template.
- Proceed with the remaining pieces once the shape is satisfactory.
Test Fabric Markers Before Drawing on Your Project
Choose a mark you can see while working and remove before the item is finished. Chalk, water-soluble pens, and air-disappearing pens behave differently, and product names matter more than ink color. On a matching scrap, make the intended mark, remove it exactly as directed, let the fabric dry, and inspect both sides. A water-removable mark is a poor choice for material damaged by water. An air-disappearing mark may vanish before you finish a project spread across several evenings, so keep the paper template available.
Heat is another reason to test early. Some marking products can become difficult or impossible to remove after pressing, while certain fabrics develop water marks during removal. Do not iron across an unfamiliar mark simply because the line looks faint. Simplicity’s instructions discuss removability testing and possible heat setting of some marking formulas. For a small craft, a few discreet placement marks can be enough; covering the entire visible surface with guide lines creates more cleanup work than the project needs.
- Download beside your cutting setup: Simplicity’s How to Cut and Mark Fabric PDF explains transferring pattern marks and choosing removable marking methods.
- Video 1 – Watch fabric cutting and marking: Simplicity: Cut and Mark Fabric shows the relationship between a paper pattern, the fabric, and the placement marks. The link opens the publisher’s page containing the video.
Use Fabric Scissors First, and a Rotary Cutter When Helpful
With scissors, keep the fabric supported by the table and use your free hand to steady the nearby material without pulling it. Open and close the blades with controlled movements, repositioning the fabric when needed to follow a curve comfortably. If the scissors repeatedly drag or fold the cloth instead of cutting cleanly, inspect their condition and try a suitable alternative on the scrap. Avoid forcing the cut or trying to compensate by pulling the fabric tighter, since the released piece may no longer match your template.
For rotary cutting, place the material on a cutting mat, align an appropriate ruler, and keep the supporting hand away from the blade path. Close the blade guard whenever the cutter is set down. Common OLFA sizes include 28, 45, and 60 mm, with different sizes serving smaller curves, general cutting, or larger tasks. A 45 mm cutter is a general-purpose option, not a necessary purchase for every beginner. Start with a single layer until you can maintain alignment and control comfortably.
- Manufacturer reference: OLFA’s rotary cutter size guide explains how blade size relates to cutting tasks.
- Video 2 – Watch a rotary cutting introduction: Professor Pincushion: Rotary Cutting 101 introduces the tool and its basic use. Review the safety guidance before adding it to your kit.
3. How Do You Keep Fabric Pieces in Place While Working?
Arrange the complete design before adding glue or permanent stitches, then choose a holding method suited to the fabric and location. Clips work at accessible edges, suitable pins can secure internal areas, and pattern weights help during flat cutting. Work in small sections and keep the material supported. Better positioning reduces the need to pull apart wet adhesive or repeatedly correct a crooked seam.
Arrange and Mark Everything Before Applying Glue
A dry layout is a complete rehearsal with no adhesive applied. Set out the backing, letters, trim, and other pieces exactly where they will sit. Check the design from the normal viewing direction, not only from the side where you happen to be working. Photograph the arrangement before moving anything. If a design contains several similar pieces, keep them in order on a tray or label their storage positions. Writing directly on each visible fabric piece can create a separate marking problem later.
For an evenly spaced row, measure the available width after leaving the desired end margins. Subtract the combined widths of the decorations, then divide the remaining space by the number of gaps. With three letters there are two gaps between letters, not three. This approach also exposes a design problem before glue is opened: oversized letters cannot be made to fit neatly by reducing the gaps indefinitely. Cut smaller paper letters or choose a wider backing when the dry layout looks crowded.
Choose Clips, Pins, or Pattern Weights for the Job
Use clips where their jaws can grip the layers without distorting them. They are especially useful when you want to avoid pinholes, although delicate surfaces should still be checked for compression marks. Pins provide access away from an edge but must suit the fabric and be removed safely during sewing. Pattern weights serve a different purpose: they hold a template during flat layout and cutting, rather than maintaining pressure inside every glued joint. Move a weight or clip before it obstructs your tool instead of working awkwardly around it.
- Product-function reference: Clover’s Wonder Clips description explains the flat back, seam guides, and ability to hold certain materials without pinholes.
- Video 3 – Watch how fabric clips hold layers: Clover: Tool School – Wonder Clips helps you see how clips are positioned and handled during fabric work.
Use Tweezers and Small Trays for Tiny Pieces
Tweezers can make small letters, sequins, or narrow trims easier to place without smearing adhesive onto nearby fabric. Practice picking up a dry piece first, using light pressure so the decoration does not spring away. Put only the pieces needed for the current stage on your working tray. Keep clips and tweezers out of wet adhesive unless the product instructions specifically call for their contact. If the nozzle becomes difficult to control, stop and clean it as directed before continuing, rather than squeezing harder over the finished surface.
4. Should You Use Fabric Glue, Fusible Tape, or Hand Sewing?
Choose the joining method from the fabric, the location of the joint, and the finished item’s use. Permanent fabric adhesive can suit compatible decorative work; temporary adhesive holds pieces until another joining step; fusible materials require suitable heat conditions. Sewing is often appropriate where the design needs structural seams. Check both material compatibility and care instructions before treating any method as a lasting solution.
Match the Joining Method to the Fabric and Its Use
Look beyond the word strong on a package. A decorative patch mainly needs suitable surface contact, acceptable appearance, and enough flexibility for its location. A bag handle must repeatedly support weight through a concentrated attachment area. Those are different jobs even when the fabric is identical. On a flexible item, inspect how the joined area bends with the surrounding material and whether an exposed edge catches during handling. A successful test on a flat sample does not establish suitability for every stressed seam in the finished object.
| Joining method | Where it can fit | Tools needed | Main limitation to check |
|---|---|---|---|
| Permanent fabric adhesive | Compatible patches, trims, and light decorative layers | Controlled applicator and suitable holding method | Fabric compatibility, curing, appearance, and washing instructions |
| Temporary positioning adhesive | Alignment before sewing or another permanent step | Product-specific applicator | Temporary hold is not the finished connection |
| Fusible tape or web | Suitable hems and flat fabric layers | Iron, pressing surface, and specified protective materials | Heat tolerance and the exact activation instructions |
| Hand or machine sewing | Seams, repairs, and appropriately designed reinforcement | Suitable needle, thread, and optional machine | Stitch choice, fabric condition, and construction quality |
Some adhesives marketed for no-sew work are temporary, while some fabric tapes are intended to create a permanent bond. Read the particular product’s purpose instead of assigning permanence by its physical form. Also check whether stitching through a dried adhesive is permitted; an unapproved combination can make the next sewing step difficult. For a first project, keeping decoration separate from structural construction reduces the number of variables you must solve at once and makes later troubleshooting much more straightforward.
- Evidence for the temporary-versus-permanent distinction: Aleene’s No Sew Glue description identifies that product as a temporary positioning aid before permanent stitching.
Apply Fabric Glue in a Controlled Layer and Test a Swatch
Use a sample containing both actual materials, including the same decoration backing when possible. A glue can behave differently on plain fabric and on a patch with a coating already attached. Follow the label for cleaning, application, pressing, and waiting. Keep one untreated scrap nearby for comparison. After the stated waiting period, inspect the front and back, flex the sample as the project will flex, and check the edges gently. Record visible staining, unwanted stiffness, or lifting instead of judging success only from immediate stickiness.
There is no useful universal instruction to apply a certain number of drops per square centimeter across every fabric adhesive. Nozzle size, formulation, fabric absorption, and contact area all affect the amount needed. Follow the specified coating method and aim for controlled coverage without flooding the surface. Excess adhesive can spread beyond the contact area or change the feel of the fabric. If you compare application amounts on scraps, change one variable at a time so you can tell which adjustment improved the result.
- Prepare clean, dry samples matching the finished material combination.
- Read whether adhesive belongs on one surface, both surfaces, or selected areas.
- Apply the instructed coating and align the pieces without stretching them.
- Hold or support the joint using a method compatible with the adhesive.
- Leave it undisturbed for the required time before checking its condition.
- If washing is intended, test the sample only after the product permits washing and follow both materials’ care instructions.
- Video 4 – Watch controlled fabric-glue application: How-To: Aleene’s Fabric Fusion Permanent Fabric Adhesive, published by TulipColorCrafts, demonstrates a specific permanent fabric adhesive. Use its movements as an introduction and follow your own product’s directions for timing and coverage.
Follow Product Instructions for Heat and Curing Time
Working time, initial set, full cure, and the earliest permitted wash are different milestones. Initial set means the pieces have begun holding position; it does not automatically mean the assembly can withstand pulling, ironing, or washing. Temperature, humidity, fabric construction, and adhesive thickness can influence the process, so a printed estimate does not replace checking the instructions and actual conditions. Do not add heat to speed a liquid adhesive unless its manufacturer permits it, particularly when the formula or fabric is unfamiliar.
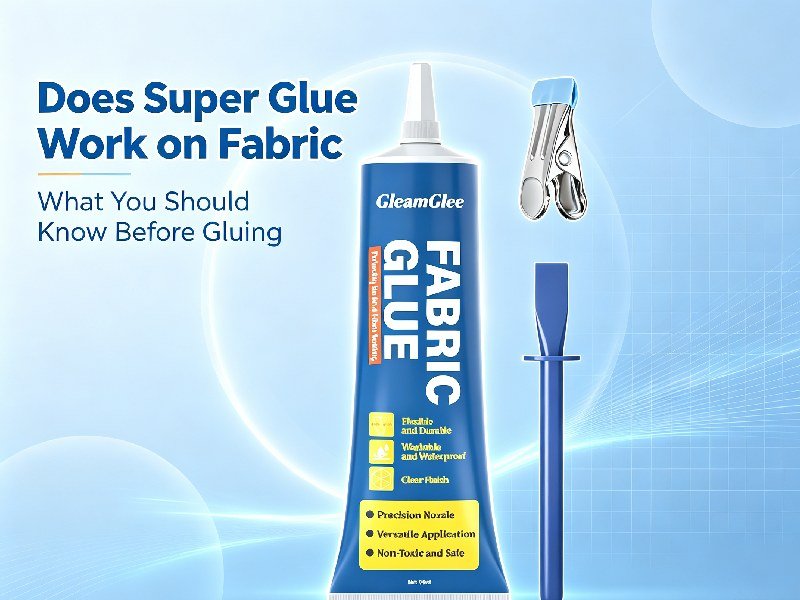
GleamGlee Fabric Glue is one option to consider for compatible decorative fabric work when a fine applicator and a flexible, clear-drying bond are useful. Its manufacturer describes an initial set of approximately 6-10 minutes and full cure of about 24 hours. These are manufacturer-stated parameters, not independent durability results. Check the current package and test the complete fabric combination before choosing it for a visible project. For custom craft kits or repeated workshop orders, evaluate the dispensing format and sample performance before deciding on pack quantities.
- Brand product information: GleamGlee’s fabric-glue product notes provide the stated applicator features and setting information. Consult the current package for your exact product.
Waiting periods differ between formulas, even within the same broad category. For example, the published instructions for Aleene’s Fabric Fusion Permanent Fabric Adhesive allow washing after 48 hours. That number should not be transferred to another adhesive or interpreted as a comparative strength result. For heat-activated products, the important instructions instead include temperature, pressing time, any required steam or pressing cloth, and cooling. The fabric must tolerate the required conditions as well as the adhesive, otherwise a different joining method is needed.
- Product-specific washing reference: Aleene’s Fabric Fusion instructions explain preparation and the stated wait before washing.
- Video 5 – Watch an iron-on bonding method: OnlineFabricStore: How to Use Dritz Stitch Witchery contains a video and instructions for positioning, pressing, and cooling this fusible material. Follow the exact version’s directions rather than applying its settings to every fusible product.
Learn a Simple Hand Stitch and Recognize When More Support Is Needed
Hand sewing is worth trying even if you mainly plan to make no-sew crafts. It gives you another way to join a small fabric area, secure a decoration, or hold layers temporarily. Start with a suitable needle and manageable thread length on a scrap, moving in and out through the layers without pulling so tightly the fabric gathers unintentionally. Practice keeping the spacing consistent. A loose running stitch works for learning and basting. Loaded seams need an appropriate stitch and construction, so do not assume the practice stitch is sufficient.
- Video 6 – Learn the basic running stitch: Professor Pincushion: How to Sew a Running Stitch shows the repeated in-and-out motion. Practice on offcuts before using the technique in a finished piece.
5. How Much Fabric, Time, and Money Do You Need?
Calculate materials from the cutting pieces, their quantities, and the usable fabric width. Add seam or overlap allowances only when the pattern requires them, and reserve matching scraps for testing. Check the layout before ordering fabric because area alone does not prove the pieces fit. For planning, keep reusable-tool spending, consumable quantities, active making time, and adhesive waiting time as separate entries.
Calculate Cutting Sizes and the Number of Pieces
Begin with the pattern’s own dimensions. If a rectangular design requires a 1 cm seam allowance on each of its four sides and its finished panel is 20 x 10 cm, the cutting panel becomes 22 x 12 cm. This arithmetic applies to that particular construction, not automatically to every pouch or bookmark. Some patterns already include allowances, some use a fold instead of a cut edge, and some no-sew decorations need no allowance at all. Write the chosen cutting size on the template to prevent accidental double additions.
- Rectangular cutting length: finished length + allowance at each relevant end.
- Rectangular cutting width: finished width + allowance at each relevant side.
- Repeated-piece count: number of finished items x number of that piece needed per item.
- Example: 4 double-layer bookmarks x 2 body pieces = 8 body rectangles, with decorations and test scraps counted separately.
The examples below separate a cutting measurement from a finished object. They are arithmetic illustrations for planning, not tested yield claims or fixed project standards. For the banner, the 10 x 15 cm measurement is the bounding rectangle before shaping its lower edge; letters and suspension materials require their own pieces. If a design uses woven fabric needing a turned edge, revise the cutting dimensions for the specified construction before using the same quantity calculation.
| Planning example | Cutting size | Pieces per item | Quantity for the stated batch |
|---|---|---|---|
| Double-layer felt bookmark | 20 x 5 cm per body rectangle | 2 body pieces | 4 bookmarks need 8 rectangles |
| Five-flag felt banner | 10 x 15 cm bounding rectangle per flag | 1 body piece per flag | 1 banner needs 5 bodies, plus letters and suspension materials |
| Decorative pouch patch | 6 x 6 cm flat patch example | 1 patch | 3 pouches need 3 patches, plus test scraps |
| Rectangular sewn panel | 22 x 12 cm cutting size for a 20 x 10 cm finished panel with 1 cm on all four sides | Follow the actual pattern | Count lining, matching sides, and other pieces separately |
A 40 x 30 cm usable sheet can fit twelve 20 x 5 cm rectangles in a simple grid: two along the 40 cm direction and six along the 30 cm direction. Those twelve pieces provide six double-layer bookmark bodies. This layout assumes no required gaps, edge trimming, additional allowances, defects, or directional restrictions. Real material may provide less usable space. Set aside testing material separately rather than quietly treating the entire purchased sheet as both production stock and practice cloth.
Check Units and Try a Fabric Layout Before Buying
One inch equals exactly 2.54 cm, and one yard equals 91.44 cm. A 20 x 5 cm example therefore measures approximately 7.87 x 1.97 inches. Keep the original template units whenever possible so repeated rounding does not change matching pieces. If your ruler uses inches but the pattern uses centimeters, convert the complete cutting measurement, including any required allowance. Then check the result physically with the template before ordering material or making a whole batch of cuts.
- External tool – Convert pattern dimensions: Centimeters to inches converter helps when your pattern and measuring tools use different units.
To plan a more complicated arrangement, compare the actual shapes inside the usable fabric width. A directional print may prevent rotating a piece even when rotation would save space. A visible repeating motif may require extra length for matching. Sailrite’s panel nesting tool lets you create and manually arrange panels while considering fabric width and pattern repeats. Prepare the dimensions needed for your cutting layout, check the selected mode’s size definitions, and verify the result against your paper pieces instead of assuming a software layout is automatically optimal.
- External tool – Explore fabric placement: Sailrite Panel Nesting supports manual panel placement, copying, and rotation. Respect grain, nap, print direction, and any allowances when preparing your layout.
Separate Your Shopping Budget from Making and Waiting Time
Write down what you already own before comparing prices. A new ruler or storage box may add little if an existing one performs the same task comfortably. Compare a kit with the individual tools you would actually purchase, including their quality and useful sizes. Do not divide the kit price by its advertised piece count and assume the result reflects value: a package containing many pins and a poor pair of scissors may still leave your main cutting problem unsolved.
- Shopping total: sum of each needed item’s quantity x its current unit price, plus any applicable delivery charges.
- Example of quantities, not a price quote: 1 suitable pair of scissors, 1 ruler, 1 chosen joining material, and enough fabric for the planned layout and samples.
- Batch record: note cutting time, positioning time, joining time, and separate waiting periods after making a prototype.
The first completed sample is your best planning reference because your pace, materials, and design are specific to you. Record active work and waiting separately. If a glue’s current instructions require a 24-hour cure and you finish gluing at 7 p.m., the following 7 p.m. is the earliest scheduled point for the instructed post-cure checks under suitable conditions, not the end of the evening’s craft session. A longer washing restriction still applies independently. Avoid scheduling a washable gift for delivery immediately after assembly simply because the surface feels dry.

6. Which Fabric Crafts Can You Make with a Basic Tool Kit?
Start with a flat felt bookmark, a simple fabric letter banner, or a decorative patch on a ready-made pouch. These projects reuse measuring, cutting, holding, and joining tools without requiring you to construct a heavily loaded item. Make one complete example before preparing a batch. Use the first piece to confirm dimensions, appearance, handling, and the waiting period needed before normal use.
Make a Simple Felt Bookmark
A flat bookmark is a useful first exercise because the outline is easy to measure and both sides remain accessible during assembly. Choose felt with a thickness and flexibility suitable for the intended book; a bulky stack can be uncomfortable between pages. For the example here, cut two matching 20 x 5 cm rectangles, or adjust the dimensions after trying a paper version. Keep decoration thin and away from areas where it could catch a page. Test any chosen adhesive on the same felt before assembling the bookmark.
- Make and check the paper template inside the intended book.
- Cut two matching body pieces and any flat decorative shapes.
- Arrange the decoration on the upper piece before joining the bodies.
- Use a suitable adhesive according to its coating instructions, or sew with an appropriate stitch.
- Align the bodies, support them flat, and complete the required waiting period.
- Inspect the edges and place the finished bookmark in a book only after it is ready for use.
Check the result by looking along the edges and comparing its feel with the original felt. The two layers should sit as intended, with no sticky areas contacting paper. If the assembly is noticeably stiffer than you want, change the material combination, layer count, or connection method on another sample. Do not attempt to soften it with unapproved heat or solvents. Keep the successful template and material notes so a second bookmark uses the same dimensions and sequence instead of starting the decision process again.
Create a Fabric Letter Banner
A small felt banner teaches repeated cutting and visual spacing without making a garment. For a five-flag example, begin with five 10 x 15 cm bounding rectangles and five paper letters sized to fit within the visible area. Decide the suspension method before shaping the tops, since a folded channel or sewn ribbon attachment changes the construction. Dry-lay the entire word in reading order, check the margins around each letter, and step back to view it from the distance at which the banner will hang.
- Prepare one flag template and cut the five matching bodies.
- Make paper letters first and confirm their size and orientation.
- Cut the fabric letters and arrange the full word without adhesive.
- Mark discreet placement references using a tested method.
- Attach each letter using the chosen compatible joining method.
- Complete the planned suspension attachment and its required waiting period.
- Check the banner before hanging it in a suitable location away from heat and children’s reach.
- Video 7 – Watch a no-sew banner come together: TulipColorCrafts: No Sew Fabric Banner demonstrates a banner using Aleene’s Fabric Fusion Peel & Stick Sheets. Use it for layout and assembly ideas; adhesive sheets and liquid fabric glue require different application instructions.
Before making a long banner, complete a small sample of the flag and its suspension attachment. A letter staying attached to felt does not prove the top attachment can support the flag during hanging or repeated handling. Keep the decoration lightweight and use a construction suited to its intended display. For reusable decorations, store the pieces flat or loosely arranged so folding does not place concentrated stress on attached letters. Follow all material care instructions if you plan to clean the finished banner.
Add a Decorative Patch to a Ready-Made Pouch or Tote
Decorating a finished pouch lets you practice placement without constructing the bag itself. Choose a flat, accessible area away from zippers, thick seams, and locations constantly creased during use. A 6 x 6 cm patch is a convenient planning example, but its actual size should suit the pouch. Check the patch backing as well as the outer fabric; an existing iron-on coating may require its own application method. Prepare and test the combination before committing to the visible face of the bag.
- Follow the pouch’s care label and adhesive instructions for preparation.
- Mark or photograph the planned patch position during a dry layout.
- Keep front and back layers separated with a suitable protective barrier when needed.
- Attach the patch with the compatible adhesive or an appropriate sewing method.
- Support the area until the connection reaches the required readiness stage.
- Check the patch edges, then open and close the pouch to inspect normal movement.
The protective barrier must also be compatible with the adhesive, so do not assume any sheet of paper or plastic will release cleanly. Avoid accidentally bonding the front and back of the pouch together. This project covers surface decoration; repairing a handle, base seam, or zipper attachment requires a construction appropriate to those loads. Once the decorated pouch performs as intended, record the patch material, dimensions, application method, and washing restrictions before repeating it for gifts or a larger craft session.
- Further project practice: Utah State University Extension’s Easy Sewing Maker Projects offers additional sewing projects when you want to extend your skills beyond flat decoration.
7. How Do You Fix Common Mistakes and Care for Your Tools?
Troubleshoot from the visible problem instead of adding more glue or cutting again immediately. Check the template, tool condition, fabric preparation, joining method, and elapsed waiting time. Use scraps to compare a correction before repeating it on the finished piece. After working, clean tools as directed, close or cover sharp parts, and store the materials so the next session begins with usable equipment.
Troubleshoot Uneven Cuts, Glue Marks, and Lifting Edges
Several different causes can produce a similar failure. An edge may lift because it was disturbed too early, because the materials are incompatible, or because the finished object pulls on the connection during use. Adding adhesive without identifying the likely cause can increase stiffness or visible residue while leaving the underlying problem unchanged. Inspect a failed sample after the required waiting period and compare it with your notes. Adjust one factor, such as positioning or coating method, before judging a second sample.
| Visible problem | Possible factors to check | Practical next step |
|---|---|---|
| Uneven or mismatched cuts | Moving template, unsupported cloth, unsuitable or worn blade | Stabilize the pattern and make one controlled scrap cut |
| Visible glue mark | Excess application, absorbent fabric, incompatible combination | Stop adding glue and test a revised method on matching scraps |
| Unwanted stiffness | Adhesive type, coating amount, stacked material thickness | Compare another permitted coating or joining method |
| Lifting edges | Waiting time, surface condition, coverage, or repeated stress | Complete the instructed wait, then correct the identified cause |
| Pouch layers stuck together | Insufficient separation during application | Follow the product’s removal advice; avoid forceful pulling |
Clear-drying adhesive does not guarantee an invisible result on every textile. A dried coating may still change the surface sheen, darken absorbent fibers, or show through a thin fabric. Examine a test under ordinary lighting from the angle at which the item will be seen. If appearance is unacceptable, changing the design or using suitable stitching can be more effective than repeated cleanup attempts. Never introduce an unfamiliar solvent to a valuable item without checking both the adhesive removal guidance and the fabric’s compatibility.
Use Blades, Needles, Adhesives, and Heat Safely
Keep the working area orderly enough to see where blades, pins, and small decorations have gone. Close the cutter guard before setting it down, store needles in a dedicated container, and keep hot tools on their specified support. Read adhesive labels for intended use, ventilation, handling, and cleanup. Low odor is not a reliable measure of safety, and a product being water-based does not by itself establish suitability for children. Select materials for the actual people and activity involved, with direct adult supervision for children’s craft sessions.
- Safety reference and download: The U.S. Consumer Product Safety Commission’s Art and Craft Safety Guide discusses age-appropriate materials, label reading, supervision, and storage. Its guidance does not certify or endorse a particular fabric adhesive.
When children take part, adults should prepare the activity around their abilities rather than simply shrinking an adult project. Precut pieces may be more suitable than introducing a rotary cutter, and selecting large decorations can reduce the need for fiddly handling. Keep unused adhesive and sharp tools out of reach and supervise the work directly. Do not interpret the absence of a strong smell as permission to ignore a label. For any adhesive without clear age-appropriate instructions, choose a suitable alternative for the children’s portion of the activity.
Clean, Store, and Upgrade Your Tools Thoughtfully
Follow each tool’s cleaning instructions instead of applying the same solvent to scissors, mats, nozzles, and fabric. Close adhesive containers promptly and retain their labels so curing and handling information stays available. Store a cutting mat flat and away from heat sources, which helps avoid distortion; do not use it as an ironing surface unless expressly designed for that purpose. Check tools before the next session, especially if a blade previously dragged or a nozzle required excessive pressure to dispense the adhesive.
- Tool-care reference: Utah State University Extension’s sewing supplies guide includes cutting-mat storage and handling guidance.
Upgrade equipment when the work provides a clear reason. Repeated straight panels can justify a rotary cutting setup; a project with sewn structural seams may justify more sewing instruction and suitable equipment. A second specialized marker is useful only if it solves a problem on the fabric you actually use. Keep a short note beside completed projects describing what slowed you down. It is easier to choose the next useful tool from a recurring difficulty than from the number of accessories advertised in a kit.
Conclusion
Begin with one manageable project and a small set of tools you can control comfortably. Measure from a checked template, rehearse the layout, and test the joining method on matching scraps before working on the final fabric. Give the connection its specified waiting time and inspect the result in the way it will actually be used. A dependable first bookmark, banner, or decorated pouch gives you practical knowledge for the next project, while keeping unnecessary purchases and avoidable rework to a minimum.
8. Frequently Asked Questions About Beginner Fabric Craft Tools
The questions below address choices you are likely to face immediately before starting: whether existing scissors will work, whether a machine is necessary, and whether a finished no-sew item can be washed. The answers depend on the material and project, so use them alongside the instructions for your specific tools and adhesive. A quick scrap test remains useful whenever a substitute tool or unfamiliar fabric changes the setup.
Can I Use Regular Scissors Instead of Fabric Scissors?
You can try existing scissors if they are sharp, comfortable, and able to cut your chosen fabric cleanly. Test a straight line and a small curve on an offcut, looking for dragged fibers, folded fabric, or excessive hand effort. Replace them when they fail this practical test rather than buying solely because of the label on the handle. Suitable fabric scissors become worthwhile when they provide cleaner, more controlled cuts for the materials you use regularly, especially across repeated pieces.
Do I Need a Sewing Machine for My First Fabric Craft?
No sewing machine is required for the flat decorative projects described here when you choose a suitable adhesive or hand-sewing method. Start with a felt bookmark or a patch on an existing pouch to practice measuring, positioning, and finishing. A machine becomes relevant when the chosen pattern, material, or production volume benefits from it. Being able to decorate an object without sewing does not establish whether its handles, seams, or other loaded connections can be constructed the same way.
Can I Use Binder Clips Instead of Sewing Clips?
Binder clips may work for simple temporary positioning if their opening and grip suit the fabric layers. Test them on an offcut first, checking for dents, slipping, distortion, or marks from the clip surfaces. Purpose-made sewing clips may be easier to use because of their shape, flat base, and seam guides, but those features do not automatically make every ordinary clip unusable. Keep either type away from wet adhesive and remove it before it obstructs cutting or sewing.
Can I Start with Old Clothes and Fabric Scraps?
Yes, provided the material is clean, dry, and in suitable condition for the intended project. Examine old clothing for weak areas, previous coatings, stains, and stretched sections before choosing the usable pieces. Keep any available fiber and care labels with the fabric. A scrap from an unknown garment should receive the same marking and adhesive tests as new material, and a low-value trial project is a sensible place to learn how an unfamiliar cloth behaves during cutting and assembly.
Can I Wash a No-Sew Fabric Craft?
A no-sew item can be washed only when the fabric, decorations, joining material, and construction all allow the proposed care method. Wait for the adhesive’s stated washing interval, which may differ from its initial setting or curing description. A washable glue does not make a water-sensitive decoration or unsuitable backing machine washable. Test the complete material combination when practical, then use the care method permitted by every component rather than choosing a cycle solely from the glue’s front-label claim.
Is a Beginner Tool Kit Better Than Buying Items Separately?
A starter kit is useful when most of its contents match your first projects, the main tools are suitable, and its current price compares favorably with the individual items you need. Count reusable tools separately from repeated consumables such as pins or thread spools. Check whether the kit duplicates a ruler, scissors, or storage you already own. Buying fewer appropriate items individually can be a better fit when a large set leaves you with unused accessories and still lacks a dependable cutting or joining tool.





















