 Skip to content

A small fabric project can become surprisingly complicated. You find a design you like, gather a few scraps, and expect an easy afternoon. Then the fabric slips, the pieces stop lining up, or the finished decoration develops a stiff, shiny edge. Usually, the answer is a better sequence of decisions: simplify the design, choose manageable materials, prepare the pieces together, and use a connection suitable for the finished item.
The most useful shortcut is to remove unnecessary operations while keeping the steps responsible for a reliable result. A ready-made tote eliminates bag construction. A reusable paper template replaces repeated measuring. An envelope pillow opening avoids a zipper. Fabric glue can simplify suitable decorative connections, while stitching remains useful for structural parts. The following guide brings these choices together with worked measurements, practical projects, instructional videos, and checks you can repeat at home.
1. Start with a Smaller, Simpler Project
Before buying another tool, look at the amount of work built into the design. Every separate panel needs cutting and positioning, every extra layer needs alignment, and every closure adds an installation step. Simplification begins by deciding which features serve the finished item. Keep the useful ones, then reduce the number of operations required to achieve them. This approach works whether you are making your first decoration or repeating a familiar project for gifts.
Choose One Useful Outcome and One New Skill
Describe the finished item in a single practical sentence, such as a washable decorated shopping bag or a removable cover for an existing cushion. This gives your choices a purpose. A bag for carrying groceries has different construction needs from a lightweight display banner. Identify the part you want to learn, too: accurate cutting, positioning a small applique, or sewing a straight seam. Treat one new skill per project as a manageable learning strategy, rather than a strict rule.
Turn the idea into a short list of operations before choosing materials. For the decorated tote, the list might be prepare, cut, position, attach, cure, and inspect. Adding a lining introduces another set of panels and seams; adding a zipper introduces a closure and its installation sequence. Cross out features you could add to a later version. This makes difficulty visible before money and fabric are committed, and gives you a clear stopping point for the first project.
- Define the use: display, everyday handling, carrying weight, or occasional decoration.
- Record the size: measure the actual object or available display space.
- Choose the care requirement: washable, spot-cleaned, or display only.
- Name the new skill: learn one unfamiliar operation before adding several more.
Reduce Pattern Pieces, Closures, and Decorative Layers
Imagine planning a lined bag with a zipper, three pockets, and layered flowers. A simpler first version uses an existing canvas tote with one flat fabric motif. You still create something personal, but you avoid drafting the bag, assembling its lining, and installing the closure. For a sewn project, square or rectangular panels make measurements easier to follow. Repeated decorative shapes can share a single template instead of being drawn individually every time.
New Mexico State University’s sewing guidance supports selecting patterns with fewer pieces and organizing equipment before starting. These recommendations provide a sound practical basis for simplifying a project, although they do not establish a universal percentage of time saved. Your actual saving depends on the design, materials, familiarity with the tools, and amount of rework avoided. Record your own process if you need a realistic estimate for a second or larger batch.
- University guidance: NMSU: Sewing Shortcuts, covering organization, pattern selection, preparation, and efficient sewing sequences.
Separate Hands-On Time from Waiting Time
A useful schedule distinguishes work you perform from time the materials need. Washing fabric, allowing it to dry, checking a bonded sample, and waiting for adhesive to cure can extend the calendar without occupying your hands continuously. If a decoration needs overnight curing, complete it before the evening you intend to pack or use it. A project advertised as quick can still require planning across two days, especially when the material combination has not been tested before.
- Example project note: decorate one existing tote with one flat felt motif.
- Preparation: check care labels, prepare matching scraps, and confirm the layout.
- Active work: record measuring, cutting, positioning, bonding, and cleanup separately.
- Waiting: include sample testing, drying, and the product’s required cure period.
- Ready for use: count from the final bonded connection, not the first piece attached.
2. Choose Fabrics and Tools That Are Easy to Work With
The fabric influences almost every later step, including marking, cutting, joining, finishing, and washing. A material can look perfect in a photograph yet behave very differently on your table. Thin cloth may reveal adhesive, slippery cloth may shift during cutting, and stretchy cloth may change shape while you handle it. For an easier project, start with material you can hold flat and control comfortably, then add specialized fabrics once the basic method feels familiar.
Start with Stable Fabric or a Ready-Made Blank
For ordinary straight-seam projects, a stable, light- to medium-weight woven fabric is often a manageable starting point. Cotton is a fiber description, however, rather than a guarantee of stability: cotton jersey can stretch considerably, while woven cotton usually behaves differently. Felt can simplify the cut edges of suitable flat decorations, but its thickness, surface, and care requirements still matter. Check the actual material rather than choosing entirely from its name or photograph.
Handle a small piece in the same way you will handle the project. Fold it to the intended number of layers, check whether your scissors cut it cleanly, and place the proposed decoration on top. Hold the combination toward the light to spot transparency before adhesive is involved. Gently compare movement along and across the fabric, then let it relax. If the pieces curl, stretch, or slide as you position them, choose a more stable starting combination or simplify the shape.
An existing tote, cushion cover, or plain fabric panel can also remove several construction steps. Inspect it before decorating: an attractive blank with weak handles or worn fabric is a poor foundation for frequent use. When repurposing clothing, choose sound areas away from thinning elbows, knees, and old tears. Solid colors and small nondirectional prints generally require fewer layout decisions than stripes, large motifs, or fabrics with a visible directional pile.
- Practical fabric guidance: Sew Essential: beginner sewing tips, including manageable fabrics and practice on scraps.
Build a Minimal Kit for Your Chosen Method
Collect the tools needed for the project in front of you, leaving optional equipment for later. A sharp pair of fabric shears and an accurate ruler can handle many flat craft designs. Clips are useful for holding accessible edges, while a removable marking tool helps transfer reference points. If you choose a rotary cutter, add a suitable cutting mat and ruler, learn its handling instructions, and keep your supporting hand clear of the blade path.
- Cut and measure: fabric shears, a ruler, and a non-stretching tape measure when needed.
- Position: a tested marking tool, paper template, and suitable clips or pins.
- Protect and test: matching scraps, a work-surface protector, and a small parts tray.
- Join: the selected adhesive or appropriate needle, thread, and sewing equipment.
- Add only as needed: tweezers, a pressing cloth, or a rotary cutting setup.
- Downloadable reference: USU Basic Sewing Supplies PDF, distinguishing basic, optional, and advanced tools.
A stable work surface is part of the kit. Keep the whole piece supported instead of allowing one end to hang over the table and pull against the ruler. Place the ruler where your supporting hand can hold it without reaching across a cutting path. For repeated straight seams, use the machine’s seam guide or another guide approved for the equipment. Rehearse the movement on scraps before trying to control the final project at the same time.
- Video: steadier measuring and straighter sewing. Jan Howell demonstrates accessible aids for holding a ruler and guiding seams in 8 of My Best Sewing Tips and Hacks for Beginners. Choose the techniques relevant to your equipment and material.
Prewash, Press, and Test a Scrap
If the finished item will be washed and its materials allow water washing, prepare the fabric using a suitable care cycle before final cutting. Let it dry completely, then press only at a temperature appropriate for the material. Felt, coatings, delicate trims, and specialty fabrics need their own care instructions checked first. Also read the adhesive directions: some manufacturers specifically advise avoiding fabric softener during preparation. A clean, dry surface is the starting condition, not an optional finishing detail.
You can measure dimensional change instead of assuming a standard shrinkage percentage. Mark a 20 cm reference length on a washable sample, following the fabric direction, then measure it again after the intended wash and complete drying. If the distance becomes 19.4 cm, the change is (20 – 19.4) / 20 x 100 = 3%. This is an illustrative result, not a typical rate for cotton. Measure both directions; once the actual fabric is prepared, take final cutting dimensions from its prepared state.
Make the test resemble the real connection. Use scraps from both materials, the intended overlap or contact area, and the same application method. Label the sample so you remember which side, adhesive, and arrangement you used. After the specified cure period, inspect the front and back, bend it gently, and check the edges. If washing is part of the intended use, wash the sample only after the product’s stated waiting period and inspect it again after drying.
Keep an unbonded scrap beside the finished sample as a comparison for color and softness. If you need to compare two application approaches permitted by the instructions, label them A and B and change only one factor, such as dispensing technique. Keep fabric, contact area, and waiting conditions the same. Record which sample looks better after curing and cleaning. Without this simple control, a softer result on a different fabric can easily be mistaken for an improvement caused by the adhesive method.
- Appearance: look for darkening, shiny patches, visible ridges, or transferred markings.
- Handling: compare flexibility with an unbonded scrap of the same fabric.
- Attachment: check whether edges remain attached under gentle handling.
- Care: confirm the combined materials tolerate the intended cleaning method.
- Method: change one variable at a time when comparing samples.
3. Choose the Right Joining Method: Glue, Iron-On Adhesive, or Sewing
There is no single joining method for every part of a fabric project. A small letter on a banner, a folded edge, and a loaded bag handle perform different jobs even when they share the same fabric. Examine each connection separately. Consider whether it must stretch, bend repeatedly, withstand washing, carry weight, or remain alterable. Once those requirements are clear, choosing between adhesive, heat bonding, and stitches becomes much less confusing.
The direction of the force helps explain many disappointing bonds. Sliding two overlapping pieces past one another loads the connection differently from lifting a loose corner and peeling it back. 3M’s adhesion guidance explains how peel concentrates force along an advancing edge. Applied to a fabric decoration, this suggests paying close attention to exposed corners, snagging, and repeated folding. A larger patch does not automatically solve an edge-peeling problem, and its area alone cannot predict how much weight it will hold.
- Evidence for this distinction: 3M: common stress types in adhesive joints illustrates shear and peel. The fabric example above applies this general principle; it is not a strength test of a craft adhesive.
Match the Method to the Fabric and the Job
Use the table as a starting point, then check the instructions for the actual material and product. In particular, distinguish temporary positioning products from permanent adhesives, and sewable fusible products from versions intended to remain unstitched. A package described simply as iron-on does not answer either question. Temperature compatibility matters as well: a heat-activated material cannot be assumed suitable for every fabric or decoration just because an iron is available at home.
| Joining method | Suitable starting applications | Check before committing |
|---|---|---|
| Fabric glue | Compatible flat appliques, felt details, ribbon, and decorative trim | Material match, appearance, flexibility, cure time, and care |
| Iron-on adhesive | Compatible heat-tolerant appliques or folded edges | Temperature, permanence, product type, and sewability |
| Hand or machine sewing | Structural seams, handles, closures, and appropriately designed stretch connections | Fabric, needle, thread, stitch, and construction |
| Positioning plus sewing | Appliques needing stable placement before stitching | Positioning method and a suitable needle path |
HeatnBond UltraHold illustrates how specific these choices can be. Its manufacturer describes it as a permanent, heat-activated, no-sew adhesive and explicitly instructs users not to sew through it. A different product in the range is intended for stitching. This distinction is useful when planning a project with both decorative and sewn sections. Follow the selected package’s instructions instead of combining a heat setting from one tutorial with a finishing method from another.
- Manufacturer instructions: Therm O Web HeatnBond UltraHold, including preparation, application, and the restriction on sewing.
For a paper-backed fusible applique, organize the work in two stages: preparing the adhesive-backed shape and attaching the prepared shape to the base fabric. Check which side of the material faces the fabric, which liner is removed, and when the assembly must cool. Rehearse the orientation on paper first, especially for letters. Use the package’s pressing time, heat setting, and steam instruction. Guessing any of these from another product can leave an incompletely bonded shape or damage the material.
- Video: understand the iron-on sequence. Therm O Web’s UltraHold demonstration shows the paper-backed adhesive process, including bonding, cutting, removing the liner, and placing the shape. Its settings apply to that product and suitable materials.
Use Fabric Glue for Suitable Decorative Connections
For an appropriate decorative bond, start with the completed dry layout and a successful matching sample. Apply the adhesive as instructed, bring the surfaces together accurately, and support the connection while it sets. Avoid moving a wet motif back and forth to search for its position. That movement can spread adhesive beyond the intended area and disturb the arrangement. A paper positioning reference is much easier to correct before glue reaches the fabric.
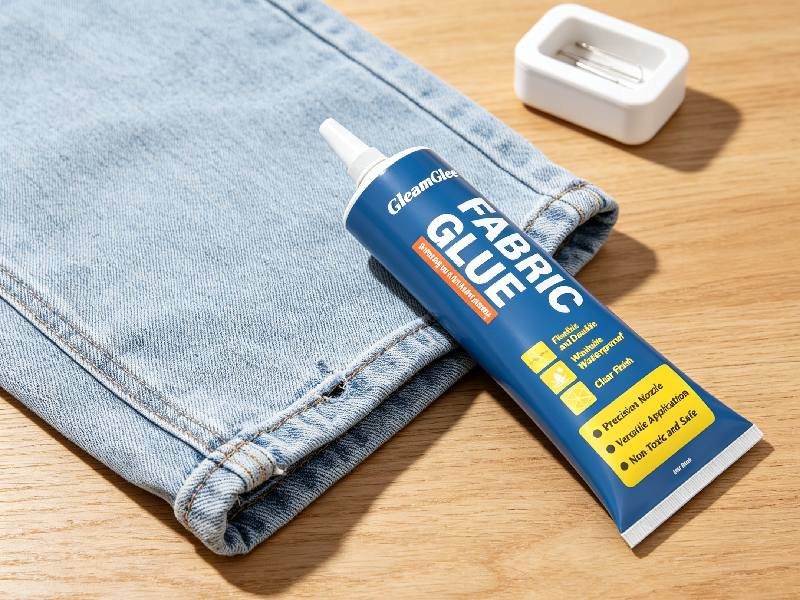
GleamGlee’s fabric-glue product guidance specifies a thin, even application to one surface, followed by alignment and pressure. Its fine applicator is intended to help control placement on small details. Use these directions for the specified product and confirm them on the package. With any brand, practice dispensing onto matching scraps first. Clear drying also does not promise an invisible result on every textile, particularly if excess material changes the surface texture or forms a raised edge.
Control where the adhesive goes as carefully as how much you dispense. A thick bead may squeeze beyond a small motif when pressed, while isolated spots can leave parts of its edge unsupported. Follow the specified application pattern and examine the result on the matching sample before choosing your technique. If a full-area bond makes a delicate decoration too stiff, consider a different suitable product, a smaller decorative element, or stitching. Simply adding more pressure cannot make every fabric-and-adhesive combination feel soft.
- Prepare clean, dry materials and protect the work surface.
- Confirm the full arrangement without adhesive.
- Apply the selected product according to its own instructions.
- Position the piece accurately and press as directed.
- Use a suitable holding method without creating impressions or spreading glue.
- Leave the connection supported for the required setting and curing periods.
Sew Structural Parts and Keep Glue Out of the Needle Path
A decorative motif on a tote has a different job from the handle supporting its contents. Treat the handle, bag body, zipper attachment, and other load-bearing connections as construction details requiring an appropriate sewn design. Adhesive may still help elsewhere in the same item. Frequently stretched areas deserve similar attention: flexibility of a cured glue film alone does not establish whether the whole connection can accommodate the movement required during everyday use.
- Connection guidance: Gorilla: how to glue fabric without sewing, including situations where structural or repeatedly flexed connections should be sewn. Its application directions belong to its own products.
If an applique will be machine stitched after positioning, keep the planned needle path compatible with the positioning method. Brother’s guidance warns against placing glue in areas the machine will sew because adhesive reaching the needle or bobbin case can cause damage. Clips, pins, or an appropriate temporary method may be preferable. Do not assume a permanent craft adhesive becomes sewable simply because it feels dry, and do not stitch through a product whose manufacturer prohibits it.
- Machine guidance: Brother: applique stitching instructions, including keeping glue away from the needle path.
For the sewn parts, choose needle type for the fabric and needle size to suit the thread and material combination. The two numbers printed on a package, such as 80/12, are size designations rather than two separate needles. SCHMETZ distinguishes general-purpose Universal needles from Jersey and Stretch types, which address different fabric behavior. Check your machine’s accepted needle system, install the selected needle as directed, and sew through the same number of layers you expect in the project.
- Download beside your machine: SCHMETZ Needle Guide PDF explains needle anatomy, size markings, fabric applications, and symptoms associated with a worn or damaged needle.
4. Measure, Mark, and Cut with a Clear Plan
Accurate preparation often saves more frustration than faster assembly. Once fabric has been cut too small, extra glue or a different stitch cannot restore the missing allowance. Separate the intended finished dimensions from the dimensions of each piece before cutting. Write the measurements on a paper template, mark the direction of the fabric or print, and check the whole arrangement. The examples below use stated assumptions so you can see exactly what each calculation includes.
Add the Correct Seam, Hem, or Overlap Allowance
A seam allowance is material outside the stitching line. A hem allowance is the material consumed by the planned fold or folds. A bonded overlap is a design dimension chosen for the connection and supported by a suitable application method. These quantities are not interchangeable. Commercial patterns may already include allowances, so read their instructions before adding anything. With a homemade pattern, label the cutting line and the finished edge separately to avoid mixing them later.
| Example panel | Finished dimensions | Allowance on each edge | Cutting dimensions |
|---|---|---|---|
| Sewn rectangular panel | 30 x 20 cm | 1 cm seam allowance | 32 x 22 cm |
| Double-folded rectangular panel | 30 x 20 cm | Two 1 cm folds, totaling 2 cm | 34 x 24 cm |
| Flat decorative shape | Chosen design size | Depends on edge treatment | Follow the chosen template |
For the sewn example, the width is 30 + 1 + 1 = 32 cm, and the height is 20 + 1 + 1 = 22 cm. The double-folded example adds 2 cm at each edge instead. These calculations describe individual panels rather than complete projects. A lined item needs its lining counted separately, and a closed shape may need multiple panels. Bonded construction also needs its own tested overlap instead of automatically borrowing either example.
Label each paper piece with its name, quantity, cutting size, and any direction requirement. Then identify the fabric’s lengthwise direction, which runs parallel to the selvage on ordinary woven yardage. Align the pattern’s grainline as instructed instead of assuming the shop’s cut edge is square. Where two pieces must behave alike, keep their orientation consistent. USU’s guidance on straight-grain borders describes differences in give between lengthwise and crosswise cuts, showing how orientation can affect a seemingly simple rectangle.
- Evidence for grain direction: USU: Straight Grain Quilt Borders connects cutting direction with fabric give and explains measuring and aligning straight borders.
Transfer useful marks while the template is still in position. For a rectangular cover, these might be the opening edge, center, and matching points; for a decorative letter, they might be its top and centerline. Mark on the appropriate side with a method already checked for removal. Cut the first piece without stretching the fabric, compare it with the paper template, and correct any discrepancy before using it as the reference for several more pieces.
- Video: transfer markings before lifting the pattern. Simplicity’s cutting and marking tutorial with Brittany J Jones introduces cutting and marking tools and demonstrates the process of preparing fabric pieces.
Estimate Fabric with a Cutting Layout
Suppose you need six panels measuring 32 x 22 cm, with allowances already included, and your usable fabric width is 110 cm. Keeping the 32 cm side across the width gives room for three panels per row: 3 x 32 = 96 cm. Six panels require two rows, so the theoretical length is 2 x 22 = 44 cm. This is a simple geometric minimum for the stated arrangement, not an automatic shopping quantity.
Real fabric introduces additional considerations. Exclude unusable selvages when determining width, and allow for squaring uneven cut ends, preparation, test pieces, and any required pattern matching. Directional prints or pile may prevent rotating pieces to fit a tighter layout. If you already own the fabric, laying paper rectangles over its usable area provides a quick physical check. If you are buying fabric, verify these conditions before rounding the requirement to the seller’s available cutting increments.
- External layout tool: Sailrite Panel Nesting lets you set fabric width and panel dimensions, then adjust placement. Check its fields and account for allowances deliberately; do not assume every input represents a ready-to-cut size.
When entering dimensions into a calculator, decide whether its fields describe a finished object or individual cut panels. A cushion calculator may add boxing, seam allowances, or other construction pieces automatically, while a panel layout tool serves a different purpose. Compare the resulting list with your paper pattern before relying on the total. For the six-panel example, you should still be able to identify six 32 x 22 cm pieces in the layout; unexpected extra parts signal a setting to investigate.
- Video: see a fabric calculator in use. Sailrite’s Box Cushion Calculator quick-start video demonstrates dimensions, quantities, and panel placement. It uses a cushion-specific calculator, so its construction settings are not a replacement for your own pattern.
Dry-Lay the Pieces and Mark Reference Lines
Lay every piece in its intended position before attaching anything. Mark a centerline and a few removable reference points, then check spacing from both the front and the sides. For letters or narrow ribbon, a full-size paper layout helps prevent a gradual drift across the fabric. Photograph the arrangement if several pieces need lifting during assembly. Use a marking method already tested on the actual fabric, including its removal process and any planned pressing.
Here is a simple spacing calculation for four equal-width shapes. On a 30 cm panel, reserve 3 cm at both sides and use four shapes measuring 4 cm wide. The remaining distance is 30 – 6 – 16 = 8 cm. Three internal gaps divide this into approximately 2.67 cm per gap. This is a geometric starting point; letters with unequal outlines may look better after small visual adjustments made during the dry layout.
Check two measurements when a supposedly rectangular arrangement looks crooked: the distance from the motif to each side, and the distance from its top edge to a fixed horizontal reference. A centered shape can still be tilted. For repeated letters, draw one baseline on the paper layout and place each letter against it before transferring the arrangement. Keep any photograph square to the work rather than shooting at an angle, which can make unequal spacing look more balanced than it is.
5. Try Three Simple Fabric Projects Step by Step
Choose the example matching the skill you want to practice, rather than attempting all three at once. The tote decoration removes most construction work, the felt banner introduces repeated shapes and alignment, and the envelope cover provides a straightforward sewn project. For each one, define a visible success point before starting: a flat, clean motif; evenly spaced banner flags; or a cover whose opening overlaps and accepts the insert comfortably. These checkpoints make the instructions easier to evaluate as you work.
Decorate a Ready-Made Tote Without Sewing
Begin with a sound, already-sewn canvas tote and one flat felt motif. A circle approximately 8 cm across is an easy practice shape, although its size should suit the available bag panel. Select a single layer for the first attempt so you can concentrate on placement and adhesive control. Check the tote and felt care instructions, then test the intended connection on matching scraps before applying it to the visible front of the bag.
- Materials: one prepared tote, felt for one motif, matching test scraps, suitable fabric glue, paper, a ruler, scissors, and a tested protective separator.
- Keep the existing construction: decorate the bag panel; retain the original sewn body and handles.
- First-version option: omit paint, beads, and additional layers until the basic attachment works well.
- Cut a paper circle and place it on the bag to judge the size and position.
- Transfer the shape to felt and cut a clean edge without stretching the material.
- Put a suitable separator inside the tote to protect the opposite layer; first check it will not bond to the adhesive or mark the fabric.
- Dry-position the motif and mark small reference points.
- Apply the adhesive using the method confirmed on the sample, then align and press the motif.
- Keep the panel flat and supported for the specified period before removing supports or using the bag.
- Video: decorate an existing bag with felt. Aleene’s and Craft Box Girls: No-Sew Donut Tote demonstrates a more decorative version using felt, paint, and fabric glue. Follow the directions for your own adhesive when adapting the idea.
Inspect the result from several angles after the allowed curing period. Look for an edge beginning to lift, a visible glue outline, or an unexpectedly stiff area. If the sample was intended to be washable, compare its appearance again after the planned wash and drying method. A successful decoration should suit how you will handle the bag, rather than merely look attached while lying untouched on a table for a photograph.
If you prefer a line design to a solid felt shape, dry-lay short yarn sections on the bag before attaching them. Work from a paper sketch, check the ends remain within the intended outline, and keep the first design away from heavily folded areas. Small curves create more ends and positioning decisions, so a broad initial or simple geometric line is easier to manage. Test the yarn as a separate material combination; success with a felt patch does not establish its behavior.
- Related project reference: Aleene’s simple tote designs shows another approach using an existing bag and small sections of yarn decoration.
Make a Felt Banner with One Reusable Template
For a small practice banner, start with three felt rectangles approximately 10 x 15 cm, three contrasting letters, and ribbon sized for the intended display. A 60 cm ribbon provides an illustrative starting length: three 10 cm flags and two 3 cm gaps occupy 36 cm, leaving 12 cm at each end before allowing for the actual attachment. This calculation does not establish a suitable hanging method; check the display location and fastening arrangement separately.
- Make one paper flag template and label its top edge and centerline.
- Trace and cut three matching flags, checking the first before cutting the rest.
- Arrange the letters using the same top reference and visual center on each flag.
- Photograph the complete dry layout, then attach the letters in manageable groups.
- Allow the decorative connections to cure according to the adhesive instructions.
- Place suitable ribbon across the top 1 cm of each flag in this example, then attach each flag with a straight machine seam or a line of hand backstitching through ribbon and felt. Keep decorative adhesive out of the stitching area.
- Check every hanging connection before putting the banner in position.
The letters and hanging points should be treated as separate connections. A letter only needs to remain attached to its flag during the intended handling, while the ribbon carries the banner’s weight. Keeping those functions separate makes the design easier to understand and inspect. For a longer banner, recalculate the occupied width and end lengths instead of stretching the spacing by eye, and make sure the larger display still suits the chosen attachment method.
Mark the ribbon before sewing the flags: start the first flag 12 cm from one end, leave 3 cm between flags, and check the final end length against the first. Those positions come from the 60 cm practice layout, so recalculate if the attachment uses more ribbon. Place all three flags before fastening any of them. After assembly, lay the banner flat and compare its top line, letter alignment, and gaps; correcting one flag now is easier than adjusting it while the display is hanging.
Sew an Envelope Pillow Cover Without a Zipper
An envelope cover uses overlapping back panels, giving access to the insert without installing a zipper. Jan Howell’s basic example uses a 16 x 16 inch pillow form, a 17 x 17 inch front panel, and two 17 x 11 inch back panels, with a 1/2 inch outer seam allowance. Keep the original measurements together when following this version. In metric units, those panels are 43.18 cm square and 43.18 x 27.94 cm respectively.
- Original dimensions and method: Jan Howell’s envelope pillow cover tutorial.
The overlap can be checked before you sew the outside seam. Each 11 inch back panel loses 1/2 inch to its double-folded opening hem, leaving 10.5 inches. Together, the two hemmed panels span 21 inches; laid across the 17 inch front, they overlap by 4 inches. This calculation explains where the opening comes from. If you change the hem depth or panel dimensions, recalculate the overlap instead of keeping the old cutting sizes and hoping the opening still closes.
- Prepare the chosen fabric and cut the front and two back panels.
- On one 17 inch opening edge of each back panel, fold under 1/4 inch twice, consuming 1/2 inch in total, and topstitch the hem.
- Place the front and back panels right sides together, with the finished back edges overlapping in the middle.
- Align the outside edges and secure the layers.
- Sew the perimeter with the specified 1/2 inch allowance, then finish the raw seam edges appropriately.
- Reduce corner bulk without cutting the stitches, turn the cover right side out, and insert the pillow.
- Video: see the overlapping back assembled. Sew an Envelope Pillow Cover / Beginner demonstrates the basic project and optional variations.
Keep the first cover plain so you can check the size and opening before adding piping, buttons, or a decorative border. Lay the cut pieces out on your fabric before assuming a fixed yardage will be enough. The back panels may fit differently depending on fabric width and print direction. When you make a second cover, the checked pattern and a record of the first layout become useful shortcuts without changing the construction.
Stay in one unit system while cutting the entire cover. Switching between rounded centimeters and fractional inches on neighboring pieces can introduce avoidable mismatch. One inch equals 2.54 cm, so the 17 inch front dimension converts to 43.18 cm and the 11 inch back dimension to 27.94 cm. Mark the converted cutting dimensions clearly if you work in centimeters, retain the matching seam and hem allowances, and do not convert only the finished pillow size.
- External conversion tool: CalculatorSoup inches-to-centimeters converter accepts decimal and fractional inches. For reference, 1/2 inch is 1.27 cm, while 17 inches is 43.18 cm.

6. Save Time by Batching Tasks and Fixing Problems Early
Making several copies introduces a different challenge from making one item. Small inconsistencies can spread through the whole batch if the first version has not been checked. A template with the wrong allowance creates many incorrect pieces quickly, and an untested adhesive combination can repeat the same visible defect across every gift. Complete a representative sample first, then organize repeat work around the proven dimensions, materials, sequence, and required waiting time.
Make One Complete Sample Before Making Multiples
Use the sample to record facts you can actually observe: the pieces required, dimensions, cutting arrangement, attachment method, active working time, and completed appearance. For a bonded item, finish the curing and relevant care checks before approving the method for the remaining pieces. If several fabric colors or finishes behave differently, sample those combinations separately. A successful result on one felt color or coating does not automatically confirm the behavior of every other material in the batch.
For a repeated glued decoration, estimate consumption from several completed samples rather than guessing drops. If a suitably precise scale shows the capped bottle has lost 6 g after six representative decorations, the observed average is 1 g each. Twenty similar decorations would therefore suggest 20 g before your chosen allowance for handling loss. These are example measurements, not product coverage claims. Use enough repetitions for the change to exceed the scale’s resolution, and keep the cap and weighing routine consistent.
Keep mass and volume separate when ordering supplies. A measured requirement of 20 g cannot automatically be converted to 20 mL, because the relationship depends on the adhesive’s density. Compare your estimate with a package labeled in the same unit, or use density information supplied for the exact product. Also include adhesive used for sampling and cleanup in your planning. A carefully measured small batch provides a more useful purchasing basis than a universal claim about the number of crafts one bottle can finish.
The following table scales the small banner into 20 examples, using three flags and three letters per banner. The additional 10% is an illustrative allowance selected for this plan, not an industry standard. Work out spares by the individual part, color, or letter needed. For example, 20 identical three-letter banners need enough of each letter; 66 random letters would not provide a usable replacement set if one specific character ran short.
| Component | Per banner | For 20 banners | With the example’s 10% spare |
|---|---|---|---|
| Felt flags | 3 | 60 | 66 |
| Felt letters | 3 | 60 | 66, allocated by letter and color |
| Ribbon | 0.60 m | 12 m | 13.2 m |
| Fabric glue | Establish with the sample | Scale the observed requirement | Adjust using measured use and available pack size |
For a class, gift-making group, or coordinated craft kit, consistent materials are often more useful than a large assortment of unfamiliar products. Include suitable instructions and give each participant the same tested combination where practical. If you are sourcing a larger quantity, you can ask GleamGlee about available bottle, label, or packaging options for your intended kit. Confirm the exact product instructions and sample performance before making quantity, compatibility, or completion-time promises to other people.
Group Similar Tasks and Keep Parts in Order
Set up the work so each part has an obvious next destination. Keep cut pieces separate from uncut material, and keep freshly bonded pieces away from the area used for measuring and trimming. Small labeled trays or sheets of paper can identify the components for each item. Arrange only as many active pieces as you can comfortably position within the adhesive’s stated working period; batch preparation does not mean coating every part with glue at once.
- Prepare together: make templates, gather tools, and label component groups.
- Cut together: repeat checked shapes while preserving grain and print direction.
- Arrange together: dry-lay each item before beginning its connections.
- Join in manageable groups: respect the product’s working and holding requirements.
- Keep curing separate: leave enough flat space so pieces will not be stacked prematurely.
- Check before packing: use the same acceptance points for every finished item.
For scheduling, suppose shared preparation takes 20 minutes and each of 20 items needs another four minutes of active work. The estimate is 20 + (20 x 4) = 100 minutes, excluding sample development and waiting periods. These numbers illustrate the method; substitute observations from your own sample. If the adhesive requires approximately 24 hours before the intended use, calculate that period from the last completed connection rather than treating the whole batch as ready when active work ends.
Available table space can limit a batch more than cutting speed. If your protected curing area holds only four flat items without overlap, plan the sequence around those four places. Prepare the next group while the first remains supported, but do not stack wet pieces to clear room. Record the final attachment time for each group on a paper note nearby. This keeps the earliest finished item from becoming a misleading reference for the readiness of the last one.
Diagnose the Problem Before Repeating the Same Step
When a defect appears, inspect the failed surfaces before repeating the same step. Adhesive remaining mostly on one material suggests a different problem from fabric fibers tearing away with the glue. A soft, wet interior suggests the connection may have been checked too early, while a fully cured edge which lifts again needs its material match, contact, and loading reconsidered. These observations are clues rather than a laboratory diagnosis. Compare them with the successful sample, then change one factor and repeat the relevant check.
- Evidence for reading a failed bond: Bostik: adhesive terminology and failure modes distinguishes separation at the surface, failure within the adhesive, and failure of the material itself. These definitions support the checks below; they do not identify a cause from appearance alone.
| Problem | Check first | Practical next step |
|---|---|---|
| Motif slides during assembly | Wet application, placement, support | Rehearse the layout and join fewer pieces at once |
| Shiny outline or stiff patch | Application amount and fabric penetration | Compare a fresh sample using controlled application |
| Adhesive stays mostly on one side | Preparation, contact, material finish, cure | Recheck compatibility and method before adding more glue |
| Fibers tear away with the bond | Condition and strength of the textile | Use sound material or redesign the attachment |
| Matching panels differ in size | Cutting size, allowances, grain direction | Return to the paper template and compare dimensions |
| Skipped stitches or tangled thread | Needle condition, threading, bobbin area | Follow the machine’s troubleshooting sequence on scraps |
For machine problems, begin with the manufacturer’s instructions rather than changing several settings randomly. Inspect the needle’s condition and suitability, confirm threading and bobbin placement, and check the accessible area for accumulated lint as directed. Stop if the machine binds or behaves abnormally. A small practice seam after each correction helps identify which change improved the result, while protecting the main project from repeated holes or damaged edges during troubleshooting.
- Equipment reference: Janome troubleshooting guidance for common needle, thread, and feed-related checks.
7. Finish, Cure, and Check the Project Before Use
A fabric project is finished when its construction and care requirements have been completed, rather than when the last visible decoration is attached. Raw edges may still need finishing, adhesive may still need time, and an overlapping opening may need checking with the actual insert inside. Give these final checks a place in the plan. They are easier to complete calmly at the worktable than after a gift has been wrapped or a bag has been loaded.
Finish Raw Edges Where the Fabric Needs It
Choose edge finishing according to the fabric and expected handling. Woven edges can unravel, while suitable felt decorations may keep a clean cut outline without a sewn hem. Depending on the project, a folded hem, appropriate zigzag finish, or binding may be practical. Pinking shears can help in suitable applications, but a zigzag-shaped cut is not a universal substitute for a secure finish on frequently washed or heavily rubbed edges.
On the envelope cover, finish the exposed raw seam allowances without cutting into the line holding the front and back together. Test a zigzag on a scrap folded to the same thickness, then inspect whether the fabric stays flat and the edge is contained. Adjust within your machine’s instructions if the edge tunnels or puckers. A decorative felt circle may need only a clean cut, so choose the finish for the actual edge rather than adding the same treatment everywhere.
- Video: finish seams without assuming you need a serger. Simplicity and Brittany J Jones demonstrate seam-allowance finishing, including several approaches to managing raw edges.
Inspect both sides after finishing. A neat front can hide a raw edge escaping underneath, especially around corners or overlapping panels. Trim loose threads carefully, check whether the opening still operates comfortably, and make sure added trim does not interfere with the intended use. For a first pillow cover, a straightforward finish you can inspect is preferable to a more elaborate edge treatment you have not yet learned to control consistently.
Distinguish Initial Setting from Full Cure
Initial setting means the connection has begun to hold its position; it does not necessarily mean the item is ready for use or washing. GleamGlee’s product guidance lists approximately 6-10 minutes for initial setting and recommends about 24 hours before washing, ironing, or frequent use. Treat these as the brand’s product instructions, with the actual package and application conditions taking priority. Allow the actual material combination and conditions to guide the final readiness check.
Use separate notes for working time, initial hold, full cure, and the first permitted wash whenever the product distinguishes them. Working time governs how long you can position the parts; initial hold governs careful handling; the remaining milestones govern later use and care. A quick initial grip can be useful for a small motif, but it does not erase the rest of the schedule. Also avoid inferring cure from the exposed edge alone when adhesive is sandwiched between layers.
Other products can specify different milestones. The linked Aleene’s Fabric Fusion instructions state washing is allowed after 48 hours, demonstrating the importance of checking a product’s wash-ready requirement rather than copying a general dry-time claim. Record the time the final connection was made, keep it supported as directed, and avoid testing it repeatedly while it is still developing its bond. Do not introduce heat to shorten the wait unless the selected product specifically requires or permits it.
- Product-specific timing reference: Aleene’s Fabric Fusion instructions, including its 48-hour wait before washing.
Check the Finished Project and Follow Its Care Instructions
Choose care conditions acceptable for all parts of the finished item: the base fabric, decorations, thread or adhesive, and any inserted components. A washable adhesive does not automatically make a delicate embellishment suitable for machine washing. Check the tested sample after drying, rather than inspecting it only while wet. For sewn items, look for seam distortion and loose threads; for bonded decorations, look for altered texture, edge lifting, or changes in appearance around the connection.
For a washable project, photograph the sample before cleaning and again after it has dried under the intended conditions. Compare the same areas: corners, overlap edges, color, stiffness, and the surrounding cloth. Write down the cycle and drying method so a second check means something. One successful wash gives useful evidence for that sample under those conditions; it does not establish a claim such as surviving 50 washes. Give a finished gift the care instructions supported by its complete material combination.
- Size and function: confirm fit, opening access, and intended placement.
- Construction: inspect structural seams and hanging or carrying connections.
- Appearance: check edges, markings, excess adhesive, and loose threads.
- Readiness: confirm the relevant setting, curing, and wash-ready periods have passed.
- Care: keep instructions appropriate for the complete material combination.
- Limits: a gentle hand check is not a load test or proof of a particular number of wash cycles.
Conclusion
The most dependable way to simplify DIY fabric projects is to make the decisions early and preserve what worked. Choose a manageable design, prepare suitable materials, label the cutting dimensions, and test the actual connections before committing the whole item. Use adhesive where its properties suit the job and sewing where the construction requires it. Keep the successful template, material notes, and care instructions together after finishing. Your next project can then begin with a checked process, leaving more time for the personal details you wanted to create in the first place.
8. Frequently Asked Questions About Simplifying DIY Fabric Projects
These questions bring together common decisions made before a fabric project begins: whether a machine is necessary, which first project to choose, when adhesive can help, and how to plan its use. The answers remain conditional where the material or product matters. A useful shortcut should fit the whole project, including handling and cleaning, so use these answers alongside the relevant method, sample check, and instructions described above.
Can I Make Fabric Projects Without a Sewing Machine?
Yes. Flat felt decorations, suitable fabric appliques, and embellished ready-made items can often be completed with an appropriate adhesive or heat-bonding product. Hand sewing also provides an option for projects needing stitches without machine equipment. The important distinction is the work performed by each connection. Decorating an existing bag is different from constructing its loaded handles, so choose the method for the actual part rather than assuming every project must be entirely sewn or entirely glued.
What Is the Easiest Fabric Project for a Beginner?
A single flat felt decoration on an already-sewn tote is a manageable starting point because it reduces the work to cutting, positioning, bonding, and checking. If your goal is learning to sew, a simple envelope pillow cover introduces straight seams without requiring zipper installation. Choose stable materials and a small number of pieces. Avoid judging difficulty only by finished size: a tiny layered ornament can involve more precision than a larger rectangular cover.
Is Fabric Glue as Strong as Sewing?
There is no useful universal strength comparison without specifying the materials, connection design, product, preparation, and type of force involved. A suitable fabric adhesive may work well for a decorative patch, while a sewn construction is more appropriate for a carrying handle or other structural part. Flexibility and washability claims do not establish a load rating. Evaluate the intended use, follow the product instructions, and avoid using a decorative sample as evidence for an unrelated structural connection.
Can I Use Regular Craft Glue on Fabric?
Only if the particular glue’s instructions cover your material and intended use. A product described as clear or strong may still be unsuitable for a flexible, washable textile project. Check compatibility, application method, cured feel, and care requirements, then compare matching scraps before using it on the finished piece. Ordinary craft glue, hot-melt glue, fabric adhesive, and heat-activated bonding products should not be treated as interchangeable simply because each can attach something during a quick demonstration.
How Much Fabric Glue Should I Use?
Follow the selected product’s directions and test the amount on the actual material combination. There is no reliable universal number of drops per motif or completed projects per bottle. Absorbency, contact area, edge shape, and application technique all affect consumption and appearance. Practice a controlled application which produces adequate contact without unnecessary buildup, then repeat the successful method. For a batch, estimate supply from observed sample use rather than a bottle-size claim unrelated to your project.
How Long Should Fabric Glue Dry Before Washing?
Use the wash-ready time printed for the exact product, rather than relying only on a surface feeling dry. Initial grip, full cure, and permission to wash can be separate milestones. The product examples above show different waiting requirements, so a tutorial using another brand does not establish your timetable. Allow the required period after the last bonded connection, follow care conditions suitable for all materials, and check a representative sample before washing the finished item.





















