 Skip to content

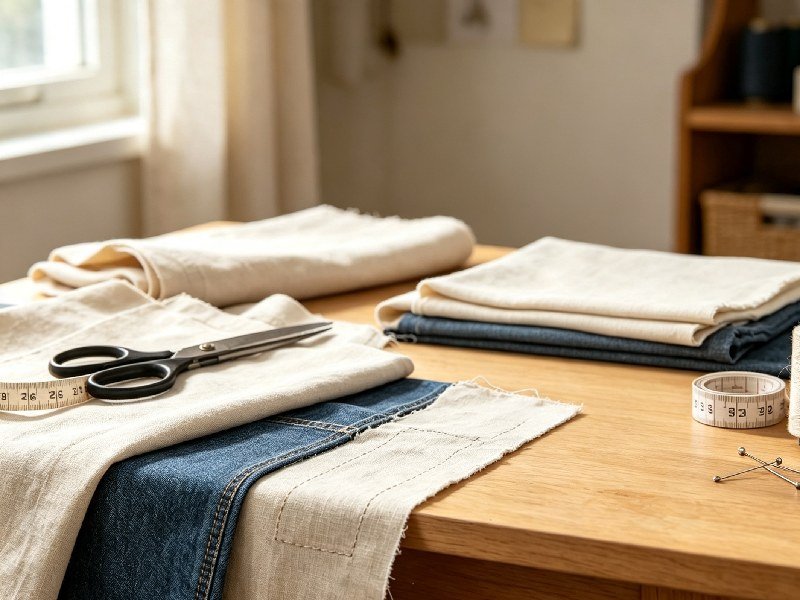
Making twelve gift bags, twenty felt ornaments, or a classroom set of fabric banners can look deceptively simple when you already know how to make one. The difficulty appears after the table fills with nearly identical pieces: fronts and backs become mixed, directional prints turn the wrong way, one measurement error reaches every item, and glued decorations are stacked before they have cured. Successful batch crafting is therefore less about moving your hands faster and more about designing a repeatable sequence in which each error is caught before it travels.
To make fabric crafts in batches, approve one master sample, calculate materials from its measured requirements, and sort every component into labeled kits. Complete one operation across a manageable group—preparing, cutting, marking, sewing or gluing, pressing, decorating, curing, inspecting, and packing—before moving forward. Check the first piece after every irreversible operation so one mistake is not repeated across the entire batch.
This guide applies the practical discipline used in a small sewing room without turning a home craft table into a factory. It works for handmade gifts, holiday decorations, club projects, classroom activities, charity sewing, and small amounts of sellable inventory. You will learn where batching saves effort, where it introduces risk, how to choose between stitching and adhesive, and how to calculate time and cost from your own test data. The goal is a calm worktable, traceable pieces, and a group of finished crafts you would be comfortable giving, using, or selling.
1. What Does Making Fabric Crafts in Batches Mean?
Batch crafting means completing the same operation on several comparable items before changing tools or moving to the next operation. You might cut every body panel, mark every placement line, sew every side seam, or glue every appliqué in sequence. The method reduces repeated setup, but it works only when the project, materials, and first sample have already been checked. It is organized repetition, not uncontrolled mass production.
Batch Crafting vs. Making One Item at a Time
In one-at-a-time crafting, a single item travels from raw fabric to finished piece before the next item begins. This approach is comfortable for an unfamiliar pattern because mistakes remain limited to one unit and the maker receives immediate information from every step. Its drawback is repeated setup: the scissors, iron, presser foot, thread, adhesive, clips, and measuring tools may be put down and picked up many times. Batch crafting groups those repeated actions so the workbench stays focused on one type of decision for longer.
A simple example is a set of fabric coasters. The one-at-a-time method cuts, layers, stitches, turns, presses, and topstitches coaster number one before cutting coaster number two. A batch method cuts all squares first, builds all layered sets, stitches all openings, clips all corners, turns the entire group, and then presses and topstitches. The finished construction can be identical, but the flow requires fewer changes between cutting, machine work, and pressing. This advantage becomes more noticeable when several items use the same thread, seam allowance, template, or adhesive applicator.
- Evidence beside this method: WeAllSew, “Batch Sewing Tips” describes batch sewing as an assembly-line approach extending from cutting and marking through construction and pressing. Its practical notes about familiar patterns, similar thread colors, labels, and repeated inspection support the sequence explained above.
When the Assembly-Line Method Saves Time
Batching is most useful when setup is meaningful and variation is low. Threading a machine, attaching a zipper foot, heating an iron, preparing a protected glue surface, or aligning a template takes time regardless of whether one item or six items follow. Keeping comparable work together spreads the setup across more finished pieces. Batching also makes comparison easier: when twelve cut panels sit side by side, a short piece or reversed motif is easier to notice than when each piece disappears immediately into construction.
The limit is equally important. A very large pile can increase counting mistakes, hide defects, and leave too much unfinished work waiting for the next operation. The practical target is therefore not the largest batch your table can hold. It is the smallest repeatable group capable of reducing setup without overwhelming your ability to label, inspect, and store work in progress. New makers often benefit from a three-to-five-piece pilot, followed by micro-batches of five to ten once the sequence proves stable; these numbers are starting points, not universal standards.
Before choosing a batch size, draw the operation sequence on one sheet of paper and circle every point requiring a change of tool, material, machine setting, heat setting, or work area. Those circles represent setup moments batching may reduce. Next, underline every point where an error becomes difficult to reverse, such as cutting, permanent bonding, heat activation, or enclosing a seam. Those underlined steps need first-piece approval. This simple map prevents “work faster” from becoming the only plan and shows where checking creates more value than speed.
- Supporting process example: Our Daily Craft, “How to Batch Sew Sewing Projects” follows batching through fabric preparation, cutting, clipping, machine work, pressing, and thread trimming, making it useful beside the operation-mapping exercise rather than as a detached reading list.
Who Benefits Most from Batch Crafting?
The method is useful for a parent preparing party favors, a teacher organizing a supervised activity, a volunteer group making charity items, a hobbyist creating seasonal gifts, or a small maker preparing a limited craft-fair range. People without advanced sewing skills can also benefit when the project uses felt, ribbon, flat embellishments, or a suitable fabric adhesive. In every case, the method should match the end use: a decorative banner has different structural, washing, and safety requirements from a tote bag intended to carry weight.
The same project may justify different batching choices for different people. A solo maker with one cutting mat and four square feet of curing space may process four bonded items at a time, while a supervised volunteer group can divide the same design among dedicated stations. Available capacity, not ambition, sets the safe amount of work in progress. If pieces must be stacked, moved off the table, or left unlabeled merely to fit the chosen quantity, the batch is already too large for the current setup.
- Video beside the workflow decision: BATCH Sewing Hacks to Speed Up Your Sewing Workflow gives makers a visual reference for grouping repeated gift-making operations before a deadline. Watch it after mapping the project steps, then adopt only the ideas compatible with the actual pattern and materials.
2. Which Fabric Crafts Are Best for Batch Making?
The best batch projects use a stable pattern, fixed dimensions, a limited number of pieces, and the same construction sequence for every item. Coasters, fabric bookmarks, simple gift bags, bunting, felt ornaments, napkins, scrunchies, and flat appliqués usually meet those conditions. Fitted garments, delicate materials, many size variations, or heavily personalized designs are safer in smaller groups because each unit demands additional decisions.
Use a Quick Batch-Suitability Test
Before purchasing material for twenty pieces, score the project against five practical questions. Has one sample already worked? Are the dimensions identical? Can all components be labeled unambiguously? Will the same needle, thread, heat setting, or adhesive method suit the full group? Can a mistake be detected before it becomes hidden inside the next operation? A project answering yes to all five questions is a strong batching candidate. Two or more uncertain answers signal a need for another sample or a smaller pilot.
For a more disciplined decision, assign zero, one, or two points to five areas: pattern stability, material consistency, repeatability of the joining method, ease of identifying components, and visibility of defects. A score of eight to ten suggests a strong batching candidate; five to seven suggests a small pilot with extra checks; zero to four favors one-at-a-time construction until uncertainty is removed. This ten-point screen is a practical planning framework, not a published industry standard, so it should be used as an initial decision aid rather than a certification system.
- Pattern completed successfully before: 0–2 points
- Materials behave consistently during cutting and joining: 0–2 points
- Components are easy to name, orient, and count: 0–2 points
- Joining settings can remain stable across the group: 0–2 points
- Defects remain visible before the next irreversible step: 0–2 points
The end use matters as much as the shape. A flat felt ornament experiences little load and can often be sewn, bonded, or made with a combination of methods. A tote handle, bag bottom, clothing seam, or hanging loop may experience repeated tension, friction, washing, or sudden pulling. Those areas should not be converted into glue-only construction merely because adhesive application looks quicker. Batch efficiency never removes the need for appropriate structural stitching or reinforcement.
| Batch suitability | Typical projects | Practical construction choice | Main risk to control |
|---|---|---|---|
| High | Coasters, napkins, bookmarks, bunting flags, felt letters, flat ornaments | Sewing, suitable fabric glue, fusible web, or a tested hybrid method | Reversed pieces, inconsistent dimensions, glue bleed-through |
| Moderate | Scrunchies, simple pouches, fabric baskets, bowl cozies, drawstring gift bags | Mostly sewing, with adhesive or fusible material for decoration | Curves, elastic length, zipper alignment, heat compatibility |
| Low for a first batch | Fitted clothing, multi-size garments, slippery or stretchy projects, highly personalized work | Individual fitting or small controlled batches | Fit variation, distortion, orientation errors, repeated rework |
| Unsuitable for glue-only structural assembly | Load-bearing bag handles, high-stress seams, safety-related gear | Structural stitching designed for the load; adhesive only where appropriate | Separation under tension, abrasion, washing, or repeated flexing |
Best Beginner-Friendly Batch Projects
Beginners should favor pieces large enough to handle comfortably and simple enough to inspect from both sides. A fabric bookmark with a rectangular template, a felt ornament with two mirrored body pieces, or a basic drawstring bag provides repetition without dozens of confusing components. Straight edges and visible seam paths also make first-piece checking easier. If a project uses small beads, sequins, or rhinestones, add them only after the main construction is stable and provide suitable control when children or groups are involved.
- Project evidence placed with project selection: Utah State University Extension, “Easy Sewing Maker Projects” provides fixed-dimension, step-based examples such as small holders and fabric covers. These projects show the limited component count and visible construction sequence suitable for a beginner batch.
Projects to Keep in Small Batches
Directional prints, plaid matching, nap fabrics, stretch knits, velvet, lace, and pale fabrics can still be batch-made, but they deserve smaller work-in-progress groups. Directional motifs limit how pattern pieces can rotate on the cloth. Stretch fabrics can change shape when stacked or pulled during cutting. Lace and light-colored cloth may reveal adhesive or pressure marks. A sensible sequence is to test one complete piece, make three more under the same conditions, inspect them after use or curing, and only then enlarge the group.
Variants also create hidden complexity. Twelve identical bags made from one stable cotton are one production family; four sizes, three linings, two cord colors, and personalized names are many small families sharing a product name. Group pieces only while the template, settings, and inspection criteria remain the same. When color, size, fabric weight, needle, thread, adhesive amount, decoration, or care requirement changes, close the current group, count it, and begin the next variant with a newly checked first piece.
When Sewing or Reinforcement Is Still Necessary
Choose the joining method from the stress path rather than from convenience alone. Decorative letters on a wall banner do not carry the banner’s weight, while the hanging tabs do. A flat appliqué on a gift bag may be bonded, while the bag sides and drawstring channel remain stitched. Beads with holes are often more reliably sewn when the item will flex or wash repeatedly. A good project sheet should mark each connection as decorative, positioning, or structural before production begins.
One useful stress-map technique is to sketch arrows showing where the finished item will be pulled, folded, carried, hung, washed, or rubbed. Mark a connection “structural” when failure would release a load or stop the item from functioning. Mark it “decorative” when failure mainly changes appearance, and “positioning” when it only holds layers before another secure operation. This map makes method selection more consistent across the batch and prevents an attractive sample from being mistaken for a durability test.
3. How Do You Plan Batch Size, Materials, Time, and Cost?
Plan the batch from one approved master sample rather than from a guess. Record the sample’s dimensions, component count, active work time, material consumption, joining method, waiting time, and failure points. Use those observations to calculate the full run, add a reasoned allowance, and set a work-in-progress limit. Separate hands-on labor from curing or cooling so the deadline and unit cost remain realistic.
Make and Approve One Master Sample First
The master sample is the physical standard for the batch. Make it in the intended fabric, thread, interfacing, trim, and adhesive rather than in whatever scrap happens to be nearby. Measure its finished size, photograph the front and back, note the order of operations, and test the areas most likely to fail. If the final item will be bent, washed, packed tightly, or exposed to heat, the sample should encounter the same condition before the remaining material is cut.
A complete master-sample record should include the pattern version, finished measurements, seam or bond locations, component quantities, fabric direction, thread and needle details, pressing conditions, adhesive application pattern, holding method, active time, curing time, and inspection result. The record should also identify any step needing special attention, such as a narrow turning opening, mirrored letter, slippery trim, or absorbent fabric edge. Without this information, a physical sample may look correct while providing too little guidance for repeat production.
Record active time with a simple stopwatch, but do not include a twenty-four-hour adhesive cure as twenty-four hours of labor. Active time covers measuring, cutting, positioning, sewing, gluing, pressing, trimming, inspecting, and packing. Waiting time covers curing, cooling, or drying when the maker is free to perform another task. Lead time includes both. This distinction makes backward scheduling more accurate and prevents a glued batch from being planned for packaging immediately after the last decoration is attached.
Choose a Pilot Batch and a Work-in-Progress Limit
After the master sample passes, make a pilot group of three to five. This modest group reveals whether labels are clear, whether pieces shift during repeated handling, and whether the planned station order works. If the pilot passes without a repeating defect, move to controlled groups of five to ten or another number suited to the table, curing space, and storage trays. A larger event order can still be divided into several traceable micro-batches instead of becoming one unmanageable pile.
Set the actual work-in-progress limit from the least capable stage. If the cutting table holds twelve kits, the sewing tray holds eight, but the protected curing shelf holds only four pieces without stacking, a bonded micro-batch should not exceed four. The effective limit can be written as the smallest of cutting capacity, assembly capacity, pressing or holding capacity, curing capacity, and inspection capacity. This prevents a fast early station from flooding a slower later station with pieces likely to be misplaced or damaged.
- Capacity rule: Effective micro-batch size = the smallest safe capacity among cutting, kitting, joining, holding or pressing, curing, inspection, and storage.
A sewing-line study published in 2018 found a measurable trade-off between waiting time and transportation time as batch size changed; its specific factory figures are not household benchmarks, but the operational lesson is useful. Smaller is not automatically best, and larger is not automatically fastest. The practical batch size minimizes total handling and waiting while keeping errors visible. Home makers can approximate this by recording movement, queue time, defects, and completed pieces across two or three pilot sizes.
- Downloadable research evidence: Application of Lean Manufacturing in a Sewing Line for Improving Overall Equipment Effectiveness (PDF) reports how batch size, waiting, transportation, layout, and work in progress interacted in one industrial sewing study. Its operating principle is relevant, although its factory quantities should not be copied into a home craft plan.
Once the pilot is complete, compare at least four simple observations: active minutes per usable item, number of times work moved between areas, pieces waiting at the slowest station, and defects requiring correction. Increase the next group only if the table remains organized and first-pass yield stays acceptable. A group producing slightly faster stitching but twice as much sorting or rework is not a more efficient batch when the complete process is counted.
- Planning video placed with batch-size refinement: How to Batch Sew Step by Step and Make a Higher Profit and Productivity helps viewers connect grouped operations with time and output. Any time, price, or profit figures shown belong to its creator’s example and should be replaced with the maker’s own stopwatch and cost records.
Calculate Components and Material Allowance
Start with component counts, not a vague estimate of “enough fabric.” If one drawstring gift bag requires two body panels, two cord lengths, and one decorative appliqué, twelve bags require twenty-four body panels, twenty-four cords, and twelve appliqués before allowance. Add spare pieces selectively. A cutting error may justify one extra pair of body panels, while a unique personalized name panel may need a different contingency. Preserve matched pairs, fabric direction, dye lot, and motif placement when rounding quantities upward.
| Planning measure | Formula | Illustrative 12-bag example | How to use the result |
|---|---|---|---|
| Required components | Components per item × target quantity | 2 body panels × 12 = 24 panels | Count every component separately before cutting |
| Preparation quantity | Required quantity × (1 + allowance) | 24 × 1.05 = 25.2, rounded to a practical matched quantity such as 26 | Treat 5% as an example; adjust for test results, motif matching, flaws, and minimum cut units |
| Active time per sellable item | Total hands-on batch time ÷ sellable units | 150 minutes ÷ 12 = 12.5 minutes | Compare with the master sample and locate slow operations |
| First-pass yield | Units passing without rework ÷ units completed × 100 | 11 ÷ 12 × 100 = 91.7% | Investigate the failed unit before increasing the next batch |
| Actual unit cost | Total batch cost ÷ sellable units | $90 ÷ 11 = $8.18 | Divide by usable output, not merely the quantity started |
The five-to-ten-percent allowance often seen in simple craft planning is a starting range, not a promise. Plain rectangles cut from stable fabric may need little extra when a tested layout is available. Directional prints, visible motif matching, shrinkage, cloth flaws, fraying, or first-time techniques may require more. Expensive fabric may justify a smaller initial purchase and a second controlled cut rather than a generous blanket percentage. Keep the reason for every allowance beside the number.
Two similar-looking allowance formulas answer different questions. Multiplying the required quantity by one plus an allowance is convenient when you intentionally add spare material. Dividing the required good quantity by expected yield is more exact when historical defects are known. If twenty good pieces are required and expected yield is ninety-five percent, the yield-based calculation is 20 ÷ 0.95 = 21.05, rounded to a workable whole quantity. Do not apply both methods to the same risk or the buffer will be counted twice.
- Spare-material method: required quantity × (1 + selected allowance)
- Yield method: required good quantity ÷ expected yield rate
- Use one method for a given source of loss and document the reason for the percentage
Material calculations should also distinguish fabric area from usable cutting length. Selvages, pattern repeats, nap, one-way prints, shrinkage, flaws, and seam allowances reduce the usable portion of a nominal fabric length. A simple area calculation may therefore underestimate the purchase requirement. Prepare a scaled or physical layout using the actual usable width, lock all grain-sensitive pieces in the proper direction, and round the result to a quantity the supplier can sell.
- External calculation tool placed with yardage planning: Fabric Yardage Calculator can estimate repeated rectangular pieces from finished dimensions, usable fabric width, seam allowance, repeat, quantity, and selected extra allowance. Its result is a planning estimate and should be checked against the actual pattern layout before fabric is ordered or cut.
Separate Hands-On Time from Waiting Time
Build the schedule backward from the moment the crafts must be packed, delivered, or displayed. Reserve the final quality check and packaging period first, then place the full adhesive cure or cooling period before it, followed by assembly, decoration, sewing, cutting, and material testing. If several materials or adhesive formulas are used, schedule from the slowest confirmed requirement. A comfortable buffer is more useful than counting every available evening as uninterrupted production time.
For an illustrative schedule, suppose cutting and kitting require ninety minutes, sewing requires two hours, decorative bonding requires forty-five minutes, inspection and packing require sixty minutes, and the selected adhesive requires a full day before washing or demanding use. Hands-on work totals five hours and fifteen minutes, but the calendar lead time exceeds one day. These sample numbers are not standards; their purpose is to expose the difference between labor and elapsed time before accepting a deadline.
Add dependencies before assigning calendar dates. Cutting can usually begin only after the sample and material test pass. Adhesive decoration may begin only after the relevant panel lies flat and its placement is marked. Packing begins only after full cure and final inspection. Other activities can overlap: while micro-batch one cures, micro-batch two may be sewn, provided the curing area and labels remain controlled. A schedule built around dependencies shows where waiting can be used productively without shortening a required cure.
- External scheduling tool placed beside backward planning: Timeanddate Date and Time Calculator can subtract testing, curing, inspection, and packing intervals from a fixed completion date. It is suitable as a normal outbound reference and does not need to be embedded as a generator on the page.
Estimate Cost per Sellable Item
Costing should include fabric, thread, interfacing, adhesive, trim, packaging, paid or valued labor, equipment-related overhead, and expected waste. Divide the final total by sellable units, not units started. If twelve pieces enter the batch but one becomes a practice sample and one requires rework, ten or eleven units may initially carry the cost. For personal gifts, the same calculation still helps compare a handmade plan with the available budget and prevents a small but essential component from running out halfway through production.
Separate planned cost from actual cost. Planned cost uses the estimated material allowance, expected active time, and target yield before work begins. Actual cost uses receipts, measured consumption, recorded labor, rework time, and final usable quantity after the batch closes. The difference identifies where the estimate failed. If adhesive use is higher than planned, examine application width, absorbency, nozzle buildup, and squeeze-out before assuming the bottle size is inadequate. If labor rises, locate the operation with the longest queue or most repeated corrections.
- External costing tool placed with cost-per-unit calculation: Mavenory Free Batch Cost Calculator accepts batch materials, packaging, labor time and rate, overhead, output, and rejects to estimate cost per sellable unit. Check every input against receipts and stopwatch records rather than treating its displayed example as a price recommendation.
4. How Do You Prepare, Cut, Label, and Kit Fabric Pieces?
Prepare the exact materials before beginning the production cut. Test cleaning, marking, pressing, sewing, adhesive visibility, flexibility, and any planned washing on scraps from the same fabric. Once the method passes, make reusable templates, mark grain or motif direction, cut only a controllable stack, and label every component. Build one complete kit per finished item so missing or reversed pieces are found before assembly.
Pre-Treat and Test the Exact Materials
Prewashing is appropriate when the fabric, pattern, end use, and joining-product directions call for it, especially when the finished craft will be laundered. It should not be presented as an automatic rule for every felt, coated textile, ribbon, dry-clean-only cloth, or nonwashable decoration. Follow the fabric care label, dry the material fully, and press only within the material’s temperature limit. Keep one unwashed reference swatch when color change, shrinkage, or surface finish needs to be compared.
Run a compatibility test using the full material stack, not only the top fabric. For an adhesive appliqué, include the appliqué fabric, base fabric, dye, coating, interfacing, and intended amount of glue. After the specified cure, inspect the face and reverse for staining, bleed-through, shine, stiffness, edge lift, or color movement. Bend the sample several times and, when laundering is expected, wash one test sample according to the planned care method before approving the batch.
Create a control strip beside the test rather than relying on memory. Keep one untouched fabric piece, one piece exposed to the planned pressing process, and one fully joined specimen. Photograph all three in the same light and label them with material, temperature or joining method, application date, and inspection date. A difference in shade, handle, surface sheen, or flexibility becomes easier to recognize when the untreated control remains available. This comparison is especially useful for pale cloth, satin, coated fabric, velvet, and loosely woven materials.
A material can pass one criterion and fail another. A bond may look clean when flat but become stiff when folded. A trim may survive hand washing but distort during machine drying. A dark fabric may hide minor adhesive penetration while a pale version reveals it immediately. Define the actual end-use checks before testing so a sample is not approved merely because it remained attached for a few minutes on the table.
Create Reusable Cutting and Placement Templates
A batch template needs more information than an outline. Mark the piece name, quantity per item, grainline or direction, fold line, right-side orientation, seam allowance status, and matching points. Placement templates should also show a centerline, distance from finished edges, and any exclusion zone where a sewing needle, fold, or drawstring channel will pass. If the template is transparent, the maker can align motifs and check the cloth beneath it without repeated measuring.
Inspect the template before trusting it repeatedly. Measure two independent dimensions, compare mirrored pieces, and confirm whether seam allowance is included. Punch a small orientation hole or add a large “RIGHT SIDE UP” mark if fronts and backs look alike. Templates used with rotary cutters need firm, undamaged edges; a nick or softened cardboard corner can slowly alter every following cut. When a template is revised, retire or visibly cancel the old version so two sizes cannot circulate on the same table.
Digital layout can help when several identical shapes must fit inside a defined area, but the screen does not know whether a real fabric has nap, stretch, flaws, or a one-way motif. Use a digital preview to explore spacing, then perform a physical dry layout on the actual usable width. Place larger or direction-sensitive pieces first and use appropriate gaps for seam allowance and cutting. Never rotate a pattern piece merely to save fabric when its grainline or print direction must remain fixed.
- External layout reference placed beside template planning: Cricut Help, “Using Templates in Design Space” explains how a template can be resized, positioned, duplicated, hidden, and used as a visual guide without becoming part of the final cut.
Cut Safely Without Letting Layers Shift
Use sharp fabric shears for controlled individual cutting or a rotary cutter, acrylic ruler, and self-healing mat for suitable straight repeated cuts. Keep the noncutting hand behind the cutting edge, close or retract the blade whenever it leaves the mat, and replace a blade requiring excessive force. Do not stack more layers simply because the cutter can pass through them. Thick, slippery, stretchy, loosely woven, or precisely patterned fabrics usually need fewer layers to preserve accuracy.
The first cut from every template should be compared with the master sample before the remaining stack is cut. Confirm finished dimensions plus seam allowance, direction, mirrored orientation, notch position, and quantity per item. After several cuts, place the template back over a completed piece to detect gradual drift. If an edge begins to wander, stop and correct the cutting method rather than trimming every subsequent assembly differently at the sewing or gluing station.
Plan the cutting order to protect both accuracy and the maker’s hands. Straighten and support the fabric without pulling it off-grain, cut the largest direction-sensitive parts first, and fill suitable gaps with small pieces only when rotation is allowed. Pause when pressure on the ruler becomes inconsistent or hand fatigue begins to change the cutting angle. A short break and a fresh blade can be less costly than several layers drifting beneath a ruler. Count completed pieces into matched sets before moving leftover cloth or changing color.
- Downloadable tool guide placed with the cutting checklist: USU Basic Sewing Supplies (PDF) lists essential and advanced tools, including sharp shears, removable marking tools, rotary cutters, self-healing mats, grid rulers, press cloths, and rotary-cutter safety gloves.
- Video placed directly after the rotary-cutting instructions: Rotary Cutter 101: Safety Tips Every Beginner Sewist Needs covers cutter selection, mats, rulers, blade changes, hand safety, and common beginner mistakes before users attempt repeated cutting.
Label Every Component and Build Individual Kits
Label pieces with a removable method appropriate for the fabric, or attach a paper tag or clip where direct marking could show. A useful code contains the batch number, finished-item number, component name, size or color, and orientation. For example, B02-07-FR-R can mean batch two, item seven, front, right side. The code matters less than consistency. A printed key at the workstation prevents each helper from inventing a different abbreviation.
Place all parts for one finished item into a tray, envelope, shallow box, or clear bag. Include thread, trim, cord, and decoration only when those supplies are reserved per piece; shared tools stay at the station. Before the kit leaves cutting, compare its contents with a short bill of materials. Keep paired or mirrored parts clipped together, but avoid pins capable of snagging delicate fabric. A photograph of the approved dry layout provides a faster reference than repeated measuring during assembly.
Use error-proofing cues visible from arm’s length. Different tray colors can distinguish size groups, a red clip can identify the right side, and a bold arrow can identify nap or motif direction. Keep rejected or uncertain parts in a separate marked container rather than returning them to the usable stack. At the end of cutting, reconcile three quantities: pieces planned, pieces cut, and complete kits released. If these counts do not agree, find the discrepancy before the joining station starts consuming parts.
Labels should remain attached until the point where confusion is no longer possible. Removing every tag immediately after the first seam may leave similar linings or decorations unidentified later. At each operation, decide whether the label can stay outside the seam, move to the next container, or be replaced with a temporary clip. The route card should record any part substitution so a later material or bonding issue can be traced to the affected items rather than the entire project.
Set Up a Safe Workspace for Families or Groups
Separate sharp tools, heated equipment, adhesive application, and small embellishments into controlled areas. In a classroom or family project, an adult should read every material label, manage rotary cutters and irons, and decide whether glue, beads, pins, or cords are appropriate for the participants. Product suitability for fabric does not automatically establish child safety. Good ventilation, protected work surfaces, closed containers, cleaned nozzles, and clear storage rules should be based on the product label and activity setting.
Assign each participant one clearly demonstrated task and place a correct sample plus an unacceptable sample at the station. The unacceptable sample is valuable because it shows what misalignment, excessive glue, an open seam, or heat damage looks like before the person repeats it. Keep a simple handoff count between stations, and never reward speed alone. In a supervised group, a slower station producing clean pieces is preferable to a fast station sending hidden defects into work others cannot safely correct.

5. What Is the Step-by-Step Batch-Making Workflow?
A reliable batch moves through six visible zones: cutting, dry layout and kitting, joining, pressing or holding, curing or cooling, and final inspection and packing. Release work from one zone only when its check is complete. Perform the same operation across a limited group, approve the first result, and keep each item identified. This flow saves setup while preventing unfinished pieces from becoming an anonymous pile.
Set Up Six Simple Workstations
Workstations do not require six rooms or six people. On a home table, they can be six labeled trays used at different times. In a group project, each station can have its own tools, operation card, approved sample, and output tray. Arrange them to reduce backtracking: fabric should not cross the room repeatedly between a cutter, sewing machine, iron, and storage shelf. Glue and hot tools need stable protected surfaces, while the curing zone should remain flat, clean, undisturbed, and large enough for the entire micro-batch.
| Station | Work completed | Release check before the next station |
|---|---|---|
| 1. Cutting | Cut approved templates and count components | First cut matches master; direction and quantity confirmed |
| 2. Layout and kitting | Dry-position parts and build item-specific kits | Every kit is complete, identified, and photographed if needed |
| 3. Joining | Sew, bond, or fuse the planned connections | First seam or bond is correctly located with no visible damage |
| 4. Pressing or holding | Press seams, apply clips, weights, or approved pressure | Fabric is flat; pressure has not distorted or marked the surface |
| 5. Curing or cooling | Keep work undisturbed for the product-specific period | Batch card shows completion time and earliest inspection time |
| 6. Inspection and packing | Check dimensions, appearance, function, care, and count | Only conforming, fully ready items enter packaging |
- Downloadable workstation example placed beside the station design: USU Charity Pillow Cases (PDF) divides a repeatable group project into cutting, rolling and pinning, sewing, turning, pressing, edge finishing, and packing stations. Its quantities and project details are specific to pillowcases, but its visible handoff structure is readily adapted to other fabric crafts.
Give every micro-batch a one-page route card moving with it. The card should show batch code, item range, material lot or color, current operation, completed operations, quantity entering, quantity leaving, person or station, completion time, and any exception. This record does not need manufacturing software; a clipboard or printed sheet is enough. Its purpose is to prevent an unlabeled tray from arriving at the iron or sewing machine with no reliable way to know which steps are complete.
A practical route card might begin with twelve pieces entering cutting, twelve complete kits leaving layout, eleven passing the first joining check, and one moving into a clearly marked correction tray. The quantity should reconcile at every handoff. If a station receives ten pieces when the previous station released eleven, the missing item must be found before the next operation begins. This simple control prevents mixed batches, missing components, and accidental duplication.
Complete One Operation Across the Whole Micro-Batch
Begin with the smallest irreversible operation. Sew one representative seam or bond one representative decoration, then compare it with the master sample for alignment, puckering, tension, bleed-through, stiffness, and edge condition. Once approved, repeat the same operation on the rest of the micro-batch. If the machine needle, presser foot, thread, heat setting, fabric, template, or adhesive changes, treat the next item as a new first piece and check it again.
For sewn projects, group operations by machine setup where the pattern allows. Complete compatible straight seams before changing to a zipper foot or twin needle, but preserve the correct construction order. Press seams at the required stage rather than leaving all pressing until the end, because pressed seam allowances often control the accuracy of the next step. For adhesive projects, group only as many pieces as can be applied, aligned, and fixed within the product’s workable handling period.
Watch for the slowest station because it sets the pace of the complete batch. If four pieces can be cut in five minutes but bonding and alignment require four minutes per piece, cutting dozens in advance will not increase finished output; it will create waiting work. Reduce the release quantity, add an appropriate fixture or placement guide, or divide compatible tasks among trained helpers. Do not add people automatically, because extra handoffs can create more variation than the additional capacity removes.
When a station becomes the repeated delay, measure the complete task before changing it. The slow period may come from searching for pieces, reopening containers, removing backing paper, correcting alignment, cleaning squeeze-out, or writing labels rather than the joining action itself. Prepare materials upstream only when doing so does not shorten adhesive shelf exposure, remove necessary identifiers, or create another pile. The best improvement often removes searching and repositioning rather than asking the operator to work faster.
Use Chain Piecing for Suitable Sewn Components
Chain piecing feeds one prepared pair after another through the sewing machine with short thread chains between pieces. It can reduce repeated stops and thread trimming when several units share the same seam. Keep the item order stable, maintain the required seam-start and seam-end security for the project, and cut the chain apart only after checking orientation. Chain piecing is not suitable when a piece needs individual fitting, a different thread setting, or an inspection before the seam can safely continue.
Arrange paired pieces in a fixed pickup order before starting the machine. Sew a short scrap leader if appropriate for the fabric and machine, feed the first pair, leave only the thread bridge needed to move into the next pair, and keep completed units in sequence. Before separating the chain, compare seam allowance and orientation across the row. If one piece is reversed, the attached order helps locate neighboring units made during the same moment and supports a focused check instead of inspecting an unrelated full-day batch.
- Video placed directly after the chain-piecing method: AllPeopleQuilt, “Video 8: Chain Piecing” gives a compact visual example of feeding like-sized units continuously without lifting the presser foot between every pair.
Worked Example: Twelve Fabric Gift Bags
Assume the approved bag uses two body panels, two drawstrings, and one flat appliqué. The structural side seams and drawstring channel are sewn; the appliqué may be stitched, fused, or bonded after compatibility testing. Prepare twenty-four body panels, twenty-four cords, and twelve appliqués, then add only the justified spare quantity. Make twelve numbered kits, but release them in three micro-batches of four during the first run so alignment, machine setup, and decorative placement remain easy to compare.
At Station 1, cut and verify one panel before completing the fabric stack. At Station 2, pair fronts and backs, mark the channel and appliqué position, and confirm two cords per kit. At Station 3, sew the comparable seams across four bags, press as required, and complete the next operation. Apply decoration only after the bag front lies flat. Glued appliqués move to a timed curing tray; sewn appliqués move to thread trimming and inspection. The final count separates gift-ready or sellable units, correction work, and unusable pieces.
The route card for this example can release item numbers 01–04 first, 05–08 second, and 09–12 third. After the first group, record whether any panel was reversed, whether the casing width remained consistent, whether cords passed freely, and whether the appliqué placement stayed inside its guide. Correct the operation card before releasing 05–08. This staggered approach protects the remaining material while still obtaining the setup benefit of repeated cutting, sewing, pressing, and decoration.
For a no-sew variation, replace the sewn bag with a flat felt ornament using two body shapes, a light decorative layer, and a separately reinforced hanging feature appropriate to the design. Cut and kit the body pieces in the same way, but size the micro-batch from the number of ornaments capable of lying flat in the protected curing area without overlap. Inspect the first cured ornament for edge coverage, stiffness, visible residue, and hanging behavior before releasing the remaining decoration sets.
Do not invent glue consumption from bottle capacity. Weighing the container before and after the master sample can provide a rough internal measure when the scale is suitably precise, or the maker can mark the bottle level and record the application pattern. Repeat the measurement across the pilot because tiny dots, thin lines, and broad coatings consume very different amounts. Use the average only for the tested materials, nozzle, and design; a larger appliqué or absorbent felt can change consumption substantially.
When weighing consumption, use the same capped or uncapped condition before and after, allow for the resolution of the scale, and avoid interpreting a tiny change below the scale’s reliable increment. A practical alternative is to apply the chosen dot or line pattern to a transparent practice sheet marked with the real bond outline, then photograph it as the application standard. The target is repeatable coverage with minimal squeeze-out, not a falsely precise universal number detached from the fabric and design.
6. How Does the Process Change for Sewing, Fabric Glue, and Fusible Web?
Choose the joining method from material compatibility, stress, flexing, washing, appearance, available tools, and production timing. Sewing is normally preferred for structural or load-bearing seams. Fabric glue can simplify suitable flat decorative work and no-sew crafts but needs controlled application and curing space. Fusible web offers repeatable heat-activated placement when every layer tolerates the required temperature. Hybrid construction uses each method only where it performs appropriately.
| Method | Best suited to | Batch control | Waiting or setting issue | Important limit |
|---|---|---|---|---|
| Sewing | Structural seams, handles, washable construction, high-flex areas | Standardize needle, thread, seam allowance, tension, and pressing order | Little chemical cure, but pressing and cooling may affect the next operation | Material may pucker, stretch, fray, or show needle damage |
| Fabric glue | Flat appliqués, felt shapes, ribbon, lace, patches, and suitable light-duty no-sew pieces | Use a tested nozzle pattern, thin application, placement guide, pressure method, and timed trays | Initial hold and full cure are product-specific | Not a universal replacement for structural stitching; bleed-through and stiffness must be tested |
| Fusible web | Repeated flat shapes and appliqués on heat-compatible layers | Standardize template direction, iron setting, pressing cloth, pressure, and cooling | Bond forms through the specified heat and cooling procedure | Heat-sensitive, coated, dimensional, or incompatible materials may be damaged |
| Hybrid construction | Bags, apparel decoration, banners, keepsakes, and projects with mixed stress levels | Map decorative, positioning, and structural connections before work begins | Follow the slowest relevant joining requirement before packing | Adhesive must not interfere with a sewing path unless explicitly suitable for sewing through |
Sewn Batches: Control Needle, Thread, Tension, and Pressing
Test the complete layer stack under the machine before sewing the batch. The needle appropriate for stable woven cotton may not suit knit, denim, coated fabric, or adhesive-backed appliqué. Confirm tension and stitch length on a scrap, then compare the test seam with the master. Group similar thread colors only when the design permits, and record machine settings on the operation card. Replace or inspect the needle if skipped stitches, visible holes, adhesive buildup, or fabric damage appears.
Pressing belongs inside the construction sequence rather than at the very end. A seam pressed flat or to the correct side can determine whether the next edge aligns, whether a casing remains even, and whether topstitching looks consistent. Use a press cloth when the fabric may shine or mark, and verify temperature on scrap. Allow fused or pressed pieces to cool flat before moving them, because a warm bond or softened surface can shift even when it appeared aligned under the iron.
Machine settings should be verified again after a material or construction change. A lining joined to cotton may feed differently from several layers at a folded casing. A seam crossing cord, elastic, or bulky corners can also alter stitch formation. Do not assume a clean test on two flat layers proves every later operation. Identify the thickest and most difficult stack during the master-sample stage and keep a labeled scrap of this stack near the machine for setup confirmation.
Fabric-Glue Batches: Apply Thinly and Track Time
For a compatible glue project, clean and dry the surfaces, test the exact materials, and apply a thin, even layer to the intended area rather than flooding the fibers. Align the first piece against a placement guide, press or fix it as directed, and check the face and back for squeeze-out or bleed-through before repeating. Use a capped bottle between micro-batches and keep the nozzle clean so the application width does not change as dried residue accumulates.
Fabric bonding depends on intimate contact between the adhesive and both surfaces. A layer too sparse may leave dry gaps, while a heavy layer can soak through an open weave, extend curing, stiffen the craft, or squeeze beyond the edge. Absorbent felt and canvas may behave differently from dense polyester or coated fabric even when the decorative shape is identical. The useful process target is therefore a repeatable application pattern confirmed on the real material stack, followed by enough controlled pressure to maintain contact without driving adhesive outward.
Calibrate the application visually before beginning the batch. Draw the real bond outline on a disposable practice surface, apply the intended dots or thin line, and photograph the acceptable pattern beside one too light and one too heavy. If several people apply adhesive, each person should reproduce the acceptable sample before receiving fabric kits. During production, inspect the first face and reverse under consistent light. A widening bead often signals a blocked or damaged nozzle, stronger hand pressure, or a bottle becoming harder to control.
For GleamGlee Fabric Glue, the confirmed use guidance is a typical initial set of about six to ten minutes and approximately twenty-four hours for full cure before washing, ironing, heavy handling, or high-frequency use. Once fully cured, the bond is intended to dry clear and remain flexible, while fabric care limits still govern washing and ironing. These figures are product-specific, not universal adhesive timings. Light, delicate, coated, elastic, specialty, or high-value fabrics should receive a hidden-area test first.
Initial set and full cure answer different questions. Initial set describes the point when correctly supported pieces begin resisting ordinary movement; it does not mean the craft has reached final wash, heat, or load readiness. Full cure is the later release condition used before more demanding handling. Record both on the batch card, and start the clock when the relevant piece is actually bonded rather than when the first item entered the station. For longer micro-batches, use separate tray times so the earliest pieces are not confused with the latest.
Ambient conditions and application thickness can influence real handling, so time alone should not replace inspection. Keep the batch in a normal, clean, ventilated indoor environment consistent with the label, avoid testing by repeatedly peeling an uncured edge, and do not accelerate curing with unapproved heat. If the project must be washed or ironed, wait for the confirmed full-cure period, then follow the care limit of the most sensitive fabric, trim, decoration, and adhesive in the finished stack.
Never translate “fabric adhesive” into “safe for every fabric,” “certified non-toxic,” or “suitable for unsupervised children” without matching documentation. Avoid claiming a fixed number of crafts per fifty-milliliter bottle because coverage changes with bond area, layer thickness, fabric absorbency, nozzle control, and waste. For a repeated design, determine consumption from a master sample and pilot, then add a practical process allowance supported by those observations.
Cleaning the nozzle is part of batch control rather than simple housekeeping. Wipe accessible residue according to the product directions, close the cap securely between sessions, and store the container in the stated orientation and environment. Never force an applicator toward the face, use an uncontrolled sharp object inside the nozzle, or add a solvent unless the manufacturer specifically authorizes it. A changed nozzle opening changes the applied line and can invalidate consumption figures gathered from the earlier sample.
- Video placed beside adhesive application and cure control: Aleene’s Fabric Fusion Glue Guide provides a visual overview of fabric-adhesive selection and application for flexible fabric and embellishment work. It demonstrates another manufacturer’s products, so its cure times and formula-specific claims must not be transferred to a GleamGlee project.
Fusible-Web Batches: Control Heat Compatibility
Fusible web can make repeated appliqué placement efficient because paper-backed shapes can be traced, cut, arranged, and bonded in a consistent order. The web still needs its own test. Confirm which side carries adhesive, whether tracing must be mirrored, whether the fabric tolerates the required heat and steam condition, and whether a pressing cloth is required. Mark the iron setting on the station card and avoid sliding the iron when the product calls for a controlled press.
Prepare fused shapes as labeled sets and keep the release paper attached until the documented stage. Small letters and asymmetrical motifs may need mirrored tracing, so complete one full word or image before tracing the remainder. Use a placement overlay or reference grid rather than measuring each letter independently from a moving fabric edge. If alignment drifts across a long banner, divide it into fixed reference zones and approve the first zone before activating heat on the rest.
Cool the first fused sample fully before testing the edge. A bond can appear stable while warm yet lift after cooling or flexing. Inspect the face for shine, flattening, color change, adhesive shadow, or distorted pile. If the appliqué will later be stitched, confirm the fusible product and needle path are compatible. Products differ, so users should consult the selected manufacturer’s current instructions rather than apply one temperature or pressing time to every web.
- Manufacturer evidence placed beside heat-compatibility testing: Pellon EZ-Steam II Product Guidance directs users to prewash suitable fabrics, test heat compatibility, and follow a defined placement and pressing sequence for its specific fusible product.
- Video placed beside the fusible-web procedure: How to Do Fusible Appliqué visually demonstrates layout, pre-fused shapes, placement, and pressing tools, helping users understand the method before applying their own product instructions.
Hybrid Construction: Position First, Reinforce Where Needed
Hybrid construction works well when one project contains both decorative and structural connections. A small amount of appropriate adhesive or fusible material may hold an appliqué in position, while perimeter stitching supplies the chosen finish or additional resistance. The gift-bag body, casing, and handle remain sewn according to the pattern. Map the sewing line before applying adhesive; unless the adhesive is explicitly suitable for sewing through, leave the needle path free to avoid residue, skipped stitches, or machine contamination.
Draw the hybrid map directly on a copy of the pattern. Use one line style for structural stitching, another for decorative stitching, and shaded areas for adhesive or fusible coverage. Add the sequence beside each zone because positioning products can change how layers feed through a machine. Run the complete stack through a pilot after the bond reaches the instructed condition, inspect the needle and stitch formation, and stop if residue, skipped stitches, drag, or puckering appears. The map then becomes the repeatable instruction for the batch.
A hybrid project should pass as a complete system rather than as separate pieces of evidence. A bonded appliqué may remain attached during a flat test but interfere with folding the bag or sewing the casing. A perimeter stitch may be secure while its needle holes become visible on delicate fabric. Make, cure, manipulate, and care for the full master sample in the intended sequence. Only after this complete check should adhesive positioning and structural stitching be released as one repeatable method.
- Manufacturer video and evidence placed beside hybrid construction: Brother, “Sew Appliqué Stitching—Video Included” demonstrates appliqué stitching and cautions against placing glue where the machine needle will sew because glue can affect the needle or bobbin area.
7. How Do You Prevent Defects, Cure, Inspect, and Pack the Batch?
Prevent batch-wide defects by checking the first piece after cutting, marking, joining, pressing, and decoration, then inspecting every finished item visually. Keep curing or cooling records by batch, test a sample for flex and intended care, and stop when a repeated defect appears. Packaging begins only after the joining method has reached its confirmed ready condition and each item has passed the defined acceptance criteria.
Approve the First Piece at Every Irreversible Stage
An irreversible stage removes material, penetrates fabric, activates heat adhesive, or creates a bond difficult to reposition. The first cut confirms pattern dimensions; the first seam confirms orientation, seam allowance, tension, and stitch behavior; the first glue application confirms amount, visibility, alignment, and pressure; the first pressing confirms heat compatibility. Place the approved piece at the station as a physical reference. Helpers should compare their output with it rather than relying on memory or a verbal instruction passed around the room.
If a defect appears, pause the batch and identify its boundary. Determine the last item known to be correct, then isolate every piece made after the setting, tool, or material changed. Rework only when the correction will not damage appearance, size, flexibility, or durability. Quietly hiding a flaw inside later construction makes diagnosis harder and may waste more materials. A simple stop rule—two similar defects in one micro-batch—can prevent an uncertain process from continuing unchecked.
Define acceptance before inspection begins. “Looks good” is difficult for several people to apply consistently, while measurable criteria are easier: finished width within the pattern’s chosen tolerance, appliqué centered within a marked guide, no open seam, no visible adhesive beyond the permitted edge, required parts present, and drawstring moving freely. The tolerance should come from the project’s function and master sample rather than an arbitrary number copied from another craft. Record any approved cosmetic variation so acceptable handmade character is not confused with a defect.
A first-piece check should end with a clear decision: release, correct and recheck, or stop. “Probably fine” is not a useful status because the remaining batch will multiply the uncertainty. If the piece needs correction, make the correction and inspect it again before releasing the operation. When the cause remains unknown, hold the unprocessed kits while investigating material, setup, template, or technique. Protecting unused components is often the lowest-cost quality decision available.
Use Visual and Sample-Based Quality Checks
Every finished item should receive a visual and dimensional check because these inspections are quick and nondestructive. Compare overall size, symmetry, seam position, raw edges, thread tails, decoration placement, visible adhesive, surface marks, and component count. A sample from each traceable group can receive a gentle flex or light manual pull appropriate to the intended use. The purpose is not to perform a laboratory strength claim; it is to catch obvious edge lift, loose embellishments, missed seams, or excessive stiffness before packing.
If the finished item is intended as washable, retain a representative sample for a care test after the full product-specific cure. Use the planned wash method, dry it as intended, and compare appearance, dimensions, seam integrity, color movement, and bonded edges with an unwashed reference. One successful home test does not establish universal durability across every fabric and washing machine, but it provides more relevant project evidence than assuming a bond is ready merely because its surface feels dry.
Use two levels of inspection. Screen every item for visible, countable, and functional features because these checks are quick. Reserve slower or potentially damaging checks—extended flexing, repeated opening, washing, or stronger pull evaluation—for designated test samples representing the same material and process group. Do not sell or gift a piece after deliberately stressing it beyond normal handling unless it still meets the project’s criteria. Keep the retained test sample and notes long enough to compare future batches using the same design.
Inspect under consistent conditions whenever appearance matters. Glue marks, shine, pale stains, and uneven appliqué edges can disappear in dim or strongly colored light. Use the same neutral work light, viewing distance, and flat background for the master and finished pieces. Check both faces before lining or packaging hides the reverse. If the batch contains several fabric colors, verify the darkest and lightest versions separately because the same application may appear different across colors and weaves.
Track Curing or Cooling Time by Batch
Each curing tray should carry a card with the batch code, material combination, joining product, completion time, earliest full-cure time, operator, and required inspection. Place newly bonded items in a single layer unless the product instructions and project test support stacking. Clips or weights should distribute suitable pressure without denting the fabric or forcing adhesive beyond the edge. Do not confuse initial set, when pieces may resist light movement, with full cure, when the product reaches the condition required before demanding use.
Use a physical status system incapable of depending on memory. A red card can mean “do not move,” yellow can mean “initially set—awaiting full cure,” and green can mean “released for inspection.” Write times on the cards rather than relying only on color. When items finish bonding at noticeably different times, place them on separate trays or record time ranges. Never move a later item forward merely because it shares a shelf with an earlier piece already eligible for inspection.
Fusible pieces also need controlled cooling. Record the pressing setting and allow the first piece to cool flat before judging the bond. Sewn pieces may proceed more quickly, but freshly pressed seams can distort if folded or packed while hot. In mixed batches, use the slowest unresolved condition as the release gate. A gift bag with completed seams is not pack-ready if its decorative appliqué still needs hours of undisturbed cure.
Curing space should be planned before adhesive is applied. Measure the flat area occupied by one item, include room for labels and safe handling, and multiply it by the intended micro-batch. If the available shelf supports four pieces, bonding twelve at once creates pressure to overlap or move them early. Additional trays can help only when they can remain level, protected, ventilated as directed, and clearly timed. A crowded cure area should reduce batch size, not reduce cure control.
Measure Yield, Rework, and Actual Unit Cost
Record the quantity started, quantity passing without rework, quantity successfully corrected, and quantity scrapped. First-pass yield equals pieces passing without rework divided by pieces completed, multiplied by one hundred. A lower result is not a reason to hide data; it indicates where a template, instruction, station, or material combination needs correction. Compare defects by type—mis-cut, reversed, misaligned, puckered, stained, edge-lifted, or incomplete—so the next pilot addresses the actual cause.
Actual unit cost should be recalculated with sellable or usable output. If a batch consumed ninety dollars of materials, labor, packaging, and overhead but produced only eleven acceptable units, the cost is ninety divided by eleven, or about $8.18 per usable piece. This arithmetic does not prescribe a retail price. It reveals the cost of rework and waste, and it helps a maker decide whether a smaller batch, clearer template, different method, or additional inspection will improve the next run.
Pair the cost number with defect location. One rejected unit caused by a hidden fabric flaw calls for a stronger incoming-material check; three reversed pieces call for better orientation marks; repeated edge lift calls for compatibility, coverage, pressure, or cure investigation. Treating every rejected piece as generic “waste” loses the information needed to improve. A compact defect log with category, station, item number, disposition, and suspected cause often provides more value than a complicated dashboard no one maintains.
Do not compare batches solely by pieces completed per hour. Include usable output, active time, waiting work, rework, and material loss. A batch producing fifteen pieces with three corrections may be less effective than a smaller group producing twelve clean pieces. Compare like with like: the same pattern version, material family, quality criteria, and level of personalization. Otherwise, a change in design complexity may be mistaken for a change in worker or process performance.
Pack Only When the Batch Is Ready
Before packaging, remove loose threads, confirm edges, count components, and verify any care instructions. Allow bonded work to reach full cure according to the actual product, not merely the time when the surface stopped feeling tacky. Avoid tight rolling, airtight wrapping, or heavy stacking when the tested method requires more open time or could be marked by pressure. Keep a batch code on the packing record so a later compatibility issue can be traced to materials and process notes.
Condition the finished pieces in the intended packing arrangement before closing the full batch. Place one approved item in its envelope, box, folded stack, or display sleeve for the planned period, then inspect for transfer marks, crushed decoration, sharp folds, blocked drawstrings, trapped odor, or renewed sticking. Packaging can introduce pressure and heat different from open-table curing. If the test fails, change the fold, separator, package size, or release time rather than forcing the same packing method across every completed unit.
For group and family activities, safety belongs inside the plan from material selection through cleanup. Adults should control sharp cutters, hot irons, pins, cords, and small decorations as appropriate; read and retain labels; keep food away from the worktable; and store products closed after use. No article should declare an adhesive child-safe or certified non-toxic without specific supporting documentation for the exact product and market.
- Downloadable safety evidence placed beside the group-safety guidance: U.S. Consumer Product Safety Commission Art and Craft Safety Guide (PDF) provides broader guidance on selecting materials, reading hazard information, and managing arts-and-crafts activities, including work involving children.
Conclusion
Good batch crafting is a controlled promise: every finished piece should reflect the approved sample even when the maker repeats an operation many times. Start with one real sample, move through a small pilot, count and label every component, and release work only after the relevant check. Use sewing for structural demands, adhesive for compatible decorative or light-duty applications, fusible web where heat allows, and hybrid construction when the project needs more than one answer.
The most useful batch is not necessarily the largest or fastest. It is the group size capable of moving through cutting, assembly, curing, inspection, and packing without losing identity or concealing defects. Measure the real bottleneck, preserve material traceability, separate active time from waiting time, and use acceptable finished output when calculating cost. These habits make the process more predictable whether the goal is six family gifts, thirty classroom ornaments, or a small craft-fair collection.
When selecting adhesive for a repeat craft kit or customized production pack, evaluate the real fabric layers, bond area, application pattern, nozzle control, cure schedule, final care method, and packing conditions before confirming the process. GleamGlee can be considered for compatible fabric decoration and light-duty no-sew applications where a clear, flexible cured bond is appropriate, but the master sample and pilot should remain the final project-specific decision points.
8. Frequently Asked Questions About Making Fabric Crafts in Batches
These questions address the decisions most likely to delay or damage a batch: how many pieces to begin with, when to cut the full quantity, how much extra material to prepare, whether fabrics can share a batch, and when glued work is ready. The safest answer usually comes from the master sample and pilot record, because two projects carrying the same name can use different fabrics, dimensions, stress levels, washing methods, and joining products.
How Many Items Should a Beginner Make in One Batch?
A beginner should make one complete master sample and then a pilot of about three to five comparable pieces. If the pilot shows consistent size, clean construction, accurate labels, and no repeating defect, the next work group can increase to roughly five to ten pieces when space and curing capacity allow. These figures are practical starting ranges rather than universal production standards. Complex designs, expensive fabric, many colorways, or unfamiliar adhesive behavior justify smaller groups even when the total order is large.
The safest quantity is also limited by the smallest workstation. A maker may be able to cut twenty pieces quickly but have protected curing space for only four. In this situation, four—not twenty—is the practical bonded micro-batch. The full project can still contain many units, but each traceable group should fit comfortably through joining, holding, curing, inspection, and storage without stacking, premature movement, or lost labels.
Should I Cut All the Fabric at Once?
Cut the full quantity only after the master sample confirms pattern size, seam allowance, orientation, shrinkage decision, material compatibility, and assembly order. Even then, a first run is safer when one micro-batch is cut and assembled before the remaining cloth is committed. Directional motifs, plaid matching, nap, stretch, fabric flaws, and personalized parts make staged cutting especially valuable. The small delay of a pilot cut is usually easier to absorb than correcting twenty mirrored or undersized pieces.
When the pattern and material are familiar, stable rectangular parts may be cut in a larger group than complex decorative pieces. This does not mean every component needs the same batch quantity. A maker might cut twelve plain body panels but only four directional appliqués, completing and checking those four before cutting the next set. Component-specific batch sizes can protect expensive or mistake-prone material while preserving efficiency on low-risk parts.
Can Different Fabrics Be Mixed in the Same Batch?
Different fabrics can share a project, but they should share a production batch only when their handling needs are compatible. Group materials by thickness, stretch, slip, fraying, needle requirement, heat tolerance, color behavior, absorbency, and care method. A cotton outer and lightweight lining may belong in one kit while still receiving different cutting or pressing instructions. If switching materials requires a new needle, temperature, pressure, adhesive amount, or cure observation, treat the first item after the switch as a new approval piece.
Do not assume two colors of the same fabric behave identically. Dye, coating, print, finishing, storage, and supplier-lot variation can affect marking visibility, heat response, or adhesive appearance. Test the lightest, darkest, and most heavily printed versions when a batch contains several colorways. Keep their lot or color information on the kit and curing card so an issue limited to one material group does not cause unnecessary rejection of every finished item.
How Much Extra Material Should I Prepare?
For a simple, tested project, five to ten percent can serve as an initial planning allowance, but the correct figure depends on evidence from the sample and layout. Plain rectangles on stable fabric may need less, while motif matching, shrinkage, flaws, fraying, mirrored pieces, and beginner cutting may need more. Add allowance separately by component and round to practical units. Two body panels per bag, for example, should be rounded as usable pairs rather than as an isolated fractional panel.
Avoid adding an allowance twice. If the yardage layout already contains ten percent extra for squaring, flaws, and one cutting mistake, do not automatically add another ten percent for the same risks. Historical yield provides an alternative calculation when repeat data exists: required good units divided by expected yield. Keep the method and reason beside the estimate so the next batch can replace a generic percentage with actual project information.
Can Fabric Glue Replace Sewing in Batch Crafts?
Fabric glue can replace sewing for many compatible flat decorations and light-duty no-sew projects, but it should not be presented as a universal substitute for structural stitching. Consider the direction and frequency of stress, laundering, abrasion, heat, flexing, and the surface area available for bonding. Bag handles, load-bearing seams, fitted garment construction, and safety-related items normally require appropriate stitching or engineered reinforcement. A hybrid method can bond an appliqué while sewn seams carry the project’s actual load.
Separate a project into connection zones before selecting the method. A decorative letter may be suitable for bonding, its surrounding border may receive decorative stitching, and the hanging loop or bag seam may require structural stitching. Testing should reproduce the complete material stack and intended use. An adhesive passing a flat appearance check has not automatically passed folding, hanging, washing, packing, or repeated-flex requirements.
How Long Should Glued Fabric Crafts Cure Before Packing?
Follow the instructions for the exact adhesive because initial grab, handling time, and full cure are different stages and vary by formula, layer thickness, fabric, humidity, and temperature. For GleamGlee Fabric Glue, current confirmed guidance is approximately six to ten minutes for initial setting and about twenty-four hours for full cure before washing, ironing, heavy handling, or frequent use. Keep each batch timed and undisturbed, and do not use another manufacturer’s video timing as a substitute.
Start the timing record when each micro-batch finishes bonding. If the first four items were completed at 10:00 a.m. and the next four at 10:40 a.m., they should not share one inaccurate release time. Use separate trays or clearly written ranges. Surface dryness alone is not a full-cure test, and repeatedly peeling an edge during cure can damage a bond still developing. Pack only after the documented period and required inspection are complete.
How Do I Keep Small Fabric Pieces from Getting Mixed Up?
Give every finished item a number and carry the number through its body pieces, lining, trim, cord, and decoration. Use removable marks, paper tags, clips, clear bags, shallow trays, or envelopes according to the material. Pair mirrored parts, mark direction visibly, and place a bill of materials inside each kit. A photo of the approved dry layout helps users reconstruct the arrangement. Before joining begins, count every kit; after each station, return all components to the same identified container.
Use a consistent code rather than relying only on color. B03-08-LN-R might mean batch three, item eight, lining, right side, provided the code key defines every abbreviation. Keep uncertain or rejected parts in a separate container and never return them to the good stack without a new decision. At each handoff, reconcile the quantity entering, quantity leaving, and quantity held for correction before the next operation begins.





















