Skip to content


To repair frayed tablecloth edges, first check whether the stitching has come undone or the fabric itself has worn away. An intact hem can often be secured with hand stitches or a suitable washable fabric glue. A genuinely fraying edge usually needs its loose yarns contained inside a new hem or binding, with the repair anchored in sound fabric. Measure before cutting, test any adhesive on a hidden area, and follow the selected product’s full curing and washing instructions.
A favorite tablecloth deserves a repair suited to the way you use it. A linen cloth brought out for family celebrations has different needs from an everyday cotton cloth washed after frequent spills. The instructions below explain how to choose a method, prepare a trial repair, control the finished dimensions, and inspect the result after washing. Video demonstrations and reference links sit beside the relevant work, so you can check a technique before committing your own fabric.
What Kind of Damage Does Your Tablecloth Edge Have?
Look at the underside of the edge before reaching for scissors or glue. Loose sewing thread, unraveling fabric yarns, and a missing corner can look similar from across the room, but each needs a different repair. Work in good light, lay the cloth flat, and compare the damaged area with an undamaged section. Your first aim is to find fabric strong enough to hold the repair.
Loose Stitches, Fraying Fibers, or Missing Fabric?
An opened hem often shows a clear fold and a row of empty needle holes, while the fabric between them remains intact. Fraying looks different: individual yarns escape from the woven edge, sometimes forming a loose fringe. A worn fold can combine both problems, with broken stitches beside fabric which has become thin. Follow the damage along its full length before deciding; the most obvious loose thread may be only the end of a longer weakened area.
- Loose stitching, intact cloth: Restore the existing fold and secure it by hand, machine, or a compatible hem adhesive.
- Raw edge with loose yarns: Enclose the edge in a new hem or binding; consider a suitable sealant for localized stabilization.
- Thin fabric along the old crease: Move the fastening into sound cloth or introduce suitable support.
- Missing corner or notch: Plan a patch, replacement border, or change in finished shape.
- Even decorative fringe: Compare the design on other sides before cutting; intentional fringe is not automatically damage.
Slide a contrasting sheet of paper under the edge to make small gaps easier to see, and examine the cloth without pulling the yarns apart. Look for a reasonably consistent weave where you intend to stitch or bond. If touching or unfolding the area produces more breaks, stop treating it as an ordinary loose hem. Do not pull a long loose yarn to remove it; on a woven cloth, this can enlarge the damaged strip.
Check the Fabric, Finish, and Care Label
Record the fiber content, surface finish, and required cleaning method before choosing your materials. A plain woven cotton cloth, polyester blend, coated wipe-clean cloth, and open lace border present different contact surfaces. In an adhesive repair, both surfaces matter: glue may meet the reverse of a coating on one side and absorbent yarns on the other. A product suitable for an uncoated fiber is not automatically suitable for every finished textile containing that fiber.
If the label has disappeared, inspect the underside and look for the original product information. Avoid identifying the cloth solely by its texture or sheen. Keep heat out of the process until you know the cloth tolerates it, and never use a lighter to seal an unknown edge. For pale, sheer, embroidered, or coated material, a hidden compatibility test should examine visible marking and stiffness as well as whether the repair initially holds together.
When a Tablecloth Needs More Than a Simple Edge Repair
A repair needs an attachment area which can carry the load. Sewing through a brittle strip or bonding strongly to yarns already breaking apart may simply move the next failure beside the new fastening. This is particularly important around antique embroidery and fine lace, where a thick patch or dense line of stitching can change how the textile bends. For valuable or extensively weakened pieces, pause before cutting, gluing, or removing the original border.
- Evidence for supporting weak fabric: Canadian Conservation Institute — Stitches Used in Textile Conservation. The illustrated guidance shows damaged textiles supported by backing fabric, with anchoring stitches extending into stronger surrounding areas. Its conservation methods need skilled judgment on fragile pieces.
Photograph the front, reverse, and intact neighboring construction before altering an heirloom. A specialist may be able to preserve the border, support the worn section, or convert the usable center into a smaller cloth. For an inexpensive everyday cloth, a visible replacement edge may be a perfectly useful outcome. Decide which matters most in your case: retaining original material, preserving the dimensions, keeping the repair discreet, or returning the cloth to routine household use.
Which Repair Method Should You Use?
Choose the method around three questions: how much sound fabric remains, how the tablecloth is cleaned, and how visible the repair can be. Hand sewing works well for a short loose hem; machine sewing suits longer replacement hems. Fabric glue can secure a compatible intact fold, while binding can cover an edge with limited allowance. No sewing machine is needed for many successful repairs.
Compare Sewing, Fabric Glue, Fray Sealant, and Hem Tape
Use the comparison below to match the repair to the condition of the cloth. Sewing, adhesives, and bindings can all produce useful results when matched to the fabric and construction. A sealant for thread ends has a different job from an adhesive holding two folded layers together. Likewise, a temporary positioning glue needs another fastening if the finished hem must survive washing.
| Repair method | Best starting situation | What it needs | Main limitation |
|---|---|---|---|
| Hand-sewn hem repair | A short section of stitching has opened | Intact folded fabric and sound anchoring points | Takes patience; tight stitches can pucker |
| Machine-sewn double-fold hem | A long raw edge needs enclosing | Enough fabric for two folds and a secure seam | Usually reduces the finished dimensions |
| Washable fabric glue | A compatible, intact hem needs fastening | Clean, dry surfaces, even contact, and full cure | Cannot replace missing or rotten fabric |
| Fray sealant | Local yarn ends need stabilizing | A suitable product and a successful hidden test | Does not automatically create a finished hem |
| Iron-on hem tape | A fold can tolerate the required heat | Compatible fabric, tape, and pressing conditions | Unsuitable if heat requirements conflict |
| Sewn binding or supported repair | A sound edge needs covering or reinforcement | Secure fabric for attachment and compatible trim | Changes the appearance; severe weakness needs assessment |
Read the exact product name and instructions before choosing an adhesive. The words “no-sew,” “clear,” and “fabric” describe different properties; none independently confirms suitability for your laundering routine. Some products hold layers temporarily while stitching, while others are intended to remain as the final fastening. Also separate fray control from bonding: securing existing thread ends does not necessarily create the continuous attachment needed to hold an opened folded hem in place.
- Product-label example: Aleene’s No-Sew Temporary Fabric Glue is a positioning aid for sewing and loses its temporary hold through washing. Check for an explicitly suitable lasting repair product when glue will be the only fastening.
Choose for Wash Frequency, Appearance, and Remaining Fabric
For an everyday tablecloth, start with the cleaning routine you actually need. If it must endure frequent hot washing, bleaching, or professional laundering, a glue without compatible instructions is a poor match. A sewn repair using suitable fabric and thread is usually the more practical starting point in this situation. Sewing does not make every textile heat-resistant, however; the cloth, new trim, and thread still need a compatible care routine.
Appearance and size matter just as much as convenience. Hand sewing can minimize visible stitching on a plain front surface. A contrasting binding can make an altered edge look intentional, while matching binding can be quieter visually. Re-hemming may be straightforward when the cloth has generous overhang, but disappointing when it barely covers the table already. Before choosing, place a temporary fold along the damaged side and check the result on the actual table.
- A short opening in an otherwise intact hem: Preserve the original fold and repair only the failed fastening. Rebuilding the whole perimeter usually adds unnecessary work.
- A long edge with repeated fraying: Assess a continuous new hem or binding so the weak area is handled consistently.
- A cloth needed for dinner tonight: Choose a method whose completion and waiting times fit the schedule. A glue which sets in minutes can still require a much longer cure.
- A cloth already close to the tabletop dimensions: Measure first; a deeper hem may remove the overhang you want to retain.
How Do You Prepare and Measure a Tablecloth Before Repair?
Prepare the cloth, test your materials, and check the finished size before making an irreversible cut. A tidy repair begins with a clean working area and a clear plan for where the new edge will sit. Measure the existing cloth and table separately, then allow for the net movement of each finished edge. This avoids losing more overhang than you expected during trimming and folding.
Clean and Test the Repair Area
For a sturdy, washable cloth, remove relevant soil according to its care instructions and let the repair area dry completely. If loose fabric could unravel further in washing, stabilize it appropriately first or assess a gentler cleaning approach. Do not automatically machine-wash fragile textiles before repairing them. Avoid using alcohol, acetone, or another solvent as a universal preparation step: the cleaner must also be suitable for the fibers, dyes, finish, and chosen adhesive.
Gather the following supplies before starting, so you do not have to handle a wet adhesive or half-folded hem while searching for a missing tool. A basic ruler and a stable work surface are often more useful than a large collection of specialized equipment. Choose clips or pins according to the material; a coated cloth may retain pinholes, while a delicate cloth can be marked by a strong clip pressing directly against it.
- A ruler or measuring tape, sharp fabric scissors, and a removable marking tool tested on the cloth.
- A clean, flat working surface and suitable protection beneath adhesive work.
- Fine pins or fabric clips, selected to avoid marking the material.
- Matching thread and an appropriate needle for a sewn repair.
- The selected fabric adhesive, fray sealant, or hem tape with its current instructions.
- Compatible binding or support fabric if the edge needs covering or reinforcement.
Use spare matching fabric when available, keeping an untreated piece beside the trial as a visual and handling reference. Reproduce the actual fold, number of layers, adhesive amount, and fastening method. Testing a dot on a single flat layer does not show how a glued hem will behave. If no spare fabric exists, use a truly inconspicuous location and keep the test small; a compatibility test can itself leave a permanent mark.
- Check immediately: Watch for dye movement, coating damage, excessive soaking, or glue spreading beyond the intended fold. Stop if an unwanted change appears.
- Check after the stated full cure: Compare color, flexibility, and surface feel with untreated cloth. Flex the sample gently without deliberately tearing it apart.
- Check after the permitted first wash: Use a sacrificial sample and the intended compatible care routine. Inspect it again after drying, because puckering or a visible adhesive outline may become clearer then.
A useful sample answers a specific question: can this combination of cloth, fold, fastening, and care routine produce an acceptable result? Write down the product, application date, and earliest permitted washing time on a separate piece of paper. If you change the glue, backing material, or pressing conditions, the earlier sample no longer represents the new repair exactly. This modest preparation is especially worthwhile before working along a full dining-table perimeter.
Measure the New Edge and Remaining Table Drop
Record the current finished length and width, rather than measuring only the damaged section. Next, mark the proposed finished edge after all trimming and folding. The difference between the old and new edge positions is the net inward movement used in the calculations below. If you open an existing hem, account for the fabric recovered inside it. Subtracting both the old allowance and the full new fold can accidentally count the same fabric twice.
- Finished length: Original finished length minus the inward movement at both ends.
- Finished width: Original finished width minus the inward movement at both sides.
- Drop at each end, when centered: Finished cloth length minus table length, divided by 2.
- Drop at each side, when centered: Finished cloth width minus table width, divided by 2.
- Round cloth diameter: Original diameter minus twice a uniform inward movement around the edge.
| Measurement in this example | Calculation | Result |
|---|---|---|
| Original cloth | Measured before repair | 220 × 150 cm |
| Tabletop | Measured separately | 180 × 90 cm |
| New cloth length | 220 − 2 − 2 | 216 cm |
| New cloth width | 150 − 2 − 2 | 146 cm |
| Drop at each end | (216 − 180) ÷ 2 | 18 cm |
| Drop at each side | (146 − 90) ÷ 2 | 28 cm |
This example assumes each finished edge moves inward by 2 cm; it is not an instruction to remove 2 cm from every damaged cloth. Your actual allowance comes from the worn area and chosen construction. If only one end moves inward by 2 cm, the total length falls by 2 cm rather than 4 cm. Recenter the repaired cloth before checking the new drop, particularly when the repair is limited to one side.
- Optional measuring tool: Omni Tablecloth Size Calculator. Use your table dimensions and preferred drop to find the finished cloth size you need, then compare it with your planned repair. The tool does not measure damage or add your hem allowance.
A negative drop result means the proposed cloth will not cover the tabletop in that direction. Even a positive number can leave too little overhang for your preference, so test the marked fold on the table before cutting. Check printed borders as well as measurements: a geometrically even repair may still look uneven if one stripe disappears on a single side. An added border is another option, but its attachment still needs sound original fabric.
Trim Only After Planning the Finished Edge
Fold and clip the proposed repair before cutting, then place the cloth back on the table. Check overhang, pattern alignment, and whether a border will look uneven. For a rectangle, compare opposite sides and measure at several points instead of relying on one worn corner. Once the new attachment will sit in sound fabric, trim only what the selected method requires. Keep loose yarns separate from structural yarns still holding the weave together.
If a single corner is damaged, shortening all four sides may remove more usable fabric than necessary. A corner repair, replacement border, or local binding may preserve more of the cloth. On the other hand, a very small patch can look conspicuous on an otherwise plain edge. Lay the proposed support or trim in place before attaching it, and check both the close-up appearance and how it looks from normal dining distance.
How Can You Repair Frayed Tablecloth Edges Without Sewing?
A no-sew repair is most useful when the remaining fabric is sound and the selected product can do the required job. Fray sealant stabilizes suitable yarn ends, fabric glue can fasten an intact folded hem, and compatible iron-on tape bonds folded layers with heat. None of these methods restores missing cloth by itself. Test the material first and keep the required curing time in your schedule.
Stabilize Light Fraying with a Suitable Fray Sealant
Use a fray sealant when the immediate job is to secure suitable loose yarn ends, rather than rebuild a missing strip. Preserve the weave which remains intact and avoid flooding the area to make it look smoother. After the product dries, the edge may still need enclosing in a hem or binding for its intended appearance and use. Different fray-control products can have different washing, dry-cleaning, and handling restrictions, even when their intended purposes overlap.
- Identify the boundary: Find where the unraveling ends and the reasonably intact weave begins. Do not treat widespread thinning as a small loose-thread problem.
- Complete a hidden test: Check both sides after drying, especially on a pale cloth where the treated area may look darker or shinier.
- Separate the layers: Put the specified protective material beneath the treatment area so the product cannot transfer to another folded part of the cloth.
- Apply sparingly: Follow the bottle’s application directions and keep the liquid inside the planned treatment area.
- Let it dry undisturbed: Avoid repeated touching or bending while the treatment is still wet.
- Check the finish: Confirm the loose ends are secured and the untreated weave beside them remains sound. Plan a folded or bound finish if needed.
- Video for these steps: How to use Dritz Fray Check — Prym Americas. Use the demonstration to understand this sealant’s purpose and application; it is not a method for replacing missing fabric.
- Manufacturer’s instructions: Dritz Fray Check usage and care specifies a scrap test, protection between layers, a small application, and 15–30 minutes to dry. The product carries a flammability warning, so keep it away from ignition sources and follow the label precautions.
If the test leaves a noticeable ring or a hard edge, adding more product will not improve the appearance. Reconsider a narrow sewn hem or compatible binding before treating a larger area. Also avoid assuming a successful sealant treatment makes a damaged fold structurally sound. The fabric supporting the edge can continue to wear, so inspect the neighboring weave rather than judging the repair only by whether the original loose threads have stopped moving.
Secure an Intact Folded Hem with Fabric Glue
Fabric glue works best here as a fastening between prepared layers. Restore the original fold when it remains usable, or create a planned new fold which encloses the raw edge. Both bonding surfaces should meet without stretching, thick lumps, or a loose fringe filling the joint. If a section has worn away, establish suitable replacement fabric or another sound construction first. A heavy glue bead cannot supply the woven structure missing from a damaged corner.
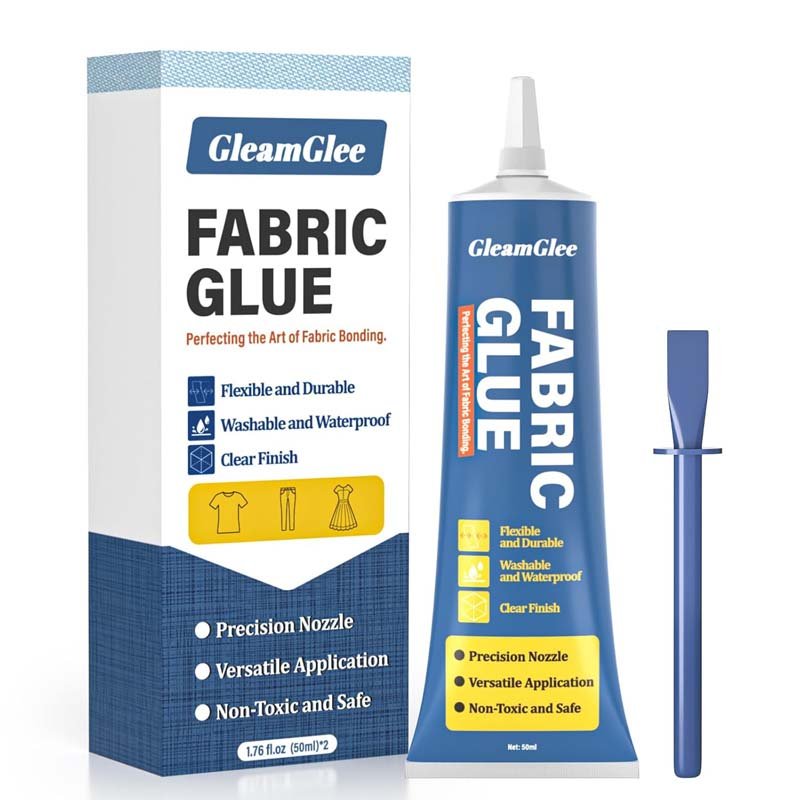
GleamGlee Fabric Glue is one option for compatible household fabric repairs. Brand-provided guidance describes a clear, flexible finish after full cure, with approximately 6–10 minutes for initial setting and 24 hours for full curing before washing or ironing. These times refer to this product’s instructions, not every textile adhesive. Use the current package directions and a test on your actual cloth, particularly when it is light-colored, delicate, or has an unusual surface finish.
- Make a dry trial fold: Align the hem without adhesive. Check the face, finished length, and any pattern crossing the repair. Mark reference points with a removable, tested tool if useful.
- Protect the layers underneath: Keep the rest of the cloth away from the bonding area. Use a clean working surface and protection compatible with the product’s instructions.
- Open a manageable section: Work only over a length you can align comfortably within the stated working period. Do not coat the entire perimeter and then struggle to reposition it.
- Apply a thin, even layer: For this product, the guidance calls for application to one bonding surface. Keep the adhesive within the intended contact area instead of painting the visible face.
- Close without stretching: Bring the folded layers together using the trial alignment. Press as directed and check the front before securing the section.
- Hold without squeezing out the glue: Use appropriate light fixing pressure. Protect delicate fabric from clip marks, and keep fixing tools out of wet adhesive.
- Leave the repair undisturbed: Allow the initial setting and full curing stages. Do not keep lifting a corner to see whether it has bonded.
- Inspect before use: Once cured, check the face, fold alignment, and flexibility. If a trial failed, investigate it before extending the same method around the cloth.
- Product instruction note: The sequence and approximate setting times above come from GleamGlee’s Fabric Glue guidance. Initial setting is not permission to wash; the current product label and the tested fabric combination govern use.
“Thin” should describe an even application which wets the intended contact area without forming a raised puddle. There is no dependable universal number of drops per centimeter across cotton, dense polyester, open weaves, and coated fabric. The amount needed changes with absorption, nozzle output, and the width of the bond. Judge your trial fold for even contact and unwanted penetration. More adhesive can increase visible marking and alter the hand feel without correcting an unsuitable bonding surface.
If wet glue escapes beyond the fold, pause and follow the product’s removal advice. Do not rub it across a wider area or introduce an untested solvent. If a cured repair lifts, look at the separation: clean fabric on one side can suggest poor contact or compatibility, while torn fibers attached to the bond suggest the cloth itself failed. These observations help choose the next step, but they are not a laboratory diagnosis of the adhesive.
For occasional home repairs, GleamGlee’s listed 50 ml single-tube format may be a practical starting size; a two-tube pack suits people keeping supplies for several fabric projects. Bottle capacity alone does not establish how many meters of hem it will repair. For repeated work on a particular textile, formulation or packaging customization can be discussed around a fabric sample, application method, desired softness, and laundering conditions. Confirm performance on the intended construction before committing to wider use.
Use Iron-On Hem Tape Only on Compatible Fabrics
Iron-on hem tape is an alternative when both the cloth and tape tolerate the same pressing conditions. Check the exact product version, including its suitability for the fabric weight and color. A bond can fail if the required heat does not reach it, while excessive heat can damage the tablecloth. Do not try to resolve conflicting instructions by guessing a compromise setting. Select another fastening method when the cloth cannot tolerate the tape’s stated process.
- Prepare and test: Follow the tape’s preparation instructions and make a trial using the actual folded layers.
- Set the hem first: Measure and form the fold before inserting tape. The finished edge should already be in its intended position.
- Enclose the adhesive: Keep the strip completely between fabric layers, with no exposed tape beneath the iron.
- Press in sections: Use the stated temperature, steam setting, pressure, and contact time. Lift and reposition the iron as instructed rather than dragging the fold out of alignment.
- Cool, then inspect: Let the joined section settle before gentle handling. Check continuity along the edge and complete the waiting period before washing.
- Video for these steps: How to Use ThermOWeb’s HeatnBond Hem Tape — Therm O Web. The demonstration shows tape placement and heat bonding; use the directions for the exact roll in your hand.
- Product-specific numbers: HeatnBond Hem Regular Weight instructions specify medium heat without steam, 8 seconds per section on the first side, 3 seconds per section on the other side, and 24–48 hours before washing. This version also says not to sew through it.
If a section lifts after cooling, first check whether the layers were flat and the prescribed pressing process was followed. Do not keep increasing the iron temperature until something changes. A thin coating, unsuitable fabric weight, or incompatible finish can remain a problem regardless of extra pressing. Follow the selected tape’s re-pressing guidance where available, and stop if you see glazing, distortion, discoloration, or another unwanted change in the tablecloth.
How Do You Repair a Tablecloth Hem by Hand or Machine?
Sewing is a practical choice when the cloth needs a secure enclosed edge and has enough strong fabric to hold stitches. Repairing a short opening by hand preserves more of the original construction. A machine becomes helpful when a long section needs a new hem. In either case, let the fabric lie naturally and avoid pulling the stitching so tightly it gathers the edge.
Repair a Loose Hem by Hand
Begin with the existing fold if it remains sound. Choose thread close to the cloth’s color and suitable for its weight, rather than assuming the thickest thread will make the strongest repair. A fine cloth can distort around oversized stitches. Position the work flat with the wrong side facing up, secure the fold gently, and begin in sound fabric near the intact hem. The aim is to join the fold without gathering the cloth underneath.
- Prepare the opening: Remove detached sewing thread only where necessary. Preserve stable stitching and do not cut structural yarns while clearing old thread ends.
- Restore the fold: Match the undamaged hem on either side. Use clips, pins, or temporary basting appropriate to the material.
- Hide the start: Secure the thread within sound folded fabric so the anchoring point does not sit on an exposed raw edge.
- Travel inside the fold: Take a short stitch through the folded hem, keeping most of the sewing thread concealed there.
- Catch the main cloth lightly: Make a small catch into the sound fabric beside the fold, then return to the folded hem. Check the face to limit visible marks.
- Keep the thread relaxed: After each short section, let the cloth lie flat. If it begins to gather, release the tension before continuing.
- Finish securely: Anchor the final thread in sound folded fabric, tuck away the tail, and inspect both faces before trimming any remaining sewing thread.
- Video for the needle movements: How to Hand Sew: Slip Stitch & Blind Hem — Craftsy. Follow the relationship between the hidden stitch in the fold and the small catch in the main fabric.
Do not judge a hand-sewn repair by invisibility alone. If the needle catches almost nothing in a loose weave, the hem may look discreet but detach easily. If each catch is too large or pulled tightly, the front can show dimples. Adjust on a small trial until the hem remains attached while the cloth lies flat. If needle entries enlarge holes or split weakened yarns, the repair needs a different anchoring area or support.
- Technique reference: Professor Pincushion — Blind Stitch explains the concealed stitch within the fold and the small catches in the main fabric. Matching thread helps reduce visibility, but fabric strength and relaxed tension still matter.
Sew a New Double-Fold Hem by Machine
A double-fold hem encloses the raw edge in two turns of fabric. For a practice example, a 6 mm first turn followed by a 12 mm second turn places the finished edge approximately 18 mm inward from the newly cut raw edge. The first turn hides the loose edge; the second creates the finished hem. These dimensions illustrate the construction, and must be adjusted for the cloth’s thickness, remaining allowance, and desired appearance.
Before sewing the tablecloth, make a sample with the same layers and fold width. Thread the machine according to its manual and use an undamaged needle appropriate to the fabric and thread. A plain straight stitch can secure a conventional woven hem; its length and tension need a sample check rather than a universal setting. Inspect both sides for skipped stitches, loops, distortion, and whether the stitch line actually catches the inner fold.
- Mark the finished edge: Confirm the new seam will run through sound fabric and the cloth will retain an acceptable size.
- Turn the raw edge inward: Make the first fold consistently, containing the loose yarn ends which remain after planned trimming.
- Form the second fold: Keep its width steady around the cloth. Press only under care-compatible conditions; otherwise hold the shape with suitable pins, clips, or basting.
- Resolve the corners before the long seams: Trial-fold each corner so excess layers do not force the adjoining hems out of position.
- Sew along the inner fold: Position the stitching to secure the folded fabric reliably. Remove pins before the needle reaches them.
- Support the tablecloth: Keep its weight on the work surface and guide the edge while the machine feeds it. Avoid pulling from the front or back.
- Check as you go: Stop after the first short section to inspect the underside, then complete the hem and secure the thread ends.
- Video for basic hemming: How To Sew A Hem — Professor Pincushion. Use the demonstration to understand forming and fastening a hem, alongside the two-fold construction described above.
- Downloadable construction reference: BERNINA — Heirloom Linen Table Topper PDF. The illustrations show table-linen folds and edge stitching. Its wide decorative hem and specialist needle choices belong to that project, rather than every repair.
If stitches skip or the fabric gathers, stop before sewing around the entire perimeter. Recheck threading and needle condition, verify the fabric is being supported, and retest the setup. Do not pull harder to force the cloth through the machine. If the needle must cross a thick corner, slow down and follow the machine’s instructions for bulky areas. A short corrected sample costs much less effort than removing a full uneven seam from fragile cloth.
- Machine troubleshooting evidence: SINGER — Troubleshooting Tips identifies incorrect threading, unsuitable or damaged needles, and pushing or pulling the fabric among causes of stitch problems. Consult your machine’s manual before changing settings or adding stabilizer.
How Do You Repair Corners, Curves, and Decorative Edges?
Corners and curves need their own preparation because fabric layers must change direction without bunching. A square corner can become bulky when both hems overlap, while a curved edge can ripple if its binding is stretched unevenly. Decorative trim also needs a sound attachment area. Test the shape before fastening, and preserve the original border wherever its fabric remains strong enough to support the repair.
Make Flat Mitered Corners
A mitered corner joins the adjoining hems along a diagonal, reducing the pile of overlapping fabric at a square corner. For a right-angle corner with equal hem widths, the finished diagonal commonly lies at 45 degrees. Unequal hem widths need a different layout. Work with clearly marked folds and make a trial corner first; a small error at the point can pull both nearby edges out of line once the long hems are sewn.
- Establish the folds: Form both adjoining hems to their planned widths. Reopen them enough to see the crease lines.
- Mark the diagonal: Fold the corner inward so corresponding crease lines align, then mark or crease the resulting diagonal for the miter.
- Match the corner halves: Fold the corner with right sides together, aligning the marked lines and edges. Use the linked illustration to check the orientation.
- Baste and inspect: Trial-stitch the corner seam and turn it to its finished position. Confirm both hems lie flat before permanent stitching or trimming.
- Finish the corner seam: Sew securely, trim only the excess required by the method, and keep an appropriate seam allowance.
- Turn and complete the hems: Ease the point into shape without forcing a sharp tool through it, then secure the adjoining inner folds.
- Video for the folding sequence: How to Sew a Mitered Corner — OnlineFabricStore. The technique applies to tablecloths, runners, napkins, and similar square-cornered projects.
- Downloadable corner diagram: Martha Stewart — Sewing a Mitered Corner PDF. The single-page illustration distinguishes the diagonal crease from the sewn seam. It is offered for personal use; follow its diagram at your worktable.
Check the finished corner from normal viewing distance as well as close up. A tiny fold discrepancy may be harmless, while a tight diagonal can visibly twist the edge when the cloth hangs. If the existing corner is missing fabric, mitering alone will not replace it; move the finished outline inward or add a suitable repair piece. Avoid cutting all four corners in advance until the first trial confirms the chosen construction works on your cloth.
Bind Curved Edges with Bias Tape
Bias binding can enclose a raw edge while accommodating a curve because its fabric is cut diagonally across the grain, commonly at 45 degrees. Double-fold tape wraps around the edge, leaving a folded finish on both sides. Choose enough width to cover the prepared raw edge and let the stitching land in sound material. A strip which only hides the loose fringe without anchoring beyond the weakened area does not create a dependable repair.
Measure the path where the binding will sit, then add the allowance required by your joining method. A 216 × 146 cm rectangle has a perimeter of 724 cm, or 7.24 m. A circle with a 150 cm diameter has a circumference of approximately 471 cm, or 4.71 m. These are edge lengths, not complete shopping quantities. Joining ends, cutting strips, and correcting an error can all require additional material.
- Rectangular edge length: 2 × (finished length + finished width).
- Circular edge length: Approximately 3.1416 × finished diameter.
- Unit conversion: 1 inch = 2.54 cm; convert before combining measurements.
- Joining allowance: Use the amount needed for the particular seam or overlap, rather than assuming one percentage fits every binding method.
- Optional material-planning tool: Quilter’s Paradise Binding Calculator estimates strips and fabric from rectangular project dimensions and binding width. Check its units and cutting assumptions; it does not assess damaged fabric or automatically plan a round tablecloth repair.
Before attachment, lay the tape around a trial section without stretching it. On a circular cloth, mark corresponding reference points on the cloth and binding to help keep the distribution even. Prepare new washable binding according to its care instructions so its later behavior is compatible with the cloth. If heat is permitted, shaping suitable bias tape to the curve can help it sit more naturally before sewing, rather than relying on tension to force it into place.
- Construction evidence: BERNINA — Binding 3 Ways explains binding construction and bias use on curves. Use the curved-edge examples to judge the shape of your trial, while choosing a fabric and width appropriate to the tablecloth.
- Check coverage: Fold a sample of the tape around the prepared edge and confirm the planned stitches will reach sound cloth.
- Start away from a corner: Leave the ends needed for your chosen join and open the narrower fold of the tape.
- Align raw edges: Place the opened tape against the tablecloth edge, following the intended orientation for your binding method.
- Sew the first side: Stitch along the first crease, guiding the curve gently without stretching the layers.
- Wrap around the edge: Fold the binding over so the opposite folded edge covers the first line of stitching.
- Secure the second side: Baste if useful, then stitch while checking the underside for missed areas. Hand finishing is also an option.
- Join and inspect: Finish the ends neatly and check the full perimeter for exposed raw edges, gaps, and ripples.
- Video for these steps: How to Sew Double Fold Bias Tape — Melly Sews. Watch how the tape encloses the edge and how the second side is secured.
- Downloadable binding instructions: Sewing.org — Using Bias Tape PDF. The diagrams show the wider underside on many double-fold tapes, curved applications, and ways to finish the joining ends.
If the binding flares outward, do not assume washing will make it settle. Check whether the cloth or tape was stretched, whether the width suits the curve, and whether the layers were distributed evenly. Unpick only the affected section where practical, then lay it flat and rebaste before sewing again. If the original edge continues to break beside the binding, the attachment may still be too close to weakened fabric and needs reassessment.
A curved hem is another option when you prefer to retain the tablecloth’s own fabric at the edge. Turning a wide band inward creates extra length which must fit around a smaller circumference, making folds and puckers more likely. A narrower hem can reduce the difficulty, depending on the cloth. Try one curved section first, keep the folds consistent, and avoid cutting relief notches into a narrow fraying edge without a suitable construction plan.
- For a trial curved hem: Mark the intended edge, form a narrow fold compatible with the fabric, secure a short curved section, and inspect it flat before continuing around the circle.
- Video for this alternative: How to Sew a Curved Hem — Professor Pincushion. The tutorial demonstrates eased, rolled, and decorative ribbon approaches, helping you compare a folded curved hem with added binding.
Reattach Decorative Trim or Reinforce a Worn Corner
Inspect the trim and its attachment area separately. A detached lace border may be intact while the cloth underneath has worn thin; alternatively, the cloth may be sound while the trim itself is breaking. Match any repeating motif before fastening, and avoid stretching the decorative edge to make its ends meet. On open lace, a visible glue line can show through the holes, so discreet stitches may give better control over the finished appearance.
For an ordinary washable cloth with a localized worn corner, choose support fabric compatible in weight and care requirements. Lay it beneath the damage and extend it far enough to reach sound original cloth; the required overlap depends on the actual weak area, not a universal measurement. Finish exposed support edges using a suitable method, align the original fabric without pulling it out of shape, and secure the repair where the textile can carry it.
- Check before fastening: The support lies flat, does not distort the weave, and is acceptable when viewed from the front.
- Check the attachment route: Stitches or adhesive must secure usable fabric, rather than only a loose fringe around the hole.
- Check the repaired edge: Re-form the hem or binding so the corner has a complete finish after reinforcement.
- Stop for specialist assessment: The damage enters fragile embroidery, complicated crochet, or a larger area which breaks during gentle handling.
A very small patch is not always the least visible solution. A wider replacement corner or continuous border can look more deliberate, especially on a plain tablecloth where an isolated repair catches the eye. Compare the alternatives by laying them in position before attachment. For valuable textiles, retain the original material and seek advice before introducing permanent adhesive, because a later conservation treatment may need access to the fibers and original stitching.

How Do You Keep Repaired Edges Soft and Washable?
The final result depends on the amount of material added, the way the repair is held, and the care it receives afterward. A thin adhesive application and a flat fold help preserve drape, while full curing gives the bond its intended preparation before use. Wash the cloth only under conditions allowed by every component, including any new thread, binding, backing fabric, or adhesive.
Wait for Full Cure Before Washing or Ironing
Treat initial setting, surface drying, full curing, and the first permitted wash as separate milestones. A fold can feel secure while the adhesive inside remains unready for laundering. The useful question is not simply whether it feels dry, but whether the named product’s required process is complete. Keep the original label until the repair has been used and washed successfully, and record the earliest permitted wash time if several products are being used on different projects.
| Product or repair material | Stated early stage | Stated cure or first-wash guidance |
|---|---|---|
| GleamGlee Fabric Glue | Approximately 6–10 minutes for initial setting | Brand guidance: approximately 24 hours for full cure before washing or ironing |
| Dritz Fray Check | Allow 15–30 minutes to dry | Drying guidance; confirm all applicable care instructions separately |
| HeatnBond Hem Regular Weight tape | Heat-bond, then allow cooling | Wait 24–48 hours before washing |
| Aleene’s Stop Fraying | Full cure stated at 24 hours | Wait 7–10 days before washing |
The last row demonstrates a distinction which is easy to miss: a manufacturer can specify full cure at one time and permit washing considerably later. Follow the first-wash restriction as well as the curing instruction. Do not shorten the interval because another adhesive dries sooner, or assume extra waiting makes a product compatible with a cleaning process outside its intended use. Also check whether dry cleaning is allowed; washability does not establish dry-cleaning compatibility.
- Evidence for the separate waiting periods: Aleene’s Stop Fraying instructions specify 24 hours to fully cure, 7–10 days before washing, and state the product is not dry-cleanable. These directions apply to that formulation, rather than every fray sealant.
Before the first wash, find the care conditions shared by the cloth and every repair material. If the tablecloth tolerates a hotter setting than the adhesive, the adhesive restriction still matters. If a new colored binding needs gentler washing or might transfer dye, address it before attaching it to a pale cloth. Where the required household cleaning routine cannot be reconciled with the repair materials, select a different construction rather than relying on an improvised wash schedule.
- Laundry reference at this stage: American Cleaning Institute — Laundry Basics. Use its care-label and laundering guidance alongside the adhesive instructions to choose compatible washing and drying conditions.
Preserve Drape with Thin, Controlled Repairs
Softness depends on the complete construction. Extra adhesive, thick binding, several overlapping corner layers, and tight stitching can each change the edge’s movement. A clear finish describes appearance and does not guarantee an unchanged feel. After the sample cures, drape it over the edge of a table and compare it with untreated cloth. Check whether it forms a stiff ridge, curls upward, or falls differently enough to matter in normal use.
- Limit unnecessary material: Keep glue within the intended bond instead of coating a broad surrounding strip.
- Match the repair weight: Avoid heavy tape or backing on a very light cloth unless the change in drape is acceptable.
- Check the corners: Distribute or remove excess layers only as the chosen construction permits; do not trim through the fastening.
- Relax the stitching: Tight thread can gather an otherwise soft fabric and make the repaired edge feel rigid.
- Retest after changes: A different glue amount, binding width, or backing fabric can produce a different result.
If a cured repair feels too stiff, do not automatically soak it, scrub it, or apply heat to soften it. Those actions can alter the bond, dye, or fabric finish without resolving the underlying construction problem. Compare the sample with your intended result and consider whether a narrower supported area or a sewn hem would be more suitable. For adhesive removal, use instructions specific to the product and textile, testing any proposed treatment away from the visible face.
Check the Repair After Its First Wash
Inspect the cloth after its first permitted wash and drying cycle while the edge is relaxed on a flat surface. Compare it with a photograph taken after the repair cured. Look at the fold, nearby weave, corner shape, and surface color. Avoid pulling the bond apart as a test; you are checking ordinary service behavior. If something has changed, use the visible pattern to guide the next check rather than covering the area with another layer of glue.
| What you notice | What to investigate | Practical next step |
|---|---|---|
| A fold lifts and one surface looks clean | Poor contact, unsuitable finish, or care incompatibility | Recheck the sample and instructions; change methods if the materials do not suit the care routine |
| Fibers remain attached to the failed bond | The fabric itself may have torn | Move the attachment into sound cloth or add suitable support |
| The hem puckers or binding ripples | Thread tension, feeding, stretching, or different shrinkage | Relax and remake the affected section after testing the construction |
| A stiff or shiny line appears | Excess adhesive, thick layers, or visible penetration | Stop adding product; assess removal or reconstruction options |
| Fraying appears beside the new seam | The seam remains inside weakened fabric | Reassess the damage boundary, support, and finished dimensions |
These observations are clues rather than proof of a single cause. For example, a lifted hem can involve both incomplete contact and an unsuitable wash cycle, while puckering can come from stretched binding and shrinkage together. Change one relevant part of the sample at a time so you can see whether the result improves. If the cloth continues to tear beyond the repair, repeated local fixes may be less useful than a new border or smaller finished cloth.
Protect the repaired edge during ordinary use as well as laundering. Clear heavy dishes before repositioning the tablecloth, avoid dragging it across a rough tabletop corner, and deal with loose decorative trim before it catches on something. Store the cloth clean and dry, allowing a bulky corner to lie comfortably rather than forcing it into a sharp compressed fold. Regular inspection lets you catch an opened stitch before the surrounding fabric starts to unravel.
A lasting, comfortable repair begins with the construction. Preserve a sound existing hem where possible, enclose exposed yarns when necessary, and place every new fastening in material capable of holding it. Test the finished fold before cutting the full edge, calculate the size you will keep, and respect product-specific curing and cleaning instructions. The most useful result is a tablecloth which looks appropriate on your table, feels comfortable in use, and can be cared for without repeating the same failure.
FAQs About Repairing Frayed Tablecloth Edges
The questions below cover the decisions most likely to come up during a tablecloth edge repair: whether sewing is necessary, how much size may be lost, how adhesive behaves in washing, and which approach suits a curved or delicate edge. Use the answers alongside the method instructions above, since the condition of your particular fabric and the selected product’s care requirements still determine the final choice.
Can I repair a frayed tablecloth without sewing?
Yes, when the damage and materials suit a no-sew method. A compatible fabric glue can secure an intact folded hem, a suitable sealant can stabilize light fraying, and iron-on tape can bond a hem on fabric which tolerates its pressing requirements. Start with a hidden test and sound fabric. If the cloth has a hole, extensive weakness, or missing edge material, adhesive alone will not rebuild the area; support, binding, sewing, or professional repair may be needed.
Will re-hemming make my tablecloth too small?
It can, depending on the damaged area and the new folds. Calculate the change from the old finished edge to the proposed new finished edge on each side. If opposite edges each move inward by 2 cm, the corresponding overall dimension decreases by 4 cm. Check the resulting drop on your actual table before cutting. Opening an existing hem may recover some allowance, while binding can sometimes preserve more size when sound fabric remains close to the edge.
Does fabric glue stop fraying permanently?
A suitable adhesive or sealant can help secure existing yarns, but no single result applies to every fabric, product, and cleaning routine. A loose folded hem needs reliable attachment, while an exposed raw edge may need enclosing as well as stabilization. Read whether the product is intended for a lasting washable repair or temporary positioning. Continued abrasion or fabric weakness beside the glued area can still produce new fraying, even when the original bond remains intact.
How long should I wait before washing a glued tablecloth?
Wait for the specific product’s stated first-wash period, which may differ from its drying or full-cure time. The examples above range from approximately 24 hours under one fabric glue’s guidance to 7–10 days for a particular fray-control adhesive. These are product-specific directions, not interchangeable recommendations. Keep the cloth flat during the required curing stage, and confirm the planned wash temperature and drying method are also compatible with both the textile and the repair material.
What is the best way to repair a round tablecloth edge?
A narrow curved hem or bias binding is often worth considering because the edge must turn continuously without forming bulky folds. Bias binding can cover a raw edge while accommodating the curve, provided it is attached to sound fabric without being stretched unevenly. Measure the planned circumference before cutting binding and add the joining allowance required by your technique. If you prefer a folded hem, practice on similar fabric first and check the curve for puckering before completing the whole circle.
Can I repair a vintage linen or lace tablecloth at home?
A small loose hem on otherwise strong fabric may be manageable with careful hand sewing, but age alone does not reveal the cloth’s condition. Stop if the fibers feel brittle, needle entries enlarge, dyes appear unstable, or the damage reaches valuable embroidery or delicate lacework. Avoid irreversible trimming and adhesive application until the repair has been assessed. For an heirloom or fragile piece, a textile conservator or experienced specialist can help preserve more of its original construction and appearance.