Skip to content


Fabric glue can make a small sequin repair or a detailed clothing project manageable, even if you rarely pick up a needle. The useful question is whether a particular adhesive will hold your particular sequins on your particular fabric through wearing and cleaning. A denim jacket, a stretchy dance costume, and a sheer evening blouse place very different demands on the same small spot of glue. Start with those demands before choosing a bottle.
For small, lightweight decorations, look for an adhesive intended for the materials involved, a flexible dried bond, and clear instructions for washing. Test spare sequins on matching fabric before working on the garment. Large hanging pieces, valuable clothing, and areas exposed to repeated pulling may be better served by stitching. The steps below explain how to make this choice, control visible glue, plan realistic drying time, and repair problems without turning a small defect into a larger one.
Can You Use Fabric Glue for Sequins?
Yes, suitable fabric glue can attach many small sequins to clothing and craft fabrics. Success depends on contact between the sequin backing and the cloth, compatibility with both surfaces, and enough undisturbed drying time. Gluing is most useful for decorative areas with limited strain. Sewing deserves priority when pieces need to swing freely, carry repeated tension, or remain individually replaceable.
Individual Sequins, Sequin Trim, and Sequin Fabric Are Different
A loose flat sequin, a cup-shaped sequin, and a strip of overlapping sequins do not present the same bonding surface. A flat piece may sit close to the cloth, while a cupped piece contacts it differently. Strung trim also contains a connecting thread, and some decorative strips have a separate fabric backing. Examine the underside before deciding where adhesive belongs. Applying glue only to a shiny visible surface may never create a useful connection to the garment.
Sequin fabric introduces another distinction. Its decorative pieces may already be sewn or glued to a supporting textile, while the garment itself relies on ordinary seams. Replacing a missing decoration is a surface repair. Closing an open side seam is a construction repair. If a dress has both problems, treat them separately rather than spreading adhesive across the damaged area and expecting the decoration to restore the strength of the seam.
When Gluing Makes Sense—and When Sewing Is Better
Think about what will happen to the decoration after it leaves your worktable. A few scattered sequins on a jacket back experience different conditions from densely packed pieces around a sleeve cuff. A dangling piece also needs a movable attachment instead of a fully bonded face. The following choices are starting points for testing; none replaces the care label, the adhesive instructions, or a check of the actual materials in your hands.
| Project or decoration | Sensible starting method | What to check before committing |
|---|---|---|
| Small individual sequins on stable woven fabric | Compatible fabric adhesive | Contact, visible marks, gentle bending |
| Sequin lettering on denim | Glue in short sections or stitch | Curves, ends, trim construction |
| Large, dangling, or multi-hole pieces | Individual stitches | Movement, thread attachment, fabric support |
| Sequins on stretchy performance clothing | Test a stretch-suitable method | Fit, recovery, lifting during movement |
| Open structural seam in sequin fabric | Appropriate seam stitching | Strength of the supporting textile |
Stitching can also be convenient when you expect future alterations. A decoration sewn through an existing hole can often be replaced without removing a cured glue patch. Gluing may suit someone who wants a neat scattered pattern without visible thread. Neither choice is automatically superior for every project. Judge the attachment by how the garment moves, how it must be cleaned, and whether the decoration needs to be removable.
- Video: sewing as an alternative. Professor Pincushion’s sequin tutorial is useful when comparing adhesive attachment with needle-and-thread methods before decorating or repairing a garment.
How Do You Choose the Right Fabric Glue for Sequins?
Choose by the complete material combination and the finished garment’s needs. Look for stated compatibility, flexibility after drying, workable application control, and a clear washing schedule. A product described simply as strong or permanent leaves important questions unanswered. A useful adhesive should let you place the decoration accurately and preserve enough comfort and movement for the location you are decorating.
Check the Fabric, Sequin Backing, Flexibility, and Washability
The underside of a sequin deserves as much attention as the cloth. Its color coating or finish may behave differently from the visible face, and appearance alone does not identify the plastic beneath it. Use an actual spare piece for your trial. Similarly, two garments labeled polyester can differ in weave, coatings, stretch, and absorbency. Matching the fiber name is only the beginning of a compatibility check, particularly on thin or specially finished textiles.
Flexibility and stretch are related but different practical needs. A glued patch can bend comfortably while still limiting how far a knit fabric extends. For a dance costume, test the decorated fabric at its expected wearing size and after it relaxes. For a tote bag, check the fold near the decorated area. The right observation comes from the intended use, not from squeezing a dry blob of adhesive between your fingers.
- Check the exact adhesive name, size, and instructions on the package.
- Identify the garment’s fiber content and care restrictions.
- Inspect the sequin underside and any existing coating.
- Decide whether the decorated area bends, stretches, rubs, or hangs.
- Confirm the waiting period before wearing and washing.
- Keep a spare sample of the actual fabric and decoration.
Compare Specific Glue Formulas, Not Just Brand Names
Adhesive ranges often include several formulas with similar names. Use the full product name when comparing instructions or following a tutorial. For example, Aleene’s Fabric Fusion Permanent Fabric Adhesive, 4 fl. oz. specifically lists sequins and beads among its uses. This is useful product information, but it does not establish identical performance on every sequin coating. The application and care directions belong to this formula, not automatically to every bottle carrying the same brand.
E6000 Fabri-Fuse is another example where the complete name matters. Its manufacturer describes flexibility, stretch, and recovery, while other products under the E6000 name have their own directions. Likewise, a glue intended for decorative gems can specify a much longer waiting period before washing than before wearing. Keep comparisons focused on requirements you can verify. A higher price, a larger bottle, or a strong-sounding name cannot replace a matching-material sample.
What to Verify Before Using GleamGlee Fabric Glue
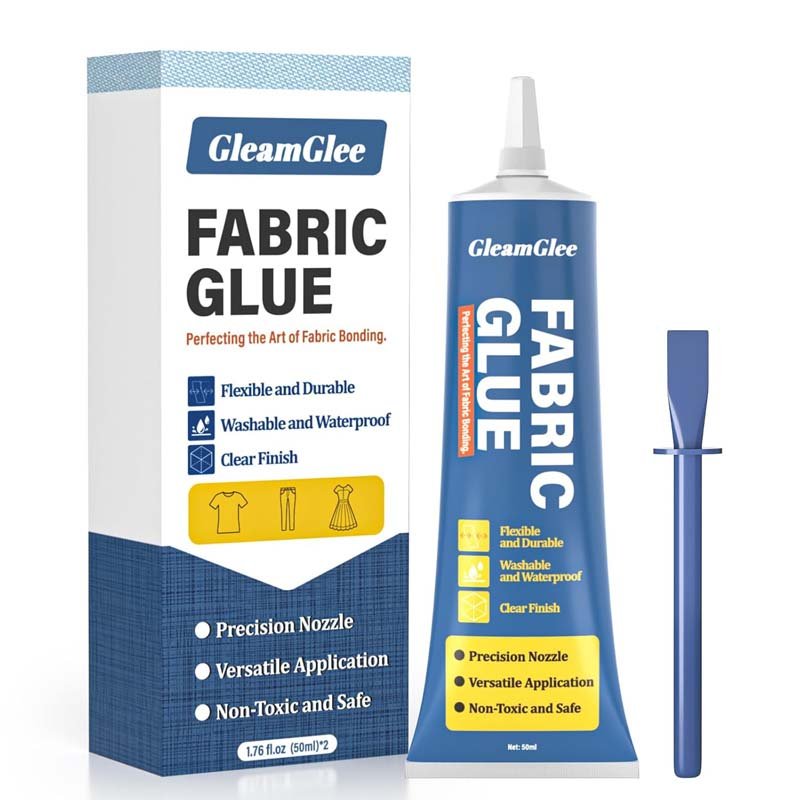
GleamGlee Fabric Glue is a relevant option for everyday fabric embellishment projects where its stated material uses match the job. The brand’s fabric compatibility and product information lists 50 ml single tubes and 50 ml × 2 packs, clear drying, and a soft, flexible cured finish. Choose a pack around the number of projects you expect to complete, while checking the current packaging for your exact product’s directions and allowing the sample result to guide the final choice.
For repeated costume or craft production, applicator control can matter as much as pack size. A narrow, manageable bead helps you repeat a neat placement across many pieces without excessive cleanup. If you are arranging customized glue packaging or a recurring supply, begin with a representative fabric-and-sequin sample and document the application method. Agreeing on the intended use, nozzle behavior, and care instructions gives the project a more useful starting point than requesting maximum strength alone.
How Should You Prepare and Test Before Gluing?
Prepare clean, dry materials, separate the garment layers, and arrange the design before opening the glue. Then test the actual fabric and sequins through the intended drying and care routine. A small trial can reveal staining, poor contact, stiffness, or coating damage while the consequences are still manageable. Keep the trial simple enough to repeat when changing a material or adhesive.
Prepare the Fabric, Tools, and Layout
Read the garment’s care label before cleaning it. If washing is allowed and appropriate, prepare the fabric and let it dry completely before applying adhesive. Fabric Fusion specifically instructs users to prewash without fabric softener. A delicate or dry-clean-only garment needs a preparation method consistent with its own restrictions. Do not improvise with an aggressive cleaner merely to make the surface feel cleaner; a damaged finish cannot be repaired by choosing a stronger glue.
Lay the work on a stable surface with enough room to leave it undisturbed. Separate the front and back of the garment so stray adhesive cannot join them. Any protective sheet or support should first be checked against the selected glue; an absorbent backing can become part of the bond. Place a few sequins without glue and look at the pattern from a normal viewing distance. This catches crowded lettering and uneven spacing before anything becomes permanent.
- Gather matching scrap fabric and spare sequins.
- Use fine tweezers or a suitable pickup tool for small pieces.
- Keep a shallow tray nearby so loose sequins remain easy to find.
- Test a fabric marking method before using it on a visible area.
- Prepare an adhesive-compatible support or separating layer.
- Read the label for handling, ventilation, and cleanup instructions.
- Keep the drying area clear of household activity.
Test Appearance, Flexibility, Hold, and Washing
A useful home trial includes more than checking whether the sequin stays on immediately. Prepare a small group using the intended adhesive and application method, then leave it for the stated period. Inspect the face and reverse of the cloth under the lighting in which the garment will be seen. Look for a darker halo, changes in shine, stiff edges, or a dull sequin coating. Compare the sample with untouched fabric and an unused sequin.
Once the product permits handling, bend the sample and reproduce the movement expected during wear. Use gentle, realistic handling rather than pulling a delicate textile until it tears. If the project will be washed, make a separate trial for the planned care method after the specified waiting period. A sample surviving one wash is useful evidence for your project, but it is not a promise of unlimited wash cycles or a substitute for a garment’s cleaning restrictions.
- Appearance passes: no unacceptable halo, coating change, or obvious glue buildup.
- Comfort passes: the decorated area bends without an irritating hard edge.
- Attachment passes: pieces remain secure during the movement you expect.
- Care passes: the tested cleaning method does not cause lifting or unacceptable appearance changes.
Estimate Sequin Quantity and Keep a Simple Project Record
Count a completed dry layout before estimating materials for several garments. For a simple grid, multiply the number of rows by the pieces in each row; for lettering, count the actual arranged pieces or measure the trim along the real curves. Adding a reserve is a planning choice for dropped, damaged, or replacement pieces. The examples below use 10% solely to show the arithmetic, not as a universal allowance for every project.
| Illustrative project | Planned quantity | Optional 10% reserve | Total prepared |
|---|---|---|---|
| One motif with 8 rows of 12 sequins | 96 pieces | 10 pieces after rounding up | 106 pieces |
| Three garments using 120 sequins each | 360 pieces | 36 pieces | 396 pieces |
| Five garments using 80 sequins each | 400 pieces | 40 pieces | 440 pieces |
The same arithmetic cannot reliably predict glue consumption. A porous textile, a different nozzle, a larger contact area, or frequent cleaning of the tip can change how much adhesive a project uses. Avoid planning from an unsupported claim about pieces per bottle. Make one representative project first and record the materials, application approach, completion time, and result. For larger batches, keep the same materials available so a replacement sample remains comparable.
- External tool: unit conversion. Use the inch-to-millimeter converter when a pattern uses inches and your sequins are sold in millimeters; 0.25 inch equals 6.35 mm.
- External tool: reserve calculation. The percentage calculator can calculate an allowance you choose; increasing 360 pieces by 10% gives 396 pieces.
How Do You Glue Individual Sequins and Sequin Trim?
Work in small sections, apply adhesive where the selected product requires it, and place each decoration without dragging it across the fabric. Use the successful sample to judge the amount of glue and the pressure needed. Keep the garment supported during drying. Individual sequins, cup-shaped pieces, and connected trim each need slightly different handling, especially around curves or overlapping decorations.
Attach Individual Sequins in Small Sections
Start in a comfortable area of the garment where you can reach the work without resting your hand on wet adhesive. If the design is symmetrical, mark a tested center reference and work outward in manageable sections. Place the glue close to its destination rather than carrying a dripping applicator over completed work. The useful batch size is the number of pieces you can position calmly within the product’s working time, not a fixed number copied from someone else’s video.
Follow the selected formula’s directions for the application surface. Fabric Fusion allows application to fabric or embellishment, while Fabri-Fuse’s technical instructions specify applying to both surfaces being joined. This difference matters when a tutorial shows only a dot on the cloth. Keep the contact area controlled, inspect each placement, and change the technique only after testing. Repeatedly lifting a sequin to adjust its position can spread glue beyond the intended footprint.
- Confirm the layout and separate the garment layers.
- Prepare the applicator according to the product instructions.
- Apply the amount established by your sample to the specified surface or surfaces.
- Pick up one sequin and check its orientation.
- Lower it into position without sliding across the cloth.
- Press as required to establish contact, keeping the visible face clean.
- Check alignment before moving to the next small section.
- Leave the work supported and undisturbed for the required drying period.
- Video: individual placement. How to Attach Sequins With Glue for Single Sequins offers a visual introduction to attaching separate pieces.
- Video: another practical demonstration. Gluing sequins! How to do it! can help you picture the workflow alongside the written steps.
Position Cupped Sequins and Control Visible Glue
Cup-shaped sequins deserve their own sample because their shape changes where they touch the adhesive. The decorative face normally needs to remain clean and visible, but the most effective contact pattern depends on the piece and glue. Some techniques use a small amount rising through the center hole to help secure the sequin. This makes a blanket rule against any glue in the hole unhelpful; judge the actual result for attachment and appearance.
Excess adhesive can leave a shiny rim even when it dries transparent. Too little can leave parts of the intended contact area unbonded. Compare finished samples after the full waiting period instead of judging wet glue alone. If the sequin sits above an obvious mound or the surrounding cloth looks soaked, pause before repeating the same application across the garment. A consistent, successful small placement is a better target than an extremely tiny dot at any cost.
Attach Sequin Trim, Lettering, and Backed Appliqués
Lay out connected trim along the full design before fastening it. At a tight curve, check whether the strip follows the shape naturally or twists and lifts. Avoid pulling the trim tight to force a curve; the released tension may disturb the attachment later. Work along short portions while preserving the intended overlap and direction of the sequins. At the end of a cut strip, check whether the connecting thread needs securing to prevent individual pieces from slipping away.
A fabric-backed appliqué needs contact through its backing, while a bare strand presents the construction of the sequins and connecting thread directly. Do not assume both can be treated as a solid fabric patch. For a practical lettering example, Aleene’s bridal jacket project shows how a sequin strand is arranged and attached to denim. Use the project for layout and handling ideas while retaining the instructions for your own adhesive and garment.
- Video: connected trim. How to Attach Sequins With Glue When Using Strips of Sequins focuses on working with a continuous strand.
- Video: a finished clothing project. Sequin lettering on a denim bridal jacket connects placement and attachment to a complete wearable design.
How Do You Handle Stretchy, Thin, or Delicate Fabrics?
Special fabrics need a trial reflecting the way the finished garment behaves. Stretch clothing must retain useful movement; sheer textiles must look acceptable from both sides; delicate surfaces must tolerate the application and eventual cleaning. If the sample fails one of these needs, change the attachment method before decorating the garment. A successful result on denim is not evidence for tulle.
Stretch Fabrics: Test at the Intended Wearing Size
A performance garment can look perfect on a table and reveal problems when someone moves in it. Check the intended design with the fabric supported close to its wearing dimensions, avoiding maximum stretch. Then evaluate both the extended and relaxed appearance. Closely packed decorations can restrict movement even when the glue itself remains flexible. Leave suitable space for the cloth to move, particularly near areas which repeatedly bend and expand during wear.
The firsthand tutorial Beading and Sequins on Spandex demonstrates garment support and specific sequin attachment techniques, including a center-hole adhesive bead. Treat this as an experienced maker’s approach rather than a laboratory comparison of all glues. For an adhesive’s own properties and directions, the downloadable E6000 Fabri-Fuse technical data sheet describes flexibility, stretch, and recovery. Match the method, garment, and exact product before applying either source to a different project.
Mesh, Tulle, Satin, and Other Delicate Surfaces
Open mesh can allow glue to pass through holes instead of remaining where you need it. Thin fabric may show a darker patch, and a smooth surface may reveal a shiny halo. Satin describes a fabric construction or surface appearance rather than one single fiber, so check the fiber and care information as well. On every sample, inspect the reverse and the support underneath, since a clean-looking face can hide unwanted bonding to another layer.
Try the complete decoration on spare matching material whenever possible. A hidden spot on the garment may help assess appearance, but a loose scrap is easier to bend, examine, and wash without risking the clothing. If glue produces an unacceptable mark, switching to another adhesive is only one option. A sewn attachment or a separate decorative trim may meet the design goal with a more manageable risk of permanent surface changes.
High-Movement Areas and Valuable Garments
For cuffs, costume joints, and other active areas, test the full movement expected during use. Raise the arm, bend the elbow, sit down, or reproduce the relevant dance position while assessing fit and attachment after curing. Look for local lifting rather than waiting for an entire piece to fall off. If failure repeats in the same location, reconsider the size, spacing, or fastening method instead of covering the area with another thick layer of adhesive.
A valuable garment also changes the acceptable cost of experimentation. If you cannot obtain a suitable sample or identify the decoration’s construction, professional alteration may be more sensible than trying several glues on the original. Machine attachment is an option for people who already own compatible equipment. It is not a necessary investment for repairing a few missing sequins, where careful hand stitching can remain the more approachable route.
- Video: machine attachment of trim. Brother’s Pearls and Sequins Foot video instructions describe a compatible attachment for pearls and sequins up to 5 mm in diameter. Check the listed machine and accessory requirements.
How Long Should the Glue Dry Before Wearing or Washing?
Use the waiting times for your exact adhesive, and distinguish drying for handling from readiness for washing. Published instructions vary considerably between fabric formulas. A garment can appear dry long before the manufacturer permits laundering. Record when application finishes and protect the project from movement during the specified period. Add testing and cleaning time when planning for a performance or event.
Setting, Drying, and Washing Readiness Are Different
Initial setting means the decoration begins to stay in position. It does not establish readiness for repeated stretching, packing, or washing. Products may also describe drying and curing differently, so read the actual use instructions rather than comparing isolated numbers on marketing pages. A few minutes of surface drying should never be substituted for an explicit instruction to wait several days before cleaning. Follow the conditions attached to the figure you are using.
The amount applied and the surrounding conditions can affect drying, which makes rushing a thick application especially unhelpful. Avoid introducing heat to accelerate the process unless the product and every affected material permit it. Protect the decorated area from folding and stacking while it sets. For several costumes, attach a simple paper note to each support with the completion time, exact adhesive, and earliest permitted next step so batches do not become confused.
Follow the Instructions for Your Exact Glue
The times below are manufacturer instructions for the named products, not results from a comparative test. They demonstrate how much washing schedules can differ even among adhesives sold for fabric or embellishments. Check the current package if its directions differ from an online description, and resolve any uncertainty before treating a valuable item. Wearing permission also cannot override a garment which remains visibly wet or otherwise unsuitable for use.
| Exact product | Published drying or wearing instruction | Published washing wait |
|---|---|---|
| Aleene’s Fabric Fusion Permanent Fabric Adhesive, 4 fl. oz. | Directions state 2–4 hours to dry and cure | 48 hours |
| Aleene’s Jewel-It Embellishing Glue, 4 fl. oz. | Wait 24 hours before wearing | 7–10 days |
| E6000 Fabri-Fuse | Dry flat for 8 hours | 72 hours |
For Jewel-It, the manufacturer’s product instructions distinguish 24 hours before wearing from 7–10 days before washing. The Fabric Fusion instructions and Fabri-Fuse technical sheet linked earlier support their respective rows. None of these schedules automatically transfers to another adhesive. GleamGlee’s product information describes an initial set around 6–10 minutes and approximately 24 hours for full curing; confirm the current product directions before choosing a cleaning schedule for your particular project.
Planning in hours avoids a common calendar mistake. If a product requires 72 hours before washing and you finish at 6 p.m. on Monday, Thursday morning is too early; Thursday at 6 p.m. completes the interval. The date and time calculator can add the stated waiting period to your completion time. It calculates the calendar interval only, so it cannot confirm material compatibility or judge the actual condition of a bond.
Wash and Store the Finished Garment According to All Materials
Use a cleaning method permitted by the garment, the decorations, and the glue. A machine-washable adhesive does not make a dry-clean-only dress machine washable, and a hand-wash label does not authorize soaking an untested decoration. When all materials allow washing, reduce unnecessary rubbing and catching through the care method appropriate to the item. Inside-out washing or a protective bag may be useful when compatible with the garment’s instructions, but neither guarantees attachment.
After cleaning, inspect the area before the next wear. Catching a lifted edge early can prevent a missing piece during use. Store the garment so sequins are not crushed along a hard fold or pressed against snag-prone textiles. Heat needs separate consideration: a glue described as iron-safe does not certify the sequin coating, plastic, or base fabric for the same treatment. Do not use a hot iron directly on the decoration merely because the adhesive tolerates ironing.

How Do You Fix Loose Sequins, Glue Marks, and Stiff Areas?
Stop adding glue until you understand the likely failure. Inspect where adhesive remains, whether the fabric or sequin finish has changed, and when the problem appeared. A defect during stretching calls for a different response from a wet glue spill. Test the correction on spare materials when possible, especially before introducing a cleaner or removing a cured bond from delicate cloth.
Diagnose Why Sequins Are Falling Off
The location of leftover adhesive gives useful clues, but it cannot prove a single cause by itself. Inspect several failed pieces if you have them, compare with a secure area, and review the original preparation and waiting period. Also consider the garment’s use: a recurring problem at a cuff may involve abrasion or movement as well as compatibility. Use the following observations to choose the next check rather than treating them as a definite diagnosis.
| Observed problem | Possible issue to investigate | Practical next step |
|---|---|---|
| Glue remains on cloth; sequin back looks clean | Backing compatibility or incomplete contact | Test actual spare sequins with the chosen formula |
| Glue comes away with the sequin | Cloth finish, poor contact, or insufficient curing | Review preparation and repeat a controlled sample |
| Pieces lift mainly during stretching | Layout or adhesive cannot accommodate movement | Adjust spacing, test another suitable method, or sew |
| Pieces fall after washing | Cleaning too soon, incompatible care, or a weak bond | Check the product schedule and garment care label |
| A shiny ring or hard patch develops | Excess adhesive or spreading into the textile | Reduce application on a fresh sample before repairing |
Change one important variable at a time during troubleshooting. If you simultaneously switch adhesive, increase the quantity, scrub the fabric, and change the sequin, a better result will not reveal which adjustment helped. Keep a simple note of each trial and allow the full waiting period before comparing. This is particularly useful for several matching garments, where repeating a successful process is more valuable than finding one isolated placement which happens to hold.
Deal with Wet Glue and Cured Glue Differently
Follow the adhesive’s cleanup instructions while a spill is fresh. For example, Fabric Fusion permits water cleanup before drying, but this does not make water appropriate for every glue or every textile. Avoid spreading the spill while attempting to remove it. Use a spare sample to check the cleanup method if the fabric is delicate, and stop when the process begins to alter the color, surface, or texture of the material.
Cured adhesive presents a different problem because removing it may also disturb fibers, dyes, or decorative coatings. Do not treat alcohol, acetone, heat, or forceful peeling as universal fixes. Check the manufacturer’s removal advice and the garment restrictions before trying a method in a hidden area. When removal cannot be done cleanly, a carefully matched replacement decoration, a redesigned trim, or a professional repair may leave a better result than continuing to attack the residue.
Reattach Missing Pieces—or Switch to Stitching
Before replacing a sequin, check whether its neighbors are individually attached or joined by a continuous thread. A broken strand may need its thread secured before replacing the missing pieces. Match the size, color, finish, and orientation as closely as possible, then assess the condition of the cloth beneath the gap. A new adhesive layer should not simply bury loose residue or damaged fibers and be expected to restore a sound attachment.
- Photograph the area before repair so orientation and spacing remain clear.
- Identify the original attachment and any damaged connecting thread.
- Test the proposed glue or stitch method with matching spare materials.
- Repair the smallest necessary area.
- Allow the specified waiting period before testing movement or cleaning.
If a repaired area feels stiff, adding more adhesive usually leaves you with more material in the same place. Consider whether the decoration can be repositioned, replaced with a backed trim, or secured by a suitable stitch. Avoid pulling out a cured patch merely to start over if the cloth is fragile. The best repair preserves enough sound material for the next attachment and still looks acceptable beside the surrounding design.
A Practical Finish for Your Project
A successful sequin project begins with a realistic match between the materials and their intended use. Choose an adhesive with relevant instructions, test it on the actual decoration and cloth, and copy the successful sample carefully. Clean placement is easier to achieve when you work in small sections and have already planned the design. Give each completed area enough undisturbed time before checking its movement, packing it away, or wearing it.
For clothing you expect to keep, make washing and future repair part of the original plan. Save a few matching sequins, keep the product name with your project notes, and inspect active areas before use. Where gluing remains unsuitable, switching to a stitch or a different trim can complete the design without repeated failures. A comfortable garment with an appropriate attachment method is a more useful result than forcing one adhesive to handle every situation.
Fabric Glue for Sequins: Frequently Asked Questions
The questions below address common choices during sequin decorating and repair, including substitute glues, visible marks, timing, quantity, and heat. Treat the answers as practical starting points alongside the instructions for your exact materials. Where an existing garment already has damaged thread, unknown adhesive, or a delicate finish, identifying the original construction is often the most useful step before making another change.
Can I Use Hot Glue or Super Glue Instead?
Check the exact formula rather than assuming either product category suits washable clothing. The adhesive must match the fabric and sequin backing while meeting the finished item’s flexibility and care needs. A quick initial grab does not establish suitability for repeated bending or laundering. For a wearable project, an adhesive with clear fabric-embellishment instructions is usually easier to evaluate. Test any alternative through the planned movement and care routine before applying it widely.
Will Clear-Drying Glue Leave Invisible Results?
Clear-drying glue can still leave a visible outline, a shiny surface, or a darker-looking area in some fabrics. The amount applied, the textile’s absorbency, the sequin’s shape, and the lighting all influence the appearance. Inspect a fully dried sample from the front and reverse, then compare it with untreated cloth. Keeping adhesive within the intended contact area helps control marks, but transparency alone cannot guarantee an invisible repair on every material.
Can I Repair Missing Sequins on an Existing Dress?
Often you can, provided the supporting cloth remains sound and you can match the decoration closely enough. First identify whether the original pieces were individually sewn, glued, or connected along a strand. Secure damaged thread where necessary and examine any old adhesive before choosing a repair. For a valuable dress or an unfamiliar delicate fabric, a professional alteration may be appropriate, especially if an attempted glue cleanup could create a larger visible mark.
Can I Wear the Garment the Same Day?
Possibly, but only when the adhesive’s specific instructions and the actual condition of the garment allow it. Same-day handling, wearing, and washing are separate questions. Do not use a dry-feeling surface as the only test, and avoid relying on fresh glue for a high-movement performance. If the available time is shorter than the stated waiting period, consider an appropriate stitched repair or another garment instead of trying to accelerate the process without guidance.
How Much Glue Do I Need for My Project?
Start with a representative sample and the amount needed to make effective contact without an unacceptable halo or hard patch. There is no dependable universal number of sequins per milliliter because size, backing, fabric, applicator control, and application method differ. For several identical garments, complete one example first and record its real material use. Keep spare decorations for repairs, and avoid equating a larger glue deposit with a stronger or better-looking result.
Can I Iron Fabric with Glued-On Sequins?
Only use heat when the fabric, sequins, and adhesive all permit the proposed treatment. An iron-safe glue does not establish a safe temperature for plastic decorations or their coatings. Check the garment care instructions and keep the iron away from the decorated surface unless the complete assembly is specifically suitable. If creases can be managed without heating the embellishments, use the permitted care method rather than experimenting directly on the finished design.