Skip to content


A no-sew pouch looks like a small project, yet it asks a fabric adhesive to do several jobs at once: hold a seam, stay flexible when the pouch bends, avoid showing through the cloth, and survive the way the finished item will be used. The best result starts before the bottle opens. Choose a pouch with realistic loads, match the adhesive to the fabric surface, test a hidden scrap, and give the bond its full cure time. This guide walks through those decisions in plain language, with a repeatable construction method, sizing formulas, video demonstrations, and clear limits for cases where glue alone is not the right fix.
What Fabric Glue Can and Cannot Do in a No-Sew Pouch
This section helps decide whether a glue-only pouch fits its intended use before any fabric is cut. It separates light craft seams from parts that carry repeated pulling, explains why a neat-looking bond can still peel, and gives a small-sample check for appearance and handling. The practical takeaway is to treat adhesive as a good option for broad, low-stress folds while choosing stitching or reinforcement for straps, heavy contents, safety-related uses, or other points where failure could matter.
A useful alternative for low-stress fabric work
Fabric glue can make a clean pouch without a machine, needle, or visible stitches. It is especially useful for a flat pencil sleeve, a small pouch for paper clips, a simple gift envelope, a light cosmetic organizer, or an outer fabric panel whose edges are folded and bonded. A suitable textile adhesive can remain more flexible than a hard craft glue after curing, which matters because a pouch is repeatedly handled, folded, opened, and put down. The outcome still depends on the fabric, adhesive, seam width, application amount, pressure, and cure conditions.
The phrase “fabric glue” covers products with different formulas, working times, intended materials, and care instructions. One label may specify a quick initial grab and a day before washing; another may allow laundering only after two days. A tutorial made with a particular brand therefore shows a technique, not a universal cure schedule. Read the current bottle or product sheet, then treat its instructions as the rule for the adhesive in hand. If the brand, formula, or fabric changes, repeat the small test instead of carrying an old result forward.
Decide by the pouch’s job, not by its appearance
A pouch can look sturdy while the bonded edge remains a weak point under pulling. A flat pouch holding index cards has little leverage on its seams. A zipper pouch filled with metal tools creates more weight, while a wristlet strap or shoulder strap concentrates force into a small area. A decorative glued edge can be appropriate for the first use and unsuitable for the second. Before cutting, write down the contents, approximate weight, frequency of opening, chance of getting wet, and whether failure would damage anything valuable.
The safest boundary is simple: use adhesive for light, non-structural seams and decoration; add sewn, riveted, or purpose-made mechanical reinforcement where force concentrates. Do not rely on a thin glue line as the sole support for a handle, strap, child-safety item, pet restraint, heavy tool pouch, or anything worn while moving. For those projects, a stitch, rivet, or professionally designed closure transfers load through a more dependable mechanical connection. A glue-only pouch is best treated as a craft container unless it has been built and tested for a more demanding purpose.
| Pouch feature or use | Glue-only suitability | Practical reason |
|---|---|---|
| Flat pencil or paper pouch | Good starting project | Light contents and broad, stable side bonds keep strain modest. |
| Gift pouch for dry, light items | Usually suitable after a scrap test | The pouch is handled gently and can be allowed to cure fully before use. |
| Small cosmetics pouch | Conditional | Choose a washable textile adhesive, keep liquids sealed, and avoid claiming leakproof performance. |
| Zippered pouch | More demanding | The zipper tape flexes and moves; adhesive must be compatible with both tape and fabric. |
| Pouch with a strap or handle | Poor choice for glue alone | Force is concentrated at attachment points and repeated lifting can peel a bonded patch. |
| Heavy, wet, or frequently washed contents | Not a dependable glue-only use | Load, moisture, movement, and laundering raise the cost of a bond failure. |
Bond geometry explains why one seam can stay flat while a nearby zipper end lifts. Adhesive joints may be loaded in shear, peel, cleavage, or tension, and the direction and repetition of the force matter. A broad side seam usually spreads contact over a longer area; a strap anchor or gusset corner can pull one edge away and concentrate peel. This is general adhesive-design guidance, not a strength rating for fabric glue or a tested pouch. It supports a practical rule: keep glue-only parts broad and low-stress, and mechanically reinforce points that are pulled repeatedly.
Evidence: 3M’s overview of adhesive bond strength explains adhesion versus cohesion, common stress modes, surface wetting, and cleanliness. Its discussion is general engineering guidance; it does not test a particular fabric adhesive or pouch.
Set a realistic success test
“It stuck once” is not the same as “the pouch is ready for use.” A meaningful home test uses the same fabric layers, adhesive amount, overlap, pressure, and cure time planned for the project. After full cure, bend the test piece around a finger several times, flex the seam in both directions, and tug gently along the bonded edge. Look for peeling, cloth distortion, a stiff ridge, a visible halo, or adhesive transferred to the reverse side. This small sample will not certify a load rating, but it catches avoidable compatibility and appearance problems before they reach the finished pouch.
Choose Fabric Glue That Matches the Fabric and the Job
Choosing an adhesive starts with the actual fabric surface and the pouch’s care needs, rather than a broad claim that one glue works on every textile. This section compares common cloth types, finishes, stretch, and lining combinations, then explains what to look for on the product label. A controlled offcut test is the practical decision point: it shows whether the adhesive discolors, stiffens, or lifts from the exact materials before the visible pouch is assembled.
Start with fiber, surface, finish, and stretch
The label “cotton,” “polyester,” or “canvas” is useful, but it does not describe every surface detail. A loose cotton weave can drink up liquid adhesive; a tightly woven polyester may offer less texture for a bond; a coated canvas can behave more like a plastic surface than an absorbent cloth. Stretch knits move at the seam, and a laminated textile may prevent adhesive from contacting the fibers. A good choice considers the actual face and backing of the fabric, not only the fiber name printed on a tag.
For an easy first project, medium-weight woven cotton or stable canvas is generally easier to align and hold flat than slippery satin, sheer cloth, or a very stretchy knit. Felt and fleece are thick and porous, so excess adhesive can soak in and leave a hard patch. Denim offers a robust weave but adds thickness at folded intersections. With a lining, test both the outer cloth and lining together, because the adhesive touches two materials and may wick through the lighter layer. If a textile is coated, delicate, valuable, or unfamiliar, test a concealed area first.
| Fabric or surface | Typical challenge | Better first move |
|---|---|---|
| Medium-weight woven cotton | Absorbency can pull glue away from the seam surface | Start with a small, controlled line and test the reverse for show-through. |
| Canvas or denim | Thick folds can create bulky corners | Keep seam allowances flat, press in short sections, and avoid stacked glue pools. |
| Polyester lining | Smooth finish may reduce mechanical grip | Check the adhesive label for polyester use and test a cured sample before assembly. |
| Felt or fleece | Porous pile may absorb adhesive and become stiff | Use only a thin application and inspect softness after a full cure. |
| Stretch knit or elastane blend | Repeated stretch may peel the bonded edge | Test while gently flexing; choose sewing or a stretch-rated method for stressed seams. |
| Waterproof or laminated fabric | Coating can block contact with textile fibers | Confirm explicit compatibility; an ordinary fabric adhesive may not bond reliably. |
| Sheer, satin, or pale fabric | Marks, darkening, or a visible glue line can show | Test beneath a flap or seam allowance and use very small amounts. |
Read the product label for performance words
Look for wording about permanent textile bonding, flexibility after curing, washability, supported fabric types, and whether the glue suits clothing or craft decoration. “Dries clear” describes appearance, not strength. “Quick dry” describes one stage, not necessarily full cure. “Water resistant” does not automatically mean suitable for soaking, repeated laundering, or a pouch carrying wet products. A useful label should distinguish initial holding from full cure, state any wash wait, and identify surfaces the maker does not recommend.
Avoid substituting hot glue, school glue, super glue, or general-purpose craft adhesive merely because it is nearby. Some may bond a particular test sample, yet create a rigid patch, crack under folding, stain thin cloth, or fail after moisture exposure. This is not a claim that every non-fabric product fails on every textile; it is a reminder that material compatibility and flex performance need evidence from the product directions or a representative test. For a no-sew pouch, an adhesive sold for fabric is the more sensible starting category.
Video demonstration: Eight fabric-glue tips from Speed-Sew shows handling advice for that product. It is useful for seeing controlled application, but its brand-specific steps and timing should not be transferred to another bottle without checking that product’s label.
Run a hidden-area test before full application
Cut two pieces from a leftover offcut, ideally at least 1 inch (2.5 cm) square, and apply the glue exactly as the label instructs. Pair the actual outer fabric with the actual lining or backing, let the sample cure for the full stated period, and inspect both faces in daylight. The small sample should answer four practical questions: Does the color change? Does the adhesive show through? Does the bonded area remain pliable enough for the pouch? Does the edge lift after gentle flexing? A test on a different fabric or with a different glue amount cannot answer those questions reliably.
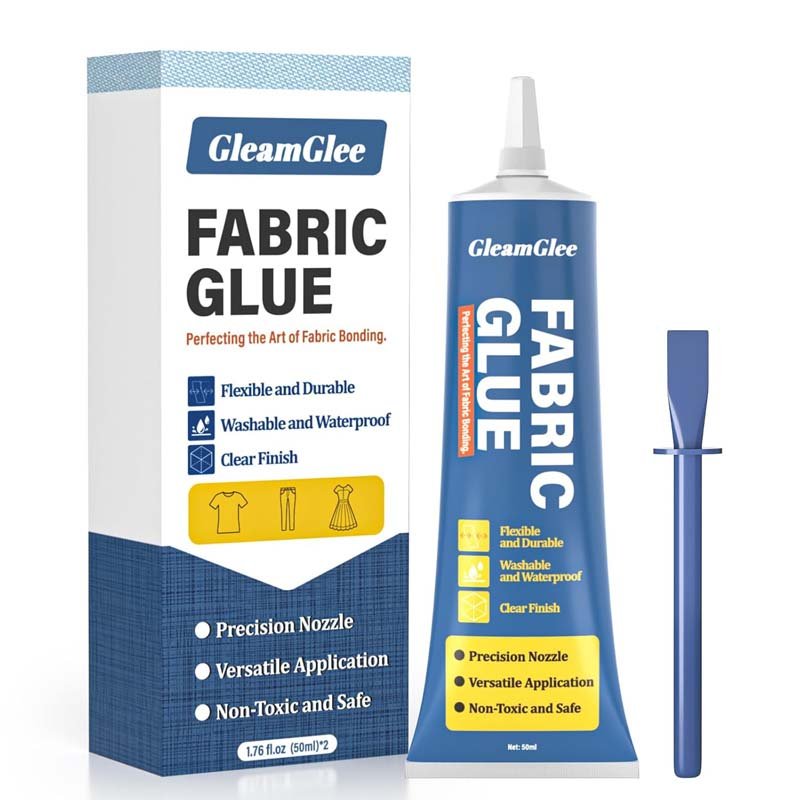
For a product example, GleamGlee’s product information lists cotton and polyester among its intended fabrics, describes a 6–10 minute initial set and about 24 hours for full cure, and advises testing unfamiliar blends or finishes. Treat those times as product-specific directions, not a guarantee for every fabric or pouch design; check the current package label because instructions can change. The same disciplined approach applies to every brand: confirm the named material, test the exact combination, and keep the pouch’s load modest enough for the bonded construction.
A useful sample test copies the complete bond stack instead of testing only a single face of fabric. Bond outer cloth to lining if that is how the finished pouch will be built, include the same seam overlap, and apply the same pressure and glue amount. After the stated full cure, examine both sides in daylight, flex the seam repeatedly by hand, and inspect whether the edge begins to lift. This is a household screening method for fit and visible defects, not a standardized strength test or a substitute for manufacturer data.
Plan the Pouch Before Opening the Bottle
Good planning keeps a simple pouch simple and reduces the chance of cutting valuable fabric to the wrong size. This section works backward from finished interior dimensions, distinguishes flat folded designs from zippered or gusseted patterns, and shows how to account for seam and top-turn allowances. The measurements are starting examples rather than a universal pattern; a paper mock-up should confirm the opening, usable interior, fold thickness, closure position, and lining fit before adhesive is applied.
Choose a simple shape for the first build
A flat folded pouch is easier to glue evenly than a boxy pouch with a gusset, multiple layers, and zipper ends. One rectangle can form the front and back, with the bottom created by a fold and the sides bonded as two straight seams. A top fold or hem can cover raw edges, while a hook-and-loop tab gives a simple closure. Each extra feature adds alignment and peel points, so begin with a shape whose edges can lie flat under a book or other broad, clean weight.
A Brit + Co pencil pouch project illustrates a folded envelope-style layout made with fabric, oilcloth, and adhesive. Its listed material dimensions belong to that project and should not be treated as a universal pattern; use it to visualize the order of folding and where an opening or flap can sit. A project tutorial can demonstrate construction sequence, but it does not independently verify a bond’s strength across every adhesive, fabric weight, lining, or care routine.
Measure the finished pouch and work backward
For a simple rectangle folded at the bottom, decide the finished internal width and height first. Add a side allowance on both sides, then add a top-turn allowance to the front and back portions. A practical starting pattern is: cut width = finished width + 2 × side allowance; cut height = 2 × finished body height + 2 × top-turn allowance. For example, a pouch with a target 6-inch body width, 4-inch body height, 1/2-inch side allowances, and 1/2-inch top turns starts at 7 inches wide by 9 inches tall. Paper-test the fold because thick fabric and glue line placement change the usable inside space.
Measurement tool: Omni Calculator’s length converter converts pattern dimensions between inches, centimeters, and other units. It helps avoid mixing units while cutting; it does not calculate adhesive quantity or replace a paper mock-up.
Mark the finished width and height on paper before adding allowances.
Choose a consistent side allowance, such as 1/2 inch, for a small stable woven pouch.
Add top-turn fabric on both front and back edges if you plan to hide raw edges.
Make a paper mock-up, fold it, and check the opening and usable interior.
Add small corner notches only if the paper version folds neatly; avoid stacked fabric bulk.
These figures are a planning example, not a tested universal pattern. A pouch with a zipper needs extra space for the zipper tape and top construction. A gusset changes the relationship between flat fabric width and finished volume. A thick canvas fold consumes more space than a thin cotton fold, and a lining takes up room inside the finished pouch. If a free pattern supplies dimensions, follow its construction order and test the adhesive rather than combining dimensions from one pattern with steps from another.
Estimate adhesive contact without guessing glue volume
Glue needs to cover the intended contact area, but the amount depends on the adhesive nozzle, fabric absorbency, seam width, and maker’s directions. Do not calculate a “correct milliliter quantity” from pouch perimeter unless the product maker provides a bead rate for the specific adhesive. Instead, measure the total bond line so you can plan the job, then use the smallest continuous layer that wets the fabric surfaces without squeezing far beyond the seam. If the seam line is 7 inches on each side, the bonded side length is 14 inches total; this is a useful layout measure, not a volume formula.
One inch equals exactly 2.54 centimeters, so a 7-inch pattern width converts to 17.78 centimeters before any rounding. For small craft work, rounding to the nearest millimeter is usually more practical than carrying many decimal places through every cut. Keep one unit system throughout the project to prevent mixed-unit errors, and remember that converting the dimensions does not change the allowance needed by a particular fabric or fold construction.
Printable reference: Download NIST’s Metric Conversion Card (PDF) for a compact unit-conversion reference. It is a measurement aid, not a sewing or adhesive pattern.
Think through the contents and closing method
Before cutting fabric, test the opening with the objects the pouch will hold. A pencil pouch must fit the longest pencil plus enough room to remove it; a cosmetic pouch needs a closure that does not press into fragile containers. For a light envelope pouch, a glued fabric tab or hook-and-loop tape can work when the adhesive is compatible with both the tape backing and fabric. A magnet, snap, or zipper adds concentrated forces, so its attachment point deserves its own sample test or mechanical reinforcement.
The Engineer Mommy treat-pouch tutorial is a separate example of a small folded pouch with a closure. Its construction can help readers picture the relationship between body folds and a flap, but a pet-treat pouch tutorial does not establish that every glued pouch is safe for food contact, washing, or use as a pet restraint. Keep the fabric and adhesive away from food unless the product explicitly supports that use, and never use a craft pouch to restrain an animal.
Make a brief plan on paper: outer fabric, lining, finished dimensions, closure, contents, approximate load, and intended care. This record helps identify the cause if the first trial wrinkles or opens. It also helps another crafter repeat the process without guessing. A paper mock-up costs little and reveals problems with flap length, opening width, and folded corners before adhesive enters the picture. Do not invest in a complex gusset or precious fabric until a flat sample has proved the glue and cloth combination behaves as expected.

Frequently Asked Questions
These answers address the decisions readers most often face after choosing a no-sew pouch project: which adhesive to use, whether glue can hold a zipper, how long to wait, and what to do when fabric marks or seams lift. Each answer depends on the exact product label and fabric combination, so use the guidance as a practical starting point and verify any care or compatibility claim with a cured sample before relying on the finished pouch.
Best fabric glue for a no-sew pouch
There is no single best glue for every pouch. Choose a permanent textile adhesive whose current label includes the actual fabric, remains suitable for the amount of flex expected, and states a clear full-cure and care schedule. Test the fabric, lining, and closure materials as a combined stack. For a first project, stable medium-weight cotton and straight seams are easier to evaluate than a slippery lining, stretch knit, or coated fabric.
Fabric glue for a zipper pouch
It can work for some light pouches when the adhesive maker supports the fabric and zipper-tape materials, but a zipper receives repeated pulling and flexing. Keep glue out of the teeth and slider path, and test a sample with the same tape, fabric, seam width, and cure schedule. For a heavy pouch, frequent use, or zipper end under stress, sew the zipper or add mechanical reinforcement rather than relying on a narrow glue line alone.
Fabric glue drying time before use
Follow the timing for the specific product and distinguish initial set from full cure. A bond may stay in place after several minutes yet remain unsuitable for washing, ironing, stretching, or regular handling. Product examples on the market range from a short initial holding period to a much longer full-cure or wash interval. Keep the project supported and undisturbed for the stated full-cure period, and allow extra time if the product label recommends it.
Washing a fabric-glue pouch
Only if the adhesive and the other materials permit washing after the stated cure time. Product instructions differ: a named adhesive may specify one day, while another specifies a longer wash wait. Follow the current label, fabric care instructions, zipper and trim limits, and any lining guidance. Wash gently the first time and inspect the edges after drying. Do not infer waterproofness, unlimited wash durability, or suitability for soaking from a washable claim alone.
Fabrics that are difficult to glue
Smooth coated fabric, waterproof laminates, very stretchy knits, sheer cloth, satin, and delicate pale fabric deserve extra caution because adhesion, marking, or show-through can be unpredictable. Thick pile can absorb too much adhesive, while stacked denim can form bulky corners. Check the product’s supported materials and test an offcut before making a visible bond. When a coating blocks adhesive contact or stretch keeps peeling the seam, choose a different adhesive system or a sewn construction.
Preventing glue show-through and hard spots
Use a hidden test to learn how quickly the specific fabric absorbs adhesive. Work with a thin, controlled line within the seam allowance, support the fabric evenly, and avoid pressing so hard that glue squeezes out. A precision tip or small applicator helps keep the application neat. If the sample still shows a halo or cures stiff, use a heavier or darker fabric, choose another compatible product, or change the design so the bond sits inside a fold.
Heavy items and straps on a glue-only pouch
Treat a glue-only pouch as suitable for light, low-stress contents unless the complete design has been professionally tested for a higher load. A strap anchor, zipper end, or gusset corner concentrates force and can peel or tear the cloth even when the adhesive remains intact. Use stitching, rivets, reinforced patches, or a design rated for the intended load. Never hang a heavy or valuable item from an untested glued strap, and never use a craft pouch for a safety-critical purpose.