 Skip to content
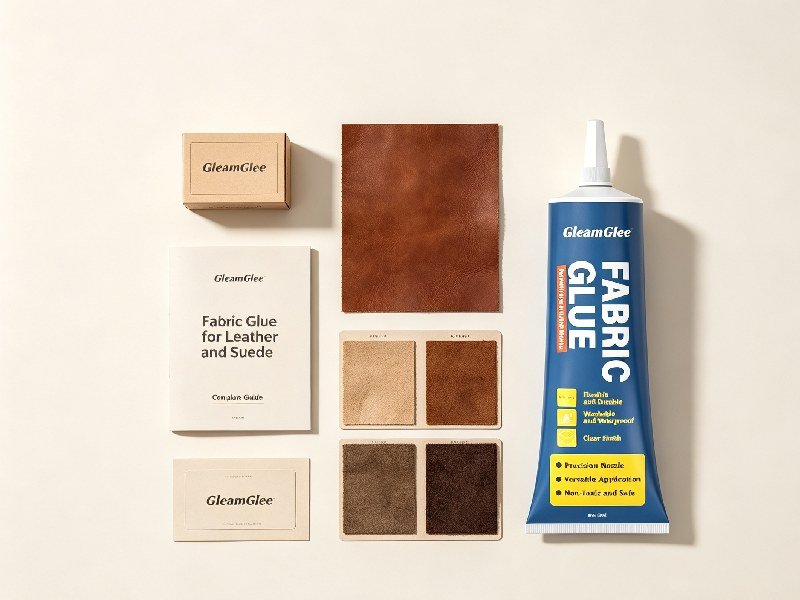
Leather and suede projects often look straightforward until the adhesive touches the surface. A glue that works cleanly on denim may darken suede, slide across coated leather, or cure into a stiff ridge that becomes visible whenever the material bends. The real task is not simply making two pieces stick. It is creating a bond that fits the texture, flexibility, finish, thickness, and expected use of both materials.
Fabric glue can work on leather and suede when the formula remains flexible, the bonding faces are clean, and the finished joint carries light or moderate stress. Apply a thin, controlled layer, press the materials evenly, and allow the full stated cure time. Finished leather, oily hides, delicate suede, and load-bearing joints require testing and may need specialist leather adhesive, stitching, or mechanical reinforcement.
Consider a simple leather pouch lined with cotton. One side lies flat and clean, while the other develops dark spots and stiff patches. The difference may be only a few extra drops of adhesive or a poorly prepared surface. Small process choices determine whether the result looks handmade in the best sense—or visibly repaired.
Does Fabric Glue Work on Leather and Suede?
Fabric glue can bond certain leather, suede, faux leather, and textile combinations, especially in patches, linings, trims, decorations, and light repairs. Performance depends on the adhesive formula, surface finish, material absorbency, bond area, and expected movement. Smooth coatings, natural oils, loose suede fibers, heavy loads, and repeated flexing may require specialist glue or additional stitching.
What Makes Leather and Suede Hard to Bond?
Leather and suede are not uniform materials. Their surface behavior can vary dramatically according to tanning method, finish, color treatment, protective coating, thickness, and which side of the material is being bonded.
Smooth leather may contain pigments, waxes, conditioners, waterproof finishes, polyurethane topcoats, or acrylic sealers. These treatments improve appearance and stain resistance, but they can also reduce the adhesive’s ability to spread and make close contact with the leather fibers. The glue may seem secure at first, yet lift cleanly once the material is bent.
Suede creates a different problem. Its open, fibrous nap absorbs liquids quickly. If too much glue is applied, part of the adhesive can sink below the bonding interface before the second piece is positioned. The result may be a darkened surface, a hard patch, or a weak joint with insufficient adhesive remaining between the materials.
Thickness also changes how a bond behaves. Thin garment leather easily reveals glue ridges. Thick leather may resist bending but place more force on the joint when folded. Loose felt can absorb adhesive rapidly, while tightly woven canvas may need stronger pressure to achieve full contact.
The project must therefore be evaluated as a complete material combination. Fabric bonded to coated faux leather, cotton attached to unfinished leather, and suede trim applied to a costume may all need different application methods, even when the same tube of glue is used.
Which Material Sides Bond Best?
The best bonding surface is usually clean, stable, dry, and slightly receptive to adhesive. Unfinished leather often accepts glue more easily than a glossy grain surface. The back of suede may provide a firmer bonding face than the visible nap. Fabric should be stable enough to hold the adhesive near the joint instead of allowing it to pass through.
| Material surface | Typical behavior | Main risk | Practical approach |
|---|---|---|---|
| Finished grain leather | Low to moderate absorption | Peeling from the coating | Clean, test, and roughen only when safe |
| Leather flesh side | High absorption | Glue soaking too deeply | Apply a thin, controlled film |
| Suede nap | Very high absorption | Darkening and stiffness | Use minimal adhesive and test first |
| Suede backing | Moderate to high absorption | Uneven glue uptake | Spread carefully and press flat |
| Cotton or canvas | Moderate absorption | Wrinkling during placement | Smooth gradually from one side |
| Felt or lace | High absorption | Bleed-through | Apply glue to the firmer surface |
| Faux leather | Usually low absorption | Weak grip on plastic coating | Confirm formula compatibility |
When installing a fabric lining, applying the adhesive to the leather side often provides better control. The cloth can then be lowered slowly and smoothed outward, reducing the chance of glue soaking through the fabric.
For suede decoration, apply adhesive to the hidden backing whenever possible. Keep the glue slightly inside the edge so pressure does not force it onto the visible nap.
A decorative surface is not automatically a good bonding surface. Smooth, attractive finishes are often less adhesive-friendly than unfinished or lightly porous backing materials.
How Do Oils and Coatings Affect Adhesion?
Oil and surface treatments frequently explain why a bond appears strong for several minutes but later peels away. Leather conditioner, polish, silicone spray, waterproofing products, wax, grease, manufacturing release agents, and natural oils can all create a weak boundary between the glue and the material.
When the cured adhesive pulls away cleanly and leaves the leather glossy, it may have bonded to a coating rather than to the leather itself. Applying a thicker layer usually does not solve the problem. The new adhesive simply attaches to the same unstable surface.
Oily pull-up leather deserves particular caution. Its oils are part of the material and may continue migrating after the surface has been wiped. Repeated cleaning with strong solvents can damage color and texture without creating a dependable bonding face.
Synthetic leather may also contain plasticizers or protective coatings that react poorly with certain adhesives. A compatible product should remain stable after full cure without softening, wrinkling, discoloring, or separating from the surface.
Avoid treating alcohol, acetone, or household degreaser as universal leather preparation products. These liquids may strip pigment, dull the finish, or create pale rings. Begin with the least aggressive method and move to stronger preparation only when testing supports it.
When Should You Run a Patch Test?
A patch test is necessary when the material is valuable, pale, dyed, coated, highly absorbent, unfamiliar, or difficult to replace. Testing is also important when the finished item will be bent, stretched, washed, heated, exposed to humidity, or used frequently.
Use an offcut whenever possible. A 25 × 25 mm sample is usually enough to assess color change, while a 50 × 50 mm overlap gives more room for simple bending and peel comparisons.
Check the sample at four stages:
- Immediately after application, inspect for spreading, bleed-through, or darkening.
- After the initial set, check whether the pieces slide or lift.
- After full cure, inspect flexibility, edge visibility, and surface texture.
- After bending and light pulling, identify where failure begins.
A useful test asks more than whether the materials remain attached. It should also reveal whether the joint becomes stiff, glossy, wrinkled, discolored, or difficult to handle.
When comparing techniques, prepare several labeled samples at once:
- Thin application on the leather side only
- Thin application on both materials
- Cleaned and lightly prepared leather
- Alternative adhesive intended for leather
Allow every sample the same cure time before comparison. This provides a clearer answer than relying on packaging claims alone.
Which Fabric Glue Should You Choose?
Choose fabric glue according to the materials, movement, load, environment, and required appearance. A practical formula for leather and suede projects should offer controlled application, a clear finish, useful working time, and enough flexibility to tolerate normal bending. Decorative work may suit flexible fabric glue, while footwear, straps, handles, and structural seams usually need specialist adhesive and reinforcement.
What Makes a Bond Flexible?
A flexible bond moves with the material rather than resisting it. This matters because jackets, wallets, handbags, shoes, cushions, and accessories rarely remain flat during use.
When a cured adhesive is much stiffer than the surrounding material, stress gathers along the edge of the glue film. The center may remain attached while the outer edge begins to peel. On thin leather or suede, a rigid adhesive layer may also create a visible ridge or hard patch.
A flexible adhesive must balance two properties:
- Enough internal strength to hold the bonded materials together
- Enough elasticity to bend without cracking or separating
A practical comparison can be made after full cure. Bend the bonded sample around a cylinder approximately 25–40 mm in diameter and repeat the motion about 20 times. Inspect the joint for whitening, cracking, edge lifting, or a hard crease.
This is not a certified laboratory test, but it provides useful comparisons between formulas, application amounts, and preparation methods.
Glue quantity affects flexibility as much as chemistry. Even a flexible product can feel rigid when applied too heavily. A thin, continuous film generally spreads force more effectively than a thick bead.
Which Glue Bonds Fabric to Leather?
Flexible fabric glue often suits patches, linings, appliqués, ribbons, costume details, and light repairs. Leathercraft adhesive may be more appropriate for larger leather panels or joints that experience frequent movement. Contact adhesive is commonly selected for higher-stress construction, although it requires more precise timing and application control.
| Project | Suitable adhesive direction | Main performance need | Reinforcement |
|---|---|---|---|
| Fabric patch on leather jacket | Flexible clear adhesive | Low stiffness and clean finish | Optional edge stitching |
| Cloth lining in a leather pouch | Fabric or leathercraft adhesive | Even coverage and working time | Usually unnecessary |
| Suede trim on a costume | Low-stain flexible adhesive | Precise application | Usually unnecessary |
| Decorative ribbon on a bag | Precision fabric glue | Clear drying | Optional at exposed ends |
| Leather bag handle | Leather or contact adhesive | High peel resistance | Stitching or rivets |
| Shoe upper or sole | Footwear adhesive | Flex, water, and abrasion resistance | Depends on construction |
| Temporary positioning | Repositionable leather adhesive | Short-term hold | Stitching required |
The strongest adhesive is not always the best one. A formula that sets almost instantly may be convenient for a small patch but unsuitable for a large fabric lining that requires gradual alignment.
Viscosity also matters. A low-viscosity adhesive may flow easily but soak into suede. A very thick adhesive may stay in place but create ridges beneath thin leather or fabric.
For garments and bag linings, prioritize a soft cured film. For footwear, handles, belts, and high-load seams, use an adhesive developed for those stresses rather than relying on ordinary craft glue.
Is Water-Based Glue Suitable for Suede?
Water-based adhesive can work on suede when it is designed for porous materials and applied in a controlled, thin layer. It often offers easier cleanup and more positioning time than fast solvent-based products.
However, suede can absorb moisture quickly. Excess application may darken the surface, flatten the nap, move dye, or create a stiff area. Even when the adhesive dries transparent, the moisture introduced during application can change how the fibers reflect light.
Whenever the product instructions allow it, apply the adhesive to the firmer mating surface rather than directly onto visible suede. When suede is being bonded to leather, placing the glue on the leather side may reduce absorption.
Leave approximately 1–2 mm between the glue film and the visible suede edge. This margin helps prevent squeeze-out without leaving the edge completely unsupported.
Use flat, moderate pressure. Excessive clamping may force wet adhesive deeper into the suede or leave pressure marks. A smooth board with evenly distributed weight is often safer than several narrow clamps.
Pale suede requires especially careful testing. Examine the cured sample under daylight and from several angles. Reject the method if it leaves persistent darkening, gloss, flattened fibers, or hardened patches.
When Is Specialist Leather Glue Better?
Specialist leather adhesive is better when the joint carries weight, bends sharply, receives regular abrasion, or must remain reliable outdoors. Typical examples include handles, straps, belts, shoe components, thick wallet sections, tool pouches, and upholstery.
A useful distinction is decorative versus structural bonding.
Decorative work includes:
- Patches
- Ribbons
- Lightweight linings
- Costume trim
- Beads
- Appliqués
- Small interior details
Structural work includes:
- Bag handles
- Shoulder straps
- Shoe edges
- Load-bearing seams
- Thick leather laminations
- Upholstery joints
- Frequently folded corners
Specialist leather adhesives may offer stronger initial grab, improved peel resistance, and better durability during repeated flexing. Some are applied wet to one surface, while others require coating both sides and waiting for a tack stage.
When joint failure could damage valuable contents or create a safety concern, adhesive should not be the only support. Stitching, rivets, folded seams, larger overlap areas, or mechanical fasteners provide added security.

How Do You Prepare the Materials?
Prepare the materials by identifying the bonding faces, removing dust and surface contamination, allowing cleaned areas to dry, and testing any roughening method before use. Proper preparation helps the adhesive contact the material evenly, but aggressive sanding or solvent cleaning can permanently damage leather color, synthetic coatings, suede nap, and the finished appearance.
How Should You Clean Leather?
Begin with a dry, lint-free cloth or a soft brush. Remove dust, loose fibers, and surface debris from the planned bond area.
If the material contains light dirt or residue, use a cleaner confirmed to be suitable for that leather type. Apply a small amount to the cloth rather than pouring it directly onto the item. Keep the cleaned area limited to the hidden bonding zone.
Allow the surface to dry completely before applying glue. A lightly dampened area may need 15–30 minutes or longer, depending on material thickness, cleaner type, room temperature, and humidity.
Do not apply adhesive over:
- Leather conditioner
- Shoe polish
- Wax
- Silicone protector
- Waterproofing spray
- Grease
- Wet cleaning residue
- Loose pigment or finish
Avoid assuming that acetone, strong alcohol, or household degreaser is safe. These products can strip pigment, dull gloss, dry the leather, or create visible rings.
If color transfers heavily to the cloth during cleaning, stop. The finish may be unstable, and further preparation could create a permanent mark.
When the surface remains oily after gentle cleaning, changing the adhesive or adding reinforcement is often safer than repeatedly stripping the leather.
Do Smooth Surfaces Need Roughening?
Some glossy leather surfaces benefit from light roughening because it removes weak surface contamination and provides more area for adhesive contact. It is not appropriate for every material.
Light preparation may help when:
- The surface is very smooth and glossy
- A test bond peels away cleanly
- The roughened area will remain hidden
- The leather is thick enough to tolerate abrasion
- The finish is not printed, metallic, or delicate
Roughening may be unsuitable when:
- The leather is thin
- The visible surface may be damaged
- The material is coated faux leather
- The finish contains a printed design
- The suede nap is part of the visible appearance
Use fine abrasive material with light, even pressure. Work only inside the marked bonding area. The goal is a subtle matte texture, not deep scratches.
Remove loose particles after preparation. Dust left behind can become a new weak layer between the adhesive and leather.
A controlled test is more reliable than guesswork. Compare a cleaned-only sample with a lightly roughened sample using the same adhesive quantity, pressure, and cure time. If both perform similarly, choose the less destructive method.
How Do You Protect Suede Nap?
Suede can be damaged by wet glue, dirty tools, excessive pressure, and repeated rubbing. Protect the visible nap before application begins.
Place the material on a clean, smooth surface. Avoid rough towels, corrugated cardboard, or textured pads that may leave marks. Work with clean, dry hands or powder-free gloves, especially when handling pale suede.
Mark the adhesive boundary on the hidden side. Keep the glue line slightly inside the edge to reduce squeeze-out. Apply several small deposits and spread them into a thin film instead of placing one heavy pool in the center.
Use release paper or a smooth non-stick sheet between the project and any weight. A flat board distributes pressure more safely than several small clamps.
If adhesive reaches the visible nap, avoid rubbing it immediately. Rubbing pushes the liquid deeper and spreads the affected area. Follow the glue’s cleanup instructions and test the same method on scrap suede first.
After full cure, inspect the surface under side lighting. A flattened or hardened section may be difficult to see from directly above but obvious when light moves across the fibers.
Which Tools Keep Application Clean?
The correct tool depends on project size, adhesive viscosity, and the level of precision required.
Useful tools include:
- Fine-point nozzle for patches, narrow seams, and edge repairs
- Small flat brush for medium-size lining panels
- Silicone spreader for creating a thin, even film
- Mini roller for smoothing fabric after placement
- Release paper for protecting exposed surfaces
- Smooth board for distributing pressure
- Cotton swab for limited cleanup
- Removable alignment guides for controlling glue boundaries
Keep adhesive brushes separate from brushes used for leather dye, conditioner, waterproofing products, or suede care. Small amounts of oil or silicone can contaminate the bond.
Before opening the glue, perform a dry run. Position the materials, test the alignment, and place every tool within reach. This prevents searching for a roller or weight while the adhesive is already setting.
For repeat production, use the same applicator and spreading process each time. Changing tools can significantly alter glue quantity, even when the layer appears similar.
How Do You Apply Fabric Glue?
Apply fabric glue as a thin, continuous film, following the product instructions for one-sided or two-sided coating. Align the materials during the available working time, press the full bond area evenly, and keep the assembly undisturbed until full cure. Excess adhesive can cause staining and stiffness, while incomplete coverage creates dry spots and peeling edges.
How Thin Should the Glue Layer Be?
The correct adhesive layer is thick enough to cover the full bond area but thin enough to avoid pools, ridges, squeeze-out, and bleed-through.
There is no universal thickness because adhesives differ in viscosity, solids content, and drying behavior. Material absorbency also changes how much glue remains in the joint.
A useful test uses three 50 × 50 mm samples with light, controlled, and heavy application levels.
| Application level | Visual appearance | Likely result |
|---|---|---|
| Too light | Broken film or dry gaps | Weak areas and lifting edges |
| Controlled thin layer | Continuous, even coverage | Good balance of flexibility and strength |
| Too heavy | Pools, ridges, and squeeze-out | Stiffness, staining, and slow curing |
After full cure, compare:
- Bond continuity
- Flexibility
- Edge lift
- Bleed-through
- Darkening
- Visible ridges
- Ease of bending
Do not control usage by squeezing harder or holding the tube in one place. Move the nozzle steadily and spread the bead into a consistent film.
More glue does not automatically mean more strength. Once both surfaces make complete contact, additional thickness often produces stiffness rather than useful adhesion.
Do You Coat One Side or Both?
The correct coating method depends on the adhesive chemistry. Some fabric glues are designed for one-sided wet bonding. Contact adhesives commonly require both surfaces to be coated and allowed to reach a specified tack stage.
For lightweight fabric bonded to leather, applying adhesive to the leather side may reduce bleed-through. For two absorbent materials, coating both surfaces may improve coverage if the product instructions allow it.
Do not assume that waiting longer always improves adhesion. A wet-bond glue may lose effectiveness if it dries too far before joining. A contact adhesive may perform poorly if the surfaces are pressed together too soon.
A reliable application sequence is:
- Read the product instructions.
- Decide which surface provides better control.
- Apply a thin, even film.
- Observe the stated open or set time.
- Join the pieces once, with accurate alignment.
- Apply even pressure across the full bond.
For the GleamGlee fabric-glue specification used in this article, the adhesive is applied evenly, the materials are pressed together, the bond begins setting in approximately 6–10 minutes, and full cure requires up to 24 hours.
Leather and suede should still be tested because surface treatments and absorbency vary.
How Do You Align and Press the Pieces?
Dry-fit the materials before opening the glue. Mark hidden alignment points and confirm that curves, corners, and edges meet correctly.
For a small patch, lower one edge first and roll the piece gradually into position. This helps release trapped air.
For a large fabric lining, begin from one controlled side or the center and smooth outward. Do not drop the entire panel onto the wet adhesive at once.
Avoid stretching fabric unless the design specifically requires tension. Stretched cloth may contract later and pull against the bond.
Pressure should be even across the entire joint. Finger pressure may be sufficient for a small appliqué. Larger panels benefit from a mini roller, smooth board, or distributed weights.
Place release paper between the visible leather or suede and any pressing surface. Avoid narrow clamps directly on soft materials because they can leave dents or push excessive glue toward the edges.
Repeated lifting and repositioning can damage the adhesive film. If a project requires extended alignment time, use a formula with suitable working time rather than trying to correct a fast-setting product.
How Long Should the Bond Cure?
Initial set and full cure are different stages. A joint may feel stable after several minutes while the adhesive inside remains soft.
For this product specification:
- Position the materials immediately after applying the glue.
- Maintain stable pressure during the first 6–10 minutes.
- Avoid bending, pulling, washing, or heating during the early cure.
- Allow up to 24 hours before normal use or durability testing.
Cool rooms, thick glue layers, low airflow, and non-porous surfaces may extend practical drying time.
Do not judge cure only by touching the exposed edge. The outer film may feel dry while the adhesive deeper inside the joint continues developing strength.
Keep the project flat during early curing. Do not hang a repaired bag, fold a wallet, wear a garment, or test a patch prematurely.
For washable textile projects, wait through the full cure period before laundering. The garment care label remains important. Leather and suede should not be washed or ironed simply because the adhesive can tolerate those conditions on suitable fabric.

What Mistakes Weaken the Bond?
Bond failure usually comes from surface contamination, excessive or insufficient glue, uneven pressure, premature handling, or using a light craft adhesive on a structural joint. Staining, stiffness, and peeling are often caused by the application process rather than proving that all fabric glue is unsuitable for leather or suede.
Why Does Glue Soak Through or Stain?
Glue soaks through when the material absorbs liquid faster than the joint can retain it. Thin cotton, lace, felt, suede, and lightweight lining fabrics are especially vulnerable.
Staining may appear as:
- A dark patch
- A shiny ring
- A stiff area
- A visible glue line
- Dye movement
- Flattened suede fibers
A clear-drying adhesive can still leave a visible mark. “Clear” refers to the cured adhesive film, not the way moisture or absorbed resin affects the material.
Control the risk by:
- Testing the exact material
- Applying glue to the less absorbent side
- Using a fine applicator
- Keeping adhesive inside the visible edge
- Applying moderate, even pressure
- Avoiding heavy rubbing on wet suede
If a test sample darkens, reduce the application amount before changing products. If a very thin film still causes staining, the formula may not suit that material.
Do not scrub fresh glue from suede with water or solvent unless the product instructions explicitly support that cleanup method.
Why Does the Bond Become Stiff?
Stiffness usually comes from excessive adhesive, an overly rigid formula, or deep glue penetration into soft fibers.
A heavy bead can cure into a strip that behaves differently from the surrounding material. This is especially noticeable on garment leather, suede, thin bag linings, and costume materials.
A wider overlap with a thin film often performs better than a narrow overlap filled with a thick bead. For example, a 15–20 mm hidden overlap generally distributes force more effectively than a 5 mm strip carrying the same load.
After curing, compare the bonded area with an untreated piece. Bend both slowly. A flexible bond should follow the material without creating a sharp hinge.
If the bonded section remains flat while the surrounding material folds around it, the glue film is probably too thick or rigid.
Do not use leather conditioner, oil, direct heat, or solvent to soften a cured joint. These treatments may weaken adhesion and stain the material. Rebuild the joint using less glue or a more flexible adhesive.
Why Do Bonded Edges Peel?
Peeling usually begins at the edge because force concentrates there. The center of a patch may remain attached while a corner catches on clothing or nearby objects.
Rounded corners are generally less vulnerable than sharp points. A small corner radius of approximately 3–5 mm can reduce snagging on decorative patches.
| Failure pattern | Likely cause | Practical correction |
|---|---|---|
| Glue remains on fabric | Poor contact with leather | Improve preparation or change adhesive |
| Glue remains on leather | Fabric absorbed too much adhesive | Adjust coating method |
| Suede fibers pull away | Weak surface layer | Add backing or reinforcement |
| Glue film tears internally | Insufficient adhesive strength | Select a stronger formula |
| Corners lift first | High edge peel stress | Round or protect the corners |
| Entire panel releases cleanly | Contamination or poor wetting | Reclean, retest, or change glue |
| Center holds but edge lifts | Incomplete edge coverage | Extend the thin film evenly |
Do not repeatedly inject more glue beneath a loose edge without removing unstable material. This creates a hard ridge and makes later repair more difficult.
For handles, straps, belts, and frequently folded edges, peeling is often a sign that the joint needs stitching or mechanical reinforcement.
Can Heat or Moisture Damage the Bond?
Heat can soften some adhesives, accelerate aging, or cause materials to expand at different rates. Moisture can enter exposed edges, affect uncured glue, move dyes, or weaken adhesion to contaminated surfaces.
A washable glue does not make every bonded item washable. The complete project is limited by its most sensitive component.
Genuine leather, suede, decorative finishes, metallic coatings, and some faux leathers may not tolerate machine washing even when the adhesive can.
For ironable fabric work:
- Wait through the full cure period.
- Follow the textile care label.
- Avoid direct contact between the iron and exposed glue.
- Use a protective cloth when appropriate.
- Do not apply normal garment heat to leather or suede without material-specific guidance.
Test only the conditions the item will realistically face. A clothing patch may need a wash test. A leather pouch may need repeated opening and closing. A decorative display item may need only stable indoor performance.
How Do You Verify a Reliable Repair?
Verify the repair only after full cure by checking appearance, flexibility, edge security, and bond continuity. Then perform gentle bending, pulling, or realistic use tests. A dependable repair should remain attached without creating hard ridges, discoloration, or damage to the surrounding material. Structural joints should also use specialist adhesive, stitching, rivets, or other reinforcement.
Which Projects Suit Fabric Glue?
Fabric glue is best suited to projects with a reasonable bonding area and low to moderate stress.
Suitable uses often include:
- Decorative leather patches
- Fabric bag linings
- Ribbons and lace
- Appliqués
- Costume details
- Interior wallet fabric
- Suede craft shapes
- Lightweight trim
- Fabric backing behind a small tear
- No-sew textile alterations
Projects requiring greater caution include:
- Leather tears in high-movement areas
- Large upholstery repairs
- Outdoor equipment
- Handbag straps
- Belts
- Shoe components
- Frequently folded wallet edges
Ordinary fabric glue is not suitable as the only fixing method for shoe soles, heavy handles, climbing equipment, protective gear, or joints where failure could cause injury.
The fabric glue described in this article is designed primarily for clothing, denim, curtains, embroidery, ribbons, buttons, sequins, patches, crafts, and flexible textile repairs. Leather and suede should be treated as compatibility-tested mixed-material applications.
How Do You Test Flex and Peel Resistance?
Wait through the full cure period before testing. Early handling measures an unfinished joint and may create avoidable damage.
For a basic flex test:
- Prepare a sample using the real project materials.
- Allow the full 24-hour cure.
- Bend it slowly in both directions.
- Repeat approximately 20 cycles.
- Inspect for cracks, whitening, stiffness, and lifting.
For a simple peel comparison, leave a small unbonded tab at one end. Pull it back slowly at a similar angle for every sample.
Observe where the failure occurs:
- Adhesive separates from the leather
- Adhesive separates from the fabric
- The glue film tears internally
- Suede fibers pull away
- The base material tears before the bond
These failure patterns help identify whether the weakness is in surface preparation, adhesive strength, material structure, or joint design.
Commercial testing should use consistent sample dimensions, controlled cure conditions, and clear acceptance criteria. Depending on the intended market, evaluation may include peel strength, repeated flexing, heat aging, humidity exposure, laundering, and storage stability.
Are Washable Claims Relevant to Leather?
Washable claims apply to the adhesive under stated conditions, not automatically to every bonded material.
Fabric glue may remain secure after laundering, while genuine leather or suede may shrink, fade, harden, or lose finish.
For washable textile repairs, define:
- Cure time before washing
- Water temperature
- Wash cycle
- Detergent type
- Drying method
- Ironing temperature
- Number of test cycles
For leather and suede projects, flexing, humidity, edge lifting, and normal handling may be more relevant than machine washing.
The GleamGlee fabric-glue specification states that cured adhesive is washable and ironable for compatible textile applications after full cure. Those claims must be used together with the care instructions for the garment or fabric.
A leather item should not be placed in a washing machine solely to test the adhesive. Validate the complete construction according to the material with the lowest heat and moisture tolerance.
When Should You Sew or Reinforce the Bond?
Use stitching or mechanical reinforcement when the joint carries weight, experiences repeated pulling, bends sharply, or protects valuable contents.
Reinforcement is particularly important for:
- Bag handles
- Shoulder straps
- Belts
- Shoe components
- Upholstery seams
- Tool pouches
- Outdoor equipment
- Thick folded leather
- Frequently opened wallet edges
Glue can still be useful. It holds the layers flat, improves alignment, spreads force, and prevents movement before stitching.
A dependable construction may use a thin adhesive layer followed by perimeter stitching. Rivets can strengthen high-load points, while folded edges protect the adhesive from direct peeling.
For a decorative patch, glue alone may be sufficient after successful testing. For a strap carrying a loaded bag, adhesive should normally be only one part of the joint.
The most reliable repair is not necessarily the one using the strongest glue. It is the one that matches adhesive flexibility, overlap area, material strength, curing time, and reinforcement to the stresses the item will face.
Conclusion
Retailers, distributors, Amazon sellers, Shopify brands, craft companies, and leather-goods businesses should evaluate fabric glue against the exact materials and use conditions of the intended product. A formula that performs well on cotton and denim may require adjustment before it is positioned for leather, suede, faux leather, or mixed-material craft kits.
GleamGlee supplies 50 g single-tube and two-tube fabric-glue formats for textile repairs, patches, clothing alterations, trims, crafts, and other flexible applications. Based on the supplied product specification, the glue begins setting in approximately 6–10 minutes, reaches full cure within 24 hours, dries clear, and remains flexible after curing.
Private-label and custom projects can be developed around factors such as:
- Target leather, suede, fabric, or synthetic substrate
- Desired viscosity and application control
- Flexible or faster-curing performance
- Clear or customized appearance
- Wash and heat requirements
- Precision nozzle, brush, or alternative applicator
- Single-tube, multipack, or retail-kit packaging
- Multilingual labels and instructions
- EU, UK, US, or Canadian market requirements
- FBA-ready and retail-ready packaging
The stated customization MOQ begins at 200 units. Print-ready design work may be prepared in as little as two days, sample development usually takes 7–14 days, and standard bulk production is approximately 20 days, with faster scheduling available for qualifying projects.
To request a quotation, provide:
- Intended materials
- Main use scenario
- Package size
- Expected order quantity
- Target sales country
- Required setting and curing time
- Wash, heat, or flexibility requirements
- Existing benchmark product or sample
These details make it possible to determine whether an existing fabric-glue formula fits the application or whether a leather- and suede-focused version should be developed.





















