Skip to content


Adding several patches to a jacket, pair of jeans, shirt, or uniform can make a garment feel personal, but the hardest decision often comes before sewing or pressing: where should each patch go? A layout that looks balanced on a table can shift visually when the garment is worn. A patch may cover a pocket opening, land across a stiff seam, or make one side look much heavier than the other. Planning all the patches together helps you catch these issues while every piece is still easy to move.
The most reliable starting point is to arrange the full set before permanently attaching anything. Choose one patch to act as the focal point, place the remaining patches around it, and use garment features such as seams, pocket edges, plackets, and hems as visual guides. Then put the garment on, check the layout from several angles, and test normal movement. Only after the layout works on the body should you mark and attach the patches.
How to Position Multiple Patches on Clothing
A clean result comes from solving the layout in a fixed order: check the garment and patch constraints, identify the design goal, create a complete arrangement, test it on the body, and only then choose how to attach each piece. This order matters because patch position and attachment are linked. A location that is easy to sew may be poor for movement, while an ideal-looking spot may be unsuitable for heat or adhesive. Treat each decision as a small checkpoint before making the next one.
Start with the whole set, not one patch at a time
Take out every patch you may use and place the garment on a clean, flat surface. Make sure the clothing is dry and smoothed out, then separate the patches into rough groups by size, shape, color, or theme. This simple inventory prevents a common planning problem: attaching the first few patches in attractive spots, then discovering that the last large patch has nowhere sensible to go. If you are not sure you want every patch, keep a second group nearby as optional pieces rather than forcing all of them into the design.
Before making a layout, record the dimensions of the patches that have strict orientation or text. A rectangular patch with lettering may need to stay level, while a curved emblem can fit into a less regular space. You do not need a design program for this step. A small note with each patch’s width and height, plus a quick photo of the garment front and back, is enough to compare available spaces and notice which pieces will compete for the same area.
Sort patches by purpose, backing, and priority
Before placement, classify each patch by what it needs to do. A decorative badge can be placed for visibility; a repair patch must cover the damaged area and extend onto sound cloth; an official insignia may have a required position; and a name or text patch needs to remain legible. Then note the backing, thickness, dimensions, orientation, and care requirements. Two patches that look similar from the front can behave differently when sewn or heated, so this inventory prevents an attractive mock-up from relying on an attachment method the materials cannot tolerate.
Use the following short inventory for each patch. It is more reliable than trying to remember differences while moving ten similar pieces across a jacket. A phone photo with a number beside each patch is enough for most personal projects, and you can put the same number on a paper template. For collections that include official, repair, and decorative pieces, use separate marks or colors on the sketch so the non-negotiable placement constraints remain visible throughout the design process.
- Purpose: decorative, repair, identity, uniform, or a mix.
- Dimensions and orientation: widest point, tallest point, and which edge is the top.
- Backing: sew-on, heat-activated, pressure-sensitive, hook-and-loop, or another construction.
- Fabric constraints: the garment fiber, lining, finish, stretch, and care-label limits.
- Priority: anchor, supporting patch, optional filler, or piece reserved for a later stage.
Choose a focal patch and build outward
Select the patch that matters most to the wearer or has the strongest visual weight. It may be the largest patch, a back patch, a symbol with personal meaning, or a piece whose text needs to be easy to read. Set it in a likely position first, then arrange medium patches nearby and use small patches to connect open areas. This gives the eye a clear place to land while leaving the rest of the layout flexible. If several patches are the same size, choose one based on color contrast or meaning instead of pretending there is an objective “correct” center.
Use the garment’s own structure as a loose planning grid. On a denim jacket, the button placket, pocket edges, shoulder seams, side seams, and lower hem can help you compare alignment. A patch can sit parallel to one of these features without being mathematically centered in a panel. On a shirt or hoodie, the collar, center line, pocket, and sleeve seam can play a similar role. Treat these lines as references, not rules: a deliberately tilted patch can work if the whole layout looks intentional and does not interfere with how the garment closes or moves.
Compare complete layouts before fixing anything
Create at least two complete arrangements before choosing one. In the first, try a more ordered pattern with repeated spacing or mirrored patches; in the second, group patches by theme or color and leave a different amount of blank fabric. Take a photo of each version from directly in front of the garment, then compare the photos at normal screen size. The camera view makes it easier to spot a crowded corner, an accidental diagonal, or a patch that draws attention away from the main design.
If you are building a battle jacket or vest, watch the full garment as the layout develops before borrowing any particular arrangement. The useful lesson is the process: test positions, add pieces in relation to existing patches, and inspect the result as a whole. Do not copy the final density automatically, because a different jacket cut, patch size, wearer, or style can call for more open fabric or a different focal point.
- Video demonstration: How To Make A Battle Jacket — follow the patch-planning and placement segment around 2:22 to see how pieces are considered together before the finished vest is judged. This is a process example, not a universal layout template.
Leave a growth zone if the project will continue
If the jacket, vest, or travel garment will collect new patches over time, treat open space as reserved capacity rather than accidental emptiness. A sleeve section, lower back band, or secondary front panel can remain relatively clear for future pieces, while the first group forms a complete design on the rest of the garment. This avoids the common pattern of filling every attractive location early and later forcing new patches into narrow gaps. If the project is intended to be finished now, use the open space deliberately rather than leaving it by default.
For a growing collection, mark the current arrangement as a first phase in the photo or sketch. Record which zone remains open and its approximate usable width and height, but do not promise that a future patch will fit until its real dimensions are known. A small reserved area can preserve flexibility without making the garment look unfinished; the key is to create a visible boundary between the current composition and the area intended for future additions.
Save a record of the approved plan
When a layout feels close, take clear photos of the front, back, and sleeves before moving anything. Photograph the garment flat and, if possible, while it is being worn. These images become a simple reference if a patch shifts while you sew or if you split the project over several days. Numbering the patches on a quick sketch can also help when several similar pieces are involved. Keep the photo with a note of which patch is the focal point and which edges you used as alignment references.
A first-hand patch-jacket project is useful evidence for the planning process, but it should be read as a personal craft example rather than a controlled test of one ideal spacing rule. The project documents arranging patches together, using seams and plackets as references, trying the jacket on, and photographing the layout before sewing. It also shows that open denim and denser coverage can both work when they fit the maker’s intended style.
- Practical project reference: Aro Worlds’ patch jacket tutorial — see how the maker plans the full set, compares placement against garment seams, and checks the worn jacket before stitching.
Where to Place Patches on Jackets, Jeans, Shirts, and Uniforms
Think of a garment as a set of panels with different jobs instead of one uninterrupted canvas. A chest panel is usually visible, a back panel offers broad space, sleeves move and twist, and knees or elbows bend repeatedly. Those physical differences affect both appearance and comfort. Before choosing exact coordinates, locate the seams, openings, lining, stretch zones, and likely friction points, then decide which areas are available for decoration and which need to stay clear.
Jackets and vests
Jackets offer several natural placement zones: the upper chest, areas above or beside pockets, sleeves, shoulders, the lower front, and the back panel. A large patch often works best on a broad panel where it can be seen without crossing a closure. Smaller patches can sit near pockets, along the lower hem, or on sleeves, provided they do not cover pocket openings, buttonholes, zippers, vents, or adjustment tabs. A layout that uses the center back as a focal area can balance smaller pieces across the front, but this is only one option.
Check the interior construction before choosing a final location. A lined jacket may have an inner pocket, loose lining, or insulation behind the outer shell. Sewing through both sides can trap a pocket or create an uncomfortable line against the body. A thick seam can also be difficult to stitch through and may make an iron-on patch sit unevenly. If the garment has decorative seams or panels, use them to create alignment, but leave enough distance from the seam so the patch edge does not lift or bunch when the jacket is worn.
Jeans and trousers
On jeans, patches can be placed on the thigh, lower leg, knee, back pocket, or near a hem. Start by checking how the pants look while standing, then sit and bend the knees. A patch positioned directly over a bend may crease or feel stiff, particularly if it is large or has a thick embroidered border. The back pocket area is visually prominent, but attaching a patch across the pocket opening can make the pocket difficult to use. Decide whether you want the patch on the pocket itself or on the fabric beside it before marking anything.
For a balanced pair of jeans, compare the left and right legs from the front and back rather than judging one leg at a time. The patches do not need to be mirrored, but color and size can be distributed so that one side does not feel much heavier. Keep the patch away from the inseam and other areas where fabric rubs repeatedly if the patch is stiff. If the purpose is to cover a tear, inspect the surrounding fabric too; a decorative patch may hide a small mark, but it may not reinforce worn or weakened cloth well enough for repeated movement.
Shirts, hoodies, and knitwear
For shirts, common starting points include the chest, sleeve, upper back, and lower front. A button placket or center line can help you keep lettering level, and the pocket edge can serve as a reference for a smaller design. On a hoodie, consider the pocket pouch, drawstrings, hood seam, and zipper before selecting a position. A patch close to a fold or opening may look different when the garment is worn than it does while flat. Leave enough room for the fabric to drape naturally around the patch.
Stretch fabrics need a separate check because a patch can reduce stretch in the area beneath it. Test the garment’s movement before committing, especially if it is a fitted shirt, athletic top, or knit sleeve. If the patch backing is thick, place it where the fabric is less likely to stretch repeatedly. A small, flexible patch may behave differently from a dense embroidered emblem, so do not assume that two patches with the same dimensions will feel equally comfortable once attached.
Uniforms and official badges
Uniform patches are not always decorative choices. Schools, scouting organizations, clubs, employers, and public-service groups may specify which insignia belong on which garment panel and how they should be arranged. Check current instructions for the exact organization before planning the layout; a general style diagram cannot override an official uniform guide. A real example is the Girl Scouts’ current insignia page, which links to its 2025 “How to Wear” guide and illustrates why official badge arrangements should be checked before any decorative styling.
- Official placement reference: Girl Scouts Uniforms and Insignia — use the current insignia guide when arranging Girl Scout badges; follow the relevant organization’s own rules for other uniforms.
- Downloadable placement guide: Scouting America Guide to Awards and Insignia, Section 1 (PDF) — official diagrams show designated sleeve and pocket positions for Scouting America uniforms; these rules apply to those uniforms, not casual clothing.
For branded workwear, sports uniforms, and school garments, also check whether names, safety markings, reflective strips, or sponsor logos must remain visible. A visually tidy arrangement can still be inappropriate if it hides identification or required information. If a uniform owner has not supplied a placement diagram, ask the organization for its current instructions rather than guessing. For ordinary casual clothing, personal preference can lead the decision; for regulated or organization-issued clothing, the wearer may have less freedom.
Use garment placement charts as references, not universal rules
Commercial embroidery placement guides can help readers recognize common areas such as left chest, upper sleeve, back yoke, or center back. The diagrams are made for decorated apparel, so use them to identify familiar zones rather than treating them as a precise instruction for consumer patches. A logo chart may assume a standard polo silhouette and a professional decoration process; a jacket, handmade vest, or garment with a different cut can place the visual center somewhere else.
- Downloadable placement chart: Vantage Apparel Popular Placement Guide (PDF) — compare standard apparel-decoration zones, then adapt them to the actual garment’s panel, pocket, and seam layout. Vantage notes that placement varies with silhouette and logos.
| Garment area | Useful visual references | Check before attaching |
|---|---|---|
| Jacket chest | Placket, pocket edge, shoulder seam | Buttons, zipper, pocket opening, logo visibility |
| Jacket back | Center back seam, yoke, side seams | Fit across shoulders and room for movement |
| Sleeve | Shoulder seam, elbow area, cuff | Arm bend, cuff opening, sleeve lining |
| Jeans | Side seam, pocket edge, knee line, hem | Sitting, bending, pocket access, rubbing |
| Shirt or hoodie | Center line, collar, pocket, hood seam | Drape, stretch, drawstrings, closure |
| Uniform | Official insignia diagram | Organization rules and required markings |
How to Balance Patch Size, Color, Shape, and Spacing
Balance is easier to judge when you separate the design into four questions: what should attract attention first, which pieces belong together, how the empty fabric should feel, and whether repeated edges or colors create a rhythm. There is no industry measurement that makes every personal layout attractive. The practical test is whether the arrangement looks intentional at normal viewing distance, stays readable when worn, and leaves enough room for the clothing to do its job.
Give the eye a clear focal point
A layout feels easier to read when one or two patches attract attention first and the rest support them. Visual weight comes from more than physical size. Bright colors, dense embroidery, high contrast, lettering, and unusual shapes can all make a small patch stand out. If several patches compete equally, try moving one toward a less prominent zone or separating it from a cluster. The aim is not to make every patch identical in importance; it is to make the overall arrangement feel deliberate.
A practical way to test visual weight is to look at a photo in grayscale or squint slightly at the garment from a few steps away. Strong light-dark areas will remain noticeable even when color is removed, which can reveal whether all the visual attention is concentrated on one side. This is a design check, not a scientific measurement. If the layout still reads clearly at a distance and the wearer can point to the intended focal patch, the hierarchy is probably working for that design.
Choose between symmetry, rows, and loose clusters
Symmetry can make a uniform, team garment, or neatly arranged denim jacket feel orderly. Matching patches on both sides of a center line are easy to compare, especially when their shapes and colors are similar. Rows can work well along a hem or across a broad back panel, but they need a level reference and consistent gaps. A slight difference in patch width can make a row look uneven, so align the visual centers or top edges rather than assuming every patch will naturally line up.
Loose clusters are often better for mixed shapes and patches with different themes. Group pieces that share a color, subject, or personal story, then leave a little separation between groups. An asymmetrical layout can still feel balanced if a large patch on one side is counterweighted by several smaller pieces on the other. Before attaching anything, compare the entire jacket as a photo at thumbnail size; if one side looks much darker or busier, move one attention-heavy patch or create a clearer supporting cluster.
- Video comparison: Battle Jacket Update: Patch Layout Options — compare alternative patch arrangements on a jacket and notice how moving a group changes the overall balance. Use it for ideas, not as a rule for a different patch set.
Use color and shape to connect separate areas
Repeating one or two colors across the garment can make patches feel related even when they are different sizes. For example, a red detail on the chest can be echoed by a smaller red accent on the sleeve or lower back. Repetition does not mean using every color the same number of times. Instead, look for a few colors that recur naturally and avoid accidentally placing all high-contrast patches in a single small area unless you want that zone to dominate.
Shape can also create a visual rhythm. Several rectangles may look orderly when their edges follow a seam; circles or irregular shapes can soften a grid-like layout. If a patch has a pointed top, lettering, or an obvious direction, orient it consistently with the garment unless a deliberate angle is part of the design. A useful second view is grayscale: it temporarily removes hue and makes light-dark contrast easier to compare, revealing whether the heaviest visual patches all sit in one small area.
- Video example: DIY Embroidery Patch & Pin Jean Jacket — observe how embroidered patches and small pin accents can share a denim jacket, and use the mix of sizes and shapes as a composition reference.
Decide how much blank fabric to leave
There is no universal gap that makes every patch layout look right. A dense battle vest, a tidy work jacket, and a shirt with two small accents have different goals and available space. Begin with the patch sizes and the garment panel, then adjust the empty areas by eye. If the edges almost touch, check whether the pieces look crowded; if a large empty patch of fabric separates every item, see whether moving a small patch closer creates a clearer group. The wearer’s preferred style matters more than an arbitrary spacing number.
If you are arranging patches in a single straight row, a spacing calculation can provide a starting point: subtract the combined patch widths and chosen side margins from the usable panel width, then divide what remains by the number of gaps between patches. For example, a 36-centimeter panel with 8-, 5-, and 6-centimeter patches has 19 centimeters of patch width. If you reserve 2 centimeters at each outer edge, the two internal gaps share 13 centimeters, or 6.5 centimeters each. This is arithmetic for a straight row, not an aesthetic recommendation. If that gap looks too wide, arrange a tighter cluster or use a different panel rather than pretending the formula sets a universal ideal.
- Calculation tool: Calculator.net basic calculator — use it for simple width, margin, and gap arithmetic; the final spacing still needs a visual fit check.
How to Preview and Mark a Patch Layout Before You Attach Patches
The preview stage is where an inexpensive design adjustment can prevent a permanent sewing hole, heat mark, or adhesive stain. Use a mock-up that matches the actual patch dimensions, not a rough sketch with guessed sizes. Then examine the arrangement both flat and on a person, since curved panels and folds change the apparent spacing. Keep the test method gentle: pins and marking tools can damage some fabrics, so use them only after checking the garment and testing on a hidden area.
Make full-size paper templates
Cut paper shapes to the actual width and height of each patch, and write a short label on each template. For a patch with text or a directional image, draw an arrow showing which way is up. Paper templates are inexpensive and let you compare several arrangements without repeatedly handling the patches. Lay them on the garment and take photos from directly above. If you are planning a front and back design, keep separate template sets or label which side each piece belongs to.
A printout or digital outline can help when patches are numerous, but keep the source image at the correct scale. A patch drawn at 5 centimeters on screen is not useful if the printer scales the page to fit. A phone photo can also serve as a light-weight mock-up: photograph the garment straight on, add labeled rectangles over the image, and compare two or three complete arrangements without making a new design board. Check any digital planner against the real patch dimensions because a silhouette template may not match the exact size or cut of your garment.
- External layout tool: The Black Thread Battle Jacket Builder — place patches on true-centimeter jacket or vest templates, switch between front and back views, and export a plan image. It is aimed at battle jackets and vests, so it is a planning aid rather than a sizing authority for shirts, jeans, or uniforms.
Check the garment on a body or dress form
When the flat layout is ready, wear the garment or place it on a dress form. Look at it from the front, back, and side, because the body changes how panels curve and how patches relate to one another. Check the shoulder and chest balance while standing naturally, then sit, bend, and raise both arms. A patch near a pocket can disappear under a fold; a patch on the upper back may sit differently when the shoulders move. Photograph the worn layout so you can compare it with the flat version.
If another person helps with placement, have them stand at a normal viewing distance and describe what they notice first. They can point out a patch that appears tilted, hidden, or too close to a closure. This is a visibility check, not a vote on fashion. A short alignment demonstration can also help beginners see why the patch should be positioned, checked against nearby edges, and rechecked before heat is applied.
- Video demonstration: How to Apply Iron On Patches — observe the maker align a patch with garment features and review the position before pressing. Follow the instructions supplied with your own patch and garment rather than copying the video’s heat settings or timing.
Run a four-view fit check before transferring marks
A flat lay answers only whether patches fit on the fabric panel. A body check answers whether those patches still look level when the garment curves and folds. For a repeatable review, photograph the front, back, and both sides from roughly the same distance, then wear the garment and compare the patches with the center placket, shoulder seams, pocket edges, and hem. The goal is not mathematical perfection; it is to catch a tilt or collision that appears only when the garment is shaped around a person.
Use a short movement sequence that reflects real wear. Stand with arms relaxed, raise both arms, reach forward, sit down, bend at the waist, and bend the knees if the patches are on trousers. Open every pocket and closure during the same test. If a piece rotates, wrinkles the fabric, catches on a strap, or disappears under a fold, move it before marking. This check is especially useful for sleeves, knees, elbows, and fitted garments where a flat measurement can give a misleading impression.
- Try-on sequence: front and back visibility; relaxed stance; arms raised; seated posture; normal bend; pocket and closure access.
Mark points without damaging the fabric
Choose a marking tool that can be removed from the specific fabric, and test it first on a hidden area or a scrap from the same garment. Use a small mark at the patch corners or center rather than drawing a complete outline that may remain visible. Mark only after the worn layout is approved, and make the marks inside the edge or at alignment points that the patch will cover. The Utah State University Extension sewing guide advises selecting a removable marking tool and testing it on a project-fabric scrap before use.
- Evidence and supplies reference: Utah State University Extension Basic Sewing Supplies — see its guidance on testing fabric markers and its descriptions of rulers, needles, and press cloths.
For temporary positioning, choose the least intrusive method that suits the garment: paper templates while flat, clips on an accessible edge, a few hand-basting stitches on sturdy fabric, or pins used carefully after the garment is off the body. Do not wear clothing with pins still in it, and do not press an iron over a trial layout. Avoid pinning delicate, coated, waterproof, or easily snagged fabrics unless you know the pins will not leave marks. Once the location is approved, transfer the marks and remove all temporary pieces before attaching the patches.
How to Keep Patch Placement Comfortable and Functional
A patch changes more than the appearance of the surface. It can stiffen a panel, cover an opening, catch on a bag strap, or make a repeated bend less comfortable. Before approving a design, trace the garment’s normal movements and inspect both the face and the inside. This is especially useful for lined jackets, fitted shirts, work clothing, athletic garments, and any piece worn for long periods, where an attractive placement can still become irritating in daily use.
Protect pockets, closures, seams, and openings
Before finalizing a position, open and close every pocket, zipper, button, cuff, vent, drawstring, and flap near the patch. A patch may look well placed while the garment is flat yet block the hand from entering a pocket or prevent a button from lying smoothly. On a lined jacket, check the inside with your hand to make sure a planned stitch will not trap the lining or join two layers that should move separately. These checks take only a few minutes and can prevent an annoying permanent change.
Use seams as alignment references when they help, but do not place every patch directly on top of thick seams. Several layers of denim, seam allowances, and patch embroidery can be difficult to sew through and may form a stiff ridge. A thick area can also prevent a heat-activated backing from contacting the fabric evenly. If the placement crosses a bulky seam, shift the patch slightly to one side or use a sewing method that can handle the thickness without damaging the garment.
Allow room for bending, sitting, and reaching
Think about which parts of the garment move during normal wear. Elbows bend, knees crease, shoulders rotate, and shirt fronts fold when the wearer sits. A rigid or heavily embroidered patch can make these areas feel less flexible, especially if the patch covers a broad section. Try the layout in the motions the wearer actually makes, such as reaching for a shelf, carrying a bag, or sitting at a desk. The test does not need special equipment; it needs the garment to be worn before the attachment is permanent.
For a sleeve patch, compare the position with the arm relaxed and bent. For a trouser patch, check both standing and sitting positions. If a patch repeatedly folds at its center or rubs against another panel, move it to a less active zone or use a smaller, more flexible piece. This advice is a practical fit check rather than a promise that any specific location will work for every person. Body shape, garment fit, patch thickness, and fabric stretch all affect comfort.
Check where the patch will rub against the wearer or equipment
A patch on the upper back may rub against a backpack, a lower-back design can meet a chair, and a thigh patch can brush against another leg or a bag. These areas are not automatically unsuitable, but repeated contact can lift an edge, irritate skin, or make a thick patch feel more noticeable. Ask how the garment will normally be used: commuting, school, work, concerts, sport, or occasional wear. Place important text and delicate edges away from the highest-contact area when the design allows it.
For bags and uniforms, consider straps, seat belts, harnesses, protective equipment, or reflective panels that cover parts of the garment during use. A patch hidden under a strap may not serve its visibility purpose, and added thickness beneath a snug strap can affect comfort. Check the garment with the actual item or equipment if the intended use makes it relevant. This is a practical wear observation, not a universal friction rating; patch materials, strap pressure, and fabric all vary.
Separate decorative placement from structural repair
A decorative patch can cover a stain or small mark, but hiding a hole does not always restore the strength of worn fabric. If cloth is frayed, thinning, or torn in a high-stress area, inspect how far the damage extends before deciding where the patch should go. For crotches, shoulders, underarms, load-bearing pockets, straps, and other areas that receive repeated pulling, a full stitched repair or professional alteration may be more suitable than adhesive alone. The patch should be large enough to extend onto sound fabric if it is being used to cover damage.
Keep the wearer’s needs in mind. A patch used to express a hobby can be positioned for visibility, while a repair patch may need to cover and stabilize weakened cloth. Those goals can overlap, but they are not identical. If a tear continues to grow, the fabric is delicate, or the garment is valuable, do not rely on decorative placement advice as a repair plan. Consider a tailor or experienced repair service, especially when preserving the garment’s fit or original finish matters.
Consider weight, backing, and fabric behavior
Large patches add weight and stiffness; multiple large pieces clustered on one panel can change how a light shirt or jacket hangs. Compare the patch backing with the garment fabric before deciding where to attach it. A dense embroidered patch may work comfortably on sturdy denim but feel bulky on a lightweight blouse. A heat-seal backing can also be unsuitable for a fabric that cannot tolerate the required temperature. When in doubt, test a comparable fabric scrap or ask the patch maker about the backing before modifying the garment.
For stretch knits, rainwear, coated fabric, silk, vintage clothing, and other delicate or high-value garments, test the entire attachment method in an inconspicuous place or seek professional help. The patch and clothing instructions both matter. A patch maker’s recommendation cannot override a garment label that warns against heat, and a glue label cannot guarantee compatibility with every dye, finish, coating, or blend. The goal is to preserve the fabric as well as secure the patch.
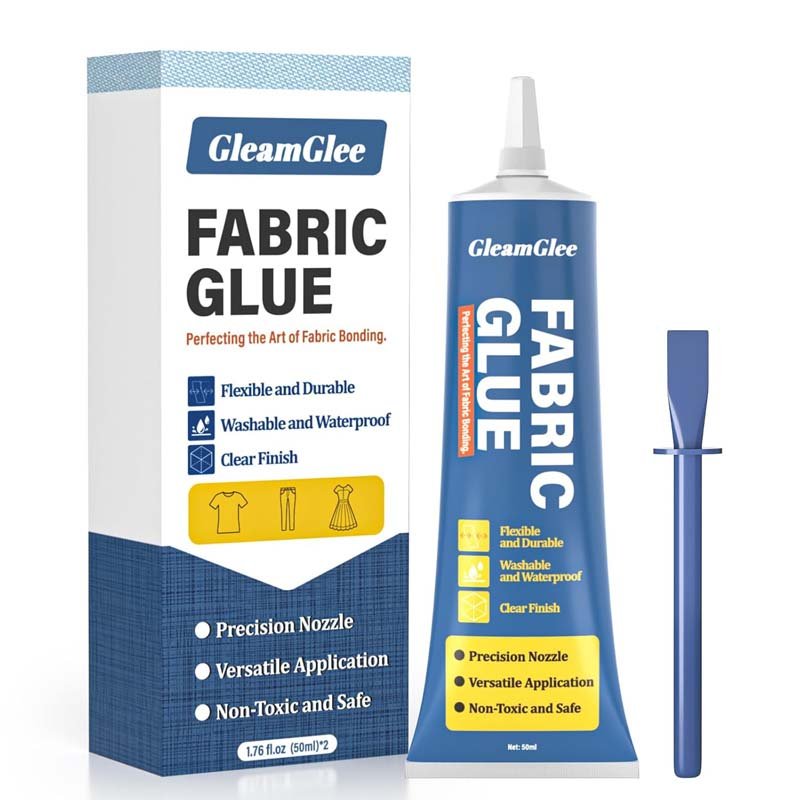
- Product-specific instructions: GleamGlee fabric compatibility and use guide — review the listed materials and its clean-surface, thin-application, test-area, and cure-time directions; follow the current bottle label for the product in hand. Its initial set of about 6–10 minutes and full cure of about 24 hours are product-specific, not universal adhesive timings.
How to Attach Multiple Patches After the Layout Is Final
Attachment is the last stage, not a shortcut for holding an undecided layout in place. Confirm each patch’s backing and the garment’s care limits, then choose a method patch by patch. It is possible for one garment to use stitching on a delicate sleeve, an iron-on patch on compatible denim, and another approved method elsewhere, but each choice must match the actual materials. Write down the sequence and keep the approved layout photo nearby while working.
Choose a method based on the patch backing and garment
Once the layout is approved, identify whether each patch is sew-on, iron-on, adhesive-backed, or designed for a separate fabric adhesive. Do not assume all patches that look similar use the same backing. Read the patch instructions and the garment care label, then compare the requirements with the fabric. It is common to use more than one attachment method on a single garment, but the plan should be consistent with the patch construction and expected wear.
| Method | Useful when | Main checks |
|---|---|---|
| Sewing | The patch has no heat backing or needs a stitched edge | Needle access, lining, seam thickness, stitch security |
| Iron-on backing | The patch and garment both tolerate the required heat | Care label, backing instructions, press cloth, cooling |
| Fabric adhesive | The patch and fabric are compatible and a no-sew option suits the use | Hidden-area test, thin application, cure time, washing instructions |
Sew-on patches
For hand sewing, use thread that suits the patch edge and garment, and test needle access around thick seams before beginning. Tack down a few points first to hold the patch in place, then sew around the edge while checking that the fabric beneath is not pulling into folds. If the patch is rectangular, securing the corners can help keep it aligned. For irregular shapes, use enough temporary points to stop the patch from shifting. Keep stitches even and avoid catching a pocket lining or a garment layer that needs to remain free.
- Hand-sewing video: How to Sew a Patch on Denim — watch the needle, thread, and edge placement on denim; the demonstration is useful for the sequence, while needle size and stitch choice should match your patch and fabric.
A sewing machine can save time on a sturdy jacket, but it may be difficult to maneuver around sleeves, pockets, and lining. Hand sewing gives more control on awkward areas, while a machine can make a strong consistent seam when the garment can be positioned safely. For a patch near a lining, work slowly and keep the lining separate; a card inside the garment can protect the opposite layer from accidental stitching, but remove it before continuing.
- No-machine video: Add Patches to a Custom Denim Jacket without a Sewing Machine — follow a hand-attachment process on denim and note how the patch is held while the maker works. It is a method demonstration, not proof that one stitch works for every fabric.
Iron-on patches
Before using heat, read both the garment label and the patch maker’s directions. Some fabrics can be damaged by ironing, and trims, coatings, linings, or embellishments may respond differently from the main fabric. Place the garment on a stable, heat-safe surface and use a press cloth if the patch instructions call for one. Position the patch, check that it has not shifted, then follow the specified temperature, pressure, and pressing sequence. Allow it to cool before checking the edges.
Do not use a single online video’s iron temperature or timing as a universal setting. Different adhesives, embroidery thicknesses, and garment fibers need different conditions. The Federal Trade Commission’s clothing-care guidance explains that labels must warn consumers when a common procedure such as ironing could harm the garment. Treat the care label and patch maker’s instructions as the controlling specifications, then test on an inconspicuous area only if the instructions permit heat.
- Care-label evidence: FTC Clothes Captioning: Complying with the Care Labeling Rule — review its explanation of “Do not iron” warnings and other garment-care instructions.
- Iron-on video: Easy Steps Video: How to Iron On Patches — watch a press-and-check sequence, but take the actual temperature, pressure, and dwell time from the patch and garment instructions.
Fabric adhesive
A fabric adhesive may suit selected patch and fabric combinations when the manufacturer explicitly includes that use. Do not infer that a glue is suitable for wearable clothing just because the word fabric appears on the label. Prepare a clean, dry surface, apply only the directed amount, and test an inconspicuous area when the instructions permit. A product described as washable should still reach its stated full cure before washing, ironing, or frequent movement.
A fabric adhesive may be suitable only when the product directions explicitly cover the patch and garment use. Do not treat compatibility with a fiber name as proof that every wearable garment, coating, dye, or finish will behave the same. GleamGlee’s fabric compatibility guide describes the fibers and application steps listed for its product; check the current product label for the exact use, test in a hidden spot when allowed, and choose stitching or professional help if the care label or glue directions do not support the garment.
Photograph the approved arrangement and list the order of work
Before attachment, save one clear photo of each side and write a short sequence such as “back anchor, left chest pair, right sleeve cluster.” For every patch, note its top edge, the seam or pocket used as a reference, the intended method, and any pocket or lining that must stay free. This is especially useful when the project will be completed over several sessions or by more than one person. The written sequence reduces the chance of replacing a patch at a slightly different angle after the garment is turned around.
Work in batches and inspect each section
When attaching several patches, complete one area at a time instead of moving randomly across the garment. Recheck the photo or sketch before each patch, confirm its orientation, and compare it with the neighboring pieces. If sewing, tack the next patch before finishing all its edges. If pressing or gluing, work on a stable section where the fabric can remain flat and undisturbed for the required time. A batch workflow reduces the chance of accidentally rotating a patch, closing a pocket, or forgetting which side should face up.
After all patches are attached and fully cooled or cured, inspect the garment inside and outside. Look for loose edges, skipped stitches, glue squeeze-out, puckered fabric, or areas where the lining is caught. Wear the garment again and repeat the movement check. Follow the care instructions for the patch and attachment product before laundering. If the layout has shifted, compare it with the saved photo before wearing or washing the garment.

Common Patch Placement Mistakes
Most placement problems are avoidable because they become visible before permanent attachment. The warning signs are usually practical: a pocket stops working, a patch looks crooked when worn, the design becomes heavier on one side, or an attachment method conflicts with the care label. Use this section as a final diagnostic pass. If any check fails, move or resize the patch during the preview stage instead of trying to disguise the problem after it has been sewn, pressed, or bonded.
Attaching each patch before planning the full set
The first patch may look great by itself but leave no good place for a larger piece, text patch, or back design. Before making permanent holes or applying heat, place all intended patches on the garment and compare the full front and back. If you are still waiting for a special patch, leave a deliberate open area rather than filling it with pieces that may later compete for the same space. A photo of the approved arrangement gives you a reference if the project pauses between sessions.
Making the layout too dense before deciding how it will be worn
A dense layout can be intentional on a battle vest, yet the same density may look crowded on a fitted overshirt or conceal useful panels on workwear. Before filling every open area, compare the garment in the intended setting and consider whether future additions are planned. If you want a busy design, make the density deliberate by grouping patches into zones and preserving a few clean paths around closures and seams. If the look should be quieter, use fewer pieces and let the blank fabric frame the focal patch.
Judging only from a flat garment
A garment on a table does not show how its panels curve around the body or fold when the wearer moves. Check the design while standing, then sit, bend, reach, and look at the side view. If the patch is meant to be seen when worn, verify that it is not hidden by a lapel, pocket flap, strap, arm, or fold. A dress form is useful when available, but trying on the garment is a simple practical test for most projects.
Using a universal spacing rule
A fixed distance may work for one row on one jacket and look awkward on a smaller shirt. Measure only when the layout needs straight alignment; otherwise, compare the empty spaces by eye and adjust for patch shape, garment panel, and intended density. Avoid presenting a specific number of centimeters as a scientifically proven rule unless a source actually establishes that rule for the same garment and patch type. The evidence supports planning, fit checks, and material-specific decisions, not one universal aesthetic formula.
Using a ruler to force an arrangement that does not suit the silhouette
Measurement can make a row level, but it cannot decide whether a row belongs on a curved jacket panel or narrow sleeve. A centerline, pocket edge, or hem is a useful reference only when the garment is worn and the reference remains visually straight. If a row looks level on the table but slopes around the body, adjust the visual alignment rather than adding more measurements. Use numbers to make repeatable spacing; use the try-on check to decide if the resulting line actually looks right.
Ignoring function or care instructions
A patch should not block a pocket, zipper, cuff, or required uniform marking. Similarly, a patch that can be ironed onto denim may not be appropriate for a delicate blouse or coated jacket. Check the garment label and patch directions before applying heat, and keep the inside of the garment in view while sewing. Small checks at this stage prevent the most frustrating outcomes because permanent attachment can be difficult to reverse without leaving marks or holes.
| Before attaching | Check |
|---|---|
| Overall layout | All patches were arranged together and photographed |
| Fit | Front, back, and side views were checked while worn |
| Movement | The wearer can sit, bend, reach, and move comfortably |
| Function | Pockets, closures, cuffs, and required markings remain usable |
| Materials | Patch backing, garment fabric, and care label are compatible |
| Attachment | Temporary pins or marks are removed; cure and care directions are followed |
| What looks wrong | Likely cause | Practical adjustment |
|---|---|---|
| One side dominates | High contrast, large patches, or text clustered together | Move one attention-heavy patch or strengthen the opposite cluster |
| Row looks tilted when worn | Alignment was judged only on a flat garment | Recheck against the center placket or panel while worn |
| Pocket or zipper is awkward | The patch edge crosses a functional opening | Move the patch clear of the opening and retest access |
| Edge bridges a raised seam | The patch is spanning bulky construction | Shift it to a flatter area or choose an attachment method suited to the thickness |
| Patch feels stiff at a bend | A rigid piece covers a high-movement zone | Move it to a lower-motion panel or choose a smaller, more flexible patch |
| Design feels unfinished or crowded | Future space or density was not planned | Reserve an intentional area or edit the smallest filler pieces |
A good multi-patch layout starts with the garment and the complete set of patches, not with the attachment method. Pick a focal piece, use seams and garment panels as visual references, compare more than one arrangement, and look at the design while it is being worn. Leave spacing that suits the chosen style, protect pockets and movement areas, and choose sewing, heat, or fabric adhesive only after checking the patch backing and garment care label. These steps make the result easier to plan and reduce avoidable placement mistakes.
The most useful rule is simple: preview first, attach second. Take a photo, mark the approved positions with a fabric-safe method, and keep the care and attachment instructions nearby. A patch layout is personal, so the goal is not to copy one jacket or follow an arbitrary gap measurement. It is to make the patches look intentional, feel comfortable, and stay compatible with the clothing they are meant to personalize.
Frequently Asked Questions
How far apart should multiple patches be?
There is no universal spacing measurement for every garment. Patch size, fabric panel width, intended density, and the wearer’s preferred style all affect the best gap. For a straight row, measure the usable width and use the remaining space to calculate equal gaps if a precise line is important. For clusters or mixed shapes, use the calculation only as a starting point and adjust the layout visually. Always check the result on the garment rather than relying on a number alone.
Should patches be symmetrical on a jacket?
They can be symmetrical, but they do not have to be. Matching placements can make a uniform or structured jacket look orderly, while an asymmetrical arrangement may suit mixed patch shapes or a more relaxed design. If the layout is asymmetrical, balance visual weight by distributing bright colors, large patches, or heavy embroidery across the garment. A front-and-back photo can help you notice whether one area dominates more than you intended.
Should I place the largest patch first?
Usually, it helps to place the most important or visually dominant patch first because it sets the available space for the smaller pieces. That patch may be the largest, but a bright symbol or readable text patch can become the focal point even when it is not physically big. Place it in the panel where you want attention to land, then arrange the remaining patches around it. Compare multiple positions before attaching anything permanently.
Can I put a patch over a pocket or seam?
You can, but first decide whether the pocket must remain usable and whether the seam will make the patch difficult to attach. A patch over a pocket opening may block access; sewing through both pocket layers may close it. Thick seams can make sewing harder and can cause some heat-activated patches to sit unevenly. Check the garment inside and outside, then shift the patch or choose a different attachment method if the original location affects function.
Can I use fabric glue for multiple patches?
Some fabric adhesives are suitable for selected patch and fabric combinations, but do not assume a craft adhesive is suitable for a wearable garment without checking the exact product directions. Test a hidden area only when the manufacturer permits it, apply the stated amount, and wait for the full cure before washing. Adhesive is not a temporary layout marker unless the product is explicitly designed to reposition. Stitching or professional repair may suit high-stress areas better.
Can I iron patches onto any clothing?
No. The patch backing and the garment must both tolerate the required heat. Check the care label for ironing warnings and follow the patch maker’s directions for temperature, pressure, and pressing time. Delicate fabrics, coatings, synthetic blends, trims, and linings can respond differently from denim or cotton. If the label warns against ironing or the material is valuable or unfamiliar, choose a suitable sew-on method or ask a repair professional before applying heat.
How many patches should I put on one jacket?
There is no fixed maximum because jacket size, patch dimensions, fabric weight, and preferred style vary. A few pieces may create a clean accent, while a battle vest may use much denser coverage. Instead of choosing a number first, map the usable panels, place the focal patch, group supporting pieces, and test the layout while wearing the jacket. Stop when visibility, comfort, pocket access, and attachment space still work together.