 Skip to content
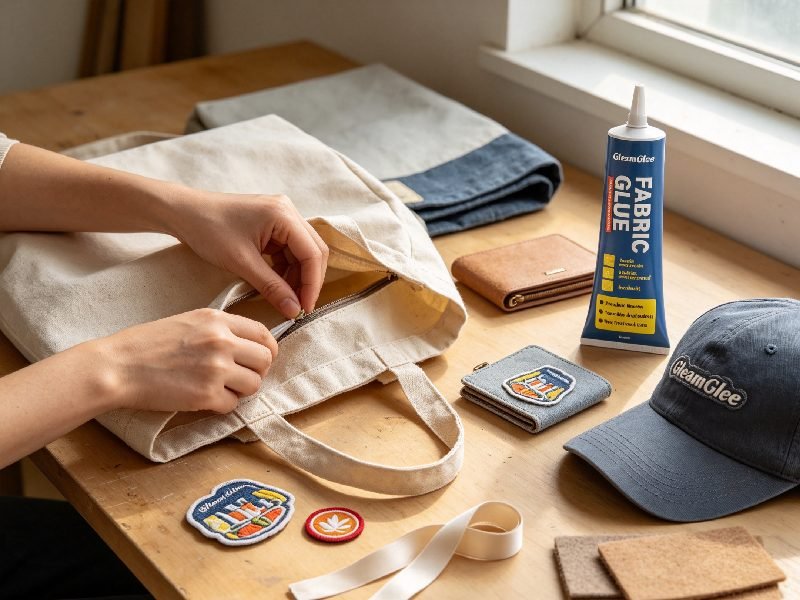
A loose backpack lining, a lifting patch, or a torn hat sweatband may look like a minor problem, but these small failures often decide whether an accessory remains useful or gets thrown away. Sewing is reliable, yet it is not always practical on curved caps, narrow pouches, layered bag panels, or projects covered with embroidery and decorative trim. The right fabric glue offers another option, but only when the adhesive matches the material, movement, and stress involved.
Fabric glue for bags, hats, and accessories is a flexible textile adhesive used for light repairs, patch attachment, lining work, embellishment, and no-sew crafts. A suitable formula should bond common fabrics, dry clear, remain soft after curing, and tolerate normal bending, washing, or cleaning. It should not replace stitching on heavily loaded handles, safety straps, or severely damaged structural seams.
Consider a favorite canvas tote with a detached inner pocket. The bag itself may still be perfectly usable, while the loose lining catches every item placed inside. A thin, controlled layer of flexible glue can return that pocket to service in minutes of hands-on work. The difference between a clean repair and a stiff, peeling patch comes down to several decisions that are easy to overlook.
What Is Fabric Glue for Accessories?
Fabric glue for accessories is a flexible adhesive designed to join textile surfaces without sewing. It works well for patches, linings, trims, appliqués, frayed edges, and small non-structural repairs on bags, hats, pouches, wallets, and fabric accessories. It is not the right choice for heavily loaded handles, safety straps, or badly weakened seams that require stitching or replacement.
How Does It Replace Sewing?
Fabric glue replaces stitches by creating a continuous bonding layer between two surfaces. Instead of holding the material together at separate needle holes, the adhesive spreads the force across the glued area. This can produce a smooth, low-profile repair on patches, folded edges, inner linings, and decorative fabric pieces.
It is especially useful when the area is difficult to reach with a sewing machine. The curved crown of a cap, the narrow opening of a cosmetic pouch, or the inside corner of a backpack pocket can be awkward to stitch neatly. Glue also avoids visible thread, puncture marks, and mismatched stitching on decorative projects.
However, a glued repair needs enough contact area. Two torn edges placed directly against each other provide very little surface for the adhesive to grip. An overlapping seam or backing patch creates a wider bond and usually performs better. As a practical starting point, a patch should extend roughly 10–20 mm beyond a small tear on every side when the shape of the item allows it.
Fabric glue is most useful when the repaired area:
- Lies flat or follows a gentle curve
- Can be pressed firmly during setting
- Has enough overlap for a continuous bond
- Is not exposed to heavy pulling
- Can remain undisturbed during curing
- Needs to stay soft after drying
Sewing and glue do not always need to compete. In some repairs, a thin adhesive layer can hold the materials in place before stitching. This reduces movement, keeps patch edges flat, and makes alignment easier.
What Items Can It Repair?
Fabric glue can be used on many common accessories, but the exact repair matters more than the name of the item. A backpack may have a suitable loose lining and an unsuitable broken shoulder strap at the same time.
On bags, fabric glue is commonly used for detached linings, loose internal pockets, lifting decorative patches, frayed fabric tabs, small openings in low-stress seams, and loose trim. It can also secure appliqués, embroidered labels, or fabric letters to canvas totes and craft bags.
On hats, it can attach patches, logos, ribbon, fabric flowers, lightweight felt pieces, and decorative trim. It may also repair a small tear in a fabric sweatband or reattach a loose internal edge, provided the repaired section does not become bulky or uncomfortable.
Other suitable items include:
- Fabric wallets
- Cosmetic pouches
- Pencil cases
- Headbands
- Bows
- Costume belts
- Fabric-covered notebooks
- Soft storage baskets
- Cloth phone pouches
- Decorative wrist cuffs
- Fabric gift bags
The condition of the surrounding material should always be checked. Glue cannot restore strength to fabric that has become thin, rotten, powdery, or badly stretched.
| Repair area | Fabric glue suitability | Main concern |
|---|---|---|
| Loose bag lining | Usually suitable | Keep glue away from visible outer fabric |
| Decorative patch | Usually suitable | Cover patch edges completely |
| Hat sweatband edge | Often suitable | Avoid a thick, uncomfortable glue bead |
| Small pouch seam | Suitable with overlap | Do not load before full cure |
| Backpack shoulder strap | Not suitable alone | Requires stitching or replacement |
| Heavy bag handle | Not suitable alone | High peel and shock load |
| Large tear in weak fabric | Limited | Needs backing and often stitching |
Which Tasks Work Best?
Fabric glue performs best on repairs where the bonded surfaces have broad contact and the load is spread evenly. A lightweight embroidered patch on canvas is a good example. The patch covers a wide area, the materials are flexible, and the bond is not usually carrying the weight of the bag.
Loose linings are another strong application. The repair stays inside the bag, is protected from direct abrasion, and can often be pressed flat while curing. Small decorative trims, ribbons, lace, fabric labels, and felt shapes also work well because they are lightweight.
Good uses include:
- Attaching fabric patches and appliqués
- Securing loose lining panels
- Reinforcing a non-structural folded edge
- Fixing lightweight decorative trim
- Sealing lightly frayed fabric
- Holding pieces in place before sewing
- Creating no-sew pouches and costume parts
- Adding sequins, fabric flowers, or soft ornaments
Edge preparation is important. A patch with several drops of glue in the center may appear secure at first, but an uncoated corner can catch on clothing or fingers and begin to peel. A thin, continuous layer near the perimeter is usually more useful than a thick pool in the middle.
When Is Sewing Better?
Sewing is better when the repaired part carries weight, controls safety, or experiences repeated shock. Bag handles, backpack shoulder straps, luggage webbing, buckle anchors, and load-bearing loops are exposed to forces that ordinary fabric glue should not be expected to manage alone.
A repair may also need sewing when the tear is long, the edges cannot overlap, or the surrounding fabric has weakened. In these cases, the failure is not limited to the seam. The material itself may no longer be strong enough to support a bonded repair.
Professional repair or replacement is the safer choice for:
- Backpack suspension straps
- Child carrier straps
- Pet leads or harnesses
- Heavy luggage handles
- Safety-related closures
- Severely torn webbing
- Large zipper anchor failures
- High-value technical outdoor equipment
A useful test is to ask what happens if the repair fails. If the result is only a loose decoration, glue may be reasonable. If the bag could drop a laptop, camera, tool, or other valuable item, mechanical reinforcement is the better approach.
Which Materials Can Fabric Glue Bond?
Fabric glue commonly bonds cotton, canvas, denim, polyester, felt, ribbons, lace, and many blended textiles. Performance varies with weave, thickness, absorbency, stretch, and surface treatment. Waterproof coatings, silicone finishes, wax, oil, stain repellents, and smooth synthetic layers may reduce adhesion, so coated or delicate materials should always be tested before a full repair.
Which Bag Fabrics Bond Well?
Cotton canvas is one of the most practical materials for fabric glue because its woven surface gives the adhesive many fibers to grip. It is widely used in tote bags, organizers, tool rolls, and casual backpacks. The main challenge is absorbency. Too little glue may disappear into the weave, while too much can darken the fabric or create a stiff patch.
Denim also bonds well in many repair and craft projects. Its dense weave provides a stable surface, but thick folded seams may require more careful pressure. When attaching a patch to denim, the adhesive should reach the outer edge of the patch without soaking through the garment or bag.
Polyester linings are smoother and less absorbent. They usually need a thinner layer, clean surfaces, and firm contact. Because linings are lightweight, excessive glue can easily bleed through or form a hard ridge.
Felt accepts adhesive readily, but it can absorb a large amount if the glue is applied too heavily. A controlled film is better than a thick bead. Nylon requires more caution because many nylon bags are treated with water-repellent or stain-resistant finishes.
| Material | Typical bonding behavior | Practical preparation |
| Cotton canvas | Generally bonds well | Test for darkening on light colors |
| Denim | Strong textile surface | Press thick areas evenly |
| Polyester lining | Smooth and lightweight | Use a thin layer and firm pressure |
| Felt | Highly absorbent | Avoid saturating the fibers |
| Nylon | Results vary | Test for water-repellent coating |
| Coated fabric | Often difficult | Hidden-area test is essential |
| Stretch fabric | Bond may be stressed | Use only where movement is moderate |
A material label does not reveal every surface treatment. Two polyester bags from different manufacturers can behave very differently because one may be untreated while the other has a durable water-repellent finish.
Which Hat Materials Need Care?
Hats are more complicated than flat fabric projects because they combine curved panels, stiffeners, foam, sweatbands, embroidery, plastic inserts, and moisture-management finishes.
Cotton twill baseball caps are often suitable for patch and trim work. Their woven surface provides useful contact, and the crown can be supported from inside during pressing. Polyester sports caps need more testing because they may contain sweat-resistant or water-repellent treatments.
Felt hats can bond well, but excess glue may soak into the material and produce a hard area. Structured hats may also lose their shape if they are clamped too tightly. The repair should be supported with a rounded form, rolled towel, or clean object that matches the natural curve.
Sweatbands require careful cleaning because body oil, salt, hair products, and moisture can interfere with adhesion. Only a small amount of glue should be used near areas that touch the skin. A thick cured bead may feel rough even when the repair is secure.
Extra care is needed with:
- Vintage hats
- Wool felt
- Silk linings
- Straw hats
- Waterproof caps
- Foam-backed trucker hats
- Heat-sensitive printed logos
- Structured crowns
- Leather hatbands
For valuable or collectible hats, a reversible or professional repair method may be more appropriate than a permanent adhesive.
Do Patches Stay Secure?
Patches stay secure when the backing, weight, flexibility, and edge shape are compatible with the adhesive. Lightweight embroidered patches are generally easier to bond than thick rubber badges, metal-backed emblems, or heavy beaded decorations.
The perimeter usually determines whether a patch lasts. Corners and narrow points catch easily, especially on bags that rub against clothing or hats handled by the brim and crown. Rounded patch corners tend to resist lifting better than sharp square corners.
Before applying glue, inspect the back of the patch. Some patches have an iron-on coating, plastic film, foam layer, old adhesive residue, or rubber backing. These surfaces may not respond like plain fabric. A hidden sample test is useful when the patch is expensive or the accessory cannot be replaced easily.
For a reliable patch bond:
- Clean the fabric beneath the patch
- Check the patch backing
- Apply a thin, continuous layer
- Cover the perimeter carefully
- Avoid flooding embroidered edges
- Press from the center outward
- Support curved surfaces from underneath
- Allow the full cure before bending or washing
Heavy decorations should not be attached only by a few small glue dots. The adhesive area and the weight of the ornament need to be considered together.
Can It Bond Mixed Materials?
Fabric glue can bond some mixed-material combinations, but the result is less predictable than fabric-to-fabric bonding. Fabric to felt, canvas, denim, ribbon, lace, and many textile linings are usually the most straightforward combinations.
Fabric to faux leather may work only if the synthetic surface accepts the adhesive. Faux leather can contain polyurethane, PVC, plasticizers, surface coatings, or release agents. Some products bond successfully, while others peel cleanly after curing.
Fabric to genuine leather, rubber, metal, rigid plastic, or coated foam may require a dedicated adhesive. A product designed primarily for textiles should not automatically be treated as a universal glue.
A useful compatibility test takes only a small sample:
- Clean both surfaces.
- Apply the same amount planned for the final repair.
- Press the materials together.
- Allow a full 24-hour cure.
- Bend and flex the sample repeatedly.
- Pull gently from different directions.
- Check for staining, stiffness, or edge lifting.
- Repeat any expected cleaning process.
For business use, record the material supplier, batch, application amount, room conditions, cure time, and result. This makes the test repeatable and helps prevent inconsistent production.

How Do You Choose Fabric Glue?
Choose fabric glue by matching the adhesive to the material, movement, cleaning method, and stress of the repair. A useful product should provide enough strength without creating a hard, brittle area. Clear drying, flexibility, wash resistance, controlled application, and a defined full-cure time are usually more important for bags and hats than an unusually aggressive strength claim.
Which Strength Is Suitable?
Bond strength should be judged in relation to the repair. A lightweight ribbon needs less holding power than a thick embroidered patch, while a small metal decoration may create more peel stress than a large fabric panel.
Repairs can be divided into three practical groups:
- Decorative bonding
- Functional textile repair
- Structural repair
Decorative bonding includes lace, ribbon, sequins, letters, and small appliqués. Functional repair includes linings, hems, patches, and low-stress seams. Structural repair includes handles, shoulder straps, buckle anchors, and load-bearing webbing.
| Repair level | Common examples | Suitable method |
| Light decorative | Ribbon, lace, sequins | Small controlled glue dots |
| Standard textile | Patches, lining, folded edges | Thin full adhesive layer |
| Moderate stress | Reinforced seam or large patch | Wider overlap and careful testing |
| Structural | Handles, straps, safety parts | Stitching, replacement, or professional repair |
Initial tack should not be confused with final strength. A repair may feel secure after several minutes but still be vulnerable to movement. Final performance depends on the complete cure, the thickness of the adhesive, room temperature, humidity, surface condition, and bond area.
For commercial use, a simple pull test is not enough. A realistic evaluation should include bending, edge peeling, abrasion, cleaning, temperature exposure, and repeated handling.
Why Does Flexibility Matter?
Bags fold, hats curve, pouches open, and headbands stretch. A rigid adhesive creates a hard zone inside a flexible object. This can feel uncomfortable, distort the shape, or transfer stress to the fabric beside the repair.
When a stiff glue layer bends repeatedly, it may crack. Even if the adhesive itself remains attached, the surrounding fibers can tear at the edge of the hardened area. This is common when too much glue is used on thin material.
A suitable cured bond should:
- Bend with the surrounding fabric
- Avoid a sharp plastic-like edge
- Resist cracking on gentle folds
- Keep patch corners flat
- Remain comfortable on wearable items
- Avoid visible distortion
Flexibility must be checked after full curing. Wet glue naturally feels soft, so handling it too early gives no useful information about the finished bond.
A simple test is to bend the cured sample in several directions 20–30 times by hand, then inspect the surface and edges. This is not a formal laboratory test, but it can reveal obvious stiffness, cracking, or lifting before the accessory is returned to use.
Is Clear and Washable Better?
Clear-drying glue is usually preferable for visible accessories, but “clear” does not mean invisible under every condition. Thin or pale fabric may darken if the adhesive penetrates too deeply. Thick layers may also leave a glossy edge.
Wash resistance is valuable for caps, fabric bags, clothing accessories, and children’s items. The repair should not be washed before the full cure is complete. The accessory’s care label also remains important. A structured cap that requires hand cleaning should not be put in a washing machine simply because the adhesive is washable.
Iron compatibility can be useful for hems, patches, and fabric alterations, but the lowest heat tolerance of all materials must be respected. Plastic decorations, foam, printed logos, synthetic coatings, and faux leather may be damaged by heat even when the adhesive itself can tolerate ironing.
Check these claims separately:
- Clear after curing
- Non-yellowing appearance
- Wash resistance
- Water resistance
- Heat tolerance
- Flexibility after washing
- Edge stability after repeated cleaning
For finished products, test the complete assembly rather than two plain fabric pieces. A printed patch, coated lining, decorative film, or synthetic trim can change the result.
How Do Nozzle and Cure Time Matter?
A precision nozzle is especially useful for bags, hats, and accessories because many repairs involve narrow edges, small patches, curved seams, or tiny decorations. Better flow control reduces waste and limits visible residue.
A fine nozzle helps with:
- Patch perimeter coverage
- Narrow lining seams
- Small fabric tears
- Sequins and rhinestones
- Ribbon edges
- Hat sweatbands
- Detailed costume work
A cap with a built-in pin helps keep the opening clear, but the nozzle should still be wiped after use. Dried glue around the tip can change the flow and cause a sudden oversized drop during the next project.
Cure time has two stages. The setting period holds the pieces in position. The full cure develops the final bond. For GleamGlee Fabric Glue, the initial set is approximately 6–10 minutes under normal conditions, while full curing requires about 24 hours.
Cool rooms, high humidity, thick glue layers, and smooth non-absorbent materials may slow the process. The repair should not be judged, loaded, washed, or sharply folded until the full curing period has passed.
How Do You Apply Fabric Glue?
Apply fabric glue to clean, dry, well-aligned surfaces in a thin, even layer. Press the pieces together without sliding them, support the repair in its natural shape, and keep it undisturbed during setting. GleamGlee Fabric Glue normally sets in about 6–10 minutes and should cure for 24 hours before washing, ironing, loading, or repeated bending.
How Do You Prepare the Surface?
Surface preparation removes barriers between the adhesive and the fabric fibers. Dust, lint, body oil, fabric softener, waterproofing spray, old glue, and loose threads can all reduce bond quality.
Start by emptying the bag or removing any detachable parts. Brush away dirt and lint. If the item must be cleaned, follow its care instructions and let it dry completely. Damp fabric can dilute the adhesive and delay curing.
Old adhesive residue should be removed only when it can be done without damaging the material. Hard scraping may weaken thin fabric or remove a printed finish. Loose fibers may be trimmed carefully, but the damaged area should not be cut larger than necessary.
Before opening the glue:
- Test a hidden area
- Position the patch or lining
- Mark the location lightly
- Prepare clips or weights
- Protect visible nearby fabric
- Support curved hats from inside
- Check that both surfaces meet naturally
A repair is easier to complete neatly when everything is prepared before the adhesive begins to set.
How Much Glue Should You Use?
Use enough glue to create continuous contact, but not enough to saturate the fabric. A thin, even layer is usually stronger and more flexible than a thick bead because it cures more evenly and does not create a bulky ridge.
For patches, cover the back lightly and reach close to the perimeter. For linings, use a narrow continuous line or closely spaced small dots along the original seam. For sequins and small decorations, use micro-dots.
The amount should be adjusted to the material:
- Thin fabric needs less adhesive
- Open canvas may need slightly more coverage
- Felt absorbs quickly
- Smooth polyester needs a very thin film
- Thick patch edges need careful perimeter coverage
- Curved surfaces need even pressure, not extra glue
Too much adhesive can cause:
- Bleed-through
- Dark spots
- Long curing time
- Stiffness
- Visible residue
- Accidental bonding to nearby layers
Do not add more glue simply because the bond is not strong after a few minutes. The adhesive needs time to cure.
How Long Should You Press?
After application, place the pieces together once and press evenly. Sliding them back and forth can push adhesive away from the contact area and leave streaks.
For GleamGlee Fabric Glue, hold or secure the repair during the initial 6–10 minute setting period. Pressure should be firm enough to bring the surfaces into contact, but not so strong that all adhesive is squeezed out.
Flat patches may be covered with clean release paper and weighted. Hat repairs should be supported with a rounded form so the crown is not flattened. Clips can be used on bag linings, but the jaws should be padded to prevent marks.
| Stage | Practical timing | What to do |
| Positioning | First 1–2 minutes | Align carefully and avoid repeated movement |
| Initial set | About 6–10 minutes | Maintain even contact |
| Early cure | Several hours | Keep flat and avoid stress |
| Full cure | About 24 hours | Wait before washing, ironing, or loading |
During curing, keep the item open and supported. Do not pack a repaired bag tightly, fold a hat, or seal the item in airtight packaging. Thick materials and coated surfaces may need extra time.
What Mistakes Cause Failure?
Most failed fabric repairs are caused by poor preparation, excessive adhesive, incomplete edge coverage, movement during curing, or loading the repair too early.
Dirty surfaces prevent proper contact. Too much glue creates a thick layer that dries slowly and may remain stiff. Too little glue around a patch edge allows corners to lift. Washing after only a few hours can weaken a bond that has not finished curing.
Common mistakes include:
- Bonding damp fabric
- Applying glue over oil or waterproofing
- Stretching the fabric during application
- Using only center dots on a patch
- Folding the repair before curing
- Washing within 24 hours
- Using rigid general-purpose glue
- Repairing a structural strap with adhesive alone
- Ignoring the care label
- Skipping a hidden-area test
The appearance of a failed joint can help identify the cause. Glue left on only one surface may indicate contamination or poor pressure. Adhesive split between both surfaces may suggest excessive load. Fabric fibers torn away with the glue may mean the surrounding textile was weaker than the bond.

What Repairs and Projects Work Best?
Fabric glue works best for patches, loose linings, hat decorations, sweatbands, pouches, hems, appliqués, and other projects with broad contact areas and limited structural stress. It is especially practical for no-sew crafts and small repairs that must remain soft. Handles, shoulder straps, buckles, and heavily loaded seams normally need stitching or professional reinforcement.
How Do You Repair Bags?
First identify whether the damaged part carries weight. A loose lining, internal pocket, decorative patch, or fabric tab is very different from a torn shoulder strap.
For a lining repair, empty the bag and pull the lining outward when possible. Clean both surfaces, return the lining to its original position, and apply a narrow adhesive layer. Press the area with padded clips or light weights. Keep the bag open so the lining does not bond to the opposite side.
For a small hole, place a backing patch behind the damage. The patch should extend beyond the weak area rather than covering only the visible opening. Rounded corners are less likely to catch and peel.
Suitable bag repairs include:
- Detached inner pockets
- Loose lining edges
- Lifting brand patches
- Frayed fabric tabs
- Small non-structural seam openings
- Decorative panels
- Canvas embellishments
- Fabric labels
Unsuitable glue-only repairs include:
- Shoulder strap anchors
- Heavy tote handles
- Luggage grab handles
- Buckle attachments
- Zipper load points
- Torn structural webbing
After curing, test the repaired area with a light load before returning the bag to normal use.
How Do You Repair Hats?
Hats should be repaired in their natural shape. Place a rolled towel or rounded support inside the crown before attaching a patch or trim. This allows pressure to follow the curve without flattening the hat.
Apply a thin adhesive layer to the back of the patch, position it carefully, and press from the center outward. Check the alignment from the front, side, and top. A patch that looks centered on a flat surface may appear uneven when the cap is worn.
For sweatband repairs, clean away body oil and salt residue first. Use only a narrow line of glue and keep it away from the exposed edge that touches the forehead.
Good hat projects include:
- Embroidered patches
- Cloth labels
- Ribbon bands
- Felt shapes
- Fabric flowers
- Lightweight logos
- Costume decorations
- Small internal tears
- Loose sweatband sections
Structured, waterproof, vintage, or high-value hats should be tested carefully. Some contain stiffeners, foam, coatings, or heat-sensitive components that react differently from ordinary fabric.
Which Accessories Suit No-Sew Work?
No-sew bonding is well suited to lightweight accessories that do not carry heavy loads. Pouches, headbands, bows, fabric wallets, costume cuffs, decorative belts, fabric notebook covers, and soft gift bags are practical examples.
Overlap is important in no-sew construction. A 10–15 mm folded seam is generally more reliable than joining two raw edges directly together. The exact overlap depends on the fabric thickness, the size of the item, and the expected load.
Useful no-sew projects include:
- Cosmetic pouches
- Pencil cases
- Headbands
- Fabric bows
- Costume belts
- Fabric book covers
- Soft wallets
- Festival accessories
- Gift bags
- Decorative cuffs
Projects that touch the skin should use minimal adhesive near exposed edges. Mixed-material parts such as metal clips, plastic buckles, or rubber decorations may require a different adhesive.
Small-batch makers should test finished samples through bending, opening, closing, and cleaning. A product that looks neat after one day may behave differently after several weeks of handling.
What DIY Projects Can You Make?
Fabric glue can be used to personalize existing accessories or create simple projects from scratch. Canvas tote bags can be decorated with letters, patches, ribbon, lace, or fabric shapes. Bucket hats can be updated with lightweight patchwork pieces. Plain caps can be customized for teams, events, clubs, or gifts.
Other practical projects include:
- Cosplay accessories
- Festival pouches
- Holiday gift bags
- Fabric banners
- Decorative headbands
- Costume wrist cuffs
- Fabric-covered storage boxes
- Personalized pencil cases
- Wedding accessories
- School craft projects
Design the project around the strengths of adhesive bonding. Use broad overlaps, lightweight decorations, rounded patch corners, and flexible materials. Avoid placing a thick glue layer directly on fold lines.
Fabric glue is also useful during product development. Designers can create several accessory samples, compare patch placement, and evaluate color combinations before committing to stitched production. This reduces wasted material and speeds up early prototype work.
Is GleamGlee Fabric Glue Suitable?
GleamGlee Fabric Glue is suitable for everyday fabric repairs, patches, linings, trims, embellishments, and no-sew accessory projects. It dries transparent, remains soft and flexible after curing, and is designed to withstand normal washing and ironing when used on compatible materials. It is available in a 50g single-tube pack and a two-tube 50g pack.
What Performance Does It Provide?
The formula is designed for repairs where appearance and movement matter. A bag lining or hat patch should not become hard and brittle after drying. The cured adhesive remains flexible so the repaired area can move with the surrounding fabric.
It dries transparent and is designed to avoid obvious yellowing, making it useful on visible hems, patches, ribbons, denim, curtains, and accessory repairs. The fine-point nozzle supports controlled application on narrow seams and small decorative parts.
Key characteristics include:
- Strong textile bonding
- Clear cured appearance
- Soft and flexible finish
- Washable after full cure
- Suitable for ironing on compatible fabrics
- Fine precision nozzle
- Anti-clog pin in the cap
- Approximately 6–10 minute initial set
- Approximately 24-hour full cure
- 50g tube capacity
The formula can be used for clothing, jeans, curtains, embroidery, ribbon, buttons, sequins, patches, tote bags, hat decorations, loose linings, and many household fabric projects.
Specialty coatings, delicate textiles, waterproof fabrics, and mixed materials should still be tested before full use.
How Does It Handle Washing?
Once fully cured, the adhesive is designed to tolerate normal washing and ironing. The repaired item should remain undisturbed for about 24 hours before cleaning or heat exposure.
The accessory’s original care instructions remain important. A washable adhesive does not make every hat or bag machine washable. Structured caps may lose their shape, and coated bags may require surface cleaning only.
For longer repair life:
- Wait for the full 24-hour cure
- Follow the fabric care label
- Use a gentle cycle when appropriate
- Place small items in a laundry bag
- Avoid strong twisting after washing
- Use a pressing cloth when ironing
- Select a safe temperature for the fabric
- Avoid direct heat on plastic decorations
For business or private-label projects, wash testing should be completed on the finished assembly. A plain fabric sample does not represent every printed patch, synthetic lining, coating, or decorative component.
Which Pack Fits the Project?
The 50g single tube is suitable for household repairs, occasional crafting, sewing kits, schools, and first-time users. It provides enough adhesive for multiple small projects without requiring a large container.
The two-tube pack is more suitable for frequent crafters, costume departments, schools, repair services, and users working on several accessories. Separate tubes also allow one tube to remain sealed until the first is finished.
A single tube may be enough for:
- Several small patches
- A loose bag lining
- Hat decorations
- Pouch repairs
- Basic home crafts
The two-tube pack is better for:
- Multiple tote bag projects
- Group craft activities
- Costume production
- Regular repair work
- Small online craft businesses
- Larger seasonal projects
Store the tube closed and away from extreme heat or freezing conditions. Wipe the nozzle after use and replace the cap immediately.
Can It Be Customized?
GleamGlee supports branded wholesale, OEM, ODM, and private-label fabric glue projects for retailers, distributors, online sellers, craft brands, repair businesses, and importers.
Customization can begin with an existing formula or a defined target, such as cure time, viscosity, flexibility, odor level, packaging size, nozzle type, or market positioning. A customized order can start from approximately 200 units, depending on packaging and project requirements.
Available support includes:
- Existing or customized formulations
- Private-label branding
- 50g single and multipack options
- Custom tubes, bottles, pouches, or kits
- Logo and label design
- Multilingual packaging
- SDS and TDS support
- CLP, REACH, and GHS documentation
- Packaging compatibility testing
- Leakage and transport testing
- Sample development in about 7–14 days
- Printable design drafts in as little as 2 days
- Standard bulk production in about 20 days
- Expedited production options around 15 days
The manufacturing system combines formulation, packaging development, label printing, and raw-material support. Buyers can provide their target fabric, application, package size, destination market, annual volume, and reference product so the technical and sales teams can prepare a suitable sample and quotation.
Conclusion
Fabric glue can extend the useful life of bags, hats, and accessories when the adhesive is matched to the material and the type of repair. It is particularly effective for decorative patches, detached linings, small fabric tabs, loose trims, hat sweatbands, appliqués, pouches, and other projects that have broad contact areas and limited structural stress.
Reliable results depend on preparation and patience. The surfaces should be clean and dry, the glue layer should remain thin and even, and the repaired area should stay supported during the setting period. A bond that feels dry after several minutes has not necessarily reached its final strength. Waiting for the full 24-hour cure before washing, ironing, folding, or loading the item greatly reduces avoidable failures.
Fabric glue should not be used as the only repair method for heavily loaded bag handles, backpack straps, safety webbing, buckle anchors, or badly weakened seams. These areas generally need stitching, reinforcement, replacement, or professional repair.
For direct product orders, GleamGlee provides 50g single-tube and two-tube fabric glue options. Retailers, distributors, Amazon sellers, Shopify brands, craft suppliers, and private-label buyers can also request customized formulations, packaging, multilingual labels, compliance documents, and sample testing.
To request a quotation or customized fabric glue sample, provide the intended application, target fabrics, preferred package size, destination market, expected order quantity, and whether the product will use the GleamGlee brand or a private label. This information allows the technical and sales teams to recommend an existing formula or prepare a more precise development proposal.





















