 Skip to content
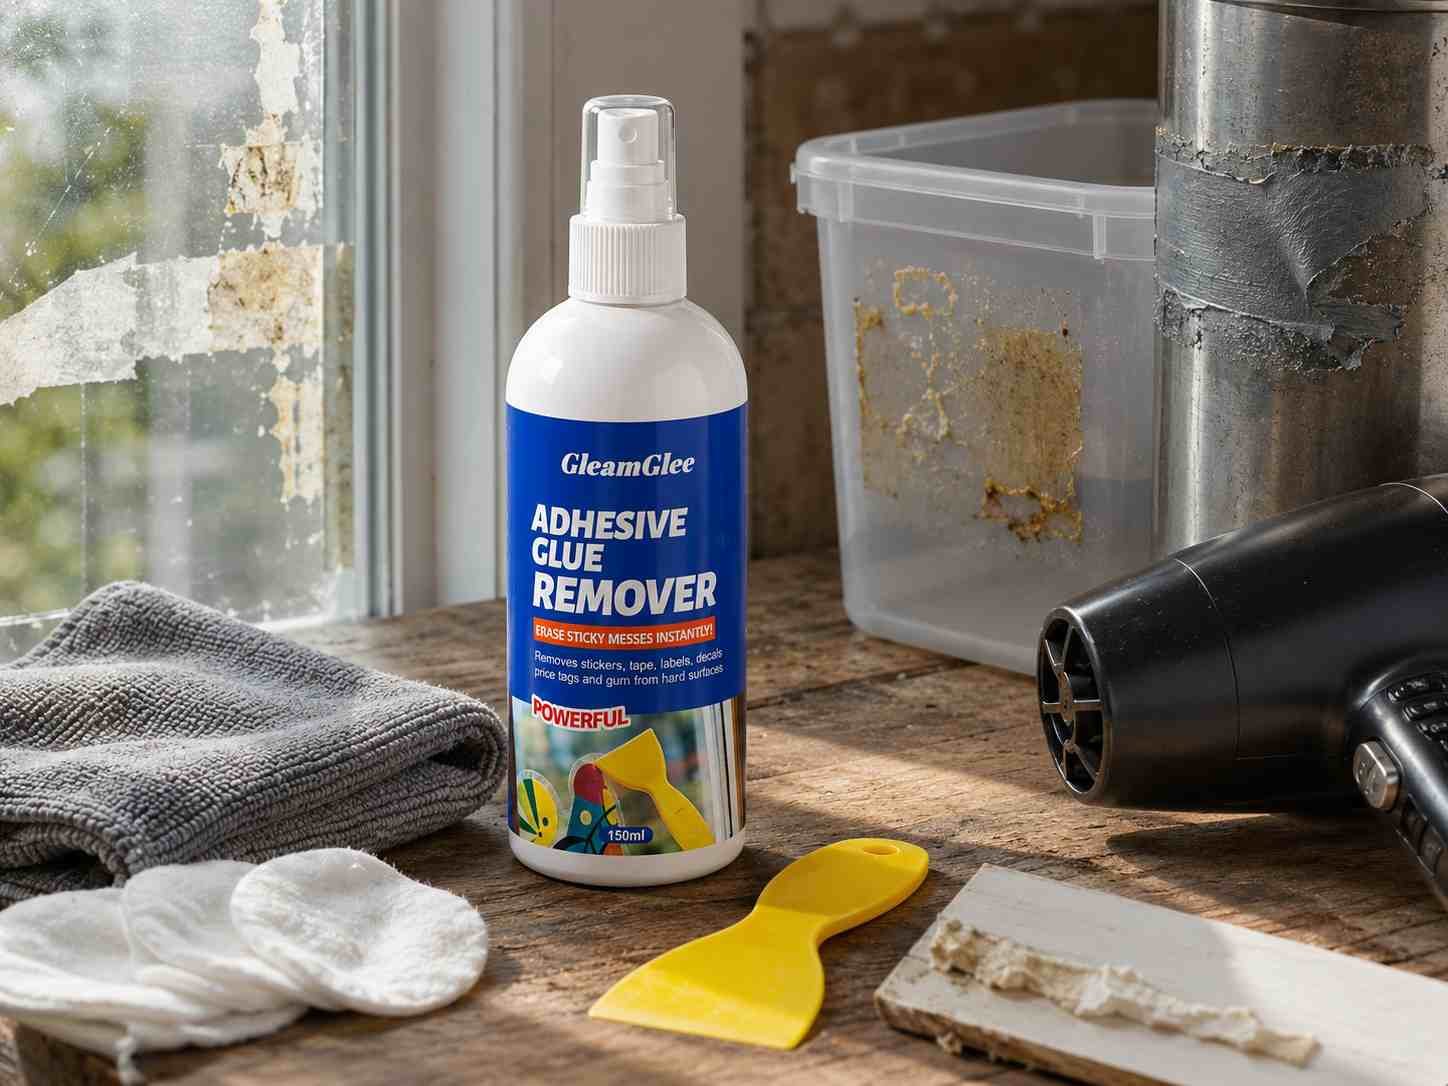
A sticky label can turn an otherwise simple cleanup into an irritating job. The printed layer tears away, damp paper remains attached, and rubbing only spreads the adhesive into a wider, shinier patch. People often respond by scraping harder, yet extra force can scratch glass, cloud plastic, dull painted metal, or damage the finish on a wooden table. A safer method begins by understanding that the label and the adhesive underneath it are two separate materials that may need to be removed in different stages.
To remove a sticky label with adhesive remover, peel away loose paper, test the remover on a hidden part of the surface, apply a controlled amount to the remaining label or glue, and allow the adhesive to soften. Lift the residue with a smooth plastic scraper or clean cloth, repeat when necessary, and finish with a surface-appropriate cleaner.
The basic process is easy to remember, but surface type, label age, adhesive thickness, storage temperature, and exposure to sunlight all affect the result. A fresh price sticker on a glass jar may release within seconds, while a sun-baked decal on a car window can require several controlled applications. The difference between a clean result and a damaged finish often comes down to patience, a low scraping angle, and knowing when to stop.
What Makes Sticky Labels Hard to Remove?
Sticky labels become difficult to remove when the adhesive has aged, spread into microscopic surface texture, or developed a stronger bond than the paper or plastic label above it. Heat, sunlight, pressure, moisture, dirt, and long storage periods can change the glue’s behavior, which is why softening the adhesive before scraping usually produces a cleaner and safer result.
H2 Image Prompt: A highly realistic 4:3 commercial lifestyle photograph showing several difficult sticky labels on common household objects, including a glass jar, plastic storage box, stainless-steel container, and finished wooden tray. Some labels are torn, yellowed, or partially peeled, with visible glue underneath. Natural window light, realistic surface textures, slightly imperfect arrangement, DSLR photography, shallow depth of field, no CGI, no illustration, no watermark, no perfect symmetry.
Why Labels Leave Residue
Most price stickers, barcode labels, shipping labels, decals, and packaging seals use pressure-sensitive adhesive. The glue develops a bond when the label is pressed onto a surface, allowing it to flow into tiny surface irregularities without needing heat, water, or chemical curing. That convenience helps labels survive shipping and handling, but it also makes them difficult to remove cleanly after months or years.
The label face and the adhesive layer do not always age in the same way. Paper may absorb moisture, become brittle, or split into thin fibers, while the glue remains firmly attached underneath. A vinyl label may peel away in one flexible sheet, yet leave a smooth and rubbery adhesive film that smears when rubbed. Laminated labels may resist liquid penetration until an edge is lifted or the upper layer is removed.
Heat can increase the problem because many pressure-sensitive adhesives become more mobile when warm. Labels stored near kitchen appliances, sunny windows, vehicle glass, or warehouse roofs may form stronger contact with the surface over time. Repeated pressure from stacked packaging can also increase the bonded area, while dust, oil, and moisture may become embedded in the adhesive and create darker residue.
Scraping alone removes only the material that can be physically lifted. When the glue remains firmly bonded, added pressure increases the risk of surface damage without addressing the reason the residue is still attached. Adhesive remover reduces that risk by softening or breaking down the glue layer before mechanical removal begins.
Which Labels Are Hardest?
The hardest labels usually combine a strong adhesive with a face material designed to resist moisture, abrasion, heat, or outdoor exposure. Shipping labels, permanent barcode stickers, vinyl decals, double-sided tape, foam mounting strips, and protective films are engineered to remain attached during storage and transport, so they often resist simple soap-and-water cleaning.
Paper labels can be deceptive because they appear weak but often separate into layers. The printed surface peels away, leaving paper fibers bonded to the glue. When remover is applied too early, the paper absorbs the liquid and forms a soft pulp that must be wiped away before the adhesive underneath can be treated properly.
Vinyl decals create a different problem. Their plastic face may peel cleanly, but the remaining adhesive can cover a large area as a nearly invisible film. Rubbing that film with a dry cloth can spread it beyond the original label boundary. Old outdoor decals may also leave hardened edges and softer centers because sunlight and temperature affected different parts of the label unevenly.
| Label Type | Typical Problem | Practical First Step |
|---|---|---|
| Paper price label | Tears into fibers and leaves wet paper | Remove loose paper before treating glue |
| Barcode sticker | Coated face blocks liquid penetration | Lift one edge to expose adhesive |
| Vinyl decal | Plastic peels away but clear glue remains | Treat the remaining film directly |
| Shipping label | Strong permanent adhesive over a large area | Work in several small sections |
| Double-sided tape | Foam or plastic carrier covers the glue | Remove the carrier before applying remover |
| Protective film | Wide, thin adhesive layer remains | Test a small area before broad cleaning |
Label age is often more important than label size. A recently applied shipping label may release more easily than a small sticker that has remained on a container for several years. Storage conditions, adhesive formulation, and surface texture all influence whether the label lifts cleanly or breaks apart.
Is Label Glue Different?
Label glue, sticker residue, and tape marks are often discussed as though they are identical, but their structure can vary considerably. Label glue is usually a thin pressure-sensitive layer beneath paper or plastic. Sticker residue describes that adhesive after the visible sticker has been peeled away. Tape residue may include glue mixed with paper fibers, plastic film, fabric reinforcement, or foam.
The distinction matters because adhesive remover performs best when it reaches the glue directly. Spraying a thick foam mounting pad may soften the upper material without reaching the adhesive attached to the surface. Removing the foam or tape carrier first exposes the layer that actually needs treatment and prevents unnecessary product use.
Residue texture provides useful clues. A clear, tacky film often responds to a short application and clean wiping. Yellowed or hardened glue usually needs repeated treatment. Rubber-like mounting adhesive may roll into small pieces after softening rather than dissolve into liquid. Paper fibers generally need to be removed before the remaining glue can be evaluated.
Not every visible mark is adhesive. Clouding on acrylic may indicate chemical stress, while a dull patch on painted metal may be finish damage. When the surface no longer feels sticky but still looks different, continuing to add remover may worsen the appearance rather than improve it.
Which Tools Do You Need?
Most label-removal jobs can be completed with a suitable adhesive remover, a smooth plastic scraper, and a clean cloth or disposable paper towel. Cotton swabs, gloves, a soft brush, and mild soap may improve control in certain situations. Each tool should help soften, lift, or collect residue without scratching the surface or spreading dissolved glue.
H2 Image Prompt: A highly realistic 4:3 overhead commercial lifestyle photograph of a practical adhesive-removal toolkit arranged naturally on a lightly worn worktable. Include an adhesive remover spray bottle, smooth plastic scraper, microfiber cloth, folded paper towels, cotton swabs, nitrile gloves, and a small bowl of mild soapy water. Soft daylight, realistic shadows, authentic minor imperfections, consumer DSLR perspective, no CGI, no illustration, no watermark, no perfect symmetry.
Which Remover Works Best?
A suitable adhesive remover should be formulated for pressure-sensitive glue and related sticky deposits rather than ordinary dust or food stains. General household cleaners may remove grease and dirt, but they often struggle with barcode labels, tape marks, vinyl adhesive, mounting residue, gum film, waxy buildup, or glue mixed with oil.
Spray formats are useful because they distribute product evenly and help control how much liquid reaches the surrounding surface. The user can concentrate treatment on label edges, small glue patches, or narrow strips without pouring excess cleaner across a larger area. Controlled application is especially valuable on vertical surfaces, appliance panels, furniture, vehicle trim, and objects with seams.
A fast-acting adhesive remover may begin softening light sticker residue in approximately 15 seconds. That timing should be considered an initial working period rather than a guarantee for every adhesive. Thick double-sided tape, old decals, weathered glue, and residue contaminated with dirt may require more than one short treatment cycle.
Cleanup quality also matters. Some household alternatives loosen glue but leave an oily layer that attracts dust and requires additional degreasing. A practical remover should allow dissolved adhesive to be collected with a cloth or paper towel and should leave a surface that can be finish-cleaned without prolonged scrubbing.
No formula should be assumed safe on every material. Surface testing remains necessary on acrylic, clear plastics, painted finishes, printed markings, varnished wood, soft-touch coatings, and automotive surfaces. Removal speed has little value when it is achieved at the cost of permanent surface damage.
Do You Need a Scraper?
A plastic scraper is useful when the residue is thick enough to lift as a layer. It provides more controlled pressure than a fingernail and is usually less aggressive than a metal blade. An expired plastic card may work for a small household job, but a purpose-made scraper normally has a smoother edge and a shape that is easier to hold.
The scraper should be kept at a low angle, almost parallel to the surface. A steep angle concentrates pressure along a narrow point and increases the chance of scratches, gouges, or dull marks. The adhesive remover should perform most of the softening, while the scraper guides the loosened material away.
Thin glue films may not require scraping. A clean paper towel or microfiber cloth can often lift them after the adhesive has softened. Disposable towels are useful during the first pass because collected glue can be discarded instead of remaining trapped in a reusable cloth.
Metal blades, damaged scrapers, rough scouring pads, and steel wool should generally be avoided. Even a hard surface can be scratched when dust or grit becomes trapped beneath the tool. Razor blades may be appropriate for certain untreated glass applications in professional settings, but they are not suitable for plastic, coated glass, mirrors, painted surfaces, films, or unknown finishes.
What Should You Check?
Before applying remover, identify the surface beneath the label and determine whether it is painted, printed, coated, laminated, sealed, porous, or unfinished. Plain glass and stainless steel may tolerate a different process from acrylic, varnished wood, car paint, powder-coated metal, or a printed appliance panel.
Remove dirt before wiping or scraping. Fine particles can behave like sandpaper when pressed beneath a cloth, particularly on glossy plastic, polished metal, and automotive clear coat. Cleaning the surrounding area before adhesive treatment reduces the chance of turning a glue problem into a scratch problem.
A hidden-area test should be evaluated after the surface dries. Look for clouding, loss of gloss, softened paint, color transfer, swelling, tackiness, whitening, cracking, or a visible boundary around the treated spot. Some coatings appear unchanged while wet but reveal damage after the liquid has evaporated.
Follow the product label regarding ventilation, gloves, storage, flammability, and skin contact. Keep the remover away from heat, open flames, food, children, and pets as directed. Avoid spraying directly near switches, screens, charging ports, appliance seams, vents, or electrical controls where liquid may enter.
Which Cloth Works Best?
The wiping material can determine whether softened glue is removed or simply spread over a wider area. A cloth that has absorbed dissolved adhesive will often redeposit a thin sticky film, causing the surface to remain tacky even after several rounds of wiping.
Folded paper towels work well during the first pass because each contaminated section can be discarded. Wipe in one direction, expose a clean section after one or two passes, and avoid broad circular rubbing. Circular movement tends to spread dissolved adhesive outside the original label area.
Microfiber cloths are better for final polishing on durable glass, metal, and finished surfaces. They should not be used for heavy residue unless they can be washed separately afterward. Adhesive trapped in the fibers can transfer onto other objects during future cleaning.
Cotton swabs provide better control around small labels, trim edges, corners, and narrow seams. On sensitive surfaces, applying remover to a swab or cloth rather than spraying directly can reduce overspray and limit contact with surrounding materials. Whatever material is chosen, it must be soft, clean, and free of abrasive particles.
How Do You Remove Sticky Labels?
Remove a sticky label by cleaning the surrounding area, peeling away loose material, applying adhesive remover to the remaining paper or glue, and allowing enough time for softening. Lift the residue with a low-angle plastic scraper or clean cloth, repeat the treatment when necessary, and finish with a cleaner appropriate for the surface.
H2 Image Prompt: A highly realistic 4:3 step-by-step lifestyle photograph showing hands removing a sticky paper label from a glass jar. One hand sprays adhesive remover onto the exposed residue while another uses a smooth plastic scraper at a low angle. Include a folded paper towel and partially removed label nearby. Natural kitchen daylight, visible glass texture, slight messiness, DSLR realism, no CGI, no illustration, no watermark, no excessive text.
How Should You Prepare?
Begin by removing dust, grit, food residue, grease, or road dirt from the surrounding area. Preparation is particularly important on glossy plastic, vehicle paint, polished metal, and finished wood because small particles can create visible scratches when trapped beneath a scraper or cloth.
Lift one corner of the label with a fingernail or plastic tool. Peel slowly at a low angle, keeping the label close to the surface rather than pulling it straight upward. Low-angle peeling reduces stress on the label face and may allow more adhesive to leave with the paper or vinyl.
When a paper label tears, remove as much of the loose upper layer as possible. Adhesive remover works more efficiently when it can reach the glue rather than sitting on coated or water-resistant paper. With laminated labels, lifting an edge first may allow the liquid to move underneath the face material.
Position the object so runoff can be controlled. Empty food containers before treatment, protect nearby rubber seals on vehicles, and avoid spraying toward appliance controls or electrical seams. When working on a vertical surface, place an absorbent towel below the residue to collect excess liquid.
A reliable preparation routine includes cleaning the area, peeling loose material, exposing the adhesive, protecting nearby sensitive parts, and testing the remover in a concealed location. A few minutes of preparation usually prevents unnecessary spreading, repeated wiping, and surface damage.
How Do You Apply It?
Apply enough remover to cover the residue without saturating the entire object. A light, even spray is generally more useful than a heavy application because it provides better control and makes it easier to evaluate how the adhesive and surface respond.
For light residue, begin with an approximately 15-second dwell period when the product instructions support that timing. Test the edge with a plastic scraper or clean towel. When the glue becomes softer, shinier, mobile, or begins to gather, continue removal. When it remains firm, apply another light coat rather than increasing pressure.
Large shipping labels, decals, or protective-film residue should be divided into smaller working areas. Treating the entire surface at once may allow the product to evaporate before each section is cleaned. Smaller areas also make it easier to notice changes in the finish.
On vertical surfaces, control runoff carefully. Spray the remover onto a cloth or cotton pad when direct spraying would allow liquid to enter seams, trim, or electrical gaps. Work from the outside edge of the residue toward the center to prevent spreading.
Each cloth section should contact the adhesive only briefly before being turned. A saturated towel will redistribute glue, producing a shiny or tacky film that makes the cleaning process appear ineffective.
How Long Should It Sit?
Dwell time depends on label construction, adhesive thickness, storage age, temperature, surface type, and exposure to heat or sunlight. A fresh price sticker may soften within seconds, while an old mounting strip or outdoor decal may require several short applications.
Longer contact is not automatically better. Plain glass or uncoated metal may tolerate additional working time when allowed by the product label, but painted, plastic, printed, or finished surfaces benefit from shorter and more controlled treatment cycles.
Visible changes can help determine readiness. Softened glue may become glossy, begin to move under light pressure, gather along the scraper edge, or roll into small pieces. Old residue sometimes loosens first around the perimeter, so work from the released edge toward the center.
Do not leave the treated object unattended. Product evaporation can change the way the formula behaves, while softened glue may spread or run. Warm surfaces accelerate drying, which is why car panels and windows should be treated in the shade after they have cooled.
Cold temperatures may slow adhesive softening, but uncontrolled heating introduces unnecessary risk. Heat guns, flames, and excessively hot water can deform plastic, damage paint, weaken seals, or create a safety hazard around cleaning products.
How Do You Finish?
After the adhesive has softened, place the scraper nearly flat against the surface and push slowly beneath the residue. Thick glue may gather into a small ridge in front of the tool. Remove that material with a paper towel before continuing so it does not spread back across the cleaned area.
For thin films, press a folded towel onto the residue briefly and wipe in one direction. Use a clean section for each pass. When the area still feels sticky, the most common cause is a contaminated towel rather than a lack of remover.
Once the glue is gone, clean the area according to the surface. Wash reusable glass jars and metal containers with mild dish soap and water. Use a compatible detailing product on vehicle surfaces when necessary. Wipe finished wood with minimal moisture and dry it promptly. Clean plastic only with a method approved for the particular item.
Inspect the area after drying. Side lighting can reveal thin residue that is difficult to see from the front. A properly cleaned surface should feel smooth and should not attract lint or dust. When the tackiness is gone but a cloudy mark remains, stop treatment because the remaining appearance may result from finish damage rather than adhesive.

How Do You Treat Different Surfaces?
Different materials need different levels of caution. Plain glass and uncoated metal are generally more tolerant, while plastic, finished wood, painted surfaces, and vehicle components require shorter contact times and stricter spot testing. Adjust product quantity, dwell time, wiping pressure, and final cleaning method according to the exact material.
H2 Image Prompt: A highly realistic 4:3 commercial comparison photograph divided naturally across one work area, showing adhesive residue being removed from a glass jar, clear plastic container, brushed metal appliance panel, finished wooden board, and car window sample. Include a spray bottle, scraper, and cloth in active use. Natural daylight, realistic reflections and imperfections, DSLR photography, shallow depth of field, no CGI, no illustration, no watermark, no perfect symmetry.
How Do You Clean Glass?
Glass jars, bottles, windows, and mirrors are among the most common label-removal projects. Plain glass is relatively durable, but not every glass surface is untreated. Decorative films, tint, printed borders, mirror backing, heating elements, and specialty coatings can respond differently to the same remover.
For jars and bottles, peel away as much paper as possible, apply remover to the exposed glue, and allow it to soften. Lift the residue with a plastic scraper, wipe with a disposable towel, and repeat when necessary. Wash food containers thoroughly before reuse and prevent cleaner from entering lids, seals, or threaded openings.
Windows should be treated in small sections. Control runoff near frames and rubber seals, particularly when their compatibility is unknown. Automotive windows may contain aftermarket tint on the inside, so a process suitable for exterior glass may damage an interior film.
Mirrors require extra care near chipped or exposed edges. Liquid that reaches the backing can contribute to darkening or deterioration. Apply remover to a cloth or cotton swab when treating residue near the perimeter instead of spraying directly.
| Glass Surface | Starting Method | Main Precaution |
|---|---|---|
| Plain glass jar | Spray, wait briefly, scrape, and wash | Prevent residue from reaching food-contact areas |
| Household window | Treat a small section and wipe clean | Check for films and coated surfaces |
| Mirror | Apply remover with a cloth near edges | Avoid liquid reaching damaged backing |
| Automotive glass | Work on a cool surface in the shade | Protect tint, seals, and printed borders |
| Glass appliance panel | Use minimal liquid near controls | Preserve printed markings and electrical seams |
Abrasive pads are not necessary for most glass-label jobs. Dust, metal fragments, and damaged scrapers can create permanent marks even on a surface that appears hard.
How Do You Clean Plastic?
Plastic requires careful testing because storage boxes, acrylic sheets, appliance housings, packaging trays, vehicle trim, and flexible containers may be made from different polymers. A product that works well on one plastic may cloud, soften, whiten, or crack another.
Apply a small amount to a hidden area, wipe it away, let the surface dry, and examine it under strong light. Look for gloss loss, fine cracks, whitening, swelling, stickiness, or color transfer. Transparent plastic and acrylic deserve particular attention because even slight damage remains highly visible.
Use the shortest practical dwell time and the smallest amount of remover needed. Applying product to a cloth or cotton swab offers better control than direct spraying. A plastic scraper can still scratch a plastic surface, especially when grit becomes trapped beneath the edge.
Stress-loaded plastic components may be more vulnerable. Clear bent panels, thin clips, hinges, and molded parts can contain internal stress that becomes visible as fine cracking after contact with an unsuitable cleaner.
When the plastic type is unknown, begin with mild soap and water to remove loose paper. Expose the adhesive gradually, test the remover on a small section, and stop immediately when the surface appearance changes.
How Do You Clean Metal and Wood?
Metal surfaces range from bare stainless steel to painted appliances, powder-coated tools, printed cans, and polished decorative finishes. Uncoated metal is generally easier to treat, but labels applied over paint, printing, or protective coatings need spot testing.
On brushed stainless steel, wipe in the direction of the grain to reduce streaking and help remove residue from the surface texture. Use a fresh cloth during the final pass because dissolved adhesive can remain trapped in brushed lines. Painted metal should be checked for color transfer and gloss change.
Wood presents greater uncertainty. Sealed wood may tolerate controlled treatment, while raw wood can absorb both adhesive and cleaner. Oil, wax, lacquer, varnish, stain, and water-based finishes react differently, even when they appear similar.
Apply a small quantity to a cloth instead of spraying broadly. Avoid exposed end grain, damaged finish, joints, cracks, and seams. Use minimal pressure and wipe promptly. A surface that feels smooth is not necessarily fully sealed.
Raw timber, valuable veneer, antique furniture, and delicate finishes should be handled by a specialist. The potential damage to a valuable object is far greater than the inconvenience of leaving a small adhesive mark untreated.
How Do You Clean Cars?
Vehicles contain glass, clear coat, painted panels, hard plastic, soft-touch trim, rubber seals, decorative films, screens, and printed controls. Each area requires a different level of caution, so a method that works on the window should not automatically be used on the dashboard or bodywork.
Work in the shade after the vehicle has cooled. Hot surfaces cause faster evaporation and may soften adhesive unevenly. Wash away road dirt before treatment because grit trapped beneath a cloth can create swirl marks on clear coat.
For exterior glass, apply remover in small areas and control runoff around seals. Painted body panels should be treated only with a product suitable for automotive finishes. Use a soft cloth or approved scraper with minimal pressure, and stop immediately when gloss or color changes.
Interior trim is often more sensitive than exterior plastic. Soft-touch coatings, decorative films, printed symbols, screens, and dashboard materials can discolor or become sticky after contact with unsuitable solvents. Apply remover to a cotton swab or cloth instead of spraying directly.
A careful vehicle process includes cleaning the area, testing the remover, treating one small section, lifting the softened residue gently, wiping immediately, and finishing with a compatible detailing product where necessary. Avoid leather, fabric, headliners, screens, and unknown interior coatings unless the product is specifically approved for those materials.
What Removes Stubborn Residue?
Stubborn residue is removed more safely through repeated controlled treatment than aggressive scraping. Remove paper, foam, wax, gum, or other bulk material first, apply adhesive remover to the exposed glue, and lift the softened residue in thin layers. Old or weathered adhesive may require several short applications and a fresh wiping surface during every pass.
H2 Image Prompt: A highly realistic 4:3 close-up lifestyle photograph showing stubborn old adhesive residue, thick double-sided tape, wax film, and gum traces on separate compatible hard-surface samples. A hand uses adhesive remover and a plastic scraper to lift softened glue in small sections. Natural workshop daylight, realistic worn textures, slight visual imperfections, shallow depth of field, DSLR photography, no CGI, no illustration, no watermark.
What About Old Glue?
Old adhesive can become yellow, hard, brittle, rubbery, or mixed with dust. Heat, ultraviolet light, oxidation, and long storage periods change its structure, so the residue may respond unevenly even when the same remover works quickly on a fresh sticker.
Treat a small section and test the edge after the first application. When the glue moves, rolls, or gathers under light pressure, continue slowly. When it remains hard, apply another light coat rather than pressing the scraper more forcefully.
A three-stage process is often effective. The first pass removes paper fibers and surface dirt. The second softens and lifts the main glue layer. The third removes the thin finishing film that causes lingering tackiness or attracts lint.
Old residue frequently loosens around the edge before the center. Begin where the adhesive has started to release and move gradually inward. Keeping the scraper almost flat allows the tool to travel beneath softened material instead of cutting into the surface.
Temperature influences performance, but uncontrolled heating should be avoided. Heat guns can damage plastic, paint, seals, and coatings. Cleaning products must also remain away from flames and ignition sources according to their safety instructions.
What About Thick Tape?
Double-sided tape, mounting strips, removable hooks, and foam pads include a carrier layer above the adhesive. The carrier must usually be removed before adhesive remover can reach the glue attached to the surface.
Lift one corner and pull the tape slowly at a low angle. Thick foam may tear, so remove it in sections. Avoid saturating the entire strip because the carrier may absorb product without releasing the adhesive beneath it.
After the backing has been removed, treat the exposed glue. Rubber-like residue may soften and roll into small pieces rather than dissolve completely. Collect those pieces with a paper towel before applying more remover.
Painted drywall and wallpaper require additional caution. A remover may dissolve hook adhesive but also lift paint or printed wall covering. Apply a very small amount with a cotton swab, monitor the finish closely, and stop as soon as color or texture changes.
On compatible glass, tile, metal, or hard plastic, a smooth scraper can provide controlled leverage. The correct sequence is carrier first, main adhesive second, and thin finishing film last.
Can It Remove Gum and Wax?
Adhesive remover can help clean gum residue, candle wax film, grease mixed with glue, light silicone marks, and selected craft residues, but the bulk material should generally be removed before chemical treatment begins.
For gum, lift the main mass with a plastic tool and treat only the remaining tacky film. Spraying a large piece can spread softened gum over a wider area and waste product. For candle wax, remove the solid layer carefully before treating the cloudy or greasy residue underneath.
Light silicone traces on a compatible hard surface may soften with a suitable remover. Fully cured construction silicone is different and often requires mechanical cutting followed by a dedicated silicone-removal process. A general label remover should not be expected to dissolve a thick sealant bead.
Grease mixed with adhesive can require two separate cleaning stages. The first application may remove oil and surface contamination, while a second controlled treatment addresses the glue underneath.
Suitable tasks may include gum film after bulk removal, wax residue on tested glass or metal, glue mixed with kitchen grease, adhesive on hard craft tools, and protective-film residue on compatible panels.
Why Is It Still Sticky?
A surface may remain sticky because a thin glue layer was spread by the wiping material rather than removed. Once a towel is loaded with dissolved adhesive, continued rubbing simply transfers the residue across a larger area.
Use a fresh folded paper towel for every pass and wipe in one direction. Large patches should be divided into smaller zones so the same contaminated cloth is not dragged across the entire surface.
Insufficient dwell time is another common reason. The top of the glue may soften while the lower layer stays attached. A second short application normally works better than extended dry rubbing.
Excess remover can also leave a temporary cleaning film. Finish with mild soap and water on suitable washable surfaces or use a compatible finishing cleaner. Avoid assuming that every sticky feeling comes from adhesive.
Some paints, plastics, and soft-touch coatings become tacky after contact with an unsuitable cleaner. When the surface itself appears softened, discolored, or altered, stop immediately. Continued treatment will not restore damaged material.
Which Removal Method Is Best?
A dedicated adhesive remover is usually the most efficient option for stubborn label glue because it is formulated to soften pressure-sensitive residue and reduce scraping. Soap, alcohol, vinegar, oil, or heat can work in selected situations, but the best method should be judged by removal speed, surface compatibility, cleanup effort, and consistency.
H2 Image Prompt: A highly realistic 4:3 commercial comparison photograph showing several label-removal methods on a clean but naturally worn household work surface. Include mild soapy water, alcohol wipes, a small bowl of cooking oil, a hair dryer placed safely aside, and adhesive remover with a plastic scraper. Show different tested residue samples without excessive text. Natural daylight, realistic shadows, DSLR depth of field, no CGI, no illustration, no watermark, no perfect symmetry.
Is Remover Better Than Soap?
Warm water and dish soap work well on washable jars, bottles, and containers with ordinary paper labels. Soaking can loosen paper fibers and certain water-sensitive adhesives, making it a sensible first step for simple household jobs.
Many modern label adhesives are designed to survive refrigeration, moisture, transport, and repeated handling. Water may remove the printed paper while leaving the glue untouched. When the surface remains tacky after soaking, a dedicated adhesive remover becomes the more targeted choice.
Soap and remover can be used as complementary methods. Soap may remove paper, food residue, and dirt before the glue is treated. After adhesive removal, soap can be used again as a finishing wash on containers and other water-safe objects.
Scale also affects the choice. Soaking one jar is convenient, but processing many retail containers, tools, returned products, shelves, or packaging components can consume significant time and space. A controlled spray-and-scraper process is easier to repeat consistently.
The least aggressive effective method remains the best starting point. Use soap for light, washable labels and move to adhesive remover when the residue is water-resistant, aged, or likely to cause scratching through repeated scrubbing.
Is It Better Than Alcohol?
Alcohol, vinegar, cooking oil, and heat are common alternatives, but their performance varies with the glue and surface. Alcohol may dissolve some thin adhesive films but can damage printed markings, acrylic, paint, or soft-touch coatings. Vinegar is accessible but often inconsistent on strong or aged adhesive.
Cooking oil can loosen certain tacky residues, yet it leaves a greasy film and may stain wood, cardboard, unfinished stone, and other porous materials. Heat may soften a vinyl label but can also warp plastic, damage paint, weaken seals, or spread the adhesive into a wider layer.
| Method | Suitable Starting Use | Common Limitation |
|---|---|---|
| Soap and water | Washable paper labels | Limited effect on water-resistant glue |
| Alcohol | Selected thin adhesive films | May affect coatings, paint, and acrylic |
| Vinegar | Light household residue | Inconsistent on strong adhesive |
| Cooking oil | Certain tacky deposits | Greasy cleanup and staining risk |
| Controlled heat | Selected vinyl labels | May warp plastic or damage finishes |
| Adhesive remover | Sticker, label, and tape residue | Requires surface compatibility testing |
A purpose-made remover offers better process control because it targets pressure-sensitive adhesive and often reduces the amount of rubbing required. The most useful comparison includes cleanup time, surface risk, repeated applications, and consistency rather than focusing only on the cost of the liquid.
How Do You Choose?
A reliable adhesive remover should be evaluated by more than a general claim about sticker removal. Important factors include the types of residue it addresses, initial softening time, performance on aged glue, surface guidance, spray control, scraper quality, odor, cleanup experience, packaging durability, and technical documentation.
Household users benefit from a formula that handles common sticker glue, barcode labels, tape marks, waxy residue, and gum traces on suitable hard surfaces. A controlled spray and smooth plastic scraper make the process easier when residue is thick or spread across an irregular area.
Commercial users should also consider batch consistency, bottle leakage, trigger durability, shelf-life expectations, warning labels, SDS availability, multilingual instructions, packaging dimensions, production capacity, and logistics suitability.
The intended market should guide the format. A product for reusable kitchen containers may need different instructions from an automotive detailing product. A warehouse relabeling solution may prioritize larger packaging, while an Amazon product may require compact dimensions, strong leak protection, clear graphics, and FBA-ready packing.
Samples should always be tested on the actual labels and surfaces expected in the target market. Real application testing provides more useful information than broad performance claims that do not reflect the customer’s materials.
Do Businesses Need Custom Solutions?
Retailers, distributors, cleaning brands, Amazon sellers, automotive-care companies, and professional users may need more than a standard formula. Bottle size, spray pattern, odor profile, residue coverage, packaging strength, label language, compliance documentation, and accessory configuration can all affect product acceptance.
A custom project normally begins by identifying the residues the product must remove, the surfaces customers will treat, the target countries, the preferred bottle size, and the expected order volume. These details determine whether an existing formula and package are suitable or whether further testing and adjustment are needed.
Established formulas can often be combined with customized labels, logos, instructions, boxes, and scraper kits. More specialized applications may require changes to dwell time, viscosity, odor, residue range, or surface compatibility.
GleamGlee supports branded, OEM, ODM, and private-label adhesive remover projects through integrated formula development, packaging production, label printing, filling, quality control, and international logistics. Qualified projects may use standard packaging or explore customized bottles and application systems according to order volume and market needs.
The technical and production teams can support sample evaluation, multilingual artwork, SDS and TDS documentation, CLP, REACH, GHS, and market-specific labeling requirements. Low-MOQ customization may begin from approximately 200 units for suitable projects, while packaging, formula, testing, and documentation requirements determine the final commercial terms.

Conclusion
Removing a sticky label is not a contest of strength. The cleanest results come from identifying the label structure, protecting the surface, softening the adhesive, and using controlled pressure. Peel loose material first, perform a hidden-area test, apply a measured amount of remover, allow the glue to soften, and lift it with a low-angle plastic scraper or clean towel.
Fresh residue may respond within seconds, while aged labels, foam tape, outdoor decals, and adhesive exposed to heat may need several short treatment cycles. Repeated controlled applications are generally safer than aggressive scraping, prolonged soaking, or uncontrolled heating.
Surface compatibility should remain the deciding factor throughout the process. Plain glass, stainless steel, plastic, finished wood, car paint, interior trim, and coated surfaces cannot be treated as though they are identical. When tackiness disappears but clouding, discoloration, or softness remains, stop applying remover because the remaining mark may be surface damage rather than glue.
For household and professional cleaning, GleamGlee Adhesive Remover provides a practical spray-and-scraper format for suitable jars, windows, storage containers, desks, packaging, tools, vehicle surfaces, and DIY work areas. Its fast-acting design helps soften common sticky residue with less scraping and allows the user to work in controlled sections.
Businesses developing an adhesive-removal product can request formula samples, packaging options, custom labels, multilingual instructions, scraper-kit configurations, FBA-ready packing, compliance documentation, and international logistics support. Sharing the target market, expected order quantity, preferred bottle size, benchmark product, required residue types, and intended surfaces allows the technical team to prepare a more accurate quotation and customization plan.





















