 Skip to content
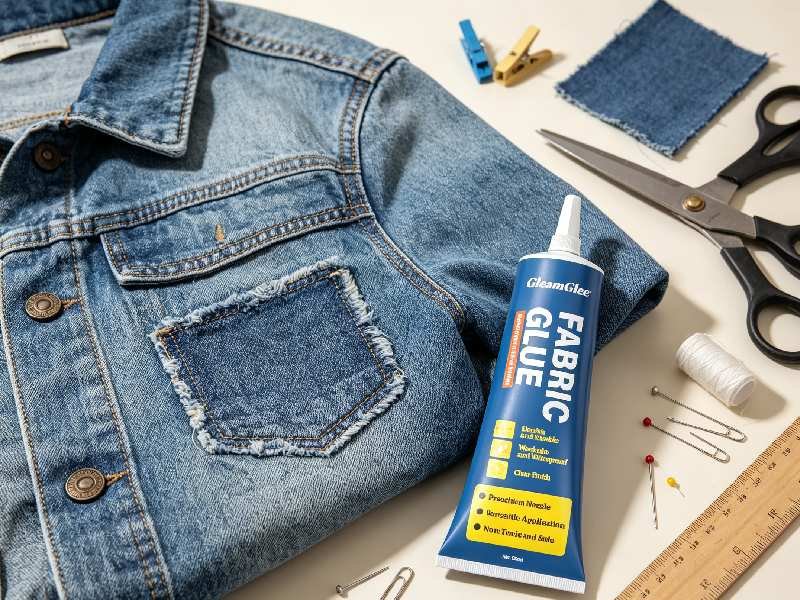
Holiday decorating often begins with a familiar problem: the ideas look beautiful, but the sewing machine is buried in a closet, the hot-glue gun feels too bulky for delicate fabric, and store-bought décor lacks personality. Fabric glue offers a practical middle ground. It can turn felt, cotton, ribbon, lace, denim, burlap, and leftover fabric into ornaments, wreaths, banners, stockings, table accents, and reusable gift decorations without requiring advanced sewing skills.
Fabric glue can be used to create no-sew holiday decorations by bonding fabric layers, attaching trims and embellishments, sealing edges, and securing appliqués to ornaments, wreaths, banners, stockings, and table décor. The best results come from choosing compatible materials, applying a thin controlled layer, pressing pieces evenly, and allowing the adhesive to cure fully before hanging, folding, washing, or storing the finished project.
A plain felt star can become a family keepsake with one date, one name, and a short ribbon loop. A scrap of tartan can become a stocking cuff. A worn table runner can gain a new border instead of being replaced. The most memorable holiday pieces are rarely the most complicated; they are the ones that carry a story. The projects below show how to make that story look clean, durable, and intentional.
What Holiday Decorations Can You Make?
Fabric glue can be used to make ornaments, garlands, wreaths, stockings, banners, table runners, napkin rings, gift bags, tree skirts, pillow accents, and fabric-covered decorations. The best projects use lightweight materials, broad bonding areas, and enough curing time before the finished item is hung, folded, filled, washed, or stored.
Easy Fabric Ornaments
Flat fabric ornaments are usually the easiest place to start because they require little material and place limited stress on the adhesive. Felt stars, trees, bells, mittens, hearts, snowmen, gingerbread figures, and simple initials can be cut from two matching layers and bonded around the edge. A ribbon loop can be enclosed between the layers before the ornament is sealed.
For beginners, an ornament measuring about 3 to 5 inches across is easier to control than a very small or oversized design. Tiny ornaments leave little room for a clean glue line, while large ornaments may bend unless they include felt, thin card, or another firm backing. A border of roughly ¼ inch gives enough space for an even bond without making the edge look bulky.
Cotton prints can be bonded over felt to create tartan trees, floral stars, striped stockings, or personalized family ornaments. Felt provides structure, while the patterned fabric gives the piece more character. This is also a practical way to use scraps left over from sewing, gift wrapping, or previous holiday projects.
Padded ornaments are possible, but the filling should remain light. Too much stuffing pushes outward against the bonded seam and can cause points or narrow corners to open. Leave a small gap, add the filling gradually, check the shape, and then close the final section.
Garlands and Banners
Fabric garlands can be made from pennants, stars, felt circles, miniature stockings, leaves, bows, letters, or layered holiday shapes. The pieces may be bonded directly to ribbon or enclosed around a cord between two matching fabric layers.
A typical pennant is about 5 to 7 inches long. This size is large enough to display a letter or motif clearly but still light enough to hang without pulling the ribbon downward. Leaving 1 to 2 inches between flags usually creates a balanced appearance. Closer spacing gives a fuller look, while wider spacing is better for long walls or shop displays.
Before gluing, lay the entire banner out on a table or floor. Check the order of letters, the direction of printed fabric, and the spacing between pieces. A quick phone photo helps preserve the layout while individual components are lifted for bonding.
For a folded-top banner, wrap the upper edge of each flag around the ribbon and bond it in place. This method provides a wider bonding area than attaching only the back edge. Leave 12 to 24 inches of free ribbon at both ends so the banner can be tied without placing strain on the decorated section.
Wreaths and Door Décor
Fabric glue works well for lightweight wreath components such as ribbon wraps, felt leaves, fabric flowers, bows, small appliqués, lettering, and decorative textile clusters. Foam, wire, grapevine, and cardboard wreath bases can all be used, but the bonding method should match the surface.
For a wrapped wreath, secure the beginning of the fabric strip on the back, wrap with a slight overlap, and add adhesive at concealed intervals. Covering the entire wreath base with a thick layer of glue is usually unnecessary. Strategic bonding at the starting point, several intermediate points, and the finishing end keeps the wrap in place while reducing mess and drying time.
Decorations often look better in grouped clusters than when spread evenly around the ring. Three or five related elements can create a strong focal point. A bow with two fabric flowers and several felt leaves, for example, appears more natural than identical decorations positioned at equal distances.
Heavy wooden signs, metal bells, thick ornaments, and large rigid pieces should not rely only on fabric glue. These components are better supported with wire, ties, or mechanical fasteners, while fabric adhesive is used for the textile layers and decorative finishing.
Table and Gift Décor
Fabric glue can update table runners, placemats, napkin rings, utensil holders, chair-back decorations, fabric gift bags, bottle wraps, and reusable gift tags. These projects are especially useful when existing household textiles need a seasonal look without being permanently replaced.
Decorative elements should be positioned away from areas exposed to hot dishes, spilled drinks, or frequent rubbing. On a table runner, trims and appliqués usually last longer when placed near the ends or corners rather than directly beneath serving dishes.
Napkin rings can be made from felt strips about 6 to 8 inches long. Overlap the ends by around 1 inch and bond them into a loop. A bow, star, leaf, or initial can then be placed over the joint, hiding the seam and increasing the bonding area.
Fabric-covered jars and containers can become utensil holders or centerpiece vessels, but textile decorations should be kept away from open flames. Battery-operated candles are a safer choice than exposed candle flames when fabric, ribbon, lace, or adhesive is used nearby.
| Decoration | Practical Size | Suitable Materials | Main Bonding Method |
|---|---|---|---|
| Flat ornament | 3–5 inches | Felt, cotton, fleece | Thin glue line inside the edge |
| Pennant flag | 5–7 inches | Cotton, felt, canvas | Fold the top around ribbon |
| Napkin ring | 6–8-inch strip | Felt, reinforced cotton | Overlap ends by about 1 inch |
| Fabric wreath | 10–18 inches | Ribbon, felt, fabric strips | Secure wraps and grouped accents |
| Gift tag | 2–4 inches | Felt, cotton over card | Spread a thin layer over flat backing |
Which Materials Work Best with Fabric Glue?
Felt, cotton, canvas, denim, fleece, burlap, ribbon, lace, and many fabric trims generally work well with fabric glue. Performance depends on absorbency, surface finish, weight, flexibility, and the second material being bonded. Coated, glossy, waterproof, waxed, or very delicate fabrics should always be tested before the final project begins.
Felt and Cotton
Felt is one of the most dependable materials for no-sew holiday crafts because it cuts cleanly and does not fray like many woven fabrics. It holds its shape well enough for stars, leaves, miniature stockings, letters, layered ornaments, and wreath decorations.
Thin craft felt is economical and suitable for flat decorative layers. Thicker wool-blend felt provides a more refined edge and greater structure, but it may require firmer pressure because the surface is denser. Very soft felt can absorb too much adhesive if a thick bead is applied.
Cotton is also easy to work with, particularly for banners, gift bags, table runners, appliqués, and ornament covers. Medium-weight cotton usually lies flat and accepts a thin adhesive layer evenly. Printed cotton can be bonded to felt to improve structure before the final shape is cut.
If the finished item may be washed later, prewash and fully dry the cotton before bonding. This reduces the chance of shrinkage pulling against the adhesive after the decoration has been assembled.
Denim, Canvas, and Fleece
Denim and canvas are useful when a project needs more body or a rustic appearance. They suit stocking cuffs, reusable gift bags, heavy-duty banners, table accents, and patch-style decorations. Their thickness, however, means folded edges and stacked seams can place more stress on the adhesive.
When bonding thick materials, press the full area evenly rather than squeezing only the outer edge. If clips are used, place them where they will not leave dents or force wet glue onto the visible surface.
Fleece works well for soft winter ornaments, plush figures, tree decorations, and stocking details. Because fleece has a raised surface, the adhesive must contact enough fibers to form a stable bond. Apply a controlled layer, press firmly, and avoid stretching the fleece while it is being positioned.
Stretching is a common source of distortion. Once the fabric relaxes, it may pull the decoration out of shape or create tension at the bond line. Let fleece lie naturally before applying adhesive.
Ribbons and Trims
Fabric glue can attach ribbon, lace, bows, flat appliqués, sequins, rhinestones, lightweight buttons, pom-poms, and decorative edging. Flat-backed decorations are usually easier to bond than round or irregular objects because they provide a larger contact area.
Ribbon should be cut cleanly and placed without tension. If it is stretched during assembly, it may pull away as it returns to its natural length. For narrow ribbon ends, a small amount of glue spread over a wider hidden section usually performs better than one thick dot.
Sequins and small decorative pieces require very controlled application. Excess adhesive may spread around the edge, pass through holes, or create a visible ring after drying. A precision nozzle or fine applicator is especially useful for this type of work.
Buttons that serve only as decoration can often be glued. Buttons that will be opened, pulled, or repeatedly handled are better stitched because their load is concentrated in a very small area.
Mixed-Material Projects
Fabric can sometimes be bonded to cardboard, paperboard, unfinished wood, foam, and other porous craft surfaces. These combinations are useful for reinforced ornaments, fabric-covered letters, tabletop signs, wreath bases, and gift tags.
Cardboard should receive only a thin layer because excess moisture can cause warping. When covering a flat card shape, spread the adhesive evenly and press the fabric beneath a clean protective sheet.
Unfinished wood often accepts fabric more readily than polished or varnished wood because the surface has more texture. Foam should always be tested first, since different foam compositions can react differently to adhesives.
Glossy plastic, glass, coated metal, silicone, waxed surfaces, and sealed wood are less predictable. A bond that appears secure after a few minutes may fail after several hours. Test the exact materials, allow a full cure, and then check for lifting, staining, surface change, and loss of flexibility.
| Material | General Suitability | Main Risk | Practical Approach |
|---|---|---|---|
| Felt | Very good | Oversaturation | Use a thin line or film |
| Cotton | Very good | Shrinkage after washing | Prewash when needed |
| Denim | Good | Thick seams | Press broadly and evenly |
| Canvas | Good | Edge stiffness | Avoid heavy glue beads |
| Fleece | Good | Stretch distortion | Position without tension |
| Burlap | Good with care | Glue passing through weave | Protect the work surface |
| Satin | Test first | Visible marks | Use minimal adhesive |
| Velvet | Test first | Crushed pile | Avoid excessive pressure |
| Cardboard | Useful backing | Warping | Apply a thin full layer |
| Coated plastic | Variable | Weak adhesion | Test after full cure |
How Do You Make No-Sew Holiday Ornaments?
Choose a simple template, cut matching fabric layers, prepare a hanging loop, apply a thin adhesive line, align the pieces, and press them without sliding. Leave a small opening if stuffing is required, then seal the final edge. Allow the ornament to cure fully before hanging, packing, washing, or adding significant weight.
Prepare the Pattern
Simple outlines are easier to cut, align, and bond. Stars, trees, mittens, hearts, bells, houses, circles, and gingerbread figures are more forgiving than designs with narrow points or complicated internal cuts.
Print or draw the pattern at the intended final size. For a first project, 3 to 5 inches is usually practical. Trace the design on the reverse side of the fabric so any marks remain hidden.
When two matching layers are needed, place the fabrics together and cut them at the same time if they can be held securely. This improves alignment and reduces uneven edges. For slippery fabric, cut the layers separately using the same template.
Plan every element before opening the adhesive. The hanging loop must be enclosed before the perimeter is sealed. Flat appliqués are easier to add while the ornament is still lying open. Stuffing should be inserted only after most of the edge has developed an initial hold.
A clean working area matters more than many beginners expect. Loose glitter, threads, pet hair, dust, hand cream, and fabric lint can interfere with a neat bond. Prepare the scissors, template, glue, applicator, ribbon, filling, and decorations before beginning so partially bonded pieces do not need to be moved repeatedly.
Apply the Adhesive
Apply fabric glue slightly inside the outer edge. Pressing will spread the adhesive outward, so a narrow margin helps prevent it from appearing on the visible face.
Coverage matters more than thickness. A continuous thin line around the perimeter is usually more effective than several thick dots. Dry gaps around corners may cause lifting, while excessive glue can soak through the fabric or create a hard ridge.
For a broad appliqué, place adhesive around the edge and across the center. If only the perimeter is bonded, the middle may bubble or move during handling.
Work in manageable sections on complicated shapes. If the entire perimeter is coated too slowly, the first area may begin setting before the final section is aligned. Close the tube between steps and keep loose fibers away from the nozzle.
The adhesive quantity should be adjusted to the fabric rather than applied in the same way to every project. Dense cotton often needs less product than thick felt or fleece. A small material test helps determine whether the glue remains near the surface, absorbs immediately, or becomes visible through the front.
Press and Set
Align the fabric carefully before pressing. Once the surfaces touch, avoid sliding one layer across the other. Sliding can spread wet glue beyond the intended area and distort the shape.
Press from the center outward to remove trapped air. For flat ornaments, place a clean protective sheet over the piece and apply a light, evenly distributed weight. Heavy objects may flatten padding or force glue through the fabric.
GleamGlee Fabric Glue begins to set in approximately 6 to 10 minutes under suitable conditions, but this is only the initial holding period. Temperature, humidity, fabric thickness, airflow, and adhesive quantity can affect the timing.
Do not repeatedly pull at the edge to check the bond. Early testing interrupts contact and can weaken the result. Leave the ornament flat and undisturbed for up to 24 hours before it is hung or stressed.
A surface that feels dry is not always fully cured inside. The adhesive between two thick fabric layers may remain soft after the exposed edge appears clear. Hanging the ornament too early places its full weight on a bond that has not yet developed its final strength.
Add the Details
Personalization gives a simple ornament more meaning. Names, dates, initials, ribbon bows, felt letters, sequins, appliqués, and lightweight buttons can be added after the main body is aligned.
Arrange the decorations first and photograph the layout. This prevents spacing problems when pieces are removed one by one for gluing. It is especially useful when making a matching set.
For a padded ornament, add filling gradually. Overfilling places outward pressure on the seam and may cause narrow points to open. Use a blunt tool to distribute the filling into corners without forcing it against the bond.
A hanging loop with about 2 to 3 inches of exposed ribbon suits many small ornaments. Enclose at least ½ inch of each ribbon end between the fabric layers. This provides a broader contact area than attaching only the tip.
For children’s projects, avoid small decorations that may detach and become a swallowing hazard. Adults should handle cutting, adhesive application, and final strength checks. Finished ornaments intended for homes with young children or pets should be placed where they cannot be chewed or pulled down.
| Step | Practical Guideline | Reason |
|---|---|---|
| Ornament size | 3–5 inches | Easier cutting and alignment |
| Glue margin | About ⅛–¼ inch inside edge | Reduces squeeze-out |
| Ribbon inside layer | At least ½ inch per end | Improves holding area |
| Initial set | About 6–10 minutes | Keeps pieces in position |
| Full cure | Up to 24 hours | Allows bond development |
| Hanging loop | About 2–3 inches exposed | Fits common branches and hooks |
| Filling | Light and even | Reduces seam pressure |

How Can You Decorate Larger Holiday Pieces?
Larger decorations should be built in sections so each bonded area can be pressed and cured properly. Fabric glue is useful for wraps, trims, appliqués, letters, cuffs, bows, and lightweight clusters on wreaths, banners, stockings, tree skirts, pillows, and table linens. Heavy rigid components should receive separate mechanical support.
Make a Fabric Wreath
Choose a base that matches the finished style. Foam rings create a smooth shape, wire frames allow more open designs, grapevine bases suit rustic décor, and cardboard circles work for lightweight indoor wreaths.
For a wrapped design, use fabric or ribbon strips about 1 to 3 inches wide. Secure the starting point on the back, wrap with a consistent overlap, and add small amounts of adhesive at hidden intervals. The wrap should be firm but not stretched.
Build the main decorative cluster separately on a flat surface. Felt leaves, flowers, bows, miniature stockings, or layered fabric shapes are easier to arrange and bond before they are placed on the curved wreath.
After attaching the cluster, test the balance before the full cure. If one side drops, reposition the hanging loop or reduce the weight. Heavy signs or bells should be secured with wire or ties.
Outdoor placement needs additional thought. Fabric glue may create a water-resistant bond, but the complete wreath can still be affected by rain, ultraviolet exposure, dust, wind, and freezing conditions. Felt, printed cotton, paperboard, metallic trims, and fabric dyes may deteriorate before the adhesive fails. Hang textile wreaths under a covered porch or use them indoors unless all materials are specifically suitable for outdoor exposure.
Build a Banner
A banner looks cleaner when one main shape is repeated. Triangles, rectangles, stockings, stars, and swallowtail flags all work, but mixing too many silhouettes can make the finished piece look unsettled.
Flags measuring 5 to 7 inches are visible enough for names or seasonal messages while remaining light. Felt, cotton backed with felt, and light canvas are practical choices.
Lay out all pieces before gluing. Check spelling, color order, pattern direction, and spacing. Leave 12 to 24 inches of unused ribbon at both ends for hanging.
Fold the top edge over the ribbon and bond it in place. This creates more contact area than gluing only a narrow strip on the back. Keep the entire banner flat while it sets.
For banners used in shops, classrooms, hotels, restaurants, or event venues, consider where the banner will be touched. A decoration placed behind a counter experiences less handling than one hung at child height or across a doorway. More frequently handled banners benefit from thicker felt backing, wider top folds, reinforced ends, and moderate overall length.
Customize Stockings
Stockings can be updated with cuffs, names, heel patches, toe panels, lace, ribbon, appliqués, and felt letters. Fabric glue works well for decorative additions, but the structural seams of a stocking that will carry heavy gifts should remain sewn.
Insert a protective sheet inside the stocking before applying adhesive. This prevents glue from passing through and bonding the front to the back.
A new cuff should be measured and test-fitted before gluing. Cut the strip slightly wider than the stocking opening so the edges can be aligned neatly.
Letters between 1 and 2 inches tall suit many standard stockings. Position the full name first, then bond one letter at a time. Allow the stocking to cure flat before it is filled or hung.
The hanging loop should be checked separately from the decorative bond. A stocking filled with gifts can place several pounds of force on a small loop and top seam. Fabric glue should not be used as the only support for a loaded stocking unless the entire structure has been designed and tested for that purpose. Decorative stockings and lightweight display stockings place much less stress on the construction.
Refresh Existing Décor
Existing decorations often need only one visual change. A plain tree skirt can receive a border, a faded pillow cover can gain a seasonal appliqué, and an old ornament can be wrapped in a new fabric print.
Inspect the original surface before bonding. Dust, loose fibers, oils, deteriorated fabric, or peeling coatings can weaken adhesion. Clean washable textiles according to their care instructions and let them dry completely.
For round ornaments, use several narrow fabric sections instead of forcing one flat piece around the entire sphere. Conceal joins with ribbon, lace, or trim.
Valuable, antique, or sentimental pieces should not be altered without testing. When reversibility matters, use ties, removable sleeves, or another nonpermanent method rather than permanent adhesive.
A useful rule is to upgrade the decoration at its strongest surface. Add a border to stable fabric, not to a fraying edge. Place an appliqué over a sound area, not over material that is already separating. Adhesive cannot restore the strength of a weak or deteriorated base unless that underlying damage is repaired first.
What Tips Help Holiday Decorations Last?
Durable fabric decorations depend on clean surfaces, even adhesive coverage, proper pressure, a full curing period, realistic weight limits, and dry storage. More glue does not automatically create a stronger bond. Excess adhesive can soak through fabric, extend drying time, add stiffness, and make the finished edge look uneven.
H2 Image Prompt: A realistic instructional craft photograph showing durable holiday decoration practices: a thin even glue line on felt, a weighted ornament curing flat, a small clock indicating 24 hours, neatly stored fabric ornaments in a rigid box with tissue dividers, and a banner rolled around a cardboard tube. Warm daylight, practical workshop setting, authentic handmade materials, clear visual organization without looking like a digital infographic, consumer DSLR photography, 4:3 aspect ratio, no watermark, no CGI, no illustration.
Control the Glue Amount
Use enough adhesive to create a thin, continuous layer across the bonding area. The surfaces should make full contact without producing large wet pools.
For felt ornaments, keep the line slightly inside the edge. Add small amounts around corners and narrow points, since these areas are more likely to lift if coverage is incomplete.
Absorbent materials behave differently. Felt, fleece, and burlap may take in more adhesive than tightly woven cotton. Test a small piece to see whether the glue remains near the surface or disappears immediately into the fibers.
After pressing, inspect the edge. A small controlled spread is normal, but wet adhesive flowing from several sides usually means too much was applied.
Thicker application is not a reliable solution for poorly fitting surfaces. If two pieces do not meet evenly, improve the cutting, flatten the materials, or provide broader support rather than filling the gap with a large amount of glue. Adhesive works best in a controlled bond line between surfaces that make proper contact.
Allow Full Curing
Initial set and full cure are not the same. A decoration may feel stable after several minutes while the adhesive between the fabric layers remains soft.
GleamGlee Fabric Glue develops an initial set in about 6 to 10 minutes and may require up to 24 hours for full curing. Thick fabric, low room temperature, high humidity, limited airflow, and heavy application can slow the process.
Plan projects at least one day before they are needed. Banners, stockings, and wreaths should not be hung immediately after assembly simply because the outer edge looks dry.
Washable or ironable projects should be handled according to the limitations of every component. A ribbon, print, sequin coating, foam insert, or metallic trim may be more sensitive to heat or washing than the cured adhesive.
Allowing more time is usually safer than accelerating drying with intense heat. A hair dryer, heater, or hot surface may distort synthetic fabrics, alter decorative coatings, or dry the exposed adhesive faster than the internal bond. Room-temperature curing on a flat surface is the more dependable approach for most household holiday projects.
Prevent Visible Marks
A test patch is the most reliable way to identify darkening, bleed-through, stiffness, or surface change before working on the final piece. Use the exact fabric and decoration materials, not a substitute.
Apply glue to the reverse of the smaller or less visible component whenever possible. For example, place adhesive on the back of a felt letter rather than directly on the stocking.
Keep tools and hands clean. Adhesive transferred from fingertips can leave shiny marks on dark fabric. Tweezers, a fine nozzle, and a disposable applicator make small details easier to control.
Do not rub wet glue across the fabric. Rubbing enlarges the affected area and drives adhesive deeper into the fibers. Follow the product instructions for cleaning and test any removal method on spare material first.
Pale satin, velvet, thin lace, and loosely woven fabrics require particular care. Even clear adhesive can change the way light passes through or reflects from the material. For highly visible projects such as wedding-season decorations, retail displays, or formal table linens, complete one sample and inspect it under the same lighting in which the final item will be displayed.
Store Decorations Properly
Store decorations only when they are fully cured, clean, and dry. Trapped moisture may contribute to odor, staining, deformation, or mildew during long storage.
Use rigid containers for padded ornaments, decorated stockings, and fabric-covered baubles. Place tissue paper or soft dividers between items so hard embellishments do not press into nearby fabric.
Fold banners at the spaces between flags rather than across bonded letters or appliqués. Long garlands can be rolled around a cardboard tube to reduce creasing.
Before hanging decorations the next season, inspect corners, seams, loops, and attached embellishments. Small lifting areas can be repaired before the item is placed under the stress of hanging.
Store the fabric glue separately with the nozzle wiped clean and the cap tightly closed. Keep it in a stable indoor environment rather than an unheated garage, freezing vehicle, or very hot attic. Before beginning a new seasonal project, test the stored product on spare fabric to confirm that its consistency and application remain suitable.
| Durability Factor | Practical Standard |
|---|---|
| Surface condition | Clean, dry, and free from loose fibers |
| Adhesive layer | Thin, even, and slightly inside visible edges |
| Initial handling | Keep aligned for about 6–10 minutes |
| Full cure | Allow up to 24 hours |
| Heavy components | Support with wire, ties, or fasteners |
| Washing | Follow the most delicate material’s care limit |
| Storage | Use a dry rigid container with soft dividers |
| Annual check | Inspect loops, corners, and trims before use |

Is GleamGlee Fabric Glue Good for Holiday Crafts?
GleamGlee Fabric Glue is suitable for many holiday projects because it dries clear, stays flexible, supports washable and ironable fabric applications, and includes a precision nozzle for controlled placement. It works with clothing fabrics, felt, denim, ribbons, sequins, patches, curtains, and other textile materials commonly used in ornaments, banners, stockings, wreaths, and table décor.
Clear and Flexible Finish
A clear finish matters when glue lines sit close to visible edges. Pale felt, patterned cotton, lace, and ribbon can all look untidy if the adhesive dries cloudy or yellow.
The adhesive is designed to dry transparent and remain flexible rather than becoming hard and brittle. This is useful for banners, stockings, fabric gift bags, pillow covers, and ornaments that will be folded, packed, and handled repeatedly.
Flexibility does not remove the need for careful application. A thick layer may still create a raised area beneath thin fabric. Testing is particularly important with satin, velvet, lace, and light-colored textiles.
The same properties also make the product useful beyond holiday crafts. It can be used for hems, patches, ribbons, sequins, curtains, denim repairs, and other everyday textile projects.
A flexible bond is particularly valuable where fabric bends repeatedly. Stocking cuffs fold during storage, banners move while hanging, gift bags open and close, and pillow covers compress during use. A brittle adhesive line may crack under this movement, while a properly cured flexible layer follows the textile more naturally.
Precision Application
Detailed work requires better control than broad general-purpose application. Small letters, narrow ribbon ends, miniature appliqués, snowflake points, and sequins can quickly become messy if too much glue is released.
The fine-point nozzle helps place adhesive into narrow areas. The cap includes a pin intended to reduce clogging, while the supplied applicator can spread glue across larger flat surfaces.
For best control, hold the nozzle close to the fabric without dragging it through loose fibers. Close the tube between stages and wipe the tip before replacing the cap.
Prepare the complete layout before gluing. Position all pieces, photograph the arrangement, and then bond from the center outward. This reduces accidental contact with wet components.
A precision nozzle also helps reduce product waste. Instead of squeezing a broad bead and removing the excess, the user can place adhesive only where contact is required. This is useful for detailed decorations, repeated workshop projects, small-batch handmade products, and samples where visual consistency matters.
Reusable Projects
The formula is designed for strong, flexible fabric bonding and can withstand washing and ironing after full curing when the complete project materials allow it. This makes it relevant to reusable stockings, table runners, gift bags, pillow covers, clothing decorations, and fabric banners.
The finished item should always be judged by its most delicate component. A fabric may tolerate washing while a metallic ribbon, printed sequin, foam insert, or decorative coating does not.
For washable projects, allow the full 24-hour cure and test the first completed item before producing a large set. A sample wash may reveal shrinkage, color bleeding, lifting, or changes in embellishments.
Reusable decorations last longer when they are designed with broad bonding areas, moderate weight, and proper storage rather than depending only on adhesive strength.
Ironable projects should be approached with the same care. Use the fabric manufacturer’s heat setting and protect delicate surfaces where necessary. Do not assume that every rhinestone, printed ribbon, synthetic trim, or foam-backed component can tolerate the temperature suitable for cotton or denim.
Pack and Custom Options
The product is available as one 50 ml tube or a two-tube pack. A single tube suits occasional repairs and several small holiday projects. The two-tube format is more practical for larger wreaths, multiple stockings, family craft sessions, workshops, or repeated seasonal use.
For retailers, distributors, Amazon sellers, craft brands, and private-label buyers, custom projects can include formula selection, viscosity adjustment, packaging design, applicator choice, multilingual labeling, and compliance documentation.
Custom production may begin from approximately 200 units, depending on the project. Packaging artwork can be prepared in as little as two days, samples generally require 7 to 14 days, and standard bulk production is commonly planned around 20 days after final confirmation. Selected urgent projects may be scheduled around 15 days when the formula, packaging, components, and production capacity allow.
Buyers comparing existing products or developing a new fabric adhesive should provide the intended market, expected quantity, preferred pack size, target viscosity, application method, required certifications, and any benchmark sample. This information makes formula matching, packaging selection, testing, and quotation more accurate.
GleamGlee integrates adhesive development, packaging selection, label printing, raw-material support, filling, assembly, quality control, and international shipping coordination. A team of more than 25 chemists, material specialists, and process engineers supports formula and application testing, while a multilingual design team can prepare packaging and instructions for major North American, European, and Asian markets.
The company’s existing supply structure can support consumer packs, private-label projects, distributor orders, retail-ready packaging, Amazon FBA preparation, and customized product development. Depending on the selected formula and destination, supporting documentation may include SDS, technical data, CLP, REACH, GHS, packaging information, and applicable quality-system documentation.
| Project Type | Practical Option | Main Benefit |
|---|---|---|
| Occasional household use | One 50 ml tube | Suitable for repairs and several small crafts |
| Frequent DIY use | Two-tube pack | Supports larger or repeated projects |
| Workshop or classroom | Multi-unit retail packs | Easier distribution and replenishment |
| Online brand | Private-label packaging | Builds a differentiated product line |
| Regional distributor | Bulk or customized pack | Supports local channels and languages |
| Established adhesive brand | OEM or custom formula | Matches target viscosity and performance |
Conclusion
Fabric glue makes holiday decorating more accessible because it removes much of the equipment, time, and technical skill associated with sewing. Felt ornaments, fabric wreaths, banners, stockings, gift bags, table runners, napkin rings, pillow covers, and personalized keepsakes can all be created or refreshed with a controlled adhesive application.
The most reliable results come from a disciplined process: choose compatible materials, test a small sample, prepare the full layout, apply a thin and even layer, press without sliding, allow approximately 6 to 10 minutes for the initial set, and leave the decoration undisturbed for up to 24 hours before use. Heavy rigid components should receive additional mechanical support, while washable projects must follow the care limits of every fabric and embellishment involved.
For consumers, GleamGlee Fabric Glue provides a transparent, flexible, washable, and precise solution for seasonal crafting and everyday textile repairs. The 50 ml single-tube and two-tube formats support anything from one personalized stocking to a coordinated collection of ornaments, garlands, and banners.
For distributors, retailers, craft brands, Amazon sellers, Shopify businesses, importers, and private-label buyers, GleamGlee can provide mature formulas, customized fabric adhesives, packaging options, multilingual artwork, compliance support, samples, scalable production, and international logistics coordination.
Buyers planning a fabric glue product line, seasonal craft kit, customized applicator, or retail-ready private-label package can submit the target market, expected order quantity, preferred packaging, benchmark sample, and required performance. The GleamGlee team can then recommend a suitable formula, sample process, production schedule, documentation plan, packaging solution, and quotation based on the actual project.





















