 Skip to content
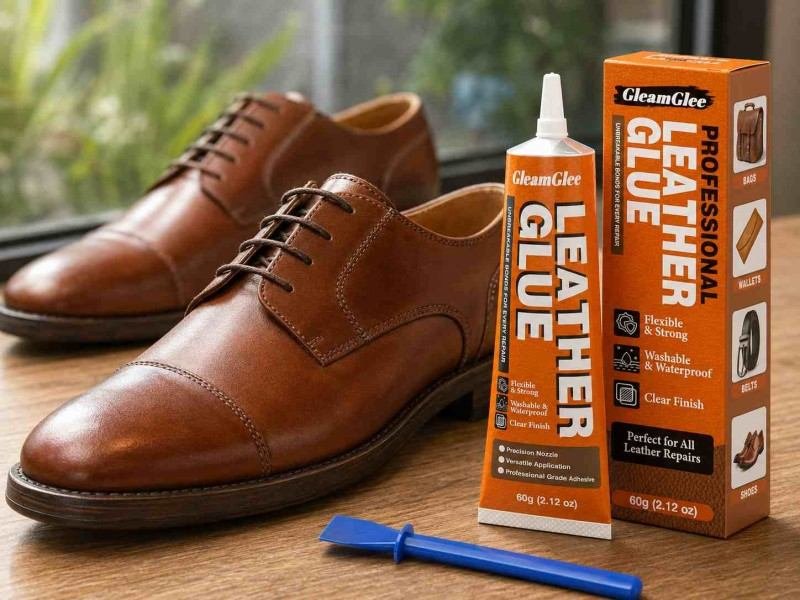
A loose sole does not always mean a favorite pair of shoes has reached the end of its useful life. In many cases, the leather upper, lining, cushioning, and outsole remain serviceable, while only the original adhesive layer has weakened. The difficulty lies in choosing a replacement glue that can cope with constant bending, body weight, moisture, impact, temperature changes, and the different surface properties of leather and modern sole materials.
The best leather glue for shoes is a flexible, water-resistant footwear adhesive that bonds the specific materials in the damaged area. For most leather-to-rubber sole repairs, a purpose-made shoe adhesive or flexible contact adhesive is more reliable than rigid household glue. A lasting formula should resist peeling, remain elastic after curing, allow controlled application, and reach full strength before the shoe returns to normal wear.
A hiker once repaired a separating boot sole the evening before a weekend trip. The glue felt firm after only a few minutes, but he resisted the temptation to wear the boots immediately and left them clamped overnight, followed by a full curing period. Two wet, rocky hikes later, the bond remained intact. The lesson was simple: reliable shoe repair depends as much on material matching, preparation, pressure, and patience as it does on the adhesive itself.
What Is the Best Leather Glue for Shoes?
The best leather glue for shoes is normally a flexible adhesive developed for footwear and compatible with both the leather upper and the sole material. Large sole separations often respond well to flexible shoe glue or contact adhesive, while small, close-fitting details may suit a toughened instant formula. Strength matters, but flexibility, peel resistance, water resistance, and full curing are equally important.
Which Glue Types Work Best?
Flexible shoe repair adhesives are usually the most practical choice for small and medium household repairs. They are commonly formulated to bond leather, rubber, fabric, vinyl, and selected synthetic materials while remaining elastic after curing. That flexibility is important around the toe, forefoot, heel edge, and sidewall, where the shoe repeatedly bends or twists during normal walking.
Contact adhesives are often preferred when a larger section of outsole has separated. A thin coat is normally applied to both surfaces, followed by a short waiting period until the adhesive becomes tacky. Once the surfaces touch, the initial grip can be strong, so alignment must be correct before firm pressure is applied. These formulas can provide excellent leather-to-rubber performance when the surfaces are clean and stable.
Polyurethane-based adhesives may offer a useful combination of flexibility, moisture resistance, and gap tolerance. However, products within the polyurethane family vary widely. Some remain smooth and elastic, while others expand, foam, harden excessively, or leave a visible repair line. The product specification should confirm footwear suitability rather than relying on the chemical name alone.
Rubber-toughened instant adhesives can be useful for narrow trim, heel details, small tabs, or tight-fitting components. Standard thin super glue is less forgiving because it may soak into porous leather, leave white residue, or cure too rigidly for a moving sole. Leather craft glue can work well for linings, patches, tongues, and leather-to-leather components, but may not withstand outsole stress or repeated exposure to wet ground.
| Adhesive Type | Best-Suited Repairs | Cured Flexibility | Typical Working Behavior | Main Limitation |
|---|---|---|---|---|
| Flexible shoe adhesive | Toe edges, sidewalls, small sole separations | High | Moderate working time | Requires full cure before wear |
| Contact adhesive | Larger leather-to-rubber bonding areas | High | Strong grip after tack time | Difficult to reposition |
| Polyurethane adhesive | Flexible, moisture-exposed repairs | Medium to high | Moderate or slow cure | Some formulas expand or foam |
| Toughened instant adhesive | Small, tight-fitting parts | Low to medium | Bonds very quickly | Limited gap filling |
| Leather craft adhesive | Linings, leather patches, internal sections | Medium | Easy to spread and position | May not suit outsoles |
Is Shoe Glue Better Than Leather Glue?
Shoe glue is not automatically stronger than leather glue, but it is usually designed for more demanding movement and environmental exposure. Leather craft adhesive often performs well when joining two leather panels, attaching a lining, positioning a decorative patch, or holding components before stitching. These applications normally experience less water, abrasion, impact, and repeated flexing than the bottom of a shoe.
A typical leather shoe can contain natural leather, coated leather, fabric lining, foam, rubber, TPR, EVA, PU, plastic reinforcements, and metal components. These materials do not stretch, compress, or absorb adhesive in the same way. The upper may flex and expand during walking while the outsole resists stretching. A suitable shoe glue must accommodate that difference without releasing from either surface.
For a loose insole, tongue, internal lining, or decorative leather panel, a flexible leather or fabric adhesive may be sufficient. For outsole separation, the safer choice is generally a formula that specifically lists footwear, leather, and the relevant sole material. Broad labels such as “universal,” “maximum strength,” or “bonds everything” provide less useful information than a clear compatibility list.
A reliable product description should identify compatible substrates, application method, working time, clamping requirements, full curing period, water resistance, temperature limitations, and cleanup procedure. Those details help users predict real repair performance far more accurately than a single strength claim printed prominently on the front of the package.
Does the Strongest Glue Always Work Best?
Maximum static strength does not guarantee long-term performance on footwear. Laboratory pull tests often place a joint under one controlled force, while shoes experience peeling, bending, twisting, impact, compression, heat, cold, sweat, rain, and thousands of movement cycles. A rigid adhesive can feel exceptionally strong on the first day yet crack or release after repeated bending at the forefoot.
A durable bond depends on adhesion to both materials, internal strength within the cured glue, resistance to peeling, and enough elasticity to move with the shoe. If the adhesive grips leather strongly but releases cleanly from rubber, the repair fails. If it grips both surfaces but becomes brittle, movement can break the adhesive layer or tear weakened material beside the bond.
The location of the repair also changes the requirement. A decorative heel ornament may experience little movement and can tolerate a firmer adhesive. A lifted toe, flex groove, or sidewall needs considerably more elasticity. A glue that performs well on one area of a shoe may therefore be unsuitable for another area on the same pair.
Applying a larger quantity does not solve poor material compatibility. Close-fitting surfaces usually perform best with a thin, continuous film. A thick layer can trap solvent or moisture, cure unevenly, shift during walking, and create a raised stress point. Material matching and careful preparation generally contribute more to durability than excessive adhesive thickness.
What Should You Check Before Buying?
Start by identifying the materials on both sides of the failed joint. “Leather shoe” describes the upper but does not reveal whether the sole is rubber, TPR, EVA, PU, PVC, leather, or a multi-layer construction. The adhesive must bond both surfaces, not just the visible leather.
Review the product information for flexibility after curing. Words such as “remains flexible,” “suitable for footwear,” “resists cracking,” or “designed for repeated movement” are more relevant than descriptions focused only on initial grab. Water resistance also matters because footwear can encounter rain, wet floors, perspiration, and routine cleaning even when it is mainly worn indoors.
Application control deserves attention, especially on finished leather, suede, and narrow sole edges. A fine-point or metal nozzle allows the user to place glue inside the joint without flooding the visible upper. A cap with an integrated pin can reduce clogging and make later repairs more predictable.
Curing information should distinguish between initial hold and full strength. Many adhesives become tacky or firm within minutes but still need 24 hours or longer before normal wear. A product that communicates these stages clearly is easier to use correctly and less likely to disappoint consumers who mistake quick grip for complete curing.
Which Glue Works for Each Shoe Material?
The correct glue depends on both materials being joined. Leather shoes may include rubber, TPR, PU, EVA, PVC, fabric, foam, suede, coated leather, or leather soles. A formula that bonds natural leather well can still release from a smooth synthetic outsole. Material identification, compatibility testing, and careful surface preparation should always come before full application.
What Bonds Leather to Rubber?
Leather-to-rubber bonding is one of the most common shoe repair tasks. Boots, loafers, casual shoes, work shoes, and hiking footwear frequently combine a leather upper with a molded rubber outsole. The challenge comes from the difference between a porous, flexible leather surface and a dense rubber surface that may contain oils, additives, or traces of mold-release material.
A flexible footwear adhesive or compatible contact adhesive is normally the most practical choice. The leather bonding surface should be free from polish, wax, conditioner, dirt, and unstable old glue. The rubber surface often benefits from light abrasion with fine sandpaper, followed by careful removal of dust. Abrasion should create a fresh texture rather than change the shape of the sole.
Many sole repairs fail at the outer edge because walking converts downward pressure into a peeling action. Once a small opening develops, water, dust, and movement gradually enlarge it. Adhesive should reach the entire unstable bonding area rather than being placed only along the visible edge. A narrow surface patch may hide the gap temporarily while loose material remains farther inside.
Rubber compounds differ considerably. Some bond readily after cleaning and light abrasion, while others have lower surface energy and resist wetting. A small hidden test can show whether the adhesive spreads evenly, cures normally, and remains attached when gently peeled. Droplets, pulling away, or clean release from the rubber suggest poor compatibility.
Which Glue Works on PU and EVA?
EVA is lightweight, compressible, and widely used in midsoles, insoles, and cushioning components. A suitable adhesive should remain flexible and should not melt, shrink, or stiffen the foam. A rigid glue line can become a hard stress point, causing the softer EVA to tear beside the repair even when the adhesive itself remains intact.
PU soles can be dense, foamed, coated, or multi-layered. Sound polyurethane material may respond well to a compatible flexible footwear adhesive. Older PU, however, can deteriorate through hydrolysis, especially after long storage in humid conditions. The sole may become sticky, cracked, brittle, powdery, or crumbly even when the shoe has not been worn frequently.
Glue cannot reverse chemical deterioration. If the material breaks away under light pressure, leaves powder on the fingers, or continues crumbling beyond the separated edge, replacement is more realistic than rebonding. Covering degraded PU with more adhesive may hold temporarily, but the surrounding sole will continue to fail.
TPR is another common molded outsole material. It feels rubber-like but can behave differently during bonding. Some grades accept flexible shoe adhesives after cleaning and abrasion, while others may need a specialized primer or professional treatment. Leather soles are normally more absorbent, yet visible leather edges can darken when excessive adhesive penetrates the material.
| Material Combination | Common Repair | Preferred Adhesive Behavior | Preparation Priority | Important Limitation |
| Leather to rubber | Detached outsole edge | Flexible and water-resistant | Remove polish and roughen rubber lightly | Some compounds resist bonding |
| Leather to PU | Boot or dress shoe sole | Flexible synthetic-material adhesion | Check for crumbling or stickiness | Degraded PU cannot be restored |
| Leather to EVA | Insole or lightweight sole section | Soft, flexible, non-aggressive | Avoid soaking or crushing foam | Rigid glue can tear nearby foam |
| Leather to leather | Sole edge, trim, patch | Flexible with controlled absorption | Remove wax and loose fibers | Visible leather may darken |
| Leather to TPR | Molded outsole separation | High peel resistance | Clean and test adhesion | Some grades may need primer |
| Leather to fabric | Lining or internal panel | Soft and low-profile | Apply a thin film | Heavy sole glue may feel stiff |
Is Glue Safe for Suede?
Suede and nubuck require much more application control than smooth finished leather. Their open fiber structures absorb liquid quickly, allowing transparent adhesive to create a permanent dark patch, flattened nap, or visible ring. Glue should remain inside the joint rather than spreading across the exposed surface.
A precision nozzle is especially useful for suede footwear. The tip can be inserted into a narrow opening, allowing adhesive to be deposited gradually along the hidden bonding area. Masking tape may protect nearby sections, but the tape itself should be tested because strong adhesive tape can pull fibers, remove color, or change the surface texture.
Wet glue should not be wiped across suede. Wiping usually spreads the product deeper into the nap and enlarges the stain. Cleanup depends on adhesive chemistry. Water-based glue, solvent contact adhesive, polyurethane, and cyanoacrylate respond to different removal methods. Applying acetone, alcohol, or household cleaner without checking compatibility can discolor the shoe or damage the finish.
A hidden-area test is valuable on suede, nubuck, patent leather, metallic finishes, coated leather, pale-colored leather, and expensive footwear. Allow the test spot to dry completely before judging it. Changes in color, gloss, softness, flexibility, or texture may not become obvious until the solvent or water has fully evaporated.
How Can You Identify the Sole?
Material identification is not always possible from appearance alone, but several observations can narrow the possibilities. Dense rubber often feels heavier and provides noticeable resistance when pressed. EVA is usually lighter, more compressible, and slightly spongy. TPR can feel rubber-like while showing a smooth molded surface. PU varies widely, from soft foam structures to dense molded soles.
Look for molded abbreviations on the outsole, under the insole, inside the shoe, or in the original product specification. Common markings include RUBBER, EVA, PU, TPU, TPR, PVC, and LEATHER. Retail listings and manufacturer care information may also identify the outsole construction.
The damage pattern can provide additional clues. Powder formation and crumbling are often associated with deteriorated foamed polyurethane. Deep compression marks may point toward EVA. A smooth, low-energy surface that resists adhesive wetting may indicate TPR, TPU, or another thermoplastic elastomer.
When the material remains uncertain, select an adhesive with clearly stated multi-material footwear compatibility and perform a concealed test. Large separations, technical boots, premium shoes, and unusual sole compounds are often better assessed by a cobbler who can determine whether primer, controlled heat activation, stitching, pressing, or full sole replacement is required.

What Makes Shoe Glue Last?
A lasting shoe repair depends on compatible chemistry, clean surfaces, complete adhesive coverage, steady pressure, and full curing. The glue must remain attached to both surfaces while tolerating bending, peeling, moisture, impact, and temperature changes. Initial tack can feel impressive, but durability depends on how the cured film behaves after thousands of movement cycles rather than during the first few minutes.
Is Flexible Glue More Durable?
Flexibility is especially important around the toe, ball of the foot, sidewall, and heel edge. These areas move every time the wearer walks. When the cured glue is much stiffer than the leather and sole, movement concentrates at the border between the bonded and unbonded sections, encouraging a new peel to begin.
A flexible adhesive distributes stress across a wider area. It can absorb small differences in stretching, compression, and expansion between natural leather, rubber, foam, and fabric. Flexibility should not be confused with weakness or incomplete curing. A reliable formula still needs enough internal strength to avoid tearing, creeping, or stretching permanently under load.
The amount of movement varies by repair location. A small decorative part near a rigid heel may perform adequately with a firmer formula. A forefoot repair needs more elasticity because the shoe bends sharply during every step. Outsole edges also experience peel force when they catch on stairs, pavement, or uneven ground.
Product demonstrations should reflect these real conditions. Pulling two rigid blocks apart may show basic adhesion, but it does not reproduce the repeated flexing and peeling experienced by footwear. More meaningful evaluation includes bending, water exposure, temperature changes, aging, and inspection of the bond after the adhesive reaches full cure.
Does Shoe Glue Need to Be Waterproof?
Most footwear repairs benefit from water resistance, including shoes mainly worn in dry environments. Rain, wet floors, perspiration, cleaning products, and high humidity can reach the bond line. Once moisture enters a weak edge, repeated movement can accelerate separation.
Hiking boots, work shoes, children’s footwear, outdoor trainers, and shoes used in wet climates demand stronger moisture performance than indoor dress shoes. The adhesive should maintain its bond after full curing, but users must understand that “water-resistant after cure” does not mean “safe to expose to water immediately.”
A repaired sole does not automatically restore the complete waterproof construction of a technical shoe. Water can also enter through damaged stitching, cracked leather, worn welt material, punctured membranes, or gaps elsewhere in the upper. Closing one visible separation may improve performance without returning the shoe to its original waterproof rating.
The shoe must be dry before repair begins. Leather, fabric lining, foam, and insoles can retain moisture long after the outside feels dry. Adhesive applied over damp material may spread poorly, cure unevenly, or release prematurely. Natural airflow and sufficient drying time are safer than aggressive heating.
How Fast Should Shoe Glue Cure?
Curing involves several stages rather than one simple number. Working time describes how long the adhesive can be spread and adjusted. Tack time applies to formulas that must partially dry before the surfaces are joined. Initial hold means the parts can remain positioned. Full cure is the point at which the adhesive reaches its intended strength, flexibility, and resistance.
A glue may grip within minutes yet remain vulnerable inside the joint. Wearing the shoe too early introduces repeated bending and peeling before the bond has developed enough strength. Thick adhesive layers, cold temperatures, high humidity, and low airflow can extend curing beyond the commonly stated period.
Contact adhesives often require a waiting period after coating both surfaces. Flexible repair glues may be joined while still wet. Instant formulas react quickly but still need time to develop final performance. Instructions for the exact product should always take priority over general expectations.
| Performance Stage | Common Practical Range | Meaning | Main Risk |
| Working time | Seconds to around 20 minutes | Time for spreading and alignment | Rushing before the joint is ready |
| Tack time | Often 5–20 minutes for contact types | Waiting before coated surfaces are joined | Joining too early |
| Initial hold | Minutes to several hours | Parts remain positioned under pressure | Mistaking initial grip for full strength |
| Full cure | Commonly 24–72 hours | Intended strength and resistance develop | Wearing or wetting the shoe too soon |
| Post-cure check | After full cure | Edge inspection and gentle flex test | Starting immediately with demanding use |
These ranges are general. Formula chemistry, film thickness, substrate porosity, temperature, and humidity can shorten or extend each stage. A conservative curing period is normally less costly than repeating a rushed repair.
Does Temperature Affect the Bond?
Many household shoe adhesives apply most predictably in a moderate indoor environment, often around 18–25°C, with dry materials and reasonable airflow. Cold adhesive may thicken and spread unevenly, while high temperatures can shorten working time and make alignment more difficult.
After curing, shoes encounter hot pavement, vehicle interiors, radiators, freezing weather, and repeated movement between indoor and outdoor temperatures. Certain adhesives soften when heated, while others become brittle in cold conditions. Outdoor, hiking, and work footwear therefore require formulas designed for wider temperature exposure.
Direct heat should not be used casually to accelerate a repair. Hair dryers, heat guns, ovens, radiators, and open flames can shrink leather, warp foam, weaken factory adhesive, damage finishes, and create vapor or fire hazards. Controlled heat activation is appropriate only when specifically required by the adhesive and performed within the stated temperature range.
Storage also affects product reliability. Adhesive that has frozen, overheated, separated, thickened, or remained open for long periods may not cure normally. A tightly sealed cap, clog-resistant precision tip, and storage within the recommended temperature range help maintain consistent viscosity and application control across multiple repair projects.
Why Does Peel Resistance Matter?
Shoe bonds frequently fail through peeling rather than direct pulling. When a toe edge catches on the ground or a sidewall opens during flexing, force concentrates along a very narrow line. Even a small opening can travel gradually through the joint as the wearer continues walking.
High peel resistance allows the adhesive layer to resist that progressive opening action. Flexibility contributes by preventing the bond edge from becoming a rigid hinge. Complete coating is equally important because small dry patches provide easy starting points for separation.
Bond geometry also matters. A large, flat area under direct compression can remain stable even with a moderately flexible adhesive. A narrow edge exposed to repeated lifting needs stronger peel resistance and careful surface preparation. Repairing only the visible outer line may leave a weak section immediately behind it.
For manufacturers and retailers evaluating shoe glue, bend and peel performance can be more informative than a single maximum-strength claim. Testing after full cure, water exposure, and accelerated aging provides a more realistic indication of how the product may behave during daily footwear use.
How Do You Glue Leather Shoes?
Successful leather shoe repair starts with confirming that both materials remain structurally sound. Loose adhesive, dirt, polish, oil, and moisture must be removed before a thin, continuous adhesive film is applied. The parts should be aligned carefully, held under even pressure, and left undisturbed until full cure. Preparation and patience usually matter more than applying extra glue.
How Do You Prepare the Surfaces?
Begin by examining why the joint failed. A clean separation between two solid materials is a good candidate for adhesive repair. Torn leather, collapsing foam, crumbling PU, a loose heel structure, or a badly distorted outsole suggests a deeper problem that glue may not solve.
Open the separated section only far enough to reach loose material. Pulling aggressively can enlarge the damage, tear the leather upper, or separate sections that were still stable. Remove old adhesive that is flaky, rubbery, powdery, or weakly attached. A blunt scraper, fine abrasive tool, or suitable sandpaper can help, but the method should not cut into the leather or reshape the sole.
Polish, wax, silicone protector, oil, conditioner, dirt, and cleaner residue can block adhesion. Use a material-compatible cleaning method and allow the joint to dry fully. Strong solvents may remove color, soften coatings, or damage synthetic materials, so they should not be selected simply because they evaporate quickly.
Smooth rubber and selected synthetic surfaces may benefit from light abrasion. Fine sandpaper in roughly the 120–220 grit range is often adequate for a small household repair, provided the adhesive instructions allow it. The objective is to create a fresh texture, not to grind away significant sole material.
Complete a dry fit before applying glue. Close the joint, check edge alignment, and confirm that the surfaces meet naturally. If the sole has shrunk, curled, or warped, the adhesive will remain under continuous stress and may not hold without professional reshaping or replacement.
How Much Glue Should You Apply?
A thin, complete film usually performs better than a thick mass. The adhesive should cover the entire bonding zone without flooding the visible edge. Exact film thickness depends on viscosity, surface porosity, gap size, and the application method recommended by the manufacturer.
Apply the product gradually. A precision nozzle allows the adhesive to reach narrow openings while reducing waste and visible squeeze-out. Move the tip steadily through the joint instead of depositing a large amount in one position and trying to spread it across the area afterward.
Look for dry islands where no adhesive has reached the surface. These uncoated spots can become starting points for peeling. At the same time, avoid filling a broad gap with glue. Large spaces may indicate missing material, collapsed cushioning, sole deformation, or poor alignment rather than insufficient adhesive.
Some formulas are applied to one surface, while contact adhesives commonly require a coat on both sides. Absorbent leather may take up more product than dense rubber, but additional coats should only be applied when the instructions recommend them. Improvised layering can create excessive thickness and slow curing.
If glue squeezes onto a visible area, follow the product-specific cleanup procedure. Wiping randomly with solvent may spread the adhesive or damage the leather finish. Suede, nubuck, patent leather, and pale colors require particularly careful control because even clear glue can leave a noticeable mark.
How Should You Press the Repair?
Pressure brings the surfaces into continuous contact while the adhesive develops strength. It should be firm enough to close the joint but not so strong that it crushes foam, distorts the upper, squeezes out most of the glue, or leaves marks in the leather.
Painter’s tape can hold a small lifted edge. Elastic bands often work well around curved toe and heel areas. Padded clamps can secure flatter side sections, while clean weighted boards may help on broad, level surfaces. A shoe tree or soft internal support can prevent the upper from collapsing under external pressure.
Always place clean padding between clamps and finished leather. Bare metal clamp faces can create dents, shine marks, or cuts. Soft leather, suede, and patent finishes are particularly vulnerable. Several low-pressure holding points may distribute force more safely than one tightly closed clamp.
Join the surfaces carefully from one end toward the other. This reduces trapped air and helps maintain alignment. Contact adhesive can grab immediately, so reference marks may be useful before joining. Once the parts meet, press across the entire repair rather than squeezing only the visible edge.
Do not repeatedly reopen the joint to inspect progress. Each check disrupts the developing adhesive layer and may introduce air, dust, or misalignment. Maintain pressure for the stated holding period, then leave the shoe stationary until the adhesive reaches full cure.
How Long Before You Can Wear the Shoes?
The shoe should remain unworn until the adhesive reaches the full curing period stated by the manufacturer. Initial grip is only enough to keep the surfaces positioned. Normal walking creates repeated flexing and peeling forces that can damage a bond that has not developed complete internal strength.
A cautious schedule begins with completing the repair in a dry, ventilated area. Maintain pressure for the recommended period, then leave the shoe undisturbed overnight when practical. Continue curing for the entire stated time, which is commonly between 24 and 72 hours for many flexible household shoe adhesives.
After curing, inspect the edge for gaps, soft glue, or movement. Flex the shoe gently by hand before placing it on the foot. A successful joint should remain closed without making unusual cracking sounds or showing adhesive movement.
Begin with light indoor wear or a short walk. Hiking, running, work use, and heavy rain place much greater demands on the bond. Gradual testing is particularly important for boots, athletic footwear, and shoes used on uneven ground.
Home repair should not be treated as proof that technical or certified footwear has regained its original protective performance. Safety shoes, climbing boots, riding footwear, and specialist waterproof products may require professional inspection even when the visible joint appears secure.

Which Shoe Glue Mistakes Cause Failure?
Most shoe glue failures result from incompatible chemistry, contaminated surfaces, unstable old adhesive, excess product, uneven pressure, trapped moisture, or wearing the shoe before full cure. A repair can also fail because the sole material itself is deteriorating. When the same area opens repeatedly, adding another layer of glue usually creates more contamination without correcting the underlying cause.
Can You Use Super Glue on Shoes?
Super glue can work on small, rigid, tightly fitting components, but standard thin cyanoacrylate is rarely the best option for a large flexible sole repair. It cures quickly, provides little working time, and can form a hard line that does not move comfortably with the forefoot.
Porous leather may absorb thin instant glue beyond the intended joint. The surface can darken, harden, or develop white blooming as vapor reacts with moisture in the air. Once the surfaces touch, repositioning may be impossible, making outsole alignment difficult.
Rubber-toughened instant adhesives provide more flexibility than basic super glue. They can be useful for narrow trim, a small heel detail, or a component with almost no gap. They still offer limited gap filling and may not suit broad areas exposed to repeated bending.
General household brand names should not be treated as adhesive categories. A single brand may sell contact cement, expanding polyurethane, epoxy, flexible repair glue, and instant adhesive. Each formula behaves differently. The exact product description, material list, cured flexibility, and application method determine whether it belongs on footwear.
A product should be chosen because it is compatible with leather and the specific sole material, not because it is already available in a household drawer or marketed with an impressive maximum-strength claim.
Why Does the Sole Peel Again?
A repaired sole often begins peeling at the edge because this area experiences concentrated opening force. Once a small gap forms, dirt, moisture, and repeated walking gradually enlarge the separation. The visible failure may be only the final symptom of a problem hidden deeper inside the joint.
| Failure Symptom | Likely Cause | Practical Response |
| Glue peels cleanly from rubber | Poor compatibility or contamination | Clean, abrade, and test a suitable formula |
| Leather fibers tear away | Leather surface is weakened | Assess structural damage before rebonding |
| Adhesive remains soft inside | Excess thickness or incomplete cure | Remove unstable glue and reapply correctly |
| Edge opens after one wear | Early use or uneven pressure | Repeat only after full preparation and curing |
| PU crumbles beside the repair | Hydrolysis or material aging | Replace the sole rather than adding glue |
| White marks appear | Cyanoacrylate blooming | Use controlled application and test first |
| Bond fails after rain | Incomplete cure or low water resistance | Dry fully and use compatible shoe adhesive |
| Toe repeatedly lifts | High flex stress or incomplete bonding area | Extend preparation beyond the visible edge |
Old glue must be removed until the new adhesive can reach stable leather and sole material. Coating over a weak factory layer creates a bond that is only as strong as the deteriorated material underneath.
Repairing only the outermost few millimeters may also leave a loose section farther inside. When the shoe bends, that hidden movement transfers stress to the new edge. The joint should be opened only as far as necessary to reach stable material and create complete adhesive coverage.
Repeated failure in the same area is a warning. Stop adding layers, remove unstable product when possible, and reconsider the material, construction, and movement pattern. Excess hardened glue can make later professional repair more difficult and may permanently distort the sole edge.
Can Too Much Glue Weaken the Bond?
Excess adhesive can create a thick internal layer that moves separately from the leather and sole. The outside may appear dry while the center remains soft, especially between two nonporous surfaces. When the shoe bends, the thick layer may stretch, shift, or tear within itself.
Large quantities also increase squeeze-out. On a black rubber sole, excess glue may merely look untidy. On suede, nubuck, fabric, pale leather, and coated finishes, it can create permanent stains or changes in texture. Removing cured adhesive can cause more damage than a carefully controlled application would have caused initially.
Too little adhesive also creates problems. Dry islands leave parts of the joint unsupported and provide starting points for peeling. The goal is not the smallest possible amount, but a continuous, appropriately thin film across the complete bonding zone.
Application method depends on the formula. A contact adhesive may require coating both surfaces. A one-sided repair glue may cure poorly if unnecessary extra layers are added. Instructions should guide the number of coats, waiting time, and film thickness.
When a large space requires filling, inspect the construction before adding more product. A gap can indicate missing material, collapsed foam, a curled sole, or a distorted upper. Glue is designed to bond surfaces, not rebuild major structural sections of footwear.
Do Wet Shoes Need to Dry First?
Wet shoes must dry completely before adhesive is applied. Leather, fabric lining, foam, and insoles can retain moisture even when the outside feels dry. Trapped water can prevent proper wetting, slow curing, or create weak zones that release during the first period of wear.
Remove the insole when possible, loosen the laces, open the tongue, and place the shoe in a ventilated indoor area. Absorbent paper can help draw moisture from the interior, but it should be changed regularly so airflow is not blocked.
Avoid ovens, open flames, high-temperature heat guns, or direct contact with radiators. Excess heat can shrink leather, distort foam, damage waterproof membranes, weaken factory adhesive, and create unsafe vapors. A fan at room temperature is normally a safer way to improve airflow.
Cleaning can introduce moisture as well. After using a water-based cleaner, allow enough time for the surface and internal layers to dry. When an approved solvent cleaner is used, wait until it has fully evaporated and the odor has dispersed.
Adhesive condition also matters. A tube that has separated, thickened, skinned over, frozen, overheated, or passed far beyond its recommended storage period may cure unpredictably. Never dilute old adhesive with an unapproved solvent in an attempt to restore its original consistency.
When Is Glue Repair Not Enough?
Glue repair is suitable for localized separation when the leather and sole remain solid, stable, and correctly shaped. It is not enough when the sole is crumbling, the heel is unstable, structural stitching has failed, load-bearing leather is torn, or most of the outsole has detached. Serious damage, technical footwear, and valuable shoes are generally safer in professional hands.
Which Repairs Can You Do at Home?
Small, accessible repairs are the strongest candidates for household treatment. A lifted toe edge, short sidewall separation, detached insole corner, loose lining, small leather trim, or decorative patch can often be repaired successfully when the materials remain sound.
The damaged parts should align naturally during a dry fit. Old adhesive must be removable without destroying the leather or sole. The repair area should also be reachable for cleaning, application, and pressure. A hidden joint that cannot be held closed evenly may require professional tools.
Internal repairs frequently need a softer adhesive than outsole repairs. A hard glue layer beneath an insole, tongue, or lining can create a pressure point against the foot. Fabric linings, soft leather patches, and cushioning components benefit from a thin, flexible bond.
Home repair is less suitable where failure creates a safety risk. Work boots, hiking footwear, riding boots, and athletic shoes may experience high loads or sudden impacts. A small visible repair can hide damage to stitching, shanks, membranes, protective components, or cushioning.
After curing, inspect the joint carefully and flex the shoe gently by hand. Begin with light wear on a clean, dry surface. A shoe that feels unstable, opens again, changes alignment, or produces unusual movement should not be used for demanding activity.
When Should You Visit a Cobbler?
Professional repair is advisable when the damage affects structure, safety, fit, waterproofing, or a large portion of the sole. Cobblers use sanding machines, primers, presses, heat-activation equipment, stitching machines, shoe lasts, replacement components, and finishing tools that cannot easily be reproduced at home.
A moving or tilted heel needs professional attention because the problem may involve screws, nails, a heel block, shank, or internal support rather than adhesive alone. Broken welt stitching also requires more than surface glue, particularly on footwear designed to be resoled.
Complete outsole separation often needs controlled removal of the old adhesive, mechanical preparation across the entire bottom, accurate alignment, and uniform pressing. A household clamp may secure one edge while leaving gaps elsewhere.
Luxury and vintage footwear deserve careful assessment before glue is applied. Excess adhesive, aggressive sanding, solvent stains, and misalignment can reduce value and complicate later restoration. Professional repair is usually easier before several incompatible products have contaminated the joint.
Certified safety shoes, climbing footwear, riding boots, and specialist waterproof boots may not regain their original protection after home repair. Even when the visible sole appears attached, hidden components may remain damaged. The cost of professional assessment is minor compared with the risk of failure during demanding use.
Is an Old Sole Still Repairable?
Age alone does not determine whether a sole can be repaired. A well-stored leather shoe may remain structurally sound for decades, while a rarely worn PU sole can deteriorate because of humidity and chemical aging. Material condition matters more than the purchase date.
A repairable sole should remain firm, flexible, dimensionally stable, and capable of being cleaned. It should not release powder, crumble under light finger pressure, feel unusually sticky, or show deep cracking that continues beyond the separated area.
Glue cannot restore missing tread, rebuild compressed cushioning, replace a damaged shank, reverse hydrolysis, or strengthen rotten stitching. Covering deteriorated material with adhesive may create a temporary cosmetic improvement, but the weakened sole will continue breaking around the bond.
Inspect the complete shoe rather than focusing only on the open edge. Check the opposite sole, heel, lining, insole, upper flex points, stitching, and outsole tread. Multiple simultaneous failures usually indicate that a single adhesive repair will provide limited value.
Premium or sentimental shoes may still justify professional resoling. A cobbler can remove degraded material, prepare a stable foundation, and install a compatible replacement sole rather than bonding onto an unreliable original surface.
Are Expensive Leather Shoes Worth Repairing?
High-quality leather shoes are often worth repairing because the upper can outlast the original adhesive, heel top lift, and outsole. Good leather also becomes more comfortable with wear, and replacing a well-fitting pair can cost considerably more than professional restoration.
Purchase price should not be the only factor. Construction quality, upper condition, comfort, replacement availability, sentimental value, and intended use all influence the decision. An expensive shoe with torn structural leather may be less repairable than a moderately priced shoe with a clean, localized sole separation.
Repairing footwear can reduce waste by extending the life of materials that have already required energy, processing, packaging, and transportation. The environmental benefit is strongest when the repair remains reliable for a meaningful period. Repeated short-lived attempts waste adhesive and may eventually make proper restoration harder.
A practical decision considers four questions:
- Are the upper, lining, stitching, heel, and sole still structurally sound?
- Will the repaired shoe be used casually or in demanding conditions?
- Is the replacement cost significantly higher than professional repair?
- Can the joint be prepared, aligned, pressed, and cured correctly?
When several answers are uncertain, a cobbler can provide a more reliable assessment than another layer of household adhesive.
How Can Brands Develop a Better Shoe Glue?
A successful retail shoe glue needs more than strong initial adhesion. Consumers also care about application control, odor, cleanup, curing time, flexibility, water resistance, packaging durability, and clear instructions. A formula that performs well but is difficult to apply can still generate poor reviews and unnecessary product returns.
Packaging should match the repair task. A precision metal nozzle helps users reach narrow sole openings and reduces visible squeeze-out. A cap with an internal pin can limit clogging. Tube size should provide enough product for several repairs without encouraging excessive application or leaving a large quantity to age after opening.
Instructions should clearly distinguish working time, pressure time, handling strength, and full cure. Illustrations can show surface cleaning, glue quantity, pressing methods, and waiting periods more effectively than long technical paragraphs. Multilingual labeling is especially important for products sold through international retail and ecommerce channels.
GleamGlee supports footwear-care brands, distributors, retailers, and ecommerce operators with existing shoe adhesive formulas and customized development programs. Available services include formulation adjustment, performance testing, packaging selection, precision applicators, label design, multilingual instructions, filling, printing, compliance documentation, and international shipment planning.
Development goals may include flexible curing, clear appearance, controlled viscosity, lower odor, water resistance, longer shelf life, selected package sizes, and compatibility with common leather and sole materials. Samples, packaging options, regional compliance requirements, and commercial quantities can be reviewed before production.
Contact GleamGlee to request product information, samples, private-label options, packaging recommendations, or a customized leather shoe adhesive quotation.





















