 Skip to content
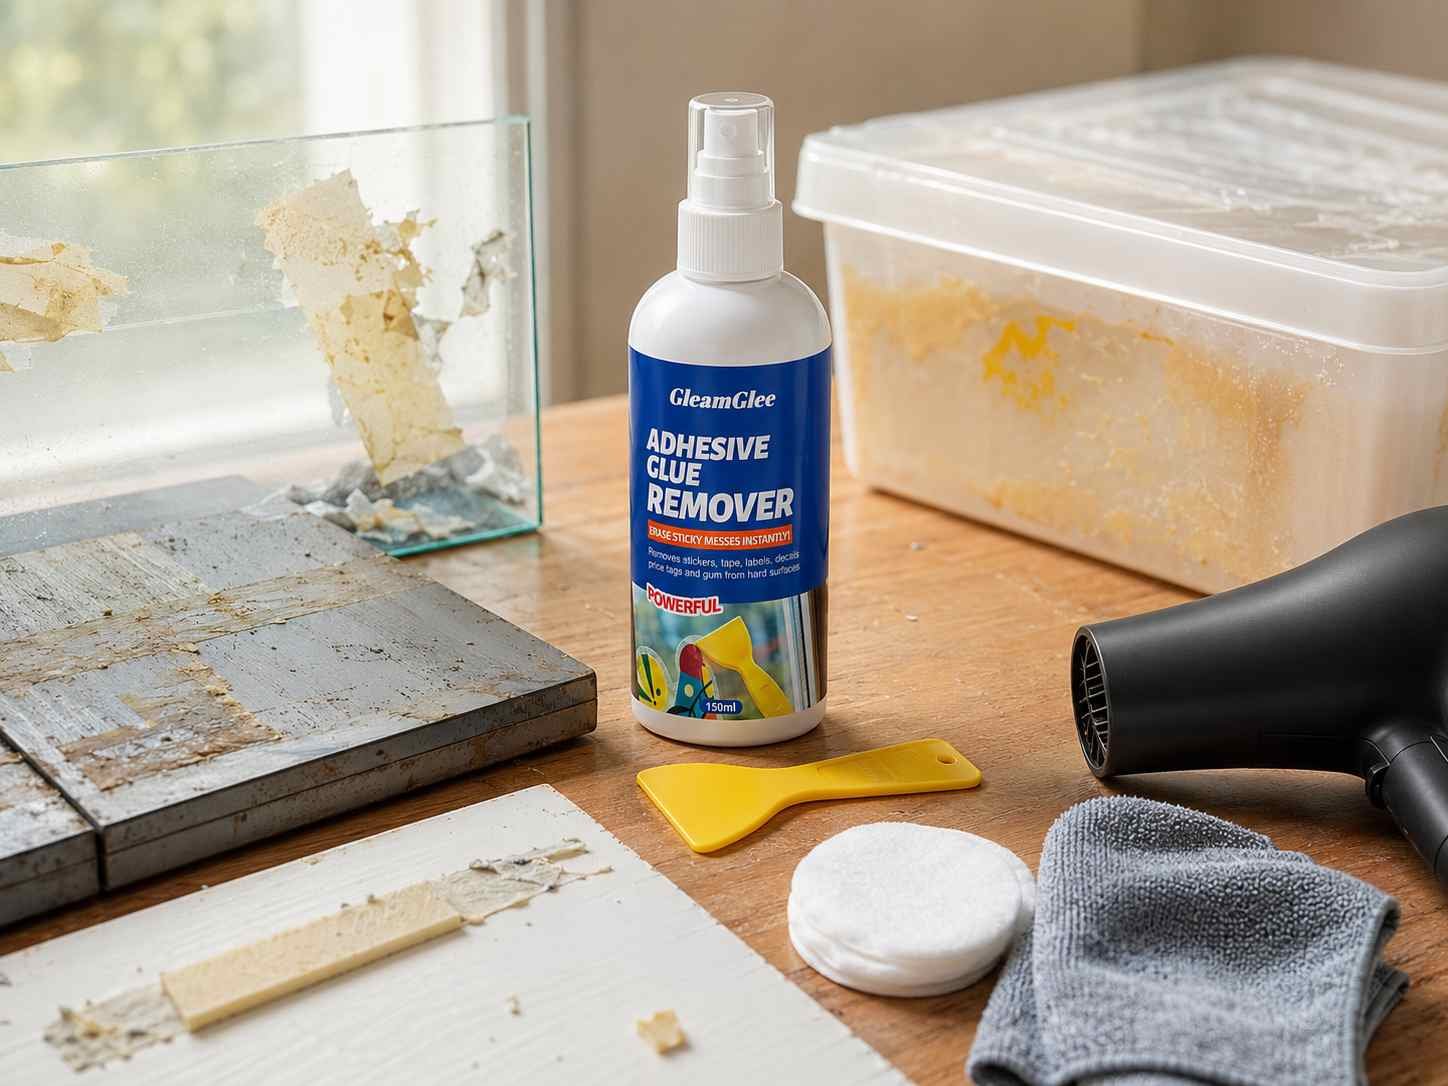
Sticky residue often looks like a minor cleaning problem until the first attempt spreads it into a larger, greasier, or more stubborn mark. A price label may leave a cloudy patch on a glass jar, mounting tape can remain attached to a painted shelf, and an old car decal may expose a thick adhesive layer that refuses to move. Beginners commonly make the task harder by scraping too aggressively, applying an unsuitable solvent, or treating every surface as though it reacts in the same way.
To remove adhesive safely, identify the residue and surface, test a hidden area, peel away loose material, apply a compatible remover, wait for the adhesive to soften, lift it with a plastic scraper, and wipe the area clean. Begin with the gentlest suitable method, increase strength only when necessary, and stop immediately if the surface becomes cloudy, soft, discolored, or damaged.
Good adhesive removal depends more on sequence than physical strength. Imagine finding an old shipping label on a storage box that has remained in a garage for several years. The paper tears away, but the glue underneath has hardened around the edges and collected dirt in the center. Repeated rubbing only spreads the mess. A few careful decisions—checking the plastic, testing the cleaner, allowing proper contact time, and scraping at a low angle—can turn a frustrating struggle into a clean, predictable job.
What Should You Check Before Removing Adhesive?
Before removing adhesive, identify the residue, confirm the surface material, inspect paint or protective coatings, and test the cleaner in a hidden area. These checks reduce the risk of scratches, clouding, staining, softening, or finish damage. The safest method depends as much on the surface beneath the residue as on the adhesive itself.
Identify the Residue
Begin by asking what created the sticky mark. A paper label normally leaves a thin pressure-sensitive adhesive, while double-sided tape may contain a foam carrier with a thicker glue layer underneath. Vinyl decals can leave broad, weathered residue, and removable hooks often produce dense adhesive strips that stretch, roll, or break apart when lifted.
Appearance and texture offer useful clues. Fresh label glue is usually soft and tacky, whereas old tape residue may feel dry around the edges while remaining sticky in the center. Mounting adhesive can feel rubbery, wax leaves a greasy film, and silicone commonly forms an elastic layer that must be mechanically reduced before the remaining trace can be cleaned.
Exact chemical identification is rarely necessary for a household task. A practical description such as thin, thick, brittle, elastic, oily, dusty, or heat-aged is usually enough to choose a safer starting method. Thin residue may respond to one brief treatment, while thick material normally requires the upper layer to be peeled, rolled, or scraped away first.
The source also matters. Adhesive from a food jar, office label, automotive decal, protective film, craft project, appliance sticker, or wall hook may use a different formulation. Knowing the original application helps explain why one residue wipes away quickly while another needs several controlled cycles.
| Residue type | Typical source | First practical action | Main concern |
|---|---|---|---|
| Thin and tacky | Price labels, stickers | Peel loose paper, then soften glue | Smearing during wiping |
| Thick and rubbery | Mounting tape, hook pads | Remove foam or carrier layer | Excessive scraping |
| Dry and brittle | Old decals, aged tape | Work in small treated sections | Surface scratching |
| Waxy or greasy | Candle wax, packaging wax | Lift the bulk material first | Oily film remaining |
| Elastic film | Light silicone residue | Remove raised material first | Damaging nearby seals |
| Embedded and dirty | Outdoor labels, car stickers | Remove grit before treatment | Abrasive particles |
Check the Surface
The surface is often more important than the adhesive. Plain glass, coated glass, acrylic, stainless steel, painted metal, rigid plastic, automotive trim, and finished wood can look equally durable while reacting very differently to heat, solvents, moisture, and scraping pressure.
A kitchen appliance may combine painted metal, printed symbols, polished trim, plastic controls, and adhesive residue within a few centimeters. Treating the whole area as bare metal could remove lettering, dull the finish, or allow liquid to enter around buttons and seams.
Plastic requires particular care because the term covers many materials. A sturdy storage container may tolerate a cleaner that clouds an acrylic display panel or softens decorative plastic. Wood also varies considerably. Sealed furniture can sometimes be cleaned with controlled moisture, while unfinished wood may absorb liquid and develop dark marks that cannot be wiped away.
When the material cannot be confidently identified, treat it as sensitive. Use a small amount of product, keep the contact time short, avoid soaking edges or joints, and use a plastic scraper with very light pressure. A slower method is usually preferable to permanent surface damage.
Inspect Coatings and Edges
Many cleaning failures occur because the visible layer is not the base material. Paint, clear coat, varnish, laminate, plating, printing, tint film, and protective coatings may be more vulnerable than the glass, metal, plastic, or wood underneath.
Inspect the area under good lighting before applying anything. Look for chipped paint, cracked clear coat, lifted laminate edges, scratches, worn printing, exposed wood grain, or narrow seams where liquid could enter. Cleaner may travel beneath a damaged coating even when the surrounding area appears stable.
Edges deserve extra attention because they often expose porous or bonded materials. The edge of a laminated desk can absorb liquid into fiberboard, while a cleaner applied near automotive trim may travel behind the panel. Acrylic joints and glued assemblies may also weaken when solvent reaches an existing bond line.
Controlled placement reduces these risks. Apply the remover to a cloth or cotton swab rather than spraying directly, work away from seams, and keep the formula confined to the adhesive. Careful application often matters more than choosing a stronger cleaner.
Perform a Patch Test
A patch test checks whether the selected method is compatible with the surface. Choose an inconspicuous area with the same material and finish as the visible residue zone. Apply a small amount of cleaner to a cotton swab or folded cloth, touch it to the test area, and wait for the planned contact time.
Wipe the area dry and inspect it from several angles. Look for discoloration, color transfer, gloss changes, swelling, softening, cloudiness, stickiness, or fine cracking. Transparent plastics may show damage only when viewed against reflected light, while painted surfaces may leave pigment on the cloth.
For many quick household jobs, a test period between 15 and 60 seconds provides useful information, provided the product instructions allow that contact time. Longer soaking should not be tested unless the cleaning process genuinely requires it.
Passing a patch test does not justify flooding the main area. Scratches, exposed edges, aged coatings, and sun-damaged sections may react differently. Continue with the same controlled amount and contact time that produced a safe result during testing.
Which Tools Do You Need?
A basic adhesive-removal kit should include clean microfiber cloths, paper towels, cotton swabs, a plastic scraper, suitable gloves, and a surface-compatible remover. A soft brush and low-heat hair dryer may help with certain tasks. Metal blades, rough pads, and uncontrolled heat are generally unnecessary for beginners.
Build a Basic Kit
A small, organized kit makes adhesive removal cleaner and more predictable. Two or three microfiber cloths are useful because one can handle softened residue while another performs the final wipe. Paper towels are better for collecting thick, dirty, or heavily dissolved adhesive that would quickly contaminate a reusable cloth.
Cotton swabs provide precise control near printed markings, furniture edges, appliance controls, window trim, and narrow seams. A plastic scraper helps lift residue after it softens and is safer on most household surfaces than a knife, screwdriver, or razor blade.
A soft-bristled brush can help on textured hard surfaces where glue sits in shallow grooves. The brush should only be used after surface compatibility has been confirmed. Stiff bristles may dull paint or polished coatings even when they do not leave obvious scratches.
Keep a small waste container, disposable sheet, or paper tray nearby. Adhesive removed from one surface easily transfers to tools, gloves, countertops, or flooring. Separating contaminated materials from clean tools prevents the cleanup area from becoming larger than the original sticky patch.
| Tool | Typical use | Practical specification | Main caution |
|---|---|---|---|
| Microfiber cloth | Wiping softened residue | Use at least two clean cloths | Fold often to avoid smearing |
| Plastic scraper | Lifting glue | Hold at roughly 20–30 degrees | Do not force beneath hard residue |
| Cotton swab | Precise application | Best for edges and printed areas | Avoid soaking seams |
| Paper towel | Collecting dirty adhesive | Replace when saturated | Stop wiping once it becomes sticky |
| Soft brush | Textured hard surfaces | Use light pressure | Avoid delicate coatings |
| Hair dryer | Softening some labels | Low setting, constant movement | Heat may warp plastic |
| Gloves | Reducing skin contact | Choose according to product label | Replace if damaged |
Choose a Safe Scraper
A plastic scraper is usually the best starting tool because its edge can slide beneath softened adhesive without the cutting action of metal. Hold it at a low angle, generally around 20 to 30 degrees, and use short, controlled strokes. The scraper should move beneath the residue rather than dig into the surface.
Work from the outside toward the center. That direction keeps the sticky area contained and reduces the chance of spreading softened glue across a wider section. Wipe the scraper edge frequently because buildup makes it less effective and can redeposit adhesive on an area that has already been cleaned.
Old credit cards are often suggested as improvised scrapers. They may work on light residue, but the rounded edge can be too blunt for thick buildup. A purpose-made plastic scraper usually provides better leverage while remaining safer than metal.
Metal razor blades are sometimes used by trained cleaners on specific untreated glass surfaces, but they are not suitable for general household work. Coated glass, tint film, painted metal, acrylic, plastic, wood finishes, and vehicle paint can be permanently scratched. Even plain glass may be damaged when a small grain of dirt becomes trapped beneath the blade.
Use Heat Carefully
Heat can soften some pressure-sensitive adhesives, making stickers and tape easier to peel. A household hair dryer is normally more controllable than a heat gun. Use a low setting, hold it several inches from the surface, and keep the airflow moving so one spot does not overheat.
Warm the label for brief intervals of around 10 to 20 seconds, then test one corner. The goal is to make the adhesive more flexible, not to make the surface hot. Stop if plastic feels soft, paint becomes tacky, or the object becomes uncomfortable to touch.
Heat is less suitable around electronics, laminated edges, vinyl surfaces, automotive tint, thin plastic, or areas with unknown coatings. It may also cause certain adhesives to spread rather than release cleanly, especially when the residue is already soft.
Do not combine heat with an adhesive remover unless the product instructions specifically permit that use. Some formulas should be kept away from elevated temperatures, flames, or ignition sources. Use one method at a time and allow the surface to return to room temperature before changing approaches.
Protect Yourself and the Area
Suitable gloves reduce direct skin contact, especially during larger jobs or repeated applications. Safety glasses are useful when spraying vertical surfaces, working beneath an object, or cleaning in confined positions where droplets could move toward the face.
Ventilation remains important even when a product has a mild odor. Open a window, work outdoors, or provide airflow according to the label directions. Odor intensity does not reliably indicate how strong or weak a cleaning formula may be.
Keep the work area away from children, pets, food, flames, and heat sources. Cover nearby porous materials such as fabric, unfinished wood, cardboard, or paper. A fine spray can travel beyond the visible target and affect items that were never meant to be cleaned.
Never mix adhesive remover with bleach, ammonia, acidic cleaners, disinfectants, or other chemical products. When one method does not work, remove its residue, allow the surface to dry, and then evaluate another approach. Combining formulas introduces unnecessary safety and compatibility risks.
How Do You Remove Adhesive Step by Step?
Remove adhesive by clearing loose material, applying a compatible remover, allowing enough time for the glue to soften, lifting the residue with a plastic scraper, and wiping with a clean cloth. Repeat short, controlled cycles when necessary. The process should rely on contact time and surface compatibility rather than force.
Prepare the Area
Start by removing dust, grit, and loose dirt from the surface. That step is especially important on car windows, outdoor furniture, tools, storage boxes, and old labels. Dirt trapped beneath a scraper can scratch even a relatively durable material.
When a label contains information that may be needed later, such as model numbers, care instructions, barcodes, or product details, photograph it before removal. Clear nearby objects and protect seams, printed markings, porous edges, and electrical openings.
Peel away as much of the top layer as possible. Pull slowly at a low angle, keeping the label close to the surface. Lifting straight upward often tears paper and leaves more adhesive behind. With double-sided tape, remove the foam or film carrier before treating the glue underneath.
Avoid soaking paper labels immediately unless the chosen method specifically requires it. Wet paper can break into pulp and make the adhesive harder to reach. Removing the dry top layer first generally gives the cleaner better access to the actual sticky residue.
Apply the Remover
Apply a light, controlled amount directly to the adhesive. On a broad glass or metal surface, an even spray may be practical. Around paint, printing, seams, plastics, automotive trim, or furniture edges, spray the remover onto a cloth or cotton swab first.
For a fast-acting adhesive-removal spray, an initial contact time of around 15 seconds may be sufficient for fresh sticker glue or light tape residue. Thick, old, weathered, or heat-exposed adhesive may need additional time or several applications. Product instructions should always take priority.
Avoid flooding the surface. Excess liquid can travel into joints, soften nearby finishes, loosen labels that should remain, or spread dissolved glue across a larger area. A thin layer placed exactly where needed is usually more effective than a puddle.
Watch the residue rather than relying on the clock alone. Softened adhesive may look swollen, glossy, wrinkled, or easier to move. Test one edge with the plastic scraper. When it remains hard, apply another small amount and wait instead of increasing pressure.
Lift and Wipe
Place the scraper at a low angle and push gently beneath the softened adhesive. Work in sections roughly 5 to 12 centimeters wide so the remover remains active while cleaning. Large areas are easier to manage when divided into several smaller zones.
Transfer lifted residue to a paper towel. Wipe the surface with a clean section of microfiber cloth, folding the cloth frequently. Once a cloth becomes sticky, it begins spreading adhesive instead of removing it.
Some pressure-sensitive adhesives dissolve into a film, while others roll into small rubbery pieces. Both reactions are common. Collect rolled adhesive immediately so it does not attach to a nearby clean area, the scraper handle, gloves, or surrounding furniture.
Repeat the apply-wait-lift-wipe cycle when necessary. Two or three gentle passes are generally safer than one aggressive attempt. If repeated treatment does not soften the residue, reassess the adhesive type and the surface before using a different method.
| Stage | Typical working time | What to look for |
|---|---|---|
| Remove loose top layer | 1–3 minutes | Paper, tape, foam, or film is cleared |
| Apply remover | 15–60 seconds per cycle | Residue becomes softer or glossier |
| Lift residue | 1–5 minutes per section | Glue moves without heavy force |
| Repeat treatment | 1–3 cycles | Remaining patches become smaller |
| Final wipe | 1–2 minutes | Surface feels smooth and non-tacky |
| Dry before reuse | 5–30 minutes | No moisture or cleaner remains |
Finish the Surface
After the visible adhesive is gone, inspect the area under side lighting. Thin residue can be difficult to see from directly above. Run a clean fingertip lightly across the dry surface because tackiness often reveals material that remains.
Use a surface-appropriate final cleaning method. Many hard household surfaces can be wiped with a damp cloth and mild soap, while other materials require manufacturer-specific care. The final step removes cleaner, dissolved adhesive, and any oily or soapy film.
Dry the area completely before attaching a new label, applying fresh adhesive, painting, polishing, sealing, or installing protective film. Even a small amount of remaining cleaner can weaken a new bond or create an uneven finish.
When the cleaned area looks different from the surrounding surface, determine whether residue remains or whether the material underneath has faded differently. A long-standing sticker can protect the covered section from sunlight and wear, leaving a visible color outline after removal. Additional cleaner will not correct that contrast.

Which Method Works for Each Surface?
Choose the removal method according to the surface finish. Plain glass and uncoated metal usually tolerate controlled scraping well, while plastic, acrylic, finished wood, painted surfaces, and automotive materials need shorter contact times and lighter pressure. Unknown or porous surfaces should always be approached conservatively.
Glass and Mirrors
Plain glass is one of the easier surfaces for beginners because it is non-porous and allows residue to be seen clearly. Remove loose label material, apply a compatible remover, wait for softening, and use a plastic scraper at a low angle.
Not every transparent surface is plain glass. Tinted windows, decorative coatings, printed bottles, mirrored coatings, privacy films, and car defroster lines can be damaged by cleaners or scraping. Test a hidden area and keep the tool away from printed or coated sections.
Avoid using a metal blade unless the glass manufacturer confirms that it is suitable and the person performing the job has the necessary experience. Fine grit trapped beneath the blade can leave long scratches that remain visible after the glass dries.
For bottles and food jars, remove the label and adhesive first, then wash the container thoroughly using its normal cleaning method. Adhesive remover addresses sticky residue but does not replace regular washing before food contact or storage.
Metal and Appliances
Unpainted stainless steel, aluminum tools, and metal containers are usually durable, but polished, plated, powder-coated, or painted finishes can show scratches and dull spots. Follow the grain direction on brushed stainless steel and avoid abrasive pads.
Appliances require careful application because a single panel may include printed symbols, plastic controls, seams, electrical openings, and decorative coatings. Apply cleaner to a cloth or cotton swab rather than spraying directly around buttons, displays, or ventilation gaps.
Do not allow liquid to enter control panels, hinges, fasteners, or appliance joints. Disconnect small electrical devices before cleaning when appropriate, and follow any surface-care instructions supplied by the manufacturer.
Adhesive shadows on painted metal may not always be residue. A sticker that remained in place for years can protect covered paint from sunlight, grease, and abrasion. After removal, the protected area may appear brighter than the surrounding finish even when no glue remains.
Plastic and Acrylic
Plastic should never be treated as one uniform material. Storage bins, folders, appliance housings, electronics, automotive trim, acrylic panels, and packaging containers can react differently to solvents, friction, and heat.
Begin with the smallest practical amount of remover and a short contact time. Test for clouding, softening, color transfer, fine cracks, or loss of gloss. Transparent acrylic deserves particular caution because permanent haze may become visible only after the surface dries.
Use a plastic scraper with very light pressure. Avoid soaking screw holes, glued joints, edges, screens, printed graphics, and transparent seams. For electronics, place cleaner on the cloth rather than the device and keep all liquid away from ports and vents.
Heat may help on some rigid plastics, but it can also cause warping. Use a low hair-dryer setting in short intervals, keeping the airflow moving. Stop immediately when the material becomes flexible, unusually warm, or visually distorted.
Wood and Automotive Surfaces
Finished wood may tolerate a controlled remover application when the coating is intact. Unfinished wood, exposed edges, scratches, joints, and end grain can absorb liquid quickly. Test underneath the object and wipe promptly.
Laminated furniture requires care around edges because liquid may enter the board beneath the decorative layer. Do not leave a soaked cloth resting on the surface, and avoid scraping toward lifted seams or chipped laminate.
Automotive surfaces combine clear coat, paint, glass, plastic, rubber, vinyl, tint film, and protective coatings. Work on a cool vehicle away from direct sunlight. High panel temperatures can cause cleaner to evaporate too quickly and may soften adhesive unevenly.
Use clean microfiber cloths because road grit can scratch paint. Car glass should be checked for tint film and printed heating elements. On painted body panels, treat small sections and avoid heavy rubbing, dirty tools, or prolonged product contact.
| Surface | Safer starting method | Suggested contact approach | Main risk |
|---|---|---|---|
| Plain glass | Remover and plastic scraper | Short application, repeat as needed | Coatings or trapped grit |
| Coated mirror | Cloth application only | Test before full cleaning | Damage to backing or coating |
| Stainless steel | Wipe with the grain | Controlled short cycles | Fine scratches or streaks |
| Rigid plastic | Patch test and light wiping | Minimal product | Softening or discoloration |
| Acrylic | Very small hidden test | Shortest practical contact | Clouding or cracking |
| Finished wood | Spot application | Wipe promptly | Dulling or finish damage |
| Unfinished wood | Avoid general soaking | Specialist method may be needed | Permanent staining |
| Car paint | Cool surface, clean cloth | Small treated sections | Clear-coat scratching |
| Car window | Confirm no film or printing | Controlled application | Tint or defroster damage |
How Do You Remove Stubborn Adhesive?
Stubborn adhesive is best removed through repeated softening and lifting rather than stronger scraping. Remove thick carrier material first, treat small areas, extend contact time cautiously, and wipe away each loosened layer. Old labels, mounting tape, silicone film, wax, gum, and sun-baked residue often require several controlled cycles.
Old Sticker Residue
Old sticker residue often contains several layers: paper fibers, dry adhesive, trapped dust, and softer glue underneath. Brush away loose dirt before applying remover so particles are not dragged across the surface during scraping.
Treat a small section and allow the product enough time to penetrate. If the edge remains hard, apply another light layer rather than forcing the scraper. Aging can make the outer surface resistant while adhesive underneath remains capable of softening.
Outdoor and automotive labels may have been exposed to years of heat, ultraviolet light, rain, and temperature changes. Work on a cool surface and divide the residue into narrow sections. Spraying a large area can be inefficient because the cleaner may evaporate before scraping begins.
A remaining shadow is not always glue. Compare the texture with the surrounding area. When the surface feels smooth and non-tacky but the color differs, the mark may come from uneven fading or oxidation. Continuing to apply remover may damage the finish without changing the discoloration.
Double-Sided Tape
Double-sided tape usually contains adhesive on both sides of a foam, film, tissue, or fabric carrier. The middle layer should be removed before the remaining glue is treated. Otherwise, the carrier absorbs product and prevents the remover from reaching the adhesive evenly.
Lift one corner with a plastic scraper and pull slowly at a low angle. Foam tape may tear into pieces, so remove each section before working on the adhesive underneath. Avoid flooding the foam because cleaner can spread beyond the intended area.
Once the carrier is gone, treat a narrow strip of residue. Some tape adhesives become soft and smear, while others roll into rubbery pieces. Use the scraper to gather the material toward the center and transfer it to a paper towel.
Mounting strips on painted walls require extra caution. Follow the original pull-tab instructions first when the tab is still available. Cleaner and scraping can remove paint or damage drywall paper, particularly where the wall finish is already weak.
Silicone, Wax, and Gum
Silicone, wax, and gum should be handled as two-stage problems. First remove the raised or solid material, then clean the thin residue left behind. Applying remover directly to a thick mass wastes product and may spread the contamination.
For light silicone residue on a compatible hard surface, lift or trim the bulk material with a plastic tool. Do not disturb seals that are intended to remain. Fully cured bathroom, glazing, or construction silicone may require a specialized silicone-removal process rather than a general adhesive cleaner.
Candle wax is often easier to lift once the main layer has hardened, provided the surface can tolerate that approach. After the bulk wax is removed, the thin oily film can be treated separately. Avoid using high heat on plastic, finished wood, laminate, or painted materials.
Remove the main piece of gum before treating the sticky trace. Rubbing fresh gum immediately can push it into textured surfaces. Gentle mechanical removal followed by a small amount of cleaner gives better control and limits spreading.
Know When to Stop
Repeated applications are reasonable when the residue becomes progressively softer and smaller. Stop when the surface begins to change, the cleaner no longer produces improvement, or the adhesive appears to be part of a structural seal or bonded assembly.
A stubborn mark may require a specialized product for cured construction adhesive, epoxy, polyurethane, contact cement, or heavy silicone. General sticker-residue removers are not designed to dissolve every cured adhesive safely.
Reassess after two or three controlled cycles. Confirm that the material is actually adhesive rather than staining, coating damage, oxidation, or exposed substrate. Additional product cannot repair a surface that has already changed color or texture.
Professional help may be appropriate for valuable furniture, painted vehicle panels, antiques, electronics, coated architectural glass, or large commercial areas. The cost of specialist cleaning is often lower than refinishing or replacing a damaged surface.
What Mistakes Should Beginners Avoid?
Avoid metal blades, heavy pressure, excessive product, long soaking, high heat, dirty cloths, and mixed cleaning chemicals. Most damage happens when users increase force before the adhesive has softened or assume that a method safe for one material will also be safe for another.
Scraping Too Hard
When adhesive resists the scraper, the natural reaction is to push harder. That usually flattens the residue into a wider film and increases the chance of scratching. Properly softened adhesive should move with controlled pressure rather than force.
A useful warning sign is excessive tool flex. When the plastic scraper bends sharply, the hand becomes tired, or the object moves under pressure, stop and allow more softening time. Divide the area into smaller sections instead of increasing force.
Metal blades create additional risk. They may appear effective on plain glass, but they can permanently damage coated glass, tint film, plastic, acrylic, automotive paint, furniture finishes, and appliance panels.
Rough sponges and abrasive powders can produce dull patches even when individual scratches are difficult to see. Adhesive removal is not the same as scouring. The objective is to weaken the residue and lift it rather than grind it away.
Using Too Much Product
A thicker application does not always work faster. Excess cleaner can run beneath labels that should remain, enter furniture edges, penetrate laminate seams, reach electrical openings, or spread dissolved adhesive across a larger area.
Use enough product to wet the residue without flooding the surface. For sensitive materials, place the cleaner on a cloth or cotton swab. Reapply only after the first cycle has been wiped away and assessed.
Long soaking is another common problem. A finish that tolerates 30 seconds of contact may change after several minutes. Short repeated applications provide more control and allow the surface to be checked between cycles.
Never leave a soaked cloth resting on wood, paint, plastic, acrylic, or laminate while attending to another task. Product contact continues even when active cleaning has stopped.
Applying Excessive Heat
High heat can warp plastic, soften paint, loosen laminate, affect vinyl, damage tint film, and make some adhesives spread. A heat gun is generally too aggressive for routine beginner tasks.
When heat is appropriate, use a household hair dryer at a low setting. Keep it moving and work in intervals of around 10 to 20 seconds. Test the label edge after each interval rather than heating continuously.
Do not heat a surface that already contains adhesive remover unless the product label specifically permits that practice. Some formulas must be kept away from elevated temperatures, sparks, flames, and ignition sources.
Direct sunlight can create a similar problem. Vehicle panels, outdoor furniture, windows, and metal objects may become much hotter than the surrounding air. Move the object into shade and allow it to cool before treatment.
Spreading or Mixing Residue
A contaminated cloth can make a small adhesive patch look much larger. Fold microfiber cloths frequently and replace paper towels once they become sticky. Clean the scraper edge after every few passes.
Work from the outside toward the center. Keep used cloths, tape fragments, paper fibers, and rolled adhesive away from the clean area. Gloves can also transfer residue, so inspect them before touching nearby objects.
Do not mix adhesive remover with bleach, ammonia, acidic cleaners, disinfectants, or other chemicals. Unexpected reactions can create fumes, damage surfaces, or leave difficult residues. Complete one method, clean the area, and allow it to dry before considering another.
After removal, perform a final cleaning step. Cleaner, oil, soap, or dissolved adhesive left on the surface can weaken a new label, repair adhesive, coating, or paint. The finished area should be dry, stable, smooth, and free from tackiness.

Conclusion
Household users may need a practical spray for labels, tape marks, decals, waxy residue, gum traces, and other sticky messes on suitable hard surfaces. Retailers, distributors, Amazon sellers, cleaning brands, and DIY suppliers may require different bottle sizes, packaging formats, label languages, or performance targets.
GleamGlee supports standard adhesive-remover products as well as private-label and customized projects. Available services include formulation adjustment, spray-bottle selection, scraper kits, multilingual packaging, regulatory documentation, sample development, and FBA-ready production.
Customization can begin from relatively flexible order quantities, depending on the formula, packaging, labeling, and destination market. Sample development commonly requires approximately 7 to 14 days, while standard bulk production is often completed in about 20 days after samples, packaging, and artwork are approved. Rush schedules may be available for suitable projects.
Businesses requesting a quotation should provide the target residue, intended surfaces, bottle size, destination market, expected order quantity, packaging requirements, and any benchmark product. Those details allow the technical and production teams to assess formula compatibility, packaging options, compliance needs, sample timing, and realistic production costs.
GleamGlee integrates formulation development, raw-material sourcing, packaging production, label printing, filling, quality control, and export support in Guangdong, China. Regional warehousing and fulfillment resources in the United States, Canada, the United Kingdom, and Europe can also support suitable distribution and e-commerce projects.
Retailers, importers, private-label brands, online sellers, and regional distributors planning to launch or improve an adhesive-removal product can contact GleamGlee for samples, packaging options, technical documentation, estimated pricing, and a project-specific production plan.





















