Skip to content

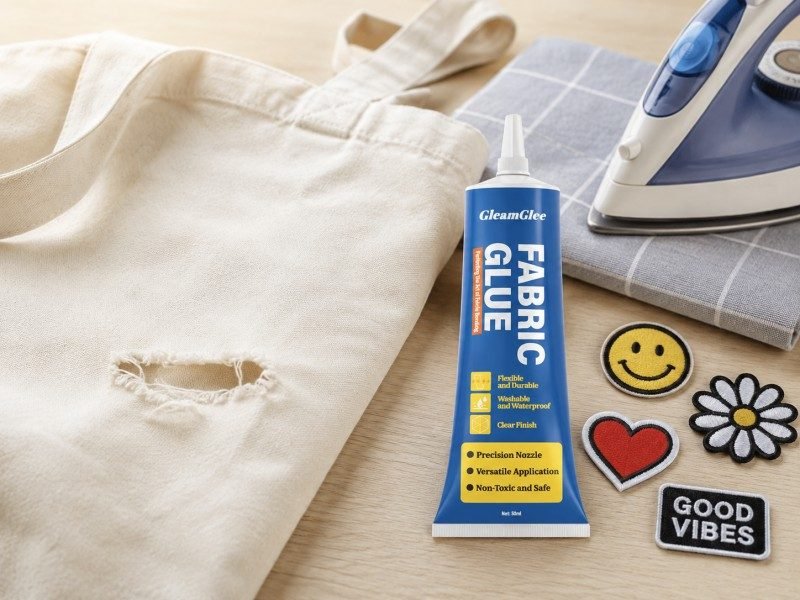
Fabric patches are meant to let clothing return to normal life. A repaired pair of jeans should still be wearable, a school uniform should still survive its regular laundry schedule, and a customized jacket should not become an item you are afraid to wash. The difficulty is that “fabric patch” can describe several very different repair systems. A sewn embroidered badge, heat-activated iron-on patch, fabric-glued repair, temporary self-stick patch, and patch secured with both adhesive and stitching may look similar from the outside but behave differently once water, detergent, agitation, and dryer heat are introduced.
The safest answer is therefore not simply “wash patched clothes in cold water.” A better rule is to identify three limits before washing: the garment’s care instructions, the patch manufacturer’s instructions, and the attachment system’s instructions. The lowest or most restrictive applicable limit should normally control the laundering process. If the shirt tolerates warm machine washing but its patch specifies cold washing, use cold. If the patch is washable but the jacket says hand wash only, keep hand washing. A washable adhesive does not turn a dry-clean-only garment into a machine-washable garment.
From a senior textile-adhesive perspective, this distinction matters more than choosing the “strongest” glue or the harshest wash setting. Successful fabric repair depends on the complete system: surface preparation, patch flexibility, adhesive thickness, edge design, full curing, fabric movement, washing conditions, drying conditions, and maintenance after repeated use. Users who understand those variables can usually care for patched clothing without creating complicated laundry routines or treating every repaired item like a fragile museum piece.
For readers who need the practical answer immediately, use this first-wash checklist before moving into the detailed sections below:
- Confirm whether the patch is sew-on, iron-on, fabric-glued, self-adhesive, or hybrid.
- Read the garment care label again after the repair.
- Check the patch or adhesive maker’s first-wash waiting period.
- Inspect all patch edges before putting the garment into water.
- Repair visible lifting, curling, fraying, or broken stitches first.
- Turn the garment inside out when practical.
- Choose a temperature and cycle permitted by every relevant component.
- Keep rough hardware, unnecessary bleach, and aggressive spot scrubbing away from the patch.
- Dry according to the garment and patch instructions.
- Let the garment dry completely before evaluating the repair.
The U.S. Federal Trade Commission’s Care Labeling Rule is useful background for this approach because washing instructions are not considered in isolation. Washing method, water temperature, drying, ironing, bleaching, and necessary warnings all form part of proper garment-care information. The FTC also recognizes that care information must take the product’s components into account, which supports a practical household principle: after adding a patch, the new component should be considered alongside the garment’s original care requirements.
- Evidence chain — FTC Care Labeling Rule: Read the FTC clothing care guidance
1. Can You Wash Clothes with Fabric Patches?
Yes, many clothes with fabric patches can be washed normally once the patch has been installed correctly and all required waiting or curing periods have passed. The important qualification is that “washable” is not one universal condition. It may mean cold machine washing for one iron-on patch, gentle washing after a 48-hour waiting period for another adhesive, ordinary laundering after full cure for a different textile glue, or hand washing for a delicate decorated garment. The attachment method determines which risk deserves the most attention.
A patch experiences several types of stress during one laundry cycle. Water changes the weight and dimensions of many textiles. Detergent contacts both fabric and adhesive interfaces. Machine action repeatedly bends the repair. The patch rubs against other clothing, the drum, zippers, buttons, seams, and itself as the garment folds. Extraction adds movement while water leaves the material. If a tumble dryer follows, heat and repeated impact are added to the same repair. A patch can therefore remain firmly attached at its center while gradually failing from one exposed edge.
Start by Identifying the Patch Construction
Do not rely only on the patch’s appearance from the front. Turn the garment over if possible and determine how it was installed. Sew-on patches rely mainly on thread. Iron-on patches contain a heat-activated backing. Glued patches depend on a separately applied textile adhesive. Some self-stick patches are designed for positioning or short-term decoration rather than repeated laundering, while hybrid repairs use adhesive for broad contact or positioning and stitching for mechanical edge security.
| Patch Type | What Holds It in Place | Main Laundry Risk | What to Check First |
|---|---|---|---|
| Sew-on patch | Thread around edge or through patch | Broken stitches, snagging, fraying | Stitching around full perimeter |
| Iron-on patch | Heat-activated adhesive backing | Edge lifting, curling, heat sensitivity | Manufacturer wash and dry instructions |
| Fabric-glued patch | Textile adhesive | Washing before full cure, edge peeling | Adhesive wash-ready time |
| Self-adhesive patch | Pressure-sensitive sticky backing | Adhesive weakening in water | Whether maker actually approves washing |
| Embroidered patch | Usually sewing, heat backing, or glue | Abrasion and border wear | Embroidery and edge condition |
| Glue + stitch patch | Adhesive plus thread | Mixed limits | Follow the stricter care requirement |
This distinction prevents one of the most common patch-care mistakes: applying a washing rule from one product to another. Two patches may both be described as “permanent,” yet one may be heat bonded, another stitched, and another attached with a liquid adhesive. Their failure mechanisms differ, so their care instructions can legitimately differ as well. The correct target is not the toughest possible laundry process; it is a routine that cleans the garment while staying within the limits of every permanent component.
GINETEX’s international textile-care system follows the same general idea of defined treatment limits. Its washing symbols specify whether domestic washing is possible, the maximum temperature, and whether a normal, mild, or very mild mechanical process is appropriate. The organization also explains that care symbols consider textile characteristics and components such as finishes, accessories, and applications. This makes the care label a useful baseline after patching, even though a consumer-added patch was not necessarily part of the garment maker’s original testing.
- Evidence chain — GINETEX care symbols: See the official textile care symbol guide
A Patch Being “Washable” Does Not Mean Every Wash Is Safe
The word washable should be interpreted together with actual instructions. A fabric adhesive can be washable after full cure while still recommending gentle washing. An iron-on patch may be washable but specify cold water. A shirt may be washable but carry a do-not-bleach warning. A decorated garment may permit machine washing but prohibit tumble drying. Treating “washable” as permission for hot water, heavy-duty agitation, chlorine bleach, and high dryer heat creates more risk than the product claim actually supports.
A practical way to think about the repair is to imagine four separate questions. Can the base garment tolerate the wash? Can the visible patch material tolerate it? Can the attachment mechanism tolerate it? Can any decoration attached to the patch tolerate it? Washing is appropriate only when those answers overlap. This approach is especially valuable for embroidered patches with metallic thread, patches on stretch sportswear, patches beside printed graphics, and fabric-glue repairs on garments containing coatings or delicate fibers.
2. What Should You Check Before Washing a Patched Garment?
The first wash should begin with inspection rather than with the washing machine. Lay the garment on a firm, well-lit surface and look around the entire patch perimeter. A repair that looks excellent from two feet away can already have a one-centimeter loose corner. Once laundering starts, repeated flexing can work on the loose edge and enlarge it. Finding the problem while everything is dry gives you a much better opportunity to repair it cleanly.
Check the Care Label Before You Check the Washer
Read the label rather than relying on how you usually wash similar clothing. Look for the washing symbol or written washing method, permitted temperature, bleach restriction, drying method, and ironing limit. Pay particular attention to instructions such as hand wash, gentle cycle, do not bleach, tumble dry low, dry flat, do not tumble dry, do not iron, or professional cleaning only. If the patch instructions impose a lower limit, use the lower limit after installation.
GINETEX explains that a number inside the wash symbol represents the maximum permitted temperature, while one bar underneath indicates reduced mechanical action and two bars indicate a very mild treatment. This is useful for patched clothing because a label marked for a mild process is already telling you the base garment should receive less mechanical stress; adding a patch is not a reason to move to a stronger cycle.
- Downloadable evidence resource — Textile Care Symbols PDF: Download the GINETEX care-symbol reference
Readers who find garment-care symbols confusing can benefit from seeing all five categories explained visually before washing a newly repaired item. The video below covers washing, bleaching, drying, ironing, and professional textile-care symbols. It is especially useful for users who normally choose a washer program from habit and have never connected the bars, dots, crossed symbols, and temperature numbers on the label with specific care restrictions.
- Video evidence 1 — Laundry Care Symbols Explained: Watch the care-label video on YouTube
Perform a 30-Second Patch Inspection
The purpose of inspection is not to prove how strong the patch is by pulling on it. Aggressively peeling a secure patch creates exactly the concentrated edge force you are trying to avoid. Instead, keep the garment relaxed and look for natural separation, a raised shadow along one edge, loose thread, rippling, curled corners, bubbles, lifted embroidery, or base fabric pulling away from the patch.
Use the following check before the first wash and whenever the garment has had unusually heavy wear:
- Patch lies flat without a naturally lifted corner.
- Full perimeter is attached or stitched.
- No broken stitches are visible.
- No long loose threads are hanging from the border.
- Base fabric around the patch has not continued tearing.
- Patch is not visibly buckling or pulling the garment into a wrinkle.
- Adhesive is no longer wet or mobile.
- Required cure or wash-ready period has passed.
- No pins, clips, temporary tape, or positioning tools remain in the garment.
If a small corner is already lifting, repair it while the fabric is clean and dry. If half of the patch has detached, old adhesive has formed hard lumps underneath, or the garment fabric has torn beside the patch, do not simply squeeze more glue into the gap. Those cases deserve a more complete repair assessment because the original installation method, material compatibility, or local stress may be the real problem.
Turn the Garment Inside Out When Practical
Turning a patched garment inside out does not make a weak repair strong, but it can reduce direct rubbing across the decorative face and exposed patch border. The patch is less likely to strike a zipper, metal button, rough denim seam, hook, or textured garment repeatedly during tumbling. This small step is particularly useful for embroidered patches, decorative jacket patches, school badges, and repairs with a distinct raised edge.
If you are unsure which face of a fabric should be treated as the visible or “right” side during repair or reinforcement work, the following Professor Pincushion demonstration gives beginners a useful visual explanation. This is particularly helpful when a patch needs to be repaired from the garment’s reverse side after washing, because working from the wrong side can keep adhesive, knots, and repair stitches less visible.
- Video evidence 2 — Identifying the Right and Wrong Side of Fabric: Watch Professor Pincushion’s fabric-side demonstration
Use a Mesh Laundry Bag Only as Extra Protection
A mesh bag can be helpful for a small patched garment, delicate embroidered item, or clothing with edges that could catch against heavier pieces. It should be considered an abrasion-control measure rather than a way to override the garment’s normal restrictions. A mesh bag cannot cure adhesive faster, make a self-stick patch washable, protect a heat-sensitive patch from a hot dryer, or make a dry-clean-only garment suitable for the washer.
The American Cleaning Institute recommends sorting according to color and care instructions, choosing the appropriate washer setting, and using mesh bags where suitable for delicate or small items. Its consumer laundry guidance is useful for patch care because most successful patched-garment laundering is simply careful everyday laundry with a few repair-specific precautions rather than an entirely different cleaning process.
- Evidence chain — American Cleaning Institute Laundry Basics: Read the ACI laundry guide
3. How Long Should You Wait Before the First Wash?
Waiting before the first wash is one of the most important differences between sewn patches and adhesive-based patches. A freshly sewn patch normally has no chemical curing period, although the stitching still needs to be completed and checked. An iron-on patch must cool and complete the waiting period specified by its maker. A liquid fabric adhesive may feel dry long before the manufacturer considers it ready for laundering. These stages should never be treated as interchangeable.
Dry to the Touch Is Not the Same as Wash-Ready
Textile adhesives develop performance over time. A repair may stop sliding after several minutes, become dry to the touch later, and continue developing its final bond afterward. A thick adhesive layer can also behave differently from a thin layer because moisture or carrier components have farther to travel before leaving the bond line. Temperature, humidity, adhesive thickness, absorbency, and fabric construction can all influence how a repair feels while curing.
For users, the practical distinction is straightforward:
- Initial set: materials stay aligned under light handling.
- Dry to touch: visible wetness may be gone.
- Full cure: the adhesive has reached its stated developed condition.
- Wash-ready: the manufacturer allows laundering.
Some manufacturers give the same time for full cure and wash-ready use. Others do not. Always follow the number printed for the exact product rather than using an internet rule such as “all fabric glue needs 24 hours” or “every iron-on patch is washable immediately after cooling.”
Real Products Show Why One Waiting Time Cannot Fit Every Patch
Cricut’s current Iron-On Patch instructions tell users to wait 24 hours after application before washing, then machine wash cold and either tumble dry low or hang dry. The same official instructions say a lifting or curling patch can be reheated and mention sewing after application as an option for additional durability. This is a useful example because it connects installation, first-wash timing, drying, maintenance, and optional mechanical reinforcement in one product-specific care system.
- Evidence chain — Cricut Iron-On Patch care: Read Cricut’s current Iron-On Patch instructions
A liquid textile adhesive can publish a different schedule. Aleene’s Fabric Fusion product instructions, for example, distinguish several time-related conditions and state that the tested product is washable after 48 hours, while also specifying inside-out gentle washing and low-temperature machine drying. The manufacturer additionally notes that thicker applications dry more slowly, which is a particularly useful reminder for household users tempted to apply a very heavy layer because they assume “more glue means more strength.”
- Evidence chain — fabric adhesive wash-ready example: Read Aleene’s Fabric Fusion instructions
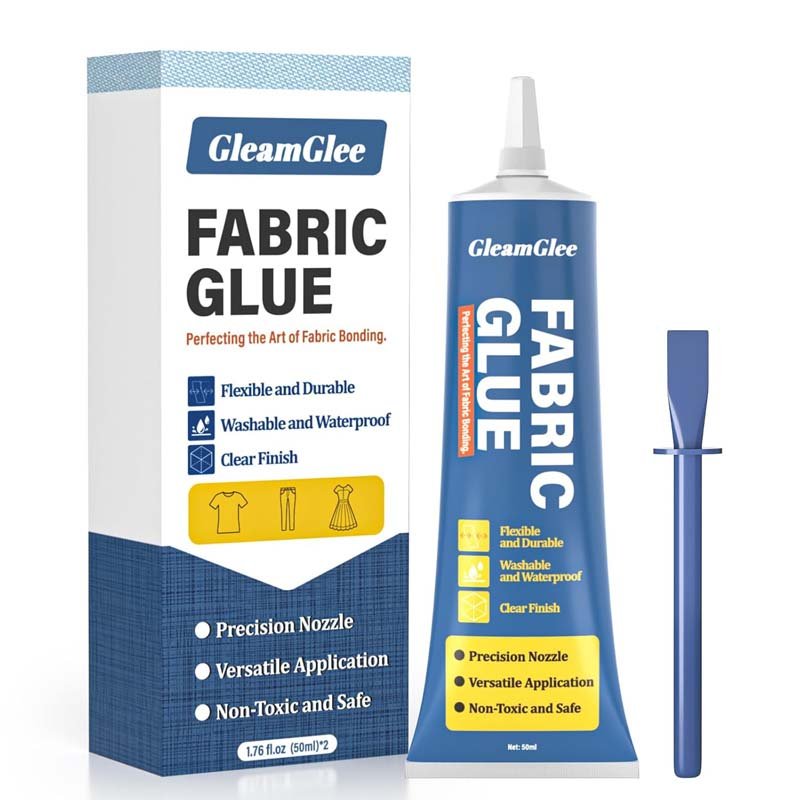
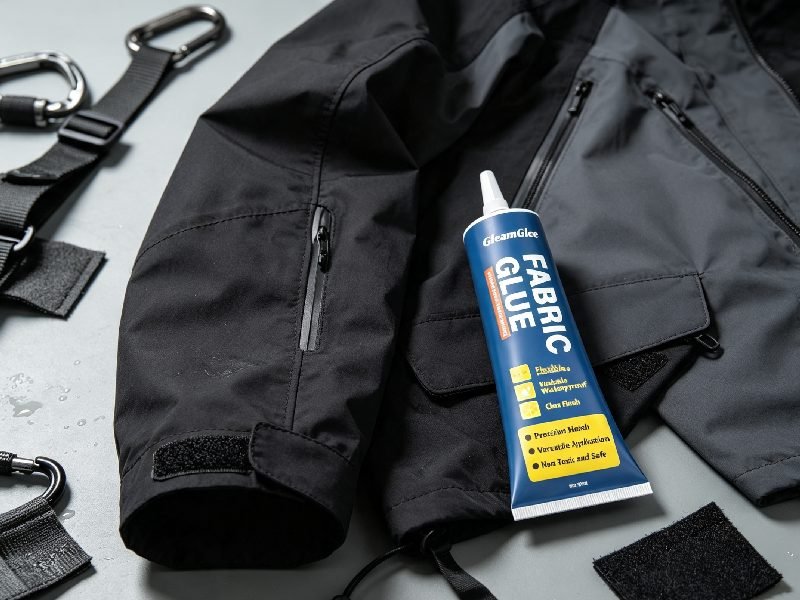
GleamGlee Fabric Glue provides another product-specific example. Its published and supplied product information describes approximately 6–10 minutes for initial setting and about 24 hours for full cure, with the fully cured bond intended to remain flexible and suitable for washable textile projects. The product is designed for common materials and applications including cotton, denim, polyester, canvas, felt, fabric patches, clothing repairs, trims, and related textile projects. These times should be presented specifically as GleamGlee parameters, not as an industry-wide rule.
- Product-specific reference — GleamGlee Fabric Glue use and cure information: Review the GleamGlee fabric-glue application guide
First-Wash Timing Comparison
| Repair System | Example Waiting Principle | What the User Should Do |
|---|---|---|
| Sew-on patch | No adhesive cure unless glue was also used | Finish and inspect stitching before wash |
| Iron-on patch | Product-specific post-application wait | Follow the patch maker exactly |
| Liquid fabric glue | Product-specific cure/wash-ready interval | Do not rely on touch dryness |
| Self-stick patch | May be temporary | Verify laundering approval first |
| Glue + stitch | Adhesive still needs its full cure | Finish stitching without disturbing uncured bond |
A simple way to avoid losing track of the waiting period is to note the date and time when the patch was fully positioned and pressed. If the adhesive says 24 hours, add 24 hours to that time before planning the first wash. If the manufacturer specifies 48 or 72 hours, use its value. This becomes surprisingly useful when a repair is finished late at night, because “wash it tomorrow” might mean only eight or twelve hours have actually passed.
- External tool — time-duration calculation: Use the Timeanddate duration calculator
Do Not Compensate for Short Curing Time with a Gentler Wash
A common misunderstanding is that an adhesive can be washed early as long as the user selects cold water and a delicate cycle. Those measures can reduce laundering stress, but they do not replace chemical curing. If the adhesive maker requires a certain interval before washing, complete that interval first. Washing at half the recommended time and choosing a gentle cycle is still washing before the product was declared wash-ready.
If the garment must be worn urgently, postponing the wash is usually a better solution than gambling with the bond. The same principle applies when the repair still looks wet, feels mobile, or has adhesive squeezing from the edge after the stated interval. Do not invent an exact extra drying time, but do allow the repair to remain undisturbed and review the product instructions before exposing it to water.
Readers who have never used liquid textile adhesive may find the following no-sew demonstration useful. Although it shows hemming rather than a patch, the video makes several important concepts visible: fabric alignment, controlled adhesive placement, keeping the fabric flat, and treating curing as a separate step from active application. The product in the video has its own parameters, so viewers should use it to understand technique rather than copy its timing onto another brand.
- Video evidence 3 — Fabric Glue Application on Clothing: Watch Aleene’s fabric-glue hemming demonstration
4. How to Machine Wash or Hand Wash Clothes with Fabric Patches
Once the repair is genuinely wash-ready, laundering should become a controlled but practical process. Users do not need seventeen special products or a separate washing machine for patched garments. They need to prevent unnecessary edge stress while respecting the care limits already established. The first wash deserves the most attention because it is the first time the completed repair experiences a full combination of water, detergent, bending, fabric weight, extraction, and drying.
Step-by-Step Machine-Washing Method
The following procedure is suitable as a conservative first-wash framework when the garment label and patch system both permit machine washing:
- Confirm the full curing or waiting interval is complete.
- Inspect every patch edge in bright light.
- Repair an already lifted corner before washing.
- Empty the garment pockets.
- Close zippers, hooks, snaps, and hook-and-loop closures where appropriate.
- Turn the garment inside out when practical.
- Use a mesh bag if the garment and patch would benefit from reduced snagging.
- Sort with garments that have compatible colors and care requirements.
- Avoid washing an exposed patch against extremely rough or hardware-heavy items.
- Measure detergent according to the detergent instructions.
- Choose a water temperature allowed by both garment and repair system.
- Choose an appropriate cycle; a gentler permitted cycle is sensible for a first wash.
- Do not scrub the patch face during the wash.
- Remove the garment without pulling on the wet patch.
- Proceed directly to the permitted drying method.
The sequence matters because a low-temperature wash does not compensate for a lifted edge, and turning a garment inside out does not compensate for incomplete curing. Treat preparation, cycle selection, and drying as three separate protection layers. When all three are correct, users can usually care for ordinary patched clothing without turning laundry into a complicated repair ritual.
Should You Always Use Cold Water?
No single temperature should be imposed on every patch system, although cold water is common in many manufacturer instructions. The correct approach is to choose a temperature at or below the maximum permitted by the garment while also meeting the patch and adhesive requirements. When two instructions differ, the more restrictive condition normally becomes the practical household limit.
For example:
- Garment allows warm; patch requires cold → use cold.
- Garment requires cold; sew-on patch has no special restriction → use cold.
- Garment says hand wash; adhesive says machine washable → hand wash.
- Garment says do not wash; patch says washable → do not machine wash the garment.
- Patch instructions are unknown → do not assume the hottest garment setting is safe.
This approach also prevents a misleading but common SEO claim: “30°C is always the best temperature for patched clothes.” Some garments and patch systems may indeed use a 30°C program, but an exact universal number is not supported for every construction. Care-label limits and product-specific instructions are more reliable than copying a convenient temperature from an unrelated repair guide.
Detergent: More Is Not Better
Use an appropriate detergent and measure it normally. Adding twice the detergent does not protect the patch or clean underneath it more effectively. Excess detergent can make rinsing more difficult, while aggressive pretreatment directly on the patch can introduce a chemical exposure that the original repair system was never intended to receive. If the patch itself is stained, follow cleaning instructions for both the patch material and the garment rather than immediately attacking it with a concentrated stain remover.
Extra caution is sensible with:
- Strong solvent-based spot removers.
- Chlorine bleach where either component prohibits it.
- Abrasive stain brushes.
- Long soaking not permitted by the garment or patch maker.
- Repeated concentrated detergent poured directly onto an adhesive edge.
- Experimental household solvents used to “clean” an adhesive patch.
When Is Hand Washing Safer?
Hand washing becomes the better option when the care label requires it or when the garment contains a vulnerable patch system, substantial embroidery, beadwork, delicate fabric, vintage construction, or an old repair that is still serviceable but no longer ideal for machine agitation. Hand washing also gives the user more control over local rubbing, although poor technique can still damage a patch if the area is aggressively scrubbed, twisted, or wrung.
Use a supportive hand-washing method:
- Confirm the garment and patch can be water washed.
- Prepare water at the permitted temperature.
- Add the correct quantity of suitable detergent.
- Lower the garment into the water without stretching the patch.
- Move the garment gently through the solution.
- Do not scrub patch edges against themselves.
- Do not twist or wring the repaired area.
- Rinse according to the garment instructions.
- Support the wet garment when lifting it from the water.
- Reshape without aggressively stretching the patch.
- Dry according to the care label and repair instructions.
Hand washing is not automatically superior for every patched item. A sturdy sewn patch on everyday cotton may handle a permitted machine cycle easily, while a poorly performed hand wash involving twisting and scrubbing can be harsher locally. The objective is controlled mechanical action, not choosing hand washing simply because it sounds gentler.
Treat the First Wash as a Baseline Test
After the first successful wash and dry, record the conditions somewhere useful, especially for school uniforms, work clothes, children’s garments, customized jackets, and household items washed by several people. A small note such as “inside out — cold gentle — low dry” or “hand wash — dry flat” is more helpful than forcing everyone in the household to rediscover the routine later.
The first successful cycle establishes practical evidence about the complete repaired garment under those specific conditions. It does not prove the patch can tolerate hotter water, harsher cycles, repeated chlorine bleach, or high heat. Continue using the successful care method unless there is a good reason and documented permission to change it.
5. How Should Washing Change by Patch Type and Fabric Type?
Fabric type matters because the patch and the underlying garment move together during wear and laundering. A flexible patch on stable cotton behaves differently from a thick patch on elastic jersey. A liquid adhesive can penetrate absorbent cotton more readily than a smooth synthetic weave. A waterproof technical fabric may have coatings or laminated layers not visible from the surface. Rather than memorizing dozens of fabric-specific rules, focus on four physical properties: thickness, absorbency, stretch, and surface treatment.
| Fabric / Patch Situation | Main Concern | Washing Direction |
|---|---|---|
| Cotton + sewn patch | Thread wear and shrinkage | Follow label; inspect stitching after drying |
| Denim + glued patch | Edge flexing and thick fabric movement | Cure fully; avoid unnecessarily harsh first wash |
| Polyester woven + patch | Surface compatibility and drying heat | Follow label and patch thermal limits |
| Stretch jersey + rigid patch | Movement mismatch | Use gentle care and assess flexibility |
| Nylon / coated fabric | Coating compatibility | Check garment maker guidance first |
| Delicate fabric + patch | Seep-through, distortion, visible marks | Hand/professional care where specified |
| Heavy embroidered patch | Snagging and border stress | Reduce abrasion and consider edge stitching |
Cotton Patches and Cotton Clothing
Cotton is one of the easier fabrics for household patch repairs because its woven varieties are familiar, relatively stable, and often compatible with sewing, iron-on patches, and textile adhesive. Cotton can still absorb liquid glue quickly, however, so a thin controlled layer is better than saturating the repair. Too much adhesive can migrate toward the visible side, increase local stiffness, and create a harder edge between the patch and the surrounding garment.
After full cure, wash the garment within its existing care limits and the patch system’s limits. Do not assume all cotton should be washed hot. Dyed cotton, printed cotton, preshrunk cotton, mixed fabrics, and decorated garments can all carry different labels. The fiber name is only the starting point; the actual care label remains more useful.
Denim and Jeans
Denim is a common patch substrate because tears at knees, thighs, pockets, and worn areas are easy to identify and patch. Its strength can create a misleading impression that every repaired pair of jeans should go straight into a heavy-duty cycle. A large patch, however, introduces a new edge into the garment, and that edge may flex hundreds of times during a single wash and dry process. The first wash therefore benefits from avoiding harsher mechanical treatment than the repair actually needs.
For glued denim patches, flexibility after cure is important. GleamGlee Fabric Glue is positioned for denim and fabric-patch applications, with a transparent, flexible bond after full curing. A thin adhesive layer is particularly important on jeans because a thick hard repair around a knee or thigh can create a noticeable difference in bending. Strength without flexibility can simply transfer stress from the glue line into the denim beside it.
Iron-On Patches Need Heat Compatibility Before They Need Washing Advice
Before worrying about washing an iron-on patch, confirm the patch was installed at a temperature the garment can tolerate and according to its specific instructions. Heat-activated backings differ, and there is no universal household temperature or pressing time for every iron-on patch. Care instructions should be kept with the garment after installation whenever possible because they may contain a specific first-wash interval and dryer limit.
The following visual demonstration is useful for understanding how iron-on patches are aligned, protected during pressing, heated, allowed to cool, and checked around the edges. It also discusses avoiding excessive dryer heat for the demonstrated system. The exact temperatures and timings belong to the patch shown, so users should still follow their own product rather than treating the video as a universal specification.
- Video evidence 4 — How to Apply an Iron-On Patch: Watch the iron-on patch demonstration
Polyester and Synthetic Fabrics
Polyester garments vary from stable woven uniforms to highly elastic sportswear, so the word polyester does not give enough information on its own. Look at the garment structure. Is the textile woven or knitted? Does it stretch? Does it contain elastane? Is there a printed graphic, reflective transfer, laminate, or water-repellent finish? These characteristics can matter more to a patch repair than the fiber name.
Dryer heat deserves particular attention on synthetic garments. Even when both garment and patch are washable, the highest dryer setting may be unnecessary. A heat-activated patch or textile adhesive also has its own temperature tolerance, while nearby graphics or coatings may impose an even lower limit. Use the documented drying method rather than interpreting “washable” as “safe at all laundry temperatures.”
Stretch Fabrics and Knits
A patch does not have to fall off to be a poor repair. If it is much less flexible than the garment, it can create a stiff island surrounded by highly mobile fabric. Every time leggings stretch over a knee or sportswear expands during movement, stress concentrates around the patch edge. Washing then repeatedly bends the same boundary while the wet fabric is heavier.
Before normal laundering, allow the repair to cure fully and test the garment gently in the direction it normally stretches. If the patch visibly prevents the fabric from moving, puckers the surrounding area, or forms a hard hinge, reconsider the repair construction. A softer, smaller patch, elastic stitching, or professional repair may perform better than adding additional adhesive.
Users who decide to add stitching should choose a needle suited to the fabric rather than pushing any available needle through the material. Professor Pincushion’s needle tutorial explains different hand-needle types, sizes, and threading, while also emphasizing how using an unsuitable needle can make sewing more difficult or damage fabric.
- Video evidence 5 — Hand Sewing Needles Basics: Watch the hand-needle selection tutorial
For machine stitching on stretch, knit, denim, or other specialized materials, SCHMETZ maintains a needle guide organized by fabric and application. This is useful for readers reinforcing patch edges on garments where a generic universal needle may not be appropriate.
- External reference tool — sewing needle selection: Use the SCHMETZ Needle Guide
Nylon, Waterproof, Coated, and Technical Fabrics
Technical fabrics deserve a higher level of caution because what appears to be a simple woven outer layer may be part of a multilayer system. Waterproof membranes, seam tape, DWR finishes, laminated backings, coatings, heat-sensitive prints, and stretch panels can all respond differently to adhesive, heat, washing, and drying. Installing a patch successfully on the surface does not automatically restore waterproofness or the original technical performance.
If an expensive waterproof jacket, ski garment, tent fabric, safety garment, or specialized outdoor product is damaged, check the original manufacturer’s repair recommendations before applying a general household method. A strong adhesive can still be the wrong solution if it interferes with a membrane or produces an inflexible area. The higher the garment value and functional importance, the more sensible professional or manufacturer-approved repair becomes.
Delicate and High-Value Fabrics
Silk, velvet, sheer textiles, vintage clothing, formalwear, heirloom pieces, and garments with complex decorative surfaces should not become testing grounds for an unfamiliar glue or patch system. A repair may leave discoloration, seep-through, visible stiffness, pile crushing, needle holes, or distortion even if the patch itself remains securely attached.
When a home repair is still appropriate, test on an internal seam allowance or comparable scrap material first. Use the smallest reasonable adhesive quantity, keep the visible surface protected, and let the sample cure completely before evaluating color, flexibility, and appearance. If the garment is expensive or damage would be difficult to reverse, professional repair is often less costly than correcting a failed DIY experiment.
6. How Should You Dry Clothes with Fabric Patches?
Drying is often where a perfectly reasonable washing routine becomes unexpectedly harsh. A tumble dryer combines thermal exposure with continuous movement. The garment repeatedly lifts, drops, folds, and rubs while water leaves the textile. A patch edge can flex differently from the garment, and a heat-sensitive adhesive can experience far more thermal exposure than it did during a cold or cool wash. Drying therefore deserves its own care decision rather than being treated as an automatic continuation of machine washing.
Air Dry vs. Tumble Dry
Use the drying method approved by the garment and patch system. If both explicitly allow low tumble drying, that may be completely appropriate. If the garment allows tumble drying but the patch instructions say hang dry, hang dry. If the patch maker does not provide dryer information, air drying can remove one important variable—heated tumbling—from the first care cycle, provided air drying is itself suitable for the garment.
GINETEX distinguishes normal tumble drying, mild tumble drying, do-not-tumble-dry instructions, and several forms of natural drying, including line and flat drying. The organization also notes that heat-sensitive and dimensionally sensitive articles may need more cautious drying conditions. Those distinctions are useful when a patch has changed the thermal or mechanical sensitivity of one area of an otherwise familiar garment.
Support Heavy Wet Garments
Air drying does not mean hanging every item from a single point. Wet textiles can be significantly heavier than dry textiles, and the additional weight may pull on a repair if a garment is suspended poorly. A repaired knit, sweater, or stretch garment may need flat drying if its label specifies it. A jacket can usually hang more naturally if permitted, but do not position a hanger or clip so the repaired section carries the garment’s wet weight.
After washing:
- Do not peel-test the patch while wet.
- Do not aggressively stretch the repaired area.
- Smooth the garment into its natural shape.
- Support heavy or stretchy clothing according to its label.
- Keep a newly repaired edge away from direct mechanical pulling.
- Let the garment return to fully dry condition before inspection.
Inspect the Patch After Drying, Not During Drying
Wet fibers can look darker, feel softer or heavier, and temporarily change dimensions. A patch may therefore look slightly different immediately after washing without actually having failed. Wait until the approved drying process is complete and the garment has returned to room conditions. Then place it flat and look at the perimeter in good light.
Check for five specific changes:
- Corners remain flat.
- Perimeter is still attached.
- Stitches remain intact.
- Base fabric has not puckered around the patch.
- Repaired area still bends naturally.
A patch that passes those checks after its first complete wash and dry has provided useful evidence that the selected routine works for the finished garment. Record the settings and reuse them instead of experimenting with a hotter or more aggressive cycle simply because the first wash succeeded.
7. What Should You Do If a Patch Peels, Curls, or Frays After Washing?
Small failures are easiest to correct while they are still small. A patch with one lifted corner may require a simple local repair, while a patch that is half detached, badly puckered, or pulling torn fabric with it may need complete removal and reinstallation. The right fix also depends on the original attachment method. Reheating, reglueing, and restitching are not interchangeable maintenance techniques.
If an Iron-On Patch Starts Lifting
Begin with the patch manufacturer’s maintenance instructions. Some heat-activated patches are designed to be reheated when an edge begins lifting. Others may require a different repair method. Do not automatically put liquid glue under every iron-on patch because the existing heat-activated backing may affect adhesion, and the garment may respond better to the original reheat process.
Before reheating:
- Confirm the garment still allows the necessary heat.
- Check nearby prints and coatings.
- Clean away lint around the loose area.
- Do not tear loose a section that remains firmly attached.
- Follow the original temperature and pressing instructions.
- Allow the repair to cool fully before testing.
- Repeat the required post-application waiting period before washing again.
If a Glued Fabric Patch Starts Peeling
When a small area has naturally separated and both the patch and base fabric remain intact, gently lift only the already loose section. Remove dry lint and fully detached residue without scraping aggressively. Make sure the area is clean and completely dry. If the existing materials remain compatible with the adhesive, apply a thin controlled line inside the loose edge and press it back into position without sliding the patch around.
The key word is thin. Repeatedly forcing thick beads of glue under the same edge often produces a progressively stiffer repair. A thick adhesive ridge can eventually create a stronger bending boundary at the edge, which may encourage the fabric to flex immediately beside the glue rather than across the whole repair. More adhesive is not automatically a more durable repair.
For a compatible fabric-glue repair:
- Open only the naturally detached section.
- Remove loose lint and debris.
- Do not aggressively remove sound adhesive.
- Make sure both surfaces are dry.
- Apply a thin, controlled adhesive line.
- Press from the secure area toward the free edge.
- Remove obvious fresh squeeze-out carefully.
- Hold or weight the patch as required.
- Allow the adhesive to complete its full cure again.
- Delay the next wash until the new repair is wash-ready.
If a Sew-On Patch Develops Loose Thread
Broken stitching should be repaired before another wash. If several perimeter stitches fail, the loose patch edge moves more during wear and washing, putting extra stress on the remaining thread. Do not pull a hanging thread through otherwise sound stitches. Trim only fully detached thread ends, anchor replacement stitching in an intact section, and continue beyond the failed area before tying off on the reverse side.
Users who only need a few reinforcement stitches do not need to master an entire sewing course. Running stitch, backstitch, slip stitch, blind hem stitch, and catch stitch cover many common garment tasks, and learning how each stitch behaves helps users choose a better repair than randomly looping thread around the patch border.
- Video evidence 6 — Five Useful Hand Stitches for Garments: Watch Professor Pincushion’s Top 5 Hand Stitches
When Should You Add Perimeter Stitching?
Mechanical edge reinforcement is especially useful when a patch is thick, frequently washed, positioned at a bending point, or has already lifted more than once. Common examples include school badges, workwear patches, children’s knee repairs, elbows, large denim patches, backpack patches, and substantial embroidered emblems. Adhesive can help locate the patch accurately and distribute contact, while stitching provides direct mechanical resistance around the edge.
A hybrid approach does not mean covering the patch with a thick glue layer and then sewing through it. The goal is efficient construction: enough adhesive for the intended bond, sufficient curing, and strategically placed stitching where mechanical reinforcement adds value. For decorative embroidered patches, stitches can often be placed along the border rather than across the central artwork.
Singer Sewing Company’s machine-patch demonstration shows how a patch can be stitched around its perimeter on a jacket. It is useful for readers who have a machine and are maintaining patches on frequently washed clothing, especially when hand sewing a thick border would be slow or difficult.
- Video evidence 7 — Sewing a Patch by Machine: Watch Singer’s patch-sewing demonstration
iFixit also provides a current step-by-step hand-sewing guide for patches. The guide shows positioning and stitching a patch onto a garment and notes that, when suitable, an iron-on patch can first be positioned before sewing. This is particularly useful for users who want better durability but do not own a sewing machine.
- Step-by-step evidence resource — iFixit: Read the iFixit hand-sewn patch guide
For readers moving from simple hand reinforcement to machine appliqué-style edge fixing, Utah State University Extension provides a downloadable machine-appliqué reference covering edge-finishing techniques. It can be used as a supporting sewing resource rather than as a substitute for the patch or adhesive manufacturer’s care instructions.
- Downloadable sewing resource — Machine Appliqué Techniques PDF: Download the Utah State University appliqué guide
When Should You Stop Adding Glue?
Repeated failure after correct application deserves diagnosis rather than another adhesive layer. If the same corner lifts after every wash, investigate the patch thickness, backing, location, garment stretch, washing conditions, and old adhesive residue. If fabric beside the patch begins tearing, the problem may be a stiffness or load mismatch rather than inadequate adhesive strength.
| Problem After Washing | Likely Area to Investigate | Better Next Step |
|---|---|---|
| One corner lifts | Edge preparation or bending | Local repair and complete recure |
| Iron-on patch curls | Heat-bond condition | Follow maker’s reheat instructions |
| Glued patch repeatedly lifts | Backing compatibility or local stress | Reassess adhesive / add stitching if suitable |
| Sewn edge opens | Thread or stitch failure | Restitch through sound perimeter |
| Patch puckers garment | Shrinkage or flexibility mismatch | Reconsider patch size/material |
| Repair becomes hard | Excess or repeated adhesive | Stop adding glue and reassess |
| Fabric tears beside patch | Load concentrated at patch edge | Broader reinforcement or professional repair |
| Entire patch detaches | Installation/system failure | Remove, clean, and redesign the repair |
There is also a point where home repair should stop. Structural seams at the crotch, shoulders, load-bearing straps, safety clothing, technical protective garments, badly damaged waterproof equipment, expensive vintage clothing, and high-value formal garments can carry consequences beyond appearance. A repair that repeatedly fails despite proper preparation, curing, and care is giving useful information: the selected method may not match the application.
A Practical Adhesive Perspective on Long-Term Patch Durability
Textile adhesive performance should not be judged only by how difficult a patch is to pull off immediately after application. A useful garment adhesive also needs controlled application, adequate contact, flexibility after curing, compatibility with the fabric, appropriate wash resistance, and a cure schedule users can realistically follow. Patch durability is therefore a system problem rather than a single “bond strength” number.
GleamGlee Fabric Glue is designed as a clear, flexible, washable no-sew adhesive for clothing and fabric applications including patches, denim, cotton, polyester, canvas, trims, crafts, and home textiles. For low- to moderate-stress patch applications where adhesive bonding is appropriate, its precision application and approximately 24-hour full-cure schedule provide a practical route for users who do not sew. For frequently washed, thick, or high-flex patches, additional perimeter stitching can still be the better engineering choice rather than simply increasing adhesive quantity.
The wider product-development context also matters for brands evaluating patch-repair kits or customized textile adhesives. A useful formulation brief should define fabric types, expected patch backings, flexibility, intended laundering conditions, cure time, applicator precision, packaging volume, and whether the adhesive is intended as a no-sew solution or as a positioning aid before stitching. Formulating around the real use case produces a more credible product than choosing an adhesive only from an initial tack test.
Conclusion
The easiest way to wash patched clothing safely is to stop looking for one universal temperature or one universal “patch rule.” First identify how the patch is attached. Then confirm the garment’s care limits and the patch or adhesive maker’s restrictions. Complete the real wash-ready interval, inspect the edges, choose a permitted low-stress laundering routine, use the correct drying method, and evaluate the repair only after it has dried completely.
For ordinary cotton, denim, polyester, and everyday clothing, this process does not need to be complicated. A properly installed patch should eventually become part of the garment’s normal care routine. The first wash is simply the point where installation quality, curing, movement compatibility, and laundering conditions meet for the first time. Once a repaired garment passes a full wash-and-dry cycle without peeling, puckering, excessive stiffness, or thread failure, record those settings and keep using them.
From an adhesive perspective, the most durable patch is not automatically the one covered with the greatest amount of glue. Thin controlled application, clean contact surfaces, complete curing, flexible materials, protected edges, and appropriate aftercare usually matter more. Sewing also remains an important partner rather than a competitor to textile adhesive. Adhesive is useful for no-sew projects, broad contact, and accurate positioning, while stitching can provide valuable edge reinforcement for repeated laundering and high-flex locations.
The goal is simple: repair clothing so it can return to useful life. If the patch survives only because the garment can never be washed, worn normally, bent, or handled, the repair has not solved the user’s real problem. Good patch care balances durability with practicality, allowing jeans, jackets, uniforms, children’s clothing, and customized garments to keep functioning without unnecessary replacement.
Frequently Asked Questions About Washing Clothes with Fabric Patches
Can you put clothes with fabric patches in the washing machine?
Yes, many patched clothes can go in a washing machine when the original garment permits machine washing and the patch attachment system is also rated for it. Complete any required curing or post-application waiting period first, inspect every edge, turn the garment inside out when practical, and use a cycle permitted by both the garment and patch. A machine-washable adhesive does not override a garment labeled hand wash or dry clean only.
Should you wash clothes with patches inside out?
Turning clothing inside out is a useful precaution because it reduces direct friction across the patch face and perimeter. This can be especially helpful for embroidered badges, decorative patches, iron-on edges, and patches on jackets or jeans. Inside-out washing is not a substitute for proper curing, however. It also cannot make a nonwashable patch washable or protect a heat-sensitive repair from an unsuitable dryer setting.
Do iron-on patches come off in the wash?
A properly installed iron-on patch can remain secure through repeated laundering when users follow its specific installation, waiting, washing, and drying instructions. Problems are more likely if inadequate heat or pressure was used during installation, the garment surface is unsuitable, the first wash happens too early, the patch sits on a highly flexible location, or later laundering exceeds the approved temperature or drying condition. Small lifting areas should be addressed before the next wash.
How long should you wait before washing a fabric patch?
There is no universal waiting time because sewn, heat-activated, and liquid-adhesive patches use different attachment systems. Some iron-on products specify about 24 hours before washing, while some liquid textile adhesives specify a different wash-ready interval. For GleamGlee Fabric Glue, the product-specific guidance is approximately 6–10 minutes for initial setting and about 24 hours for full cure. Always use the exact instructions supplied with the patch or adhesive actually used.
Can clothes with fabric patches go in the dryer?
They can when both the garment and the patch or adhesive system permit the selected dryer condition. Washing-machine-safe does not automatically mean high-heat-dryer-safe because tumble drying combines heat with repeated bending and impact. When patch-specific dryer instructions are unavailable, an appropriate air-drying method can reduce thermal and tumbling stress during the first care cycle, provided the garment itself allows natural drying.
What should I do if a fabric patch starts peeling after washing?
Stop repeated washing and identify the original attachment system first. A heat-activated patch may have manufacturer-approved reheating instructions. A small loose area on a compatible glued patch may be cleaned, thinly re-bonded, pressed, and fully cured again. Broken sew-on stitches should be replaced. If the same area repeatedly fails, investigate patch stiffness, backing compatibility, garment stretch, washing conditions, and the condition of the underlying fabric rather than adding thicker layers of adhesive.
Is sewing better than fabric glue for frequently washed patches?
Neither method is automatically better in every situation. Textile adhesive can provide broad, clean contact and an accessible no-sew option for suitable fabrics and lower-stress patch locations. Stitching provides direct mechanical edge reinforcement and can be especially valuable for thick patches, school or work uniforms, knees, elbows, children’s clothing, and garments washed frequently. When materials permit it, a carefully applied flexible adhesive combined with perimeter stitching can provide a practical hybrid solution.