Skip to content


Putting one patch on a jacket is fairly simple. Positioning six, twelve, or twenty patches is a completely different job because the patches begin to interact with one another and with the garment underneath them. Size, shape, color, text direction, border thickness, patch stiffness, pockets, seams, body curves, and future additions all influence whether the finished clothing looks deliberately designed or simply covered with patches. The best-looking results usually come from spending more time positioning and less time correcting permanent attachments afterward.
The safest working principle is simple: finish the visual layout before making the first permanent attachment. Lay out the full collection, identify the most important patch, establish reference lines, arrange large patches before small fillers, check spacing, and test the design while the clothing is actually being worn. Only after these steps should sewing, ironing, or textile adhesive become the main question. This approach is especially useful for denim jackets, battle jackets, jeans, hoodies, workwear, uniforms, costumes, children’s clothing, travel jackets, repair projects, and garments expected to gain more patches later.
From more than two decades of adhesive application and textile-repair experience, one lesson appears repeatedly: many “adhesive problems” are actually positioning or construction problems. A patch placed over a sharp bend can lift even when the adhesive itself performs correctly. A thick patch bridging a raised seam may never achieve complete surface contact. A beautiful arrangement can also become awkward after the jacket is worn because the shoulder rotates the design. Good preparation reduces these problems before glue, stitches, or heat make them difficult to reverse.
Start by laying the garment flat in its natural, unstretched shape and placing every patch you currently plan to use beside it. Choose the largest or most visually important patch as an anchor, arrange medium patches next, then use small patches to fill selected spaces. Keep pockets, zippers, thick seams, elbows, knees, stretch zones, and future patch space in mind. Use paper templates or other removable positioning methods, put the garment on, photograph it from several directions, move naturally, adjust the design, mark final reference points, and only then decide how each patch should be permanently attached.
1. Plan the Entire Patch Layout Before You Attach Anything
One of the most common mistakes in patch customization is installing Patch A before deciding where Patches B through H will go. The first patch immediately becomes a visual and physical constraint. If a small patch occupies the best center-back location, a larger graphic arriving later may have nowhere appropriate to sit. If the first patch is slightly too high, later patches often inherit the same imbalance because the user begins measuring everything relative to an already permanent mistake. Planning the full current collection first is therefore more important than installing any individual patch quickly.
The user research supporting this guide reaches the same conclusion: multi-patch projects should use an overall layout first, followed by reference points, paper templates, worn-garment checking, and an installation sequence instead of deciding each position during attachment. This order is useful even when the desired style is deliberately irregular. A punk or battle jacket does not need symmetry, but the strongest examples still tend to have recognizable hierarchy, spacing, zones, or intentional clusters rather than completely independent placement decisions.
Sort Your Patches Before You Arrange Them
Place all available patches beside the garment and divide them into practical groups before positioning. You are not trying to create a formal inventory system; you are simply identifying which pieces will influence the layout most strongly. A large black-and-white embroidered patch can visually dominate more than several pale patches combined, while a narrow name strip can create a strong horizontal line even when its total area is small. Sorting helps prevent small decorative pieces from consuming spaces better reserved for dominant artwork.
A useful starting sort is:
- Large anchor candidates: oversized logos, center-back artwork, large repair patches, major commemorative pieces.
- Medium supporting patches: secondary logos, travel destinations, clubs, events, symbols, medium embroidered designs.
- Small filler patches: tiny circles, stars, narrow text labels, miniature badges and accent pieces.
- Repair patches: pieces whose location is determined partly or fully by damage.
- Confirmed sew-on patches: patches intended for hand or machine stitching.
- Confirmed iron-on patches: patches with manufacturer instructions for heat activation.
- Fabric-backed patches: potential candidates for textile adhesive after compatibility testing.
- Special or unknown backings: rubber, PVC, hook-and-loop, pressure-sensitive adhesive, hard plastic stabilizers, or unidentified coatings.
This classification also prevents a second common mistake: assuming all patches can be attached in exactly the same way. A jacket may legitimately contain sewn patches, iron-on patches, hook-and-loop patches, and adhesive-mounted fabric decorations. Decide layout first, but record the likely attachment type early because an unusually rigid or heat-sensitive patch may need a different location from a soft embroidered piece.
Choose an Anchor Patch
An anchor patch is the visual starting point of the composition. It is often the largest patch, but size is not the only criterion. Strong contrast, recognizable typography, a highly saturated color, personal importance, or a central repair requirement can make a smaller patch the natural anchor. On a classic customized denim jacket, the center-back graphic often performs this role. On repaired jeans, a patch covering the largest damaged region may dictate the layout whether or not it would have been the aesthetic first choice.
Once the anchor is positioned, think in three levels:
- Primary: the main patch or dominant focal area.
- Secondary: medium patches supporting or balancing the primary.
- Filler: smaller patches used to complete selected gaps.
This hierarchy is more useful than trying to make every patch equally noticeable. When every patch competes for first attention, the garment can feel visually noisy even if the spacing is technically equal.
Recommended visual for this paragraph: Create an original illustration titled “Anchor → Secondary → Filler” using the same denim jacket shown three times. The first version displays only one large back patch, the second adds four medium patches, and the third adds small fillers without eliminating all empty denim.
Decide Whether the Collection Is Finished or Still Growing
A six-patch jacket should be planned differently depending on whether those are the only six patches the owner wants or the first six in a collection expected to grow for years. Travel jackets, concert jackets, motorcycle or club garments, festival clothing, scouting garments, children’s achievement clothing, and battle jackets commonly evolve. Filling every usable area today can make tomorrow’s best patch impossible to place without removing older work.
For a growing collection, intentionally reserve:
- One potential large-patch zone.
- Several small filler areas.
- Part of one sleeve.
- Some upper-back or shoulder space.
- Open fabric around important pockets.
- A few spaces capable of accepting medium patches rather than only tiny pieces.
A partially filled garment does not necessarily look unfinished. Creating clusters with visible boundaries can make empty space appear deliberate. Later patches can expand those clusters rather than being squeezed randomly into every remaining opening.
Video evidence — Understanding patch planning before permanent sewing:
A useful operational video should be placed directly here because the reader is deciding whether to install patches one by one or plan the whole garment first. Singer’s patch demonstration gives users a clear look at the later attachment stage and reinforces why final placement needs to be established before the sewing machine starts.
2. Choose the Best Patch Zones on the Garment
A garment is not a flat display board. Its back curves around shoulder blades, sleeves wrap around arms, knees flex, hoodies stretch, pockets open, and waistbands shift when the wearer sits. Positioning therefore needs to account for both appearance and mechanical behavior. A flat area with moderate movement usually offers more predictable results than a sharp bend or heavily stretched zone, especially when the patch is thick or stiff. The best location is one where the design remains attractive without unnecessarily interfering with normal clothing function.
When evaluating a potential zone, inspect the garment from both sides. A seemingly clear chest panel may contain a pocket bag underneath. A sleeve may have a heavy seam allowance running precisely below the planned patch border. A lined jacket can hide internal construction, while a zipper tape may extend farther into the fabric than expected. This inspection is useful regardless of attachment method because sewing, heat, and adhesive all behave differently when several layers or raised construction details sit beneath the patch.
Compare Common Garment Zones
| Garment Zone | Often Suitable For | Main Advantage | Main Caution |
|---|---|---|---|
| Center back of jacket | Large anchor patches, artwork, large embroidery | Broad, highly visible area | Check yoke, center seam, lining and shoulder movement |
| Upper back | Medium patches, lettering, secondary clusters | Strong visibility without occupying the center | Curves when shoulders move forward |
| Chest panel | Small to medium decorative patches | Easy to see while worn | Avoid pocket openings, zipper, placket and buttons |
| Upper sleeve | Small and medium patches | Good secondary layout zone | Curvature changes apparent angle |
| Elbow or knee | Repair patches and flexible reinforcement | Directly covers worn areas | Very high flex and abrasion |
| Jeans thigh | Medium patches and visible mending | Relatively broad area | Sitting folds and pocket bags matter |
| Lower trouser leg | Narrow text patches and small collections | Useful vertical design area | Circumference limits large patches |
| Hoodie chest/back | Lightweight decorative patches | Large visible textile surface | Knit stretch and patch weight can distort fabric |
| Uniform | Official badges and identification patches | Clear functional placement | Formal organizations may specify exact location |
Avoid Treating a Pocket as Empty Fabric
A patch positioned across a chest pocket may look visually perfect on a flat jacket and still be a poor practical choice. The pocket can become difficult to open, stitching can accidentally close part of it, or adhesive pressure can bond the pocket bag to the garment body. Before approving a location near any pocket, place a hand inside the pocket and feel its true dimensions. Many internal pocket bags extend substantially beyond the visible opening.
The same principle applies to zippers and hardware. Keep patch edges away from zipper teeth and sliders unless the design specifically accommodates them. Check snaps, buttons, drawcord channels, belt loops, rivets, elastic casings, reflective trims, and hidden fasteners. Visual layout should never make ordinary garment functions unexpectedly difficult.
Evidence source — Basic sewing tools and garment positioning equipment:
Utah State University Extension identifies practical sewing and positioning tools such as measuring tapes, rulers, pins, removable marking tools and scissors. These tools are useful for building repeatable reference points rather than relying on eyesight alone.
Downloadable evidence file — Basic Sewing Supplies PDF:
This file can be offered directly under the measurement discussion because users can download it before assembling a patch-positioning kit.
Decorative Patches and Repair Patches Need Different Positioning Logic
Decorative patch placement begins with appearance. The patch can move several centimeters if another position creates better visual balance. A repair patch is constrained by damaged fabric. If the knee of a pair of jeans contains a worn-through area surrounded by thinning yarns, simply centering a small decorative design over the visible hole may not support the weakened region around it. The repair patch needs to address the actual deterioration first, after which the surrounding decorative composition can be adjusted.
Inspect damaged textile under good lighting and from the reverse side when accessible. Fraying, transparency, loosened yarns, thinning, long runs, or a widening hole suggest a repair area larger than the obvious opening. A repair patch normally needs sound material around its perimeter rather than ending directly at the damaged edge. At heavily stressed areas, stitching or additional reinforcement may be necessary even if adhesive is used as part of the positioning or bonding process.
Evidence source — Fabric patch repair rather than cosmetic covering:
iFixit’s fabric patch guide is useful here because it shows patching as a repair process involving damaged cloth rather than merely decorating the visible hole. Place this source next to repair-patch positioning so the reader understands why the patch boundary may need to extend beyond the obvious tear.
Treat Sleeves as Cylinders, Not Flat Rectangles
Sleeve positioning causes more visual surprises than most jacket owners expect. A sleeve laid flat on a table has two visible sides, but the sleeve becomes a cylinder around the arm. A rectangular patch aligned perfectly to one seam on the table can rotate toward the inner arm once worn. Text and straight borders make even small rotational errors easy to notice. Circular patches are somewhat more forgiving because rotation is less visually obvious.
Before finalizing an upper-sleeve patch, put on the garment and allow the arm to hang naturally. Identify the part of the sleeve most visible from the front or side, temporarily mark it, then bend the elbow and raise the arm. The patch does not need to face the viewer in every movement, but it should not disappear behind the arm or fold sharply through the middle during ordinary use.
Video reference — Identifying fabric orientation before marking and attachment:
This tutorial helps users understand the right and wrong sides of fabric, which becomes especially helpful when a garment must be marked, tested or reinforced from the reverse side before the patch is permanently installed.
Follow Official Placement Rules for Uniforms
Uniform patches are different from fashion patches because appearance may be governed by an organization rather than personal preference. School, scouting, military-inspired, club, workwear, team, or event garments can have specified distances from shoulder seams, pockets, sleeve tops, or other badges. Do not “improve” a regulated placement simply because moving the badge several centimeters looks more balanced.
For example, scouting organizations publish their own insignia guides. Use those resources before creating a paper template or applying adhesive. Once the official position is known, the same measurement and temporary-layout techniques described in this guide can make accurate placement easier.
External authoritative reference — Scouting America insignia placement
External downloadable official reference — Scouts uniform inspection sheet
3. Balance Patch Size, Spacing, Shape and Visual Weight
Multi-patch layout becomes much easier once the user stops asking, “Do I have the same number of patches on each side?” and instead asks, “Does each side carry a similar amount of visual weight?” A dark rectangular patch with bold white lettering can dominate three smaller pale designs. A brightly colored circular patch near the shoulder can attract more attention than a larger muted patch close to the waist. Count, size, contrast, shape, color and location all work together.
One practical way to judge visual weight is to take a photograph and reduce it to a small thumbnail. Fine embroidery disappears, leaving the major light-dark shapes and overall distribution. If one area immediately feels much heavier, move a medium patch or several small pieces before relocating the main anchor. This approach is more useful than trying to create perfect mathematical symmetry because many visually balanced garments are intentionally asymmetrical.
Build Visual Hierarchy Before Fine-Tuning Spacing
The eye should know approximately where to look first, second and third. This does not mean every viewer must follow an identical path, but it prevents the garment from becoming one undifferentiated field of competing graphics. Begin with the anchor, establish one or two supporting zones, and only then add smaller accents. When the layout looks busy, removing one filler patch frequently improves the composition more than moving ten patches a few millimeters.
A good diagnostic method is to ask:
- Which patch is clearly dominant?
- Which patch or group supports it?
- Are the smallest pieces filling useful spaces or simply eliminating empty fabric?
- Does any patch seem visually isolated?
- Does one side appear unusually heavy?
- Are several strong text patches competing with each other?
- Are there enough visible sections of the original garment to separate designs?
Use Relative Spacing, Not a Universal One-Inch Rule
There is no scientifically meaningful universal patch gap suitable for every jacket, patch size and design style. A 25 mm gap can look enormous between two tiny badges and almost disappear between two 200 mm patches. Irregular embroidered edges create another problem because the closest points may be much nearer than the nominal rectangular dimensions suggest. For this reason, spacing should be judged relative to patch scale and measured edge to edge where practical.
A useful approach is to begin with comparable spacing inside a single cluster and then step back to evaluate the garment. If two designs visually merge from normal viewing distance, increase the gap. If one small patch looks disconnected from the rest of the group, bring it closer or create another nearby element. Equal spacing is most valuable in deliberately structured rows or paired layouts; expressive DIY layouts can use varied spacing while still maintaining rhythm.
Start with These Layout Patterns
| Number of Patches | Good Starting Structure | Visual Hierarchy | Main Risk to Avoid |
|---|---|---|---|
| 2 | Pair, diagonal, vertical stack or opposite-side balance | Equal pair or one dominant | Accidental-looking misalignment |
| 3 | Triangle, anchor plus two supports, staggered cluster | One primary plus two secondary | Rigid straight row without visual reason |
| 4–5 | Anchor surrounded by medium/small pieces | Primary, secondary, filler | Making every patch equally dominant |
| 6–10 | Two or three garment zones | One main anchor with local supporting groups | Filling every available gap |
| 10+ | Section-based composition across back, chest and sleeves | Main anchor plus several local clusters | Random density and loss of future space |
Symmetrical Does Not Automatically Mean Balanced
Symmetry works well with varsity-inspired clothing, uniforms, paired chest badges, minimal layouts, matching sleeve patches and garments with strong center construction. When the jacket has two nearly identical chest pockets, for example, two similar patches positioned the same distance above each pocket can look clean and intentional. The challenge is precision: even a small height difference becomes noticeable when the design promises symmetry.
Asymmetry works better with mixed-size patch collections, battle jackets, travel patches, visible mending, punk styling and irregular handmade designs. One large left-side patch can be visually balanced by two or three smaller pieces on the right. The most useful principle is therefore balance does not require symmetry, but asymmetry still needs a visual reason.
Suggested evidence-driven image: Place a two-panel original graphic immediately below this paragraph. The left panel shows three patches on each side but strong visual imbalance because all dark patches sit on one side. The right panel shows one large dark patch balanced by several smaller patches on the opposite side. Label it “Patch Count vs Visual Weight.”
Use Shape Direction Deliberately
Rectangles, flags, name strips and text patches create strong horizontal or vertical directions. Compare these directions with garment features such as pocket tops, yokes, waistbands, center seams and zippers. A slightly crooked text patch often looks more accidental than a deliberately angled patch because viewers expect lettering to relate to nearby horizontal or vertical references.
When rotating patches intentionally, make the angle visible enough to read as a design decision. Two or three degrees may appear like an error, while a clearly angled patch becomes part of the composition. For irregular patches, judge the actual embroidered silhouette instead of only the rectangular width and height because protruding borders may bring neighboring pieces closer than expected.
Preserve Negative Space
The exposed fabric between patches is not wasted. Negative space separates designs, keeps lettering readable, allows the garment to flex, and creates room for future additions. It is especially important when thick embroidered pieces are positioned near one another. Two stiff patches almost touching can cause the small strip of uncovered garment between them to become a sharp hinge during bending.
When a layout feels crowded, remove or relocate one patch before reducing every gap. View the garment from approximately normal conversational distance rather than only from 20 centimeters away. If individual patches merge into one large visual block, more exposed fabric is usually useful.
Recommended downloadable worksheet to create for this website:
/downloads/multiple-patch-layout-measurement-sheet.xlsx
Suggested columns: Patch ID, width, height, garment zone, distance from centerline, nearest-neighbor spacing, rotation angle, backing type, attachment method, installation order and future-space notes. This is a proposed on-site file path and should be created before the article is published.
4. Test the Layout Before Making Anything Permanent
Once a patch layout looks finished on the table, the project is only halfway through positioning. The design should still survive a worn-view test before attachment begins. Shoulders curve the upper back, sleeves rotate, a hoodie stretches across the torso, and jeans develop strong folds when the wearer sits. A patch that appears centered and spacious on a flat garment can look too low, disappear around the side of an arm, or bunch at a joint when worn.
This is why permanent attachment should remain the last step. Paper templates, photographs, removable markings and recorded measurements let you test several options without creating needle holes, heat marks or adhesive residue. The uploaded user-research material specifically recommends paper templates, centerlines, photographs and actual try-on checks for multi-patch projects.
Make Full-Size Paper Templates
Measure or trace every patch and make a 1:1 paper version. Write the patch number and orientation on the template, especially when the patch contains lettering, flags, faces, arrows or another design with a clear “top.” Paper templates can be moved repeatedly without exposing the real patches to dirt, bending, masking tape or accidental adhesive contamination.
The easiest method is:
- Put the patch on plain paper.
- Trace the real outside border rather than drawing only a rectangle.
- Cut the template at full size.
- Write the patch ID.
- Draw an upward arrow.
- Add the patch name or short description.
- Mark the likely attachment type.
- Position all templates before returning the real patches to the garment.
For unusual patch shapes, tracing is more informative than simply measuring width and height. It also makes negative-space decisions much easier because the true contours are visible.
Suggested on-site downloadable resource to create:
/downloads/full-size-paper-patch-template-guide.pdf
The PDF should include trace-and-cut instructions, patch numbering, direction arrows, a blank template page and a reminder to verify scale at 100% when printing.
Establish Reference Lines from the Garment, Not from Loose Patches
Use stable construction points to document positions. On a jacket back, the center of the collar, center-back seam or hem midpoint can serve as references. On the front, a zipper, button placket, pocket edge or yoke seam is more useful than measuring from another loose patch. On trousers, waistbands, side seams, inseams and pocket features provide repeatable reference points.
A note such as “P1 top edge 90 mm below collar center” can reproduce a position even after all loose pieces have been removed. In contrast, “P1 sits 30 mm above P2” becomes useless if P2 moves. Neighbor spacing is still worth recording, but stable garment references should define the main position.
Video evidence — Hand-sewing needle basics before temporary pinning and final stitching:
Users planning to hold templates or patches with pins often have little experience with needles. This video explains basic needle types, sizing and threading, helping the reader choose a more appropriate tool before piercing an actual garment.
Compare the Flat View and Worn View
Put the garment on with the temporary layout still in place. Stand normally rather than stretching the chest, pulling the shoulders back or holding an inspection pose. Look at the garment from the front, back and both sides. For jackets, move the arms forward, sideways and upward. For jeans, sit, stand, bend the knee and walk. For a hoodie, pull the hood up and down and place the hands in the pocket if one is present.
Take photographs of:
- Front standing view.
- Back standing view.
- Left-side view.
- Right-side view.
- Arms reaching forward.
- Arms raised if shoulder patches are present.
- Sitting position for trouser and lower-back layouts.
- Normal walking or bending position for knee patches.
The goal is not to make patches remain perfectly stationary through every human movement. Clothing itself changes shape. Instead, identify positions where ordinary motion creates severe folds, hides the design, turns text dramatically, or pushes a rigid patch into an uncomfortable body area.
Use a Phone Camera as a Layout Tool
Photographs are especially useful because looking at the same garment for twenty minutes creates visual fatigue. After repeatedly moving patches, users often prefer the most recent arrangement simply because they have forgotten exactly how the previous one looked. Photograph Layout A, B and C before changing anything. Review the images together rather than relying on memory.
Another useful trick is to shrink each image to a small thumbnail. When fine embroidery disappears, the dominant composition becomes easier to judge. If one side of the jacket turns into a dark block while the opposite side becomes mostly empty fabric, visual imbalance is easier to notice.
Use External Visual Tools for Rough Mockups
Digital mockups are valuable when patches are still being ordered or when several people need to compare ideas before meeting around the physical garment. They should never replace actual measurement because software cannot accurately model a particular user’s shoulders, sleeve rotation, pocket thickness or garment stretch. Use digital tools for visual comparison, then return to paper templates for physical confirmation.
External visual-layout tool — Canva:
Canva can be used to place photographed patch graphics over a jacket, shirt or hoodie image and compare approximate size, color distribution and arrangement before handling the actual garment.
External visual-comparison tool — Adobe Express:
Adobe Express can be used to create side-by-side images of Layout A, Layout B and Layout C, which is useful when a user wants to compare several patch arrangements without repeatedly rebuilding them from memory.
Measure Before Removing the Approved Layout
Once the worn-view test is complete, put the garment back on the work surface without changing the templates. Measure the main pieces again and record them. For each major patch, one vertical and one horizontal reference are often enough, although large rectangles, paired designs and precise uniform placements may need two or more measurements.
Take one clear overhead photograph before removing any templates. This image becomes a visual backup if paper pieces fall off while the real patches are being installed.

5. Position Multiple Patches Step by Step
The following workflow turns everything above into one repeatable process. The main advantage is not speed during the first five minutes; it is avoiding the much slower job of removing, cleaning, repositioning and reattaching a patch after discovering a layout problem. Work in this order whenever possible, especially for garments carrying more than three or four patches.
Step 1: Prepare the Garment
Lay the garment on a clean, firm table rather than a soft bed or sofa. Let the fabric rest in its normal shape without pulling it flat under tension. Empty pockets, position zippers and fasteners as they are normally worn, and check the reverse side for linings, pocket bags, seam allowances and hidden hardware. If the garment is visibly dirty around the planned patch area and its care instructions permit cleaning, clean it before permanent attachment.
This preparation stage is particularly important for adhesive-mounted patches because dust, oils and loose fibers can interfere with contact. It also matters for sewing because internal construction determines whether the needle can move safely through the intended location.
Step 2: Inventory and Number Every Patch
Assign simple IDs such as P1, P2, P3 and P4. Record width and height for important pieces and note whether each is decorative, repair-related or subject to an official uniform rule. Identify its backing as far as possible. Do not assume a shiny backing is automatically iron-on.
Step 3: Establish the Main Reference Line
Use the garment’s natural construction as your guide. For a jacket back, find the collar center and hem center. For a zippered jacket front, the zipper creates a strong vertical reference. For a sleeve, use the shoulder seam, cuff and visible center while worn. Use removable fabric marking tools only after testing them on a hidden area.
Step 4: Place the Anchor Patch
Position the most visually important patch first, but keep it completely temporary. If the design is meant to be centered, measure rather than estimating by eye. If it is deliberately offset, make the offset large enough to look intentional. A patch only 5 mm off a strong centerline may look like a mistake; a clearly asymmetrical placement can look deliberate.
Step 5: Position Medium and Large Secondary Patches
Add the pieces that consume the most area before any fillers. Watch for collisions with seams, pockets and garment movement. Maintain enough exposed fabric around the anchor so it remains visually distinct.
Step 6: Establish the Main Gaps
Measure edge-to-edge spacing among large pieces. Do not chase perfect equality unless the design calls for formal symmetry. Use measurements mainly to detect accidental differences. If two supposedly mirrored chest patches sit 32 mm and 47 mm away from the zipper, the difference is worth correcting before attachment.
Step 7: Fill Selected Gaps with Small Patches
Now introduce filler pieces. Their role is not to remove every last section of visible garment. Use them to connect clusters, balance isolated areas, or complete a particular theme. When a small patch does not clearly improve the composition, leaving the fabric exposed is usually better.
Step 8: Test Garment Functions
Before admiring the finished layout, open every affected pocket. Move every zipper. Button the jacket. Bend the elbows. Sit down. Put hands into hoodie pockets. Fold a collar. Check whether any patch lies directly across an active mechanism or sharp repeated fold.
Step 9: Replace Complex Arrangements with Paper Templates
If the project involves many patches, transfer positions to the labeled templates. Temporary paper pieces are much safer to move through repeated try-on checks than expensive embroidered patches.
Step 10: Wear the Garment and Photograph It
Perform the front, rear, side and movement checks described earlier. Look particularly closely at sleeve rotation, shoulder curvature and trouser sitting folds.
Step 11: Adjust Anything That Feels Wrong
Do not ignore an awkward patch because the rest of the layout looks finished. Moving one medium patch can often repair the balance of an entire jacket. This is the last point where every correction remains cheap and reversible.
Step 12: Mark Final Reference Points
Record fixed measurements from collar, zipper, pockets, seams, waistband or other stable garment construction. Mark only what is necessary; excessive lines create their own cleanup problem.
Step 13: Decide Installation Order
A practical default installation sequence is:
- Anchor patch.
- Large secondary patches.
- Position-critical paired pieces.
- Medium supporting patches.
- Small fillers.
- Sleeve patches.
- Curved or difficult-access zones.
The uploaded multi-patch workflow similarly recommends completing layout, numbering patches and working through the project in planned zones rather than finishing each piece independently from start to finish.
Step 14: Perform a Final Orientation Check
Before the first permanent attachment, confirm the garment itself is facing the correct direction and inspect every patch containing text, flags, arrows, faces or directional artwork. Upside-down artwork is easier to miss than expected when a jacket is laid with its collar toward the operator.
Video evidence — Basic hand stitches before permanent attachment:
This tutorial is best placed at the point where positioning is finished and the user is preparing to convert the temporary layout into a stitched attachment. It demonstrates common hand-sewing stitches rather than forcing the reader to learn an entire sewing course.
6. Choose How to Attach the Patches After Placement Is Final
Only now should the project become primarily about sewing, ironing or textile adhesive. Each method transfers force differently. Stitches provide mechanical attachment around or through the patch. Heat-activated systems depend on a compatible thermoplastic backing, sufficient pressure and an appropriate temperature. Textile adhesives create a bonded interface between compatible surfaces and require controlled application plus cure time. None of these methods is automatically best for every patch or garment.
A practical choice should consider patch backing, garment material, movement, washing frequency, heat tolerance, future removability and the user’s skill. Thick patches on high-movement workwear usually favor mechanical reinforcement. A confirmed iron-on patch on heat-safe cotton can be efficient. A compatible lightweight fabric patch on a stable low-stress area may be a good candidate for flexible fabric adhesive.
Attachment Method Comparison
| Method | Often Best For | Advantages | Main Limitations |
|---|---|---|---|
| Hand sewing | Embroidered patches, removable patches, curved areas | Repairable, controllable, no heat required | Time-consuming; thick patches can be difficult |
| Machine sewing | Multiple patches, regular borders, production work | Fast and mechanically strong | Garment must fit machine; lining and pockets complicate access |
| Iron-on | Confirmed heat-activated patch plus heat-safe garment | Fast, neat and relatively flat | Heat requirements vary; not suitable for every textile |
| Fabric adhesive | Compatible fabric patches on stable low-stress areas | No visible stitches; useful when heat is undesirable | Needs material compatibility and full cure |
| Adhesive + stitching | Large/thick patches that shift during sewing | Position control plus mechanical reinforcement | Needs careful, thin adhesive placement |
When Sewing Makes More Sense
Sewing should receive serious consideration whenever the patch is heavy, the garment is washed frequently, the location bends repeatedly, or the patch may need to be removed later. Mechanical attachment is also preferable when the patch edge experiences peeling forces during wear. A thread failure can often be repaired locally, whereas removing an unsuitable adhesive layer can be substantially more complicated.
Thick embroidered patches are easier to sew through the outer border than through the densest center embroidery. When hand sewing, a thimble can help push the needle safely, and a cardboard barrier inside the garment can prevent accidentally stitching both sides of a sleeve or pocket together.
Evidence source — iFixit hand-sewn patch guide:
This guide gives a step-by-step patch-sewing workflow and demonstrates the importance of controlling garment layers while stitching.
Video reference — Hand and machine patch attachment:
This video is useful immediately after the sewing-method discussion because it lets users compare the physical process of hand sewing with machine attachment instead of choosing only from written descriptions.
Choose the Correct Needle for Thick or Stretchy Garments
For machine sewing, needle selection should follow fabric construction rather than only the word printed on the fiber label. Denim, jersey and high-stretch knits place different demands on a needle. Trying to force a light universal needle through several layers of thick denim and embroidery can lead to bent or broken needles, while the wrong point on a knit can damage or distort loops.
External evidence/tool — SCHMETZ needle guide:
Readers sewing patches onto denim jackets, stretchy sweatshirts or other fabrics can use this resource to compare needle families by material.
Downloadable technical reference — SCHMETZ Needle ABC:
This downloadable guide is appropriate directly beside the machine-sewing advice because it gives users a reference they can keep while preparing tools.
When Iron-On Patches Make Sense
An iron-on patch should only be treated as iron-on when its manufacturer says so. A smooth or shiny patch backing is not enough evidence. Heat-seal materials differ, so there is no single universal household-iron temperature or dwell time appropriate for all patches. At the same time, the garment must tolerate the patch’s required process. A patch can be capable of high-temperature installation while the underlying polyester coating, print or stretch fabric is not.
The correct decision therefore requires two checks:
- What does the patch manufacturer require?
- What does the garment care label allow?
When these conflict, do not simply increase temperature and hope for stronger bonding. Heat marks, shine, melting, flattened pile and distorted prints can be irreversible.
Authoritative evidence — U.S. Federal Trade Commission Care Labeling guidance:
This source explains clothing-care requirements covering washing, drying, ironing and related warnings. It supports the principle that a repair product or patch should not be used as a reason to exceed the garment’s documented care limits.
When Fabric Glue Makes Sense
A textile-specific adhesive can be a useful option when the patch and garment are compatible, the surface is relatively flat, the area is not structurally overloaded, visible stitching is undesirable, or the clothing should not be exposed to the heat needed by an iron-on system. Good results depend on more than the word “fabric” on the bottle. The surface should be clean and dry, the adhesive layer controlled, and the patch stable during the full cure.
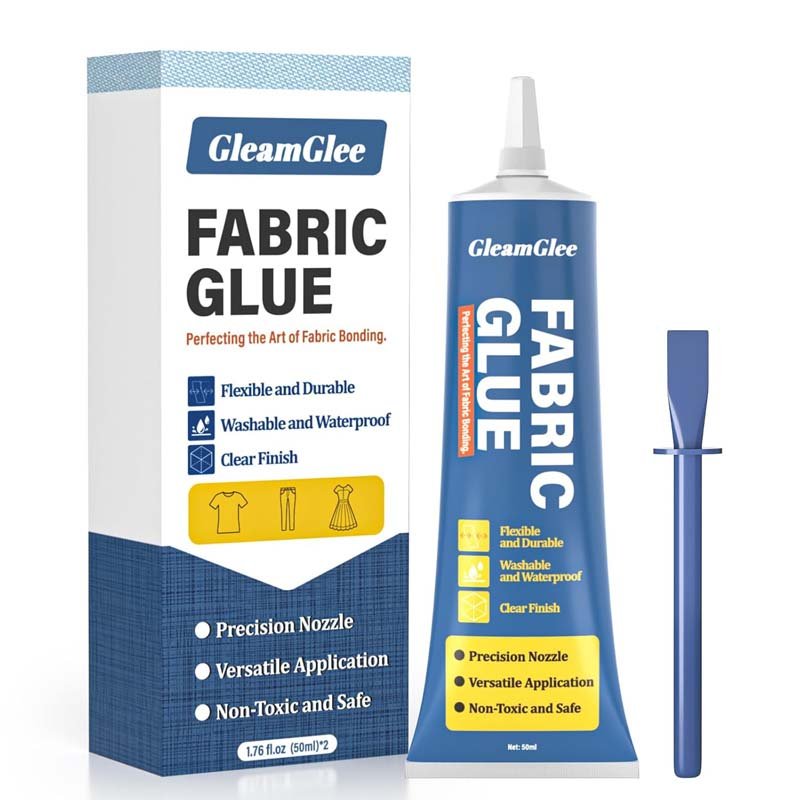
GleamGlee Fabric Glue is relevant to this type of project because its documented application range includes fabric patches, cotton, denim, polyester, canvas, felt and several common decorative textiles. Its confirmed attributes include precision application, transparent drying and flexibility after full curing. The product information states approximately 6–10 minutes for initial positioning and about 24 hours for full cure, after which the bond is described as washable and suitable for ordinary ironing within the clothing’s own care limits.
Those times should not be generalized to every fabric adhesive. Different chemistries use different cure mechanisms. The useful lesson is to distinguish initial hold from full cure. A patch stopping its movement after several minutes does not mean the garment is ready for bending, stretching, washing or ironing. For the referenced product, the approximately 24-hour full-cure period should be allowed before normal wear and care.
Apply Adhesive Thinly Rather Than Flooding the Patch
More glue is not automatically a stronger textile repair. Excess liquid can be pushed beyond patch edges, soak through porous fabric, lengthen stabilization time or create a noticeably stiff boundary. For ordinary fabric patches, controlled coverage is usually more useful than saturating the textile.
A practical application sequence is:
- Confirm final patch position before opening the adhesive.
- Test the garment and patch materials in an inconspicuous location when possible.
- Make sure both surfaces are clean and dry.
- Apply a thin, controlled layer to the intended bonding area.
- Pay special attention to edges without creating visible glue buildup.
- Position the patch once rather than sliding it repeatedly.
- Apply even pressure.
- Check for squeeze-out immediately.
- Keep the area stable through initial positioning.
- Allow the full product-specific cure before normal use.
The precision applicator described in GleamGlee’s product material is particularly useful around patch edges where the objective is controlled placement rather than soaking the fabric. The same product documentation also recommends hidden testing on special, coated, light-colored or high-value materials.
External downloadable evidence — JOANN Fabric Adhesives Guide:
This reference can sit directly below the adhesive-method discussion because it helps users understand fabric adhesive as one of several no-sew textile methods rather than treating ordinary household glue as interchangeable with clothing adhesive.
Use Glue Plus Stitching When Position Control Is the Main Problem
Some thick or large patches are difficult to keep perfectly aligned while sewing. A carefully tested, minimal amount of compatible textile adhesive can help hold the patch in its approved location before perimeter stitching. In this situation, the glue does not need to replace the stitches; it acts as positioning support while the thread supplies mechanical reinforcement.
This hybrid approach can be useful for:
- Large embroidered patches.
- Frequent-wash garments.
- Patches that slide under a sewing-machine foot.
- Curved garment surfaces.
- Situations where precise spacing must survive handling during stitching.
Avoid thick adhesive directly where the needle must pass repeatedly. Excess material can stiffen the edge and make hand penetration more difficult.
Video evidence — Machine appliqué and controlled edge stitching:
Singer’s appliqué demonstration gives useful visual context for keeping a decorative piece positioned while sewing around its perimeter. The fusible material shown in the video is not the same product as fabric glue, so the video should be used for understanding the positioning-and-stitching workflow rather than copying product-specific conditions.
Allow Proper Cure Before Washing a Bonded Patch
When adhesive is used, aftercare is part of installation rather than a separate topic. For the referenced GleamGlee adhesive, the documented full-cure reference is about 24 hours. During the earlier 6–10 minute initial positioning stage, the pieces may stop sliding, but the bond should not be treated as ready for ordinary wear. Leave the garment flat or appropriately supported until the full-cure checkpoint.
After full cure, continue following the original garment care label. A washable adhesive does not make a dry-clean-only jacket machine washable, and an iron-safe adhesive does not make a “Do Not Iron” garment safe for heat.
7. Avoid These Common Multi-Patch Placement Mistakes
Most disappointing patch layouts do not fail because the owner lacks creativity. They fail because a permanent decision was made before enough reversible checks were completed. The first patch was attached too soon, visual balance was judged only by quantity, a pocket was ignored, or the flat-table view was mistaken for the worn result. Recognizing these patterns before attachment is much easier than repairing them after washing and wear.
Common Problems and Corrections
| Mistake | What Usually Happens | Better Approach |
|---|---|---|
| Attaching the first patch immediately | Later patches are forced into leftover areas | Complete current layout before permanent attachment |
| Equal numbers on both sides | Design can still feel visually unbalanced | Compare visual weight, size and contrast |
| Universal spacing measurement | Small patches look isolated or large patches crowded | Scale gaps to patch size and design style |
| Filling every empty space | Layout becomes noisy and future space disappears | Preserve negative space |
| Ignoring seams and pockets | Garment function or attachment suffers | Inspect both garment sides first |
| Approving only the flat view | Patch rotates, bends or hides when worn | Perform worn-view and movement tests |
| One attachment method for every patch | Some patches fail or damage the garment | Choose method individually |
| Adding more glue after repeated lifting | Stiffness increases without solving root cause | Diagnose movement, backing, contamination or contact |
Do Not Permanently Install the First Patch Too Soon
The first permanent patch becomes the coordinate system for everything installed later. If it sits 15 mm too high, later pieces may either follow the error or appear inconsistent with it. If a tiny patch consumes the strongest center position, the large future anchor may end up somewhere visually weaker. There is no benefit in hurrying this decision.
Spend as much time as needed arranging the current collection. Positioning is reversible. Permanent installation is not always easily reversible.
Do Not Confuse Equal Patch Count with Balance
Three patches on the left and three patches on the right do not necessarily balance each other. One large dark rectangular graphic can outweigh several small light circles. If the garment feels uneven, photograph it and look at the image from a distance. Move a medium piece rather than adding another small patch simply to equalize numbers.
Do Not Eliminate All Negative Space
Visible denim, cotton or canvas helps each design remain readable. If patches cover nearly every surface, the garment may still be aesthetically successful, but dense coverage should be an intentional style rather than the unintended consequence of filling gaps one at a time.
When two stiff embroidered patches nearly touch at an elbow, shoulder or other curved area, the narrow fabric strip between them may also become the only place capable of flexing. Leaving more textile exposed can improve both appearance and movement.
Do Not Ignore Future Patches
If a collection will grow, record the existing layout and preserve usable medium and large spaces. Filling every opening with mini patches makes future expansion harder. A travel jacket can, for example, reserve one sleeve for future destinations, while the back carries the main anchor and established trip clusters.
Recommended on-site downloadable resource to create:
/downloads/future-patch-expansion-planner.pdf
Suggested content: current patch zones, reserved large/medium/small spaces, sleeve availability, intended future categories and a simple front/back garment sketch.
Do Not Use the Same Attachment Method Everywhere
The fact that the first four patches were sewn does not mean Patch 5 must be sewn. The fifth may have a confirmed iron-on backing. A small decorative fabric piece may be compatible with textile adhesive. A frequently replaced name patch may be more suitable for hook-and-loop attachment.
Record the attachment plan patch by patch so a mixed collection remains deliberate.
Do Not Judge a Jacket Only While It Is Flat
The tabletop is the installation position, not the wearing position. Shoulder curvature, gravity and arm movement can change a patch’s apparent angle dramatically. Jeans develop folds when sitting, and hoodies stretch differently across the body. If appearance while worn conflicts with appearance while flat, prioritize the worn view unless the preferred location creates an attachment or structural problem.
Do Not Respond to Every Lifting Edge by Adding More Glue
Repeated lifting can result from dust, old adhesive, incompatible backing, excessive patch stiffness, incomplete surface contact, bending, washing before cure, or simply an unsuitable location. Applying increasingly thick adhesive can create a hard ridge without fixing the cause. When a patch repeatedly fails in the same location, stop and diagnose the mechanical reason.
Ask:
- Is the area bending sharply?
- Is the backing compatible?
- Is there a raised seam underneath?
- Was the surface clean and dry?
- Was the bond allowed to cure completely?
- Is the patch substantially stiffer than the garment?
- Would perimeter stitching be more appropriate?
A flexible fabric adhesive can perform well in a suitable textile application, but no adhesive should be expected to turn a poor mechanical location into an ideal one.
Final Patch Placement Checklist
Before the first permanent stitch, heat cycle or adhesive application, use this checklist. It intentionally repeats some earlier ideas because the final two-minute check can prevent hours of correction later.
- [ ] Every current patch has been included in the overall layout.
- [ ] Decorative and repair patches have been separated conceptually.
- [ ] A clear anchor patch or focal zone has been chosen.
- [ ] Large patches were placed before small fillers.
- [ ] Visual weight was judged rather than patch count alone.
- [ ] Important graphics have enough negative space.
- [ ] Future patch space has been considered.
- [ ] Pockets still open normally.
- [ ] Zippers, buttons, snaps and drawcords still work.
- [ ] Hidden pocket bags and linings have been checked.
- [ ] Major seams have been identified.
- [ ] Elbows, knees, shoulders and other high-movement areas have been tested.
- [ ] Unknown backing materials have been identified before using heat or adhesive.
- [ ] Full-size paper templates were used where useful.
- [ ] The garment was checked while being worn.
- [ ] Front, back and side photographs were reviewed.
- [ ] The wearer moved naturally during the test.
- [ ] Main patch positions were measured from stable garment references.
- [ ] An overhead photograph of the final layout was saved.
- [ ] Installation order has been recorded.
- [ ] Each patch has its own appropriate attachment method.
- [ ] Care-label limits have been checked before heating or laundering.
- [ ] Adhesive projects have enough time for the product-specific full cure.
- [ ] A hidden material test has been completed when compatibility is uncertain.
Suggested on-site downloadable file to create:
/downloads/final-multiple-patch-placement-checklist.pdf
The downloadable version can turn the checklist above into a one-page printable sheet for users working beside the garment.
Conclusion
Positioning multiple patches successfully is less about finding one perfect formula and more about making decisions in the right order. Begin with the full current collection, choose an anchor, place the largest supporting pieces, preserve negative space, and evaluate the actual garment construction. A visually strong patch position is not automatically a mechanically suitable one, so pockets, seams, bending zones, stretch and hidden layers deserve the same attention as color and graphic balance.
Keep the process reversible for as long as possible. Full-size paper templates, photographs and simple measurements cost almost nothing compared with removing a permanently attached patch. The flat-table layout should be treated as a first draft; the worn garment is the real test. Walk, sit, raise the arms, bend the knees and review the garment from several directions before approving the final arrangement.
After the layout is settled, choose sewing, ironing, textile adhesive or a hybrid method based on the individual patch instead of forcing one technique onto the entire garment. Sewing remains especially useful for mechanically demanding and removable patches. Confirmed iron-on systems can be efficient when both patch and clothing tolerate their required heat. A flexible textile adhesive such as GleamGlee Fabric Glue can offer a clean no-sew solution for compatible fabric patches on suitable low-stress textile surfaces, provided the materials are tested, the layer remains controlled and the full product-specific cure is respected.
The finished garment should not merely look good on the day the patches are installed. It should remain comfortable to wear, retain usable pockets and fasteners, flex naturally, accept appropriate laundering and still leave enough design logic for future additions. When those goals are considered before attachment begins, a multi-patch jacket, pair of jeans or hoodie becomes much easier to build—and much harder to regret.
Frequently Asked Questions
1. How far apart should multiple patches be on clothing?
There is no universal distance suitable for every patch collection. A fixed one-inch gap, for example, can look excessive between two small sleeve badges and too narrow between two large back patches. Start by judging edge-to-edge spacing relative to patch dimensions, design density and garment size. Structured layouts benefit from reasonably consistent gaps, while creative asymmetrical layouts can vary more. From normal viewing distance, each important patch should still read as a separate design rather than visually merging with its neighbor.
2. Which patch should I position first?
Start with the patch carrying the greatest visual or practical importance. In many projects this is the largest patch, particularly a center-back graphic, but a smaller high-contrast design can also act as the anchor. A repair patch covering damaged fabric may need to be placed first because the damage determines its location. Position the anchor temporarily, then arrange medium supporting patches around it before introducing small fillers. Do not permanently attach the anchor until the complete current layout has passed the worn-garment test.
3. Should multiple patches on a jacket be symmetrical?
Not necessarily. Symmetry works especially well for varsity-style jackets, uniforms, paired chest patches and minimalist designs because the garment already contains strong left-right structure. Asymmetry is often more natural for battle jackets, travel collections, visible mending and mixed-size decorative patches. The important distinction is between intentional asymmetry and accidental imbalance. A large patch on one side can be balanced by several smaller patches on the other even when the two sides contain different numbers and shapes.
4. Is fabric glue or sewing better for clothing patches?
Neither method is automatically better in every situation. Sewing is generally preferable for heavy embroidered patches, frequently flexed areas, high-wash garments or patches that may need removal later. Fabric adhesive can be useful for compatible textile patches on relatively flat, low-stress clothing surfaces when visible stitches or heat are undesirable. Iron-on patches are another option when the patch backing is specifically designed for heat and the garment can tolerate the required process. Some larger patches benefit from thin adhesive positioning followed by perimeter stitching.
5. Can I overlap multiple patches?
Yes, but overlap should be planned before attachment because it changes thickness, appearance and the order in which patches must be installed. The lower patch becomes harder to access after the upper one is placed, while several stacked embroidered borders can create a stiff area. If the garment bends strongly at the overlap, check comfort while wearing it before making the design permanent. For collections expected to change in the future, separate patches with small gaps are generally easier to remove, replace or rearrange.
6. How do I keep several patches from moving before sewing?
Use a combination of reference measurements and temporary fixation. Mark stable garment features such as a center seam, zipper, pocket edge or collar center, then record the approved distances. Full-size paper templates can preserve the overall arrangement while real patches are removed and returned one at a time. For sewing, pins, clips or an appropriate temporary positioning method can control movement depending on fabric sensitivity. Large patches should be checked again after the first few stitches because they can rotate slightly while the garment is handled.
7. Can clothes with glued patches be washed?
Washability depends on the exact adhesive, patch and garment rather than the phrase “fabric glue” alone. For GleamGlee Fabric Glue, the confirmed product information gives approximately 6–10 minutes for initial positioning and around 24 hours for full cure, with washable performance described after full curing. The original clothing care label still sets the upper limit for washing and heat. Before the first wash, inspect the patch edges, confirm complete cure and avoid treating an early dry-to-touch condition as full readiness for laundering.