 Skip to content
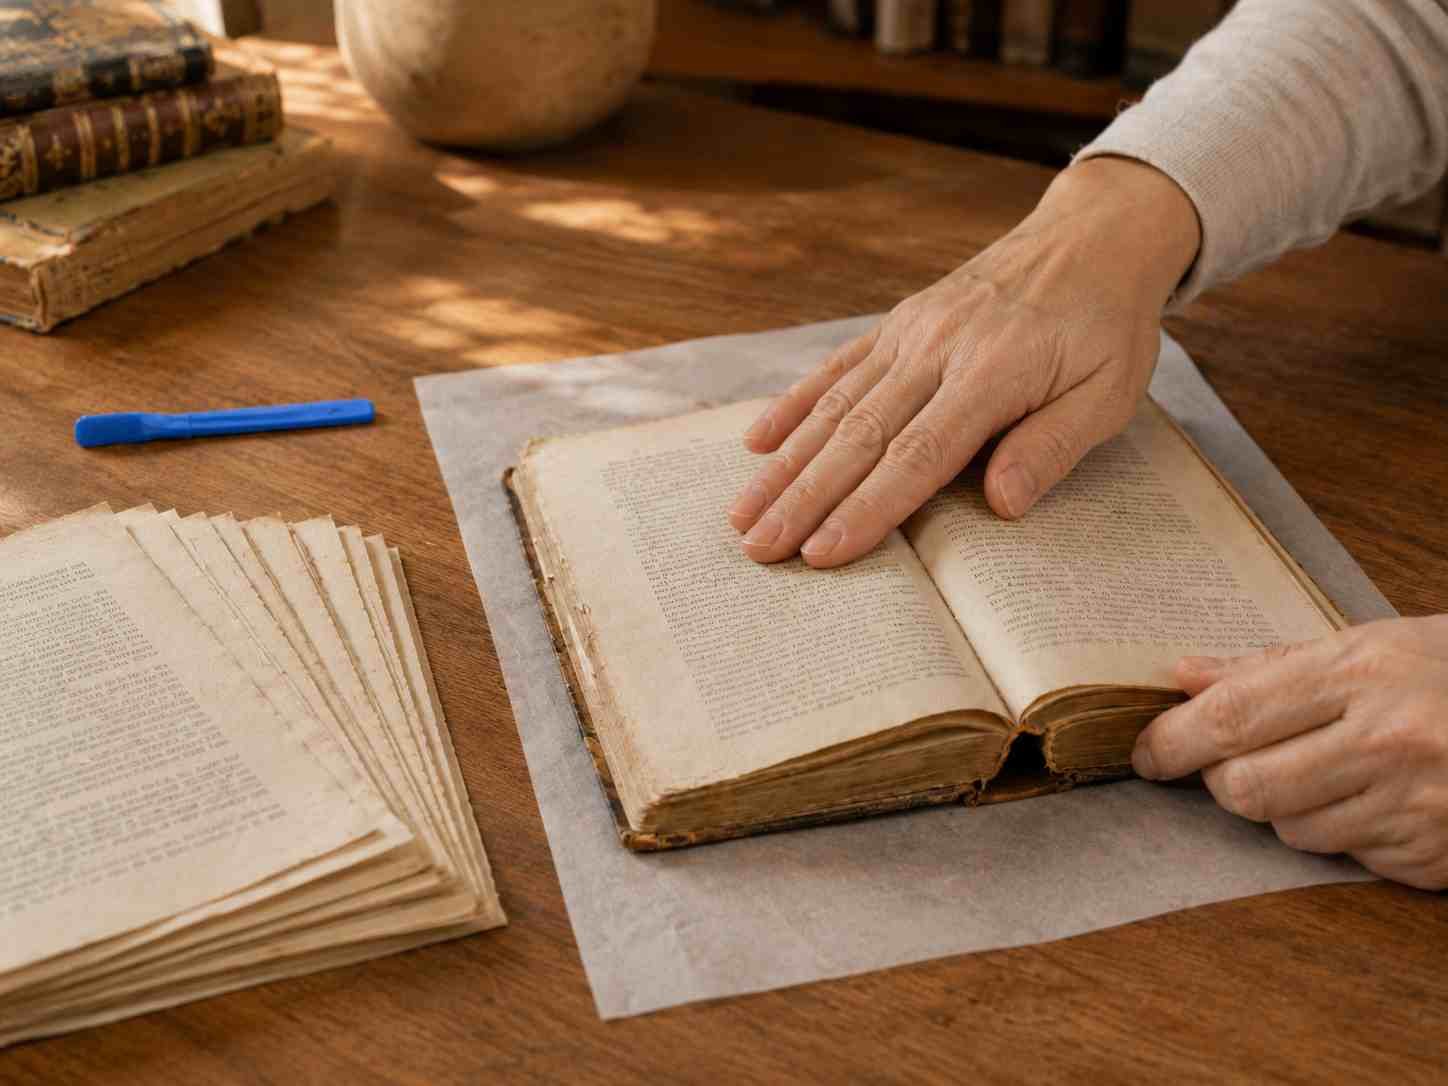
A damaged old book often looks worse than it really is. One loose page can make the whole book feel ruined. A cracked spine can make readers afraid to open it again. A cover that has started to peel away may look like the final stage before the book goes into a storage box forever. But many old books do not need to be replaced, thrown away, or sent to an expensive repair service. They need the right repair method, the right amount of book glue, and enough drying time. The biggest mistake is treating book repair like a fast craft job. Old books need control, not force. A thin glue line, accurate page alignment, and gentle pressure can often bring a worn book back into daily use without leaving thick marks or stiff pages.
To repair old books using book glue, check the damage first, clean away loose dust, align the pages or cover before gluing, apply a thin layer of clear flexible book glue, press the repair area evenly, and let the book dry closed for 12 to 24 hours. This method works for loose pages, weak spines, and many detached covers.
Think about a family cookbook that has been opened hundreds of times. The most-used recipe pages are stained, the spine is soft, and two pages are sliding out. Replacing that book would not feel the same because the handwritten notes are part of its value. The repair does not need to make it look new. It needs to make it usable again while keeping its character. That is the real goal of old book repair.
What Can Book Glue Fix?
Book glue can fix many common old book problems, including loose pages, cracked spines, detached covers, weak paperback bindings, worn journals, school textbooks, cookbooks, manuals, magazines, and paper craft books. It works best when the paper is still complete enough to hold glue and the damaged part can return to its original position without being forced.
Most old book damage starts small. A single page begins to lift from the spine, the cover edge starts peeling, or the paperback spine opens into a narrow crack. These problems are often repairable because the book structure is still there. The page, cover, or spine only needs to be re-bonded in the right place. The repair becomes harder when paper is brittle, moldy, wet, missing large sections, or already covered with old tape residue.
A practical way to judge repair difficulty is to look at how the book will be used after repair. A family cookbook may need to open flat on a counter. A textbook may need to survive daily handling in a backpack. A vintage novel may only need light reading and shelf display. Book glue can help in all three cases, but the glue amount, pressure, and drying time should be different.

| Book Damage | Can Book Glue Help? | Suggested Glue Amount | Drying Time |
|---|---|---|---|
| One loose page | Yes | 1-2 mm thin line | 12 hours |
| 2-5 loose pages | Yes | Thin edge coat | 12-24 hours |
| Cracked paperback spine | Yes | Thin inner spine layer | 24 hours |
| Detached soft cover | Yes | Thin spine-edge line | 24 hours |
| Loose hardcover hinge | Often | Controlled hinge line | 24 hours |
| Torn page edge | Sometimes | Tiny dots or patch support | 6-12 hours |
| Brittle antique paper | Use caution | Test first, minimal glue | 24+ hours |
| Damp or moldy book | Not yet | Dry and treat first | Do not glue |
Can Book Glue Fix Pages?
Book glue can fix loose pages when the page edge is still mostly intact and can slide back into the book evenly. This often happens in novels, textbooks, manuals, cookbooks, workbooks, journals, and children’s books. A page that has fallen out cleanly is usually easier to repair than a page with a torn inner margin. The safest method is not to coat the whole page. Instead, apply a narrow line of glue along the inner edge where the page originally touched the spine. For most pages, a 1-2 mm glue line is enough. After placing the page, close the book with wax paper on both sides of the repair and press it flat until dry.
- Check page numbers before gluing so the page does not go back in the wrong place.
- Dry-fit the page once before applying glue; the outer edge should line up with nearby pages.
- Repair small groups of 2-5 pages at a time instead of gluing a thick stack.
- Keep glue away from printed text, page corners, and visible margins.
| Page Repair Situation | Better Method | Common Risk |
|---|---|---|
| One page falls out cleanly | Thin glue line on inner edge | Page dries crooked |
| Several pages loosen together | Repair in small sections | Pages form a stiff block |
| Inner edge is slightly torn | Use tiny glue plus gentle pressure | Paper wrinkles |
| Thin old paper | Use less glue and test first | Glue shows through |
Can Book Glue Fix Spines?
Book glue can fix many cracked or weak spines, especially when the page block is still inside the cover and the damage is mainly caused by dried old adhesive. Paperback books, cookbooks, school books, magazines, and frequently opened manuals often fail at the spine first because that area bends every time the book is used. A good spine repair should hold the pages together without making the spine hard. The glue must stay flexible after drying because a book spine is not a fixed surface. For a narrow spine crack, apply a thin layer of glue inside the gap, press the book closed, and let it dry for about 24 hours. Do not fill the entire spine with heavy glue unless the book has fully separated.
- Use a fine nozzle to place glue inside the spine gap instead of flooding the gutter.
- Press the spine evenly so the page block settles back into position.
- Avoid opening the book flat during the first few uses after repair.
- Let spine repairs dry longer than simple page repairs because the glue sits deeper.
| Spine Problem | Glue Use | Better Drying Method |
|---|---|---|
| Small paperback crack | Thin glue layer inside crack | Close book under flat weight |
| Pages lifting from spine | Light glue along page block edge | Use wax paper near first/last page |
| Cover still attached but weak | Reinforce inner spine line | Keep book closed 24 hours |
| Spine split into two parts | Repair slowly in sections | Press and dry between steps |
Can Book Glue Fix Covers?
Book glue can fix many loose or detached covers when the cover is still in good shape and can line up with the page block. Paperback covers, softcover manuals, journals, notebooks, children’s books, and some hardcover hinges can often be repaired with a thin, controlled glue line. Cover repairs need more care than loose page repairs because the result is visible from the outside. If the cover shifts by even 2-3 mm while drying, the book may look uneven or fail to close properly. Before using glue, place the cover back on the book without adhesive and check the top, bottom, and spine edges. Once the fit looks right, apply glue only where the cover originally attached.
- Dry-fit the cover first; never use glue to “force” the cover into place.
- Apply glue along the spine contact area, not across the whole cover surface.
- Use wax paper near the first and last pages to prevent accidental sticking.
- Press with a flat weight for 12-24 hours, depending on cover thickness.
| Cover Type | Repair Chance | Key Detail |
|---|---|---|
| Paperback cover peeling at spine | High | Align cover edge before pressing |
| Softcover manual cover loose | High | Use thin spine-edge glue |
| Journal cover lifting | High | Press flat to avoid corner curl |
| Hardcover hinge loose | Medium | Protect inner pages with wax paper |
| Cover torn or missing pieces | Limited | May need paper patch support |
Which Book Glue Is Best?
The best book glue for old book repair should dry clear, stay flexible, apply in a thin controlled line, and work safely on paper, covers, spines, photos, vellum, kraft paper, journals, and handmade books. It should hold pages firmly without leaving yellow stains, hard ridges, thick lumps, or sticky residue after drying.
A good book glue is not simply the strongest glue on the shelf. Books move every time they are opened, closed, pressed into a bag, placed on a shelf, or read flat on a table. The glue must hold the repair while still allowing that movement. For most loose pages, cracked spines, and cover repairs, a thin 1-2 mm glue line is usually enough. A repair that needs a thick layer often needs better alignment, not more glue.
The right book glue should also give users enough working time to position the page or cover correctly. Instant adhesives can feel convenient, but old book repair often needs careful adjustment before pressing. A fine nozzle, clear finish, low odor, and flexible dry layer make the repair easier for home users, parents, teachers, librarians, crafters, and anyone trying to save a book without making it look over-repaired.
| Book Glue Feature | Why It Matters | Better Repair Result |
|---|---|---|
| Clear drying | Reduces visible repair marks | Pages and covers look cleaner |
| Flexible finish | Allows spine movement | Less cracking after repeated reading |
| Fine nozzle | Controls glue amount | Lower risk of overflow |
| Paper-safe bonding | Works with paper fibers | Less staining and wrinkling |
| Low odor | Better for indoor repair | Easier to use at home or school |
| Smooth flow | Avoids glue blobs | More even glue line |
| Multi-use formula | Works beyond books | Useful for crafts and journals |
Is Clear Book Glue Better?
Clear book glue is better for most old book repairs because the repaired area is often close to the reader’s eyes. Loose pages usually need glue near the inner margin. Spine cracks are visible when the book opens. Cover repairs may leave marks near the outside edge if the glue dries cloudy or yellow. A clear-drying book glue helps the repair look cleaner, especially on old novels, family cookbooks, Bibles, children’s books, journals, magazines, photo albums, and handmade paper projects. Clear glue is also helpful when repairing books with light-colored pages or decorative covers because even a small yellow mark can make the repair look rough. However, clear glue still needs careful use. If too much is applied, it can still dry with shine, raised edges, or stiff spots. The best result comes from a thin glue line, even pressure, and fast cleanup of excess glue before drying.
- Use clear book glue for visible page edges, spine gaps, and cover seams.
- Apply a thin layer; clear glue can still show if it is too thick.
- Wipe away squeeze-out while the glue is still wet.
- Use wax paper to protect nearby pages from accidental sticking.
| Repair Area | Why Clear Glue Helps | Risk If Glue Is Not Clear |
|---|---|---|
| Loose page edge | Repair line stays less noticeable | Yellow line near text |
| Paperback spine | Opened book looks cleaner | Cloudy spine marks |
| Cover seam | Outside repair looks neater | Visible glue stains |
| Photo album | Images stay cleaner-looking | Dull or cloudy marks |
| Scrapbook page | Decorative paper stays neat | Uneven shiny patches |
Is Flexible Book Glue Safer?
Flexible book glue is safer for old books because a book is not a fixed object. The spine bends, the cover pulls, and the pages move slightly every time the book is used. If the glue dries too hard, the repair can crack, pop loose, or make the book difficult to open. This is especially important for paperback novels, cookbooks, school textbooks, manuals, journals, planners, and children’s books because these books often receive repeated handling. A flexible dry layer lets the repaired area move with the book instead of fighting against it. For spine repair, flexibility is more important than instant hardness. A hard glue may feel strong on the first day, but after several openings, it can create a sharp break line. A flexible book glue gives a more natural reading feel and reduces the chance of the repaired area failing again.
- Choose flexible book glue for spines, hinges, covers, and frequently opened books.
- Avoid glue that dries into a hard plastic-like ridge.
- Let flexible repairs dry fully before opening the book wide.
- Open repaired books gently during the first few uses.
| Book Type | Why Flexibility Matters | Suggested Drying Time |
|---|---|---|
| Paperback novel | Spine bends with every read | 24 hours |
| Cookbook | Often opened flat on counters | 24 hours |
| School textbook | Daily backpack and desk use | 24 hours |
| Journal or planner | Pages turn often | 12-24 hours |
| Children’s book | Covers and pages are pulled often | 24 hours |
| Hardcover hinge | Cover needs controlled movement | 24+ hours |
Is Book Glue Better Than Tape?
Book glue is usually better than tape for lasting book repair because it rebuilds the damaged connection instead of covering the problem from the outside. Tape may look quick, but it can yellow, peel, collect dust, stiffen the page, and leave sticky residue. On old paper, tape removal can tear fibers or lift print. Book glue is cleaner because it goes where the original bond failed: the inner page edge, spine gap, hinge line, or cover seam. It also keeps the repair flatter when applied correctly. Tape adds an extra layer on top of the paper, which can make pages feel stiff and uneven. For a low-value temporary repair, tape may work for a short time. For old books, cookbooks, journals, school books, or sentimental items, book glue gives a neater and more natural result after drying.
- Use book glue when the page, spine, or cover needs a long-term repair.
- Avoid tape on vintage paper, valuable books, or sentimental books.
- Do not tape across the spine of a book that still needs to open naturally.
- If tape is already present, remove it only if it comes away safely.
| Repair Option | Best Use | Main Problem |
|---|---|---|
| Book glue | Loose pages, spines, covers | Needs drying time |
| Tape | Short-term low-value fixes | Yellowing and residue |
| Super glue | Hard non-paper repairs | Brittle and stiff on paper |
| Hot glue | Rough craft work | Too thick for book spines |
| Glue stick | Light paper craft | Too weak for binding |
| General craft glue | Simple paper projects | May wrinkle old pages |
How Do You Prep Book Glue Repair?
Prep book glue repair by checking the damage, sorting loose pages, cleaning away dry dust, testing the fit before gluing, protecting nearby pages, and setting up a flat drying area. Good prep helps avoid crooked pages, glue overflow, wrinkled paper, stuck pages, and weak spine repair.
Preparation matters because book glue works best when the damaged parts already fit together correctly. Glue should not be used to force a page, cover, or spine back into place. If a loose page sits unevenly during a dry test, it will usually dry unevenly after glue is added. If a cover is 2-3 mm out of line, the book may never close neatly again. Spending 5 minutes checking alignment can save the whole repair.
Before starting, place the book on a clean, dry, flat surface with good light. Keep wax paper, cotton swabs, a small brush or toothpick, a clean cloth, rubber bands, and a flat weight nearby. Once glue touches the paper, the repair should move smoothly from application to pressing. Searching for tools after gluing often leads to fingerprints, glue marks, and page shifting.
| Prep Step | Why It Matters | Time Needed |
|---|---|---|
| Check damage | Finds the real repair area | 1-2 minutes |
| Sort pages | Prevents wrong page order | 1-3 minutes |
| Dry-fit repair | Confirms alignment | 1-2 minutes |
| Clean dust | Improves glue contact | 1 minute |
| Add wax paper | Stops pages sticking together | 30 seconds |
| Prepare pressure | Keeps repair flat while drying | 1 minute |
What Tools Need Book Glue?
Book glue repair does not need a professional repair bench, but it does need a few simple tools that keep the glue controlled and the book protected. A fine-nozzle book glue helps place a narrow line inside the spine or along a loose page edge. Wax paper is important because wet glue can spread slightly when the book is closed. Cotton swabs help clean small glue marks before they dry. A toothpick or small brush can spread a thick glue bead into a thinner line. A flat weight keeps the book closed during drying, while wide rubber bands can help hold paperback spines in place. The tools should be prepared before opening the glue, especially when repairing old paper that can shift easily.
- Use wax paper on both sides of a repaired page.
- Keep cotton swabs ready before pressing the book.
- Use flat pressure instead of sharp clips on old covers.
- Test glue flow on scrap paper before touching the book.
| Tool | Best Use | Avoid This Mistake |
|---|---|---|
| Wax paper | Protects nearby pages | Leaving it stuck in place after drying |
| Cotton swab | Removes wet glue excess | Rubbing fragile paper too hard |
| Toothpick | Spreads glue thinly | Scraping the page edge |
| Flat weight | Holds repair evenly | Using uneven or heavy pressure |
| Rubber bands | Holds paperback closed | Wrapping too tightly |
| Clean cloth | Removes dry dust | Using damp cloth on old paper |
How Clean Before Book Glue?
Clean before book glue by removing loose dust, crumbs, paper fibers, and old broken adhesive from the repair area. The surface does not need to look new, but it should be dry and stable enough for glue to bond directly to the paper or cover. Dust and loose fibers can weaken the repair because the glue may stick to debris instead of the book. Use a dry soft cloth, small brush, or gentle air movement. Avoid water, alcohol, oil, or household cleaners on old paper because moisture can cause waves, stains, ink movement, or weak paper fibers. If the book feels damp or smells musty, let it dry fully before repair. Do not glue over moisture because it can trap odor and weaken the bond.
- Brush out dry crumbs from cookbooks and children’s books.
- Remove only loose old glue; do not dig into the spine.
- Keep the repair area dry before applying book glue.
- Stop cleaning once the surface is stable enough to bond.
| Book Condition | Cleaning Method | What to Avoid |
|---|---|---|
| Dry dust | Soft cloth or small brush | Wet wiping |
| Crumbly old glue | Remove loose pieces only | Deep scraping |
| Food crumbs | Brush out gently | Shaking the book hard |
| Brittle paper | Minimal touching | Repeated rubbing |
| Damp pages | Dry first | Gluing immediately |
| Musty odor | Air out and inspect | Sealing with glue |
How Check Pages Before Book Glue?
Check pages before book glue by confirming page order, direction, edge alignment, and how the loose page sits when the book closes. This step is simple, but it prevents some of the most frustrating repair mistakes. A page can easily be glued upside down, slightly too high, too deep into the spine, or 2-3 mm outside the page block. Once the glue dries, correcting that mistake can tear the paper. For one loose page, check the page number on both sides and compare it with the pages before and after it. For several loose pages, stack them in order first, tap the outer edge lightly on a flat surface, and dry-fit the group before adding glue. If the stack feels too thick, repair fewer pages at a time.
- Always dry-fit the page before applying glue.
- Align the outer edge with nearby pages, not with a ruler alone.
- Repair 2-5 loose pages at a time for better control.
- Do not force pages into a tight spine gap.
| Page Check | Good Sign | Problem Sign |
|---|---|---|
| Page order | Numbers match before and after | Missing or reversed pages |
| Page direction | Text faces the correct way | Upside-down placement |
| Outer edge | Lines up with page block | Sticks out clearly |
| Spine fit | Slides in without force | Wrinkles near inner margin |
| Page group | Stack sits flat | Thick raised block |
| Book closing | Closes naturally | Page shifts or buckles |
How Do You Use Book Glue?
Use book glue by applying a thin controlled line to the damaged edge, placing the page, spine, or cover back into position, pressing the repair evenly, cleaning excess glue while it is still wet, and letting the book dry closed for 12 to 24 hours. Most old book repairs need accuracy more than glue volume.
Book glue should be used in small amounts because paper reacts quickly to moisture. A thick glue layer can wrinkle pages, stiffen the spine, or squeeze into the printed area. For loose pages, a 1-2 mm glue line along the inner edge is usually enough. For spine gaps and cover seams, the glue should only touch the area that originally held the book together.
Before applying glue, test the fit without adhesive. After applying glue, align the page or cover immediately and close the book gently. Use wax paper near the repair area to stop unwanted sticking. Press the book with flat, even pressure, then leave it untouched while drying. Opening the book too early can shift the page, weaken the spine, or pull the cover loose again.
| Repair Area | Glue Placement | Glue Amount | Better Drying Time |
|---|---|---|---|
| Single loose page | Inner page edge | 1-2 mm thin line | 12 hours |
| 2-5 loose pages | Inner edge of page group | Thin edge coat | 12-24 hours |
| Cracked paperback spine | Inside spine gap | Thin even layer | 24 hours |
| Detached soft cover | Spine contact edge | Thin line | 24 hours |
| Loose hardcover hinge | Inner hinge channel | Controlled small line | 24+ hours |
| Torn page edge | Tear line or support strip | Tiny dots | 6-12 hours |
| Scrapbook binding | Page stack edge | Thin coat | 12-24 hours |
How Apply Book Glue?
Applying book glue correctly starts with control. The glue should go only where the original bond has failed, not across the whole page or cover. For a loose page, place a thin line along the inner edge that slides into the spine. For a cracked spine, place glue inside the narrow gap where the page block has separated. For a cover repair, apply glue along the contact area where the cover originally attached. A fine nozzle is helpful because most book repair areas are narrow and easy to overfill. Before touching the book, squeeze a tiny amount onto scrap paper to check the flow. If the glue comes out too fast, adjust hand pressure first. Once the glue is on the book, spread any raised bead lightly before pressing.
- Keep the glue line thin; most page repairs only need 1-2 mm of coverage.
- Do not apply glue over printed text, page corners, or large visible areas.
- Use a toothpick or small brush to flatten thick spots before closing the book.
- Apply less glue on thin, yellowed, glossy, or brittle paper.
- Clean the nozzle after use so dried glue does not block the next repair.
| Repair Type | Better Glue Method | Warning Sign |
|---|---|---|
| Loose page | Thin line on inner edge | Glue reaches printed margin |
| Spine crack | Small line inside the gap | Glue pools in the gutter |
| Cover edge | Thin line on contact area | Cover slides after pressing |
| Torn page | Tiny dots or thin support strip | Paper becomes wavy |
| Photo album page | Small controlled line | Glossy stain appears |
| Journal binding | Thin coat on page stack edge | Pages dry into a hard block |
How Press Book Glue Repairs?
Pressing book glue repairs is about steady contact, not heavy force. Once the page, spine, or cover is aligned, the repaired surfaces must stay in place long enough for the glue to set. Use wax paper around the repair area first, especially near loose pages, hinges, and covers. Then close the book gently and check whether the outer edges still line up. If a page sticks out or the cover shifts, adjust it before adding weight. A flat weight works better than sharp clips because pressure is spread evenly across the book. For paperbacks, wide rubber bands can help hold the spine closed, but they should not be tight enough to bend the cover. If glue squeezes out after pressing, remove it while wet.
- Use wax paper before closing the book to prevent accidental page bonding.
- Press with flat, even weight instead of squeezing hard by hand.
- Check page and cover alignment one last time before leaving it to dry.
- Avoid narrow clamps on old covers unless they are padded.
- Do not keep reopening the book to check the repair during drying.
| Pressing Method | Best For | Avoid |
|---|---|---|
| Flat weight | Pages, covers, spine repairs | Uneven pressure |
| Wide rubber bands | Paperback spine repair | Tight wrapping |
| Wax paper plus closed book | Loose page repair | Forgetting protective paper |
| Padded clips | Small cover corners | Direct metal pressure |
| Stack of books | Home drying setup | Crooked surface |
| Hand pressure for 30-60 seconds | Initial placement | Relying on it for full drying |
How Long Does Book Glue Dry?
Book glue drying time depends on the paper type, glue amount, repair depth, room humidity, and how much pressure is applied. A loose page may begin to hold after several hours, but old book repairs are safer when left closed overnight. Spine and cover repairs need longer because the glue sits deeper and carries more movement after drying. A practical rule is 12 hours for small page repairs and 24 hours for spine, cover, and hinge repairs. Thick paper, glossy pages, humid rooms, and heavy glue layers may need extra time. Do not use a hair dryer, heater, or direct sun to speed the process. Fast heat can warp covers, dry paper unevenly, or make old adhesive more brittle. Let the book dry flat at room temperature.
- Leave loose page repairs closed for at least 12 hours when possible.
- Leave spine and cover repairs for about 24 hours before normal reading.
- Open the repaired book gently at first, about 30-45 degrees.
- Do not force a repaired paperback flat right after drying.
- Add more drying time if the room is humid or the glue layer was thicker than planned.
| Repair Type | Minimum Rest Time | Better Rest Time | First Use After Drying |
|---|---|---|---|
| Single loose page | 4-6 hours | 12 hours | Turn gently from outer edge |
| Several loose pages | 8-12 hours | 24 hours | Open slowly near repaired area |
| Paperback spine | 12 hours | 24 hours | Do not force flat |
| Soft cover repair | 12 hours | 24 hours | Check cover edge first |
| Hardcover hinge | 12-24 hours | 24+ hours | Support cover while opening |
| Torn page repair | 3-6 hours | 12 hours | Turn with both hands if fragile |
| Scrapbook binding | 12 hours | 24 hours | Test page movement slowly |

What Book Glue Mistakes Hurt?
Book glue mistakes that hurt old books include using too much glue, choosing super glue instead of flexible book glue, skipping page alignment, pressing too hard, opening the book before it dries, and applying glue to brittle or damp paper without checking first. These mistakes can cause stained pages, stiff spines, crooked repairs, stuck pages, and new tears.
Most failed book repairs are not caused by weak glue. They happen because the repair area was rushed. A loose page was not dry-fitted before gluing. A cover shifted while drying. A cracked spine was filled with too much adhesive. A book was opened after two hours because the surface looked dry, while the inner bond was still soft. Old books need small, controlled steps because paper reacts quickly to moisture and pressure.
The safest habit is to repair less area at one time and let the glue dry fully. A neat repair should not feel thick, hard, sticky, or raised after drying. The repaired book should close evenly, pages should turn without pulling, and the spine should bend naturally. If the repair still feels weak, check alignment, pressure, dust, and drying time before adding more glue.
| Mistake | What Happens | Better Fix |
|---|---|---|
| Too much book glue | Wrinkled paper, stiff spine, visible marks | Use a thin 1-2 mm line |
| Wrong glue type | Brittle bond, stains, hard page edge | Use flexible clear book glue |
| No dry-fit | Crooked pages or shifted cover | Test position before gluing |
| No wax paper | Pages stick together | Protect both sides of repair |
| Pressing too hard | Glue leaks, cover warps | Use flat, even pressure |
| Opening too soon | Bond pulls apart | Dry 12-24 hours |
| Gluing damp paper | Poor bond, trapped odor | Dry book fully first |
| Repairing brittle paper fast | New tears or flakes | Test hidden area first |
Do You Use Too Much Book Glue?
Using too much book glue is one of the easiest ways to damage an old book, even when the glue itself is suitable for paper. Paper does not need to be soaked to form a bond. For many loose page repairs, a thin 1-2 mm glue line along the inner edge is enough. If glue spreads into the printed margin, makes the page wavy, or squeezes out heavily when the book is pressed, the amount is too much. Thick glue can also dry into a hard ridge inside the spine, making the book harder to open. A better repair starts with less glue, correct placement, and enough drying time. If the repaired area still feels weak after drying, add a second tiny amount only where the bond failed.
- Test the glue flow on scrap paper before touching the book.
- Use a thin line instead of coating the whole page.
- Spread thick spots with a toothpick before pressing.
- Wipe squeeze-out while the glue is still wet.
- Use wax paper so excess glue does not reach nearby pages.
| Repair Area | Safer Glue Amount | Too Much Glue Looks Like |
|---|---|---|
| Single loose page | Thin 1-2 mm inner-edge line | Glue reaches printed text |
| Several loose pages | Light edge coat in small groups | Pages dry into a stiff block |
| Paperback spine | Thin inner spine layer | Raised lump in the gutter |
| Cover seam | Narrow contact line | Cover slides or glue leaks |
| Torn page | Tiny dots or thin support line | Paper waves or darkens |
Is Super Glue Book Glue?
Super glue is not book glue, and it is usually a poor choice for old book repair. It dries fast and hard, but books need movement. A paperback spine bends. A hardcover hinge pulls when opened. A loose page turns again and again. When super glue soaks into paper fibers, the repaired area can become stiff, shiny, dark, or brittle. It may hold for a short time, but the paper around the hard spot can crack later. Super glue also gives very little time to align a page or cover. If the page is slightly crooked, the mistake may be locked in place almost instantly. For old books, a clear flexible book glue is safer because it gives better control and keeps the repaired area more natural after drying.
- Avoid super glue on loose pages, spines, hinges, and covers.
- Do not use instant glue on thin, yellowed, or valuable paper.
- Choose flexible book glue for areas that need to bend.
- Use slower, controlled drying when page alignment matters.
| Adhesive | Good for Old Books? | Main Problem |
|---|---|---|
| Flexible book glue | Yes | Needs drying time |
| Super glue | No | Too hard and brittle |
| Hot glue | Usually no | Too thick for spine repair |
| Tape | Temporary only | Yellowing, peeling, residue |
| Glue stick | Light crafts only | Too weak for binding stress |
| General craft glue | Sometimes | May wrinkle or dry stiff |
Can Book Glue Damage Old Paper?
Book glue can damage old paper if it is applied too heavily, used on paper that is already damp or brittle, spread over printed areas, or pressed without protection. Even paper-focused glue should be used carefully on old books because aged paper may absorb moisture unevenly. Thin vintage pages can wrinkle. Yellowed paper may darken where too much glue is applied. Brittle edges can tear when pressed or reopened too soon. Before repairing a fragile book, touch the page edge gently and check whether it bends or flakes. If possible, test a tiny hidden area with a small amount of glue. The safest method is to repair only the needed area, use the smallest amount that can hold, protect nearby pages with wax paper, and let the book dry fully before handling.
- Do not glue damp, musty, or moldy books before drying and checking them.
- Use less glue on thin, yellowed, glossy, or brittle paper.
- Keep glue away from ink, illustrations, and visible page surfaces.
- Test a hidden area when repairing sentimental or vintage books.
- Stop if the paper flakes, cracks, or tears during handling.
| Paper Condition | Glue Risk | Safer Method |
|---|---|---|
| Strong modern paper | Low | Normal thin glue line |
| Yellowed but flexible paper | Medium | Use less glue and dry longer |
| Thin vintage paper | Medium to high | Test hidden area first |
| Brittle page edge | High | Use minimal glue and light pressure |
| Glossy coated paper | Medium | Apply very thinly |
| Damp paper | High | Dry fully before repair |
| Moldy paper | Very high | Do not glue before treatment |

Is GleamGlee Book Glue Good?
GleamGlee Book Glue is a good choice for repairing old books, loose pages, cracked spines, detached covers, journals, scrapbooks, photo albums, cards, and paper crafts. It dries clear, applies through a fine metal nozzle, and is designed for books and paper projects where clean control matters more than heavy glue volume.
Many book repairs fail because the glue is too thick, too hard, or too difficult to place accurately. GleamGlee Book Glue is made for narrow repair areas such as inner page edges, spine gaps, cover seams, hinge lines, and paper craft joints. The fine metal nozzle helps users apply a thin line instead of flooding the page. For most loose page repairs, a 1-2 mm glue line is enough, so controlled application can reduce waste, stains, wrinkling, and stuck pages.
The product is also useful beyond one damaged book. A household can use it for cookbooks, children’s books, planners, school workbooks, greeting cards, invitations, postcards, and memory albums. Retail shops, stationery sellers, craft stores, schools, and online stores can position it as a practical repair-and-craft product because one bottle covers several daily paper problems.
| Use Scene | What GleamGlee Book Glue Helps With | Practical Benefit |
|---|---|---|
| Old book repair | Loose pages, cracked spine, weak cover | Extends book life |
| School books | Textbooks, workbooks, notebooks | Reduces replacement waste |
| Home library | Novels, cookbooks, diaries, religious books | Keeps sentimental books usable |
| Journals | Loose sheets, lifted covers | Cleaner everyday repair |
| Scrapbooks | Decorative paper, cardstock, embellishments | Stronger handmade pages |
| Photo albums | Page attachment and paper layers | Clearer finish near photos |
| Cards and invitations | Paper, vellum, kraft paper | Neater handmade results |
| Small bookbinding | Handmade notebooks and prototypes | Better page stack control |
Why Choose GleamGlee Book Glue?
GleamGlee Book Glue is suitable for users who want a clean repair without needing professional tools. Old book repair often happens on a desk, kitchen table, classroom shelf, library counter, or craft bench. In these places, the glue needs to be simple to control. A fine metal nozzle is helpful because users can place glue exactly along a page edge or inside a spine gap. This matters when repairing thin paper, yellowed pages, or visible cover seams, where even a small glue overflow can leave an obvious mark. The clear-drying finish also helps repaired books keep their original look. Instead of creating a thick white or yellow patch, the glue is made to blend into the repair area when used in a thin layer.
- Fine metal nozzle helps apply narrow glue lines with better control.
- Clear drying helps reduce visible repair marks on pages and covers.
- Works on books, paper, kraft paper, vellum, photos, cards, and craft paper.
- Useful for loose pages, cracked spines, covers, journals, albums, and handmade books.
- Better for careful repair than tape, hot glue, or brittle instant glue.
| Product Detail | Why It Matters During Repair |
|---|---|
| Fine metal nozzle | Helps reach tight spine gaps and inner page edges |
| Clear finish | Keeps repair cleaner on visible book areas |
| Paper-focused use | Fits books, journals, cards, albums, and crafts |
| Controlled flow | Reduces over-application and glue waste |
| Multi-scene use | One bottle works for repair and DIY paper projects |
How Does Book Glue Stay Clear?
GleamGlee Book Glue is designed to dry transparent, which is important because book repair lines are usually visible when the book is opened. Loose page repairs sit near the inner margin. Spine repairs appear in the gutter. Cover repairs can show along the outside seam if the glue dries cloudy or yellow. A clear finish gives the repair a cleaner look, especially on old novels, family cookbooks, Bibles, children’s books, journals, magazines, photo albums, cards, and scrapbooks. Clear drying does not mean users should apply more glue. A thick layer can still leave shine or raised edges. The best result comes from applying a thin line, pressing the repair evenly, and wiping away excess glue before it dries.
- Use a thin glue line for a cleaner transparent finish.
- Wipe squeeze-out while the glue is still wet.
- Place wax paper near the repair to stop accidental page sticking.
- Let spine and cover repairs dry for about 24 hours before normal use.
- Avoid applying glue across large printed or illustrated areas.
| Repair Area | Clear Finish Benefit | Use Tip |
|---|---|---|
| Loose page edge | Repair looks less noticeable | Keep glue near the inner edge |
| Paperback spine | Gutter looks cleaner when opened | Spread glue thinly inside the crack |
| Cover seam | Outside edge looks neater | Press cover flat while drying |
| Photo album | Reduces cloudy marks near images | Use very small amounts |
| Scrapbook page | Keeps decorative paper clean | Remove excess before drying |
| Cards and invitations | Gives a neater handmade look | Apply light pressure after bonding |
Where Else Can Book Glue Work?
GleamGlee Book Glue can be used for more than old book repair. It works well for paper crafts, handmade journals, sketchbooks, scrapbooks, photo albums, greeting cards, invitations, postcards, guest books, planners, calendars, manuals, comics, graphic novels, school projects, and creative paper layouts. This matters because many people buy book glue for one loose page but later need it for another small paper repair. A parent may fix a child’s picture book first, then use the same glue for a school project. A craft lover may repair a journal and later use it for a handmade album. A reader may save a cookbook, then use the glue on a paperback spine. One bottle becomes more useful when it can handle both repair and creative paper work.
- Repair family books, cookbooks, children’s books, journals, and diaries.
- Create handmade notebooks, sketchbooks, scrapbooks, and guest books.
- Attach paper, cardstock, kraft paper, vellum, and photo album pages.
- Fix school workbooks, manuals, planners, and office guides.
- Use in DIY cards, invitations, postcards, and memory projects.
| User Need | Common Project | Why Book Glue Helps |
|---|---|---|
| Save old books | Loose pages and weak spines | Clear repair with controlled glue line |
| Repair school items | Workbooks and textbooks | Extends daily-use materials |
| Make crafts | Cards and scrapbooks | Bonds paper neatly |
| Preserve memories | Photo albums and guest books | Cleaner finish near visible pages |
| Build journals | Handmade notebooks | Holds page stacks more firmly |
| Fix daily paper items | Manuals and planners | Practical repair for regular use |

Conclusion
Repairing old books with book glue is often easier than it looks, as long as the repair is done slowly and carefully. Loose pages, cracked spines, worn covers, journals, cookbooks, school books, and family keepsakes can often be saved with a thin line of clear flexible book glue, proper alignment, light pressure, and enough drying time. The most important rule is to use less glue than expected. A clean repair should hold the book together without making the pages stiff, leaving visible marks, or stopping the spine from opening naturally.
GleamGlee Book Glue is made for readers, families, schools, libraries, crafters, stationery sellers, and repair-focused brands that need a clean and practical paper adhesive. It dries clear, applies through a fine metal nozzle, and works for book repair, bookbinding, journals, scrapbooks, photo albums, cards, invitations, and other paper projects. For ready-to-sell branded products or customized book glue solutions, GleamGlee can support product supply, packaging design, label customization, low MOQ orders, and international shipping for different markets.





















