 Skip to content
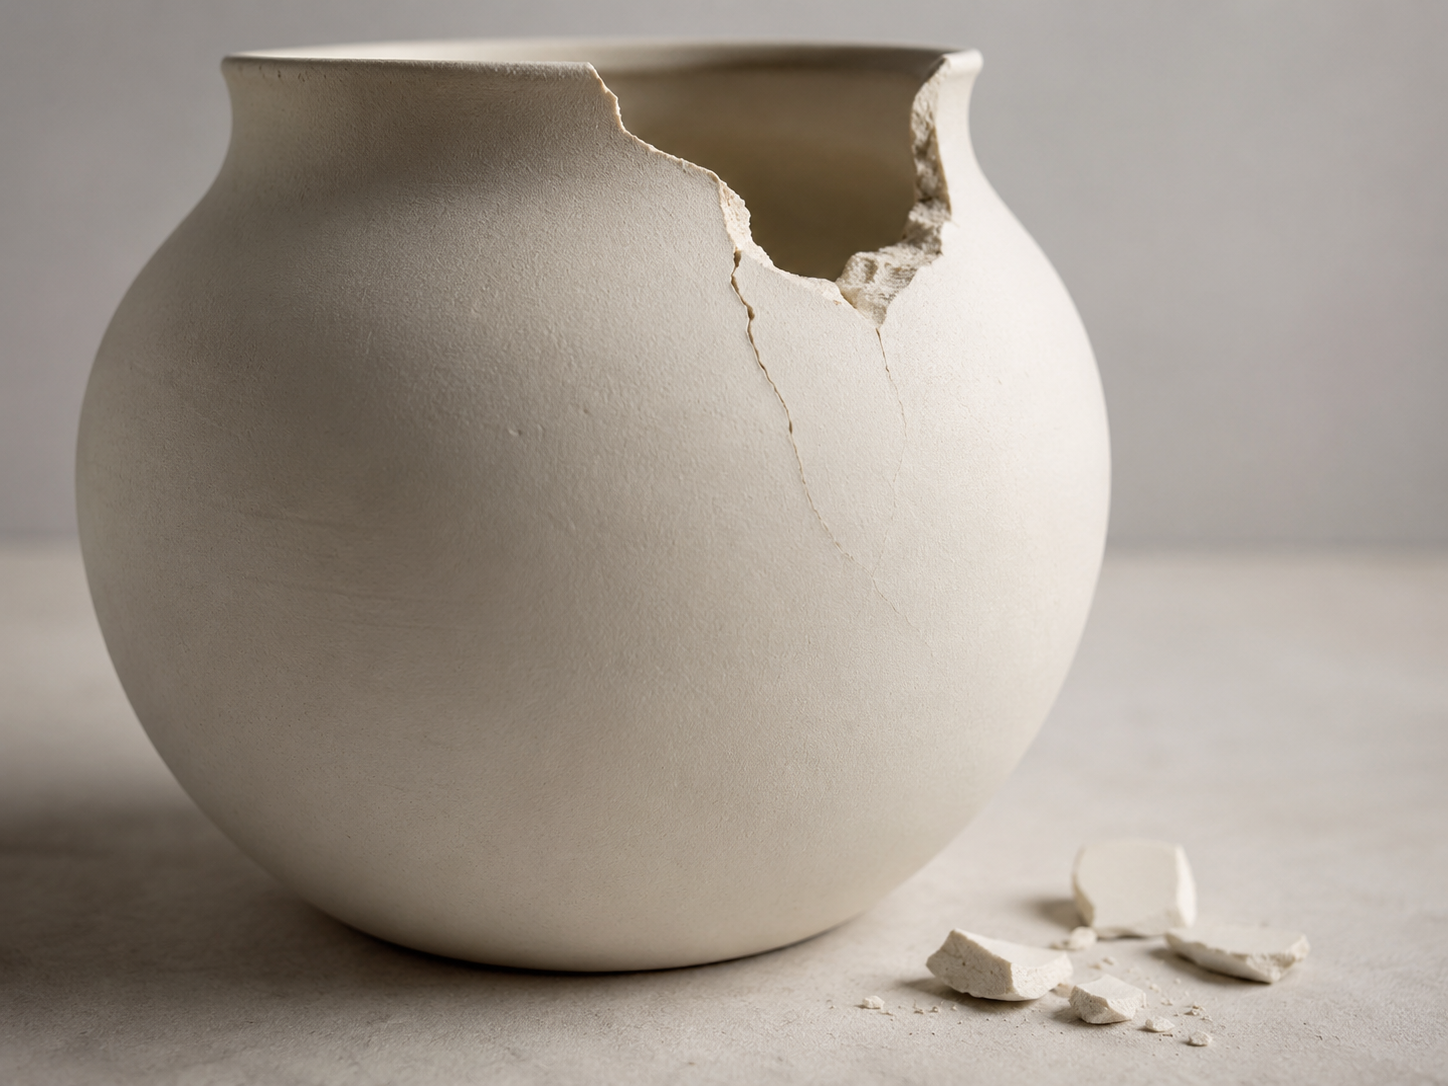
A broken ceramic vase feels different from a broken plastic container or a cracked storage box. Many vases carry memory: a housewarming gift, a handmade piece from a trip, a family decoration, a favorite planter from the living room window, or a vase that simply looks perfect on one shelf. Replacing it may be possible, but replacement does not always solve the real problem. The shape, color, story, and emotional value are often the reason people search for ceramic vase glue instead of throwing the piece away. A good repair is not just about sticking two broken edges together. It is about getting the seam tight, keeping the surface clean, avoiding thick glue marks, and making sure the vase can still be used in the right way after repair.
Ceramic vases can often be repaired with glue when the broken pieces fit closely together. Clean and dry the edges, test the fit first, apply a thin layer of ceramic vase glue, press the pieces firmly for 5–10 seconds, remove extra glue before it spreads, and let the repair cure before adding water, soil, flowers, or weight.
The repair becomes easier when you know what kind of break you are dealing with. A clean rim chip needs a different approach from a long body crack. A decorative shelf vase does not face the same pressure as a planter filled with wet soil. A porcelain vase with a glossy surface also needs cleaner glue control than a rough handmade pottery piece. This guide walks through the real repair questions people care about before opening the glue: what can be fixed, which glue fits the damage, how much glue to use, how long to wait, and when a repaired vase should be treated as decoration instead of heavy-use tableware.
What Is Ceramic Vase Glue?
Ceramic vase glue is a repair adhesive made for ceramic, porcelain, pottery, and similar hard surfaces. It is mainly used when a vase has a crack, broken rim, loose base, chipped edge, or separated ceramic fragment that still fits back into place. Compared with ordinary craft glue, ceramic vase glue needs stronger surface bonding, cleaner drying, and better control during application, because vases are usually decorative items placed in visible areas of the home.
A good ceramic vase glue should create a tight bond without leaving a thick or cloudy repair line. Most ceramic vase repairs are small but delicate: a narrow crack on the body, a missing rim piece, a broken neck, or a small chip on a planter edge. These repairs do not need a large amount of glue. They need a thin, accurate layer that can enter the broken edge, hold the pieces together, and keep the surface looking clean after drying.
Ceramic vase glue works best when the broken pieces fit closely together. If the vase has missing ceramic, crushed edges, powdery fracture lines, or old yellow glue from a previous repair, the result may need more preparation. Glue can bond the pieces, but it cannot always replace missing shape, color, or glaze. For clean vase breaks, however, the right glue and careful handling can make the repair strong enough for display, dried flowers, light household use, and some moisture exposure after full curing.
| Ceramic Vase Damage | What Ceramic Vase Glue Can Do | What to Watch |
|---|---|---|
| Hairline crack | Helps seal and stabilize the crack line | Surface must be clean and dry |
| Broken rim | Reattaches the saved rim piece | Alignment must match the curve |
| Loose base | Bonds the base back to the vase body | Needs stable support while curing |
| Small chip | Reattaches the chip if the piece is saved | Missing chips may need filler |
| Planter crack | Helps close and strengthen the crack | Wet soil adds pressure |
| Porcelain décor | Creates a cleaner visible repair | Excess glue can show easily |
What Is Ceramic Vase Glue Used For?
Ceramic vase glue is used for everyday repairs where the vase or ceramic piece is still valuable enough to save. Many broken vases are not expensive antiques, but they may match a room, belong to a set, hold personal memory, or have a shape that is hard to replace. Common repair jobs include cracked flower vases, chipped porcelain décor, broken ceramic planters, loose vase bases, detached decorative parts, and small pottery pieces. It is also useful for craft repairs where ceramic needs to bond with glass, wood, metal, stone, or plastic. The best results happen when the broken parts can be tested first and sit tightly together before glue is applied. If the pieces do not match well during a dry test, glue alone will not make the repair look natural.
- Repairing cracked ceramic vases used for display or dried flowers.
- Reattaching broken rims, neck pieces, feet, bases, or decorative parts.
- Fixing ceramic planters, flower pots, soap dishes, ornaments, and figurines.
- Bonding ceramic pieces in mosaic art, craft projects, and home décor repairs.
- Repairing mixed-material pieces where ceramic connects to wood, glass, metal, stone, or plastic.
| Common Item | Typical Damage | Repair Goal |
|---|---|---|
| Flower vase | Body crack or rim chip | Restore shape and reduce visible damage |
| Ceramic planter | Wall crack or broken lip | Keep the planter usable with care |
| Porcelain ornament | Small broken detail | Reattach delicate parts neatly |
| Pottery décor | Loose base or side break | Keep the piece stable for display |
| Mosaic project | Ceramic shard bonding | Attach pieces to wood, glass, or stone |
Is Ceramic Vase Glue Strong?
Ceramic vase glue can create a strong bond when the broken surfaces are clean, dry, and pressed together with close contact. Strength does not come from applying a thick bead of glue. In most vase repairs, too much glue makes the seam wider, pushes the pieces apart, and leaves visible squeeze-out. A thin glue layer usually gives a better result because the ceramic edges can meet closely. The bond also depends on curing time. A fast-grab glue may feel stable after pressing for a few seconds, but the repair should still be left undisturbed before water, soil, flowers, or weight are added. Strength also depends on use. A display vase has less stress than a planter filled with wet soil or a vase holding heavy fresh flowers.
- Clean breaks are usually stronger than crushed or missing-edge breaks.
- Thin glue lines often create cleaner and stronger repairs than thick glue layers.
- Repaired rims, necks, and handles should not be used as lifting points.
- Base repairs need extra curing time before the vase stands upright or carries weight.
- Water-filled vases and planters place more pressure on repaired seams.
| Use After Repair | Stress Level | Practical Advice |
|---|---|---|
| Shelf display | Low | Usually suitable for clean glue repair |
| Dried flowers | Low | Avoid forcing stems against the repaired area |
| Fresh flowers with liner | Medium | Safer than direct water contact |
| Direct water use | Medium to high | Test slowly after full curing |
| Ceramic planter | High | Use an inner pot if the crack is large |
| Outdoor décor | High | Protect from soaking, impact, and temperature swings |
Is Ceramic Vase Glue Clear?
Ceramic vase glue should dry clear when used on visible areas, because vases are usually decorative pieces. A repair that is strong but cloudy, yellow, or raised can make the damage stand out. Clear glue helps the repaired seam look cleaner, especially on white ceramic, glossy porcelain, glazed pottery, and decorative ornaments. However, clear glue does not guarantee a fully invisible repair. The final look depends on the break line, ceramic color, surface finish, glue amount, and how well the pieces align. A tight crack on a patterned vase may hide well, while a wide chip on a glossy white rim may still show. The repair should focus on control: use less glue, place it accurately, press the pieces flush, and clean excess before it dries.
- Use a fine nozzle to place glue only on the broken edge.
- Apply a thin line instead of spreading glue over the visible surface.
- Align painted patterns, stripes, or raised details before pressing.
- Remove fresh squeeze-out carefully before it dries into a shiny mark.
- Avoid rubbing wet glue across matte, porous, painted, or gold-trimmed ceramic.
| Vase Surface | Visibility Risk | Repair Tip |
|---|---|---|
| Glossy porcelain | High | Use very little glue and clean squeeze-out quickly |
| White ceramic | Medium to high | Keep the seam thin and well-aligned |
| Dark glazed vase | Medium | Clear glue may hide better, but raised glue can reflect light |
| Matte pottery | Medium | Avoid excess glue because it may darken the surface |
| Patterned vase | Medium | Align the design before pressing |
| Handmade ceramic | Variable | Test tape and cleaning methods carefully |
Is Ceramic Vase Glue Waterproof?
Ceramic vase glue can be waterproof or water-resistant after curing, depending on the formula. This matters because many vases are used with fresh flowers, water, damp stems, or wet soil. Still, waterproof glue should not be treated as a promise that every repaired vase can be used exactly like a new one. A repaired seam is still a stress point. Standing water, heavy flowers, wet soil, repeated washing, and outdoor weather can all place pressure on the bond. Cracks near the lower body or base need the most care because water pressure is stronger there. For valuable or sentimental vases, a hidden liner is often safer than direct water use. The vase keeps its appearance, while the liner holds the water.
- Let the glue cure fully before adding water, soil, or flowers.
- Test with a small amount of water first instead of filling the vase completely.
- Place the vase on a dry towel during testing to check for slow leaks.
- Use a glass or plastic liner for sentimental or decorative vases.
- Use an inner nursery pot for repaired ceramic planters.
- Avoid dishwashers, soaking, hot water, or long water exposure unless the product label allows it.
| Water Situation | Risk Level | Better Use Method |
|---|---|---|
| Damp cloth cleaning | Low | Wipe gently after full cure |
| Dried flowers | Low | No water pressure on the seam |
| Fresh flowers with liner | Low to medium | Recommended for repaired vases |
| Direct water filling | Medium to high | Test slowly and monitor leaks |
| Wet soil in planter | High | Use inner nursery pot |
| Outdoor rain exposure | High | Use only after full cure and inspect often |
Which Ceramic Vase Glue Works Best?
The best ceramic vase glue is the one that matches the damage, not simply the one that claims the highest strength. A thin crack, a clean rim break, a missing chip, and an old porcelain vase all need different repair thinking. For most home vase repairs, a clear fast-bonding ceramic glue works well when the broken pieces fit tightly, the seam is visible, and the repair needs to look neat after drying.
A good ceramic vase glue should have four practical qualities: strong adhesion, clear drying, precise application, and moisture resistance after curing. Strength matters, but control matters just as much. Too much glue can make the seam thick, push the ceramic pieces apart, and leave shiny marks on the glaze. A precision nozzle is helpful because most vase repairs involve narrow edges, curved surfaces, and small fragments that are easy to over-glue.
GleamGlee Ceramic Glue is suitable for common vase repairs because it bonds ceramic, porcelain, pottery, glass, metal, wood, plastic, rubber, PVC, concrete, and other household materials. It creates a crystal-clear bond, applies neatly through precision nozzles, and supports quick pressing for 5–10 seconds. For clean cracks, broken rims, saved chips, ceramic planters, and decorative porcelain pieces, it gives a practical balance of strength, clean appearance, and ease of use.
| Repair Type | Best Glue Feature | Better Repair Result | Extra Care |
|---|---|---|---|
| Hairline crack | Thin flow and clear finish | Cleaner crack sealing | Do not flood the surface |
| Broken rim | Fast grip and fine nozzle | Neater edge repair | Match the curve before pressing |
| Body break | Strong bond and clear drying | Restored vase shape | Support while curing |
| Small chip | Precise glue control | Less visible edge repair | Saved chip must fit closely |
| Planter crack | Waterproof resistance | Better moisture handling | Use inner pot for wet soil |
| Old porcelain vase | Clear, controlled application | Less surface mess | Test fit carefully before gluing |
Which Ceramic Vase Glue Fits Cracks?
The best ceramic vase glue for cracks should be clear, controlled, and able to reach the crack line without leaving a thick mark on the outside surface. Hairline cracks usually need very little glue. A heavy bead can sit on top of the glaze instead of entering the crack, making the repair look messy and raised. Before applying glue, the vase should be cleaned and dried fully, especially if it has held water, flowers, soil, or fragrance sticks. If the crack is close to the base, the repair needs more care because water pressure is stronger in the lower part of the vase. For display vases or dried-flower vases, a clean crack repair is usually easier. For water-holding vases, the repaired seam should be tested slowly after full curing.
- Use a fine nozzle to guide glue along the crack instead of spreading it across the surface.
- Keep the glue line thin to reduce shiny marks and surface buildup.
- Press or tape the crack closed if the ceramic body slightly opens.
- Let the repair cure fully before testing water or placing flowers inside.
- Use a liner if the crack is near the bottom or the vase has sentimental value.
| Crack Position | Repair Difficulty | Best Use After Repair |
|---|---|---|
| Upper body crack | Medium | Display or dried flowers |
| Middle body crack | Medium | Light use after full cure |
| Lower body crack | High | Better with inner liner |
| Planter wall crack | High | Better with inner nursery pot |
| Surface glaze line | Low to medium | Mostly cosmetic improvement |
Which Ceramic Vase Glue Fits Breaks?
The best ceramic vase glue for clean breaks should bond quickly, dry clear, and allow accurate placement before the pieces shift. Clean breaks are often the easiest vase repairs because the broken fragments still match each other. A broken rim, neck piece, side fragment, base foot, or decorative ceramic detail can often be reattached neatly if the fit is tested before glue is applied. The dry-fit step should not be skipped. Place the pieces together without glue first, check the seam from several angles, and make sure the curve, pattern, and height all line up. Once the glue is added, there is less time to adjust. A thin layer is usually enough because pressing the pieces together spreads the adhesive across the contact area.
- Arrange all broken pieces on a soft towel before starting.
- Test the repair order first if the vase has more than two fragments.
- Apply glue only to the broken edge, not the visible outside surface.
- Press firmly for 5–10 seconds, then support the piece while curing.
- Use painter’s tape, rubber bands, or a folded towel to keep curved pieces stable.
| Broken Area | Best Holding Method | Repair Note |
|---|---|---|
| Rim piece | Painter’s tape | Keep the curve level |
| Vase neck | Soft wrap or tape | Do not lift from the repaired neck |
| Side fragment | Rubber band or towel support | Prevent outward shifting |
| Base piece | Flat padded surface | Wait longer before standing upright |
| Decorative detail | Finger pressure or light tape | Use very little glue |
Which Ceramic Vase Glue Fits Chips?
The best ceramic vase glue for chips depends on whether the chipped piece is still available. If the chip is saved and fits back into place, a clear precision glue can reattach it neatly. Small chips on rims, planter lips, porcelain decorations, and raised ceramic details often need only a tiny amount of adhesive. If the chip is missing, glue alone cannot rebuild the lost shape. It can stabilize loose edges or bond filler, but the missing area may still need putty, color touch-up, or a decorative repair style. Chips are more visible on glossy white ceramic and porcelain because light catches the broken edge. Patterned or darker vases may hide small chip repairs better, but alignment still matters.
- Save every small ceramic fragment after the vase breaks.
- Use tweezers for tiny chips to avoid glue on fingers and glaze.
- Apply a very small amount of glue to prevent squeeze-out around the chip.
- Do not use glue as a thick filler for missing ceramic.
- Consider filler or touch-up if the missing area is on the front or rim.
| Chip Situation | Can Glue Repair It? | Better Result |
|---|---|---|
| Saved rim chip | Yes | Reattach with thin glue |
| Saved planter chip | Yes | Cure fully before soil or water |
| Missing small chip | Partly | Stabilize edge, then touch up |
| Missing large chip | Limited | Filler may be needed |
| Crushed ceramic edge | Difficult | Clean loose powder before repair |
Which Ceramic Vase Glue Fits Old Vases?
The best ceramic vase glue for old vases should be clear, controlled, and used carefully. Older vases can be more difficult to repair because they may have weak glaze, dust inside cracks, previous glue residue, small hidden fractures, or porous ceramic edges. A vase may also have paint, gold trim, decals, or handmade surface details that can be damaged by harsh cleaning or strong tape. Before applying glue, check whether the vase has been repaired before. Old yellow adhesive can block new glue from reaching the ceramic. If the old glue is thick or loose, it may need careful removal, but scraping too hard can damage the vase. For valuable antiques, rare porcelain, or family heirlooms, a small hidden test or professional repair may be safer.
- Check old seams for yellow glue, loose filler, or previous repair marks.
- Avoid strong solvents on painted, gilded, or delicate porcelain surfaces.
- Use the smallest amount of glue needed to reduce visible residue.
- Support the repair gently instead of using harsh tape on fragile glaze.
- Use the repaired vase for display if water use may risk further damage.
| Old Vase Condition | Repair Risk | Practical Choice |
|---|---|---|
| Clean old break | Medium | Careful glue repair may work |
| Previous glue present | High | Remove residue only if safe |
| Gold trim or painted surface | High | Avoid strong tape and solvents |
| Porous handmade pottery | Medium to high | Use thin glue and test carefully |
| Valuable antique | High | Consider professional restoration |
| Sentimental display vase | Medium | Repair for display, use liner if needed |

How to Use Ceramic Vase Glue?
Ceramic vase glue should be used with a clean, slow, and controlled repair process. The basic method is simple: clean the broken edges, test the fit, apply a thin layer of glue, press the pieces together, remove extra glue, and leave the vase still until the repair has cured. The result depends less on speed and more on alignment, glue amount, and patience.
Most vase repairs fail because the pieces are glued too quickly. A broken rim, cracked body, loose base, or chipped planter edge should always be checked before glue is applied. If the pieces do not fit neatly during a dry test, they will not fit better after glue is added. A dry test also shows where support is needed, which side should face forward, and whether small fragments are missing.
GleamGlee Ceramic Glue is designed for simple home repairs with a precision nozzle, clear finish, and fast initial bonding. For most clean ceramic breaks, apply a thin line of glue, press firmly for 5–10 seconds, and keep the repair stable while it cures. Do not add water, soil, flowers, or weight until the repaired area has had enough time to strengthen.
| Repair Step | Main Goal | Time Needed | Common Mistake |
|---|---|---|---|
| Step 1 | Clean and dry the ceramic | 3–10 minutes | Gluing over dust or moisture |
| Step 2 | Test the fit | 2–5 minutes | Skipping alignment check |
| Step 3 | Apply glue and press | 5–30 seconds pressing | Using too much glue |
| Step 4 | Support and cure | Several hours or longer | Moving the vase too soon |
Step 1: How to Clean Before Ceramic Vase Glue?
Before using ceramic vase glue, the broken edges must be clean and fully dry. Ceramic can look clean from the outside, but the broken line may hold dust, soil, dried flower water, mineral residue, old glue, oil from fingers, or tiny loose ceramic powder. These small layers can stop the glue from bonding directly to the ceramic. For a vase used with flowers, check the inside wall for dried water marks. For a planter, remove soil from both sides of the crack. For an old vase, look for previous yellow adhesive along the break. Cleaning should be gentle because broken ceramic edges are sharp, and painted or glazed surfaces can scratch easily.
- Use a soft dry cloth, small brush, or cotton swab to remove dust and loose particles.
- Let damp ceramic dry fully before gluing, especially on unglazed pottery or planters.
- Avoid soaking porous ceramic because trapped moisture can weaken the bond.
- Remove old glue only if it can be done without scratching or chipping the vase.
- Touch the broken edges as little as possible after cleaning to avoid finger oil.
| Surface Condition | What to Do | What to Avoid |
|---|---|---|
| Dusty crack | Brush gently | Blowing moisture from mouth |
| Flower water residue | Wipe lightly and dry | Gluing while damp |
| Planter soil | Remove soil from inside and outside | Leaving dirt inside crack |
| Old glue | Scrape only if safe | Damaging glaze or paint |
| Matte pottery | Dry clean first | Over-wetting the surface |
Step 2: How to Test Fit Before Ceramic Vase Glue?
A dry fit should always be done before applying ceramic vase glue. This means putting the broken pieces together without glue to check whether the edges match, the shape closes, and the pattern lines up. This step is especially important for vase rims, curved bodies, neck sections, and bases because a small alignment mistake can become very visible after the glue dries. If there are several pieces, test the repair order first. Some fragments must be placed before others, like a puzzle. When the repair is tested first, it becomes easier to know where to place fingers, where to apply tape, and how much pressure is needed after the glue is added.
- Place all broken pieces on a soft towel so small chips do not roll away.
- Match the largest pieces first, then check smaller rim or edge fragments.
- Look at the seam from the front, back, side, and top before gluing.
- Check painted patterns, stripes, flowers, or raised details for alignment.
- Decide which side of the vase will face forward if the seam cannot be fully hidden.
| Vase Area | What to Check During Dry Fit | Best Support After Gluing |
|---|---|---|
| Rim chip | Curve and top edge height | Painter’s tape |
| Vase neck | Round shape and vertical line | Soft wrap or tape |
| Body crack | Seam closure and surface level | Rubber band or towel nest |
| Base piece | Balance and contact area | Flat padded surface |
| Decorative detail | Position and direction | Light finger pressure |
Step 3: How to Apply Ceramic Vase Glue?
Ceramic vase glue should be applied in a thin, even line. Using more glue does not usually make the repair stronger. In many vase repairs, too much glue pushes the broken pieces apart, creates a raised seam, and leaves shiny squeeze-out on the glazed surface. A precision nozzle helps control the amount, especially on hairline cracks, small rim chips, porcelain details, and narrow broken edges. Apply glue only where the ceramic pieces touch. For a clean break, a thin line on one broken edge is often enough. For a larger piece, apply a controlled line along the full contact area. After the glue is applied, press the pieces together firmly for 5–10 seconds and keep them aligned.
- Apply a thin line instead of a thick bead.
- Keep glue on the broken edge, not across the visible outside surface.
- Press the pieces together in the same position tested during the dry fit.
- Remove fresh squeeze-out before it dries into a raised mark.
- Use tweezers for tiny chips to avoid glue on fingers and glaze.
| Repair Type | Glue Amount | Pressing Tip |
|---|---|---|
| Hairline crack | Very small amount | Press crack closed if possible |
| Rim chip | Tiny line on broken edge | Hold curve level for 5–10 seconds |
| Body break | Thin continuous line | Press evenly across the seam |
| Base repair | Thin layer on contact area | Keep vase stable and flat |
| Porcelain detail | Minimal glue | Use tweezers or light pressure |
Step 4: How to Cure Ceramic Vase Glue?
Ceramic vase glue may grip quickly, but the repair still needs curing time before normal use. Initial hold and full strength are different. A rim chip may feel stable after a few seconds, but the bond can still be weak if the vase is moved, washed, filled with water, or placed under weight too soon. After pressing, the repair should be supported so the seam does not shift. Curved vase pieces may need painter’s tape, rubber bands, soft clamps, or a folded towel to keep the shape steady. A base repair may need the vase placed on a padded flat surface until the bond becomes stronger. The repaired vase should not be tested with water, soil, or heavy flowers until curing is complete.
- Keep the vase still after pressing; do not keep checking or moving the seam.
- Use soft support instead of strong force that may damage the glaze.
- Wait before adding water, soil, flowers, stones, or decorative weight.
- Test water slowly after curing by placing the vase on a dry towel.
- Use a liner for valuable vases or cracks near the lower body.
| After Repair Action | Safer Timing | Reason |
|---|---|---|
| Light handling | After initial set, with care | Prevents early seam movement |
| Dusting surface | After repair feels stable | Avoids rubbing fresh glue |
| Adding dried flowers | After curing | Reduces pressure on seam |
| Testing water | After full cure | Checks for slow leaks |
| Adding soil to planter | After full cure | Wet soil adds weight and pressure |
| Outdoor placement | After full cure | Weather adds stress |
Do Ceramic Vase Glue Repairs Last?
Ceramic vase glue repairs can last when the broken surfaces are clean, the pieces fit tightly, the glue is applied in a thin layer, and the repaired area is allowed to cure without movement. A clean rim chip or decorative crack usually lasts longer than a wide body break, missing chip, planter crack, or base repair that carries weight. The way the vase is used after repair has a big effect on long-term results.
A repaired ceramic vase should not be treated exactly like a new, unbroken vase. The glue can restore shape and strength, but the repaired seam remains a point that needs care. Display vases, dried-flower vases, and decorative pieces usually place low stress on the repair. Water-filled vases, outdoor planters, heavy flower arrangements, and frequently handled pieces place more pressure on the bond.
The longest-lasting repairs usually share the same habits: clean preparation, accurate alignment, controlled glue amount, firm pressing, full curing, and careful use afterward. For valuable or sentimental vases, using an inner liner is often the safest way to keep using the vase with flowers while reducing water pressure on the repaired seam.
| Repair Situation | Expected Durability | Main Risk | Better Use Method |
|---|---|---|---|
| Small rim chip | Good | Visible glue mark | Use thin glue and light pressure |
| Decorative body crack | Good to medium | Seam movement | Support while curing |
| Lower vase crack | Medium | Water pressure | Use a hidden liner |
| Loose base repair | Medium | Weight and impact | Cure fully before standing upright |
| Ceramic planter crack | Medium to low | Wet soil pressure | Use an inner nursery pot |
| Outdoor vase repair | Medium to low | Rain, heat, cold, impact | Inspect often after weather changes |
Do Ceramic Vase Glue Bonds Stay Strong?
Ceramic vase glue bonds can stay strong for a long time when the broken edges fit closely and the repaired area is not placed under heavy stress. A tight fracture line allows the glue to form a thin bond between the ceramic surfaces. That thin bond is often cleaner and stronger than a thick glue-filled gap. Problems usually start when the repair is rushed, the pieces are misaligned, the vase is moved before curing, or the repaired part is used as a handle. A vase neck, rim, base, or decorative handle may feel solid after repair, but it should not carry the same force as the original fired ceramic body. Strength is not only about the glue itself; it also depends on how the repaired vase is handled in daily use.
- Clean breaks usually create stronger repairs than crushed, powdery, or missing-edge breaks.
- A thin glue line helps the ceramic edges sit closer and reduces weak gaps.
- The vase should stay still during curing because movement can weaken the bond.
- Repaired rims, necks, handles, and bases should not be used as lifting points.
- Heavy flowers, stones, water, or soil should be added only after full curing.
| Bond Factor | Better Result | Weaker Result |
|---|---|---|
| Surface fit | Pieces close tightly | Wide gaps or uneven edges |
| Glue amount | Thin, even layer | Thick bead or glue puddle |
| Surface condition | Clean and dry | Dust, oil, soil, or moisture |
| Curing | Left still until strong | Moved or tested too early |
| Daily handling | Lift from main body | Lift from repaired part |
Do Ceramic Vase Glue Repairs Hold Water?
Ceramic vase glue repairs may hold water when the adhesive is waterproof, the crack is fully sealed, the pieces fit tightly, and the repair has cured completely. Still, water use is one of the hardest tests for a repaired vase. Standing water creates constant pressure against the lower body and base, and a tiny weak point can become a slow leak. A repaired rim or upper-body chip has much lower water risk than a crack near the bottom. For sentimental vases, expensive porcelain, handmade pottery, or planters, a liner is often the better choice. The outside vase keeps its original look, while a glass, plastic, or inner nursery pot holds the water or soil.
- Let the repair cure fully before any water test.
- Start with a small amount of water instead of filling the vase completely.
- Place the vase on a dry towel or paper towel to check for slow leaks.
- Use a liner for cracks near the base, old vases, or valuable pieces.
- Avoid soaking, hot water, and dishwashers unless the glue label clearly allows it.
| Repair Location | Water Risk | Practical Advice |
|---|---|---|
| Rim chip | Low | Usually fine for normal display |
| Upper body crack | Medium | Test slowly after curing |
| Middle body crack | Medium | Use light water test first |
| Lower body crack | High | Use inner liner |
| Base repair | High | Avoid direct water pressure |
| Planter crack | High | Use inner nursery pot for wet soil |
Do Ceramic Vase Glue Seams Show?
Ceramic vase glue seams may show, but careful repair can make them much less noticeable. The final appearance depends on the vase color, surface finish, break shape, glue amount, and alignment. Clear glue helps reduce visible marks, but it cannot hide every fracture line. A tight clean break on a patterned or dark glazed vase may blend in well. A chip on glossy white porcelain may still show because light reflects from the repaired edge. The biggest visual problems usually come from too much glue, shifted pieces, dried squeeze-out, and gaps where ceramic is missing. A clean-looking repair starts before gluing: dry-fit the pieces, check the pattern, use a small amount of glue, and press the seam flush.
- Clear glue gives a cleaner finish, but alignment controls how neat the seam looks.
- Excess glue should be removed before it dries into a raised shiny mark.
- Patterned vases should be matched carefully before pressing.
- Missing chips may still show unless filler or touch-up is used.
- The repaired side can face the wall or back of a shelf when the seam cannot be fully hidden.
| Vase Finish | Seam Visibility | Repair Tip |
|---|---|---|
| Glossy white porcelain | High | Use very little glue and clean quickly |
| Dark glazed ceramic | Medium | Watch for raised shiny glue |
| Matte pottery | Medium | Avoid excess glue soaking into surface |
| Patterned vase | Medium | Match the design before pressing |
| Textured ceramic | Low to medium | Keep glue from pooling in texture |
| Gold-trimmed vase | High | Avoid rubbing or strong tape |
Do Ceramic Vase Glue Repairs Need Care?
Ceramic vase glue repairs need care after curing, especially when the vase will hold water, soil, heavy flowers, or sit outdoors. The repair may be strong enough for normal use, but the seam should still be protected from unnecessary pressure. A repaired vase should be cleaned gently, lifted from the main body, and placed where it will not be bumped often. For planters, wet soil is the biggest concern because it adds weight and keeps moisture against the repair. For fresh flowers, a liner helps protect the glued seam from standing water. For outdoor décor, rain, sunlight, cold nights, and accidental impact can shorten the life of the repair if the item is not checked from time to time.
- Lift repaired vases from the body or base, not from the rim, neck, or handle.
- Clean with a soft damp cloth instead of soaking the repaired area.
- Use dried flowers or a liner when the crack is near the lower body.
- Keep heavy stems, stones, and soil away from the repaired seam when possible.
- Place repaired vases away from shelf edges, crowded storage, or high-traffic areas.
- Inspect outdoor repairs after heavy rain, strong sun, or temperature changes.
| Care Situation | Better Habit | What to Avoid |
|---|---|---|
| Daily cleaning | Wipe gently with soft cloth | Soaking or scrubbing seam |
| Moving the vase | Hold from main body | Lifting by repaired rim or neck |
| Fresh flowers | Use inner liner | Direct water on weak seam |
| Planter use | Use inner nursery pot | Wet soil pressing on repair |
| Shelf display | Place in stable area | Crowded edges or bump zones |
| Outdoor use | Check after weather | Constant soaking or impact |
Is GleamGlee Ceramic Vase Glue Good?
GleamGlee Ceramic Vase Glue is a good choice for common ceramic vase repairs when the broken pieces fit closely and the repair needs a clean, clear finish. It is designed for ceramic, porcelain, pottery, glass, metal, wood, plastic, rubber, PVC, concrete, and other household materials. For vases, planters, ornaments, figurines, and decorative ceramic pieces, it offers a practical balance of strength, precision, and neat application.
The main advantage is control. Many ceramic vase repairs involve narrow cracks, curved edges, small chips, or delicate porcelain parts. A thick glue opening can easily apply too much adhesive, leaving a shiny ridge or cloudy mark. GleamGlee Ceramic Glue includes precision nozzles that help place glue directly onto the broken edge. Each pack includes 4 precision nozzles, while the 2-pack version includes 8 nozzles, making it easier to handle more than one repair.
GleamGlee Ceramic Vase Glue works best for clean breaks, hairline cracks, saved chips, broken rims, loose bases, planter cracks, and small decorative ceramic details. It creates a crystal-clear bond, supports fast pressing for 5–10 seconds, and is designed with a resealable anti-clog cap to help keep the glue ready for future use. For missing ceramic, wide gaps, or rare antique pieces, glue may still help with bonding, but filler or specialist restoration may be needed for the best visual result.
| GleamGlee Feature | What It Helps With | Practical Repair Value |
|---|---|---|
| Crystal-clear bond | Visible vase seams and porcelain repair | Cleaner-looking finish |
| Fast initial grip | Rim chips and small fragments | Less slipping during repair |
| Precision nozzles | Cracks, narrow edges, detailed parts | Better glue control |
| Waterproof resistance | Vases and planters after curing | Better moisture handling |
| Heat resistance | Household ceramic items | More stable daily use |
| Multi-material bonding | Ceramic with glass, metal, wood, plastic | More repair options |
| Anti-clog cap | Storage after first use | Less drying and waste |
| Resealable tube | Repeat repairs | Better long-term convenience |
Why Choose GleamGlee Ceramic Vase Glue?
GleamGlee Ceramic Vase Glue is useful when a vase repair needs to look neat, not just stay attached. Many ceramic items are placed in visible areas such as shelves, dining tables, office desks, window ledges, bathrooms, and garden corners. A glue that leaves a thick, cloudy, or yellow repair line can make the damage more noticeable. GleamGlee Ceramic Glue is designed to dry clear and bond firmly, which makes it suitable for decorative repairs where appearance matters. The precision nozzle also helps reduce over-application, especially on small rim chips, fine cracks, porcelain details, and curved vase edges. This matters because most vase repairs fail visually before they fail structurally: too much glue, a crooked seam, or a raised shiny edge can ruin the final look.
- Good for ceramic vases, porcelain décor, pottery pieces, planters, ornaments, and figurines.
- Clear drying helps reduce visible glue marks on display pieces.
- Precision nozzles make it easier to apply a thin line on narrow cracks and small chips.
- Fast initial grip helps small fragments stay in place during repair.
- Waterproof resistance after curing supports vases, planters, and moisture-exposed repairs.
- Resealable anti-clog cap helps keep the glue usable after the first repair.
| Repair Need | Why GleamGlee Fits | Best Use Tip |
|---|---|---|
| Visible vase crack | Clear bond reduces repair marks | Use a thin glue line |
| Broken rim chip | Fine nozzle controls placement | Press curve flush |
| Porcelain ornament | Less glue mess on small details | Apply with light pressure |
| Ceramic planter | Waterproof resistance helps after curing | Use an inner pot for wet soil |
| Mixed-material décor | Bonds ceramic to other surfaces | Clean both materials first |
How Does GleamGlee Ceramic Vase Glue Work?
GleamGlee Ceramic Vase Glue works by forming a strong adhesive layer between clean, dry surfaces. For a clean ceramic break, the repair process is simple: dry-fit the pieces first, apply a thin layer of glue to the broken edge, press the pieces together firmly for 5–10 seconds, remove any fresh squeeze-out, and keep the vase still while the bond cures. The glue should not be used like filler. A thin line usually works better than a heavy bead because the ceramic edges can sit closer together. When the pieces meet tightly, the seam looks cleaner and the repair has better contact. The precision nozzle helps control the amount of adhesive, especially on small surfaces where too much glue can spread onto the glaze.
- Clean and dry the broken edge before applying glue.
- Test the fit before gluing so the seam closes properly.
- Apply a thin line only where the ceramic pieces touch.
- Press firmly for 5–10 seconds to create initial grip.
- Keep the vase stable while curing to prevent seam movement.
- Wait before adding water, soil, flowers, stones, or weight.
| Step | What to Do | What to Avoid |
|---|---|---|
| 1 | Dry-fit the broken pieces | Guessing the alignment after glue |
| 2 | Clean dust, oil, and residue | Gluing over soil or moisture |
| 3 | Apply a thin glue line | Using a thick bead |
| 4 | Press for 5–10 seconds | Sliding pieces while pressing |
| 5 | Wipe fresh excess glue | Smearing glue across glaze |
| 6 | Let the repair cure | Filling with water too soon |
Where Can GleamGlee Ceramic Vase Glue Help?
GleamGlee Ceramic Vase Glue can help with many common repairs around the home, not only flower vases. It is suitable for ceramic vases with cracked bodies, broken rims, loose bases, and chipped edges. It can also be used on porcelain figurines, ceramic planters, flower pots, decorative trays, ornaments, bathroom accessories, mosaic art, and craft pieces. Many ceramic items include other materials, such as a wooden base, metal accent, glass insert, plastic trim, or stone decoration. Since GleamGlee Ceramic Glue can bond ceramic with several household materials, it is useful for mixed repairs that ordinary ceramic-only products may not handle well. It is especially practical for people who prefer to save damaged items instead of replacing them.
- Living room: repair display vases, ceramic décor, picture frame accents, and ornaments.
- Kitchen: fix ceramic trays, mug handles, small non-food-contact decorative areas, and serving décor.
- Bathroom: repair soap dishes, toothbrush holders, and ceramic accessories.
- Garden: fix planters, flower pots, small ornaments, and decorative ceramic pieces.
- Craft area: bond ceramic shards for mosaics, school projects, and handmade décor.
- Storage and holiday décor: repair seasonal ceramic figures and porcelain ornaments.
| Area | Common Item | Typical Repair |
|---|---|---|
| Living room | Flower vase | Crack, rim chip, loose base |
| Bathroom | Ceramic soap dish | Broken corner or split part |
| Garden | Ceramic planter | Wall crack or chipped lip |
| Shelf display | Porcelain figurine | Broken small detail |
| Craft table | Mosaic ceramic pieces | Bonding shards to a base |
| Holiday storage | Ceramic ornament | Detached piece or chip |
Who Needs GleamGlee Ceramic Vase Glue?
GleamGlee Ceramic Vase Glue is useful for people who want a simple way to repair ceramic items at home without replacing them immediately. It fits homeowners, renters, plant lovers, craft users, collectors, DIY repair users, and anyone who keeps vases, porcelain décor, pottery, ornaments, or ceramic planters around the home. The product is especially helpful when the damaged item still has practical or personal value. A vase may match a room perfectly, a planter may belong to a set, or a porcelain ornament may carry family memory. In these situations, a clean glue repair can save money, reduce waste, and keep the item in use. It is also useful as a small household repair tool because one tube can handle more than one ceramic or mixed-material repair.
- Homeowners who need quick repairs for vases, planters, and ceramic décor.
- Renters who want to fix small household ceramic items instead of replacing them.
- Plant lovers repairing ceramic pots, planter lips, and decorative plant containers.
- Craft users making mosaics, ceramic decorations, and mixed-material projects.
- Collectors repairing figurines, ornaments, porcelain pieces, and display items.
- Families repairing sentimental ceramic items that are difficult to replace.
| User Need | Matching Repair | Product Benefit |
|---|---|---|
| Save a favorite vase | Crack or broken rim | Clear, controlled repair |
| Repair a planter | Wall crack or chipped lip | Waterproof resistance after curing |
| Fix décor quickly | Small porcelain or ceramic piece | Fast initial grip |
| Handle detailed work | Tiny chip or ornament part | Precision nozzle |
| Keep glue for later | Multiple small repairs | Resealable anti-clog cap |
| Repair mixed materials | Ceramic with wood, glass, or metal | Multi-surface bonding |

FAQs About Ceramic Vase Glue
Ceramic vase glue questions usually come from very specific repair worries. People want to know if the crack will still show, whether the vase can hold water again, how long the glue should dry, and whether the repair is safe for porcelain, planters, or decorative pieces. These are practical questions because a vase repair is often visible, delicate, and connected to daily home use.
The best answer depends on the damage. A small rim chip is usually easier to fix than a long crack near the base. A display vase has lower repair stress than a vase filled with water every week. A ceramic planter filled with wet soil places more pressure on the seam than a shelf ornament. Good repair advice should help users avoid waste, but it should also set clear expectations.
Ceramic vase glue works best when the broken pieces are clean, dry, and closely matched. It can repair many cracks, chips, rims, planters, and porcelain pieces, but it cannot always hide missing material or make an old break look brand new. The goal is to make the repair strong, clean, and suitable for the way the vase will actually be used.
| Question | Short Practical Answer | Best Extra Tip |
|---|---|---|
| Can it fix hairline cracks? | Yes, if the crack is clean and stable | Use a fine nozzle and very little glue |
| Can it repair a rim? | Yes, if the broken piece is saved | Match the curve before pressing |
| Can it hold water? | Sometimes, after full curing | A liner is safer for valuable vases |
| Can it fix planters? | Yes, with care | Use an inner nursery pot for wet soil |
| Can it repair porcelain? | Yes, if the glue dries clear | Avoid excess glue on glossy surfaces |
| Can it fix missing chips? | Not fully by glue alone | Use filler or touch-up if needed |
Can Ceramic Vase Glue Fix Hairline Cracks?
Ceramic vase glue can fix many hairline cracks when the crack reaches the ceramic body and the surface is clean, dry, and stable. A hairline crack usually needs only a tiny amount of glue. Applying too much can leave a raised shiny line on the surface, especially on glossy porcelain or glazed ceramic. The repair is easier when the crack opens slightly under gentle pressure because the glue can reach the inner edge. If the mark is only surface crazing in the glaze, glue may not change the appearance much. Cracks near the upper body are usually lower risk than cracks near the base, because the base area faces more pressure when the vase holds water.
- Clean the crack with a soft cloth, brush, or cotton swab before applying glue.
- Let the ceramic dry fully, especially if the vase recently held flowers or water.
- Apply a very thin glue line with a precision nozzle.
- Press or tape the crack closed if the vase body allows it.
- Test water slowly after full curing if the vase will hold fresh flowers.
| Crack Type | Repair Chance | Better Use After Repair |
|---|---|---|
| Upper hairline crack | Good | Display or dried flowers |
| Middle body crack | Medium | Light water test after curing |
| Lower body crack | Higher risk | Use an inner liner |
| Glaze crazing only | Limited | Mostly cosmetic, glue may not help much |
| Moving crack | Medium to high risk | Support carefully while curing |
Can Ceramic Vase Glue Repair a Vase Rim?
Ceramic vase glue can repair a vase rim when the broken rim piece is still available and fits back into place. Rim repairs are common because the top edge of a vase often hits a sink, shelf, table, or storage box. The rim is also one of the most visible areas, so the repair needs careful glue control. A thick glue line can be seen from above, and a misaligned chip can make the rim feel uneven. Before applying glue, place the rim piece back into position without adhesive and check whether the curve, height, and outer edge match. If the piece sits flush during the test, the repair has a better chance of looking clean.
- Save small rim fragments immediately after the vase breaks.
- Dry-fit the rim chip before adding glue.
- Use a very small amount of ceramic vase glue on the broken edge.
- Press the piece level with the surrounding rim for 5–10 seconds.
- Use painter’s tape only if the glaze or painted finish can handle it.
| Rim Damage | Glue Repair Result | Extra Care |
|---|---|---|
| Small saved chip | Usually good | Use minimal glue |
| Large saved rim piece | Medium to good | Support while curing |
| Missing rim chip | Limited | Filler may be needed |
| Crushed rim edge | Harder | Remove loose powder first |
| Painted rim | Medium risk | Avoid rubbing or strong tape |
Can Ceramic Vase Glue Hold Water?
Ceramic vase glue may help a repaired vase hold water when the adhesive is waterproof, the crack is fully bonded, and the repair has cured completely. Still, water use should be treated carefully. A repaired vase is not the same as a new fired ceramic piece. Standing water creates pressure, especially near the lower body and base. A tiny weak point in the seam can become a slow leak that damages wood tables, shelves, or fabric surfaces. A rim chip or upper crack is usually less risky than a crack near the bottom. For a sentimental, handmade, or expensive vase, a hidden glass or plastic liner is often the safest way to use fresh flowers.
- Wait for full curing before testing water.
- Start with a small amount of water instead of filling the vase completely.
- Place the vase on a dry towel during the first water test.
- Check for slow leaks after 10–30 minutes.
- Use a liner when the crack is near the base or the vase is meaningful.
| Repair Location | Water Risk | Better Choice |
|---|---|---|
| Rim only | Low | Normal careful use |
| Upper body crack | Medium | Test slowly |
| Middle crack | Medium | Use light water first |
| Lower body crack | High | Use inner liner |
| Base repair | High | Avoid direct water pressure |
| Old vase crack | High | Use liner or dried flowers |
Can Ceramic Vase Glue Fix a Ceramic Planter?
Ceramic vase glue can fix many ceramic planters, especially cracked walls, broken lips, loose decorative pieces, and clean side breaks. Planters need more care than display vases because wet soil is heavy and holds moisture against the repaired area. A planter crack may look small when empty, but once soil and water are added, the pressure can push against the seam. The repair should be fully cured before the planter is used again. If the crack is large or near the lower wall, an inner nursery pot is a safer option. The outer ceramic planter keeps its decorative look, while the inner pot holds soil and water.
- Remove all soil before repairing the planter.
- Clean both the inside and outside of the crack.
- Let the ceramic dry fully before applying glue.
- Use a thin glue line and close the crack tightly.
- Use an inner nursery pot for larger cracks or heavier plants.
| Planter Damage | Repair Difficulty | Best Use After Repair |
|---|---|---|
| Chipped lip | Easy to medium | Normal display use |
| Upper wall crack | Medium | Light plant use |
| Lower wall crack | High | Inner nursery pot |
| Base crack | High | Avoid direct wet soil pressure |
| Outdoor planter crack | High | Inspect after rain and sun exposure |
Can Ceramic Vase Glue Repair Porcelain?
Ceramic vase glue can repair porcelain vases, ornaments, figurines, and decorative pieces when the broken edges fit closely and the glue dries clear. Porcelain repairs need extra care because the surface is often smooth, glossy, and light-colored. Even a small amount of dried excess glue can show under bright light. White porcelain also makes misalignment easier to see because the crack casts a fine shadow line. Before gluing porcelain, dry-fit the pieces and check the seam from several angles. If the porcelain has gold trim, painted details, or decals, avoid strong tape and harsh cleaning. A clear precision glue is usually better for small porcelain repairs than a thick adhesive that leaves a raised seam.
- Use clear ceramic vase glue for visible porcelain repairs.
- Apply the smallest amount needed for the broken edge.
- Align white porcelain carefully because shadow lines show easily.
- Avoid strong tape on gold trim, decals, or painted details.
- Keep repaired porcelain for display if direct water use may risk the seam.
| Porcelain Item | Common Damage | Repair Tip |
|---|---|---|
| Porcelain vase | Crack or rim chip | Use thin glue and align carefully |
| Figurine | Broken arm, leg, or detail | Use tweezers for small parts |
| Ornament | Detached piece | Hold gently while curing |
| Gold-trimmed piece | Edge chip | Avoid rubbing and strong tape |
| White porcelain | Visible seam | Remove squeeze-out quickly |
Can Ceramic Vase Glue Fix Missing Chips?
Ceramic vase glue can reattach a missing chip only if the original chip is still available. If the piece is gone, glue alone cannot rebuild the lost ceramic shape. It can stabilize loose edges or help bond a filler, but it will not replace color, glaze, texture, or the original curve. This is important for rim chips, front-facing cracks, and decorative porcelain pieces where appearance matters. If the missing chip is small and hidden, the vase may still look acceptable after the loose area is stabilized. If the missing chip is large or on a visible edge, filler, paint touch-up, or decorative repair work may be needed after bonding.
- Save every small ceramic fragment after the vase breaks.
- Use tweezers for tiny chips to avoid glue marks on the surface.
- Do not use a thick glue blob as a replacement for missing ceramic.
- Use filler when the missing area changes the shape of the vase.
- Place the damaged side toward the back if the repair line cannot be hidden.
| Missing Chip Situation | Glue Alone Enough? | Better Repair Plan |
|---|---|---|
| Saved small chip | Yes | Reattach with thin glue |
| Saved large chip | Usually yes | Support while curing |
| Missing tiny chip | Sometimes acceptable | Smooth or touch up if needed |
| Missing rim section | No | Filler or decorative repair |
| Missing front-facing piece | Limited | Filler plus color touch-up |
| Crushed edge | Difficult | Remove loose powder first |
How Long Should Ceramic Vase Glue Dry?
Ceramic vase glue may grip quickly, but drying time and full curing time are not the same. A fast initial grip helps the piece stay in place after pressing for 5–10 seconds, but the bond still needs time to build strength. Moving the vase too soon can weaken the repair before it fully sets. Larger breaks, base repairs, planter cracks, and water-holding repairs should be given more time than tiny rim chips. Room conditions also matter. Cool, damp, or poorly ventilated spaces may slow the curing process. A thin glue line usually cures more cleanly than a thick bead. The safest habit is to wait longer before adding water, soil, flowers, stones, or weight.
- Treat the first few minutes as initial holding time, not full strength.
- Keep the repaired seam still while curing.
- Wait longer for base repairs, planter cracks, and larger body breaks.
- Do not test water until the repair has fully cured.
- Avoid moving, twisting, washing, or loading the repaired area too soon.
| Repair Type | Early Handling | Safer Use |
|---|---|---|
| Tiny rim chip | Gentle handling after initial set | Full use after curing |
| Porcelain detail | Keep still after pressing | Display after curing |
| Body crack | Support while curing | Test water later |
| Base repair | Keep flat and stable | Stand upright after stronger cure |
| Planter crack | No soil during curing | Add plant only after full cure |
| Water vase repair | No water during curing | Test gradually after cure |
Conclusion
Repairing a ceramic vase with glue is not only about saving money. It is also about keeping a piece that still has beauty, use, or personal meaning. The best results come from a careful process: clean the broken edges, test the fit before gluing, use a thin line of ceramic vase glue, press the pieces firmly, remove extra glue, and give the repair enough time to cure. Clean cracks, saved rim chips, loose bases, planter cracks, and porcelain decorations can often be repaired well when the broken parts fit closely. For water-holding vases or planters, a liner or inner nursery pot can help protect the repaired seam and make the repair last longer.
GleamGlee Ceramic Vase Glue is made for these everyday repair needs, offering a clear bond, strong adhesion, precision nozzles, waterproof resistance after curing, and multi-material use across ceramic, porcelain, glass, metal, wood, plastic, rubber, PVC, and concrete. It is a practical choice for vases, planters, ornaments, figurines, mosaic crafts, bathroom accessories, and small household repairs. For anyone looking for a clean, easy-to-use ceramic glue for home repair, GleamGlee provides a reliable option. For product orders, wholesale supply, or custom ceramic glue solutions, GleamGlee can support branded products, packaging customization, and adhesive formula development.





















