 Skip to content
A loose tile often starts as a small annoyance. One bathroom tile sounds hollow when tapped. One kitchen backsplash tile opens slightly at the corner. One patio tile moves after rain. At first, the problem looks too small to call a tiler, but too visible to ignore. The real risk is what happens behind the tile. Water can enter. Grease can collect. Dust can weaken the edge. A loose tile can also crack nearby grout and make the surrounding tiles less stable over time.
To bond tiles using construction adhesive, remove loose dust and old adhesive, clean and dry both surfaces, apply controlled adhesive beads, press the tile firmly into position, hold it with tape or weight, and let it cure before grouting, cleaning, walking, or water exposure. The method works best on stable bathroom, kitchen, wall, floor, and outdoor tile repairs.
A clean tile repair is not about squeezing on as much glue as possible. It is about using the right amount in the right place. A bathroom tile needs dry backing. A kitchen tile needs grease removed. An outdoor tile needs a firm, dust-free base. A floor tile needs enough curing time before foot traffic. This guide explains where construction adhesive works for tiles, where it does not, how much to apply, how long to wait, and why GleamGlee Construction Adhesive is useful for real home repair jobs and custom adhesive product projects.
What Is Construction Adhesive for Tiles?
Construction adhesive for tiles is a heavy-duty bonding material used to attach, reset, or repair tiles on stable surfaces such as concrete, drywall, plaster, cement board, brick, stone, stucco, and wood panels. It is different from light household glue because tile surfaces are harder, heavier, and less absorbent. A tile repair needs an adhesive that can grip firmly, fill small uneven gaps, and stay stable after curing.
It is mainly used for small and medium tile jobs rather than full professional tiling systems. Common uses include fixing one loose bathroom wall tile, bonding a kitchen backsplash tile, repairing a lifted patio tile, attaching decorative mosaic pieces, or securing stone tiles on a feature wall. The tile and the base must be clean, dry, and firm. If the wall is damp, the floor moves, or the base is crumbling, the surface problem should be fixed before adhesive is applied.
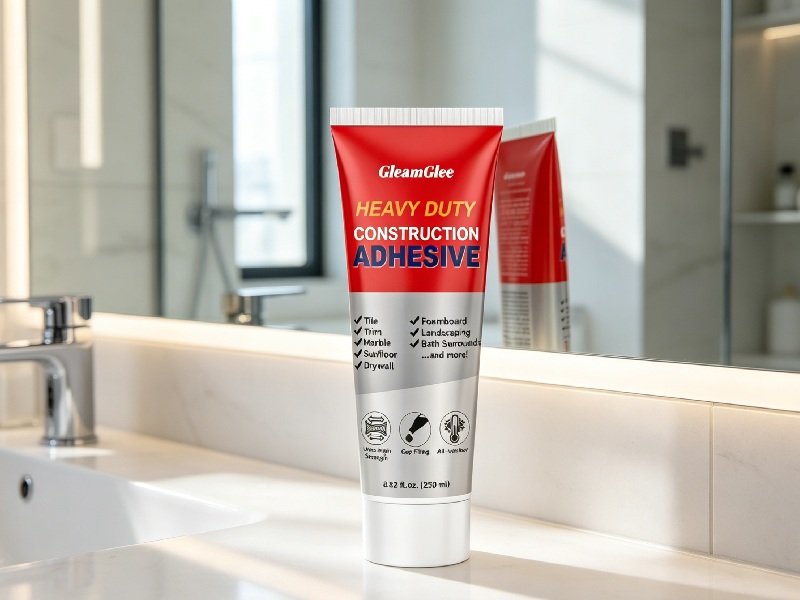
GleamGlee Construction Adhesive is suitable for tile, concrete, stone, wood, drywall, stucco, brick, and similar repair surfaces. Each 8.8 oz tube can provide up to 30 feet of coverage depending on bead thickness and surface texture. Its medium-consistency formula helps reduce dripping on vertical tiles, while the precision-tip cap helps place adhesive behind the tile without pushing too much product into visible grout lines.
| Tile Bonding Point | Practical Meaning | Repair Note |
|---|---|---|
| Main use | Attach or reset tiles on stable surfaces | Best for local repairs and small projects |
| Suitable surfaces | Tile, concrete, drywall, brick, stone, wood, stucco | Surface must be clean and dry |
| Coverage | Up to 30 ft per 8.8 oz tube | Actual coverage depends on bead size |
| Texture | Medium consistency | Helps on vertical and rough areas |
| Application | Precision-tip cap | Better control near tile edges |
| Cure habit | Around 24 hours before normal use in many small repairs | Longer may be needed in damp, cold, or outdoor areas |
What Is Construction Adhesive?
Construction adhesive is a strong repair adhesive made for building materials that need more grip and coverage than ordinary glue can provide. Tile bonding is a good example because tiles are usually hard, dense, and smooth on the surface. Ceramic and porcelain tiles may not absorb adhesive easily. Stone tiles may have rough backs with small high and low spots. Outdoor tiles may carry dust or cement powder. A construction adhesive needs enough body to stay in place, enough contact to hold the tile, and enough curing strength to resist movement after the repair is finished.
Key points to understand:
- Construction adhesive is made for tougher materials such as tile, concrete, stone, brick, drywall, stucco, and wood.
- It is useful when drilling, nailing, or replacing a full tiled area is unnecessary.
- It works best for stable local repairs, not for unsafe or moving surfaces.
- It needs clean surface contact, pressure, support, and curing time.
- It should not be applied over damp plaster, loose old adhesive, grease, or crumbling backing.
| Glue Type | Common Use | Tile Repair Limit |
|---|---|---|
| Craft glue | Paper, foam, lightweight decoration | Too weak for tile repair |
| Super glue | Small hard parts | Brittle and poor for large tile backs |
| Hot glue | Temporary craft fixing | Weak under heat and moisture |
| Wood glue | Wood-to-wood bonding | Not ideal for tile, concrete, or stone |
| Construction adhesive | Tile, stone, concrete, brick, drywall, wood | Needs clean surface and full curing |
Is Construction Adhesive Good for Tiles?
Construction adhesive is good for tiles when the job involves a stable repair area and the tile is still usable. It can help with bathroom wall tiles, kitchen backsplash tiles, vanity backsplash tiles, mosaic pieces, decorative tile panels, stone tiles, patio tiles, balcony tiles, and small floor tile repairs. The repair works best when the tile can sit flat in its original position and the base underneath is not loose, wet, soft, or moving. If the tile rocks, sits too high, or does not align with nearby tiles, old adhesive or debris may still need to be removed.
Best tile uses include:
- One loose bathroom wall tile that needs resetting.
- A lifted kitchen backsplash tile with a clean backing.
- A decorative mosaic piece that has fallen away.
- A patio or balcony tile on a firm, dry base.
- A stone tile on a clean feature wall or outdoor surface.
- A small floor tile repair where the subfloor does not flex.
Avoid using construction adhesive alone when:
- Many tiles are loose in the same area.
- The wall is damp, swollen, or crumbly.
- The floor moves when stepped on.
- The tile is part of a heavy overhead installation.
- The area has active water leakage.
- The tile is broken into several weak pieces.
What Makes Construction Adhesive Hold Tiles?
Construction adhesive holds tiles through four main things: surface contact, bead size, pressure, and curing time. Surface contact means the adhesive must touch the real tile and real base material, not dust, grease, soap film, mildew, loose paint, old flaky adhesive, or damp plaster. Bead size controls how much adhesive sits between the tile and base. Pressure spreads the adhesive and reduces hidden air gaps. Curing time allows the adhesive to build strength before the tile faces water, cleaning, walking, or temperature change.
Main factors that improve tile hold:
- Clean both sides before bonding. The back of the tile and the base surface both matter.
- Match bead thickness to the tile. Smooth tiles need controlled beads; rough stone tiles may need slightly thicker beads.
- Press evenly. The adhesive should flatten behind the tile, not stay in thick lumps.
- Keep grout gaps clear. Adhesive should not fill visible joints before finishing.
- Support the tile. Tape, spacers, weight, or bracing can stop movement while curing.
- Wait before use. Around 24 hours is a practical habit for many small repairs; cold, damp, outdoor, or thick repairs may need longer.
| Bonding Factor | Good Practice | Common Problem |
|---|---|---|
| Surface contact | Clean, dry, solid tile and base | Adhesive bonds to dust or grease |
| Bead amount | Enough to flatten under pressure | Too little leaves hollow spots |
| Bead control | Keep adhesive away from grout edges | Too much causes squeeze-out |
| Pressure | Press tile flat and level | Air gaps weaken the bond |
| Support | Use tape, spacers, or weight | Tile slides before curing |
| Cure time | Wait before water or foot traffic | Repair fails from early movement |
What Tile Repairs Need Construction Adhesive?
Construction adhesive is most useful for tile repairs that are small, visible, and local. A full wall or full floor installation may need a complete tiling system, but one loose tile, one lifted edge, or one decorative repair can often be handled with construction adhesive. Common examples include a bathroom wall tile that has separated, a kitchen backsplash tile with a loose corner, a vanity backsplash tile, a stair riser tile accent, a mosaic art piece, a patio tile edge, or a decorative stone tile on a feature wall.
Good repair matches include:
- Bathroom wall tiles away from active leaks.
- Kitchen backsplash tiles after grease removal.
- Mosaic tiles where precise adhesive placement matters.
- Outdoor patio tiles on dry concrete or stone.
- Decorative stone or ceramic wall accents.
- Tabletop tile projects, mirror surrounds, and plant pot decorations.
- Small floor tile repairs on firm, non-moving bases.
Repair areas needing extra caution:
| Repair Area | Main Risk | Better Handling |
|---|---|---|
| Bathroom tile | Hidden moisture | Dry fully before bonding |
| Kitchen backsplash | Grease film | Degrease before adhesive |
| Floor tile | Foot traffic | Weight and avoid walking early |
| Outdoor tile | Rain, dust, moss | Bond during dry weather |
| Large tile | Weight and sliding | Use more support while curing |
| Mosaic tile | Adhesive squeeze-through | Use small controlled beads |
| Stone tile | Rough back | Use enough bead thickness |
Which Tiles Need Construction Adhesive?
Construction adhesive is suitable for tiles that need local bonding, resetting, edge repair, or small-area installation on a stable surface. It is commonly used for wall tiles, kitchen backsplash tiles, bathroom tiles, mosaic tiles, decorative tiles, patio tiles, balcony tiles, stone tiles, and selected floor tile repairs. The tile should be intact, the base should be firm, and both surfaces should be clean and dry before bonding.
Not every loose tile needs the same repair method. A wall tile that has separated from dry plasterboard is different from a floor tile that moves because the subfloor flexes. A backsplash tile near a stove needs grease removal. A bathroom tile needs moisture control. An outdoor tile needs a dry base and weather protection during curing. Construction adhesive works best when the problem is bonding, not structural movement, water damage, or a broken substrate.
GleamGlee Construction Adhesive can bond tile, concrete, stone, wood, drywall, stucco, brick, and similar surfaces, making it useful for many tile-to-base combinations. Its 8.8 oz tube can provide up to 30 feet of coverage depending on bead thickness, while the medium-consistency formula helps with vertical tiles and rough backs. The precision-tip cap also helps place adhesive behind tiles without flooding grout lines.
| Tile Area | Good Use | Main Check Before Bonding |
|---|---|---|
| Wall tiles | Reset loose ceramic, porcelain, or mosaic tiles | Wall must be dry and firm |
| Floor tiles | Small stable tile repairs | Base must not flex or move |
| Kitchen tiles | Backsplashes, accents, tile edges | Remove grease and old residue |
| Bathroom tiles | Wall tiles, vanity backsplashes, tub surrounds | Check for dampness first |
| Outdoor tiles | Patio, balcony, terrace, garden path tiles | Surface must be dry and dust-free |
| Stone tiles | Feature walls, outdoor edges, decorative cladding | Use enough bead thickness for rough backs |
| Mosaic tiles | Small decorative repairs and art pieces | Keep gaps clear and avoid squeeze-through |
Which Wall Tiles Use Construction Adhesive?
Wall tiles are often a strong match for construction adhesive because they usually need firm bonding rather than heavy load support. Common examples include bathroom wall tiles, kitchen splashback tiles, vanity backsplash tiles, mosaic wall pieces, decorative feature wall tiles, stair riser tiles, and ceramic or porcelain accent tiles. The wall surface must be strong enough to hold the tile. If the wall is dry, clean, and stable, construction adhesive can create a neat repair without drilling, nails, or a full tile replacement job. Wall tile repairs also need careful alignment because even a small slide during curing can make grout lines look uneven.
Useful wall tile situations:
- One loose ceramic or porcelain wall tile needs resetting.
- A mosaic tile section has lifted from a dry wall.
- A vanity backsplash tile has opened at one edge.
- A decorative tile needs clean bonding without visible fasteners.
- A feature wall tile needs support while curing.
| Wall Tile Type | Suitable With Construction Adhesive? | Practical Note |
|---|---|---|
| Bathroom wall tile | Yes | Dry the wall fully before bonding |
| Kitchen splashback tile | Yes | Degrease before applying adhesive |
| Mosaic wall tile | Yes | Use small controlled beads |
| Large wall tile | Sometimes | Extra tape or bracing may be needed |
| Tile on weak plaster | Not directly | Repair the wall first |
| Tile near active leak | Not directly | Stop moisture before bonding |
Which Floor Tiles Use Construction Adhesive?
Floor tiles need more caution than wall tiles because they face foot traffic, furniture pressure, cleaning, vibration, and sometimes moisture. Construction adhesive can work for a small floor tile repair when the tile is intact and the base underneath is firm. A single loose tile in a hallway, bathroom, kitchen, basement, or utility room may be suitable if the subfloor or concrete base does not move. If several floor tiles sound hollow, shift underfoot, or crack in the same area, the problem may come from a weak base, movement, or poor original installation. In that case, adhesive alone may not give a lasting repair.
Good floor tile repair conditions:
- Only one or two tiles are loose.
- The base does not flex when stepped on.
- The tile can sit level with nearby tiles.
- Old adhesive can be removed enough for a flat fit.
- The repaired tile can be kept unused during curing.
| Floor Tile Condition | Adhesive Suitability | Repair Detail |
|---|---|---|
| Single loose tile | Good | Clean base and weight during curing |
| Slight lifted edge | Good if base is firm | Apply controlled bead under the lifted area |
| Several loose tiles | Risky | Check wider floor condition first |
| Flexing subfloor | Poor | Movement may break the bond |
| Raised tile after test fit | Poor until corrected | Remove more old adhesive |
| Outdoor floor tile | Possible | Keep dry and avoid foot traffic while curing |
Which Kitchen Tiles Use Construction Adhesive?
Kitchen tiles often need construction adhesive for backsplashes, sink-side tiles, stove-side wall tiles, decorative tile strips, island base tiles, countertop tile edges, and small replacement pieces. Kitchen tile repairs are usually visible, so clean bead placement matters. Adhesive should sit behind the tile, not squeeze into the front edge or grout line. The biggest issue in kitchens is grease. Cooking oil can leave a thin film on walls, tile backs, and splashback surfaces even when they look clean. If adhesive is applied over grease, the bond may be weak from the start. Degreasing and drying are essential before bonding.
Useful kitchen tile situations:
- A backsplash tile has lifted at one corner.
- A tile behind the sink needs resetting.
- A decorative wall tile needs clean attachment.
- A countertop edge tile needs local repair.
- A kitchen island tile trim needs firm bonding.
| Kitchen Tile Area | Main Risk | Better Handling |
|---|---|---|
| Backsplash tile | Grease film | Degrease and dry before bonding |
| Sink-side tile | Water residue | Remove moisture and old sealant |
| Stove-side tile | Heat and oil | Avoid direct flame zones |
| Island base tile | Kicks and impact | Tape and allow full curing |
| Countertop tile edge | Cleaning and pressure | Keep adhesive away from food-contact areas |
| Decorative wall tile | Visible finish | Use thin controlled beads |
Which Outdoor Tiles Use Construction Adhesive?
Outdoor tiles can use construction adhesive when the product is suitable for exterior conditions and the repair is applied to a clean, dry, stable surface. Patio tiles, balcony tiles, terrace tiles, garden path tiles, poolside surrounds, outdoor kitchen tiles, stone tiles, and exterior decorative tiles can often be repaired with construction adhesive after proper preparation. Outdoor surfaces are harder to bond because they collect dust, sand, moss, soil, cement powder, and moisture. Rain, frost, heat, and foot traffic also place extra stress on the repair. GleamGlee Construction Adhesive is designed for indoor and outdoor use and can resist rain, heat, and freezing cold after full curing.
Outdoor tile repair works better when:
- The surface is dry before adhesive is applied.
- Loose dust, soil, moss, and cement powder are removed.
- The tile sits flat on a firm base.
- The repair is protected from rain during early curing.
- Foot traffic is blocked until the adhesive has set.
| Outdoor Tile Area | Suitable Use | Extra Care |
|---|---|---|
| Patio tile | Yes | Weight tile and avoid walking early |
| Balcony tile | Yes | Remove dust and repair in dry weather |
| Terrace tile | Yes | Keep rain off during curing |
| Poolside tile | Yes with care | Keep dry before and during early cure |
| Garden path tile | Yes if base is firm | Remove soil and moss first |
| Outdoor kitchen tile | Yes | Remove grease and weather dirt |
| Tile on crumbling concrete | Not directly | Repair base before bonding |

How to Bond Tiles with Construction Adhesive?
Bonding tiles with construction adhesive works best when the job is handled in four clear steps: clean the tile and base, apply the adhesive in controlled beads, press the tile firmly into position, and let the repair cure before water, grout, cleaning, or foot traffic. The surface must be dry, stable, and free from dust, grease, soap film, old loose adhesive, and crumbling material.
Tile repair is not about using the biggest amount of adhesive. Too much adhesive can raise the tile, block grout lines, slow drying, and create squeeze-out around the edges. Too little adhesive can leave hollow spots behind the tile. A good tile repair uses enough adhesive to create solid contact after pressing, while still allowing the tile to sit flat and level with the surrounding surface.
GleamGlee Construction Adhesive is suitable for tile, concrete, stone, wood, drywall, stucco, brick, and similar surfaces. Its 8.8 oz tube can provide up to 30 feet of coverage depending on bead size and surface texture. The medium-consistency formula helps reduce dripping on vertical tiles, the precision-tip cap helps control bead placement, and the included fixing tape helps keep tiles steady while curing.
| Step | Main Action | Key Detail | Common Problem to Avoid |
|---|---|---|---|
| Step 1 | Clean tiles and base | Remove dust, grease, old adhesive, and moisture | Bonding over weak residue |
| Step 2 | Apply adhesive | Use controlled beads, not thick piles | Raised tile or squeeze-out |
| Step 3 | Press tiles firmly | Keep tile flat and grout gaps even | Hidden air gaps or sliding |
| Step 4 | Let tiles cure | Wait before water, grout, cleaning, or walking | Repair moving too early |
Step 1: Clean Tiles Before Construction Adhesive
Cleaning is the first and most important step before bonding tiles with construction adhesive. The adhesive must touch the real tile and the real base surface, not dust, grease, soap film, loose grout, old flaky adhesive, mildew, damp plaster, cement powder, or outdoor dirt. For a loose tile repair, both sides matter. The back of the tile should be scraped and brushed if old adhesive is powdery or uneven. The wall, floor, concrete, or backing surface should also be cleaned until it feels firm and dry. If the tile cannot sit flat before adhesive is applied, the repair may dry unevenly or sit higher than nearby tiles.
Key cleaning points:
- Bathroom tiles need soap film, loose grout, moisture, and mildew removed.
- Kitchen tiles need grease and cooking residue cleaned before bonding.
- Floor tiles need loose grit, old adhesive lumps, and dust removed.
- Outdoor tiles need sand, soil, moss, cement powder, and moisture cleared.
- Stone tiles need extra brushing because rough backs often hold fine powder.
| Tile Area | What to Remove First | Better Preparation |
|---|---|---|
| Bathroom wall tile | Soap film, moisture, loose grout | Scrape, wipe, dry fully |
| Kitchen backsplash | Grease, oil film, old sealant | Degrease and dry |
| Floor tile | Dust, grit, uneven old adhesive | Scrape and test tile fit |
| Outdoor tile | Sand, moss, cement powder, moisture | Brush hard and repair in dry weather |
| Stone tile | Powder from rough back | Brush both tile and base |
Step 2: Apply Construction Adhesive to Tiles
Apply construction adhesive in controlled beads instead of spreading a thick layer across the whole tile. The bead pattern should match the tile size, back texture, and repair location. For a small wall tile, apply a bead slightly inward from the edge and add one or two center lines. For a kitchen backsplash tile, keep adhesive away from visible edges and grout gaps. For a floor tile, use even bead lines so the tile sits level after pressing. For rough stone or outdoor tiles, slightly thicker beads may be needed to reach uneven low spots, but the adhesive should still remain controlled. The goal is firm contact, not heavy overflow.
Useful application tips:
- Keep adhesive slightly away from tile edges to reduce squeeze-out.
- Use more lines for larger tiles, not one thick lump in the center.
- Apply slightly thicker beads on rough stone or outdoor tile backs.
- Avoid filling grout gaps with adhesive if regrouting is needed later.
- Wipe fresh excess before it cures.
| Tile Type | Suggested Bead Pattern | Amount Guidance |
|---|---|---|
| Small wall tile | Edge bead + 1–2 center lines | Keep bead inward from edge |
| Kitchen backsplash | Thin parallel lines | Avoid grout gaps |
| Floor tile | Even lines across contact zones | Keep tile level |
| Mosaic tile | Small dots or fine lines | Avoid squeeze-through |
| Stone tile | Medium-thick beads | Fill texture gaps |
| Outdoor tile | Beads on stable contact areas | Use only on dry base |
Step 3: Press Tiles Firmly with Construction Adhesive
After applying construction adhesive, place the tile carefully and press it firmly into position. Pressure spreads the adhesive across the tile back and helps remove hidden air gaps. A tile that is only lightly placed may look correct from the front but may not have enough contact behind it. For wall tiles, press until the tile sits flush with nearby tiles and the grout gaps stay even. For floor tiles, press downward evenly and check that the repaired tile is not raised. For backsplash tiles, press from the center outward so adhesive spreads without flooding the edges.
Important pressing habits:
- Press the full tile surface, not only the center.
- Check tile height against surrounding tiles before curing.
- Keep grout gaps straight and open.
- Do not repeatedly pull the tile away to check the bond.
- Use tape, spacers, braces, or weight to stop movement.
| Repair Area | How to Press | How to Hold |
|---|---|---|
| Wall tile | Press flat and align gaps | Fixing tape or spacers |
| Kitchen backsplash | Press center outward | Tape across edges |
| Floor tile | Press downward evenly | Flat weight |
| Outdoor tile | Press into bead lines | Weight or brace |
| Mosaic tile | Press lightly and evenly | Tape sheet or support |
| Stone tile | Use steady pressure | Brace vertical pieces |
Step 4: Let Tiles Cure After Construction Adhesive
Curing time allows construction adhesive to develop strength behind the tile. A tile may feel stable soon after pressing, but the adhesive inside still needs time before it can handle water, grout, cleaning, walking, or temperature change. For many small tile repairs, waiting around 24 hours before normal use is a practical habit. Bathroom, outdoor, floor, cold, damp, thick-bead, or stone tile repairs may need longer. The tile should stay still during this period. If it slides, lifts, or is stepped on too early, the adhesive can cure with weak contact or hidden gaps.
Curing rules that help:
- Keep wall tiles taped until they no longer shift.
- Do not expose bathroom tiles to water too soon.
- Do not walk on floor tiles during early curing.
- Do not regrout until the tile is firmly bonded.
- Protect outdoor tiles from rain, pets, tools, and foot traffic.
| Tile Repair | Practical Waiting Habit | Avoid During Curing |
|---|---|---|
| Bathroom wall tile | Around 24 hours or longer if damp | Water, steam, regrouting too soon |
| Kitchen backsplash | Around 24 hours | Scrubbing, grease, pressure |
| Floor tile | At least 24 hours | Walking, furniture, cleaning |
| Outdoor tile | 24 hours or longer in cold weather | Rain, tools, foot traffic |
| Stone tile | Longer if heavy or rough | Removing support early |
| Mosaic repair | Around 24 hours | Touching small pieces too soon |
Do Construction Adhesive Tile Repairs Last?
Construction adhesive tile repairs can last when the tile is bonded to a clean, dry, and stable base. The repair life depends on surface strength, adhesive coverage, bead thickness, pressure, curing time, moisture exposure, and daily use after bonding. A loose tile on a firm wall can stay bonded well. A tile attached to damp plaster, dusty concrete, greasy backsplash, or a moving floor may loosen again.
A lasting tile repair starts with checking why the tile failed. If old adhesive dried out, a new bond may work well. If water entered behind a bathroom tile, the wall must dry first. If grease built up behind a kitchen backsplash tile, the surface must be degreased. If an outdoor tile lifted because the concrete base is powdery, the loose layer must be removed. Adhesive should bond tile to a solid base, not to dirt, moisture, or weak material.
GleamGlee Construction Adhesive is designed for tile, concrete, stone, wood, drywall, stucco, brick, and similar surfaces. After full curing, it is built for indoor and outdoor use and can resist rain, heat, and freezing cold. For many small tile repairs, around 24 hours before normal use is a practical minimum. Damp rooms, outdoor areas, thick adhesive beads, heavy tiles, or cold conditions may need longer curing time.
| Repair Area | Main Stress | What Helps It Last | What Causes Failure |
|---|---|---|---|
| Bathroom tile | Water, steam, soap | Dry base and cure before water exposure | Bonding over damp plaster |
| Kitchen tile | Grease, heat, wiping | Degrease and keep edges clean | Adhesive over oil film |
| Outdoor tile | Rain, frost, dust, foot traffic | Repair in dry weather and protect while curing | Wet or powdery base |
| Floor tile | Weight, walking, vibration | Keep tile level and avoid early foot traffic | Moving subfloor |
| Wall tile | Gravity, alignment | Use tape or spacers during curing | Tile sliding before set |
| Stone tile | Weight, rough back | Use enough bead thickness and support | Too little contact |
Do Bathroom Tiles Stay Bonded?
Bathroom tiles can stay bonded with construction adhesive when the wall or floor behind the tile is dry, firm, and clean before application. Moisture is the biggest risk in bathroom tile repairs. A tile may loosen because grout cracked, water reached the backing, or old adhesive weakened from repeated humidity. If construction adhesive is applied over damp plaster, wet grout dust, mildew, or soap film, the repair may look firm at first but loosen again later. The surface should be scraped, wiped, and left dry before bonding. After the tile is pressed in place, water exposure should be avoided until the adhesive has cured properly.
Important bathroom repair points:
- Remove soap film, loose grout, mildew, and old flaky adhesive.
- Let the wall or floor dry fully before applying construction adhesive.
- Use fixing tape or spacers to hold wall tiles while curing.
- Regrout or seal only after the tile is firmly bonded.
| Bathroom Tile Area | Suitable Repair? | Extra Care |
|---|---|---|
| Vanity backsplash | Yes | Remove water marks and old sealant |
| Bathroom wall tile | Yes | Dry the wall fully first |
| Tub surround tile | Yes, with care | Avoid water during curing |
| Shower-adjacent tile | Yes, with longer cure | Regrout after adhesive sets |
| Tile over active leak | No | Fix the leak first |
| Soft or swollen wall | No | Repair the backing first |
Do Kitchen Tiles Stay Bonded?
Kitchen tiles can stay bonded when grease is removed and the repaired tile is not cleaned, heated, or stressed too soon. Backsplash tiles, sink-side tiles, island base tiles, decorative wall tiles, and countertop edge tiles often loosen from old adhesive failure, repeated wiping, heat nearby, or impact. The surface may look clean, but cooking oil can leave a thin film on tile backs, walls, and splashback areas. That film can block construction adhesive from gripping properly. Before bonding, the tile back and wall should be degreased, wiped clean, and dried. Adhesive should be placed behind the tile in controlled beads, away from visible grout gaps.
Important kitchen repair points:
- Degrease backsplash surfaces before applying adhesive.
- Keep adhesive away from grout lines and front tile edges.
- Avoid direct flame areas and food-contact surfaces.
- Wait before scrubbing or wiping the repaired tile.
| Kitchen Tile Area | Main Risk | Better Handling |
|---|---|---|
| Backsplash tile | Grease film | Degrease and dry before bonding |
| Sink-side tile | Water residue | Remove moisture and old sealant |
| Stove-side wall tile | Heat and oil | Avoid direct flame zones |
| Island base tile | Kicks and contact | Tape while curing |
| Countertop tile edge | Wiping and pressure | Cure before regular use |
| Decorative tile strip | Visible finish | Use thin controlled beads |
Do Outdoor Tiles Stay Bonded?
Outdoor tiles can stay bonded with construction adhesive when the surface is dry, solid, and free from dust, moss, sand, soil, or loose cement powder. Outdoor repairs face more stress than indoor repairs. Rain, frost, heat, sunlight, temperature movement, garden dirt, and foot traffic can all weaken a poorly prepared bond. A patio tile or balcony tile may look ready for repair, but the base may still be damp underneath or covered with fine powder. Construction adhesive should be applied only when the tile and base are dry. The repair should also be protected from rain and walking during the early curing period.
Important outdoor repair points:
- Repair during dry weather, not just before rain.
- Brush concrete, stone, and tile backs until loose powder is removed.
- Use weight or bracing to keep tiles still while curing.
- Allow longer cure time in cold, damp, or shaded areas.
| Outdoor Tile Area | Suitable Repair? | Repair Note |
|---|---|---|
| Patio tile | Yes | Weight tile and block foot traffic |
| Balcony tile | Yes | Remove dust and repair in dry weather |
| Garden path tile | Yes, if base is firm | Remove soil and moss first |
| Poolside tile | Yes, with care | Keep dry during early curing |
| Outdoor kitchen tile | Yes | Remove grease and weather dirt |
| Tile on crumbling concrete | No | Repair base before bonding |
Do Floor Tiles Stay Bonded?
Floor tiles can stay bonded when the base is firm, the tile sits level, and the repair is left undisturbed during curing. Floor tile repair is more demanding than wall tile repair because the tile must handle walking, furniture weight, cleaning tools, vibration, and impact. If a floor tile loosened because the subfloor flexes, one adhesive repair may not solve the issue. If several tiles sound hollow or move together, the problem may cover a wider area. A single loose tile on a solid base is a better match for construction adhesive. The tile should be cleaned, test-fitted, bonded with even bead lines, pressed flat, weighted if needed, and left unused until cured.
Important floor repair points:
- Check whether the floor moves before bonding the tile.
- Remove old adhesive lumps so the tile sits level.
- Use even bead lines instead of one thick pile.
- Avoid walking on the repair for at least 24 hours in many small jobs.
| Floor Tile Condition | Repair Outlook | What to Do |
|---|---|---|
| Single loose tile | Good | Clean, bond, weight, cure |
| Slight lifted edge | Good if base is firm | Apply controlled adhesive under edge |
| Several loose tiles | Risky | Check wider floor problem |
| Moving subfloor | Poor | Stabilize base first |
| Raised tile after test fit | Poor until corrected | Remove more old adhesive |
| Outdoor floor tile | Possible | Keep dry and block traffic |
What Construction Adhesive Tile Tips Help?
The best construction adhesive tile tips are simple but important: clean both surfaces, test the tile fit, apply the right bead amount, press the tile evenly, keep grout gaps open, support the tile during curing, and wait before water, grout, cleaning, or foot traffic. Most tile repair failures come from dust, grease, damp backing, too much adhesive, too little pressure, or moving the tile before the adhesive has cured.
Tile bonding needs more care than many small repair jobs because tiles are hard, smooth, visible, and often used in wet or high-contact areas. A bathroom tile may face steam and water. A kitchen backsplash tile may face grease and repeated wiping. A floor tile may face foot pressure every day. An outdoor tile may face rain, frost, heat, and dust. The repair should match the tile location instead of using the same method everywhere.
GleamGlee Construction Adhesive helps with controlled tile repair because it has a medium-consistency formula, a precision-tip cap, fixing tape, and up to 30 feet of coverage per 8.8 oz tube depending on bead thickness. These details are useful when the tile needs neat placement, stable hold, and clean edges. The strongest repair usually comes from good preparation, not from applying the largest amount of adhesive.
| Tile Tip | What to Do | Why It Matters |
|---|---|---|
| Clean both surfaces | Remove dust, grease, soap film, old adhesive, and moisture | Adhesive grips the real surface |
| Test the tile fit | Place tile without adhesive first | Prevents raised or uneven repairs |
| Use controlled beads | Apply lines or small dots, not thick piles | Reduces squeeze-out and hollow spots |
| Press evenly | Press across the whole tile | Spreads adhesive and removes air gaps |
| Support while curing | Use tape, spacers, weight, or brace | Stops slipping or lifting |
| Wait before use | Allow around 24 hours or longer when needed | Builds a stronger bond |
What Adhesive Amount Works?
The right adhesive amount depends on tile size, tile weight, surface texture, and repair location. A small ceramic wall tile needs less adhesive than a rough stone tile or outdoor patio tile. A backsplash tile needs a clean bead that stays away from grout lines. A floor tile needs enough adhesive to support the tile evenly without raising one edge. A mosaic tile needs very controlled placement because excess adhesive can push through small gaps and become visible on the front.
Key amount tips:
- Use thin controlled lines for smooth ceramic or porcelain wall tiles.
- Use slightly thicker beads for rough stone or outdoor tile backs.
- Keep adhesive slightly away from visible edges and grout gaps.
- Use more bead lines for larger tiles instead of one thick lump.
- Press the tile to check that the bead flattens without flooding the sides.
| Tile Type | Better Bead Style | Amount Warning |
|---|---|---|
| Small wall tile | Edge bead + center lines | Do not overfill the back |
| Backsplash tile | Thin parallel lines | Avoid grout gaps |
| Floor tile | Even lines across contact zones | Do not raise tile height |
| Mosaic tile | Small dots or fine lines | Avoid squeeze-through |
| Stone tile | Medium-thick beads | Fill texture, not the whole face |
| Outdoor tile | Strong beads on dry contact areas | Avoid wet or dusty bases |
What Tile Mistakes Matter?
The most common tile repair mistakes happen before the tile is even pressed into place. Dust, grease, soap film, old powdery adhesive, damp plaster, loose grout, moss, and cement powder can all weaken the bond. If construction adhesive is applied over these layers, the tile may look fixed at first but loosen later. The adhesive may harden properly, but it has bonded to weak residue instead of the tile or base.
Mistakes to avoid:
- Bonding over damp walls, wet concrete, or hidden moisture.
- Applying adhesive over kitchen grease or soap film.
- Leaving thick old adhesive that stops the tile sitting flat.
- Using too much adhesive and blocking grout lines.
- Removing tape, spacers, or weight too early.
- Walking on floor tiles before the adhesive has cured.
| Mistake | What Happens | Better Method |
|---|---|---|
| Dust left behind | Weak contact | Brush and wipe both surfaces |
| Grease not removed | Adhesive cannot grip well | Degrease kitchen tiles |
| Too much adhesive | Raised tile and squeeze-out | Use controlled beads |
| Too little adhesive | Hollow spots behind tile | Add enough lines for contact |
| No support | Tile slides or lifts | Use tape, spacers, or weight |
| Early use | Bond breaks before curing | Wait before water or foot traffic |
What Dry Time Helps?
Dry time helps construction adhesive build strength behind the tile. A tile may feel secure after pressing, but the adhesive layer inside still needs time before it can handle water, grout, cleaning, walking, or temperature change. For many small tile repairs, around 24 hours before normal use is a practical habit. Bathroom, floor, outdoor, stone, cold, damp, or thick-bead repairs may need longer.
Useful dry time habits:
- Keep wall tiles taped until they no longer shift.
- Do not expose bathroom tiles to water too soon.
- Do not walk on floor tiles during early curing.
- Do not regrout while the tile still moves.
- Allow more time in cold, damp, shaded, or poorly ventilated areas.
| Tile Repair | Practical Waiting Habit | Avoid During Curing |
|---|---|---|
| Bathroom wall tile | Around 24 hours or longer if damp | Water, steam, early regrouting |
| Kitchen backsplash | Around 24 hours | Scrubbing, grease, pressure |
| Floor tile | At least 24 hours | Walking, furniture, cleaning |
| Outdoor tile | 24 hours or longer in cold weather | Rain, tools, foot traffic |
| Stone tile | Longer if heavy or rough | Removing support too early |
| Mosaic repair | Around 24 hours | Touching small pieces too soon |
What Finish Looks Clean?
A clean tile repair depends on where the adhesive is placed before the tile is pressed. Construction adhesive should stay behind the tile, slightly away from the visible front edge. If the bead is too close to the edge, it can squeeze into grout lines or smear onto the tile face. This matters most on kitchen backsplashes, bathroom wall tiles, mosaic repairs, stone tiles, and decorative tile projects where the repaired area is easy to see.
Clean finish tips:
- Keep adhesive slightly inward from tile edges.
- Wipe fresh squeeze-out before it cures.
- Keep grout gaps open for later finishing.
- Check tile alignment before leaving it to dry.
- Avoid smearing adhesive on porous stone or textured tile faces.
| Visible Tile Area | Clean Finish Tip | What to Avoid |
|---|---|---|
| Bathroom wall tile | Keep grout lines clear | Adhesive filling joints |
| Kitchen backsplash | Wipe squeeze-out early | Smears near tile edges |
| Mosaic tile | Use small dots or fine lines | Adhesive pushing through gaps |
| Stone tile | Keep adhesive off the front | Residue in pores |
| Floor tile | Keep tile level | Raised edge or uneven joint |
| Decorative tile | Check alignment before curing | Crooked final position |
A strong tile repair should also look natural after curing. The tile should sit flat, line up with the surrounding tiles, keep the grout gaps open, and avoid visible adhesive marks. GleamGlee Construction Adhesive’s precision-tip cap and medium-consistency formula make this easier by helping place the adhesive in controlled beads. With clean surface preparation, proper bead amount, firm pressure, steady support, and enough curing time, tile repairs can look neat and hold reliably.

Why Choose GleamGlee Construction Adhesive?
GleamGlee Construction Adhesive is made for tile repair jobs that need strength, clean application, and steady curing. It bonds tile, concrete, stone, wood, drywall, stucco, brick, and other common home repair surfaces. This makes it useful for bathroom wall tiles, kitchen backsplashes, floor tile repairs, outdoor patio tiles, balcony tiles, garden path tiles, mosaic pieces, and decorative stone tile projects.
The 8.8 oz tube can provide up to 30 feet of coverage depending on bead thickness and surface texture. For small tile repairs, that means one tube can often handle several loose tiles or a mix of bathroom, kitchen, and outdoor repair points. The medium-consistency formula helps the adhesive stay where it is placed, especially on vertical tiles and rough tile backs. It is not too runny, so it is easier to control around edges and grout gaps.
GleamGlee Construction Adhesive is also designed for practical use at home. The precision-tip cap helps apply clean bead lines behind tiles, while the included fixing tape helps hold wall tiles, backsplash tiles, and decorative pieces during curing. The formula is safe, non-toxic, and low-odor, making it more comfortable for indoor use. After full curing, it is built for indoor and outdoor durability, including rain, heat, and freezing cold.
| GleamGlee Feature | Tile Repair Benefit | Where It Helps |
|---|---|---|
| 8.8 oz tube | Up to 30 ft coverage depending on bead size | Several small tile repairs |
| Multi-surface bond | Works on tile, concrete, stone, wood, drywall, stucco, brick | Tile-to-wall, tile-to-concrete, tile-to-stone repairs |
| Medium consistency | Helps reduce dripping and sliding | Wall tiles, backsplashes, vertical repairs |
| Precision-tip cap | Places adhesive neatly behind tiles | Grout edges, mosaic pieces, visible repairs |
| Fixing tape included | Holds tiles steady during curing | Wall tiles, backsplash tiles, decorative panels |
| Low odor | More comfortable indoors | Bathroom, kitchen, basement, hallway |
| Weather resistance | Handles rain, heat, and freezing cold after curing | Patio, balcony, garden, outdoor kitchen |
Why Is GleamGlee Strong for Tiles?
GleamGlee Construction Adhesive is strong for tiles because it is made to bond both tile surfaces and the materials behind them. A tile repair rarely involves tile alone. A bathroom wall tile may need to bond to plasterboard, cement board, drywall, or old prepared backing. A kitchen backsplash tile may bond to painted wallboard or a cleaned tile base. A patio tile may bond to concrete or stone. GleamGlee’s formula is suitable for tile, concrete, stone, wood, drywall, stucco, and brick, which helps with these mixed-surface repairs. Strength still depends on clean preparation, even bead coverage, firm pressure, and enough curing time. When the tile and base are dry, solid, and dust-free, the adhesive can form a dependable bond for many common tile repair jobs.
Key strength points:
- Bonds tile to common backing surfaces such as concrete, stone, drywall, stucco, brick, and wood.
- Works for bathroom, kitchen, wall, floor, and outdoor tile repairs when the base is stable.
- Medium consistency helps the adhesive stay in place on vertical surfaces.
- After full curing, it is designed to resist rain, heat, and freezing cold.
- Strongest results come from clean surfaces, firm pressing, and stable curing.
| Tile Repair Area | Strength Need | GleamGlee Advantage |
|---|---|---|
| Bathroom wall tile | Moisture-aware bonding | Strong hold after dry prep and cure |
| Kitchen backsplash | Grip on cleaned wall or tile base | Good for visible backsplash repairs |
| Patio tile | Outdoor durability | Resists weather after full curing |
| Stone tile | Rough-back contact | Medium body helps fill small texture gaps |
| Wall tile | Anti-slide support | Works with fixing tape while curing |
Why Is GleamGlee Easy on Tiles?
GleamGlee Construction Adhesive is easy to use on tiles because the product is designed for controlled repair work. Tile bonding needs accuracy. Too much adhesive near the edge can squeeze into grout lines. Too little adhesive behind the tile can leave hollow spots. A runny adhesive can slide down a wall before the tile is supported. GleamGlee’s medium-consistency formula helps solve these practical problems. It can be squeezed by hand and placed in controlled beads behind the tile. The precision-tip cap is helpful for small repair areas, narrow backsplash gaps, mosaic pieces, and visible tile edges where a messy application would be easy to notice. The included fixing tape also helps keep the tile steady while the adhesive cures.
Ease-of-use points:
- Hand-squeeze tube works well for small tile repairs without extra tools.
- Precision-tip cap helps place adhesive in clean lines.
- Medium texture helps reduce dripping on wall tiles.
- Fixing tape helps hold tiles while curing.
- Controlled application helps keep grout gaps clear.
| Tile Type | Application Benefit | Practical Result |
|---|---|---|
| Wall tile | Bead stays in place better | Less sliding during repair |
| Backsplash tile | Cleaner edge control | Less squeeze-out near grout lines |
| Mosaic tile | More precise placement | Less adhesive pushing through gaps |
| Floor tile | Even bead control | Easier to keep tile level |
| Stone tile | Enough body for rough backs | Better contact on uneven surfaces |
Why Is GleamGlee Safe Indoors?
GleamGlee Construction Adhesive is safe, non-toxic, and low-odor, making it suitable for indoor tile repairs when used properly. This matters because tile repairs often happen in enclosed rooms such as bathrooms, kitchens, basements, laundry rooms, hallways, and utility areas. A loose backsplash tile or bathroom wall tile is usually a small job, but a harsh-smelling adhesive can make the room uncomfortable. A low-odor formula makes the repair easier to handle in normal household spaces. Basic care is still needed: keep the room ventilated when possible, avoid contact with skin and eyes, keep adhesive away from food-contact surfaces, and close the cap after use. The repaired tile should also be left undisturbed until the adhesive cures.
Indoor use points:
- Low-odor formula is more comfortable for bathrooms, kitchens, and enclosed rooms.
- Safe and non-toxic formula suits everyday home repair use.
- Precision application helps reduce exposed adhesive and mess.
- Fresh squeeze-out should be wiped before curing.
- Avoid direct food-contact areas, direct flame zones, and children’s items.
| Indoor Area | Common Tile Repair | Safe Use Detail |
|---|---|---|
| Bathroom | Wall tile, vanity backsplash | Dry surface fully before bonding |
| Kitchen | Backsplash tile, wall accent | Remove grease and avoid food-contact areas |
| Basement | Floor or wall tile repair | Improve airflow and dry the base |
| Hallway | Floor tile or decorative tile | Block traffic during curing |
| Laundry room | Splash area tile | Avoid water exposure before cure |
Why Is GleamGlee Worth It?
GleamGlee Construction Adhesive is worth using because it combines coverage, material range, clean application, indoor comfort, and outdoor durability in one tube. The 8.8 oz size can provide up to 30 feet of coverage depending on bead thickness, which is practical for several small tile repairs rather than one single use. It can bond tile to concrete, stone, wood, drywall, stucco, and brick, so it fits many repair situations around the home. The precision-tip cap helps reduce waste, while the included fixing tape adds useful support during curing. A repair product becomes more valuable when it saves time, reduces mess, avoids unnecessary drilling, and helps prevent a small loose tile from turning into a larger repair.
Value points:
- Up to 30 ft coverage per 8.8 oz tube depending on bead size.
- Useful for bathroom, kitchen, floor, wall, patio, and garden tile repairs.
- Works on tile and common backing materials.
- Helps reduce drilling, nails, screws, and extra tools for suitable repairs.
- Low odor and clean application make it easier to use in finished rooms.
| Repair Need | Why GleamGlee Adds Value |
|---|---|
| One loose bathroom tile | Small, controlled repair without full replacement |
| Kitchen backsplash edge | Cleaner bead placement near visible tile lines |
| Patio tile repair | Outdoor-ready after full curing |
| Mosaic repair | Precision tip helps with small pieces |
| Floor tile repair | Strong bond when base is stable and tile is weighted |
| Mixed home repairs | One tube can work on tile, stone, concrete, brick, wood, and drywall |
GleamGlee Construction Adhesive gives tile repairs a practical balance of strength, control, coverage, and ease of use. It is especially useful when the tile is still intact, the base is firm, and the repair area only needs clean bonding rather than full replacement. With proper cleaning, correct bead amount, firm pressure, steady support, and enough curing time, it can help tile repairs look neater and last longer.
Conclusion
Bonding tiles with construction adhesive is a practical way to fix loose, lifted, or locally damaged tiles without replacing the entire tiled area. Bathroom wall tiles, kitchen backsplash tiles, mosaic pieces, patio tiles, balcony tiles, stone tiles, and small floor tile repairs can often be handled well when the tile is intact and the base is clean, dry, and stable. The strongest results come from careful preparation: remove dust, grease, soap film, old loose adhesive, moisture, and crumbling material; apply controlled adhesive beads; press the tile firmly; keep grout gaps clear; support the tile during curing; and allow enough time before water, grout, cleaning, or foot traffic.
GleamGlee Construction Adhesive is designed for these real tile repair needs. It bonds tile, concrete, stone, wood, drywall, stucco, brick, and other common surfaces, while the 8.8 oz tube offers up to 30 feet of coverage depending on bead size. Its medium-consistency formula, precision-tip cap, fixing tape, low-odor use, and indoor/outdoor durability make it suitable for bathrooms, kitchens, walls, floors, patios, gardens, and decorative tile projects. For branded product orders or custom construction adhesive solutions, GleamGlee can support sample requests, packaging options, logo customization, formula development, multilingual labels, and bulk supply for different market needs.





















