 Skip to content
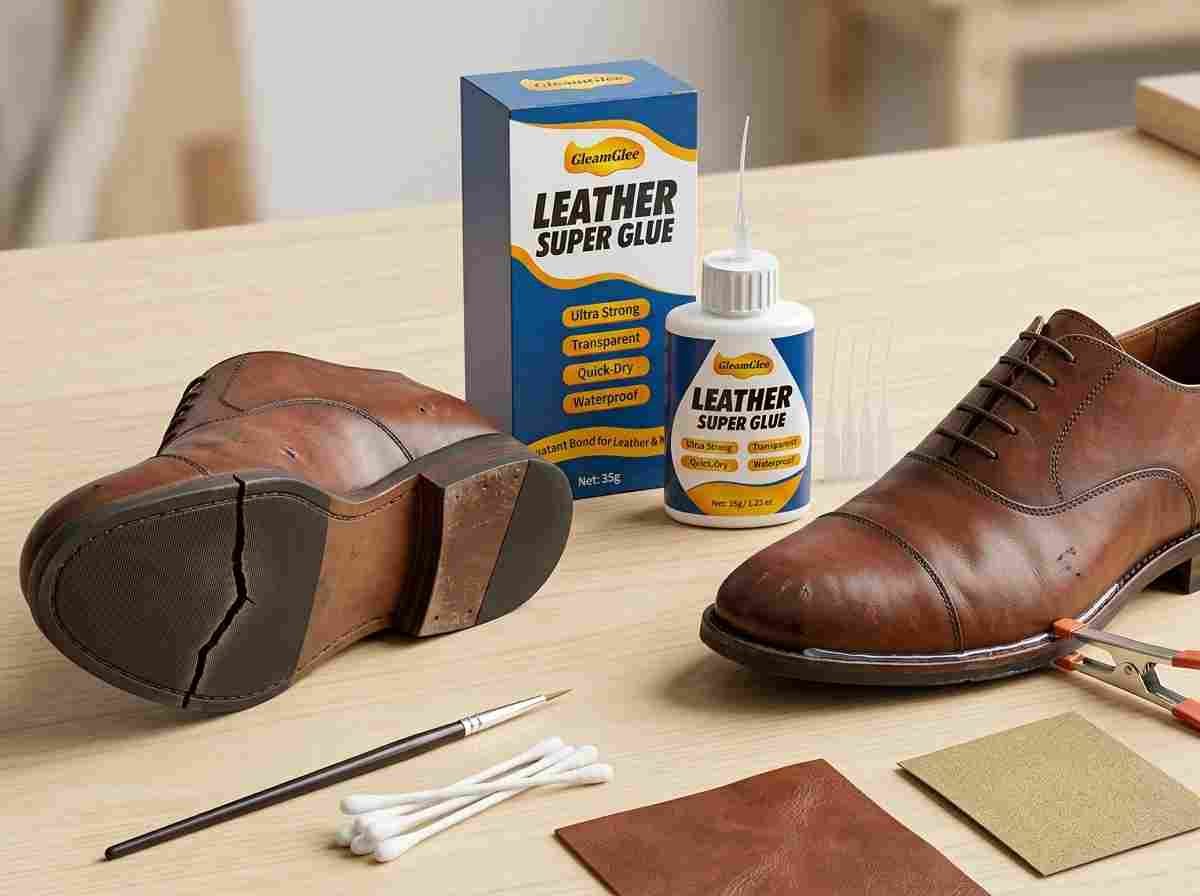
Leather shoes usually do not become useless overnight. The damage often starts as something small: a lifted sole edge, a cracked toe crease, a loose heel lining, a peeling leather panel, or a tiny split near the side of the upper. Many people ignore these problems because the shoes still feel wearable. After a few more days of walking, moisture, bending, and dust, that small opening can turn into a larger repair that is harder to hide and more expensive to fix.
To repair leather shoes using leather super glue, clean the damaged area, let it dry fully, remove loose dirt or old glue, apply a thin line of leather super glue with a precision nozzle, press the parts together firmly, wipe away overflow before it dries, and let the shoes rest before wearing. Leather super glue works best on small cracks, peeling leather, lifted linings, loose trims, and minor edge separation.
The real skill is not using more glue. It is using less glue in the right place. A clean leather shoe repair should feel firm, look neat, and avoid creating a hard, shiny patch on the shoe surface. Imagine a pair of leather boots you still love, but the toe edge has started to open. Fix it early, and you may save the pair before the damage spreads across the whole front.
What Is Leather Super Glue?
Leather super glue is a fast-setting adhesive made to bond leather and nearby materials such as rubber, vinyl, fabric, and plastic. For leather shoes, it is mainly used on small repair areas: lifted sole edges, peeling trims, cracked uppers, loose linings, and tiny splits that still close neatly when pressed.
A good leather super glue should do three things well: grip quickly, dry clear, and apply with control. Shoe repairs often happen on visible areas, so a messy glue line can ruin the look even when the bond is strong. For most leather shoe repairs, a thin, accurate line of glue works better than a thick layer.
GleamGlee Leather Super Glue is designed for real home repair needs. It sets in seconds, dries crystal clear, and includes precision nozzles for small cracks and hard-to-reach areas. It can be used not only on leather shoes, but also on handbags, belts, jackets, sofas, car seats, and mixed-material repair projects.
What Makes Leather Super Glue Useful?
Leather super glue is useful because it helps stop small leather shoe damage before it spreads into a larger repair. A loose leather trim, a tiny upper split, or a lifted lining may look minor at first, but every step adds bending, pressure, dust, and moisture to the weak point. If the shoe is still structurally sound, a controlled glue repair can lock the material back into place without replacing the whole pair. For customers, the real value is saving wearable shoes, reducing repair cost, and keeping favorite leather items in use longer.
Key customer benefits include:
| Feature | Customer Value | Best Use Case |
|---|---|---|
| Fast setting | Less holding time | Small cracks, trims, lining edges |
| Clear finish | Cleaner visible repair | Dress shoes, leather sneakers, boots |
| Fine nozzle | Less mess and waste | Narrow gaps, toe edges, seams |
| Multi-material bond | More repair options | Leather-to-rubber, leather-to-fabric, leather-to-vinyl |
| Small tube control | Better for home users | DIY shoe repair and daily leather fixes |
In practical terms, leather super glue is most helpful when the damaged area is small and the two sides still fit together. It is not meant to rebuild missing leather, replace stitching, or repair a sole that has fully separated across half the shoe.
Is Leather Super Glue Safe?
Leather super glue is safe for many leather shoe repairs when the surface is clean, dry, and tested before use. Most problems come from poor preparation rather than the glue itself. If the leather has mud, oil, polish, conditioner, rainwater, or loose old adhesive on it, the glue may bond to that weak layer instead of the shoe material. Finished leather, patent leather, suede, and nubuck can also react differently, so testing a hidden area is smart when the repair is visible or the shoe is expensive.
Use extra care in these situations:
| Shoe Condition | Main Risk | Better Action |
|---|---|---|
| Wet leather | Weak bond, trapped moisture | Let dry fully first |
| Oily or polished leather | Poor adhesion | Clean the repair area |
| Light-colored leather | Visible shine or darkening | Test a hidden spot |
| Suede or nubuck | Stiff marks, color change | Avoid visible areas if possible |
| Deep missing leather | Glue cannot rebuild texture | Use filler or professional repair |
| Large sole damage | Too much walking stress | Use shoe adhesive or cobbler repair |
For safer handling, apply a tiny amount, avoid skin contact, work in a ventilated space, and close the cap after use. A precision nozzle helps control the flow, but users should still squeeze slowly and avoid flooding the leather surface.
Which Shoes Fit Leather Super Glue?
Leather super glue fits shoes with small, clean, localized damage. It works well on leather dress shoes, loafers, ankle boots, work boots, leather sneakers, golf shoes, cycling shoes, and shoes with leather trims or overlays. The best repair case is simple: the damaged parts are still strong, still present, and still able to press back into their original position. If the shoe material is crumbling, stretched out, deeply torn, or missing a section, glue alone will not create a clean long-term repair.
Good matches for leather super glue include:
- A lifted leather trim near the eyelets
- A small crack on a smooth leather upper
- A loose heel lining that rubs the foot
- A slightly open toe edge
- A peeling leather overlay on sneakers
- A loose insole corner
- A minor heel edge separation
- Leather-to-rubber or leather-to-fabric contact points
Poor matches include:
- Full outsole separation
- Large holes with missing leather
- Cracked suede in a visible area
- Crumbling foam midsoles
- Torn seams that need stitching
- Deep dry cracks across major flex zones
A simple repair rule helps customers decide faster: if the material is separated but still strong, leather super glue may help. If the material itself is breaking down, a different repair method is usually needed.

Which Leather Shoes Can You Repair?
You can repair leather shoes with leather super glue when the damage is small, dry, clean, and still easy to press back into shape. Good repair areas include loose sole edges, peeling leather uppers, lifted linings, loose trims, small cracks, and minor heel separation.
The best results usually come from early repair. Once a small gap becomes wide, dust and moisture enter the shoe structure, the edges lose their shape, and the repair becomes harder to hide. If the leather still feels firm and the two sides still fit together neatly, leather super glue can often help extend the shoe’s usable life.
Before repairing, check the damage size, shoe material, and stress level. A lifted trim on a dress shoe is very different from a full outsole split on a work boot. Leather super glue is best for small, controlled repairs, not heavy structural rebuilding.
Can Leather Super Glue Fix Soles?
Leather super glue can fix small sole separations when the open area is narrow, the sole still lines up with the upper, and the material is not crumbling. Small toe-edge gaps, loose side edges, and minor heel-corner openings are good repair cases. The repair area should be cleaned, dried, glued lightly inside the gap, pressed firmly, and allowed to rest before the shoes are worn again. Sole repairs face more walking pressure than upper repairs, so even fast-setting glue should be given enough resting time.
Use this quick judgment table before repairing:
| Sole Damage | Repair Fit | What to Do |
|---|---|---|
| Toe edge lifted under 1 inch | Good | Apply thin glue, press, rest |
| Side gap under 2 inches | Possible | Use light glue and firm pressure |
| Heel corner slightly open | Good | Glue inside gap, clamp if possible |
| Half sole separated | Weak | Consider shoe adhesive or cobbler |
| Foam midsole crumbling | Poor | Glue cannot hold weak foam |
| Wet or muddy sole gap | Poor | Clean and dry first |
For small sole repairs, apply glue deeper inside the opening rather than only along the outside seam. If glue sits only on the surface, the shoe may look sealed but fail quickly when walking. After pressing, use tape, a rubber band, or a clamp to keep the sole aligned while it rests.
Can Leather Super Glue Fix Uppers?
Leather super glue can fix small cracks, splits, peeling panels, and loose overlays on leather uppers when the leather is still strong enough to hold a bond. The upper is the most visible part of the shoe, so the repair must be neat, thin, and controlled. A heavy glue layer can leave shine, stiffness, or a raised edge. For smooth leather shoes, boots, loafers, and leather sneakers, a fine nozzle helps place glue inside the split instead of spreading it across the surface.
Good upper repair cases include:
- Small cracks near the toe or side panel
- Peeling leather overlays on sneakers
- Loose trims around eyelets or collars
- Lifted decorative leather panels
- Small splits along stitched edges
- Minor peeling on boots or dress shoes
Be more careful with suede, nubuck, and very soft unfinished leather. Liquid glue may darken the fibers or make the surface feel stiff. For light-colored shoes, test a hidden area first. If the crack is caused by dry, brittle leather, glue can close the opening, but the surrounding leather may still need after-care once the repair has fully settled.
Can Leather Super Glue Fix Linings?
Leather super glue can fix loose linings, lifted insoles, and small inner leather panels when the glue is applied very lightly. Interior shoe repairs are less visible, but they affect comfort more directly. Too much glue inside a shoe can create hard ridges, pressure spots, or rough areas that rub the foot. The goal is to hold the lining flat, not soak the inside of the shoe with adhesive.
Common lining repairs include:
| Lining Problem | Customer Issue | Repair Tip |
|---|---|---|
| Heel lining peeling | Rubbing and blisters | Use a thin glue line and press flat |
| Insole corner lifting | Feels uneven underfoot | Remove loose dust before gluing |
| Inner leather flap loose | Catches socks | Apply tiny dots under the flap |
| Collar trim lifting | Looks worn and feels rough | Press with a rounded tool |
| Fabric lining opening | Can spread with wear | Use minimal glue to avoid stiffness |
If the insole is removable, take it out before repairing. Clean lint, dust, and loose particles from the area. Apply a tiny amount of glue under the lifted section, press it flat with a gloved finger or rounded tool, and check that no excess glue has squeezed out where the foot will touch. For best comfort, let the shoe rest before wearing.
How Do You Use Leather Super Glue?
To use leather super glue on shoes, clean and dry the damaged area, check that both sides still fit together, apply a thin line of glue with a precision nozzle, press the parts firmly, remove overflow before it dries, and let the shoes rest before wearing.
A clean repair depends more on preparation than on the amount of glue. Leather shoes collect dust, polish, conditioner, rainwater, sweat, and old adhesive. If these layers stay on the repair area, the glue may attach to dirt instead of the shoe material.
For most home repairs, follow one simple order: clean, dry, test, glue, press, rest. This works for small upper cracks, lifted trims, loose linings, and minor sole edge gaps.
How Do You Prep Leather Shoes?
Prepping leather shoes means removing dirt, moisture, oil, loose old glue, and anything that blocks direct contact between the two repair surfaces. This step is especially important because leather shoes are exposed to many hidden layers: shoe polish, road dust, rain marks, body oils, leather conditioner, and worn adhesive. Even a strong leather super glue can fail if it is applied onto a weak or dirty surface. Before gluing, the damaged area should feel dry, stable, and easy to press back into its original position.
Preparation steps:
- Brush off dry dust with a soft shoe brush or clean cloth.
- Wipe mud or surface dirt with a slightly damp cloth.
- Let the shoe dry completely before applying glue.
- Remove loose old glue with tweezers or a wooden stick.
- Do not scrape deeply into the leather.
- Check whether the damaged parts still align.
- Test a hidden area on light-colored, polished, suede, or delicate leather.
- Avoid leather conditioner before gluing because oils may weaken adhesion.
| Prep Check | Good Condition | Warning Sign |
|---|---|---|
| Surface | Clean and dry | Sticky, oily, dusty, wet |
| Old glue | Loose pieces removed | Thick flaky glue remains |
| Leather edge | Firm and flexible | Powdery, brittle, torn away |
| Alignment | Closes neatly | Warped or missing material |
| Finish | Tested if visible | May darken or shine |
For soles and heels, clean deeper inside the gap, not only the outside edge. For linings, remove lint and small fibers first, because they can create bumps after pressing.
How Much Leather Super Glue?
Use a small amount of leather super glue, usually a thin line or a few tiny drops. Most shoe repairs fail visually because too much glue is used. Excess glue can squeeze out, dry shiny, leave a raised edge, stiffen the leather, or create an uncomfortable hard spot inside the shoe. A stronger repair does not come from flooding the area. It comes from placing enough glue between two clean surfaces and pressing them together evenly.
A practical amount guide:
| Repair Area | Suggested Amount | Application Tip |
|---|---|---|
| Small upper crack | Tiny drop or thin line | Place glue inside the crack |
| Peeling leather panel | Thin line under edge | Press flat before it spreads |
| Loose trim | Small dots along trim | Avoid glue on visible leather |
| Lifted lining | Very thin layer | Prevent hard ridges inside shoe |
| Sole edge gap | Thin line deeper inside gap | Press and hold firmly |
| Heel corner | Thin line plus pressure | Tape or clamp while resting |
Better control tips:
- Hold the shoe steady before opening the glue tube.
- Use the precision nozzle to reach the gap.
- Squeeze slowly; stop as soon as glue appears inside the repair area.
- Do not spread glue across the top of smooth leather.
- Keep a cotton swab or clean cloth nearby for overflow.
- Wipe excess immediately before it dries.
- Close the cap tightly after use to protect the remaining glue.
For visible leather, less is safer. If glue appears around the repair line after pressing, the amount was probably too heavy.
How Long Should It Dry?
Leather super glue can set in seconds, but repaired shoes should still rest before normal wear. Setting means the glue has started to hold the surfaces together; it does not mean the repair is ready for walking pressure, bending, rain, or long outdoor use. Shoes are different from flat household items because every step compresses and twists the repaired area. For cleaner, longer-lasting results, give the repair more rest than the label’s initial setting time.
Suggested waiting time:
| Repair Type | Initial Hold | Better Rest Time |
|---|---|---|
| Small upper crack | Seconds | Several hours |
| Loose leather trim | Seconds | Several hours |
| Lifted lining | Seconds | Overnight if possible |
| Toe-edge sole gap | Seconds | 12–24 hours |
| Heel edge repair | Seconds | 12–24 hours |
| Work boot repair | Seconds | 24 hours if possible |
Drying tips:
- Press the repair firmly during the first bonding stage.
- For sole repairs, use tape, rubber bands, clamps, or light weight to keep alignment.
- Do not pull-test the repair immediately.
- Keep the shoes away from water while resting.
- Avoid wearing repaired shoes the same day if the area is near the sole, heel, or toe bend.
- After resting, flex gently by hand before wearing outdoors.
Fast glue is helpful because it reduces holding time, but patience after repair often decides whether the shoe survives real walking use.

What Should You Avoid?
Avoid using leather super glue on wet, dirty, oily, crumbling, or badly misaligned shoe parts. Also avoid using too much glue, wearing the shoes too soon, or treating leather super glue as a full sole replacement product. It works best for small, clean, controlled repairs.
Most failed leather shoe repairs are caused by rushing. A user sees a small opening, squeezes in too much glue, presses it for a few seconds, and wears the shoes the same day. The repair may look fine at first, but walking pressure can pull it apart quickly.
A safer repair needs three checks: Is the leather still strong? Can the damaged parts close neatly? Is the repair area clean and dry? If the answer is no, the glue may not hold well, even if the adhesive itself is strong.
Can Leather Super Glue Leave Marks?
Leather super glue can leave marks when too much glue reaches the visible shoe surface, especially on light-colored leather, glossy leather, suede, nubuck, or soft unfinished leather. Even clear glue can create shine, stiffness, or a raised edge if it dries outside the repair line. Marks are easier to prevent than remove, because dried glue may damage the leather finish if scraped or rubbed too hard. For visible repairs, the safest method is to apply glue inside the crack or gap, not across the top surface.
Ways to reduce visible marks:
- Use a precision nozzle instead of applying glue directly from a wide tube opening.
- Place glue under the lifted leather, not on top of it.
- Use small dots or a thin line rather than a thick layer.
- Test a hidden area first on light, polished, suede, or delicate leather.
- Keep a cotton swab ready to remove overflow before it dries.
- Do not smear excess glue across the leather surface.
- Protect nearby leather with tape when repairing a very visible area.
| Leather Type | Mark Risk | Repair Tip |
|---|---|---|
| Black smooth leather | Low to medium | Watch for shine |
| Brown polished leather | Medium | Test first if highly glossy |
| White leather | High | Use very small amounts |
| Patent leather | High | Avoid overflow; shine is obvious |
| Suede / nubuck | Very high | Avoid visible repair areas |
| Soft unfinished leather | High | May darken or absorb glue |
If dried glue is already visible, avoid aggressive scraping. On expensive shoes, professional cleaning or repair is usually safer.
Does Leather Super Glue Crack?
Leather super glue may crack when it is applied too thickly, used across a heavy flex point, or placed on leather that is already dry, brittle, or breaking down. Shoes bend thousands of times during normal wear, especially around the toe crease and ball of the foot. A thick adhesive layer can become a hard ridge, and that ridge may split when the shoe flexes. A thin glue line inside a small crack usually performs better because the leather can close naturally and the repair area stays flatter.
To lower the risk of cracking:
- Repair small cracks early before they widen.
- Use the least glue needed to close the gap.
- Avoid coating a large bend area with glue.
- Press the leather flat so the glue line stays thin.
- Let the repair rest before wearing.
- Do not use glue as a surface coating over dry leather.
- Condition the surrounding leather only after the repair has settled.
| Repair Location | Crack Risk | Better Practice |
|---|---|---|
| Toe bend area | High | Use very thin glue and rest longer |
| Side upper panel | Medium | Keep glue inside the split |
| Heel counter | Low to medium | Press firmly and align well |
| Loose trim | Low | Use tiny dots |
| Inner lining | Low | Use minimal glue to avoid hard spots |
| Wide sole flex zone | High | Consider flexible shoe adhesive |
If the leather keeps cracking in several areas, the problem is likely material aging, not just one broken seam. Glue can close one split, but it cannot fully restore dried-out leather.
When Should You Not Use It?
Do not use leather super glue when the shoe needs structural rebuilding, stitching, filling, or full sole replacement. It is not the best choice for crumbling midsoles, large holes, missing leather, deep torn seams, soaked shoes, or a sole that has separated across a large area. In these cases, the glue may attach to weak material or face too much bending stress. The result can be short-lived, messy, or uncomfortable.
Cases where another repair is better:
| Shoe Problem | Why Leather Super Glue Is Not Enough | Better Option |
|---|---|---|
| Full outsole separation | Too much flex and walking pressure | Cobbler or flexible shoe adhesive |
| Torn stitching | Glue cannot replace thread strength | Restitching |
| Missing leather chunk | No surface to bond cleanly | Leather filler or patch |
| Crumbling foam sole | Weak material breaks apart again | Sole replacement |
| Deep crack across toe bend | Heavy repeated flex | Professional repair or patch |
| Wet leather | Moisture weakens adhesion | Dry first, then repair |
| Luxury leather shoes | Value and finish risk | Professional cobbler |
| Large suede damage | High stain and texture risk | Suede specialist repair |
Leather super glue is still valuable for quick, small repairs. The key is knowing its role. It bonds clean surfaces together. It does not rebuild worn shoe structure, replace missing material, or reverse leather aging.

Why Choose GleamGlee Leather Super Glue?
GleamGlee Leather Super Glue is made for fast, clean, small-area leather repair. It sets in seconds, dries crystal clear, and comes with precision nozzles, so customers can repair narrow cracks, lifted trims, loose linings, peeling uppers, and small shoe edge gaps with better control.
For leather shoe repair, customers usually care about four things: will it hold, will it look clean, will it be easy to apply, and can it work on more than one material? GleamGlee Leather Super Glue is designed around these real repair needs. It bonds leather, vinyl, rubber, fabric, and plastic, which makes it useful not only for shoes, but also handbags, belts, jackets, sofas, car seats, and daily DIY repairs.
GleamGlee also supports both retail orders and business customization. For brand owners, Amazon sellers, distributors, and private-label customers, the company can provide mature formulas, packaging design, multi-language labels, low-MOQ customization, bulk production, and global logistics support.
How Fast Is Leather Super Glue?
GleamGlee Leather Super Glue sets in seconds, making it practical for small shoe repairs where the parts need to stay aligned quickly. A loose leather trim, small upper crack, lifted insole corner, or narrow sole edge gap can be difficult to hold by hand for a long time. Fast setting helps the repair stay in position sooner, but customers should still let the shoes rest before wearing, especially near the sole, heel, or toe bend. Fast grip solves the holding problem; resting time helps the repair handle walking pressure.
Useful fast-repair cases include:
- Peeling leather trim near the shoe collar
- Small cracks on smooth leather uppers
- Loose heel lining that rubs the foot
- Lifted insole corners
- Minor toe-edge sole gaps
- Loose leather overlays on sneakers
- Small leather splits on boots
- Detached decorative leather panels
| Repair Area | Why Fast Setting Helps | Wearing Advice |
|---|---|---|
| Upper crack | Keeps edges closed quickly | Rest several hours |
| Loose trim | Stops curling while bonding | Rest several hours |
| Heel lining | Holds flat before it folds again | Rest overnight if possible |
| Sole edge | Helps alignment during pressing | Rest 12–24 hours |
| Work boot edge | Reduces repair movement | Rest 24 hours if possible |
Fast setting is especially useful for home users because they may not have clamps, repair stands, or professional shoe tools. A precision nozzle and quick grip make the repair easier to handle on a table, workbench, or simple home repair area.
Why Is Clear Glue Better?
Clear glue is better for leather shoe repair because customers want the shoe to look wearable after the repair, not visibly patched. Leather shoes are often worn to work, school, travel, meetings, dinners, or daily errands, so a cloudy, yellow, or thick glue mark can make the repair look cheap. GleamGlee Leather Super Glue dries crystal clear, helping reduce visible glue lines on smooth leather, black leather, brown leather, tan leather, white leather, and colored shoe panels when applied correctly.
Clear glue is most valuable for:
- Dress shoes with polished leather
- Leather sneakers with visible overlays
- Boots with scratched or peeling panels
- Light-colored leather shoes
- Handbags and belts repaired with the same glue
- Inner linings where neatness still matters
- Car-seat or sofa repairs where the surface is visible
| Glue Finish | Customer Experience | Best For |
|---|---|---|
| Crystal clear | Cleaner, less visible repair | Shoes, bags, jackets, sofas |
| Thick cloudy glue | Repair looks obvious | Not ideal for visible leather |
| Yellowing glue | Can age the repair area | Poor choice for light leather |
| Colored glue | Hard to match leather shade | Only useful for specific colors |
Clear drying does not mean the user should apply more glue. A large amount of clear adhesive can still create shine, stiffness, or raised edges. The cleanest repair usually comes from placing a very thin line inside the damaged gap, pressing the leather flat, and wiping overflow before it dries.
Where Else Can You Use It?
GleamGlee Leather Super Glue can be used beyond leather shoes because it bonds leather, vinyl, rubber, fabric, and plastic. This matters for customers who want one useful repair product in the home instead of buying separate glue for every item. The same tube that fixes a small shoe crack can also help repair a handbag strap, belt edge, wallet corner, leather jacket split, sofa scratch, car seat trim, glove seam, watch strap, or craft project.
Common use categories include:
| Category | Repair Examples |
|---|---|
| Shoes & footwear | Soles, heels, uppers, insoles, linings, boots, sports shoes |
| Bags & accessories | Handbags, wallets, belts, watch straps, gloves, backpacks |
| Furniture & home | Sofas, armchairs, dining chairs, headboards, ottomans |
| Clothing | Jackets, coats, leather pants, cosplay pieces, motorcycle gear |
| DIY crafts | Wallets, keychains, bracelets, bookmarks, leather décor |
| Outdoor gear | Backpack straps, fishing handles, saddles, hunting cases |
| Automotive | Car seats, dashboards, steering wheel covers, gear shift trims |
| Sports items | Baseball gloves, boxing gloves, punching bags, cycling seats |
For business customers, this wide application range also makes the product easier to sell. One leather super glue can be positioned as shoe repair glue, leather repair glue, handbag repair glue, upholstery repair glue, automotive interior glue, and DIY craft adhesive. That gives product pages, packaging, and advertising more room to show real-life repair scenes.
Conclusion
Repairing leather shoes with leather super glue is one of the simplest ways to save a pair before small damage becomes permanent. The best results come from early repair, clean preparation, thin application, firm pressure, and enough resting time before wearing. Leather super glue is especially useful for small cracks, peeling uppers, lifted linings, loose trims, minor sole edge gaps, and mixed-material shoe repairs involving leather, rubber, fabric, vinyl, or plastic.
GleamGlee Leather Super Glue is designed for customers who want fast, clean, practical repair without complicated tools. Its crystal-clear finish, fast-setting bond, and precision nozzles make it useful for leather shoes and many other daily repair needs, including handbags, belts, jackets, sofas, car seats, and craft projects. For home users, it is a convenient repair kit product. For business customers, it is also a strong category opportunity with wide use cases and clear market demand.
If you want to order GleamGlee branded leather super glue, request product details, or develop a private-label leather repair glue for your market, you can contact GleamGlee directly. The company can support mature formulas, custom packaging, multi-language labels, low-MOQ customization, sample development, bulk production, and global logistics for Amazon sellers, distributors, retailers, and repair product brands.


