Skip to content


A curtain can be several times wider than your table, yet repairing its loose hem may require only a narrow strip of working space. The same principle applies to a torn sheet, an opened cushion seam, or a damaged blanket. Expose the area you need, support the remaining weight, and complete the repair in manageable sections. A useful workspace keeps the fabric relaxed and the damaged area easy to reach.
The difficult part is usually controlling everything around the repair. Fabric hanging over the table can pull a patch out of position. A heavy roll can drag a freshly glued hem sideways. A repair completed on the dining table can become awkward when dinner needs the same surface. Planning the support and resting arrangements before opening the glue or threading a needle prevents many of these avoidable problems.
This guide covers ordinary household textiles, including curtains, bedding, blankets, removable covers, and accessible upholstery openings. You will learn how to choose between stitching and adhesive, establish a continuous reference line, calculate working sections, and check the finished repair. The measurements below are practical planning examples unless attributed to a manufacturer. Fabric construction, existing damage, and product instructions still determine which method will work for your particular item.
Choose a Repair Method Before You Start
Start by checking whether the thread has failed, the fabric has torn, or the surrounding material has worn thin. An intact seam allowance can often be sewn again; missing material usually needs a patch. A compatible fabric adhesive may suit a lightly stressed hem. Repeatedly loaded seams need a repair designed for their movement, with adequate sound fabric available to support it.
Separate an open seam from a damaged fabric panel
Look at both sides under good light before trimming anything. An open seam normally has two recognizable fabric edges and a line of old stitching. A tear cuts through the cloth itself, sometimes leaving loose threads or missing material. Worn fabric may look unusually translucent, fuzzy, or thin beyond the obvious opening. Gently spread the item into its natural shape without pulling the damage wider. This inspection tells you whether the repair can follow an existing seam or needs support extending beyond the visible hole.
Avoid judging difficulty from the overall size of the item. A wide curtain with a short section of loose stitching may be straightforward, while a small hole in a badly worn fitted sheet can be difficult to repair reliably. Concentrate on the condition of the fabric around the damage. If a needle or gentle handling causes new tearing, adding more stitches in the same weak margin will not create a sound foundation.
Check the fabric and its care requirements
Find the care label and examine the fabric before choosing glue, thread, or heat. A washable cotton cover, a coated blackout curtain, and a stretchy sofa slipcover behave differently even when their tears look similar. Washing temperature, drying method, and ironing restrictions all matter. GINETEX explains washing symbols as treatment limits, including maximum temperatures and gentler processes where marked. Keep those restrictions in mind when introducing a patch or adhesive with its own care requirements.
- Care reference: GINETEX care symbols and treatment guidance.
- Before using adhesive: Test a hidden area for color change, penetration, stiffness, and adhesion after the stated cure period.
- Before marking: Check whether chalk, pencil, or removable marker can be removed without harming the finish.
- Before removing a cover: Photograph its orientation and confirm it can be taken off without damaging fasteners or attached components.
Match the repair to the way the item is used
A repair experiences different forces depending on its location. A tablecloth hem may hang with little disturbance, while a sofa seat seam flexes whenever someone sits down. A curtain heading supports hanging weight, even though its lower hem may be lightly stressed. Choose the method for the actual location and movement. The following comparison is a starting point for ordinary household repairs, rather than a guarantee of strength for every fabric or construction.
| What you find | Useful starting method | Check before proceeding |
|---|---|---|
| Loose, lightly stressed hem with intact fabric | Hand hemming or a compatible fabric adhesive | Appearance, flexibility, and care compatibility |
| Open seam with usable seam allowances | Restitch along the original seam | Both edges must still be sound |
| Hole or localized thinning | Sew a suitable patch onto sound surrounding cloth | Include weakened material in the repair area |
| Seat seam or another repeatedly loaded connection | Reinforced sewing, panel replacement, or professional repair | Access, seam allowance, and fabric condition |
| Widespread deterioration or a sensitive specialist textile | Specialist assessment | Avoid making irreversible changes before assessment |
Electric blankets, heated throws, safety equipment, and valuable antique textiles need their own repair guidance. Their electrical components, protective function, or fragile fibers make ordinary household patching advice insufficient. For everyday items, the useful stopping point is simpler: if the surrounding material cannot hold the proposed repair, or you cannot reach the area without damaging other layers, change the plan before starting. Sometimes replacing a cover is more practical than rebuilding several failing areas.
Set Up a Small Work Area
Choose a stable surface large enough for your hands, the exposed repair, and the tools you actually need. Arrange support for the rest of the textile and decide where the finished section will remain undisturbed. These are three functions, not necessarily three separate pieces of furniture. A small table can work well when each function has been planned in advance.
Create a firm surface for measuring and cutting
A dining table or desk is often sufficient for a local repair. Clear crumbs, moisture, and anything capable of staining the fabric. Check the underside of the textile as well, especially if it has been resting on the floor. A bed can hold surplus fabric, but a soft mattress is a poor reference surface for accurate measurements. Keep cutting and pressing on suitable protected surfaces, with the repair area supported rather than balanced across an unstable gap.
If you use a second surface, bring it close enough to support the fabric without creating a narrow drop where the cloth catches. You do not need to buy a large sewing station for a single repair. An existing stable table and a nearby clean support may be enough. Test the arrangement with the dry item first: move the repair through the motions you expect to use and check whether any section slips or pulls.
Reserve somewhere for the repair to rest
Think through the evening before beginning an adhesive repair on a shared table. The active work may be brief, but the joint can need much longer without folding, handling, or loading. If another household activity requires the same surface, choose a different starting time, a smaller repair section, or a suitable sewing method. Moving an entire textile with a fresh bond is difficult when the support was never designed to move with it.
- Working area: The exposed seam, hem, or patch, with space for both hands.
- Support area: The rolled or folded remainder, resting securely without pulling on the repair.
- Resting area: A protected position where a glued joint can remain in its intended shape.
- Tool area: A small tray outside the path used to advance the fabric.
- Room conditions: Follow the adhesive label for ventilation, storage, and working conditions.
Keep the tool kit small and purposeful
Gather a measuring tape, ruler, fabric scissors, suitable needle and thread, a tested marking tool, and clips or pins appropriate for the textile. Add adhesive only when the selected method requires it. Surface protection should match the operation: a cutting mat protects against cutting, while pressing needs a suitable heat-resistant arrangement. Utah State University distinguishes these tools in its sewing supplies guide and notes the temperature sensitivity of cutting mats. Keeping their functions separate protects both the textile and the furniture.
- Downloadable reference: Utah State University Basic Sewing Supplies PDF, a seven-page guide to common measuring, cutting, marking, and pressing tools.
- Watch the workspace principles: Leah Day on quilting in a tiny space. Focus on organizing the work surface and managing bulky fabric; choose stable household support rather than copying an unfamiliar suspension arrangement.

Roll and Support Bulky Fabric Without Distorting It
Expose only the working area and let the remaining fabric rest in loose rolls or broad folds. Support its weight before trying to straighten the repair. The surface should lie naturally smooth, without being stretched between clips or pulled tight across the table. When advancing to another section, move the supported bulk first, then recheck the local position before continuing work.
Choose a folding pattern suited to the item
For a curtain hem, loosely roll the panel from the top toward the lower edge, leaving the damaged hem accessible. For a sheet with a central hole, roll or fold from opposite sides toward the repair so the local area sits in the middle of the table. With a removable sofa cover, work panel by panel instead of trying to make the whole cover resemble a flat sheet. Keep thick seams and zippers out from under the immediate repair area.
Rolling works well only when the fabric tolerates it. A thick blanket may be easier to manage in broad folds, while a pile fabric can retain pressure marks from a tightly tied bundle. Use soft ties loosely around a roll if necessary, keeping them away from the damaged area. Avoid adhesive tape on visible surfaces unless its suitability has been established. The aim is to control excess material without introducing marks, creases, or additional tension.
Remove downward drag before aligning the edges
If fabric hangs over the edge of the table, its weight can shift the repair while you work. Raise or reposition the supported remainder until the local area stays put without your hands holding it. A useful dry check is to release the aligned edges briefly: if they immediately slide apart, improve the support before fastening them. Smooth wrinkles with a light hand, but do not stretch the cloth to force a distorted opening into a straight line.
The same handling problem occurs when preparing large quilts on small tables. String & Story describes working in sections with surplus layers wrapped around boards or loosely rolled to reduce wrinkles and downward drag. These techniques help explain how to manage bulk, although preparing a quilt and making a permanent adhesive repair are different operations. Borrow the support and movement principles, then follow the instructions for the actual repair method you have chosen.
- Technique reference: How to baste a large quilt in a small space.
Keep the next section easy to recognize
Before sewing or gluing, identify the starting point, direction of travel, and reverse side using suitable temporary marks or a simple sketch. Place a removable marker beside the completed area, away from wet adhesive. When you pause, record the next starting position rather than relying on memory. This is especially helpful with plain white bedding, where similar folds and edges make it easy to rotate the item or restart on the wrong section.
- Support the fabric already on the table before unrolling more material.
- Move slowly enough to notice caught layers, trapped pins, or dragging folds.
- Recheck the reverse side before stitching through several layers.
- Keep fresh adhesive joints outside tight rolls and storage bags.
- If a bond cannot be moved without disturbance, let it remain supported for the product’s required handling period.
Measure and Plan the Repair in Sections
Use one reference line for the whole repair, then divide the working route into sections you can reach comfortably. Leave a visible overlap between neighboring sections so you can compare alignment. Measure the repair route rather than the overall size of the item. A wide curtain with one short opening does not need every centimeter of its hem included in the calculation.
Establish a continuous reference before fixing anything
For an opened hem, the original fold and intact neighboring stitching usually provide the best starting references. Measure the fold at several sound locations instead of relying on one point. For a tear, mark the surrounding repair area without pulling the opening closed. Printed stripes can help visually, but a printed pattern is not proof of straight grain or accurate dimensions. Check your marks against the construction of the item and keep the same reference throughout the job.
An overlap is a checking zone, not permission to create a double layer of adhesive. When the next section reaches the table, compare its fold width and direction with the previous section. Keep any adhesive application continuous according to the product directions, without piling fresh material over a cured ridge. With stitching, examine the transition so the seam does not suddenly change position or tension where you stopped and restarted the work.
Calculate the number of working sections
Suppose the repair route is 210 cm long, your usable working span is 60 cm, and you choose a 10 cm overlap for alignment checks. The first section covers 60 cm. Each later section adds 50 cm of new coverage because 10 cm remains visible from the previous section. Three additional sections therefore complete the route. These are planning measurements for this example, rather than required dimensions for every table, textile, or adhesive.
| Section | Position along the repair route | New coverage |
|---|---|---|
| 1 | 0–60 cm | 60 cm |
| 2 | 50–110 cm | 50 cm |
| 3 | 100–160 cm | 50 cm |
| 4 | 150–210 cm | 50 cm |
For a different repair, calculate the first full working span separately. Subtract the usable span from the total repair length, divide the remaining distance by the span minus the overlap, and round the result upward. Add one for the first section. If the entire route fits within the usable span, you need only one section. The overlap must always be smaller than the span, and all measurements must use the same unit.
- Example calculation: 210 − 60 = 150 cm remaining; 60 − 10 = 50 cm added per move; 150 ÷ 50 = 3 additional sections; 1 + 3 = 4 sections.
- External calculator: Calculator.net scientific calculator can handle the arithmetic; round additional sections upward when the result is not a whole number.
- Unit conversion: Calculator.net conversion calculator helps keep measurements consistent. For reference, 60 cm is approximately 23.62 inches.
Size a patch beyond the weakened area
Measure the entire damaged or thin area, not just the empty opening. A patch needs sufficient sound surrounding fabric for its attachment. If its edges will be turned under, the cutting size also needs room for those folds. Consider an illustrative 4 × 2 cm damaged area, with 1.5 cm of coverage on each side and a 0.5 cm turn-under on each edge. The resulting cut patch would measure 8 × 6 cm.
- Cut length: 4 + 1.5 + 1.5 + 0.5 + 0.5 = 8 cm.
- Cut width: 2 + 1.5 + 1.5 + 0.5 + 0.5 = 6 cm.
- Finished patch after folding: 7 × 5 cm, before any distortion from handling or sewing.
- Adjust the design: Nonfraying patches may not need turned edges; stretchy materials and widespread thinning need a different assessment.
The example separates two easily confused allowances: fabric covering the sound area and fabric consumed by a folded edge. It does not establish a universal patch margin. The actual coverage depends on the textile, damage, stitch arrangement, and expected use. Lay a paper template over the relaxed fabric before cutting your patch. If the proposed attachment line still passes through thin or deteriorated cloth, enlarge the repair area or reconsider the method.
Repair Common Household Textiles Step by Step
Keep the item supported in its natural shape and use the simplest suitable repair. Restore intact hems along their existing folds, reconnect sound seam allowances with stitching, and cover missing material with a compatible patch. Work on one exposed section at a time. Before advancing the fabric, inspect both sides and confirm the completed area can tolerate the planned movement without disturbance.
Restore a loose curtain hem or tablecloth edge
A loose hem is a good first repair when the cloth remains intact and the fold is easy to identify. Remove loose broken thread without cutting useful fabric, then return the hem to its original position. Compare the width with neighboring undamaged sections. If the curtain has a lining, decide which layer needs repair before attaching anything; joining the lining accidentally to the outer fabric can change the way the whole panel hangs.
- Clean the repair area using a method permitted by the textile label, and let it dry completely.
- Lay the first section flat, restore the fold, and hold it temporarily with suitable clips or pins.
- For hand sewing, use small, even stitches appropriate to the fabric, catching the outer cloth lightly enough to limit visible marks.
- For adhesive, complete a hidden-area test first, then apply the thin, even amount specified for the product.
- Keep the edges aligned during the required fixing period, without squeezing adhesive onto the visible face.
- Check the fold width at the transition before advancing to the next section.
Choose hand hemming when you want to preserve movement, avoid uncertain adhesive compatibility, or keep the repair easier to alter later. A suitable fabric adhesive can be useful for a low-stress folded edge when its appearance and care performance have been tested on the material. Clear drying does not guarantee an invisible result: glue can change how light passes through a thin curtain, and an overly thick layer can leave a visible ridge.
- Watch the hand-sewing method: Professor Pincushion demonstrates a blind hem. Follow the needle through the fold and observe how little thread appears on the outer face.
Restitch an open seam without pulling it out of shape
An opened seam is usually easier to repair neatly when you can reach the reverse side. Follow the original stitching line while preserving the intended seam allowance. Anchor the new stitching in sound fabric near the opening, then continue into sound material at the other end. Backstitch is a useful hand-sewing option for this kind of accessible seam. Keep the stitch size consistent and adjust thread tension so the edges join without gathering.
- Align the seam allowances and secure the start, middle, and end before sewing.
- Anchor the thread discreetly in sound material near the existing seam.
- Bring the needle up a short distance ahead along the seam line.
- Insert it back at the end of the previous stitch, then bring it up farther ahead to continue the sequence.
- Check the reverse side regularly for caught layers or loops.
- Secure the final thread in sound material and remove temporary fasteners.
- Watch the stitch sequence: How to sew a backstitch, demonstrated by Professor Pincushion. The close view helps clarify the backward stitch and forward movement.
For an accessible opening with two intact folded edges, ladder stitch can close the gap from the outside. Run a short stitch inside one folded edge, cross to the opposite edge, and repeat. Draw the opening together gradually rather than pulling a long section tight at once. This method suits appropriate cushion or cover openings, but it cannot replace missing seam allowance or restore cloth which is already tearing around the stitches.
- Watch an outside closure: Needlepointers demonstrates ladder stitch. Observe the alternating stitches inside the two folds and the gradual closing of the opening.
Patch a sheet or blanket using sound surrounding fabric
Select a patch with compatible thickness, stretch, and care requirements. A stiff heavy patch on a lightweight sheet may feel uncomfortable and concentrate movement around its edge. A stretchy patch on stable woven fabric may distort during attachment. Where appropriate, prepare the patch using a washing and drying method permitted for both materials before cutting it to final size. The objective is a comfortable repair with compatible behavior, rather than simply the thickest reinforcement available.
- Map the damaged and weakened area while the textile is relaxed.
- Make a paper template including sound-fabric coverage and any folded-edge allowance.
- Cut the patch and prepare its edges using a method appropriate to the material.
- Position it without stretching either layer, then secure it temporarily.
- Sew the attachment line through sound fabric, checking the underside as you progress.
- Handle corners carefully and finish without leaving exposed knots in an uncomfortable contact area.
For a wool blanket, a visible patch can be a practical and attractive repair. Seljak’s published example maps several holes, positions patches, and secures them with blanket stitch, including attention to the corners. Use it as a demonstration of repair planning and edge attachment. Its chosen yarn, stitch spacing, and patch arrangement belong to that particular blanket; a fine cotton sheet needs a lighter approach suited to its own construction.
- Photo guide: Seljak’s blanket repair walkthrough.
- Watch patch attachment: Blanket stitch for an appliqué patch, linked from Seljak’s repair guide. Look closely at the thread loop and where the needle enters the layers.
- Watch the corner technique: Turning a corner with blanket stitch. Apply the turning principle to a suitably designed patch; the demonstration is not a universal stitch-spacing specification.
Handle quilts and nonremovable covers with extra care
A quilt can contain a decorative face, batting, backing, and existing quilting lines, so first identify which layers are damaged. Support the surrounding bulk and keep unrelated folded sections away from the needle. A removable duvet cover should normally be separated from the duvet before repair. For a quilt with substantial missing fabric or disturbed filling, examine a construction-specific repair guide before deciding how the patch should connect to the remaining layers.
- Layered repair reference: iFixit’s guide to patching large holes in a quilt provides a photographic example for evaluating a more involved repair.
For a nonremovable sofa cover, check whether the damaged area can be supported and whether the original folded edges remain usable. An accessible opening may allow hand sewing from the outside. Keep the needle under control and avoid catching filling or hidden layers unintentionally. A repeatedly loaded seat seam, a split with missing material, or damage extending into weak surrounding cloth deserves an upholstery repair assessment rather than an improvised line of glue.
Let the Repair Set Without Taking Over the Room
Plan resting time before beginning a glued repair. Keep the joint supported, aligned, and free from the weight of hanging fabric for the period required by its instructions. Initial set, full cure, and permission to wash are different decisions. A surface which feels dry does not establish whether the bond can tolerate folding, laundering, or the movement expected during normal use.
Keep the joint supported during the waiting period
Leave the repair in the shape you want it to retain. Fold or roll only the unbonded surplus where doing so does not pull on the joint. If you need to protect the surface underneath, use a barrier compatible with the adhesive and the operation, first checking it will not become attached. Follow the product’s instructions for pressure and support rather than piling a heavy object onto delicate fabric or squeezing adhesive through an open weave.
Do not assume additional heat will make the repair ready sooner. A hair dryer, heater, or iron can introduce problems with the textile, coating, or adhesive unless the manufacturer specifically permits the method. Keep the room conditions within the product’s guidance and avoid unnecessary handling. If space only allows one section to rest safely, schedule the repair over several sessions instead of moving a vulnerable bond simply to make room for the next section.
Read product timings as conditions rather than promises
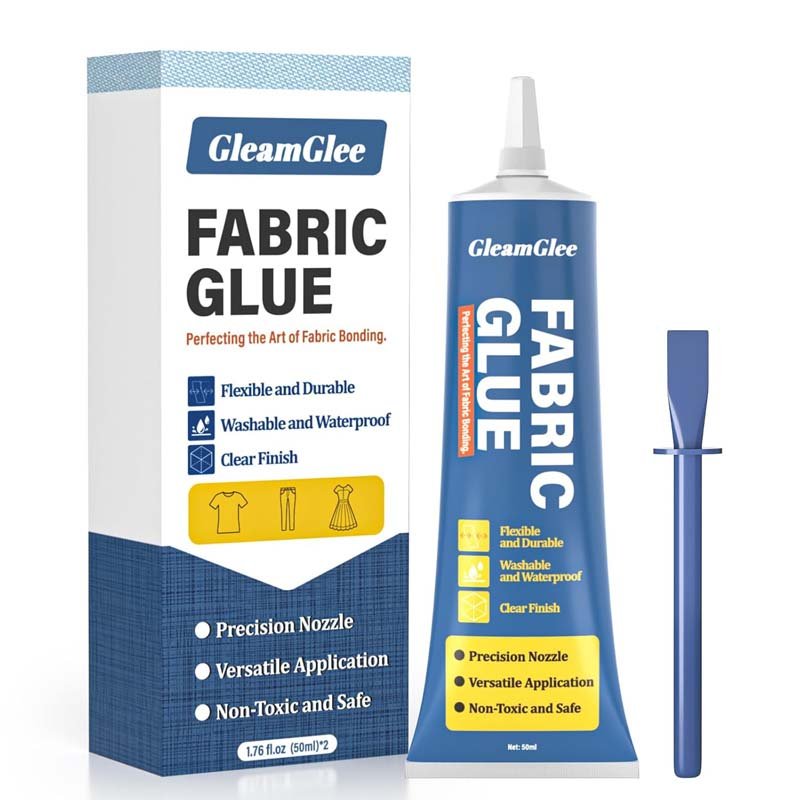
GleamGlee Fabric Glue is available in a 50 ml tube and a two-pack of 50 ml tubes. Its cotton-and-polyester product guidance describes approximately 6–10 minutes for initial setting and about 24 hours for full curing, alongside a clear, flexible finish. These are manufacturer reference values, not measurements made on your textile. Follow the directions supplied with your tube if they differ from a website description, and test unfamiliar blends, finishes, or coatings before visible work.
| Stage | What it means for your repair | Practical timing approach |
|---|---|---|
| Initial setting | The positioned materials begin to hold together | Manufacturer example above: approximately 6–10 minutes |
| Full curing | The adhesive reaches its stated cure condition | Manufacturer example above: approximately 24 hours |
| Washing, ironing, or repeated movement | The repair returns to a specific kind of use | Follow both the adhesive directions and textile care limits |
- Product details: GleamGlee fabric compatibility, pack options, and curing guidance.
- Time-planning tool: Timeanddate date and time calculator can add the stated waiting period to the time you finish bonding. It calculates elapsed time, not adhesive strength.
If your instructions require 24 hours after bonding, a section completed at 7 p.m. reaches that reference time at 7 p.m. the following day, not the next morning. Later sections have their own completion times. Record them on paper beside the project so nobody folds or uses the textile prematurely. When planning a household repair kit or a customized kit for repeated projects, consider the applicator, pack size, storage directions, and intended fabric range alongside the advertised cure time.
Return to washing and use gradually
Once the required conditions have been met, inspect the repair before putting the item back into service. Check the patch edges, seam alignment, and feel of the bonded area without aggressive pulling. For laundering, choose a process permitted by the original textile, the patch, and the adhesive. A washable glue does not override a dry-clean-only fabric label, and a washable fabric does not automatically make every adhesive suitable for immersion or machine drying.
After the first permitted wash, inspect the textile again before using it normally. Look for lifting edges, loosened stitches, stiffness changes, or new tearing beside the repaired area. Reassess the method if any of these appear. Avoid inventing a wash-cycle guarantee from a successful first wash: long-term performance depends on the materials, preparation, joint design, and care routine. For household use, a careful early check is more useful than a broad promise about permanent results.
Check the Repair and Fix Common Problems
Inspect the repair in its normal relaxed position, then check the reverse side and the way the surrounding fabric moves. Look for alignment changes, lifted edges, trapped layers, and concentrated stiffness. A neat appearance is useful, but it does not prove the repair suits its load. If the cloth beside the repair begins to fail, address the weakened material rather than tightening the same attachment.
Use a simple final inspection
Lay the repaired area flat and view a long hem from its end as well as from above. This can make a sudden change in fold width easier to see. Run your fingers gently along a fully cured bond or completed seam, feeling for hard ridges, loose thread, or sharp remaining fasteners. Then lift and reposition the supported textile as you would during ordinary handling, checking whether the repair remains comfortable and naturally aligned.
- Confirm the beginning, middle, and end of a long repair follow the same reference.
- Check both sides for accidental stitching through another layer.
- Remove every pin, clip, temporary tie, and removable marker.
- Confirm a cover still fits without forcing its repaired seam under tension.
- Keep a brief note of the method and adhesive used for future care or professional repair.
Correct the cause before adding more material
When a repair looks wrong, pause before applying more glue or sewing another dense line of stitches. Puckering can come from stretched positioning, uneven support, or excessive thread tension. Edge lifting can involve contamination, poor compatibility, insufficient curing, or a repair placed under unsuitable load. Several causes can produce a similar appearance, so examine preparation and handling as well as the product. A thicker adhesive layer is not a reliable universal solution.
| Problem | First things to examine | Useful next step |
|---|---|---|
| Puckered seam or uneven hem | Fabric tension, support, fold width | Reposition or restitch if this can be done without further damage |
| Visible glue or a hard ridge | Application amount, penetration, fabric finish | Follow product-specific removal guidance after a hidden-area test |
| Lifting patch edge | Cleanliness, compatibility, curing, movement | Reassess the attachment method before repeating it |
| New tearing beside the repair | Condition of the surrounding cloth | Enlarge the supported area, replace the panel, or seek specialist help |
Recognize when the repair needs a different approach
If a repair repeatedly opens, investigate what happens during use. A fitted sheet may be overstretched on the mattress, a cover may no longer fit comfortably, or a curtain hem may be catching on furniture. Correcting the cause can matter as much as changing the repair itself. Stop if the surrounding cloth tears during gentle handling, if the attachment must be pulled unusually tight, or if the damage prevents you from reaching a sound repair boundary.
Finish the repair and restore your space
A successful small-space repair leaves the textile usable and the room easy to put back in order. Return tools to their tray, account for needles and pins, and remove temporary surface protection once the work is ready to move. Keep any useful fabric offcuts with a short note about their purpose. If adhesive remains, close and store it as directed rather than leaving the applicator exposed beside a finished curtain or blanket.
Large household textiles become easier to repair when the work is divided into controlled local tasks. Identify sound material, support the bulk, maintain one reference, and choose an attachment suited to the item’s everyday movement. Give adhesive repairs their full instructed waiting period and check the result after returning to use. These habits make a small table a practical repair station, while helping you recognize the jobs which need a different tool, more access, or professional attention.
Frequently Asked Questions
The questions below address practical decisions which often arise after the fabric is already on the table. Each answer assumes an ordinary household textile with accessible, sound material around the repair. Care labels and product directions still apply, particularly for coated fabrics, stretch covers, and bonded areas. If the construction is unfamiliar, return to the inspection stage before choosing a faster-looking method.
Can I repair large fabric items without a sewing machine?
Yes. Many local seam openings, folded hems, and patches can be repaired with hand sewing while the rest of the item remains supported in rolls or folds. A suitable fabric adhesive is another option for compatible, lightly stressed areas. The overall size of a curtain or sheet does not determine whether a machine is necessary. What matters is access to the repair, the condition of the surrounding cloth, and the movement the repaired area will experience.
Can I repair curtains while they are still hanging?
A small, accessible hand-sewn repair may be possible while a curtain hangs, provided you can support the working area without stretching it. Long hems, measurements requiring a level reference, and adhesive repairs are usually easier to control after the panel is removed and laid locally flat. Hanging weight can pull an unset bond or distort alignment. Avoid reaching awkwardly or relying on the curtain rod to stabilize the repair while you work.
Can I use my bed instead of a worktable?
Your bed can hold the rolled or folded remainder of a textile, but a soft mattress is not a dependable surface for accurate cutting or measuring. Use a stable, protected work surface for the actual repair and keep the excess material supported nearby. Never cut or iron directly on bedding or the mattress. Before introducing adhesive, make sure it cannot transfer through the textile or onto items underneath the repair.
Can I stop halfway through and store the fabric?
You can usually pause a sewing repair after securing the thread, removing loose pins, and recording the next starting point. An adhesive repair must reach the handling condition specified by its manufacturer before moving or folding the bonded area. Keep fresh joints supported rather than packing them into tight rolls. If you cannot leave the work undisturbed, complete a smaller section or choose a suitable sewing method before starting the project.
How large should a fabric repair patch be?
A patch should cover the full damaged or weakened area and extend far enough into sound fabric for the chosen attachment. Add a separate allowance if its edges will be folded under. There is no single margin suitable for every weave, stretch level, or loading condition. Use a paper template first, and inspect where the stitches or bonded edges would sit. If their path still crosses thin material, enlarge the repair or reconsider patching.
When can I wash fabric after repairing it with glue?
Wait until the adhesive’s stated curing and washing conditions have been satisfied, then choose a laundering process permitted by both the fabric and the repair materials. A dry surface alone is not a reliable indicator of readiness. Some products give approximately 24 hours as a curing reference, while other products or conditions require different schedules. Check your actual label, record when bonding finished, and inspect the repair after its first permitted wash.