Skip to content

The fast way to attach multiple patches is to prepare the entire layout first, group compatible patches, and attach one well-supported section at a time. Fabric glue and fabric-specific adhesive sheets can reduce stitching work; correctly specified heat application can suit matching iron-on patches; sewing provides mechanical attachment when the garment and patch permit it. The best choice depends on the backing, fabric, deadline, and care routine. A quick application only saves time if the finished garment is ready when you need it.
Think of a denim jacket with twelve badges, a child’s uniform with several new awards, or a canvas backpack collecting travel patches. The difficult part is rarely placing the first piece. It is keeping the others aligned, preventing glue from reaching the lining, supporting curved areas, and avoiding lifting edges after washing. This guide works through those decisions in practical detail, with manufacturer instructions, demonstrations, and calculations placed beside the steps where they help. It covers decorative attachment; damaged straps, torn structural seams, and protective equipment need repair guidance specific to their function.
1. Choose the Fastest Method for Your Materials and Deadline
Start with three questions: what touches the adhesive, how will the garment move, and when must it be usable? The visible embroidery does not answer the first question because the back may contain a stiffener, heat-seal coating, or pressure-sensitive adhesive. A flat jacket panel also behaves differently from a stretching sleeve or curved cap. Once those details are known, compare complete workflows, including preparation and waiting, instead of choosing the bottle or tool with the shortest application step.
Match the Attachment Method to the Actual Job
Use the comparison below to narrow your options before buying supplies. None of these methods wins every project. A sewing machine already threaded beside a flat denim panel may be convenient, while setting up a press for two mismatched badges may add work. Likewise, adhesive sheets can simplify positioning but still impose finishing and washing requirements. Treat the listed conditions as decisions to resolve first; they have a larger effect on success than whether a package uses words such as quick, permanent, or heavy duty.
| Project situation | Method to consider | Useful advantage | Condition to resolve first |
|---|---|---|---|
| Lightweight textile patches on a stable fabric panel | Compatible fabric glue | Avoids stitching each outline | Backing compatibility, appearance, and curing time |
| Flat badges on suitable clothing | Fabric-specific adhesive sheets | Shapes can be cut before assembly | Complete pressure, finishing, and care instructions |
| Matching patches supplied for heat application | Specified iron or heat press | Repeated setup for the same patch system | Equipment, heat tolerance, and even contact |
| Patches needing stitched attachment | Machine or hand sewing | No adhesive waiting when sewn without glue | Needle access, suitable border, and garment layers |
| Garment with a secure matching receiving panel | Hook-and-loop patches | Simple replacement and rearrangement | Compatible mating surfaces and sufficient support |
Separate Initial Set, Handling, and Wash Readiness
An adhesive can stop a patch from sliding before it has developed the hold needed for bending, wearing, or washing. Initial set is not automatically full cure, and neither term automatically defines the first permitted wash. Read each milestone separately. Also distinguish the working period before joining the surfaces from the setting period afterward. A label stating a six-minute initial set does not give you six minutes to leave every coated patch exposed on the table before positioning them.
- Installation time: measuring, coating or cutting, aligning, pressing, and cleaning up.
- Handling time: the point when the assembly may be moved as the instructions permit.
- Use or curing time: the required wait before the intended bending, wearing, or loading.
- First-wash time: the product’s separate restriction on washing, when specified.
- Cooling time: an additional stage for heat-applied systems where the instructions require cooling before inspection or handling.
For an event tonight, a method requiring a full day before demanding use may miss the deadline even if the badges take only minutes to place. Sewing without adhesive avoids a glue-curing interval, but still requires enough time to finish and inspect the stitches. If the garment will be washed tomorrow, consider its first-wash requirement now. Choosing the method around the actual calendar prevents a finished-looking project from being used before its attachment process is complete.
Treat Movement and Accessibility as Part of Material Selection
A large rigid patch across a stretchy area can resist the fabric’s movement, so the surrounding cloth or patch edges take the strain. Smaller patches on a more stable region may suit the garment better. Check access from inside as well: stitching through a pocket can close it, and glue can migrate into an unintended layer. Open the garment fully, feel the thickness underneath each proposed location, and move seams or padding out of the working area where construction allows.
2. Identify the Backing and Test the Complete Material Pair
Sort patches with their packaging before doing any preparation. Keep plain textile backs, heat-applied backs, adhesive-backed pieces, and removable systems in separate groups. A shiny surface is insufficient evidence of an iron-on adhesive, and a paper liner does not prove an adhesive is washable. If the construction is unclear, obtain the patch supplier’s backing description before committing a valuable garment. This small identification step determines which instructions apply and prevents incompatible patches from entering the same installation batch.
Read the Backing, Not Just the Front Design
Plastic reinforcement gives an embroidered patch body; heat-seal adhesive provides an attachment layer. They can look similar while serving different purposes. A smooth stiffener should not be peeled away merely to expose something resembling cloth underneath. Pressure-sensitive products also vary in intended use, including surfaces other than fabric. Keep the original construction intact unless its supplier instructs otherwise, and record the backing type on the paper layout so a visually similar patch does not receive the wrong treatment later.
- Backing reference: American Patch’s guide to patch backing types explains the differences between common backing constructions and their intended attachment methods.
| What you find on the back | What it means for attachment | What to do next |
|---|---|---|
| Exposed textile or stitching | Glue or thread will meet a textile surface, possibly with a finish | Check compatibility and test the actual backing |
| Smooth plastic reinforcement | The layer may provide structure rather than attachment | Identify it; do not assume it melts into a useful bond |
| Identified iron-on or heat-seal adhesive | Heat and pressure must activate a specific system | Obtain its complete equipment and application requirements |
| Adhesive protected by a liner | Intended permanence and fabric suitability still need confirmation | Check installation, wash, and removal instructions |
| Hook-and-loop, rubber, silicone, or another specialty construction | A different joining system or material limitation may apply | Use the supplied system or obtain specific compatibility guidance |
Understand What a Good Bond Actually Needs
Adhesion describes the connection between glue and each contacting surface; cohesion describes the glue’s own internal strength. Both matter. A strong adhesive cannot compensate for failing to grip a smooth backing, and a well-gripped backing cannot rescue an adhesive layer which remains unsuitable for the job. Surface condition also affects how closely the adhesive contacts the material. In practice, evaluate both sides of the joint and the cured result, rather than treating a stronger-sounding glue description as a complete solution.
- Evidence for this material check: 3M’s explanation of adhesive bond strength distinguishes adhesion, cohesion, and surface contact. These are general bonding principles, not performance tests for a particular fabric-glue brand.
For clothing, the surface you can see may be a finish rather than the underlying fiber. A coated polyester bag and an uncoated polyester shirt therefore should not be treated as identical bonding surfaces. Pile, loose fibers, thick embroidery, and water-repellent finishes deserve particular attention because they change the contact available. Avoid trying to solve an unknown surface with sanding, strong solvent, or extra glue. Identify the material and test a suitable method without sacrificing the garment’s appearance or intended function.
Clean and Separate the Working Layers
Prepare washable fabric according to both the garment label and the chosen adhesive’s directions, then let it dry fully. Where prewashing is required, follow the specified laundry preparation. For example, Aleene’s Fabric Fusion instructions call for prewashing without fabric softener and testing the materials. This is useful product-specific guidance because preparation is part of the adhesive process. It is not a reason to wash dry-clean-only clothing or scrub a coated bag with a treatment its maker does not permit.
- Preparation source: Aleene’s Fabric Fusion product instructions provide the manufacturer’s preparation, testing, application, and care directions for that adhesive.
Before applying anything, slide a suitable protective barrier between the working layer and any pocket, lining, or opposite side. Check the barrier’s compatibility with the process: ordinary absorbent cardboard can become part of an accidental glue joint, while a material suitable for room-temperature gluing may be unsuitable under a press. Arrange the garment without stretching it, remove loose lint, and confirm the support will not leave an impression. Preparation includes protecting the hidden layers as carefully as the visible face.
Run a Small Trial with Observable Acceptance Checks
Use a spare patch and matching garment offcut whenever possible. Label the sample with the backing, adhesive, application date, and care method; retain an untreated offcut for comparison. Follow the intended installation process and the full waiting period before assessing it. This is a practical screening trial, not a laboratory durability certification. Its purpose is to reveal staining, unsuitable stiffness, poor edge contact, or care incompatibility before the same problem is repeated across an entire jacket or uniform set.
- Replicate the materials: use the actual backing and fabric finish, not merely similar colors.
- Replicate the process: apply the intended amount, support, pressure, and waiting conditions.
- Inspect the face and reverse: look for halos, darkening, strike-through, trapped folds, or transferred adhesive.
- Bend normally after the permitted wait: check whether the patch follows the garment without new lifting or puckering.
- Perform the first permitted wash: use a care routine allowed by both garment and attachment system.
- Inspect after drying: compare with the original photograph and untreated fabric; note any edge opening or change in feel.
Decide what acceptable means before the trial: no visible glue outside the border, no unwanted color change, no bonded pocket, and no new separation during ordinary movement or the intended permitted wash. These are project acceptance checks, not numerical industry standards. If the test fails, change one relevant factor at a time so the result is interpretable. Swapping the adhesive, doubling the coating, and changing the wash cycle together leaves you unable to identify which change actually helped.
3. Plan the Whole Layout, Then Divide It into Workable Sections
A layout photograph and a few dependable measurements do more for a batch project than repeatedly eyeballing every badge. Place all patches before attaching any, check how the garment will be worn, and settle the design. Uniforms may have official placement requirements which override decorative preferences. For a personal jacket, check collar folds, pocket access, seat contact, and backpack straps. A visually balanced arrangement should also avoid putting raised patch edges directly in a location subject to repeated rubbing.
- Official placement source: Girl Scouts’ uniform and insignia guide provides placement information for its uniforms; use the relevant organization and uniform level for an actual badge project.
Make Full-Size Templates and Preserve Their Orientation
Trace each patch at full size, assign a number, and mark its top edge. Place the paper shapes on the garment, then photograph the approved arrangement with a ruler visible for scale. Record distances from stable references such as the center back seam or pocket edge. When tracing an asymmetric shape onto adhesive liner, follow the transfer method carefully so the adhesive ends up matching the underside. Keep patch, template, and prepared adhesive together until that numbered piece is installed.
- Video: prepare custom adhesive shapes. Badge Magic’s cut-to-fit demonstration shows preparation of adhesive shapes for different badges. It is useful for understanding shape matching before the adhesive is exposed.
Check the template layout on the garment in its natural shape, particularly around the chest and sleeves. A ruler-straight row laid flat may look different when the cloth curves around a body. Use paper mockups without leaving sharp fasteners in place during a try-on, and test any temporary marking product discreetly. For repeated uniforms, reuse the template but recheck the garment size and seam positions. A template speeds alignment; it does not make every garment panel dimension identical.
Calculate Spacing Instead of Repeatedly Guessing
For a straight row containing at least two patches, calculate the available gap from the actual panel width and full patch widths, including their borders. Use one measurement unit throughout. In the example below, a 30 cm panel contains four patches, each 5 cm wide, with a 2 cm margin at each side. The numbers describe an illustrative design, not an official badge-spacing rule. Confirm the calculated arrangement with paper shapes before making any permanent marks or attachments.
- Formula: gap = (panel width – left margin – right margin – total patch widths) / (patch count – 1).
- Example: (30 – 2 – 2 – 20) / 3 = 2 cm between patches.
- Patch centers measured from the panel’s left edge: 4.5 cm, 11.5 cm, 18.5 cm, and 25.5 cm.
- Negative gap: the row does not fit within the chosen margins; change the layout rather than compressing the calculation.
- Measurement tool: the inches-to-centimeters converter helps reconcile patch listings and rulers using different units; 1 inch equals 2.54 cm.
Organize a Twelve-Patch Project without Rushing Wet Adhesive
Imagine twelve compatible patches arranged as eight on a jacket back, two on the chest, and one on each sleeve. Prepare all twelve templates and supplies together, but treat the four garment regions as separate handling tasks. Finish the supported back panel first, allow the instructed stability before moving it, and then reposition the garment for the next region. If a sleeve requires a different support or method, handle it separately instead of forcing it into the flat-panel process.
- Prepare together: identify backings, approve positions, number pieces, cut dry adhesive shapes, and collect tools.
- Apply in controlled sequence: coat and place each liquid-glue patch within the product’s working instructions.
- Move only when permitted: turning the garment can stress attachments on the opposite side.
- Record each section’s completion: the last attached patch may determine the garment’s earliest use or wash time.
- Keep a clear resting area: moving a freshly assembled jacket to clear the worktable defeats the benefit of careful support.
Curved sections need support matching their shape. A cap crown, sleeve, or padded bag pocket can spring away from a stiff patch when removed from a flat table. Arrange a suitable form inside the item and confirm the patch sits against it without being forced into a sharp bend. If the corners already stand away before adhesive is applied, reconsider the location, patch flexibility, or attachment method. Extra pressure during assembly cannot guarantee a comfortable fit after the support is removed.
4. Attach Patches with Fabric Glue, Adhesive Sheets, or Tape
Adhesive attachment works best when the design decisions are finished before the adhesive is opened. Lay out the numbered patches, check the protective barrier, prepare the support, and clear the resting space. Keep the manufacturer’s instructions within reach for application, pressure, cleanup, and waiting. Preparing a whole batch is useful; exposing or coating a whole batch before you can position it creates avoidable timing problems. With mixed shapes, start with a manageable piece so the application setup can be checked in practice.
Apply Liquid Fabric Glue with Controlled Coverage
Follow the product’s directions about coating one or both surfaces and whether joining should happen immediately or after a specified interval. For a thin, even-coat system, aim for controlled coverage within the patch outline rather than a few thick central blobs. Work close enough to support the edges without squeezing adhesive onto the visible garment. There is no single coating thickness in millimeters suitable for every patch: porosity, backing, and adhesive formulation differ, so use the specified application method and check the result on a sample.
- Confirm the location: compare the patch number and top edge with the approved photograph.
- Isolate the garment layer: position the compatible barrier and check the pocket or lining underneath.
- Apply the specified coat: spread evenly as directed; keep the applicator and patch face clean.
- Place accurately: lower the patch into position without dragging wet adhesive across the fabric.
- Establish contact: press and stabilize according to the adhesive instructions, including narrow points and borders.
- Inspect immediately: look for movement, raised corners, or squeeze-out; use only the permitted cleanup method.
- Leave supported: observe the handling and curing requirements before turning, wearing, or washing the item.
- Video: apply liquid fabric adhesive. Therm O Web’s Fabric Fuse Liquid Adhesive tutorial introduces liquid fabric-adhesive application. Follow the directions supplied with your own product for its coating and waiting requirements.
Give the Edges Attention without Flooding Them
A patch can feel secure in the middle while a loose point catches on clothing or equipment. The useful engineering principle is peel: pulling at a flexible edge concentrates stress into a smaller region than distributing it across the bond. Applied to patches, this suggests checking edge contact and reducing snagging opportunities. It does not establish a guaranteed strength value or require adding more glue everywhere. A thin, correctly formed joint with supported corners deserves more attention than a heavy central puddle.
- Evidence behind the edge check: 3M’s explanation of common adhesive-joint stresses explains how peel concentrates loading at an edge. The patch advice above is a practical application of that general principle.
Inspect contact from the side as well as the top. A thick seam under one corner can hold the backing away from the cloth, even when the center looks flat. Correct the support or change the location if needed; simply adding a heavier object may distort the embroidery or mark the garment. Avoid absorbent weights or cloth touching fresh adhesive where they could become attached. Use the stabilization method appropriate to the product and tested fabric rather than specifying an arbitrary weight for every patch.
Use Product-Specific Timing When Choosing Fabric Glue
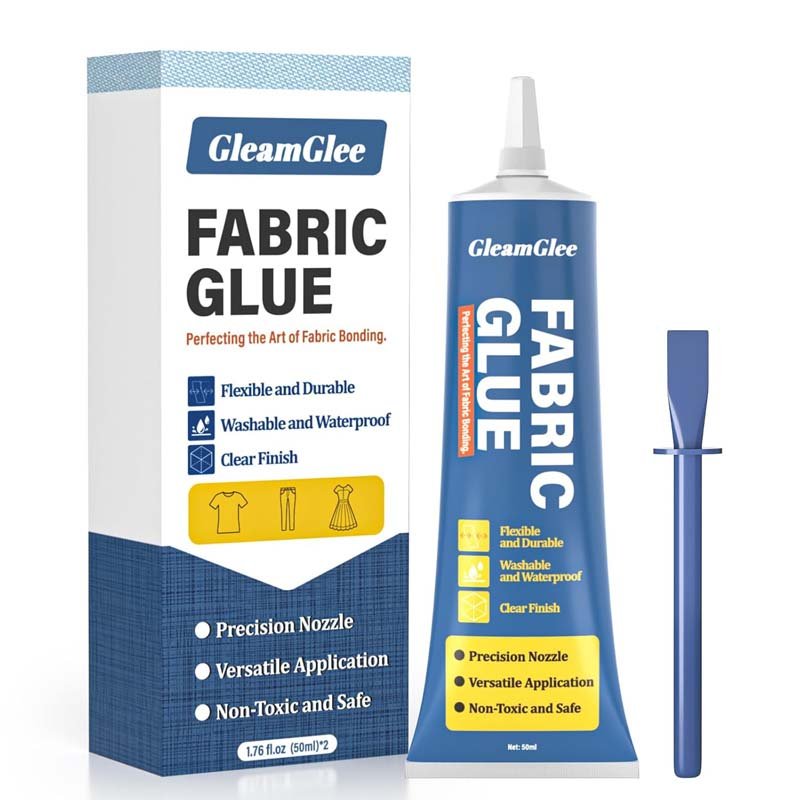
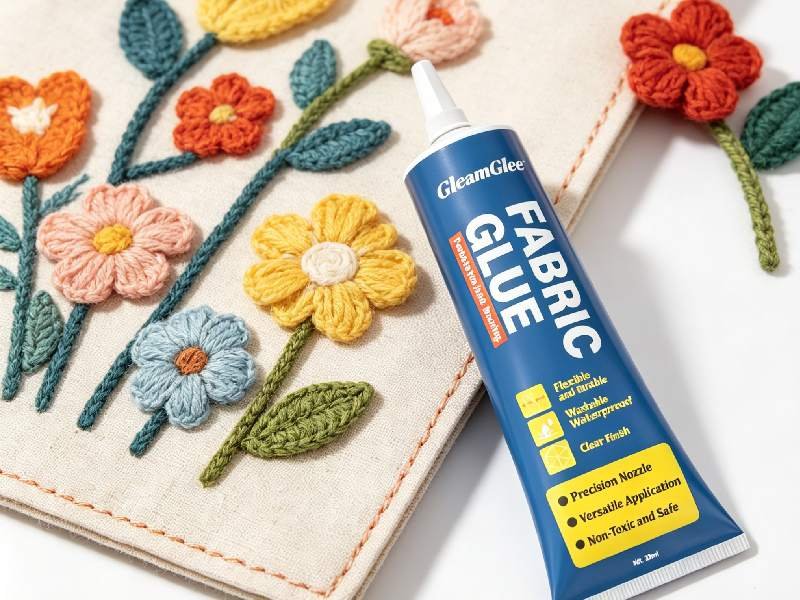
GleamGlee Fabric Glue is an option to evaluate for compatible textile patches when a clear, flexible finish and a no-sew process suit the project. Its supplied product guidance calls for clean, dry surfaces, a thin even coat on one surface, alignment and pressure, and several minutes of stabilization. It describes a typical 6-10-minute initial set and approximately 24 hours before washing, ironing, or frequent use. These are manufacturer directions, not independently established strength ratings or a universal schedule for fabric adhesives.
- Product application reference: GleamGlee’s fabric-glue patch guide provides brand-specific application context; use the current instructions supplied with the product for the actual project.
For a few patches, select the adhesive after checking material suitability and the required waiting period. For repeated club kits, costume work, or a customized product order, provide the garment fabric, patch backing, target care routine, applicator needs, and intended assembly sequence when discussing specifications. A representative sample should settle appearance and handling before a larger quantity is selected. Packaging size or custom labeling is a practical purchasing choice, but neither substitutes for confirming the adhesive works on the actual materials.
Read Every Finishing Step on Adhesive Sheets
Fabric-specific adhesive sheets allow dry preparation before installation. Cut the required shapes, keep their liners in place, and expose adhesive only as the product’s transfer sequence requires. One instructive example is Fabric Fuse sheets: the manufacturer specifies firm pressure, a 15-minute dryer finishing step, and 48 hours before washing, and says do not sew or iron. Its stated dryer setting varies with the fabric or application. If the garment cannot tolerate the complete procedure, select another method before attaching the first badge.
- For Fabric Fuse sheets specifically: transfer the cut adhesive to the patch, remove the remaining liner, position it, and apply firm pressure from the front and back.
- Finish as specified: the directions call for low dryer heat for delicate fabrics or home decor, or medium for heavier fabrics and wearables, followed by pressure again; the garment must tolerate the selected process.
- Product instructions: Therm O Web’s Fabric Fuse sheet directions describe the transfer sequence, edge pressure, dryer settings, and care restrictions for those sheets.
Apply a Dedicated Badge Adhesive in Its Own Sequence
With a badge-specific sheet system, organize each cut shape beside its matching badge and preserve the clean adhesive surface until transfer. Follow that system’s sequence for applying adhesive to the badge, removing the remaining liner, locating it on the garment, and establishing pressure. Check the outline before committing to the instructed final pressure. Do not combine one brand’s transfer technique with another brand’s dryer schedule simply because both products are sold as no-sew solutions; their complete procedures may differ materially.
- Match each prepared adhesive shape to its numbered badge.
- Transfer the adhesive using the liner sequence supplied by its manufacturer.
- Confirm the top edge and garment reference before final placement.
- Apply the required pressure across the badge, including its perimeter.
- Complete the product’s own finishing and waiting instructions.
- Video: attach badges with adhesive sheets. Badge Magic’s official badge-application demonstration shows its badge system in use. Pair the demonstration with the directions supplied for that product.
Use Tape Where Its Shape and Instructions Fit
Narrow fabric adhesive tape can be convenient for straight areas, but a rectangular strip does not automatically provide suitable attachment across a round badge or a shape with pointed corners. Plan the adhesive layout against the complete underside and follow the tape’s intended use. If a patch requires a continuous custom shape, a compatible sheet may be easier to prepare accurately. Avoid building overlapping tape ridges without guidance, because the resulting uneven surface can complicate contact and change how the patch sits.
- Video: use fabric adhesive tape. Therm O Web’s Fabric Fuse PeelnStick Tape tutorial demonstrates that tape format. Check its own instructions before deciding whether it suits the patch shape and garment.
5. Use Heat Application or Sewing When the Construction Calls for It
Heat and stitching solve different attachment needs, and each requires its own setup. A patch supplied for heat application should come with instructions covering the equipment, temperature, dwell time, pressure, and any protective pad or cooling step. Sewing requires an accessible border and a needle-and-thread combination suited to the materials. Check those details before grouping patches together. Matching artwork or similar size does not establish a shared heat recipe, and an adhesive-backed patch is not automatically suitable for sewing.
Press Compatible Patches in Controlled Groups
Position each patch completely inside the effective pressing area and support the garment so seams, zippers, or padding do not prevent the required contact. Several patches can share a press cycle only when their application conditions and the equipment setup allow it. A household iron also cannot be assumed to reproduce a professional press specification. If one edge lies outside the heated area or a thick badge prevents neighboring pieces from receiving pressure, divide the group and correct the setup before continuing.
- Check the patch’s supplied recipe and the garment’s heat tolerance.
- Prepare the required pad, cover, and support; follow any specified preheating step.
- Arrange a group which can receive the required heat and pressure throughout.
- Apply the stated cycle without sliding patches out of position.
- Follow the specified cooling or handling instructions.
- Inspect edge contact before proceeding; repeat heat only when the instructions permit it.
For a concrete example, STAHLS’ embroidered-patch specification sheet lists 21 seconds at 360°F with medium-firm pressure for its heated-upper-platen setup, together with specified covering and preheating requirements. Other equipment configurations in the same sheet use different settings. The value of this example is the complete equipment-specific recipe: copying only the temperature or timing onto an unrelated patch can produce a different result. Its pressure-sensitive version also has a different intended surface category, illustrating why backing identification belongs before application.
- Download: heat-press application specifications. STAHLS’ Embroidered Patches specifications and application PDF provides the full settings, equipment distinctions, and material limitations for that patch system.
Distinguish No-Sew Fusible Adhesive from Sewable Fusible Web
Fusible products can have different finishing requirements even within the same brand. Therm O Web identifies HeatnBond UltraHold as a no-sew option, while Lite and Feather Lite require stitching. This distinction matters when planning a batch: a product intended to eliminate stitching should not automatically become a temporary positioning layer for a sewing project. Select the final construction first, then choose the compatible fusible material. Follow its heat directions carefully, since extra time or temperature is not a universal cure for poor attachment.
- Product-selection evidence: Therm O Web’s product FAQ explains its fusible-product distinctions and application limitations.
For a suitable no-sew fusible project, trace or prepare the shape, apply the adhesive according to its liner and heat sequence, and complete the final attachment using the specified conditions. Keep the material fully supported and avoid treating different fusible webs as interchangeable. A demonstration is especially helpful for understanding which side faces the fabric at each stage. It still needs to be paired with the current instructions for the exact material and fabric being used.
- Video: use a no-sew fusible adhesive. Therm O Web’s HeatnBond UltraHold tutorial demonstrates that fusible format and its handling sequence.
Position with a Sewable Product, Then Complete the Stitching
For a sewable fusible method, prepare the adhesive and patch according to the product instructions, position the shape, and complete the required perimeter stitching. The adhesive helps keep the pieces aligned during sewing; it does not remove the finishing step when stitching is specified. Inspect the trial for puckering and excessive bulk before repeating it. If the patch already has an unknown permanent adhesive on its back, resolve that construction first instead of layering a sewable web over an unidentified system.
- Video: prepare a sewable fusible attachment. Therm O Web’s HeatnBond Lite tutorial demonstrates the sewable fusible option, useful when preparing shapes which will subsequently be stitched.
For machine sewing, support the garment so its weight does not pull the patch sideways. Use a test piece to check whether the stitch catches the patch border, forms consistently underneath, and leaves the surrounding fabric relaxed. Work slowly around curves and stop to reposition at corners without dragging the fabric against the needle. Utah State University Extension describes fusible appliqué followed by perimeter stitching, including decorative, satin, or blanket stitches. Its detailed settings concern its illustrated appliqué techniques and should not be transferred unchanged to every thick embroidered badge.
- Download: illustrated appliqué techniques. Utah State University Extension’s Machine Applique Techniques PDF explains the preparation-to-stitching sequence and illustrated stitch approaches.
Hand Sew When a Machine Cannot Reach the Area
Hand sewing can be practical for a sleeve, an awkward bag panel, or a small number of patches with accessible textile borders. Stabilize the patch using a method compatible with the garment and any existing adhesive, and keep the intended sewing layer separate from pockets and linings. Work with comfortable thread tension: the thread should hold the pieces together without gathering the fabric. A consistent perimeter is easier to inspect than a few widely separated stitches placed only where the needle passes most easily.
- Thread the needle and secure the starting end on the hidden side.
- Bring the needle through the intended garment layer and the patch’s sewable border.
- Make a small stitch, pulling the thread snug without puckering the cloth.
- For backstitch, come up ahead of the previous stitch and return into its endpoint.
- Continue around the border, checking the underside and keeping pockets free.
- Secure the thread on the reverse and inspect the completed perimeter.
- Photo guide: hand sew a patch. iFixit’s hand-sewn patch tutorial shows needle movement and finishing on its example garment.
6. Estimate Time and Materials with a Small, Repeatable Calculation
A useful estimate separates work you perform once from work repeated for each patch. Layout, tool setup, and cleanup can be shared across a batch, while coating, placement, or stitching usually repeat. Waiting may overlap between patches, but garment handling restrictions can also delay the next section. Record a small trial and use those observations for the remainder. The examples below show the arithmetic; they are planning assumptions, not measured industry averages or promises about how quickly a particular adhesive works.
Build a Hands-On Estimate, Then Add the Required Waiting
For a twelve-patch project, suppose the clean, dry garment and suitable supplies are already available. Assume eight minutes of work-area preparation, twelve minutes of layout, one and a half minutes of active application per patch, eight minutes of active repositioning between sections, and four minutes of cleanup. Those assumptions produce 50 minutes of hands-on work. They exclude prewashing, drying, compatibility testing, adhesive waiting, and any separate finishing process; add each required item to the actual schedule.
| Work stage | Illustrative active time | What the estimate includes |
|---|---|---|
| Prepare the work area | 8 minutes | Barrier, supports, tools, and numbered patches |
| Confirm the complete layout | 12 minutes | Templates, measurements, and reference photograph |
| Apply twelve patches | 12 × 1.5 = 18 minutes | Active coating or transfer and positioning |
| Reposition between regions | 8 minutes | Active handling after movement is permitted |
| Inspect and clean up | 4 minutes | Visible checks, tool cleanup, and project notes |
| Total hands-on work | 50 minutes | Waiting and separate finishing remain additional |
- Hands-on formula: shared preparation + layout + patch count × observed active time per patch + repositioning + cleanup.
- Readiness rule: every attachment must complete its own required process and waiting period before the whole garment reaches that use condition.
- Mixed-method rule: check the latest applicable readiness time across all patches, including any region completed later.
- Budget rule: include trial materials and required tools; do not compare bottle price alone with the full cost of another method.
Suppose the instructions for the chosen system require a 48-hour wait from completed installation, and the final required step finishes at 5:30 p.m. on Friday. That interval ends at 5:30 p.m. on Sunday, assuming the installation and waiting conditions meet the instructions. An earlier patch does not shorten the final patch’s requirement. Treat calendar arithmetic as scheduling assistance only: it cannot confirm whether the material has cured correctly or whether a missing finishing step can be skipped.
- External timing tool: Timeanddate’s date-and-time addition calculator can add the stated waiting interval to your recorded completion time.
Estimate Adhesive Sheets by Fit, Not Area Alone
For sheets, measure the usable dimensions and arrange the actual patch outlines before buying. Dividing total patch area by sheet area gives only a lower-bound estimate because shapes may not nest efficiently. In an illustrative layout, a usable 12 × 18 cm sheet accommodates six 5 × 5 cm square shapes as two columns and three rows, with space remaining. Twelve such shapes therefore require two sheets before allowing for any failed cuts, trial pieces, or product-specific trimming requirements.
- Columns: whole number of shapes fitting across the usable width.
- Rows: whole number fitting along the usable length.
- Pieces per sheet: columns × rows, for this rectangular-grid example.
- Example: 2 × 3 = 6 shapes per sheet; 12 / 6 = 2 sheets.
- For irregular badges: trace and nest the full-size outlines; total area alone can underestimate the required sheets.
- For planning losses: count the trial and spare shapes you actually want rather than adding an unsupported universal waste percentage.
Estimate Liquid Adhesive from Your Own Application Trial
Bottle coverage depends on patch area, absorbency, backing, applicator control, and the specified coating. A claim such as one bottle attaches fifty patches has little meaning without those details. For repeat work, weigh a capped bottle before and after applying a representative group, using the same cap and a scale precise enough to resolve the change. Divide the measured mass used by the number of comparable patches. This estimates consumption under your process, including ordinary applicator loss captured by the measurement.
- Illustrative measurement: a bottle weighs 112.4 g before and 110.6 g after three comparable test patches.
- Measured use in this example: 112.4 – 110.6 = 1.8 g.
- Average per patch: 1.8 / 3 = 0.6 g.
- Nine additional comparable patches: 9 × 0.6 = 5.4 g estimated use.
- Measurement limit: this is a hypothetical example, not a GleamGlee coverage specification; do not equate grams with milliliters without the product’s density.
Keep different sizes or backings in separate estimates if their application differs visibly. Three small woven labels will not predict consumption for a large, absorbent embroidered centerpiece. Record enough detail to repeat the method, and use a larger representative group when the scale cannot resolve the small mass change reliably. Count the adhesive already consumed by the trial in the overall purchasing plan. A simple observation-based estimate is more useful than adding extra glue merely to match an assumed coverage number.
7. Inspect, Repair, and Wash without Undermining the Attachment
Inspect the project at meaningful stages: immediately after placement for alignment and squeeze-out, after the required wait for ordinary handling, and after the first permitted wash for care-related changes. Avoid repeatedly picking at a fresh edge to see whether it is stuck, because that can disturb the developing joint. Use good light and compare the garment with its layout photograph. A quick inspection should look underneath as well, where a bonded lining, closed pocket, or misplaced stitch may otherwise go unnoticed.
Check the Result against Specific Acceptance Points
After the required waiting period, bend the garment as it would move in ordinary use and observe the patch perimeter. Look for changes rather than performing an improvised destructive pull test on the finished item. A patch can appear aligned but still bridge a seam, restrict an opening, or feel uncomfortably stiff. For repeated uniforms, inspect the first completed garment before assembling the remaining batch so an overlooked positioning or support problem does not become a repeated repair task.
- Position: patch number, orientation, spacing, and any official placement are correct.
- Appearance: no unwanted adhesive halo, staining, crushed embroidery, or puckering.
- Contact: no visible unsupported corner or newly opening edge during ordinary movement.
- Function: pockets, zippers, sleeves, and linings remain usable.
- Process: required pressure, finishing, cooling, and waiting have been completed.
- Care: the intended cleaning method is permitted by the garment, patch, and attachment system.
Read a Failure before Choosing the Repair
A separated patch provides clues, but a casual visual check cannot establish a laboratory failure diagnosis. Glue remaining mostly on one side suggests examining the opposite interface; fibers or a backing layer coming away suggest examining the material itself. Soft residue may call for checking the product and completed waiting conditions. These observations help identify the next test. They do not justify applying more adhesive to every failure or declaring one cause certain without checking the materials and process.
| What you observe | What to investigate | Practical next action |
|---|---|---|
| A corner lifts while the center holds | Missed contact, a raised seam, curvature, or repeated snagging | Correct the support or placement and use the product’s permitted edge repair |
| Adhesive remains mainly on one separated surface | Compatibility or preparation at the opposite interface | Retest that material pair before repeating the same application |
| Fibers or a backing layer come away | Failure within the fabric or patch construction | Reassess the location, patch, or attachment method |
| A shiny halo or stiff patch appears | Excess adhesive, migration, pressure, or unsuitable materials | Check permitted cleanup and revise the trial before continuing |
| Several patches lift after washing | First-wash timing, omitted finishing, or incompatible care | Compare the complete process with all applicable care instructions |
| Fabric puckers around a stitched patch | Placement distortion, thread tension, or stitch setup | Correct the sewing setup on a sample before reworking the garment |
Repair a Loose Edge Only with a Compatible Procedure
For a localized edge repair, first identify the installed adhesive and check its own repair directions. Badge Magic’s FAQ describes adding a small piece of its adhesive beneath a loose area and notes a possible stitch for certain persistent stiff points. It also specifies waiting two to three days before washing. These directions belong to that system; they do not authorize stitching through a different adhesive which prohibits sewing. After any repair, follow the applicable waiting requirements before returning the garment to use.
- Repair and care instructions: Badge Magic’s FAQ covers its loose-edge remedies, first-wash guidance, and removal precautions.
Remove an Incorrect Patch without Spreading the Problem
If a patch is badly positioned or the entire bond is unsuitable, identify the adhesive before attempting removal. The correct approach may differ between a removable badge adhesive, a cured liquid glue, and a heat-applied backing. Do not start with a hotter iron or a general solvent simply because either worked on another craft project. Test any permitted remover discreetly, protect nearby surfaces and hidden layers, and follow its complete cleanup instructions before considering another attachment on the same area.
- Video: remove a Badge Magic attachment. Badge Magic’s official removal demonstration shows removal for its own badge system. It is not a general removal method for every fabric adhesive.
Once the patch is off, inspect both the fabric and backing before reusing either. Residue, loose fibers, damaged coating, or an uneven adhesive layer can make the next installation unlike the original trial. Allow any required cleaning and drying to finish, then reassess the proposed material pair. If removal has visibly changed a delicate or coated garment, moving immediately into another glue application may hide rather than resolve the problem. A replacement patch or professional garment repair can be more appropriate for a valuable item.
Follow the Care Limits of the Complete Assembly
The usable care routine must satisfy the garment, patch, and adhesive instructions together. Permission to machine wash an adhesive does not override a garment’s dry-clean-only label, and a washable garment does not make every patch backing suitable for its usual hot cycle. Where the instructions allow it, turning the item inside out can help protect raised decoration during laundering. Check the permitted drying and ironing steps separately, then inspect the patches after the garment has dried, particularly following its first wash.
- Download: garment-care symbol reference. GINETEX’s textile-care symbol reference PDF explains washing, drying, ironing, and professional-care symbols used on garment labels.
Finish with a Process You Can Repeat
A well-planned patch project brings the materials, layout, installation, and waiting period into one workable sequence. Identify each backing, test the actual combination, approve the complete arrangement, and attach manageable sections with proper support. Record the method and completion times so care does not depend on memory. The next project becomes easier because the useful decisions are already documented. Choose supplies for their fit with the garment and its intended use, keep the application controlled, and let a sound process deliver the time savings.

8. Frequently Asked Questions About Attaching Multiple Patches
What Is the Fastest Way to Attach Patches without Sewing?
For compatible materials, liquid fabric glue or a fabric-specific adhesive sheet can reduce the active work of stitching every border. Prepare the whole layout first, then follow the selected product’s complete installation sequence. Compare its finishing, handling, and first-wash requirements with your deadline. A press-on badge system may be convenient, while a liquid adhesive may suit another backing better. The fastest useful choice is the one which reaches the required use condition on time and works with the actual garment.
Can I Iron Several Patches onto a Jacket at Once?
Yes, when the patches share compatible application requirements and the equipment supplies the specified heat and pressure across every patch. Thickness differences, raised seams, and areas outside the heated surface can prevent consistent contact. Check the jacket’s heat tolerance and the patch supplier’s equipment requirements first. For a household project, smaller controlled groups may be easier to position and inspect. Follow the required cooling and handling instructions, and do not assume a longer press cycle will correct every loose edge.
Can I Use Fabric Glue on an Iron-On Patch?
Sometimes, but the glue must be compatible with the existing heat-activated backing as well as the garment. An iron-on label describes the patch’s intended attachment system; it does not establish suitability for an additional adhesive. Keep the backing intact unless the supplier instructs otherwise and test the actual pair. If the garment cannot tolerate heat, a sew-on patch or another compatible construction may simplify the job. Layering unidentified products can make both attachment and later removal harder to predict.
How Long Should Fabric Glue Dry before Washing Patches?
Follow the first-wash instruction for the exact product and complete any required finishing steps. A patch which has stopped sliding may still be unready for washing or demanding use. The manufacturer examples discussed here include approximately a day before washing or frequent use for one liquid adhesive and longer first-wash intervals for certain badge systems. These examples are not interchangeable rules. When patches are attached in separate sessions, every attachment must satisfy its requirement before the garment is washed.
What Is the Best Way to Attach Patches to Hats and Backpacks?
Start with the backing, outer fabric, coating, padding, and access to the intended layer. A flat canvas panel may suit a different method from a curved cap crown or coated backpack pocket. Support the area in its natural shape and check whether the patch edges lie against it before attachment. Sewing requires safe access through suitable layers; adhesives need confirmed compatibility and contact. Avoid using decorative patch instructions to repair damaged straps, load-bearing seams, or other components responsible for carrying weight.
Should I Sew around a Patch after Gluing It?
Sew only when the patch, garment, and adhesive system permit the combined construction. Some fusible webs are intended for positioning followed by stitching, while certain permanent adhesive sheets explicitly prohibit sewing. Check the product before adding reinforcement, and test the needle, thread, and stitch formation on comparable material. If perimeter stitching is the intended final attachment, choose a sewable preparation method from the beginning. A few permitted corner stitches can address a specific problem, but they do not automatically provide the coverage of a completed sewn border.