 Skip to content
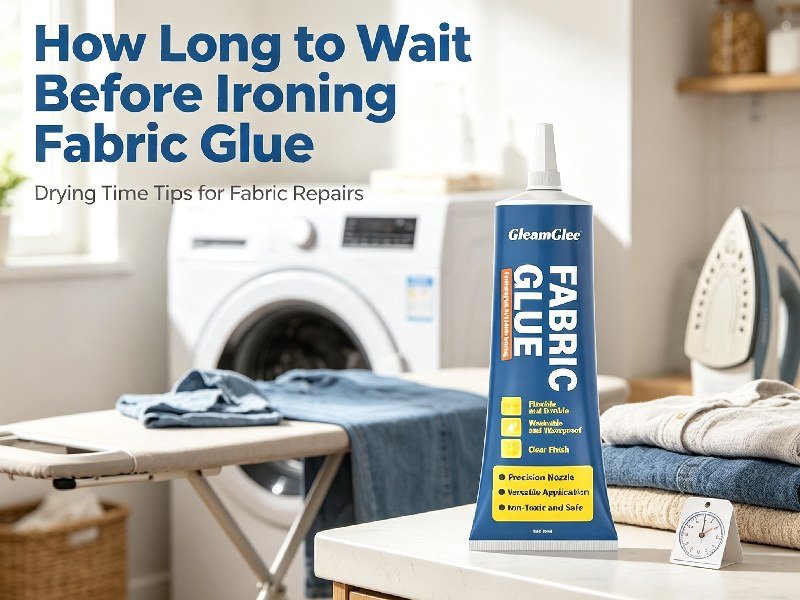
A fabric-glue repair can look finished surprisingly quickly. A loose trouser hem may stop dropping, a patch may stay flat, and a clear adhesive may lose its wet appearance within minutes. None of those visual changes automatically means the repair is ready for an iron. Heat, pressure, steam, and movement place very different stresses on a bonded textile than simply leaving it undisturbed on a table, so ironing should be treated as part of the repair process rather than a cosmetic finishing step added whenever the surface looks dry.
For GleamGlee Fabric Glue, the confirmed product information gives approximately 6–10 minutes for initial positioning and about 24 hours for full curing. After full cure, the bond is described as flexible, washable, and suitable for normal everyday ironing when the garment itself permits ironing. These figures belong to this particular adhesive and should not be transferred to another brand, a fusible web, an iron-on hem tape, or a heat-activated liquid adhesive simply because all of them can be used on clothing.
The most reliable household routine is therefore simple: identify the exact adhesive, record when the final bonded section was completed, wait for its product-specific cure or ironing period, read the clothing care label, use the least aggressive permitted heat, protect sensitive surfaces, and inspect the repair again after cooling. Following this order prevents two common mistakes at once—ironing an adhesive before it is ready and using a heat level the garment was never designed to tolerate.
This guide focuses on everyday low-stress projects such as hems, patches, cuffs, trims, curtain edges, garment decoration, and selected fabric-layer repairs. Structural locations such as crotches, shoulders, underarms, waistbands, heavily stretched activewear seams, zippers, or load-bearing straps require a different standard because the repair needs to transmit repeated force through the garment. In those locations, sewing, reinforcement, a manufacturer-approved system, or professional repair is often more appropriate than relying on a surface adhesive alone.
1. How Long Should You Wait Before Ironing Fabric Glue?
For GleamGlee Fabric Glue, about 24 hours after completing the bond is the practical full-cure reference before ironing should be considered. The important word is completing. If you begin hemming a pair of pants at 7:00 p.m. and finish the final glued section at 7:35 p.m., count from approximately 7:35 p.m. rather than from the moment you squeezed out the first line of adhesive. This conservative approach is especially useful on long hems, curtains, large patches, and projects completed in several sections.
The first 6–10 minutes should be understood as an initial positioning period, not a shortened cure time. During this stage, the fabric may stop sliding and the folded edge may appear secure enough to release light hand pressure, but the adhesive layer is still developing the properties expected during later bending, wearing, washing, and heating. Ironing at this stage adds heat and mechanical pressure while the repair is still young, creating an unnecessary risk of movement, squeeze-out, uneven bonding, or visible distortion.
A Practical First-Day Timeline
| Time After Applying GleamGlee Fabric Glue | What the Repair May Be Doing | Recommended Action |
|---|---|---|
| 0–10 minutes | Begins holding the pieces in position | Keep aligned; do not slide, stretch, wash, wear, or iron |
| 10 minutes–24 hours | Bond continues developing strength and flexibility | Keep flat or properly supported; avoid unnecessary handling |
| Around 24 hours | Product-specific full-cure reference | Inspect edges, appearance, flexibility, and bond continuity |
| After full cure | Repair can enter the ironing decision stage | Read the garment care label before applying heat |
A useful way to remember the timeline is “hold first, cure next, iron last.” A garment may look perfectly usable after fifteen minutes, but appearance is not a reliable substitute for time. If the clothing is needed for an event in only one or two hours, it is usually better to choose a temporary or sewn solution than to apply a permanent adhesive and immediately force it into service before its stated cure period has passed.
A strong piece of external evidence for product-specific timing comes from Gorilla Fabric Glue. Its current manufacturer directions list a minimum of 24 hours for full cure, yet they separately tell users to wait a minimum of three days before washing and ironing. This does not mean every fabric glue needs three days. Instead, it demonstrates an important industry principle: a manufacturer may define full cure and permitted aftercare as separate milestones, so a generic “24-hour rule” cannot replace the instructions for the exact adhesive in use.
reference content source — Gorilla Fabric Glue official directions: The manufacturer distinguishes a 24-hour full cure from a longer three-day washing and ironing wait, making it a useful comparison for understanding product-specific aftercare.
When timing matters, write the finish time on a temporary paper tag, phone note, or repair worksheet. A written time is much more useful than remembering “I glued this yesterday,” because yesterday might mean eleven hours ago or thirty hours ago. This small habit is particularly helpful for parents repairing several school garments, costume departments managing multiple outfits, travelers preparing clothing before departure, or anyone completing several repairs during one evening.
2. Why Does “Dry” Not Always Mean “Ready to Iron”?
People naturally judge an adhesive from the surface because the surface is all they can see. Once the glue turns clear, stops looking wet, or no longer feels tacky near an exposed edge, the repair appears finished. Inside a folded hem or beneath a patch, however, the adhesive film can continue developing after the visible edge has changed. This is one reason experienced textile repair work separates initial set, surface drying, full cure, and aftercare permission instead of treating them as interchangeable events.
Set Time, Dry Time, and Full Cure Are Different Stages
Initial set describes the period when two pieces begin staying where they were positioned. Dry time usually refers to the loss of obvious wet appearance or surface tack. Full cure is the stage at which the adhesive has reached the condition expected for its intended normal use. For clothing, this final distinction matters because daily service involves repeated folding, friction, body movement, laundering, and sometimes iron heat that were not present while the garment rested quietly on a work surface.
For the referenced GleamGlee product, approximately 6–10 minutes is the confirmed initial positioning period while approximately 24 hours is the full-cure reference. Those numbers explain why a hem can already feel stable in the first ten minutes without being ready to wear or iron. The product facts also describe the fully cured film as remaining soft and flexible, which is particularly important around cuffs, hems, curtain folds, patches, and other locations expected to bend naturally during use.
Another current manufacturer example illustrates how dramatically “dry” and “ready for aftercare” can differ. Aleene’s Fabric Fusion states a 2–4 hour full cure and says the bonded item becomes washable after 48 hours. The same manufacturer also notes that dry time depends on adhesive quantity, temperature, and humidity and gives a laboratory-style dry-time estimate based on a defined coating thickness and room-temperature range. This is useful evidence against judging all textile adhesives from surface appearance alone.
reference content source — Aleene’s Fabric Fusion manufacturer instructions: Useful for understanding how adhesive amount, room conditions, cure time, and later washability can be separate variables.
Conditions That Can Make a Repair Deserve More Patience
No reliable manufacturer-independent formula exists for saying that a specific percentage of humidity adds a certain number of hours to every fabric glue. Chemistry, coating thickness, textile structure, and test method vary too much for such a rule to be credible. Still, several ordinary conditions can make a bond stabilize more slowly or make the nominal cure point deserve a more careful inspection before heat is applied.
- A much thicker adhesive film than intended
- Dense multilayer denim
- A large patch covering a broad glue area
- Adhesive trapped deep inside a folded hem
- Cool working conditions
- High relative humidity
- Limited air movement
- Smooth or coated textile surfaces
- Several layers of fabric compressed together
- Repeated applications added before earlier adhesive has stabilized
Too much fabric glue also creates problems unrelated to time. A heavy deposit can soak into an absorbent textile, squeeze through a visible edge, form a darker patch on pale cloth, or create a stiff ridge after curing. A formulation designed to stay flexible works best when applied as a controlled bonding film rather than used to saturate the fibers. This is one reason a precision applicator is helpful on narrow hems and patch edges, where accurate placement matters more than simply dispensing a large amount of adhesive.
How a Controlled No-Sew Hem Is Actually Built
Before worrying about ironing, the original bond should already be neat. A practical no-sew hem starts by measuring the final length, creating a consistent fold, checking both legs or both ends of a long textile, testing the adhesive in a hidden location, and applying a thin layer inside the fold rather than flooding the visible edge. Working in shorter sections allows the user to correct a crooked line or developing wrinkle before an entire trouser leg has been bonded.
- Video evidence — How to Hem Pants with Fabric Glue: Aleene’s DIY demonstrates measuring, folding, applying fabric adhesive, and creating a no-sew pants hem. Use the video to understand the physical workflow; use the instructions for the adhesive actually being applied for cure and heat timing.
Once the repair is completed, avoid repeatedly flexing it to see whether it is “strong yet.” Every early test introduces movement precisely when the bond is still developing. Leave the repair alone for the required interval, then evaluate it. At the full-cure checkpoint, inspect the edge for continuity, compare the repaired and untreated fabric by touch, and bend the area gently in the way the garment normally moves rather than performing an aggressive pull test on a valuable piece of clothing.
3. Is Your Adhesive Regular Fabric Glue or Heat-Activated?
One of the most important checks happens before any timing calculation: determine what kind of adhesive system is actually being used. The words “fabric adhesive,” “no-sew adhesive,” and “hem adhesive” are used for several very different products. A bottled room-temperature glue may need to cure before an iron ever comes near it, while fusible web or iron-on hem tape relies on heat to form the bond in the first place.
This distinction prevents two opposite mistakes. A user might apply a room-temperature textile glue and immediately iron it because a video about fusible tape showed an iron during installation. Another user might apply an iron-activated product and leave it sitting for an entire day because they assumed every textile adhesive needs a long conventional cure before heating. Reading the product type first is therefore more useful than memorizing one universal number.
Regular Room-Temperature Fabric Glue
A conventional liquid fabric glue usually follows a sequence such as clean → apply → align → hold → cure → resume permitted garment care. GleamGlee Fabric Glue belongs to this general use pattern according to the supplied product information. It is intended for common textile applications such as cotton, denim, polyester, canvas, felt, patches, lace, ribbon, hems, curtains, and everyday repairs, with ironing considered after the approximately 24-hour full-cure stage rather than used as the activation mechanism.
Heat-Activated Liquid Fabric Adhesive
A heat-activated liquid can follow a completely different sequence because the iron helps establish the bond. A current Aleene’s demonstration of an iron-on fabric-glue product shows adhesive being applied to a hem and then activated with controlled heat. Someone using this type of system should follow the specified activation instructions instead of waiting 24 hours merely because another bottled fabric glue happens to use a 24-hour cure schedule.
- Video evidence — How to Hem Pants With Iron-On Fabric Glue: This short Aleene’s DIY demonstration clearly shows how an iron can be part of the bonding process rather than a later garment-care step.
Fusible Web and Hem Tape
Iron-on tapes and fusible sheets create another category. Therm O Web currently describes HeatnBond Hem Tape as a heat-activated, double-sided adhesive used to hem garments and home décor without sewing. Its published directions include prewashing, testing materials, using a medium iron without steam for the specified product, enclosing the tape within the folded hem, and applying timed pressure. These instructions make clear why fusible products should not be grouped with ordinary air-curing fabric glue.
reference content source — HeatnBond Hem Iron-On Adhesive Tape: The official instructions show an 8-second iron application per section followed by an additional short pass for this particular product, illustrating how heat activation follows its own timing system.
A separate Therm O Web tutorial visually demonstrates HeatnBond UltraHold, a paper-backed iron-on adhesive used to fuse fabric. The manufacturer’s video also warns against touching the iron directly to the exposed adhesive and recommends following the laundering directions of the fabric or garment after fusing. The value of this video for a fabric-glue article is educational: it shows exactly why “fabric adhesive” should never be treated as a single chemistry with one universal cure schedule.
- Video evidence — How to Use Therm O Web HeatnBond UltraHold Fusible Adhesive:
The Iron Plays a Different Role in Different Adhesive Systems
| Adhesive System | Role of the Iron | Main Timing Rule | Common Error |
|---|---|---|---|
| Room-temperature fabric glue | Post-cure garment care | Cure first; iron later only if permitted | Ironing once surface feels dry |
| Heat-activated liquid adhesive | Helps activate or complete bonding | Follow the product heating sequence | Applying a generic air-cure rule |
| Fusible web or hem tape | Heat creates the bond | Follow exact heat, pressure, and cooling instructions | Treating it like bottled fabric glue |
| Unknown adhesive | Not yet established | Read the package or manufacturer directions | Guessing from appearance |
Mixed repairs need additional care. An embroidered iron-on patch may already contain a thermoplastic backing, while a user later adds liquid fabric glue beneath one lifting corner. The garment may also contain a synthetic coating or printed decoration. At that point, the repaired zone contains several permanent materials with different heat limits. A safe process follows the most restrictive relevant instruction rather than the highest temperature tolerated by any single component.
4. How Can You Tell When a Fabric-Glue Repair Is Ready to Iron?
Reaching the stated cure time is the first checkpoint, but a sensible repairer still looks at the garment before switching on the iron. Cure guidance assumes reasonably appropriate application conditions. If one edge still appears wet, a large patch is visibly lifting, the hem shifted during curing, or excessive adhesive has formed a ridge, applying heat simply because the clock reached the nominal deadline will not correct those underlying problems.
Count from the Last Section You Finished
For a small cuff, the start point is easy to identify because the complete bond may be made in less than a minute. A long skirt hem or curtain edge is different. If the work is completed progressively over forty minutes, use the time when the last section was bonded and secured as the conservative reference point. This avoids ironing the newest part of the repair while it has had considerably less curing time than the first section.
Users who want a simple external arithmetic check can use a date-duration calculator rather than building an interactive tool into the article. Timeanddate provides a calculator that can include time fields in addition to dates, making it useful for confirming whether 24 hours have genuinely passed. The tool cannot decide whether an adhesive is chemically ready; it only helps calculate elapsed time after the correct manufacturer interval is already known.
External tool — Timeanddate Date Duration Calculator: Enter the repair finish date and time and the planned care time to calculate the elapsed interval.
Seven Checks Before Reaching for the Iron
The following checklist is intentionally static. It can be printed or saved without asking a visitor to answer questions inside a generator, and it keeps the decision focused on facts the user can verify at home.
- The product-specific cure or ironing wait period has passed.
- The bonded area stayed reasonably still during curing.
- No section looks obviously wet.
- No exposed edge remains unusually tacky.
- The hem, patch, or trim remains properly aligned.
- The adhesive manufacturer permits ironing at the relevant stage.
- The garment care label permits ironing.
The first five checks are useful observations, but none of them replaces the last two. A perfectly clear and stable adhesive might still carry an instruction not to iron, while an iron-safe adhesive can be attached to a garment whose label prohibits ironing entirely. The repaired garment is ready for heat only when the repair system and the garment both permit the planned treatment.
Use a Simple Static Cure Record
A useful downloadable resource for this section would be a “24-Hour Fabric Glue Cure & Ironing Record.pdf.” It does not need to calculate anything automatically. The sheet can provide blank spaces for adhesive name, repair location, finish date, finish time, full-cure reference, care-label symbol, selected iron setting, steam permission, press-cloth use, and post-cooling inspection notes. This is more practical for a household repair bench than a conversational tool that forces a user through multiple questions.
The supplied user-problem research already recommends static care timelines and repair checklists for people who need to continue wearing, washing, and ironing repaired clothes. It also stresses that users should wait through the full cure, read the garment label, and use a conservative process rather than treating “fabric glue is iron-safe” as permission to increase the garment’s normal care temperature.

5. What Does the Garment Care Label Allow?
An iron-safe adhesive does not turn a non-ironable garment into an ironable garment. This is arguably the most important safety boundary after cure timing. A repaired clothing item contains at least two materials with separate limits—the original garment and the adhesive—and often contains more, such as elastic, printed film, fusible interfacing, embroidery backing, sequins, synthetic trim, reflective graphics, coatings, or patch material.
The U.S. Federal Trade Commission’s Care Labeling guidance explains that clothing care instructions need to account for relevant washing, drying, ironing, and warnings. The FTC specifically notes that if a consumer might reasonably iron a garment and doing so would cause harm, the care instructions should warn against ironing. This supports a simple rule for home repair: the adhesive cannot overrule a “Do Not Iron” garment instruction.
reference content source — U.S. Federal Trade Commission Care Labeling guidance:
Use the Most Restrictive Relevant Limit
Imagine a shirt whose care label allows moderate ironing. If the cured adhesive is also approved for ordinary moderate ironing, the user can work within those shared limits. If the adhesive allows ironing but the shirt says Do Not Iron, ironing should stop there. If the shirt allows a hotter setting while the added patch or repair material requires lower heat, use the lower limit. Garment repair never creates permission to exceed the restrictions of the most heat-sensitive permanent component.
GINETEX’s current care-symbol guidance under ISO 3758:2023 provides especially useful numerical context. The organization lists a maximum sole-plate temperature of 120°C for low-temperature ironing, 160°C for moderate ironing, and 210°C for hot ironing, as well as a 120°C no-steam category and a “Do Not Iron” symbol. GINETEX also explicitly says the maximum temperature should be selected from the care label, not simply from the garment’s fiber content.
- Evidence and reference tool — GINETEX Care Symbols: This official page explains current ironing categories, press-cloth guidance, steam cautions, and the principle of choosing heat from the label instead of assuming it from fiber names.
Current GINETEX Ironing Limits and What They Mean After Repair
| Care-Label Instruction | Maximum Sole-Plate Temperature | Meaning for a Fabric-Glue Repair |
|---|---|---|
| Low temperature, no steam | 120°C | Use only after adhesive cure; do not add steam |
| Low temperature | 120°C | Protect pressure-sensitive surfaces and avoid unnecessary heat |
| Moderate temperature | 160°C | Stay within adhesive and garment limits |
| Hot iron | 210°C | High garment tolerance does not automatically authorize maximum direct heat over glue |
| Do not iron | No domestic ironing | Do not iron even if the adhesive itself is iron-safe |
These figures describe standardized garment-care severity, not tested GleamGlee maximum adhesive temperatures. The supplied GleamGlee product facts support everyday medium-temperature ironing after full curing, but they do not provide a validated absolute maximum sole-plate temperature that would justify telling users to expose the repair directly to 210°C. Keeping this distinction visible improves credibility and prevents a care-symbol table from being mistaken for adhesive-performance data.
Learn to Read the Symbols Before Heating a Repair
Many consumers recognize a washing machine symbol more easily than the ironing symbols, especially when one, two, or three dots are involved. A short visual tutorial can make this part of the article much easier to understand. The following care-label video covers washing and drying first and moves into ironing symbols at approximately 1:56, so readers can see how the symbols are interpreted before applying the information to a repaired garment.
Video evidence — How To Read The Care Label — Care Label Symbols Explained:
Do not automatically select a hot setting merely because the garment says “100% cotton.” A cotton T-shirt can include a plastic transfer, screen print, elastic neck rib, synthetic thread, decorative foil, or added patch with a different heat limit. Similarly, a polyester garment may be constructed in ways that tolerate a specific pressing treatment. The finished-item care label is therefore more useful than a broad fiber stereotype, particularly after a repair has introduced another material.
6. How Should You Iron Fabric Glue Safely After It Has Cured?
Once the correct cure period has passed and the garment care label permits ironing, the objective is not to test the maximum heat resistance of the adhesive. The objective is to smooth the garment or sharpen the repaired fold using the least severe treatment necessary. Experienced fabric handling favors controlled heat, controlled pressure, and short contact over aggressive ironing because those methods reduce the chance of shine, distorted folds, softened decoration, or unnecessary stress across the repair boundary.
Start Conservatively Within the Permitted Range
Allow the iron to reach a stable setting and begin toward the conservative end of the permitted range rather than jumping immediately to the highest level shown on the care label. A label maximum is a ceiling, not an instruction to always use maximum heat. When the fabric is unfamiliar, test an inconspicuous area first. This is especially valuable on dark fabrics that may develop shine, synthetic surfaces, decorative finishes, delicate weaves, and light-colored garments where a small glue mark would be particularly visible.
For GleamGlee Fabric Glue, the supplied product facts describe the fully cured bond as suitable for daily medium-temperature ironing and appropriate for hems, patches, curtains, and common clothing adjustments. This makes the product relevant when users want a flexible no-sew repair that can return to ordinary clothing care after full cure, but it should not be interpreted as permission to ignore a lower garment heat limit or a “Do Not Iron” warning.
Work from the Wrong Side When Practical
Turning the garment inside out reduces direct contact between the iron and visible glue boundaries, printed decoration, patches, or textured surfaces. On a trouser hem, for example, the user can flatten the folded edge from the inside, align the seam, and apply controlled pressing without repeatedly dragging the iron across the visible outer surface. This approach also makes it easier to see the original fold and identify whether the adhesive has created an unwanted ridge.
Beginners sometimes struggle to identify the right and wrong sides of fabric, particularly with subtle woven materials, similar-looking solid colors, or unprinted textiles. Professor Pincushion provides a simple visual explanation of how to distinguish the two sides, which is useful before a repair or reverse-side pressing operation.
- Video evidence — What Is the Right Side of Fabric?: Useful for determining which surface should remain outward before gluing, folding, or pressing from the reverse side.
Use a Clean Press Cloth on Sensitive Repairs
A press cloth creates a protective layer between the sole plate and the textile. It can reduce direct contact with adhesive edges, help protect pressure-sensitive fabric, and keep possible fusible residue away from the iron. Utah State University Extension includes a press cloth among advanced sewing and pressing supplies and also lists related tools such as sleeve boards, tailor boards, press mitts, and pressing aids used to control garment shaping without damaging surrounding areas.
External evidence — Utah State University Basic Sewing Supplies:
For users who want a printable reference rather than another webpage, Utah State University also provides the same basic sewing-supplies material as a PDF. The document includes pressing tools alongside measuring, marking, cutting, and hand-sewing equipment, making it a useful download for anyone assembling a small household garment-repair kit.
Downloadable external resource — Basic Sewing Supplies PDF:
A short visual demonstration helps explain how little complexity is involved. National Sewing Circle shows what a pressing cloth looks like, how it is placed over a project, and how it can protect both the fabric surface and the iron when fusible or other heat-sensitive materials are involved.
Video evidence — How to Make a Pressing Cloth:
Press and Lift Instead of Scrubbing Back and Forth
There is a useful difference between pressing and vigorous everyday ironing. For a repaired area, position the iron, apply brief controlled contact, lift it, reposition, and repeat. Sliding the sole plate repeatedly over a fresh repair can pull a fold out of alignment, stretch bias-cut fabric, polish dark textiles, or concentrate friction along a patch edge. The press-and-lift method gives the user much better control over contact time and location.
Professor Pincushion provides a clear demonstration of the difference between pressing and ordinary ironing during sewing projects. This video is particularly relevant after fabric repair because viewers can see the iron being placed and lifted rather than pushed continuously over the same area.
Video evidence — Pressing and Ironing Fabric for Sewing:
Can You Use Steam?
Steam should never be assumed safe merely because a glue is described as iron-safe. Current GINETEX guidance includes a low-temperature 120°C without steam category and separately describes steam use at other ironing levels. The garment care label therefore remains important, while the adhesive instructions must also permit the treatment. If either component restricts steam, use a dry iron and controlled pressing instead.
For uncertain coated textiles, reflective decoration, printed transfers, synthetic appliqués, sequins, and plastic-backed patches, direct steam over the repaired area is rarely the best first experiment. Work from the reverse side when practical, keep heat away from questionable decoration, use a clean press cloth, and let the garment cool before bending or judging the repair. A repair that feels different while hot may return to its normal hand after cooling.
Safe Post-Cure Ironing Sequence
- Confirm the exact adhesive cure or ironing interval has passed.
- Make sure the garment is fully dry.
- Read the garment care label.
- Identify any no-steam or “Do Not Iron” restriction.
- Turn the garment inside out where practical.
- Use a clean press cloth on sensitive areas.
- Begin with a conservative permitted temperature.
- Press and lift instead of scrubbing the repair.
- Do not park the iron on one glue line.
- Let the textile cool before testing flexibility.
- Inspect for lifting, seepage, stiffness, puckering, or shine.
7. What Changes for Cotton, Denim, Polyester, Stretch Fabrics, Hems, and Patches?
Fabric type affects application risk, heat sensitivity, absorption, thickness, flexibility, and how a repaired area behaves during normal wear. It does not automatically rewrite the cure time printed for the adhesive. A 24-hour product does not become a six-hour product because it was used on cotton, and a denim project should not be assigned an invented extra twelve-hour cure time unless the manufacturer has actually tested and published such a requirement.
GleamGlee Fabric Glue is documented for common textile applications including cotton, denim, polyester, canvas, felt, ribbon, lace, sequin fabric, patches, and upholstery-type fabric. The product dries clear and is intended to remain flexible after curing, which is valuable for wearable repairs. Even so, the supplied guidance recommends testing delicate, pale, coated, specialty, or valuable fabric in an inconspicuous area because fibers, dyes, absorbency, surface finishes, and fabric construction vary.
Cotton
Ordinary woven cotton is often manageable for household bonding because it lies relatively flat and offers good surface contact, but absorbent cotton can also pull excess liquid adhesive into the fibers. A hidden test is valuable on white shirts, pale dresses, and visible decorative areas because a heavy glue deposit can create a darker-looking region before or after cure. Apply a controlled film, complete the full product-specific cure, and choose ironing heat from the garment label rather than assuming every cotton garment should receive maximum heat.
Denim
Denim adds thickness and multiple folds. A jeans hem can contain several stacked fabric layers at the side seam, meaning a thick adhesive deposit can produce a rigid lump even when the rest of the hem feels flexible. Use a thin line, press the folded area into full contact, and avoid repeatedly opening the hem during curing. At the full-cure point, check whether the repaired area rolls and bends naturally before applying permitted heat.
Polyester and Other Synthetics
Polyester demonstrates the danger of relying on a fiber name alone. A woven blouse, sports jersey, lining fabric, coated polyester shell, and printed performance shirt may all contain polyester while having very different ironing limits. GINETEX specifically states that maximum iron temperature should come from the care label rather than fiber composition. This approach becomes even more important after adhesive, decoration, or patch material has been added to the garment.
Stretch Fabrics
Stretch garments deserve extra caution because the repair will be repeatedly extended during dressing and wear. A flexible fabric adhesive can be useful for suitable decorative attachments and some low-stress applications, but a tight leggings seam, sports waistband, shoulder seam, or another area carrying repeated structural stretch should not automatically be converted into a glue-only repair. The surrounding garment must be able to move without concentrating all of its load at the edge of the adhesive film.
Aleene’s offers a useful visual example of bonding patches to loose, stretchy loungewear with a flexible textile adhesive. The video is relevant because it shows how patch shape, fabric stretch, and placement interact. Its product-specific cure directions should not be transferred to a different adhesive, but the handling and positioning principles are useful for understanding stretch-fabric projects.
- Video evidence — How to Glue Patches on Stretchy Loungewear with Fabric Glue:
Hems, Patches, Cuffs, and Curtain Edges Need Different Handling
| Repair Type | Main Risk Before Ironing | Practical Approach |
|---|---|---|
| Trouser or skirt hem | Adhesive enclosed between folds | Allow full cure and press from reverse side when possible |
| Denim hem | Thick multilayer construction | Use a thin bond line and inspect side seams carefully |
| Patch | Broad bonded area and lifting perimeter | Check the full edge before applying heat |
| Cuff | Frequent bending and skin contact | Avoid excessive adhesive thickness |
| Curtain hem | Very long repair completed progressively | Count cure time from final finished section |
| Decorative trim | Added material may be heat-sensitive | Protect decoration and use the strictest heat limit |
A patch deserves special inspection because failure commonly begins at the perimeter rather than in the center. Run your fingers lightly around the cooled, cured edge without aggressively pulling it upward. If one corner is already lifting before ironing, determine why before adding heat. Dust, an incompatible backing, a thick glue deposit, insufficient surface contact, or a high-bending location may be more important than the ironing method itself.
For a curtain or long hem, divide the project into manageable sections while bonding, but remember that the cure clock for aftercare should reflect the newest glued section. Long projects are also more likely to contain local differences in adhesive quantity because hand pressure and dispenser angle change over the length of the repair. A careful visual check along the entire edge is therefore more useful than inspecting only the first twenty centimeters that were finished.

8. What If You Iron Fabric Glue Too Soon?
If an iron has already touched the repair before the specified cure or aftercare period, stop applying additional heat and let the textile return to room temperature before deciding what happened. Not every early contact causes visible failure, but continuing to heat, peel, scrape, or stretch a warm repair can turn a small problem into a much larger one. Cooling first allows the fabric and adhesive to return to a more representative condition for inspection.
Two kinds of damage need to be separated. Bond disturbance can appear as a shifted hem, a lifted patch edge, glue squeeze-out, puckering, or a suddenly uneven bond line. Fabric heat damage can appear as shine, flattened pile, melted synthetic fibers, distorted coating, discolored prints, softened transfers, or permanent changes in texture. Reapplying glue might help a small compatible bond failure, but it cannot reverse every type of heat damage to the original garment.
Signs the Repair May Have Been Disturbed
- The folded hem has moved out of alignment.
- A patch corner begins lifting.
- Adhesive appears along the visible edge.
- A pale fabric develops a darker glue line.
- The repaired zone becomes noticeably stiff.
- Puckering develops beside the bond.
- The fabric surface becomes shiny.
- A printed or coated area changes texture.
- The repair opens under gentle movement after cooling.
What to Do After Early Ironing
Allow the garment to cool completely and avoid pulling the bonded layers apart while they are still warm. If the product-specific cure period has not yet finished, keep the repair stable for the remaining time. Once the full interval has passed, inspect the bond again. A small lifting edge on compatible, undamaged fabric may be suitable for careful rebonding according to the adhesive directions, while widespread distortion deserves a different repair strategy.
Do not automatically reach for acetone, alcohol, adhesive remover, or another strong solvent. A chemical capable of softening adhesive may also remove dye, attack a printed image, cloud a synthetic coating, spread semi-cured glue, or leave a visible ring on pale fabric. Unless the adhesive manufacturer gives a fabric-compatible cleanup method and the textile has been tested in a hidden location, solvent experimentation on a visible garment can produce more permanent damage than the original repair problem.
When to Stop DIY Repair
The most helpful advice is sometimes to stop adding material. High-value, technically constructed, safety-related, or highly heat-sensitive clothing deserves a lower threshold for professional help, especially after a failed heat treatment.
- Bridal and formal garments
- Silk and very fine sheer fabrics
- Vintage or collectible textiles
- Tailored garments with complex internal interfacing
- Waterproof membrane apparel
- Fire-resistant or protective clothing
- High-value designer clothing
- Structural crotch, shoulder, underarm, or waistband damage
- Load-bearing bag or garment straps
- Large tears with missing or weakened fabric
The user-problem research supplied for this content project follows the same principle: household adhesive repairs are most appropriate for manageable, low-stress textile problems, while structural areas, technical apparel, and valuable garments should be approached more conservatively. It also recommends hidden testing, thin application, careful alignment, full curing, and respect for the garment’s original care label rather than presenting fabric glue as a universal replacement for sewing.
Choosing a Fabric Glue for Clothes That Still Need Normal Care
A clothing adhesive should not be judged only by how rapidly it grabs the fabric in the first few minutes. For real garments, useful questions include whether the cured film stays flexible, whether it dries cleanly enough for visible areas, whether the product states when laundering and ironing can resume, whether the applicator allows thin and accurate placement, and whether the intended repair is a realistic adhesive application rather than a structural seam carrying continuous tension.
GleamGlee Fabric Glue is positioned around these everyday clothing requirements. The supplied product facts describe a 50 ml clear-drying, flexible, washable, no-sew textile adhesive that becomes iron-safe after full curing and can be applied to common materials and projects such as cotton, denim, polyester, canvas, patches, hems, lace, ribbon, curtains, crafts, and garment adjustments. A precision application structure is intended to help users keep the adhesive where it is needed rather than flooding a visible repair.
For businesses developing a textile-repair adhesive under their own branding, care performance should ideally be considered during formulation rather than added as marketing language after the formula is finished. GleamGlee’s company materials describe a research group of more than 25 chemists, material scientists, and process engineers, along with application-laboratory work involving adhesion performance, surface compatibility, humidity, temperature variation, and repeated wear. Those capabilities can support customized formulation and private-label development, although any final ironing or laundering claim still needs to be defined for the exact finished formulation rather than copied from another product.
The same principle applies to consumer selection. A fabric glue with a fast initial hold is not necessarily better for a washable shirt than a slower product with clearly documented flexible aftercare. For hems, patches, trims, and ordinary household textile repairs, users benefit more from predictable cure information, thin application, compatibility testing, and clear aftercare limits than from dramatic claims about instant strength.
Conclusion
The most accurate answer to “How long should you wait before ironing fabric glue?” is product-specific rather than universal. For GleamGlee Fabric Glue, approximately 6–10 minutes is the initial positioning period and about 24 hours is the full-cure reference, after which ironing may be considered if the garment itself allows it. Another adhesive may specify a shorter or longer cure, a separate aftercare interval, or an entirely different heat-activation process.
A dependable repair follows a clear order: identify the adhesive system, record the time the final bonded section was completed, wait for the published cure or ironing period, inspect the repair, read the garment care label, choose the least aggressive permitted heat, use reverse-side pressing or a press cloth when appropriate, allow the area to cool, and inspect it again before normal wear. This sequence is simple enough for ordinary household use while still respecting how textile adhesives actually differ.
Most fabric-glue failures are not prevented by adding a thicker layer or using a hotter iron. Clean surfaces, accurate alignment, appropriate adhesive quantity, sufficient curing, compatible fabric movement, and sensible aftercare are more useful. A successful repair should restore the garment without unnecessarily changing its drape, comfort, appearance, flexibility, or normal care routine.
Frequently Asked Questions
Can I iron fabric glue after 24 hours?
You can consider ironing after 24 hours only when the exact adhesive uses that period as its approved full-cure or ironing reference and the garment care label also permits ironing. For GleamGlee Fabric Glue, about 24 hours is the confirmed full-cure reference. Other products can differ substantially, so the safest rule is to follow the adhesive’s own timing first, inspect the repair, and then apply the clothing label as the upper limit for heat and steam.
Is fabric glue ready to iron when it feels dry?
No reliable rule allows surface touch alone to prove a fabric adhesive is ready for ironing. The exposed edge can lose tack while adhesive deeper inside a hem, patch, or multilayer repair is still stabilizing. Use the manufacturer’s stated cure or ironing time as the primary reference. Surface dryness, edge stability, and appearance are useful inspection points after the stated period, but they should not replace the published timing for the product.
What happens if I iron fabric glue before it fully cures?
Early ironing may introduce heat, pressure, and movement before the bond has finished developing. Possible results include a shifted hem, lifting patch edge, glue squeeze-out, visible marks, puckering, stiffness, or uneven contact. The fabric itself may also suffer heat damage independently of the adhesive. Stop heating, let the area cool, avoid pulling the warm repair apart, complete the stated cure period, and then inspect the garment before deciding whether rebonding or another repair method is needed.
Can I use steam after fabric glue has cured?
Steam should be used only when both the adhesive instructions and the garment care instructions permit it. Some current textile-care categories specifically restrict steam at low temperatures, while other garments may allow it. An iron-safe adhesive therefore does not automatically mean a steam iron is suitable. When the repair includes coatings, prints, synthetic appliqués, plastic-backed patches, sequins, or unfamiliar decoration, a dry, controlled press from the reverse side is a more conservative starting point.
Can I iron a fabric patch attached with glue?
A glued patch can often be pressed after the adhesive has reached its approved iron-safe stage, but the patch introduces another material whose heat tolerance must be considered. Check the patch backing, garment label, and adhesive instructions together. Inspect the full perimeter for lifting before heating, avoid direct high heat over embroidered or synthetic decoration, and use reverse-side pressing or a clean press cloth when suitable for the garment construction.
Does fabric glue take longer to cure on denim?
The cure time should come from the exact adhesive manufacturer rather than from a generic denim rule. Denim can create thicker folds, particularly at jeans side seams, and users sometimes apply more adhesive because the fabric feels heavy. Those factors can make careful application and complete curing especially important, but they do not justify inventing a different numerical cure time. Use a thin controlled layer, support the folded hem evenly, and inspect the multilayer areas carefully once the stated cure period has passed.
Should I use the highest iron setting allowed for cotton?
No. The care label describes the finished garment, and a repaired cotton item may contain prints, synthetic stitching, elastic, interfacing, decoration, or an added adhesive with a lower practical heat limit. The maximum permitted temperature is a ceiling rather than a target. After a fabric-glue repair, use the least aggressive temperature that achieves the pressing result while staying inside the limits of every relevant permanent component of the garment.





















