 Skip to content
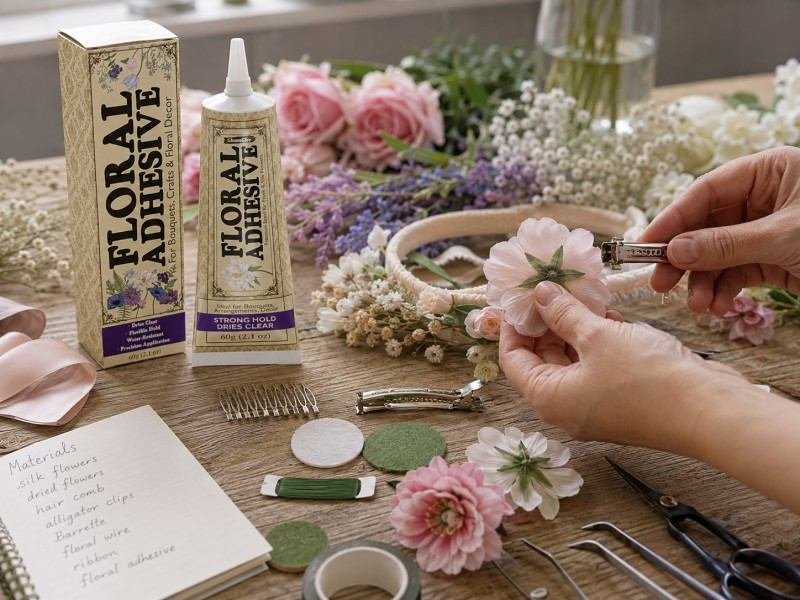
A miniature flower may contain only a few petals, one thin stem, and a center smaller than a grain of rice, yet every connection remains visible at close range. A glue line that disappears inside a full-size arrangement can become a glossy patch, raised ridge, dark stain, or stiff joint in a dollhouse bouquet. Successful miniature work therefore depends less on applying the strongest available adhesive and more on matching flow, working time, cured finish, and flexibility to the exact materials being joined.
Floral glue for miniature flower decorations should dispense in controlled micro-dots, hold lightweight parts without prolonged clamping, dry with minimal visible residue, and remain compatible with paper, fabric, clay, resin, plastic, wire, wood, or foam. The cleanest results come from testing materials first, hiding adhesive beneath overlaps, reinforcing load-bearing joints, and allowing the full recommended cure time before handling or packaging.
Consider a miniature wedding bouquet assembled after several hours of cutting, shaping, coloring, and arranging. The petals look balanced, the leaves sit naturally, and the wire stems fit perfectly inside a tiny vase. By the next morning, one petal has curled, a flower head has rotated, and a clear glue mark shines beneath the display light. The craftsmanship was not the main problem. The adhesive behaved differently from what the materials and joint design required. Understanding those small differences is what turns a fragile miniature into a decoration that remains clean, stable, and attractive through display, photography, storage, and shipping.
What Makes Floral Glue Suitable for Miniatures?
Floral glue suits miniature decorations when it combines controlled flow, dependable initial grip, enough adjustment time, a clean cured finish, and compatibility with delicate materials. Final strength matters, but miniature work also requires precise dosing, predictable curing, low staining risk, and enough flexibility or rigidity for the way each finished flower will be handled.
What Properties Matter Most?
Miniature flower making places unusual demands on an adhesive because the contact areas are extremely small. A petal may offer only a few square millimeters of bonding space, while a leaf attached to a wire stem may have almost no flat surface at all. Under these conditions, application control can influence the finished result as strongly as laboratory bond strength.
Viscosity is often the first property a maker notices. A very thin adhesive may run along wire, wick through paper fibers, or spread beyond the hidden joint. An excessively thick formula can sit between the materials as a raised bead, preventing close contact and leaving a visible ridge. A controlled medium or gel-like consistency is often easier to manage, although absorbent paper and smooth resin may require different flow characteristics.
Initial grab determines whether a newly positioned petal remains still while the adhesive begins to set. Weak grab forces the user to hold every piece for too long, while instant grab can make small alignment errors difficult to correct. The most practical balance usually allows the component to stay where it is placed while preserving a brief adjustment window.
Flexibility also needs to match the project. Fabric petals, thin leaves, and wire stems benefit from a cured bond that tolerates movement. Resin heads, wooden planters, and rigid miniature frames may need a firmer connection. A brittle adhesive can crack when a stem bends, while a very soft adhesive may allow a heavier flower head to rotate gradually during display.
| Adhesive Property | Practical Planning Range | Why It Matters |
|---|---|---|
| Open time | About 30 seconds to 5 minutes | Provides time for positioning and small corrections |
| Initial hold | Several seconds to about 10 minutes | Reduces prolonged hand pressure or clamping |
| Handling time | Often 15 minutes to several hours | Indicates when the assembly may be moved carefully |
| Full cure | Commonly 12–48 hours | Determines when the bond reaches intended performance |
| Visible glue dot | Roughly 0.5–2 mm for small parts | Limits squeeze-out, staining, and raised edges |
| Cured movement | Rigid or flexible by application | Prevents cracking, peeling, or unwanted shifting |
These figures are useful planning ranges rather than universal specifications. Actual timing and performance depend on the formula, adhesive thickness, temperature, humidity, airflow, and surfaces being bonded. Product instructions and project-specific testing should always take priority over general expectations.
Is Clear-Drying Glue Always Better?
Clear-drying adhesive is usually the safest visual choice for miniature flowers, especially around pale petals, transparent leaves, glass containers, open flower centers, and decorations intended for close photography. A small white, amber, or cloudy mark can become highly noticeable when the finished piece is enlarged in an online product image.
Clear does not always mean invisible. Some adhesives cure transparently but remain glossy, producing a wet-looking spot on matte paper, felt, unglazed clay, or natural wood. Others form a thick transparent edge that catches side lighting. A formula may look clear on plastic while darkening tissue paper, handmade paper, or untreated fabric.
The visibility of a bond depends on its color, surface gloss, thickness, and position. A transparent bead placed on the outside of a petal can be more distracting than a slightly opaque joint concealed inside the flower center. Careful placement is therefore as important as the final adhesive color.
Clear adhesive provides the greatest benefit when part of the bond might remain exposed. Hidden structural locations allow more freedom. A wire stem inserted inside a planter, for example, can use a larger reinforcing bond because the connection will later be covered by miniature soil, moss, stones, or decorative fibers.
A reliable appearance test should use an offcut of the actual project material. Inspect the cured sample under normal light, bright side lighting, and magnification. Side lighting quickly reveals glossy spots, dried strings, raised edges, clouding, and shrinkage that can be difficult to notice when viewed directly from above.
How Much Working Time Is Needed?
The right working time depends on the complexity of the flower rather than a general preference for faster adhesive. Attaching a single leaf to a wire may require only a few seconds of adjustment. Building a layered miniature rose, peony, or chrysanthemum can require enough time to control spacing, angle, overlap, and curvature across several components.
A short open time works well for simple, repetitive tasks because leaves remain aligned and flower centers stop rotating sooner. The disadvantage is that misplaced parts become harder to correct. Thin paper may tear, fabric may stretch, and painted resin may lose its finish if the component is forced after the bond begins to set.
A longer open time provides more freedom, but the assembly may require clips, pins, foam supports, or a positioning jig. Slow-setting parts can drift when the flower is rotated or moved, and exposed adhesive remains vulnerable to dust, fingerprints, and accidental contact.
For intricate miniature work, a formula with quick tack but not immediate lock is often easier to use. The part should remain close to its intended position while still allowing a small correction. Dividing the assembly into stages also improves control. The inner petals can be bonded and stabilized before outer layers are added.
Commercial craft-kit developers should test working time with both experienced makers and first-time users. A formula that feels efficient to a trained assembler may feel unforgiving at a kitchen table. Instructions should clearly distinguish between repositioning time, holding time, safe handling, and full cure so users do not mistake early grab for final strength.
Which Glue Works for Each Material?
The best glue depends on the surfaces being joined. Paper needs controlled moisture, fabric benefits from flexibility, and smooth resin or plastic requires dependable surface adhesion. Wire, wood, and foam often need both adhesive and mechanical support. Mixed-material flowers should be judged by their most difficult joint rather than their easiest connection.
Which Glue Works for Paper Flowers?
Miniature paper flowers may be made from cardstock, tissue, crepe paper, quilling strips, handmade paper, printed craft sheets, or metallic specialty stock. These materials differ in absorbency, thickness, coating, fiber direction, and moisture sensitivity, so one adhesive can behave very differently across several seemingly similar papers.
Dense cardstock usually tolerates a small amount of water-based craft or floral adhesive without major distortion. Tissue and crepe paper are more sensitive because moisture can relax fibers, flatten embossed details, or leave darker edges. The smaller the petal, the more visible even a minor change in shape or color becomes.
Adhesive should normally be placed only at the hidden base of the petal or along the overlap zone. Coating the entire contact surface adds moisture and stiffness without necessarily improving the joint. A transferred micro-dot placed with a pin, toothpick, or fine applicator is easier to control than direct pressure from a large bottle opening.
Crepe paper requires particular care because its stretch and grain create much of the flower’s natural appearance. Excess moisture may undo shaping that was added before assembly. Petals should be formed first, allowed to settle, and then joined with the smallest practical amount of adhesive.
Printed paper, watercolor surfaces, metallic finishes, and handmade pigments should be tested for bleeding or darkening. A joint may remain mechanically secure while still damaging the artwork. A sample that looks acceptable after five minutes should be inspected again after full curing because edge staining and gloss changes may develop later.
Which Glue Works for Fabric and Silk?
Fabric flowers require an adhesive that remains flexible and does not bleed through to the visible face. Ribbon, felt, lace, cotton, satin, polyester, and artificial silk all absorb or resist glue differently. Thin materials show dark spots easily, while dense felt may absorb so much adhesive that little remains at the joint.
A fabric-compatible floral adhesive should tolerate gentle bending without forming a hard, crack-prone patch. This is especially important for folded ribbon petals, miniature leaves, doll clothing decorations, soft wreaths, and floral accessories that may move during fitting, handling, or transport.
Whenever possible, place the adhesive along a folded edge, seam allowance, or concealed overlap. A joint inside the flower structure remains less visible and is better protected from rubbing. Saturating the fibers usually increases stiffness and drying time without creating a proportionally stronger result.
Synthetic silk and coated ribbon can be more difficult because the surface is smooth and less absorbent. After curing, bend the sample gently and inspect whether the adhesive remains attached or peels away as a separate film. Clean peeling often indicates that the formula has not developed enough surface adhesion.
Hot-melt adhesive can provide quick hold on heavier fabric, but its bead may be too bulky for fine miniature work. Strings, raised edges, heat marks, and stiff joints are common concerns. Low-temperature application reduces some risk, although the finished bond should still be evaluated for thickness, appearance, and softening under warm display conditions.
Which Glue Bonds Clay, Resin, and Plastic?
Clay, resin, and plastic generally need stronger surface adhesion than porous paper. Air-dry clay may absorb some adhesive, while cured polymer clay, resin castings, and molded plastic usually present smoother, less absorbent surfaces. Their greater weight can also place more stress on a miniature joint.
Cleaning often matters more than choosing a formula described only as “strong.” Resin and plastic parts may carry mold-release agents, polishing compounds, fingerprints, or sanding dust. Painted components add another weak layer because the adhesive may bond securely to the coating while the coating separates from the object underneath.
Lightly roughening a concealed contact point can improve mechanical grip on smooth clay, resin, or sealed plastic. The abrasion should remain hidden beneath the joint, and every trace of dust must be removed before adhesive is applied. The goal is to create microscopic texture without changing the visible shape.
Rigid materials also create leverage. A clay rose may weigh several times more than a paper bloom of the same diameter. When attached to the end of a long wire, small movements produce twisting and peeling forces at the connection. A recessed or drilled joint performs better than a flat bond placed directly against the stem tip.
Some plastics, especially low-surface-energy materials, can be difficult to bond with general-purpose craft adhesive. Because miniature foliage and model components are not always clearly identified by polymer type, a hidden compatibility test remains the safest approach.
| Material | Main Risk | Useful Adhesive Characteristic | Preparation Priority |
|---|---|---|---|
| Cardstock | Raised glue lines | Controlled medium viscosity | Remove cutting dust |
| Tissue or crepe | Warping and staining | Localized, low-volume application | Test moisture response |
| Fabric or ribbon | Stiffness and bleed-through | Flexible cured film | Trim loose fibers |
| Air-dry clay | Uneven porous surface | Good contact across small gaps | Remove all dust |
| Resin | Smooth, non-porous finish | Strong surface adhesion | Degrease and test coating |
| Plastic foliage | Unknown polymer or coating | Material-compatible formula | Identify plastic when possible |
| Metal wire | Oil and narrow contact area | Reliable initial grab | Clean and increase contact area |
| Foam | Softening or shrinkage | Foam-safe formulation | Test for delayed damage |
No adhesive should be assumed safe for every plastic, coating, or foam. Material families vary, and suppliers sometimes change finishes without altering the visible appearance. Testing the actual production component remains more dependable than relying on a broad material label.
What Works with Wire, Wood, and Foam?
Wire, wood, and foam usually form the hidden structure of a miniature arrangement. They support stems, pots, wreath frames, garden scenes, flower walls, and diorama bases. These joints may experience twisting, leverage, vibration, and repeated handling, so adhesive should work together with a well-designed connection.
Bare floral wire needs to be clean and free from oil. Coated wire requires testing because the adhesive is bonding to the outer coating rather than directly to the metal. A leaf wrapped partly around a stem creates more contact area than a flat leaf pressed against one narrow side.
Unsealed wood can absorb adhesive into the grain. Some penetration may help, but excessive absorption leaves too little product at the actual bond line. Painted, varnished, or sealed miniature wood behaves more like a smooth plastic surface and may benefit from light abrasion at a concealed point.
Foam presents a separate compatibility concern. Some solvent-containing adhesives can soften, shrink, melt, or discolor certain foam types. Damage may appear immediately or develop several hours later. A sample should therefore be inspected after enough time has passed to identify delayed changes.
Heavy flower heads should not simply be glued onto the flat end of a wire. Inserting the wire into a preformed hole, clay core, wooden support, or foam base transfers the load more effectively. The adhesive then prevents movement instead of carrying the entire weight through one shallow surface joint.
How Do You Prepare Tiny Parts?
Prepare miniature parts by dry-fitting the design, cleaning each contact point, removing loose fibers or unstable coatings, and testing the adhesive on spare material. Small joints have little tolerance for dust, oil, weak paint, or uneven contact. Careful preparation improves both bond strength and appearance while reducing wasted components.
How Should Surfaces Be Cleaned?
Cleaning should match the sensitivity of the material. Delicate paper usually needs only a soft dry brush to remove cutting dust and loose fibers. Fabric may need frayed threads trimmed so the bonded surfaces can meet closely. Resin, plastic, glass, metal, and sealed wood often require closer attention because fingerprints and manufacturing residues are less visible.
A clean joint must also be completely dry. Moisture trapped beneath a non-porous component can dilute the adhesive, slow curing, or create cloudiness. When a suitable cleaning product is used on a hard surface, allow enough time for full evaporation before applying glue.
Painted parts deserve special inspection. A flower may detach while the adhesive remains visibly attached to the paint layer. That failure indicates that the coating separated from the clay, resin, wood, or metal underneath. A hidden scratch or gentle pressure test can reveal whether the finish is stable enough to support the joint.
A practical preparation sequence begins by dry-fitting every component and checking the final angle. Mark the concealed contact area, remove loose debris, clean compatible hard surfaces, and lightly roughen only hidden smooth zones when necessary. Remove all abrasion dust, allow the parts to dry, and repeat the dry fit before opening the adhesive.
This routine may add only a few minutes to the project, yet it prevents many failures commonly blamed on poor glue. Strong adhesive cannot compensate for grease, unstable paint, loose fibers, or a contact area that does not fit closely.
Do You Need a Material Test?
A material test is essential when the project includes thin paper, painted surfaces, foam, unknown plastic, valuable parts, or an unfamiliar adhesive. It is equally useful when producing a larger batch because a single compatibility problem can affect every finished flower.
The most informative test joins two scraps in the same way as the final assembly. A random drop on a flat sample reveals staining and cured appearance, but it does not show initial grab, squeeze-out, repositioning, stress direction, or strength across the actual joint.
Inspect the sample at several stages. During the first minutes, look for spreading, curling, softening, color bleeding, coating damage, or foam distortion. Check again when the joint reaches handling strength and after full cure. Some cloudiness, shrinkage, or darkening appears only after the surface looks dry.
A useful test should confirm whether the adhesive remains where it is placed, whether the material keeps its original color and texture, whether the component can be adjusted safely, and whether the cured joint survives the expected bending or handling.
For repeated production, keep a dated reference sample from each important material lot. Paper coatings, fabric finishes, plastic blends, paint systems, and resin formulations can change between suppliers or batches. Retained samples make it easier to identify whether a later issue comes from the adhesive, the substrate, or the assembly method.
Which Tools Improve Control?
Precision tools reduce waste and help keep visible surfaces clean. A well-formulated adhesive can still produce poor results when the bottle opening is too large, the tip is partly blocked, or the user cannot place a consistent micro-dot.
Fine metal tips are useful for repeated dosing when they are cleaned before the product dries inside them. Pins, toothpicks, thin wire, and micro-brushes work well when a small amount of adhesive is first dispensed onto a disposable surface. This transfer method provides greater control than squeezing directly over a fragile petal.
Tweezers should hold the component securely without crushing paper, scratching resin, or embossing fabric. Sharp tips are useful for narrow flower centers, while broader smooth tips distribute pressure more safely across delicate petals and leaves.
A silicone mat creates a clean, non-absorbent work area and makes cured residue easier to remove. Foam blocks, pins, clips, and simple positioning jigs can keep several stems at repeatable angles. Magnification helps reveal squeeze-out while it can still be removed safely.
Tools should be separated by purpose. A pin used to scrape old glue should not be returned to the fresh adhesive. Dried buildup inside a nozzle changes the drop size and may release a sudden large amount when the blockage breaks free.
For a retail floral adhesive, the dispensing system should be evaluated as part of product performance. Tip diameter, bottle pressure, cap sealing, clog resistance, and storage position all influence whether the customer can create a clean miniature joint.

How Do You Apply Floral Glue Precisely?
Apply floral glue as micro-dots or thin concealed lines, position each component during the available working time, and use only enough product to wet the contact area after pressing. Build layered flowers in stages, keep adhesive beneath overlaps, and reinforce stems or heavier flower heads with wire, holes, wrapping, or another structural feature.
How Small Should a Glue Dot Be?
A glue dot should match the hidden contact area rather than the overall size of the petal or flower. For many miniature petals and leaves, a dot between approximately 0.5 and 1.5 millimeters provides a practical starting point. Larger concealed joints may require more product, but exposed areas should remain as small as possible.
The correct quantity is the amount that spreads across the contact zone without escaping beyond it. When adhesive squeezes out after gentle pressure, too much was probably applied. When only one edge becomes wet or the surfaces do not meet fully, the dot may be too small or the joint may require redesign.
Porous materials absorb some adhesive, while smooth resin and plastic retain nearly all of it on the surface. A paper petal may need slightly more than a resin component of similar size, but flooding absorbent material to compensate for penetration usually causes warping or staining.
A controlled transfer method is often safer than applying directly from the bottle. Place a small amount on a silicone mat or disposable tile, then transfer it with a pin, toothpick, fine wire, or micro-brush. Direct nozzle application works well when the flow is predictable and the tip remains clean.
| Joint Type | Starting Glue Amount | Application Method | Main Warning |
|---|---|---|---|
| Tiny paper petal | 0.5–1 mm dot | Pin or fine nozzle | Keep moisture away from visible edges |
| Fabric petal fold | Thin 2–5 mm line | Micro-brush or precision tip | Prevent bleed-through and stiffness |
| Small leaf on wire | 1–2 mm line | Toothpick or metal tip | Increase wraparound contact |
| Resin flower head | 1–2 mm dot inside recess | Precision nozzle | Avoid a flat butt joint |
| Stem inside planter | Enough to coat hidden anchor | Fine nozzle | Keep glue below decorative surface |
| Miniature wreath part | Several spaced micro-dots | Pin or toothpick | Avoid one thick, visible bead |
These values are starting points rather than fixed specifications. Formula viscosity, surface texture, joint geometry, and absorbency can change the amount required. The final bond should remain fully contacted without visible squeeze-out or unnecessary bulk.
How Do You Layer Petals Cleanly?
Layer petals from the flower center outward and allow each stage to become stable before adding the next. This approach prevents newly positioned pieces from pushing earlier petals out of place and reduces the temptation to compensate with larger amounts of adhesive.
Before bonding, arrange several petals without glue and study their overlap, angle, height, and curvature. Dry-fitting is particularly helpful for roses, peonies, chrysanthemums, dahlias, and other flowers built through repeated circular layers.
Apply the adhesive only near the petal base. The upper area should remain free so it can preserve a natural curve. Position the petal, press gently at the bond point, and avoid flattening the shaped surface. Rotating the flower after every placement is usually easier than reaching around a fixed piece.
A reliable sequence begins with the center or bud, followed by the first petal layer. Once initial grab develops, inspect the assembly for visible residue before adding the middle and outer layers. Final shaping should be completed while the adhesive still allows safe adjustment.
Perfect symmetry is not always desirable. Real flowers contain small variations in spacing, curl, and direction. A circular guide can maintain overall balance while allowing controlled irregularity. Natural variation should look intentional rather than caused by components drifting during curing.
For repeated commercial production, arrange petals in prepared groups and follow the same assembly order for every flower. Consistent sequencing improves appearance, simplifies training, and makes it easier to identify whether a defect came from placement, glue quantity, or timing.
How Do You Anchor Stems and Leaves?
Stems and leaves should be secured through both adhesive contact and structural shape. A leaf pressed against one side of a smooth wire has very little bonding area. Folding or wrapping the leaf base partly around the stem creates a stronger connection and usually produces a more natural transition.
Flower heads perform better when they include a small recess or channel for the wire. Inserting the stem several millimeters into the head changes the connection from a flat surface bond into an anchored joint. The adhesive then resists rotation and withdrawal instead of carrying the entire flower through one exposed dot.
For miniature bouquets, bind stems together with thread, thin wire, paper, or floral tape before applying adhesive. A wrapped bundle shares the load and prevents individual stems from sliding apart during handling or placement inside a vase.
Inside a miniature planter, stems can be inserted into foam, cured clay, drilled wood, or another stable core. Adhesive should remain below the visible surface, which can later be covered with model soil, moss, sand, pebbles, or decorative fibers.
Delicate leaves should normally be attached after the main stem and flower head have become stable. Otherwise, the leaf may accidentally become a handle while the remaining parts are assembled. Good sequencing reduces damage and keeps small decorative joints cleaner.
A strong adhesive cannot replace structural design when the flower head is heavy or the stem is long. Mechanical anchoring allows a smaller glue quantity, improves appearance, and reduces the risk of rotation during shipping or long-term display.
How Long Should Parts Be Held?
Hold each component only until the adhesive develops enough initial grab to prevent movement. Depending on the formula and surfaces, this may take a few seconds or several minutes. Full curing usually takes much longer and should not be confused with the moment when the component first remains in position.
Four timing stages help users plan their work. Open time is the period when the part can still be repositioned. Initial grab means the component stays in place with limited support. Handling strength allows the assembly to be moved carefully. Full cure indicates that the bond has developed its intended performance.
Temporary supports are more reliable than holding components by hand for an extended period. Foam blocks keep stems upright, clips support folded fabric, and pins stop wreath decorations from shifting. A simple jig also produces more consistent angles across multiple pieces.
Temperature, humidity, adhesive thickness, airflow, and surface porosity all affect the timeline. A thin film between paper layers may dry relatively quickly, while the same product trapped inside a smooth resin flower head may need much longer.
Avoid repeatedly tugging or twisting the joint to check whether it is ready. Disturbing a developing bond can reduce strength even when the component does not visibly separate. Place the flower in a protected area and follow the stated handling and full-cure periods before photographing, packaging, or displaying it.
How Do You Avoid Common Glue Problems?
Most glue problems can be prevented by controlling application volume, preparing surfaces, testing sensitive materials, and allowing enough cure time. Warped petals commonly result from excess moisture, visible residue comes from squeeze-out or poor placement, and weak joints often involve contamination, limited contact area, incompatible materials, or premature handling.
Why Do Paper Petals Warp?
Paper petals warp because moisture enters the fibers unevenly. When one side absorbs more liquid than the other, the paper expands, softens, curls, or loses its shaped profile. As the adhesive dries, uneven shrinkage may lock the petal into an unintended form.
Thin tissue, crepe, handmade paper, and lightweight printed stock are especially sensitive. Dense cardstock is more stable but may still develop a raised ridge when a thick bead dries beneath the surface. Very small petals magnify these changes because even a slight curl alters the entire flower shape.
Use the smallest quantity that provides full contact and keep the adhesive close to the hidden petal base. Form the petal before bonding instead of expecting wet glue to hold a newly created curve. Excessive pressure can force adhesive toward visible edges and flatten embossed or stretched texture.
Drying conditions influence the result. High humidity keeps paper soft for longer, while strong direct heat may dry one side too quickly and increase curling. A stable indoor environment with gentle airflow generally provides more predictable results.
When producing several flowers, test multiple petals from the same paper lot. Compare them before application, during initial drying, and after full cure. Small changes in coating, fiber composition, thickness, or coloring method can alter the way the paper responds.
A warped petal is not always evidence of poor adhesive quality. The problem may come from application volume, material absorbency, drying conditions, or pressure. Adjusting these factors often improves the result without changing the formula.
How Do You Prevent Visible Residue?
Visible residue is prevented by placing adhesive beneath natural overlaps and removing excess before it cures. The bond should remain inside the flower center, under a petal base, around the back of a leaf, beneath a wreath element, or below the decorative surface of a planter.
Clear adhesive can still become noticeable when it cures with a glossy finish. Matte paper, felt, unglazed clay, natural wood, and textured foam make shiny spots especially obvious. Examine cured samples from several angles rather than only under direct overhead light.
When glue squeezes out, lift the excess with a clean tool if the formula and material allow it. Aggressive wiping can spread the residue over a larger area or drive it deeper into absorbent fibers. Removal should be gentle and localized.
Stringing is another common issue, particularly with thick formulas and hot-melt products. Move the applicator away in a controlled direction and remove strings before they settle on nearby petals. Dried buildup around the nozzle makes flow less predictable and increases the chance of sudden oversized drops.
Macro photography is a practical quality-control method. A flower that appears clean on the worktable may reveal exposed glue, lint, or glossy edges when photographed for an online listing. Side lighting and magnification provide a realistic preview of how the item will appear to customers.
Commercial workshops can maintain an approved reference sample that defines acceptable residue, gloss, alignment, and bond placement. Shared visual standards are easier to apply consistently than vague instructions such as “use only a little glue.”
Why Do Tiny Bonds Fail?
Tiny bonds fail because they offer limited contact area and are easily affected by dust, oil, loose fibers, weak paint, mold-release residue, movement, and poor stress distribution. Contamination that would cover only a small fraction of a large joint can cover most of a miniature one.
Stress direction is equally important. A joint may resist a straight pull but fail under peeling or twisting. A leaf attached at one narrow edge experiences peeling stress whenever it is brushed. A flower head on a long wire experiences rotation and leverage during movement.
Adding more adhesive is not always the best repair. Better joint design usually creates a larger improvement. Increase hidden overlap, insert wires into holes, wrap leaves around stems, roughen concealed smooth surfaces, or support heavier components through a stable base.
After a failure, inspect both sides of the joint. Adhesive left on only one surface suggests poor adhesion to the other material. Torn paper fibers or lifted paint indicate that the bond may be stronger than the surface layer. A split through the middle of the adhesive can point to excessive thickness, incomplete curing, or poor resistance to the applied stress.
Storage conditions can produce delayed failures. Warm temperatures may soften some formulas, while repeated cold cycles can make others brittle. Old or poorly sealed adhesive may thicken, separate, or dispense inconsistently after repeated opening.
For valuable work or repeated production, record the adhesive batch, opening date, materials, preparation method, curing time, and environmental conditions. Simple records make it easier to separate formula problems from substrate changes or assembly errors.
How Do You Fix Misaligned Parts?
A misaligned component should be corrected while the adhesive remains within its open time. Use clean tweezers to lift or rotate it gently without dragging wet glue across the visible surface. Movement should remain small and controlled because delicate paper and fabric can deform quickly.
When the adhesive has already begun to set, forcing the part may tear fibers, stretch fabric, lift paint, or weaken the final bond. It is often safer to stop, allow the joint to cure, and then decide whether the component can be removed cleanly.
Keeping spare petals, leaves, and stems is practical for any detailed flower. Replacing one damaged piece usually produces a cleaner result than trying to hide crushed fibers, visible residue, or a distorted edge.
Do not apply a large amount of fresh glue over a partly cured joint. Layered adhesive creates bulk, uneven contact, and a higher risk of visible residue. A cleaner repair starts by separating the parts, removing loose material when safe, inspecting the surfaces, and reapplying a controlled amount.
Consumer kits benefit from simple recovery instructions that explain how long parts can be repositioned and what to do after a mistake. Beginners are more confident when the process allows correction rather than suggesting that every component must be placed perfectly on the first attempt.
A well-planned miniature flower is also easier to repair. Hidden connection points, replaceable petals, spare components, and accessible stem anchors allow corrections without dismantling the entire arrangement.

How Do You Test and Scale the Project?
Test miniature floral bonds after full curing under realistic handling, warmth, humidity, storage, and packaging conditions. Larger production runs also require checks for formula consistency, dispensing accuracy, container performance, shelf stability, and batch quality. Heavy or frequently handled parts should use structural support instead of relying entirely on adhesive.
How Long Should the Bond Cure?
A bond should remain undisturbed for the complete cure period stated for the adhesive before it is subjected to normal use, stress testing, or shipping. Surface dryness does not confirm full strength because the inner portion of the joint may remain soft after the exposed edge appears dry.
Bond thickness and airflow strongly affect curing. A thin film between porous paper surfaces may reach handling strength relatively quickly. A larger bead hidden inside a resin flower head, foam base, or miniature planter may take longer because moisture or volatile components cannot escape easily.
Scheduled checkpoints provide better information than repeated touching. Inspect the joint after the expected initial hold period, after handling strength, and after full cure. For commercial evaluation, additional reviews after 24, 48, and 72 hours can reveal delayed shrinkage, cloudiness, darkening, coating damage, or continued movement.
Finished decorations should cure on a stable, dust-free surface. Avoid stacking, compressing, sealing in plastic, or placing the flowers inside tight packaging too early. Pressure and trapped moisture can flatten petals, transfer residue, or shift joints that appeared stable.
Instructions should separate phrases such as “stays in place,” “safe to handle,” and “fully cured.” Customers often assume that rapid initial grab means immediate final strength. Clear timing language reduces premature handling and prevents complaints that are caused by interrupted curing rather than poor adhesive performance.
A retained cured sample also provides a useful production reference. Comparing new batches against an older approved flower helps identify changes in color, gloss, flexibility, or setting behavior.
Do Heat and Humidity Affect the Bond?
Heat and humidity can influence application speed, curing time, flexibility, and long-term stability. Water-based adhesives generally dry more slowly in humid air, while warm and dry conditions may shorten open time. Some cured adhesives soften in heat, and others become brittle after repeated temperature changes.
Miniature decorations often face more demanding environments than makers expect. Glass display cabinets near windows can become warm, seasonal wreaths may be stored in garages, and packaged kits may travel through hot delivery vehicles, humid warehouses, or international freight routes.
Testing should reflect the expected use rather than an extreme condition unrelated to the product. Indoor dollhouse flowers may need stable appearance under ordinary room conditions and moderate sunlight. Decorative items sold at outdoor craft markets or stored seasonally may require broader temperature tolerance.
Packaging can intensify environmental stress. A flower compressed inside a warm box may place continuous force on a partly cured joint. The complete packed product should therefore be evaluated, not only loose flower samples.
| Test Stage | Suggested Check | Practical Acceptance Point |
|---|---|---|
| Initial set | Part remains aligned without hand support | No visible slipping or rotation |
| Full cure | Gentle handling and light flexing | No separation, cracking, or tack |
| Warm exposure | Controlled moderate heat | No softening, movement, or residue transfer |
| Humidity exposure | Higher humidity followed by recovery | No clouding, distortion, or bond loss |
| Packaging test | Stored in intended insert or bag | No sticking, flattening, or adhesive transfer |
| Transport simulation | Gentle vibration and repeated handling | Stems and flower heads remain aligned |
| Appearance review | Side lighting and close photography | No objectionable gloss, staining, or strings |
| Retained sample | Normal-condition storage | Stable appearance and bond over time |
Testing conditions should be documented and repeated consistently. The purpose is to compare materials and maintain quality rather than create unsupported claims about extreme durability.
Is Wire Support Still Needed?
Wire support remains necessary whenever a component creates meaningful weight, leverage, or repeated movement. Adhesive works most reliably when the joined surfaces already fit together and the structure carries the main load.
A lightweight paper flower may sit securely on a stem with a tiny bond. A clay or resin flower of similar size can weigh several times more. When mounted on a long wire, each movement increases the force applied at the joint.
Inserting the wire into a flower head provides better support than attaching it to a flat back. Leaves can wrap around stems, bouquets can be bound before gluing, and planter stems can be inserted into foam, clay, drilled wood, or another stable core.
Wreath elements can be tied, pinned, tucked into the frame, or supported by small slots before adhesive is added. These methods reduce dependence on one exposed glue bead and create a cleaner finished appearance.
Mechanical support does not indicate weak adhesive. Furniture, footwear, packaging, and construction products commonly combine bonding with stitching, fasteners, folds, or interlocking parts. Miniature flowers benefit from the same practical principle.
The strongest arrangement uses structure to carry weight and adhesive to prevent movement. This approach reduces glue quantity, limits visible residue, and makes the finished decoration more resistant to vibration, handling, and long-term display.
What Should Bulk Buyers Verify?
Commercial craft brands, miniature-kit sellers, floral studios, online retailers, and distributors should assess the formula, dispensing system, packaging, quality control, documentation, and customer experience as one complete product. A strong adhesive can still perform poorly at retail when the nozzle dispenses oversized drops, the bottle leaks, or the cap allows repeated clogging.
Samples should be tested on the exact materials used in the finished project. Generic paper, plastic, fabric, or foam samples may not reflect coated petals, painted resin, treated ribbon, specialty wire, or the actual packaging conditions.
Important evaluation points include viscosity consistency, open time, initial grab, cured appearance, flexibility, nozzle accuracy, cap sealing, bottle compatibility, storage stability, and repeatability across batches. Reference samples can define acceptable flow, color, gloss, odor, and dispensing volume.
Packaging instructions should explain application quantity, repositioning, holding time, full cure, material testing, and storage. Multilingual visual steps are particularly useful when a product will be sold across several markets or included in a beginner-friendly craft kit.
GleamGlee supports formulation development, packaging selection, label printing, filling, assembly, and private-label production through an integrated manufacturing structure. The company’s development resources include more than 25 chemists, material specialists, and process engineers, along with application testing for adhesion, aging, temperature changes, humidity, and repeated wear.
Custom projects can begin with reported order quantities from 200 units, depending on the selected formula and packaging. Print-ready design work may be completed in as little as two days, samples commonly require approximately 7–14 days, and normal bulk production is generally around 20 days, with accelerated schedules considered for suitable orders.
Because miniature floral adhesive performance depends strongly on the specific paper, fabric, clay, resin, plastic, wire, wood, and foam involved, production approval should follow testing on the customer’s actual components.
Conclusion
Floral glue for miniature flower decorations must provide more than a strong bond. Clean results depend on controlled dispensing, predictable working time, material compatibility, appropriate flexibility, careful surface preparation, hidden application, and enough curing time before the decoration is handled or packaged.
Paper flowers require careful moisture control, fabric flowers need flexible joints, and smooth resin or plastic parts depend on strong surface adhesion. Clay blooms and longer stems often need embedded wire, drilled holes, wrapping, or another mechanical feature so the adhesive does not carry the full load.
For individual makers, the most reliable process begins with a hidden material test. Apply the smallest practical amount, position the part during the available working time, support it until initial grab develops, and leave the project undisturbed until the full cure period has passed.
For commercial brands, adhesive performance must be evaluated together with the bottle, nozzle, cap, instructions, packaging, shelf life, production repeatability, and customer skill level. A formula that creates a strong laboratory bond may still frustrate customers if it dispenses too quickly or does not allow enough time for accurate positioning.
GleamGlee works with craft brands, miniature-kit suppliers, online sellers, distributors, and retailers seeking existing adhesive solutions or customized formulations. Available support includes formula development, precision packaging, multilingual artwork, label printing, sample production, bulk manufacturing, and international logistics coordination.
A productive inquiry should include the flower materials, surfaces that must be bonded, desired open and cure times, preferred bottle capacity, applicator style, target sales market, order quantity, packaging languages, and any benchmark sample or performance requirement.
Providing those details allows the technical and packaging teams to evaluate whether an existing formula is suitable or whether a more targeted miniature floral adhesive should be developed. Contact GleamGlee to request a quotation, material-compatibility review, packaging proposal, or private-label sample for a miniature flower decoration project.





















