 Skip to content
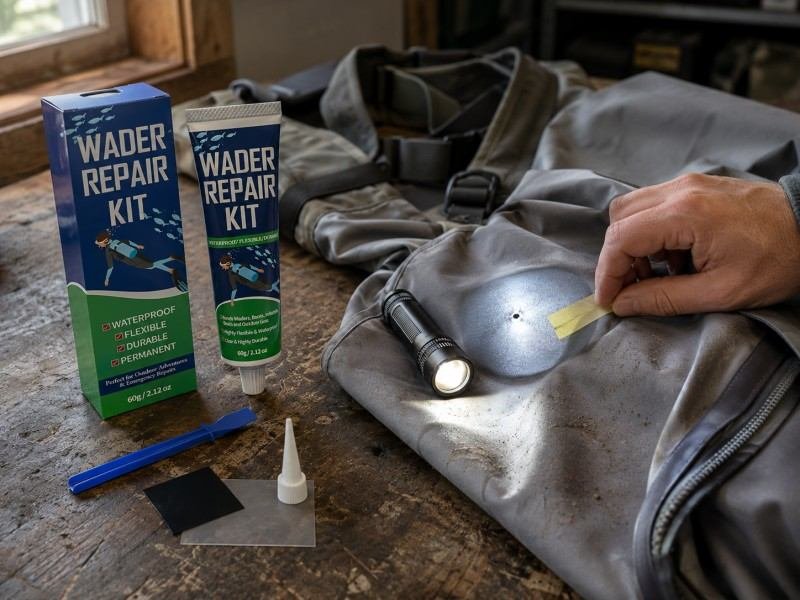
A leaking wader seam can turn a quiet day on the river into several uncomfortable hours of cold socks, damp clothing, and constant uncertainty about whether the leak is getting worse. Many anglers assume that water near an ankle, knee, or crotch seam means the entire garment has failed. In practice, a large number of seam leaks begin as small, localized problems that can be repaired at home when the fabric is still sound and the damaged area is properly prepared.
To fix a leaking wader seam, locate the exact entry point, clean and dry the surrounding material, remove only loose or failed seam tape, and apply a thin, continuous layer of flexible waterproof polyurethane repair adhesive. Allow the repair to cure fully, usually for 8–12 hours, before checking it with a controlled water test and returning the waders to service.
The most important part of the job is not squeezing glue over every visible stitch. It is understanding why the seam is leaking, whether the fabric and tape are still structurally usable, and how to create a flexible seal that can move with the garment. One angler may find a single pinhole beside an ankle seam, while another may discover that several inches of tape have lifted after years of folding and storage. Both repairs involve adhesive, but they should not be handled in exactly the same way.
The sections below explain how to diagnose the failure, select a compatible adhesive, prepare the seam, apply the repair neatly, and test the result without creating unnecessary damage.
What Causes Wader Seam Leaks?
Wader seam leaks usually develop when seam tape lifts, stitching holes enlarge, coatings age, or high-flex areas experience repeated stretching and abrasion. The first wet spot may appear away from the actual failure because water can travel along fabric layers or seams before reaching the inside surface.
Why Seam Tape Peels
Seam tape creates a barrier over the needle holes and joined fabric layers inside many breathable waders. It performs well when it remains fully bonded, but constant folding, body heat, moisture, dirt, and repeated movement gradually stress the adhesive layer beneath it. Areas near the crotch, knees, ankles, and stockingfoot connections are especially vulnerable because the material bends and stretches during every step.
Peeling does not always begin as a large visible strip. A narrow edge may lift first, allowing water to enter under the tape and travel along the seam. Once moisture and grit reach the adhesive layer, the damaged area can expand. Applying new glue over dirt or over a loose flap usually produces a short-lived result because the new adhesive is bonding to unstable material rather than to the original fabric.
Small lifted edges can often be repaired by carefully cleaning beneath them and rebonding the tape with a compatible flexible adhesive. Long sections that have become brittle, curled, contaminated, or detached from deteriorated fabric may require replacement tape or professional servicing rather than repeated spot sealing.
How Stitch Holes Begin Leaking
Most sewn seams contain hundreds of needle penetrations. The seam tape or factory-applied coating prevents water from moving through these holes, but the holes themselves can enlarge when the garment is repeatedly pulled, twisted, or worn under tension. This is common in waders that are too tight across the knees, seat, or upper thighs.
A leak beside a stitch line may look like a fabric puncture even though the thread remains intact. In other cases, the thread can abrade the surrounding coating and create a narrow path for water. The damage may be almost invisible when the waders are dry, especially on dark interior surfaces.
Sealing every stitch with a thick ridge of glue is rarely necessary. A better repair covers the confirmed leaking point and extends slightly beyond it onto clean, stable material. The adhesive should form a continuous film across the stitch holes without creating a hard lump that rubs against the wearer or catches when the waders are folded.
Where Seam Failures Appear First
Wader seams do not experience equal stress. A straight seam high on the chest usually moves less than the curved seam around the crotch or the joint where a breathable leg connects to a neoprene stockingfoot. Understanding these stress patterns helps distinguish a random puncture from a developing seam problem.
| Wader Area | Common Stress | Typical Failure Sign | Repair Difficulty |
|---|---|---|---|
| Crotch seam | Stretching, squatting, wide steps | Dampness spreading along several inches | Moderate to high |
| Inner knee | Repeated bending and fabric rubbing | Small pinholes beside stitching | Moderate |
| Ankle seam | Folding inside boots and grit abrasion | Localized wet sock or cuff | Moderate |
| Stockingfoot joint | Material transition and constant flexing | Leak around neoprene-to-fabric bond | Moderate to high |
| Chest seam | Harness tension and storage folds | Short lifted tape edge | Low to moderate |
| Bootfoot connection | Rubber flexing and adhesive aging | Cracks or separation around boot joint | High |
A wet interior is not always proof of external leakage. Perspiration can collect inside breathable garments during long walks, particularly when insulating layers are heavy. Condensation usually appears as general dampness rather than a clearly defined wet path. A genuine seam leak is more likely to produce a localized entry point, a narrow wet line, or repeated moisture in the same position.
How Do You Find a Leaking Seam?
Find a leaking wader seam by drying the garment, inspecting high-stress areas, and using a controlled test such as an alcohol reveal test or limited water test. Mark each confirmed leak immediately because tiny dark spots often disappear once the test liquid evaporates.
Start with a Dry Inspection
Turn the waders inside out and place them under bright, indirect light. Look for loose tape edges, discolored adhesive, wrinkled seam coverings, worn coatings, fine cracks, and areas that feel unusually stiff or thin. Run your fingers slowly along the seam while gently flexing the fabric. A loose section may move, click, or separate slightly when bent.
Pay attention to the exact location of the moisture felt during use, but do not assume the leak is directly behind that wet spot. Water can travel downward along the inside of a leg or sideways beneath seam tape. Begin several inches above the wet area and follow the seam in both directions.
Avoid stretching the garment aggressively during inspection. Excessive pulling can enlarge an existing defect or separate a tape edge that was still partly secure. Use removable chalk, low-tack tape, or a washable marker to identify suspicious places. Marking multiple possible points is more reliable than trusting memory after the garment has been moved or turned right side out.
Use an Alcohol Reveal Test
A commonly used method for breathable waders involves applying a small amount of 70% isopropyl alcohol to the inside surface while observing the outer fabric. Where the membrane or coating has been punctured, a darker spot may briefly appear on the opposite side. The method is useful for finding tiny pinholes near seams that are difficult to identify by sight.
Work in a ventilated area away from flames, heaters, and sparks. Apply the alcohol sparingly with a spray bottle, cotton pad, or cloth rather than soaking a large section. Test a hidden area first because coatings and finishes can differ between manufacturers. The goal is to reveal a defect, not saturate the garment.
As soon as a dark point appears, circle it lightly on the dry side. Alcohol evaporates quickly, and the mark can become difficult to relocate. Allow the area to dry completely before applying adhesive. Never place repair glue over a surface that still feels cool or damp from solvent evaporation.
Perform a Controlled Water Test
Water testing is useful when an alcohol test is unsuitable, when the garment is made from thick neoprene or rubber, or when a repair needs final confirmation. The safest approach is to test one section at a time rather than filling an entire pair of waders. Large volumes of water create weight and pressure that the seams were not designed to support from the inside.
For a lower-leg test, turn the waders inside out, support the fabric, and add only enough water to cover the suspected seam. Watch the exterior for beads, darkening, or a slow wet line. Empty the garment immediately after checking the section. Never suspend water-filled waders by the shoulder straps because the load can damage seams and buckles.
| Test Method | Best For | Typical Test Time | Main Precaution |
|---|---|---|---|
| Visual inspection | Lifted tape, cracks, abrasion | 5–10 minutes | Inspect beyond the wet spot |
| Alcohol reveal test | Tiny holes in breathable fabric | A few minutes per area | Ventilate and patch-test first |
| Sectional water test | Neoprene, rubber, uncertain seam leaks | 5–15 minutes | Use limited water and support the fabric |
| Low-light flashlight check | Thin coatings and visible pinholes | 5–10 minutes | Avoid excessive stretching |
| Post-repair wear test | Final real-world confirmation | Short shallow-water session | Avoid deep or remote water initially |
Several small leaks may be present close together, especially in old or heavily used waders. Continue inspecting after finding the first defect. Repairing one visible point while missing two nearby stitch holes often leads users to believe the adhesive failed, even though the original repair remains sealed.
Which Wader Repair Glue Should You Use?
Use a flexible waterproof adhesive that is compatible with the wader material and remains elastic after curing. Polyurethane repair glue is widely suited to breathable fabrics, neoprene, rubber, PVC, coated textiles, and high-flex seam repairs when the product instructions confirm compatibility.
Match the Adhesive to the Material
Breathable waders are usually constructed from laminated textiles that require a thin, flexible repair film. A rigid household glue may initially block water but crack when the knee, ankle, or crotch bends. Solvent-heavy adhesives that are not designed for coated fabric may also weaken finishes, stain the material, or create a hard edge around the repair.
Neoprene requires an adhesive that can stretch with the foam structure. Small surface cuts can sometimes be closed with neoprene cement, while seam leaks and mixed-material joints often benefit from a flexible polyurethane repair adhesive. PVC and rubber bootfoot waders need products that specifically list those substrates because some general-purpose glues do not bond reliably to flexible plastics.
Leather, coated nylon, polyurethane films, and rubberized textiles may appear similar but behave differently. Always check the material label and test an inconspicuous area when the construction is uncertain. Compatibility matters more than maximum advertised strength because a seam repair fails quickly when the adhesive cannot move with the substrate.
Choose Flexibility Over Hardness
A wader seam is a moving joint rather than a rigid surface. During walking, kneeling, climbing into a boat, or stepping over rocks, the material repeatedly bends through tight angles. A repair that cures into a hard plastic ridge concentrates stress along its edges, which can cause the surrounding fabric to crack or the adhesive film to lift.
Flexible polyurethane adhesive cures into a rubber-like seal that can tolerate bending, stretching, abrasion, water exposure, and changing temperatures. A suitable product should remain bonded after the garment has been folded and should not become brittle during cold-weather use.
The desired repair is not necessarily the thickest possible layer. A thin continuous film generally flexes more naturally and adds less weight. Thicker reinforcement can be useful for a damaged stockingfoot joint or a small tear, but it should be tapered onto the surrounding material rather than ending in a sharp, raised edge.
Decide Between Glue, Patch, and Tape
Small pinholes and short stitch-line leaks usually need adhesive only. A patch becomes useful when the fabric is torn, abraded, or missing material. Seam tape is appropriate when an original taped seam has lifted over a longer section and the underlying fabric remains sound.
| Damage Type | Preferred Repair Material | Suggested Coverage | Typical Cure or Set Time |
|---|---|---|---|
| Single pinhole | Flexible waterproof adhesive | About 10–15 mm beyond the point | Commonly 8–12 hours |
| Short seam leak | Thin adhesive film | About 10–20 mm beyond both ends | Commonly 8–12 hours |
| Small tear | Adhesive plus flexible patch | Patch extends 15–25 mm past damage | Follow adhesive instructions |
| Lifted tape edge | Flexible adhesive beneath tape | Cover the full loose edge | Commonly overnight |
| Long detached tape | Replacement seam tape or professional repair | Entire failed section | Depends on system |
| Cracked rubber joint | Rubber-compatible flexible adhesive | Tapered coat over stable rubber | Often 8–24 hours |
A complete 60 ml repair kit with black and clear patch material, a precision applicator, and a customizable nozzle can handle both small seam leaks and larger tears. Black patches can blend with dark neoprene or rubber, while clear material is useful where appearance or color matching matters. The applicator is particularly valuable around curved seams because it limits overapplication and helps create an even bead.

How Do You Prepare a Wader Seam?
Prepare a leaking seam by cleaning away mud, oils, loose coatings, and old failed adhesive, then drying the material completely. Trim only detached tape or unstable residue, support the seam in its natural shape, and define a repair area that extends beyond the visible leak.
Clean Without Damaging the Coating
Dirt is one of the most common reasons a repair lifts prematurely. Fine river grit, sunscreen, insect repellent, body oils, detergent residue, and boot wax can remain on the fabric even when the seam looks clean. Adhesive applied over contamination bonds to the residue rather than to the wader material.
Begin with fresh water and a soft cloth. If additional cleaning is needed, use a small amount of mild soap that does not contain fabric softener, oils, bleach, or heavy fragrance. Rinse thoroughly and allow the garment to dry. A carefully controlled wipe with manufacturer-approved cleaner or isopropyl alcohol may be appropriate for some coated fabrics, but it should be tested in a hidden location first.
Do not scrub breathable laminate with a stiff brush or abrasive pad. Rough cleaning can enlarge pinholes, damage the face fabric, or weaken the waterproof coating around the seam. Cleaning should remove contamination without changing the texture or appearance of the material.
Remove Only Unstable Material
Loose seam tape must be evaluated carefully. A short edge that remains flexible and strongly attached can often be lifted just enough to clean beneath it, then rebonded. Tape that is curled, brittle, cracked, or contaminated with old adhesive may need to be trimmed back to a stable edge.
Use small, sharp scissors and remove only material that is already detached. Pulling firmly on tape can cause a larger section to separate. Old adhesive ridges should be reduced only when they interfere with a flat repair. Scraping aggressively can remove the waterproof coating or cut the laminate.
Stable factory tape should generally remain in place. Covering a small leak and the edge of sound tape is less disruptive than stripping an entire seam. Large-scale delamination, bubbling, or fabric separation indicates a structural problem that may not be solved by a simple surface application.
Position the Seam for Application
The repair area should be flat enough for controlled application but not stretched beyond its normal shape. Place cardboard, a smooth board, a rounded form, or a piece of plastic-covered foam inside the garment to support the seam. The support prevents adhesive from transferring to the opposite fabric layer and keeps the seam from folding while it cures.
Use masking tape several millimeters away from the repair if a clean edge is important. Do not place tape directly over fragile coatings or areas where removal could lift the face fabric. Wear disposable gloves to keep skin oils away from the cleaned seam.
A practical preparation kit includes scissors, a lint-free cloth, mild cleaner, removable marker, low-tack tape, disposable gloves, a smooth support board, and the repair adhesive. A precision nozzle is useful for stitch lines, while a small disposable brush or applicator can spread adhesive across wider tape edges.
| Preparation Step | Practical Target | Common Mistake |
|---|---|---|
| Cleaning | No visible mud, oil, lint, or detergent residue | Applying glue over a seemingly clean but oily surface |
| Drying | Completely dry inside and outside | Trapping moisture beneath adhesive |
| Tape trimming | Remove only detached or brittle portions | Pulling off firmly bonded tape |
| Repair margin | Extend beyond the leak onto stable material | Covering only the exact visible point |
| Seam support | Hold the seam in a relaxed, natural shape | Stretching the fabric during curing |
| Work temperature | Follow the adhesive label, commonly normal indoor conditions | Applying in very cold, damp, or dusty areas |
Preparation often takes longer than application, but it is where repair durability is decided. A carefully cleaned seam with a modest amount of adhesive usually performs better than a dirty seam covered with a thick, hurried layer.
How Do You Seal a Leaking Wader Seam?
Seal the seam by applying a thin, continuous layer of flexible waterproof adhesive over the confirmed leak and onto clean material around it. Work the adhesive into stitch holes and beneath loose tape edges, smooth the repair without thinning it excessively, and allow the garment to cure undisturbed.
Apply a Controlled Bead
Position the nozzle close to the seam and apply a narrow bead rather than squeezing a large mound onto the fabric. For a pinhole or short stitch-line leak, the adhesive should cover the damaged point and extend approximately 10–20 mm beyond it in each direction. This margin helps bridge small nearby defects that may not be immediately visible.
Use the precision applicator, a small brush, or a gloved fingertip to spread the adhesive into a smooth film. The layer must remain continuous; gaps, bubbles, and dry edges can provide a new path for water. Avoid repeatedly brushing once the adhesive begins to skin because this can create ridges and pull the material away from the seam.
When sealing stitching, work across the thread line rather than applying glue only between the stitches. The adhesive needs to cover the needle holes and bond to stable coating on both sides of the seam.
Rebond Loose Tape Correctly
For a small lifted tape edge, place a controlled amount of adhesive beneath the loose section using a narrow nozzle or applicator. Press the tape back into its original position and remove excess adhesive that squeezes out. A smooth piece of release film, wax-free plastic, or another non-stick barrier can be placed over the repair before applying light, even pressure.
Do not clamp so tightly that all adhesive is forced away from the joint. The repair needs a thin bonding layer beneath the tape. Heavy pressure may also create a hard edge or push adhesive into unwanted areas.
If the tape has detached over a long distance, rebonding only the visible center may trap loose edges and water channels. Treat the entire unstable section or use replacement seam tape. Long failures around the crotch or stockingfoot connection often deserve professional inspection because the joint carries significant mechanical stress.
Add a Patch When Needed
A patch is useful when the fabric has torn, thinned, or lost surface material. Cut the patch with rounded corners because sharp corners are more likely to lift. The patch should extend roughly 15–25 mm beyond the damaged area onto sound fabric. Apply adhesive evenly beneath the patch and, when appropriate, seal around its perimeter.
Black patches are practical on dark neoprene, bootfoot rubber, and hunting waders. Clear patches can be less visually noticeable on coated fabrics with unusual colors. Patch thickness should remain compatible with the surrounding material; a stiff patch on a highly flexible knee or crotch area can move stress to the patch edge.
Most flexible polyurethane repair adhesives need approximately 8–12 hours to cure sufficiently under normal indoor conditions, although colder temperatures, heavy applications, or high humidity may lengthen the process. Do not fold, wear, inflate, stretch, or water-test the garment before the adhesive has cured according to the product instructions.
A rushed repair may feel dry on the surface while remaining soft underneath. Allowing an overnight cure is usually more dependable than testing the seam as soon as it becomes tack-free.

How Do You Test and Protect the Repair?
Test a repaired seam only after the adhesive has fully cured. Begin with visual and flex checks, then use a limited water test or shallow-water field test. Protect the repair by drying, storing, cleaning, and folding the waders in ways that reduce repeated stress on the sealed seam.
Inspect Before Adding Water
Examine the cured adhesive under good light. The film should be continuous, firmly bonded, and free from open bubbles, lifted edges, deep cracks, or sections that remain unusually soft. Gently bend the seam several times through its normal range of motion. The repair should flex with the fabric instead of separating or turning white at the edges.
A slightly raised surface is normal, especially where a patch overlaps a seam. A large hard lump may indicate excessive adhesive and can cause rubbing inside the garment. Do not cut or sand the cured surface unless the product instructions specifically allow it because trimming can expose a new edge.
If an area still feels tacky after the stated curing period, move the garment to a dry, well-ventilated indoor space and allow more time. Thick applications and cool conditions can slow curing significantly.
Retest in Stages
Begin with the same controlled method used to locate the leak. A small sectional water test is safer than filling the entire garment. Support the repaired section, add limited water, and watch for seepage around the repair edge. Dry the area and inspect it again before wearing.
The first field test should take place in shallow water close to shore, a vehicle, or another safe exit. Wear normal base layers so that a small amount of moisture can be detected. Avoid a remote trip, deep crossing, or cold-weather outing as the first test of a major seam repair.
If moisture returns, confirm whether it is entering through the repaired point or from a nearby unmarked pinhole. Water beside a repair does not automatically mean the adhesive failed. Closely spaced defects are common in high-wear zones, particularly around boot tops and inner knees.
Prevent the Leak from Returning
Rinse mud, salt, sand, and organic debris from the waders after use. Grit trapped in folds acts like sandpaper against seam tape and coatings. Allow both sides to dry completely before storage, but avoid prolonged exposure to direct sunlight, heaters, hot vehicle interiors, or open flames.
Store the garment loosely hanging or gently rolled rather than sharply folded along the same seams. Do not leave heavy boots, tackle boxes, or camping equipment on top of the waders. Repeated compression can crease seam tape and push contaminants into the coating.
Check repairs and high-stress seams before each season. A small edge that begins lifting can often be addressed before it becomes a long leak. Clean only with products suitable for waterproof breathable gear, and avoid fabric softeners, chlorine bleach, and aggressive solvents.
Professional service is the better choice when seam tape is detached over a long area, the laminate is delaminating, several seams leak simultaneously, or the stockingfoot and boot connections are separating structurally. Repairs under an active manufacturer warranty should also be discussed with the original brand before applying third-party products because unauthorized work may affect coverage.
Conclusion
Fixing a leaking wader seam is usually a manageable repair when the problem is localized and the surrounding fabric remains strong. The most reliable process starts with accurate diagnosis, not with covering a large area in adhesive. Once the leak is confirmed, careful cleaning, controlled removal of failed material, and a thin flexible seal can restore waterproof performance without making the seam unnecessarily stiff.
Material compatibility remains central to the repair. Breathable laminates, neoprene, PVC, rubber, leather, polyurethane coatings, and mixed-material stockingfoot joints do not respond equally to every adhesive. A flexible polyurethane repair glue that cures into a waterproof, UV-resistant rubber-like layer is well suited to many moving outdoor-equipment repairs, especially where the seam must continue bending after an 8–12-hour cure.
GleamGlee supplies complete wader repair solutions for fishing, hunting, diving, camping, and waterproof work gear. Available configurations can include a 60 ml repair adhesive, clear and black patch materials, precision applicators, and customizable nozzles for small leaks, torn seams, and larger surface repairs. The formulation is designed for compatible use across neoprene, rubber, PVC, polyurethane, leather, coated fabrics, and breathable materials.
Retailers, outdoor brands, fishing-equipment distributors, Amazon sellers, and private-label businesses can request customized formulas, packaging formats, patch combinations, nozzle structures, labels, and multilingual instructions. Custom projects can begin from 200 units, with printable design work available in as little as two days, samples commonly completed within 7–14 days, and standard bulk production commonly completed in approximately 20 days.
GleamGlee supports OEM and ODM projects with in-house formulation development, packaging production, label printing, performance testing, and compliance preparation for North American, European, British, Canadian, and Asian markets. Businesses looking for a branded wader repair glue, a complete outdoor-equipment repair kit, or a formulation adapted to a specific fabric can contact the team for samples, technical discussion, packaging options, and a project quotation.





















