Skip to content

Flexible Tent Glue for Canvas & Nylon Tents: An Expert Guide
Your trusted adhesives glue & cleaner manufacturer

A tent repair often looks simple when the fabric is lying flat on a garage floor. The real test begins later, when that same repair is pulled tight over poles, shaken by wind, exposed to rain, folded into a stuff sack, stored for several weeks, and opened again on the next trip. Canvas and nylon are flexible materials, so a repair that cures into a hard, brittle patch can solve one problem while creating another. The useful question is therefore not simply, “Which glue is strongest?” A more practical question is, “Which adhesive can stay attached while the tent continues to move?” Flexible tent glue is designed around that reality. It can bond damaged fabric, seal small holes and seams, reinforce patches, and remain pliable after curing. Material compatibility is still essential because ordinary nylon, polyurethane-coated fabric, canvas, vinyl, polyester, and silicone-treated nylon do not all respond to the same adhesive chemistry.
Quick Answer: The best flexible tent glue for canvas and standard nylon tents is a waterproof outdoor adhesive that bonds strongly without creating a rigid repair spot. It should remain flexible through folding, stretching, pitching, and packing, while also sealing small holes, seams, tears, and patch edges. Silicone-treated nylon needs a silicone-compatible repair product rather than an ordinary general-purpose tent adhesive.
Picture the problem at the campsite instead of on a workbench. A small tear appears near the lower edge of a rainfly on the evening before expected rain. One repair may only need a thin waterproof seal, while another tear of the same length near a guy-line attachment may need reinforcement because the fabric is carrying much more tension. Knowing the difference between these situations is what turns tent glue from an emergency product into a reliable part of long-term gear maintenance.
What Is Flexible Tent Glue?
Flexible tent glue is an outdoor repair adhesive designed to bond moving fabrics without turning the repaired area into a hard, brittle spot. Once fully cured, a suitable formula should tolerate bending, stretching, rolling, folding, and repeated tent setup while maintaining adhesion. Many formulas also work as sealants, allowing one product to repair punctures, reinforce seams, secure patches, and limit water penetration on compatible outdoor fabrics.
What Makes Tent Glue Different?
Tent fabric behaves differently from wood, ceramic, metal, or other rigid materials. When a tent is pitched, poles, clips, webbing, and guy lines place the fabric under continuous tension. Wind repeatedly pushes and releases the panels, while packing creates sharp folds that may pass through the same repaired area hundreds of times during the life of the shelter. This constant movement explains why initial bond strength is only one part of a successful tent repair.
A rigid adhesive may feel impressively strong when tested by hand after curing, yet the stiffness difference between the hardened glue and the surrounding flexible fabric can concentrate stress around the edge of the repair. With repeated movement, peeling often begins at this transition zone. Flexible outdoor adhesive reduces that mismatch by allowing the cured layer to deform with the fabric instead of resisting every bend.
A useful tent adhesive therefore combines several properties rather than focusing on a single strength claim. It should bond to the correct surface, remain pliable, resist moisture, tolerate normal abrasion, and provide enough working time for controlled application. For tents, “strongest” and “most suitable” are not necessarily the same thing. The better product is the one whose cured behavior matches the movement and coating of the material being repaired.
How Does Flexible Tent Glue Work?
Flexible tent adhesive normally performs two closely related jobs. First, it creates a bond between damaged fabric and another surface, such as the opposite side of a tear or a reinforcing patch. Second, it fills small gaps where water or air could otherwise travel. When the repair is applied correctly, the adhesive forms a continuous layer that both holds materials together and helps seal the damaged area against outdoor exposure.
For adhesion to develop properly, the liquid adhesive must contact a stable surface. Dust, oil, insect repellent, sunscreen, old peeling seam tape, moisture, or degraded waterproof coating can prevent that contact. This is why surface preparation often matters as much as the adhesive itself. Adding a thicker layer over contamination does not solve the underlying problem; it usually creates a heavier repair attached to a weak surface.
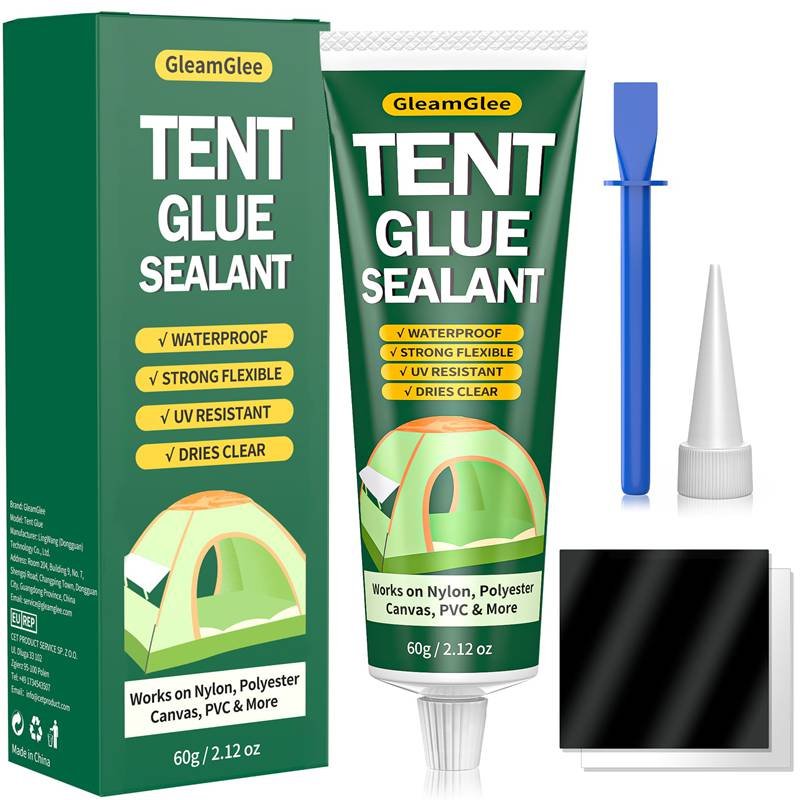
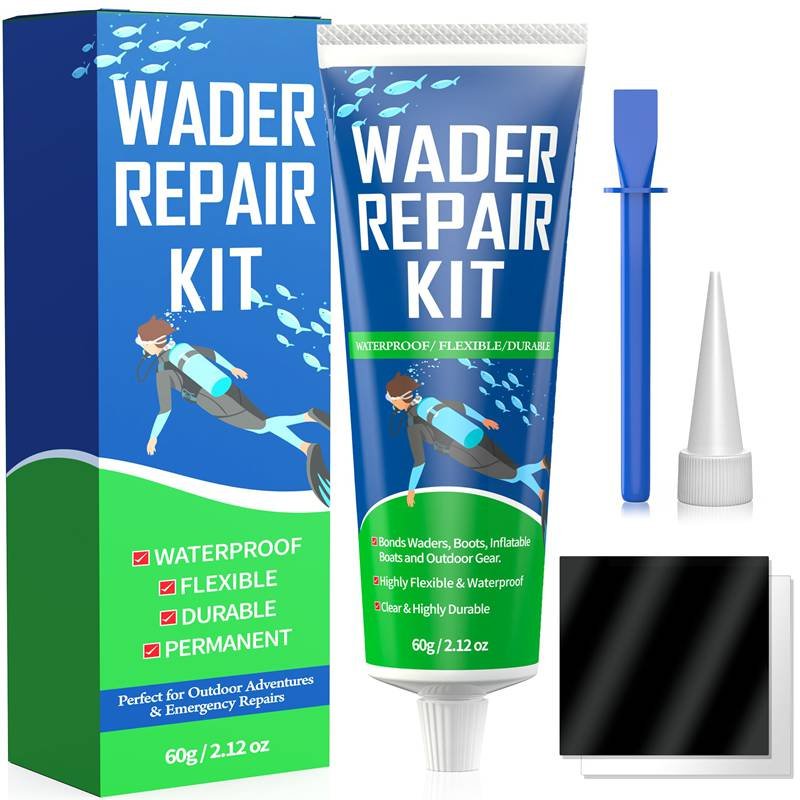
Application thickness also matters. A very thick bead may cure slowly, add unnecessary weight, create visible ridges, or produce a stiffer area than the surrounding textile requires. Thin, complete coverage is usually more useful than flooding the repair. GleamGlee Tent Glue follows this adhesive-and-sealant approach in a 2.12 fl oz, or 60 ml, format intended for compatible nylon, canvas, vinyl, polyester, and selected coated outdoor fabrics.
How Does Flexibility Protect Fabric?
Flexibility protects tent fabric by reducing the mechanical difference between the repair and the material around it. Imagine placing a hard plastic disk in the middle of a soft rainfly. When the nylon stretches, the plastic cannot stretch with it, so the greatest stress develops around the outer edge. A rigid adhesive spot can behave in a similar way, particularly after repeated folding or when the tent is pitched tightly.
A flexible cured layer moves more naturally with the fabric and spreads stress over a wider area. This matters most on rainflies, vestibules, tent doors, corners, groundsheets, pop-up shelters, rooftop tents, awnings, and other locations that repeatedly bend or carry tension. It is also important on equipment that is rolled tightly for storage because the repaired area may experience much sharper bending than it does while the shelter is pitched.
Temperature should also be considered. Many flexible materials become less compliant in cold conditions, while heat can soften coatings and increase pressure inside packed equipment. A repair adhesive may tolerate a broad temperature range after curing but still require moderate conditions during application. For that reason, a permanent home repair is usually more predictable when the tent is clean, dry, flat, and repaired at a comfortable working temperature.
Is Tent Glue Also a Sealant?
Many outdoor tent adhesives are designed to function as both bonding products and sealants because real tent damage often involves two problems at the same time. A patch over a tear must stay attached, but its perimeter also needs to prevent water from tracking underneath. A small puncture may need almost no structural reinforcement yet still require a continuous waterproof film. A leaking stitched seam may need sealing rather than a conventional patch.
This dual function makes flexible tent adhesive useful for bonding fabric patches, filling small punctures, reinforcing worn areas, coating stitch lines, sealing patch edges, and treating selected seam failures. It also reduces the need to use a rigid bonding adhesive first and then add a separate flexible sealant over the repair afterward.
However, the ability to bond and seal does not make one formula universal. Surface coating still determines compatibility. A product that performs well on standard polyurethane-coated nylon may bond poorly to silicone-treated fabric. Material identification should therefore happen before application rather than after a repair begins peeling during the first rainy weekend.

Which Tent Fabrics Can It Repair?
Flexible tent glue can repair many canvas, nylon, polyester, vinyl, and PVC-coated outdoor fabrics, but the name of the base textile alone does not confirm compatibility. The adhesive usually contacts the outer coating first, so polyurethane, silicone, water-repellent treatments, laminates, and aged coatings can change bonding behavior significantly. Identifying both the fabric and its surface treatment is one of the most important steps in a reliable repair.
Is Tent Glue Suitable for Canvas?
Canvas is generally a repair-friendly tent material because its woven construction gives patches, stitches, and suitable adhesives a substantial surface to work with. It is commonly used in family tents, wall tents, bell tents, rooftop shelters, awnings, commercial canopies, and heavier outdoor structures where long service life often matters more than minimum packed weight. Typical damage includes small spark holes, branch punctures, short tears, worn corners, seam leaks, and damage around doors or attachment points.
Small canvas damage may be handled with a flexible adhesive or localized patch, while larger openings normally benefit from reinforcement. Rounded patches are particularly useful because square corners can become easy starting points for peeling. A patch should extend well beyond the damaged fibers and onto sound fabric rather than merely covering the visible opening.
Heavy canvas tears may also require stitching before adhesive is applied. In this type of repair, thread helps restore mechanical continuity while the patch and adhesive distribute stress and restore weather resistance. Treated canvas can contain water-repellent finishes, fire-retardant systems, blended fibers, or specialized coatings, so a hidden-area compatibility test remains sensible whenever the exact construction is unknown.
Is Tent Glue Suitable for Nylon?
Nylon is widely used in camping equipment, but experienced repairers rarely treat the word “nylon” as a complete material description. Two tents can both use nylon while having completely different surface chemistry. A mainstream shelter may use polyurethane-coated nylon, while an ultralight backpacking tent may use silicone-treated nylon. Those fabrics can look very similar while requiring different repair products.
Standard nylon and polyurethane-coated nylon can often be repaired using flexible urethane-compatible outdoor adhesives. These materials appear in tent walls, rainflies, lightweight shelters, floors, sleeping bags, backpacks, and other gear. Repairs should usually remain thin because lightweight nylon is designed to fold and compress tightly, and a large mound of cured adhesive can create unnecessary stiffness.
Silicone-treated nylon is different. Silicone creates a low-energy surface that many ordinary adhesives cannot wet or bond reliably. Silnylon therefore normally requires a silicone-compatible repair sealant. Assuming that every product labeled “nylon glue” will perform on silnylon is one of the easiest ways to create a repair that looks fine initially but peels away after movement or rain.
| Tent Material | Common Repair Uses | Main Compatibility Check | Practical Repair Note |
|---|---|---|---|
| Standard nylon | Holes, tears, seams, rainflies | Identify coating | Keep repairs thin and flexible |
| PU-coated nylon | Floors, flysheets, lightweight tents | Confirm PU-compatible adhesive | Remove loose failing coating |
| Silnylon | Ultralight tents and tarps | Use silicone-compatible chemistry | Do not assume ordinary glue works |
| Polyester | Family tents, flysheets, awnings | Check waterproof finish | Usually stretches less than nylon |
| Canvas | Wall tents, bell tents, awnings | Check treatments and coatings | Larger tears may need stitching |
| Vinyl/PVC-coated fabric | Windows, floors, utility covers | Confirm coating compatibility | Flexibility is important at fold lines |
Which Other Outdoor Fabrics Can Be Repaired?
Tent repair adhesive is useful well beyond the main tent body because many pieces of outdoor equipment use related coated textiles. Polyester appears in a large number of family tents, rainflies, shelters, and awnings. Vinyl is used in clear windows, heavy covers, and selected floor or utility components. PVC-coated fabric appears in groundsheets, tarps, inflatable structures, outdoor storage covers, and temporary shelters.
The same repair principles can apply to rainflies, footprints, awnings, sleeping-bag shells, selected inflatable pads, dry bags, backpacks, rain covers, rooftop tent panels, tarpaulins, gazebos, and motorcycle touring shelters. The important point is that “outdoor fabric” is a broad category rather than a single material.
Two polyester fabrics, for example, may use completely different surface treatments. One may have a straightforward polyurethane coating, while another may contain a durable water-repellent finish, laminate, or specialty protective layer. Adhesive is bonding to that outermost surface. If the coating is unstable, peeling, contaminated, or chemically incompatible, the strength of the fibers underneath cannot rescue the bond.
Which Coated Fabrics Need a Compatibility Test?
Any tent material with an unknown, aged, silicone-rich, laminated, heavily treated, or deteriorating coating deserves a small compatibility test before a large visible repair is attempted. Silicone-treated nylon is the clearest example, but the same caution is useful with older waterproof coatings, clear vinyl windows, specialty expedition textiles, laminated materials, and equipment that has previously been treated with aftermarket waterproofing products.
A practical test does not require laboratory equipment. Choose an inconspicuous section, clean it in the same way you plan to clean the repair, apply a small amount of adhesive, and let it cure fully. Afterward, bend, roll, and lightly pull the area. The adhesive should remain attached without causing obvious discoloration, wrinkling, surface softening, or coating separation.
This test becomes particularly valuable when the tent is expensive, technically specialized, or difficult to replace. It also matters in commercial product development. Testing an adhesive directly on the actual canvas, nylon, or coated polyester supplied by the tent manufacturer is more meaningful than relying only on a broad marketing description such as “works on outdoor fabric.”
How Do You Repair a Tent?
Repair a tent by first identifying the fabric and coating, then cleaning and drying the damaged area before deciding whether the problem needs adhesive alone, a patch, stitching, or a combination of methods. Apply the adhesive in a controlled layer and keep the area flat and undisturbed during curing. Avoid folding, stretching, packing, or exposing the repair to rain until the stated full cure time has passed.
How Do You Prepare the Surface?
Surface preparation is one of the least dramatic parts of tent repair, yet it often has the greatest influence on whether the bond lasts. Used outdoor fabric may carry dust, skin oil, sunscreen, insect repellent, smoke residue, mud, moisture, old adhesive, deteriorating seam tape, or waterproofing treatments. Any of these can create a weak layer between the adhesive and the stable fabric underneath.
Start with a completely dry tent and spread the damaged section where both sides can be inspected. Remove loose dirt and material that is already detached, but avoid aggressively pulling away sound seam tape or coating. When the fabric instructions allow it, a suitable cleaning method can be used to remove surface contamination before bonding. The area should then be allowed to dry completely.
Alignment also matters. Torn edges should be returned to their natural position rather than stretched until the opening disappears. Stretching the material during repair can lock unnecessary tension into the patch and cause the repaired zone to distort later. A clean, dry, relaxed surface gives the adhesive a much better chance of developing a uniform bond.
How Do You Repair Holes and Tears?
The visible size of a hole is only one part of the repair decision. Location, fabric weight, surrounding material condition, and mechanical load can be equally important. A tiny puncture in the middle of a lightly tensioned rainfly may need only a flexible seal, while an opening of the same size next to a guy-line attachment could require reinforcement because the area is exposed to much higher stress.
Larger tears normally benefit from patches because the patch transfers force away from damaged fibers and into intact fabric around the opening. The reinforcement should extend beyond the tear onto strong material, and rounded corners reduce the chance that a sharp patch corner becomes the first place to lift.
For compatible materials, a flexible adhesive can be placed beneath the patch and used around the perimeter to create a sealed edge. Pressing the patch from the center outward helps remove trapped air and encourages uniform contact. Large structural tears, particularly in heavier canvas, may need stitching before adhesive and patching are added.
| Damage Type | Approximate Scale | Primary Repair | Additional Reinforcement |
|---|---|---|---|
| Pinhole | A few millimeters | Flexible sealant | Usually unnecessary |
| Small puncture | Under about 12 mm / 0.5 in | Adhesive or small patch | Depends on location |
| Short fabric tear | About 12–50 mm / 0.5–2 in | Patch plus adhesive | Useful on moving panels |
| Long tear | Over about 50 mm / 2 in | Patch with structural assessment | Stitching often useful on canvas |
| Local seam leak | Linear or isolated | Compatible seam sealer | Repair broken stitching first |
| Widespread coating failure | Broad surface area | Recoating or replacement assessment | Glue alone is usually insufficient |
How Do You Seal Leaking Seams?
A leaking seam should be diagnosed before additional adhesive is applied. Water appearing around a stitched line can come from failed seam tape, exposed needle holes, damaged sealant, nearby coating failure, or even internal condensation. Adding another thick layer over the entire area without identifying the source can make the repair messy while leaving the real leak untouched.
Inspect the seam along its full length under good lighting. Loose tape or sealant that is already detached can be carefully removed, while stable material should generally remain in place. After cleaning and drying the exposed surface, apply a thin, continuous layer of compatible sealant rather than irregular blobs. The goal is to close water paths through and around the stitching while keeping the seam flexible.
Long seams are easier to handle in manageable sections because this allows more consistent film thickness. GleamGlee’s 60 ml tent adhesive is designed for both bonding and compatible seam sealing, with manufacturer-stated coverage of up to approximately 60 feet depending on bead width, surface texture, and application thickness. This makes the format useful for both individual repairs and broader maintenance.
How Long Should Tent Glue Cure?
There is no single curing time that applies to every tent adhesive. Water-based seam sealers, silicone systems, urethane adhesives, and flexible repair compounds can all behave differently. Film thickness, temperature, humidity, ventilation, fabric absorbency, and patch construction also influence how quickly a repair reaches its final usable strength.
Some fast seam products can cure within a few hours, while heavier flexible repair adhesives may need most of a day or longer before the tent should be folded, tensioned, or exposed to rain. This is why “dry to the touch” should never be treated as the same thing as “fully cured.” The surface can feel dry even though the adhesive beneath it is still developing strength.
When repairing at home, leaving the tent flat overnight is often a practical choice when the product instructions allow it. Thick repairs, overlapping patches, cool temperatures, or poor airflow may need additional time. Rushing the final stage can undo otherwise careful preparation, particularly if a partially cured patch is immediately folded into a storage bag.

Do You Need Glue or a Patch?
Use adhesive alone for very small punctures, minor seam leaks, and limited surface damage when the surrounding fabric remains strong. Add a patch when a tear has reduced the material’s ability to carry load or is likely to spread. Larger canvas tears and high-stress failures may need stitching before patching so structural strength, load distribution, and waterproof sealing are restored through different parts of the repair.
Do Small Repairs Need a Patch?
Not every visible hole requires a patch. Needle-sized punctures, tiny abrasion marks, small seam leaks, and minor surface damage can often be sealed with a compatible flexible adhesive when the surrounding textile remains strong. This approach can be particularly useful on lightweight backpacking shelters where unnecessary layers add bulk and make the repaired panel harder to pack.
Location is just as important as size. A five-millimeter puncture in the center of a loosely loaded side panel may remain stable, while the same opening beside a zipper, corner webbing point, pole attachment, or guy-line loop may continue growing because the area carries much more stress. In those locations, a small reinforcement patch can be worthwhile even when the opening initially looks insignificant.
The condition of the surrounding fabric should also influence the decision. If UV exposure has made the textile brittle or noticeably thin, sealing one small hole does not restore strength to the entire weakened panel. A repair should stabilize healthy material rather than hide evidence that the surrounding fabric is reaching the end of its practical service life.
Which Tears Should Be Patched?
A tear should normally be patched when enough fibers have been cut or pulled apart that adhesive alone would leave the damaged area carrying too much tension. A patch functions as a bridge. Instead of asking torn fibers to continue supporting the original load, the reinforcement transfers force into a wider zone of intact material around the damage.
Rainflies, tent floors, vestibules, canvas sidewalls, rooftop tent panels, canopy tops, and corners are common locations where reinforcement can be valuable. The patch should extend beyond the damaged area rather than match the exact size of the tear. For many everyday fabric repairs, allowing approximately one inch or more of sound overlap provides a useful starting point, although heavy canvas or high-load areas may justify a larger margin.
Patch shape also affects durability. Rounded corners are preferable to sharp square corners because there is no single point where peeling can begin easily. A properly bonded patch should lie smoothly without bubbles, lifted edges, or wrinkles that can collect water and dirt during later use.
Do Large Tears Need Stitching?
Large tears often benefit from stitching because they represent a structural failure rather than a simple waterproofing problem. When a long section of canvas or other heavy textile has separated, thread can bring the torn edges back together and help restore mechanical continuity before a reinforcing patch is applied. Adhesive can then bond the reinforcement and seal the repair against weather.
This layered approach allows each repair method to perform the job it handles best. Stitching supports structure, patch material spreads load, and flexible adhesive bonds and seals. Using extra glue alone is not always an effective substitute for rebuilding the damaged textile when major tension is involved.
Professional repair may be preferable when damage extends into zippers, pole attachment points, heavy webbing, large roof panels, or several fabric layers at once. Temporary tape or an emergency patch can help prevent further damage during a trip, but more demanding repairs are usually better completed later when the tent can be cleaned, flattened, stitched, reinforced, and cured under controlled conditions.
Is Flexible Tent Glue Waterproof?
Flexible tent glue can create a waterproof or highly water-resistant repair when it forms a continuous cured barrier on a compatible surface. Waterproof performance depends on more than the adhesive formula itself. Surface preparation, coating compatibility, patch-edge sealing, film continuity, curing time, and the condition of surrounding fabric all influence whether rain can enter through or around the repaired area during real outdoor use.
Is the Repair Waterproof After Curing?
Waterproofing should be viewed as a complete repair system rather than a single product claim. An adhesive may itself resist water very well, yet rain can still enter through an unsealed patch edge, uncovered stitch hole, tiny channel beneath a wrinkle, or deteriorated coating beside the repair. The repaired area therefore needs continuous coverage rather than simply a strong bond in the center.
Patch edges deserve particular attention because water naturally follows small gaps. Even if most of a patch is attached perfectly, one lifted section can allow moisture, sand, and dirt to travel underneath. Once contamination reaches the bond line, later peeling becomes more likely. Sealing the perimeter when the repair system requires it can significantly improve reliability.
GleamGlee Tent Glue is designed to cure into a clear, flexible seal on compatible outdoor fabrics. This makes the formula relevant for tents, rainflies, groundsheets, tarps, awnings, sleeping equipment, and similar items where movement and moisture occur together. A controlled water test after curing is sensible before relying on any major repair during remote travel.
Does Tent Glue Stay Flexible?
A purpose-built flexible tent adhesive should remain pliable after curing because normal tent ownership involves repeated movement. A shelter is pulled tight while pitched, shaken by wind, exposed to changes in moisture and temperature, folded after use, compressed into a bag, stored for days or weeks, and then opened again. A repair that cannot tolerate those cycles may eventually crack or lift even if its first bond feels strong.
Application thickness influences flexibility as well. A thin continuous film usually moves more naturally than a large mound of cured adhesive. The objective is to use enough material to establish complete bonding and sealing without creating an unnecessarily rigid zone in the middle of a lightweight textile panel.
Once the repair has reached full cure, gently bending and rolling the area provides a useful practical check. The adhesive should move with the fabric without obvious cracking, whitening, detachment, or sharp lifting around its edge. On ultralight equipment, maintaining low bulk is especially important because thick repairs can noticeably change the way the panel folds.
How Does the Repair Handle Outdoor Wear?
Outdoor tent repairs face more than rain. Tent floors can rub against sand, stones, roots, and rough ground. A motorcycle touring tent may spend hundreds of miles vibrating inside luggage before it is unfolded. Rooftop shelters experience repeated movement during travel, while awnings and canopies can remain exposed to wind for many hours at a time.
This is why abrasion resistance matters alongside flexibility and waterproofing. A repair on the floor of a tent may need to withstand surface wear, while a rainfly repair experiences repeated wind movement and UV exposure. The location of the repair determines which stress becomes most important.
Preventing the original cause of damage also extends repair life. If the fabric continues rubbing against sharp hardware, a rough pole fitting, or an exposed vehicle component, adhesive alone cannot solve the mechanical problem permanently. Good maintenance combines a suitable flexible bond with changes that reduce repeated abrasion or excessive tension around the repaired area.
| Repair Location | Main Outdoor Stress | Most Important Repair Property | Useful Maintenance |
|---|---|---|---|
| Rainfly | Wind movement, rain, UV | Flexibility and sealed edges | Inspect before wet-weather trips |
| Tent floor | Abrasion, moisture, pressure | Waterproofing and wear resistance | Use a suitable footprint |
| Canvas wall | Tension, folding, weather | Strong patch bond and flexibility | Check stitching and patch edges |
| Seam | Water paths and repeated tension | Continuous flexible sealing | Watch for lifting seam tape |
| Awning | Wind, sun, repeated rolling | Flexibility and edge adhesion | Store fully dry |
| Rooftop tent | Folding, vibration, weather | Durable flexible reinforcement | Inspect high-stress fold areas |
How Can You Make a Repair Last Longer?
Long repair life usually comes from careful preparation rather than simply applying more adhesive. The first rule is to bond only to stable material. Glue placed over dust, loose waterproof coating, old peeling tape, or oily residue will be limited by the weak layer underneath regardless of the quality of the formula itself.
Patch geometry also matters. Rounded edges reduce opportunities for peeling, while adequate overlap spreads stress into sound fabric. Full curing is equally important because packing a partially cured repair can distort the adhesive layer and cause surfaces to stick together inside the storage bag. Thick application should be avoided unless the product instructions specifically require it.
Finally, correct the reason the fabric was damaged. Sharp poles, overtightened guy lines, rough ground, exposed hardware, or repeated friction can cause the same failure again. Let the tent dry completely before storage, inspect old repairs periodically, and deal with minor edge lifting before sand or moisture has time to work underneath the bonded area.

How Do You Choose Tent Glue?
Choose tent glue by matching the adhesive chemistry to the fabric and coating before comparing flexibility, waterproof performance, cure behavior, abrasion resistance, application control, and coverage. A product that works reliably on standard nylon can still fail on silnylon. Frequent users should also consider how easily the adhesive can handle several repair types, while commercial projects benefit from consistent formulation, reliable packaging, documentation, and material testing.
Which Features Matter Most?
Material compatibility should be the first filter because an adhesive cannot deliver useful durability if it does not bond to the surface coating. Once compatibility is confirmed, flexibility becomes especially important because the repaired area must move with the tent. Waterproof sealing, abrasion resistance, curing behavior, application control, and coverage then determine how practical the product will be during regular outdoor use.
Consumers sometimes choose products primarily by a high strength number or the phrase “fast drying,” but neither characteristic tells the whole story. Very fast curing can be convenient for a minor seam touch-up, while another repair may benefit from a longer working time that allows a large patch to be positioned correctly. Likewise, extreme rigidity can be useful on a hard material while being undesirable on a folding tent wall.
The most useful product information therefore explains the intended materials, final flexibility, cure requirements, and application method clearly. Reliable performance comes from matching the formula to the job rather than choosing the strongest-looking claim on the package.
| Selection Factor | Priority | What to Check | Common Mistake |
|---|---|---|---|
| Fabric and coating compatibility | Very high | Clear material guidance | Selecting by “nylon” alone |
| Flexibility after cure | Very high | Bends without cracking or peeling | Choosing the hardest adhesive |
| Waterproof sealing | Very high | Continuous cured barrier | Ignoring patch edges |
| Cure time | High | Full-cure specification | Packing when touch-dry |
| Abrasion resistance | High | Outdoor wear suitability | Treating all repairs as static |
| Application control | Medium-high | Thin, even spreading | Applying too much adhesive |
| Coverage | Medium | Seam length or repair area | Comparing only tube volume |
| Clear appearance | Situational | Useful on visible panels | Prioritizing appearance over compatibility |
Is Adhesive-and-Sealant Use Better?
A flexible adhesive that also works as a sealant can simplify outdoor maintenance because many tent repairs require both functions. A fabric patch needs enough bonding strength to remain attached, while the perimeter may also need sealing to prevent water from entering underneath. A puncture may need almost no structural reinforcement yet still require a continuous waterproof film.
This dual-purpose format can reduce the number of products carried in a repair kit. It is particularly practical for family camping, road trips, rooftop tents, rental equipment, outdoor schools, emergency gear, and people maintaining several shelters or fabric accessories at the same time.
Versatility should still be described carefully. A product that bonds and seals several conventional outdoor fabrics does not automatically become suitable for silicone-treated shelters. The most reliable claim is not “works on everything,” but rather “handles several repair types on confirmed compatible materials.” GleamGlee’s tent adhesive is designed around this type of use, supporting patch bonding, seam sealing, small-hole repair, tear reinforcement, and patch-edge sealing on appropriate outdoor fabrics.
How Much Tent Glue Do You Need?
Container size alone does not tell you how many repairs can be completed because usage depends heavily on application width and thickness. A thin line along a seam consumes far less adhesive than bonding the full underside of a large canvas patch. Fabric absorbency, surface texture, bead width, patch perimeter, and the number of repair layers also influence real-world coverage.
GleamGlee Tent Glue is supplied in a 2.12 fl oz, or 60 ml, tube and is designed to provide up to approximately 60 feet of seam or fabric coverage under suitable application conditions. Actual coverage will vary because a wide repair bead, rough canvas, or thick patch application naturally consumes more product than a narrow seam coating.
For a single lightweight backpacking shelter, portability may matter more than volume. Family camping, outdoor rental operations, repair workshops, event canopies, or several pieces of expedition equipment create very different requirements. Estimating total seam length, patch size, number of repairs, and future maintenance needs is more useful than simply purchasing the largest container available.
Which Specifications Matter for Commercial Projects?
For a camper, the main concern is whether one tube can repair the tent reliably. Retailers, outdoor-equipment brands, private-label projects, and distributors have a broader set of requirements because the formula must perform consistently across many units while the packaging also needs to survive storage, transport, and repeated customer handling.
Actual fabric testing becomes especially valuable in these projects. A customer producing polyurethane-coated family tents has different requirements from a company selling silicone-treated ultralight shelters. Testing both materials under the generic label “nylon” can create misleading conclusions. Using customer-supplied fabric allows compatibility, application behavior, curing, flexibility, and patch performance to be evaluated on the surface the adhesive will actually encounter.
Packaging matters as well. Tube material, cap design, nozzle control, leakage resistance, label durability, instructions, and regulatory documentation all influence the final user experience. GleamGlee integrates adhesive formulation, packaging, printing, and production resources, allowing compatible formulas and retail presentation to be developed together rather than treated as unrelated stages.
Conclusion
A reliable tent repair begins with matching the repair method to the material instead of treating every fabric tear as the same problem. Canvas, standard nylon, polyurethane-coated nylon, polyester, vinyl, PVC-coated fabric, and silnylon can behave very differently when adhesive is applied. Once the fabric and coating are identified, the repair decision becomes much clearer: minor punctures may need only sealing, medium tears often benefit from reinforcement, and major structural damage may require stitching before a patch and adhesive are added.
Flexibility is just as important as initial bond strength because tents spend much of their life moving. They are tensioned while pitched, shaken by wind, folded for transport, compressed in storage, and reopened repeatedly. A useful repair adhesive should tolerate these movements while maintaining a continuous seal around the damaged zone. Careful cleaning, controlled adhesive thickness, adequate patch overlap, complete curing, and correction of the original damage source all contribute to longer repair life.
For campers, this approach can extend the usable life of tents, rainflies, awnings, groundsheets, tarps, and other outdoor equipment instead of replacing them after relatively small damage. For brands and retailers developing their own repair products, material-specific testing and consistent manufacturing are equally important. The best tent glue is not simply the one that feels strongest after curing; it is the one that remains compatible with the fabric when the repaired gear returns to real outdoor use.

FAQ
What Is the Best Glue for a Nylon Tent?
The best glue for a nylon tent is a flexible outdoor adhesive that matches the coating on the nylon rather than simply carrying a generic “fabric glue” label. Standard or polyurethane-coated nylon often works with flexible urethane-compatible tent adhesives, while silicone-treated nylon generally needs silicone-compatible chemistry. Check the tent manufacturer’s material specification whenever possible and test an uncertain surface before making a large permanent repair.
Can You Use Tent Glue on Canvas?
Yes, a suitable flexible outdoor adhesive can be used on many canvas tents for small punctures, patch bonding, seam treatment, and localized tears. Larger canvas damage often benefits from a fabric patch, and long structural tears may also require stitching before adhesive is applied. Treated canvas can contain water-resistant, fire-retardant, or other surface finishes, so testing an unfamiliar material in a hidden area remains a sensible precaution.
Is Tent Repair Glue Waterproof?
Many purpose-built tent repair adhesives are designed to form a waterproof or highly water-resistant seal after full curing, but the final result also depends on surface preparation and application quality. Water can still enter through an unsealed patch edge, missed stitch hole, damaged coating, or poorly bonded section. For reliable results, use a compatible product, create continuous coverage, seal necessary edges, and allow the repair to cure fully before exposure to rain.
How Long Does Tent Glue Take to Dry?
Tent glue drying and curing times vary by adhesive chemistry, temperature, humidity, ventilation, and application thickness. Some lightweight seam products may become usable within a few hours, while more substantial flexible repair adhesives can require most of a day or longer. A surface that feels dry is not necessarily fully cured, so always follow the actual product instructions before folding, stretching, packing, or exposing the repaired tent to water.
Can Tent Glue Repair a Large Tear?
Tent glue can contribute to repairing a large tear, but adhesive alone is not always the best structural solution. Large tears usually benefit from a patch that extends onto strong surrounding fabric, while heavy canvas or high-tension damage may also need stitching first. In that type of repair, thread restores mechanical continuity, the patch distributes stress, and flexible adhesive bonds the reinforcement while helping seal the repaired area against water.
Should I Use a Patch or Only Glue on a Tent Hole?
Very small punctures and minor seam leaks may be sealed with flexible adhesive alone when the surrounding material remains strong and the area carries little tension. A patch becomes more useful as damage grows, occurs near a structural attachment, or begins spreading under load. Location matters as much as size, so even a small tear beside a guy-line point, zipper, pole fitting, or corner reinforcement may deserve a patch.
Can One Tent Glue Work on Canvas, Nylon, Polyester, and PVC?
Some flexible outdoor adhesives are formulated for several conventional tent fabrics, including canvas, standard nylon, polyester, vinyl, and selected PVC-coated materials, but no adhesive should automatically be assumed compatible with every coating. Silicone-treated fabrics are the most important exception because they normally require silicone-specific repair chemistry. When the fabric treatment is unknown, a small hidden-area test provides a safer answer than relying only on the name of the base textile.
Share:
Table of Contents
Here, creating your adhesives glue & removal cleaner collection is no longer a barrier—it’s a collaborative journey where GleamGlee helps brands and businesses transform their vision into durable, certified, and market-ready solutions.
Partner with GleamGlee
Join hundreds of global partners who trust GleamGlee for adhesives and cleaners that combine innovation, compliance, and speed. Our vertically integrated system—from R&D to warehouse—guarantees consistent performance and reliable delivery.
Whether you’re sourcing FBA-ready stock or developing your own formula, our team provides unmatched technical support and responsive service.