 Skip to content
Attaching one patch is usually a small craft job. Attaching eight, twelve, or twenty patches is closer to running a miniature production line. Once the patch count rises, most of the wasted time no longer comes from the few minutes spent gluing, ironing, or stitching each piece. It comes from repeatedly deciding where the next patch belongs, changing tools, correcting spacing, cleaning individual areas, waiting for unstable patches to stop moving, and discovering too late that the final patches no longer fit the original design.
The fastest reliable approach is therefore not simply “use glue” or “use an iron.” It is to plan all patches before permanently attaching any of them, identify the backing of each patch, group patches that use the same attachment method, prepare the garment in batches, work one flat garment zone at a time, and separate active application time from curing or cooling time. This batch approach is also the central recommendation in the supplied user-problem research for multiple-patch projects.
For readers who want an immediate answer before working through the full guide, the practical rule is simple: confirmed heat-applied patches are usually fastest when the garment safely tolerates the required heat; compatible plain-backed textile patches can often be installed quickly with a flexible fabric adhesive; machine sewing is efficient when many permanent patches require mechanical edge security; and a glue-plus-stitch approach is useful when accurate positioning and long-term reinforcement are both important. The best method changes with the patch backing, garment material, location, washing frequency, and expected service life.
- Quick project rule: Sort → Lay Out → Number → Prepare → Batch Attach → Cure or Cool → Inspect.
- Do not permanently attach patch #1 until you know where the last patch belongs.
- Do not assume every embroidered patch is iron-on.
- Do not treat “stuck in place” as the same thing as “fully cured.”
- Do not use a faster installation method if it conflicts with the garment care label or the patch manufacturer’s instructions.
1. What Is the Fastest Way to Attach Multiple Patches?
The fastest overall process is a batch workflow combined with the correct attachment method, rather than choosing one supposedly fastest material for every project. If ten patches need to go onto one denim jacket, completing every decision and every tool change separately can create far more work than the actual bonding process. It is faster to decide the complete layout once, mark it once, clean one garment zone once, then attach every patch in that group before changing to a different method or location.
Think of a twelve-patch jacket. In an inefficient workflow, you position patch one, attach it, clean your hands, look for patch two, reconsider the spacing, switch from glue to an iron, move to a sleeve, discover that the jacket can no longer lie flat, return to the back, and repeat the process. With a batch workflow, the twelve patches are first sorted by backing type, then the entire composition is approved, photographed, and numbered before permanent installation starts. The user-problem research supplied for this project specifically identifies classification, complete layout, batch positioning, zone-by-zone work, and unified inspection as the route to faster multiple-patch installation.
Fastest to Apply Is Not Always Fastest to Finish
“Fast” has at least three meanings in a patch project. Hands-on speed describes how many minutes your hands are actively working. Elapsed completion time includes cooling, setting, and curing. Long-term project efficiency also includes whether you have to repair lifting edges or reinstall a patch later. A peel-and-stick patch can require almost no hands-on installation time, while an adhesive project may involve short application work followed by a long cure. Machine sewing requires more active work but does not depend on a chemical curing stage.
| Attachment Method | Relative Hands-On Speed | Waiting Stage | Most Useful Situation | Main Trade-Off |
|---|---|---|---|---|
| Peel-and-stick patch | Very fast | Usually minimal | Temporary, event, light-use identification | Long-term wash performance is product-dependent |
| Professional heat press | Very fast for repeated batches | Cooling / manufacturer process | Confirmed heat-applied patches | Requires compatible equipment, patch and garment |
| Household iron | Fast | Cooling / manufacturer process | Small numbers of confirmed iron-on patches | Pressure and heat can be less uniform |
| Flexible fabric adhesive | Fast active application | Full adhesive cure required | Compatible plain textile backs, no-sew projects | Not universal for every backing or stress area |
| Machine sewing | Medium-fast | No chemical cure | Many permanent patches with accessible edges | Machine access and garment geometry matter |
| Hand sewing | Relatively slow for many patches | No chemical cure | Difficult-to-reach areas or small patch counts | Repetitive for large projects |
| Adhesive positioning + stitching | Medium | Adhesive set/cure plus sewing | Accurate layout plus mechanical edge reinforcement | Uses two processes |
No single method wins every column. A heat press may be extremely efficient when twenty identical heat-backed patches need to be placed on twenty compatible garments, while the same equipment may be inappropriate for one heat-sensitive coated jacket. Fabric glue can dramatically reduce the hands-on work involved in attaching compatible plain-backed patches, but a 24-hour cure requirement means it is not a sensible “wear it in thirty minutes” solution. A professional decision therefore compares total project requirements, not only seconds spent applying the patch.
Video evidence — Compare four common patch attachment methods
This video places sewing, ironing, fabric glue, and hot-glue-style attachment approaches side by side. It is useful at this early stage because readers can visually understand how dramatically the workflows differ before choosing one. It should be used as a method-comparison reference rather than as a universal recommendation for any particular adhesive, temperature, or patch backing.
- Video: “4 Easy Ways to Attach a Patch”
- Use it here for: Understanding how sewing, ironing, and adhesive-based methods differ in hands-on work.
2. What Should You Check Before Attaching Any Patches?
Before planning the installation method, turn every patch over. The front may show beautiful embroidery, woven artwork, a printed logo, a name badge, chenille letters, or a decorative design, but the back is what largely determines how the patch can be installed. Common structures include a plain fabric stabilizer, heat-activated layer, industrial heat-seal backing, pressure-sensitive adhesive with a release liner, hook-and-loop backing, hard plastic reinforcement, PVC, rubber, synthetic leather, or a combination of several layers.
This step matters because an embroidered front does not prove that the patch is iron-on. Even a shiny back should not be treated as proof of household-iron compatibility. Some backing layers are only embroidery stabilizers, while commercial heat-seal systems can require controlled temperature and pressure. The uploaded patch research explicitly warns that household iron-on and industrial heat-seal materials cannot always be distinguished by appearance alone; when the backing cannot be identified, the correct next step is to check the supplier information rather than increasing temperature or experimenting with several adhesives.
Identify the Backing Before Choosing Glue, Heat, or Sewing
Use the following visual check as a preliminary identification, not as a substitute for the patch manufacturer’s instructions:
- Plain woven or embroidered back: often suitable for sewing and potentially compatible textile adhesive after testing.
- Clearly labeled iron-on backing: use the patch manufacturer’s stated heat method if the garment is also heat-safe.
- Industrial heat-seal backing: follow professional application parameters rather than guessing with a household iron.
- Peel-away liner: usually indicates pressure-sensitive adhesive.
- Hook material: intended for a compatible loop receiving panel.
- Hard plastic, rubber, PVC, coated or unfamiliar back: do not automatically treat it like ordinary fabric.
- Unknown construction: stop and obtain the supplier’s installation information.
American Patch’s general sew-on instructions also begin with garment preparation, placement measurement, and securing the patch flat before stitching, reinforcing the idea that installation starts with identification and positioning rather than immediately sewing around an arbitrary location.
- Evidence source — American Patch sew-on patch guide
- Use it here for: Preparation, measurement, positioning and keeping a patch flat before permanent stitching.
Recommended downloadable resource for your own website: Patch_Back_Type_Identification_Card.pdf. The file should show real photographs or illustrations of plain backs, heat layers, peel-and-stick liners, hook-and-loop, thick embroidery, plastic stabilizers, PVC/rubber, and an “unknown—check manufacturer” example. Keep the conclusion deliberately conservative because visual identification cannot reliably determine every adhesive chemistry.
Check the Garment Care Label Before Applying Heat
Heat application is a two-part compatibility problem. The patch must tolerate and require the selected heat process, and the garment must safely tolerate the same process. The U.S. Federal Trade Commission’s Care Labeling Rule addresses washing, drying, ironing and relevant warnings, including situations where ironing may damage the garment. A patch labeled iron-on therefore does not overrule a garment labeled “Do Not Iron,” and a fabric adhesive described as iron-safe after curing does not allow a user to exceed the garment’s permitted care conditions.
- Authoritative evidence — FTC Clothes Captioning: Complying with the Care Labeling Rule
- Use it here for: Confirming the importance of garment ironing and care instructions before introducing heat.
This check becomes particularly important with lightweight synthetics, waterproof or water-resistant coatings, printed graphics, elastic fabrics, velvet or other pile surfaces, faux leather, vinyl-like materials, and technical outerwear. A universal “high heat for X seconds” instruction is poor practice because the patch adhesive and garment can have different limits. Even a patch supplier such as American Patch publishes its own specific installation parameters, illustrating why numbers from one patch should not automatically be copied onto another patch system.
Check the Patch Location for Bending, Stretching, and Peel Stress
A large flat jacket back is usually easier to bond than an elbow, knee, cuff, shoulder, pocket opening, backpack corner, or curved hat panel. The difference is not simply cosmetic. When a garment bends repeatedly, the outside patch edge can experience peeling motion even if the center remains flat. A thick patch also resists bending more than a thin woven patch, so placing a rigid badge across a joint can create a stress concentration around the perimeter.
The uploaded repair research therefore recommends additional edge reinforcement for patches in frequently flexed areas such as knees, elbows, bag corners, sleeves, and workwear. For these situations, adhesive can still be useful for accurate placement, but stitching or another mechanically secure method may be more appropriate for the long-term load.
Evidence guide — iFixit hand-sewn patch application
iFixit’s visual patch guide shows a sew-on patch being positioned and mechanically attached to clothing. It is particularly useful for readers who are deciding whether a high-movement or frequently washed patch needs stitches instead of relying only on a bonded interface.
- Guide: How to Hand Sew Patches Onto a Garment
Check Whether the Garment Will Be Washed Frequently
A costume worn twice a year and a school uniform washed every few days should not automatically receive the same installation method. Before starting, consider how often the garment is washed, whether it goes into a tumble dryer, whether patches rub against other garments or backpack straps, and whether a patch sits on a fold that is repeatedly crushed during storage. These conditions affect the amount of edge bending and abrasion an attachment has to tolerate.
For regular-wash items, it is reasonable to give special attention to perimeter security and to inspect the patch after the first completed wash-and-dry cycle. The American Cleaning Institute advises consumers to follow fabric care labels during laundering; this remains relevant after a patch is added because the original garment still has its own washing, drying and care limits.

3. How Should You Plan Multiple Patches Before Attaching Them?
Multiple patches should be treated as a single visual layout before they are treated as individual attachment jobs. Place the garment on a clean, firm surface and arrange every patch before making anything permanent. Begin with the largest, most central, or most meaningful patch, then place secondary pieces around it. Check pockets, seams, zippers, sleeve movement, fold lines, collars, backpack openings, and other garment features that may hide or distort a patch once the item is worn.
The supplied patch research recommends exactly this sequence: establish a visual center, create paper templates, define spacing rules, check the arrangement while the garment is worn, and then install major reference patches before smaller fill pieces. This is one of the biggest differences between a genuinely efficient multiple-patch workflow and the ordinary “attach one patch” tutorials that dominate basic search results.
Lay Out Every Patch Before Installing the First One
For a jacket back, use the collar center, center-back seam, yoke, or another garment feature as the main reference rather than the table edge. For sleeves, use the shoulder-to-cuff direction. For trouser legs, reference the side seam and leg center. For a backpack, account for zipper paths, fold zones, handle attachments, and how the bag expands when filled. These reference points stay connected to the garment even when the item moves on the table.
A practical layout sequence is:
- Place the largest or dominant patch.
- Establish the garment centerline.
- Place paired or symmetrical pieces.
- Add medium secondary patches.
- Fill remaining spaces with smaller pieces.
- Check consistent gaps where a regular layout is intended.
- Move every patch away from folds, seams, hardware, or high-flex areas where possible.
- Photograph the entire arrangement from directly above.
- Check the garment while worn or in its normal three-dimensional form.
- Only then make permanent marks or begin attachment.
Make Paper Templates Before Repeatedly Moving Real Patches
Tracing patches onto ordinary paper is one of the easiest ways to speed up a complicated layout. Record the patch name, width, height, number, and upright direction on each template. Twenty paper shapes can be moved around repeatedly without getting lint on self-adhesive liners, wearing embroidery edges, mixing up similar badges, or accidentally touching an adhesive-coated patch to the wrong part of the garment.
Paper templates are particularly valuable for school badges, paired sleeve insignia, large battle-jacket layouts, costume sets, matching team clothing, and any arrangement that uses a fixed visual grid. Once the templates are correct, photograph them in place and use the image as a reference after removing them for surface preparation.
Recommended downloadable file beside this step: Multiple_Patch_Paper_Template_Sheet.pdf. Include blank width, height, patch ID, orientation arrow, attachment type, distance from garment center, and neighboring gap fields. This file is static and printable, so it does not require the user to interact with a generator.
Measure Spacing Instead of Relying Only on Your Eye
Creative layouts do not need millimeter-level uniformity, but a few measurements stop the design from drifting. If two chest patches are supposed to appear balanced, measure each from the same centerline. If a pair of sleeve badges sits below the shoulder seam, record each distance from the shoulder rather than measuring only the gap between the badges. This is especially important when one patch must be removed from the layout while another is attached.
When patch dimensions are supplied in inches and the garment is being measured in centimeters, use one unit system for the full layout. NIST provides conversion tables covering length measurements; its conversion information lists one inch as 2.54 centimeters.
- External calculation/reference tool — NIST Unit Conversion
- Use it here for: Converting imported patch dimensions before establishing a spacing plan.
Make a Digital Mockup Before a Complicated Jacket or Costume
A digital mockup is useful when the layout contains many pieces, when several people must approve a uniform arrangement, or when the user wants to compare two designs without repeatedly moving physical patches. Photograph the garment as straight-on as possible, crop the patch images, and place them approximately over the garment photo. This does not replace real measurement because cameras distort scale and the garment eventually curves around the body, but it is very useful for eliminating bad design directions early.
- External layout tool — Canva
- Use it here for: Creating a simple garment photo plus patch-image mockup before physical positioning.
For users who prefer another visual-editing environment, Adobe Express can perform a similar planning role. Again, the goal is not to generate a final “correct answer”; it is simply to preview composition, scale, and relative position before permanent attachment begins.
- External layout tool — Adobe Express
- Use it here for: Comparing alternative patch arrangements before working on the actual garment.
Check the Layout While Wearing the Garment
Flat-table placement is not the final reality. Shoulders slope, sleeves rotate, the chest curves, trouser legs bend, backpacks fill out, and hats form compound curves. Temporarily attach the paper templates using a material-safe method, put the garment on, and check it from the front, side, and back. Raise the arms, bend the elbow, sit down, close the jacket, and confirm that important artwork does not disappear into a fold or sit directly over a repeatedly flexed crease.
American Patch’s uniform sewing instructions similarly recommend pinning a patch, putting the uniform on, and checking how the position looks before permanently stitching it.
- Evidence source — American Patch uniform placement and sewing guide
- Use it here for: Supporting the practice of confirming patch placement on the worn garment.
4. What Is the Fastest Batch Workflow for Multiple Patches?
Once the complete design is approved, stop making creative layout decisions and move into a repeatable production sequence. The most efficient workflow separates tasks into stages: sorting, numbering, surface preparation, attachment, stabilization or curing, reinforcement, and final inspection. Every time a repeated action can be completed across several patches before switching tools, the project becomes easier to control and usually faster.
Stage 1 — Sort the Patches by Backing and Method
Create physical groups on the worktable before touching the garment:
- Group A: plain textile-backed patches
- Group B: household iron-on patches with confirmed instructions
- Group C: professional heat-applied patches
- Group D: pressure-sensitive peel-and-stick patches
- Group E: hook-and-loop patches
- Group F: thick embroidered patches requiring sewing
- Group G: PVC, rubber, plastic-backed, leather-like, coated, or unknown materials needing separate confirmation
Sorting prevents one of the biggest batch-project inefficiencies: switching repeatedly between adhesive, iron, needle, machine, cleaning tools, and pressing equipment. It also reduces method errors because every patch in a group has already passed the same basic identification check.
Stage 2 — Number Patches and Garment Zones
For a jacket with many patches, a simple code works better than relying on memory. Use B1, B2, B3 for back patches, LS1, LS2 for the left sleeve, RS1, RS2 for the right sleeve, and F1, F2 for the front. Mark these codes on the paper templates or planning sheet, not permanently on the visible patch surface.
A zone system also improves curing and pressing logistics because the jacket back can usually remain flat while sleeves and curved sections need separate support. The goal is not to activate glue on the entire garment simultaneously. It is to complete as much as possible while each region can remain stable and correctly supported.
Recommended downloadable resource at this point: Patch_Number_and_Position_List.xlsx. Columns should include Patch ID, width, height, backing type, garment zone, distance from center, neighboring gap, attachment method, reinforcement required, completion time, and final inspection result.
Stage 3 — Prepare an Entire Zone Before Applying Anything
Remove lint, dust, loose fibers, and relevant surface contamination according to the garment’s care limitations. Make sure both patch and garment are dry. Complete adhesive compatibility testing before treating several pieces. If stitching is planned, organize thread, needle, machine settings, support material, and patch order before beginning. If heat is planned, confirm all settings from the patch supplier rather than experimenting on the first visible patch.
This preparation phase feels slower to inexperienced users because no patch has been attached yet, but it saves time later. A poorly cleaned edge or unidentified backing often creates a repair job that costs far more time than a few minutes of initial inspection.
Stage 4 — Work One Garment Zone at a Time
A flat jacket back may allow four or five adhesive patches to cure simultaneously. A sleeve may need a rolled towel, pressing form, or internal support. A cap crown may need specialized equipment. A backpack can require access to the inside panel. The geometry determines how much of the project can be processed as one batch.
Avoid spreading adhesive onto patches from three garment zones at once if those zones cannot all remain flat during initial positioning. Finish one stable area, begin its required set or cure period, then move to another section that does not disturb the first.
Stage 5 — Apply Compatible Fabric Glue in a Controlled Batch
For compatible ordinary textile patches, an adhesive batch workflow can be simple:
- Confirm patch location.
- Lift the patch without changing the reference position.
- Apply a thin, controlled adhesive layer to the intended contact surface.
- Pay particular attention to the perimeter without building a thick ridge.
- Lower the patch once rather than sliding it repeatedly.
- Press from the center toward the edge.
- Inspect for squeeze-out.
- Protect the patch surface where needed.
- Hold or weight the area according to the adhesive instructions.
- Move directly to the next compatible patch in the same zone.
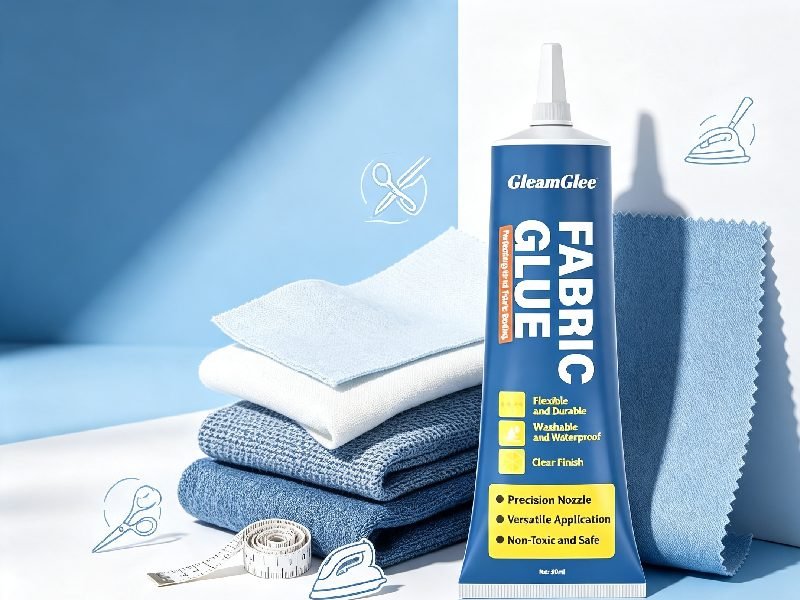
The supplied GleamGlee Fabric Glue information describes the product as a clear-drying, flexible no-sew textile adhesive suitable for fabric patches and common materials including cotton, denim, polyester, canvas, and felt. It also emphasizes thin application, accurate pressing, an initial positioning period, and complete curing before ordinary washing or ironing.
Video evidence — No-sew adhesive patch workflow
This video demonstrates the concept of using Fabric Fusion to attach Girl Scouts-style patches rather than hand sewing every patch. It is useful beside this specific step because readers can see how a textile adhesive changes the hands-on workflow. The video’s product-specific quantity and timing should not be copied to another adhesive formula.
- Video: How to Use Fabric Fusion to Glue on Girl Scouts Patches
- Use it here for: Visualizing no-sew patch positioning and adhesive application.
Use Less Adhesive Than the “More Must Be Stronger” Instinct Suggests
Fabric behaves differently from rigid metal or plastic. A very thick adhesive bead can penetrate porous fibers, create a stiff local ridge, squeeze beyond the patch edge, and make the repaired region bend sharply next to the adhesive boundary. The uploaded repair material specifically identifies excess adhesive as a preventable cause of stiffness, seepage, unpredictable curing, and visible squeeze-out.
The precision applicator described in the GleamGlee product facts is useful here because a narrow patch perimeter needs controlled coverage more than it needs a large volume of adhesive. A flexible formula can help clothing move naturally after curing, but flexible chemistry cannot compensate for flooding a fabric surface with an unnecessarily thick layer.
Stage 6 — Heat-Apply Compatible Patches as a Separate Batch
Confirmed heat-applied patches should be processed separately from glue-on patches. Group together patches whose supplier instructions specify compatible application conditions. The advantage of a professional heat press is repeatability: pressure, dwell time, platen geometry, and temperature can be controlled much more systematically than moving a household iron around a large batch.
STAHLS demonstrates embroidered patch application with professional heat-press equipment, showing how quickly repeated patches can be applied when the patch system and equipment are designed to work together.
- Video evidence — STAHLS Stock Embroidered Patches
- Use it here for: Seeing a repeated professional heat-applied patch workflow.
For caps and other strongly curved items, platen geometry becomes even more important. STAHLS also publishes demonstrations specifically for embroidered badges on caps, illustrating that a curved object is not processed exactly like a flat jacket back.
- Video evidence — Embroidered patches on caps
- Use it here for: Understanding how curved patch surfaces require suitable support and pressing geometry.
Do not transfer either video’s exact temperature, pressure, or time to unrelated patches. Utah State University Extension’s machine appliqué guidance makes a similar general point with fusible materials: users should follow the timing and manufacturer directions for the specific fusible product rather than assuming one process applies to all brands.
Stage 7 — Stitch Several Patches Efficiently Without Replanning Each One
When sewing is the final method, complete all placement and temporary stabilization first. Then stitch by garment zone instead of stopping after every patch to measure the next location. Patches with regular embroidered borders are often easier to follow with a machine than irregular heavily textured centers. Slow down around curves and corners, and use the patch edge or border as the primary sewing reference whenever construction allows.
- Video evidence — Home sewing machine patch application
- Use it here for: Seeing how a patch is guided around its edge using an ordinary home sewing machine.
Stage 8 — Inspect the Entire Zone Before Starting Another One
Stand back from the work before focusing on close details. Check whether the overall arrangement still looks balanced, then inspect every perimeter closely. Look for lifting corners, adhesive squeeze-out, wrinkles, thread loops, puckering, trapped folds, heat shine, uneven pressure, and a patch shifted away from its recorded reference position. Catching a problem at the worktable is much faster than discovering it after the first wash.
5. Which Attachment Method Is Best for Your Patches?
The attachment method should be selected by combining at least five variables: patch backing, garment material, heat tolerance, mechanical movement, and expected washing or service frequency. A sixth variable—how soon the garment must be used—can completely change the decision. A method requiring a full chemical cure is inappropriate for a jacket needed in one hour even if it would otherwise be ideal.
| Project Situation | Sensible First Method to Consider | Reinforcement Option | Main Check Before Starting |
|---|---|---|---|
| Plain fabric patch on ordinary cotton | Fabric adhesive or sewing | Edge stitching for frequent wear | Hidden adhesive test |
| Plain textile patch on denim | Fabric adhesive, hand sew, or machine sew | Perimeter stitches if heavily used | Patch flexibility and location |
| Embroidered sew-on badge | Sewing or adhesive positioning + sewing | Full edge stitching | Backing thickness |
| Confirmed iron-on patch | Manufacturer-specified heat process | Stitch perimeter if service requires it | Garment care label |
| Thick embroidered badge | Edge sewing / machine sewing | Adhesive for positioning if compatible | Needle path and backing |
| Frequently washed uniform badge | Durable installation + careful perimeter security | Mechanical edge stitching | Organization placement and washing |
| Patch over elbow or knee | Flexible or mechanical installation | Edge reinforcement | Repeated bending |
| Replaceable identification patch | Hook-and-loop | Secure receiving panel | Need for repeated removal |
| PVC, rubber, coated or hard plastic back | Manufacturer instructions | Specialized attachment if approved | Material compatibility |
When Fabric Glue Is the Fastest Practical Choice
Fabric glue is particularly useful when a patch has a compatible textile back, the garment is relatively flat, the location is not a highly loaded structural seam, and the user wants to avoid stitching around every patch. This makes it attractive for denim-jacket decoration, ordinary cotton garments, canvas bags, felt projects, costumes, selected uniform applications, and craft clothing where multiple textile pieces need clean positioning.
GleamGlee Fabric Glue is relevant to this scenario because the supplied product facts specifically include fabric patches, cotton, denim, polyester, canvas and felt among its applications. The formula is described as clear drying and flexible after full cure, with a precision application structure intended to control placement on edges and decorative details.
The manufacturer information supplied for this project gives approximately 6–10 minutes for initial positioning and approximately 24 hours for full curing. These figures are useful because they clearly demonstrate the difference between fast hands-on installation and total elapsed completion time. They must not be presented as universal fabric-glue numbers; other adhesive products can have different set and cure schedules.
When Heat Is Faster Than Fabric Glue
If a patch is specifically designed for heat activation, the garment allows the required heat, and the user has suitable pressing equipment, heat application may produce a shorter total elapsed project because there is no day-long adhesive cure. This is particularly attractive for repetitive badge production, team clothing, patches sold as a matched heat-applied system, and multiple identical items.
However, the process is only faster when the conditions are already known. Guessing temperature, repeatedly reheating a questionable edge, or damaging a heat-sensitive synthetic turns the “fast” method into an expensive correction. Heat should therefore be selected because the patch manufacturer specifies it—not merely because there is an iron nearby.
Video evidence — Professional patch and emblem heat pressing
This STAHLS demonstration is useful for seeing why a proper platen and consistent pressure matter in repeated applications. It helps explain why professional heat pressing can be highly efficient for batches while also showing why flat support and the correct equipment matter.
- Video: How to Best Heat Press Patches, Emblems & More
When Machine Sewing Is Faster Than Hand Sewing
As patch quantity increases, the sewing machine becomes much more attractive if the garment shape allows access. A regular border that would require hundreds of hand stitches around ten patches can often be followed mechanically without the same repetitive effort. Machine sewing also avoids adhesive cure time and creates a visible mechanical connection that can be inspected directly.
Utah State University Extension’s machine-appliqué material covers methods for positioning appliqué and stitching around the design, and the downloadable PDF provides a useful external technical reference for users who want to understand machine-edge construction rather than improvising.
- Downloadable evidence resource — USU Machine Appliqué Techniques PDF
- Use it here for: Machine edge stitching, fusible positioning concepts, and appliqué workflow.
When Hand Sewing Still Makes Sense
Hand sewing is not automatically outdated or inefficient. It remains useful when a jacket sleeve cannot be positioned under a sewing-machine foot, when the garment has a complex lining, when only two or three patches need reinforcement, or when the patch border requires precise visual control. It is also a valuable backup skill when an adhesive test reveals incompatibility.
Professor Pincushion’s hand-stitch tutorial demonstrates running stitch, backstitch, slip stitch, blind hem and catch stitch in one video. For a patch user, the value is not learning every traditional sewing technique; it is understanding enough stitch control to add mechanical reinforcement where adhesive or heat alone is not the best fit.
- Video evidence — Five useful garment hand stitches
- Use it here for: Learning basic stitches before reinforcing patch edges.
Glue First, Stitch Later: A Practical Hybrid Method
For some multiple-patch projects, the most efficient choice is to assign different jobs to glue and thread. A compatible fabric adhesive can hold the patch precisely in its planned location, reducing movement while the user sews. Stitching can then provide perimeter reinforcement in areas expected to face frequent bending, washing, abrasion, or long-term service. The uploaded repair research specifically identifies adhesive positioning plus perimeter stitching as a useful combination for frequently washed or high-movement patches.
This does not mean every patch should automatically receive both methods. Additional steps are justified only when the service condition needs them. A decorative felt patch on a lightly used costume may not need a complete sewn border, while a thick embroidered badge on workwear may benefit substantially from mechanical reinforcement.
Video evidence — Machine versus hand sewing a patch
This tutorial shows both machine and hand methods in the same patch context. It is useful here because readers who have already positioned their patches can compare how much work is involved in reinforcing the perimeter manually versus mechanically.
- Video: How to Sew on a Patch by Machine or Hand
When Hook-and-Loop Is More Efficient Than Permanent Attachment
A patch that needs to change repeatedly should not necessarily be permanently bonded each time. Role identifiers, outdoor equipment badges, team identifiers, event labels, or workwear patches that rotate can be more efficiently managed using a securely installed loop field and patches with compatible hook backing. In this case, the permanent installation work is moved to the receiving panel and future changes take seconds.
This is a good example of solving the user’s real goal rather than assuming “fast attachment” must mean faster glue. When the life-cycle requirement includes frequent removal, designing for replacement can be much more efficient than repeatedly bonding and removing permanent patches.
6. How Long Will a Multiple-Patch Project Actually Take?
A realistic project plan separates active working time from passive waiting time. Layout, measurement, surface preparation, adhesive application, ironing, and sewing are active. Cooling and chemical curing are passive. Combining both into one number can make one method look misleadingly fast or slow.
A simple planning equation is:
Estimated Active Time = Layout Time + Preparation Time + (Average Attachment Time × Number of Patches) + Reinforcement Time + Final Inspection Time
This formula is not an industry standard or laboratory prediction. It is a planning aid that helps the user identify the biggest bottleneck. If twenty patches require only one minute each to bond but take an hour to position because the layout keeps changing, improving layout discipline has greater value than finding an adhesive that saves ten seconds per patch.
| Project Scale | Layout Strategy | Attachment Strategy | Main Time-Saving Opportunity |
|---|---|---|---|
| 2–3 patches | Direct full layout | Any suitable method | Accurate first positioning |
| 5–10 patches | Number and photograph | Group by backing | Reduce repeated measurement and tool changes |
| 10–20 patches | Paper templates + zones | Batch similar methods | Separate layout, preparation and installation stages |
| 20+ repeated patches | Standard template / documented positions | Heat press or machine process where appropriate | Consistency, fixtures, repeatable spacing and workstations |
Do Not Multiply Cure Time by the Number of Patches
If ten compatible adhesive patches are applied in one flat jacket zone during the same session, they can normally pass through the passive cure period concurrently according to the adhesive’s instructions. Ten patches do not necessarily mean ten separate 24-hour waiting periods. The active application time scales with patch count; the passive cure stage can overlap.
For the GleamGlee product used as the example in this guide, approximately 6–10 minutes is described as the initial positioning stage and approximately 24 hours as full cure. Therefore, a ten-patch jacket can still involve a day of elapsed cure time even if the user spends only a fraction of an hour actively applying the adhesive.
Use a Spreadsheet Instead of Guessing Project Time
For projects involving many patches, a basic spreadsheet is more practical than mental arithmetic. Create columns for patch number, backing type, attachment method, garment zone, estimated application minutes, reinforcement minutes, zone completion time, and required cure or cooling time. The spreadsheet can also record whether the final visual and edge inspection has been completed.
- External calculation tool — Google Sheets
- Use it here for: Building a simple non-interactive project timing and patch-tracking sheet.
Recommended on-site file: Multiple_Patch_Project_Planner.xlsx. The file can contain formulas such as Total Active Time = Layout + Preparation + Sum of Installation + Reinforcement + Inspection, while keeping cure time in a separate “elapsed time” field. This distinction is especially helpful when comparing glue, heat, machine sewing and hand sewing.
7. How Do You Keep Multiple Patches Flat, Flexible, and Washable?
A patch project should not be judged only five minutes after installation. Jackets bend across shoulders, trousers bend at knees, sleeves twist, bags are filled and emptied, uniforms are washed repeatedly, and embroidery can catch on other items during use. The attachment method needs to survive the actual movement pattern without creating an unnecessarily rigid patch boundary.
Prevent Edge Lifting Before It Starts
A patch edge can lift because the perimeter was under-coated, the surface contained lint or oil, the patch was stiff relative to the garment, the area flexes repeatedly, the bond moved before full cure, or the patch backing was never compatible with the selected adhesive. The uploaded repair materials make an important point: a lifting edge should not automatically be diagnosed as “weak glue.”
Preventive practice includes:
- Clean and dry the contact surfaces.
- Test unknown combinations in a hidden area.
- Avoid thick adhesive ridges.
- Ensure full perimeter contact when the method requires it.
- Support curved areas during setting.
- Keep the garment in a natural, unstretched shape.
- Do not fold the bonded zone during cure.
- Add edge stitching when service stress warrants it.
- Reconsider patch size if a large rigid badge crosses a major bend line.
Initial Set and Full Cure Are Not the Same Event
This distinction is one of the most important parts of adhesive patch work. An adhesive may hold the patch well enough to stop obvious sliding long before it reaches the condition intended for washing, ironing, flexing, or normal clothing use. Testing the patch aggressively during this early period can create a failure that would not have occurred after full cure.
For GleamGlee Fabric Glue specifically, the supplied product facts state approximately 6–10 minutes for initial positioning and approximately 24 hours for full curing. After full curing, the product information describes the bond as washable, flexible, and suitable for ordinary ironing within the garment’s own care limitations. These are manufacturer-specific figures, not universal numbers for all fabric adhesives.
Follow the Most Restrictive Care Instruction
After patches are attached, the garment contains several components: original textile, patch face, patch backing, adhesive or thread, embroidery, printing, coating, and possibly hook-and-loop material. Care should remain within the limitations of the component with the lowest tolerance. A washable glue does not make a dry-clean-only coat machine washable, and an iron-safe patch does not make a heat-sensitive garment safe for high-temperature pressing.
The American Cleaning Institute recommends following the fabric care labels on clothing during laundering.
- Authoritative laundry evidence — American Cleaning Institute Laundry Basics
- Use it here for: Supporting the practice of following clothing care labels after patch installation.
Take a Conservative Approach to the First Wash
Once the complete cure or stabilization requirement has been met, inspect every patch dry before putting the garment into normal laundry service. Where the garment instructions allow, turning decorated clothing inside out can reduce direct friction against the patch face. Close zippers and hardware that could snag embroidery, avoid mixing the garment with unusually abrasive or sharp items, and do not exceed the temperature or cycle permitted by the original care label.
After washing, do not aggressively pull on a wet patch to “see if it worked.” Water can temporarily change the mass, flexibility, and feel of textile layers. Let the garment complete its permitted drying process and inspect it after it returns to a stable condition.
Recommended downloadable resource next to this section: 24_Hour_Patch_Cure_and_First_Wash_Card.pdf. For the GleamGlee example, show an application-time field, 6–10 minute initial-position checkpoint, approximately 24-hour full-cure checkpoint, garment-care-label check, dry edge inspection, first wash, full dry, and post-wash inspection. Include a note telling users of other adhesives to replace the times with their own manufacturer’s instructions.
Reinforce a Patch That Faces Repeated Washing or Movement
If a patch is thick, frequently washed, positioned near an elbow or knee, mounted on workwear, or has already experienced repeated edge lifting, stitching around a suitable border can add a mechanical restraint that adhesive alone does not provide. iFixit describes blanket stitching as a technique used to attach patches and secure fabric edges, illustrating the role mechanical stitches can play in patch repair.
- Evidence guide — iFixit Blanket Stitch on a Patch
- Use it here for: Seeing a durable hand-sewn perimeter technique for patch attachment.
A whip stitch is another simple option for suitable fabric patches. iFixit describes the technique as useful for attaching fabric patches and providing flexibility and durability.
- Evidence guide — iFixit Whip Stitch on a Patch
- Use it here for: An alternative simple hand-stitch technique around patch edges.

8. What Mistakes Make a Multiple-Patch Project Slower or Less Reliable?
Many patch failures begin before attachment. The design was never completely planned, the backing was guessed, the fabric remained dirty, a thick adhesive layer was used because “more must be stronger,” an iron setting from another product was copied, or the garment was folded and worn before an adhesive completed its cure. Correcting these decisions can save more time than any supposedly faster attachment trick.
| Failure or Symptom | First Cause to Investigate | Better Response |
|---|---|---|
| Final patches no longer fit | Early patches installed before full layout | Stop and re-plan all remaining positions |
| One corner lifts repeatedly | Missed contact, contamination, snagging or repeated bending | Clean and reassess only the loose zone |
| Whole patch shifts | Wrong backing, poor preparation, inadequate cure | Reconsider the original method |
| Fabric becomes hard | Too much adhesive or repeated re-gluing | Stop adding glue and reassess layer thickness |
| Visible glue ridge | Excess quantity or squeeze-out | Use thinner controlled coverage |
| Heat shine or distortion | Excess heat, pressure, or incompatible fabric | Stop heat treatment and review garment instructions |
| Patch moves during sewing | Poor temporary stabilization | Use suitable pins, clips, basting or compatible positioning aid |
| Multiple patches fail after washing | Cure, backing, laundering or movement problem | Diagnose the batch process instead of repairing every edge blindly |
Mistake 1 — Attaching the First Patch Before Planning the Last
This mistake has the largest effect on a multiple-patch design because every permanent patch reduces the space available to move the remaining pieces. If a central patch is 20 mm too high, three smaller pieces may end up squeezed beneath it. A ten-minute template stage can therefore prevent an hour of repositioning, removal, or compromised visual spacing.
The best rule is simple: complete the composition first, install second.
Mistake 2 — Assuming a Shiny Back Means Iron-On
A shiny layer may be a heat adhesive, stabilizer, coating, or another material. If the patch packaging does not identify the application method, do not discover the answer by progressively increasing the iron temperature. The uploaded research specifically recommends recording supplier installation parameters and treating visual identification as preliminary only.
Recommended static file: Patch_Supplier_Installation_Parameters.xlsx. Useful columns include Supplier, Patch ID, Backing Type, Approved Method, Temperature if supplied, Time if supplied, Pressure if supplied, Wash Requirement, Garment Limitation, and Source/Instruction Date.
Mistake 3 — Treating More Fabric Glue as More Security
A patch does not become automatically stronger because the fabric underneath is saturated. Excess adhesive can squeeze beyond the edge, create a visible hard line, penetrate porous cloth, lengthen drying behavior, and make the transition between bonded and unbonded fabric less flexible. The supplied fabric-repair research highlights these problems and specifically recommends thin, controlled application rather than continually adding more adhesive to a weak area.
If a patch repeatedly fails with a correct thin layer, diagnose compatibility, surface condition, stress location, or backing before adding more glue. The weak point may not be adhesive quantity at all.
Mistake 4 — Applying Heat Before Checking Both Parts of the System
Heat application needs two permissions: one from the patch and one from the garment. A heat-activated patch cannot safely override a “Do Not Iron” garment label, and a garment that tolerates ironing does not prove an unknown patch backing will activate correctly. Both conditions must be established first.
Mistake 5 — Moving an Adhesive Patch Because It “Looks Dry”
Surface appearance is a poor substitute for the manufacturer’s cure instructions. Once a patch has reached initial set, leave it alone. Do not immediately bend the sleeve, pull the jacket on, wash the item, or perform a hard peel test simply because the patch no longer slides. Early mechanical testing can disturb a bond during the very stage when the film is still developing.
Mistake 6 — Using Glue Alone on a Structural Problem
A decorative patch and a structural repair are not the same job. If a patch is covering a tear at a highly loaded seam, simply bonding a visible patch over the opening may hide the damage without restoring the garment’s original load path. Crotches, shoulders, underarms, waistbands, load-bearing bag straps, safety equipment, and severely stretched athletic seams deserve mechanical reinforcement or professional assessment rather than cosmetic attachment alone. This distinction is emphasized throughout the supplied clothing-repair materials.
Mistake 7 — Refusing to Change Methods When the Project Changes
A good patch workflow is flexible. If the adhesive test leaves a visible mark, switch methods. If the garment cannot tolerate the heat required by the patch, do not force the heat process. If a patch is too thick to sew comfortably by hand, use an appropriate machine setup or obtain professional installation. If the badge must change weekly, convert the system to hook-and-loop instead of repeatedly removing permanent attachment.
Choosing a different method is not a failed project. It is often the most efficient decision available.
Conclusion
The fastest way to attach multiple patches is not a single glue, stitch, iron temperature, or shortcut. It is a disciplined workflow: identify the patch backing, inspect the garment, plan every patch, establish references, number the layout, group similar attachment methods, prepare each garment zone once, complete similar steps in batches, allow the required cure or cooling period, and inspect the finished project before normal use.
For compatible plain-backed textile patches, a flexible fabric adhesive can remove a large amount of repetitive hand sewing and can also provide accurate temporary positioning before selected perimeter stitches are added. GleamGlee Fabric Glue fits this part of the workflow because its supplied technical information covers patches, denim, cotton, polyester, canvas and felt, with clear-drying and flexible performance after full cure. For confirmed heat-backed patches, pressing may offer shorter elapsed completion time. For frequently washed, thick, highly flexed, or long-service patches, sewing or a carefully planned hybrid attachment can provide more appropriate reinforcement.
A project that takes twenty minutes longer during planning but stays aligned through months of use is more efficient than a rushed installation that needs repeated edge repair. When the patch count rises, the real shortcut is no longer working faster with your hands; it is making fewer decisions twice.
Frequently Asked Questions
1. What is the fastest way to attach 10 or more patches?
For ten or more patches, the largest time saving usually comes from batch organization rather than simply choosing the fastest single attachment material. Lay out every patch before installation, photograph the design, assign patch numbers, sort the pieces by backing type, prepare the garment one zone at a time, and complete the same attachment process across each group. Confirmed heat-applied patches can be especially fast with suitable equipment, while compatible fabric adhesive can reduce repetitive sewing for ordinary textile-backed patches.
2. Can I use fabric glue to attach multiple patches instead of sewing?
Yes, fabric adhesive can be a practical no-sew method for compatible textile patches on appropriate fabrics and relatively low- to moderate-stress areas. It should not automatically be used on every rubber, PVC, plastic, coated, or industrial backing, and glue alone is not the best choice for every heavily flexed or structural location. Perform a compatibility test, use a thin controlled layer, stabilize the patch correctly, and follow the adhesive manufacturer’s full cure instructions before ordinary wear or laundering.
3. Is ironing patches faster than using fabric glue?
When the patch is explicitly designed for heat activation and the garment safely accepts the required temperature, ironing or professional heat pressing can provide a shorter total elapsed process because a long chemical cure may not be required. Fabric adhesive can involve less active skill than sewing, but the project may still need many hours before full service. Therefore, the faster option depends on patch backing, garment heat tolerance, available equipment, patch count, and how soon the item must be worn.
4. Can several patches be heat pressed at the same time?
Several patches can sometimes be processed efficiently within one heat-press workflow when they use compatible application parameters and sit on a surface where temperature, pressure, and contact can remain consistent. This does not mean different patch backings should be pressed together under one arbitrary setting. Patch thickness, garment seams, curved surfaces, different adhesive systems, and heat-sensitive textiles can require separate treatment. Manufacturer instructions for each patch system should control the process.
5. How long should glued patches dry before I wear or wash the garment?
The correct waiting period comes from the specific adhesive instructions because fabric glues do not all share one cure schedule. For the GleamGlee Fabric Glue referenced in this guide, the supplied product information gives approximately 6–10 minutes for initial positioning and approximately 24 hours for full cure. Initial positioning simply means the parts are beginning to hold; it should not be interpreted as permission to immediately wear, stretch, machine wash, or iron the patched garment.
6. How do I stop multiple patches from moving while sewing?
Finish the complete layout first, mark reference points, and stabilize each patch before sewing. Depending on the garment and patch, suitable options can include fabric clips, carefully placed pins, temporary basting, a manufacturer-approved fusible positioning material, or a thin compatible fabric adhesive used specifically for positioning. Work by garment zone so the material can remain flat, and avoid holding the patch with one hand while attempting to guide a sewing machine with the other.
7. What should I do if several patch edges lift after washing?
Allow the garment to dry completely before diagnosing the failure. If one small corner lifts while the rest remains secure, investigate local edge coverage, contamination, snagging, or repeated bending. If several patches peel or shift at once, look for a common cause such as premature washing, unsuitable backing, inadequate curing, excessive movement, or an inappropriate attachment method. Avoid immediately adding another thick adhesive layer; correcting the cause is more useful than repeatedly covering the symptom.





















