 Skip to content
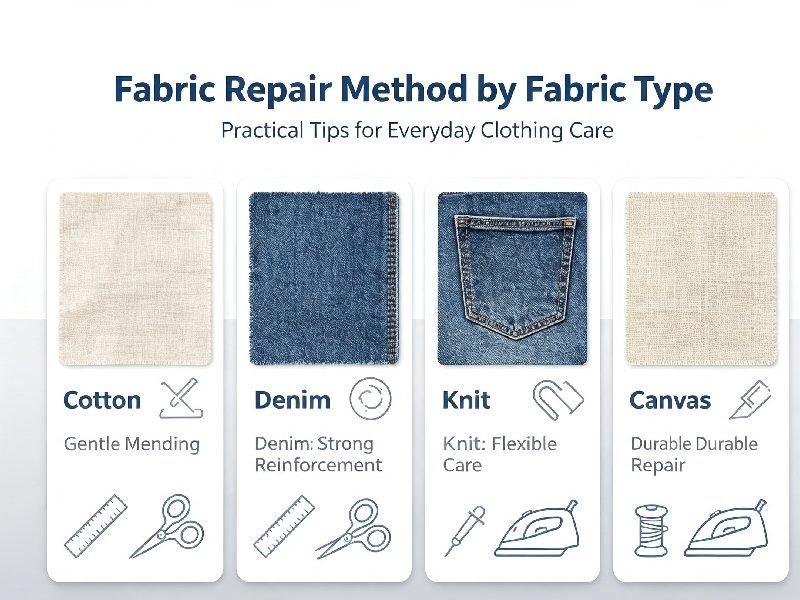
A loose cotton hem, torn denim knee, split legging seam, moth hole in a wool sweater, and puncture in a waterproof jacket may all be described as “fabric damage,” yet treating them with the same repair method is one of the fastest ways to create a second problem. The fiber name on the care label is useful, but it does not tell the whole story. A repair also has to account for whether the fabric is woven or knitted, how much it stretches, whether the surrounding fibers are already weakened, whether the surface contains a coating or pile, and how much force the repaired area experiences during normal use.
A dependable repair therefore starts with diagnosis rather than glue, thread, or a patch. The most useful sequence is identify the textile → inspect the damaged structure → judge movement and stress → select the least disruptive suitable repair → test compatibility → repair → allow the repair to stabilize or cure → return the item to normal care gradually. This approach is especially important for clothing because a visually closed tear can still fail if the new repair is much stiffer than the surrounding cloth, while an apparently strong seam can damage weakened fibers immediately beside it.
For everyday users, the goal is not to become a textile engineer before repairing a shirt. The practical goal is to notice a few physical behaviors that change the answer. Stable woven fabric tolerates alignment differently from jersey. Thick denim frequently needs reinforcement extending beyond the visible hole. Stretch activewear needs a repair capable of moving repeatedly. Fine silk can show marks from adhesive or needles that would be insignificant on canvas. Coated outdoor fabric may also perform a waterproof or wind-resistant job that ordinary clothing repair advice does not address.
There is no single “best repair method” for cotton, polyester, denim, wool, or any other fiber. Use the material name as your starting clue, then choose the actual repair according to fabric construction, thickness, stretch, surface treatment, damage type, stress level, and care requirements. Fabric adhesive works well for many compatible low-stress textile bonds, sewing is usually better for conventional load-bearing seams, patches restore missing or weakened material, darning can rebuild knitted structures, and technical or high-value items may require a specialist repair system.
| Fabric or Situation | Practical Starting Method | Main Risk to Check |
|---|---|---|
| Stable woven cotton + loose hem | Flexible fabric adhesive or blind stitch | Adhesive showing through thin fabric |
| Cotton shirt + structural shoulder seam | Hand or machine sewing | Repeated body movement |
| Denim + worn knee or thigh | Backing patch + stitching | Damage extending beyond visible hole |
| Canvas + non-load-bearing patch | Stitching or tested textile adhesive | Excess thickness and stiffness |
| Felt craft or decoration | Controlled fabric adhesive | Excessive absorption |
| Polyester woven + loose trim | Tested adhesive or fine stitching | Slick or treated surface |
| Jersey + small hole | Knit repair, fine stitching, or darning | Loss of stretch |
| Leggings + split structural seam | Stretch-compatible stitching | Rigid repair creating a new stress point |
| Wool sweater + yarn loss | Darning | Puckering from excessive tension |
| Silk or chiffon + visible tear | Fine hand repair or professional service | Permanent marks and stiffness |
| Waterproof shell + puncture | Manufacturer-approved technical patch | Damage to coating or membrane |
1. How Do You Identify the Fabric Before Choosing a Repair Method?
The most useful fabric identification for repair is not simply “cotton versus polyester.” What matters is how the material behaves when it is handled. Two fabrics containing the same fiber can require completely different repair methods because yarn structure, fabric weight, finishing chemistry, elasticity, and surface treatments change how adhesive spreads, how needles penetrate, and how force travels through a repaired area. Your first inspection should therefore combine information from the label with simple observations made on an undamaged section of the item.
Read the Fiber Content and Care Label Before Touching the Damage
Start with the sewn-in label whenever it is available. Fiber composition can alert you to wool, silk, cotton, polyester, nylon, elastane, or blended construction, while the care instructions indicate limits for washing, drying, ironing, and professional cleaning. The United States Federal Trade Commission requires covered apparel to carry care instructions, including warnings when ordinary care procedures could harm the product. A repair material should never be used as permission to exceed the garment’s original care limitations.
For example, a fabric adhesive may be described as iron-safe after curing, but this does not mean a polyester garment marked “Do Not Iron” can suddenly tolerate a hot iron. Likewise, a repaired dress originally labeled for professional cleaning should not automatically be put into a washing machine just because the repair adhesive itself is washable. When two sets of instructions apply, the safest practical rule is to follow the more restrictive limit.
reference content source — FTC Care Labeling Guide
Use this source when explaining why washing, drying, ironing, and care warnings still apply after clothing is repaired.
Identify Whether the Fabric Is Woven, Knit, Stretch, Pile, or Coated
A woven fabric is normally made from yarn systems crossing one another and often stays comparatively stable when lightly pulled. A knit fabric is built from loops and usually has more natural give. High-stretch fabrics may combine knit construction with elastane or similar elastic fibers and can expand substantially while dressing, sitting, bending, or exercising. Velvet and similar pile materials have raised fibers on the visible surface, while coated or laminated fabrics can contain additional functional layers that require their own repair strategy.
You do not need to cut the garment to identify these basic behaviors. Lay it naturally on a flat surface and compare a damaged location with sound fabric nearby. Gently pull the textile in different directions without forcing it. Look at a seam allowance, cuff interior, pocket interior, or other accessible unfinished area. If the textile springs noticeably and returns, stretch performance is part of the repair requirement. If the surface contains a visible directional nap, shiny film, waterproof finish, or bonded layer, treat it more cautiously than ordinary uncoated cloth.
Video evidence — Identifying the Right Side of Fabric
This basic fabric-orientation video is useful before repairs involving patterned, directional, textured, or two-sided textiles because users need to know which surface should remain visible before aligning a seam, patch, or hem.
Check Thickness, Stretch, Absorbency, and Surface Finish
Four observations often tell you more about repair compatibility than the fiber name alone. First, compare thickness: a thin blouse and heavy canvas should not receive the same quantity of adhesive or the same needle. Second, evaluate stretch because a repaired section on a legging may need to extend repeatedly. Third, consider absorbency: open cotton, felt, and similar materials can draw liquid adhesive into the fibers more readily than some smooth synthetics. Finally, inspect surface finish because coatings, printing, pile, or laminates can affect bonding and appearance.
From a textile-repair perspective, absorbency is particularly important when using adhesive. A thin liquid layer that remains near the interface of two stable textile surfaces can provide useful contact, while the same amount applied to a porous lightweight material may travel through the structure and become visible from the front. Increasing glue volume to compensate for absorption can make this worse. The correct response is usually to reduce application thickness and perform a representative sample test rather than repeatedly adding adhesive.
Needle selection also demonstrates how strongly material structure affects repair mechanics. SCHMETZ distinguishes Jersey needles for knits and some stretch fabrics from reinforced Denim/Jeans needles intended for heavier denim-type materials. This does not dictate a complete repair method, but it is strong practical evidence that a single needle geometry is not optimal for every textile.
External tool — SCHMETZ Needle Guide
Use this reference when a sewing repair requires users to match needle type and size to jersey, stretch fabrics, denim, or other textile structures.
Video evidence — Hand Sewing Needles Basics
Professor Pincushion explains common hand-sewing needle types, sizes, and threading. This is particularly useful for users who understand the repair method but do not know whether the needle they already own is appropriate.
Build a Small Sample Before Repairing an Important Garment
When the material is unfamiliar, a small sample is far more useful than guessing from online descriptions. The best sample is a matching scrap left from alteration or manufacturing. If none exists, an accessible interior seam allowance may be enough for a very small compatibility test. Reproduce the planned repair as closely as possible: use the same adhesive quantity, stitch type, pressure, layer count, and waiting period. A tiny drop placed randomly on a hidden corner does not fully predict how a bonded two-layer repair will behave.
For an adhesive sample, allow the material to reach its documented full cure before deciding whether it is suitable. Inspect both sides under normal lighting and compare the treated area with untreated cloth. Bend it, feel the stiffness, and—only when the original material is intended to stretch—apply a gentle controlled extension. A method should be rejected or adjusted if it causes unacceptable darkening, seepage, hardening, edge lift, puckering, surface shine, pile damage, or obvious change in movement.
Downloadable evidence resource — Utah State University Extension, Basic Sewing Supplies PDF
This downloadable reference covers basic measuring, marking, cutting, pinning, hand-sewing, and pressing supplies and is useful when assembling a simple home fabric-repair kit.
2. Which Repair Method Works Best for Each Fabric Type?
Choosing a repair technique should be treated as a matching exercise rather than a contest to find the “strongest” method. Adhesive distributes load across a bonded surface, thread creates discrete mechanical connections through the textile, patches add replacement material, darning reconstructs part of a yarn network, and technical tapes create a surface patch designed around specific outdoor materials. Each method has a job it does particularly well, and each can fail when placed into a job it was never intended to perform.
Use Fabric Type as the Starting Point, Then Add Damage and Stress
A repair decision becomes much more accurate when three variables are combined: fabric behavior, damage structure, and load. A low-stress cotton hem is not mechanically equivalent to a cotton trouser crotch seam. A decorative patch on denim is different from a denim inner-thigh hole where the surrounding yarns have already worn thin. A polyester lining can be relatively stable, whereas polyester-elastane leggings may stretch significantly every time they are worn.
Before selecting the method, identify whether the damage is a loose hem, broken seam, clean tear, hole with missing material, frayed edge, worn-thin zone, detached decoration, lifting patch, or failure of a coating or laminate. Then observe how the location behaves during ordinary use. If the opening widens when the garment is lightly moved in the same way it moves during wear, the repair must manage that force instead of merely looking closed when the item is flat.
| Fabric Type | Typical Behavior | Common Repair Need | Practical Method Direction | Adhesive Suitability | Main Warning |
|---|---|---|---|---|---|
| Cotton woven | Stable, often absorbent | Hem, trim, small tear | Glue, hand stitch, patch | Often good after testing | Thin fabric may show seepage |
| Denim | Thick, abrasion-prone | Hole, thinning, patch | Backing patch + stitching | Useful on selected low-stress work | Surrounding yarns may be weak |
| Canvas | Heavy and stable | Tear, edge, patch | Stitch, patch, tested glue | Conditional | Some areas carry substantial load |
| Felt | Nonwoven and absorbent | Decoration, craft repair | Glue or stitching | Often suitable | Easily oversaturated |
| Polyester woven | Smooth, stable | Hem, lining, trim | Tested glue or fine stitch | Conditional | Finishes vary |
| Jersey knit | Flexible loop structure | Hole, seam | Fine knit repair or elastic stitching | Location-dependent | Repair must preserve movement |
| Stretch activewear | High repeated extension | Seam or tear | Stretch-compatible sewing | Poor as sole structural repair | Rigid zone can create new failure |
| Wool knit | Flexible yarn network | Hole, thinning | Darning | Limited | Incorrect tension distorts shape |
| Silk / chiffon | Thin, mark-sensitive | Tear, edge | Fine hand repair or specialist | High caution | Needle or adhesive marks |
| Velvet | Pile surface | Seam or tear | Reverse-side repair | High caution | Pile can be crushed |
| Waterproof shell | Coated/laminated | Puncture or tear | Technical patch/system | Product-specific | Functional layer may be affected |
Know What Each Repair Method Actually Does
Fabric adhesive is particularly effective when two compatible textile surfaces provide sufficient contact area and the location does not depend primarily on a sewn structural seam. Typical examples include many hems, trims, appliqués, light patches, ribbons, lace, and selected lining or decorative repairs. A flexible fabric-specific formula is usually preferable to a rigid general-purpose craft adhesive because wearable textiles repeatedly bend, fold, and compress against the body.
Sewing is better suited to situations where force needs to travel through a seam or reinforced structure. Hand backstitch can repair many ordinary broken seams, while machine sewing becomes useful for long areas, thick fabric, repeated repair work, or stretch-compatible stitch patterns. The presence of a sewing machine does not automatically make a repair better; needle type, thread, tension, stitch geometry, and the condition of the original fabric still determine whether the new seam supports or damages the textile.
A patch is especially valuable when fabric has disappeared or weakened around a hole. Instead of pulling fragile edges together, the patch introduces sound material extending beyond the defect. Darning follows a different principle, rebuilding a network of threads across a hole or worn area and is particularly useful for knitted wool, socks, and sweater-type structures. Technical repair tapes solve yet another problem by providing lightweight surface repair for compatible outdoor synthetics where unnecessary needle holes may be undesirable.
| Method | Best Use | Main Strength | Common Misuse |
|---|---|---|---|
| Flexible fabric adhesive | Hems, trims, compatible patches, decorative bonding | No visible stitches and broad contact | Used as sole repair for high-load seams |
| Hand sewing | Small seams, hems, openings | Precise control with simple tools | Thread pulled too tight and fabric puckers |
| Machine sewing | Long seams, heavy cloth, stretch seams | Consistent mechanical reinforcement | Wrong needle or stitch selected |
| Backing patch | Missing or weakened fabric | Spreads load beyond damaged fibers | Patch too stiff for original garment |
| Darning | Wool and knit holes | Rebuilds yarn structure | Repair tension changes garment shape |
| Fusible repair | Compatible heat-safe fabrics | Fast and tidy | Heat limit guessed rather than checked |
| Technical repair tape | Compatible coated/synthetic outdoor fabrics | Low-bulk surface patch | Applied to unsupported materials |
| Professional repair | Valuable or structurally complex items | Reduces irreversible DIY risk | Delayed until prior repairs cause more damage |
Fabric Glue Should Be One Repair Option, Not the Predetermined Answer
For users who cannot sew or simply need to fix a hem, patch edge, ribbon, lace trim, or another compatible low-stress textile area, a flexible fabric adhesive can reduce the need for needles or a sewing machine. GleamGlee Fabric Glue is documented as a clear-drying, flexible fabric adhesive intended for common textile projects involving cotton, denim, polyester, canvas, felt, patches, lace, ribbons, sequins, clothing repairs, crafts, and home textiles. Its confirmed product positioning also includes washability and ironing after full cure.
Those properties do not mean adhesive should be prescribed for every damage simply because the garment is made from a listed material. A denim patch on a jacket back and a torn denim crotch seam have very different loading. A polyester decorative trim and an elastic sportswear seam also require different mechanics. A responsible product recommendation appears after the repair type has been selected, not before.
External evidence — JOANN Fabric Adhesives Guide
This downloadable guide is useful for showing users how fabric adhesives fit among no-sew and decorative fabric applications rather than presenting adhesive as a universal replacement for stitching.
3. How Should You Repair Cotton, Denim, Canvas, and Felt?
Cotton, denim, canvas, and felt are common materials for household repairs, but their apparent familiarity can encourage users to work too quickly. Lightweight cotton can reveal adhesive through the face, denim damage frequently extends farther than the obvious hole, canvas may belong to a load-bearing bag or outdoor item, and felt can absorb more adhesive than expected. The best home repair preserves healthy surrounding material instead of adding unnecessary glue, stitching, or patch thickness.
How to Repair a Loose Hem on Woven Cotton
A loose woven-cotton hem is one of the more practical home repairs because the original fold often remains visible and the fabric usually lies flat. Begin by checking whether only the original fixing has failed or whether the lower edge itself has become worn. If the cloth remains sound, restore the original fold and measure at several locations rather than copying one point. Using several reference points helps prevent a repair that gradually slopes around a trouser leg, skirt, shirt, or curtain.
For a no-sew repair, clean the inside area and allow it to dry. Test the adhesive on a hidden section, then return the hem to its natural fold. Work in manageable sections rather than applying adhesive around the entire garment before positioning anything. The supporting project guidance suggests sections around 15–25 cm as a practical handling range for long hems; this is a workflow recommendation, not a universal glue specification. Apply a thin controlled line inside the fold, align without sliding, press, inspect from the front, then continue with the next section.
A hand-sewn blind hem is a useful alternative when the cloth is thin, the user wants very little adhesive in the garment, or traditional construction is preferred. Blind hemming works by catching only a small amount of the main garment fabric while hiding most of the stitch inside the folded hem. Whichever method is chosen, the most important preparation is alignment. Adhesive and sewing can both permanently preserve a crooked hem if the fold was measured incorrectly before the repair began.
Video evidence — How to Hem Pants with Fabric Glue
This Aleene’s demonstration is useful for visually understanding measuring, folding, adhesive placement, and securing a no-sew trouser hem. Use the workflow as a visual reference, but follow the cure and care instructions of the adhesive actually being used.
External step-by-step evidence — Aleene’s Fabric Glue Hem Article
The illustrated article explains applying fabric adhesive beneath a pressed hem and securing the section while the adhesive dries.
How to Repair a Hole or Worn Area in Denim
Denim deserves more diagnosis than many quick-repair tutorials provide. A visible opening may represent only the final stage of a larger abrasion problem. Inner thighs, knees, seat areas, pocket edges, and cuffs can lose yarn gradually until a hole appears. Before repairing, hold the denim in good light and compare the surrounding region with undamaged cloth. If neighboring material appears unusually thin, translucent, fuzzy, soft, or full of broken threads, plan the repair around the whole weak zone rather than only the visible opening.
When material has been lost, a backing patch usually makes more structural sense than pulling weak edges together. Choose a patch that reaches healthy denim around the damaged zone and has enough flexibility to move with the garment. Secure the patch temporarily, check the shape from the right side, then stitch through sound surrounding fabric. If a fabric adhesive is used for positioning or selected low-stress patch work, apply it as a thin controlled layer rather than building a rigid plate beneath the denim.
An especially common mistake is making the backing patch only slightly larger than the hole. If the edge of the patch ends inside the already-weakened area, normal movement transfers stress into fibers that are not strong enough to carry it. Extending the reinforcement into visibly healthier cloth generally creates a smoother transition between repaired and original material. A professional-looking patch is therefore less about hiding every millimeter of the opening and more about rebuilding a usable load path.
Evidence — iFixit Fabric Patch Guide
This step-by-step repair guide demonstrates the principle of adding a patch over a damaged textile area rather than relying solely on the original torn edges.
Video evidence — How to Sew on a Patch by Machine
Singer’s patch demonstration is useful when the chosen repair involves perimeter stitching on denim, jackets, or other machine-accessible fabric.
How to Repair Canvas Without Ignoring Load
Canvas appears in clothing, work aprons, totes, backpacks, covers, decorative home textiles, and some outdoor products. A flat canvas panel with a small tear may be repaired with a patch, sewing, or a tested flexible adhesive depending on its role. A handle attachment, strap anchor, loaded pocket, or corner seam is completely different because force concentrates at the repair every time the object is carried. Surface bonding alone should not be assumed to rebuild this type of structural connection.
When patching canvas, flatten the item without pulling the damaged edges unnaturally together. Trim only fibers that are completely detached and interfering with alignment; do not cut sound yarn simply to make the hole look cleaner. Position a compatible backing patch into sound material and reinforce it mechanically when the repaired area carries load. If the canvas is coated, waterproofed, waxed, or otherwise treated, test compatibility before using ordinary fabric adhesive because the visible fabric may not represent the actual bonding surface.
Measurement becomes important when users switch between tutorials using inches and centimeters. Cutting a patch from an incorrectly converted measurement can leave too little reinforcement or create unnecessary bulk. Rather than using approximate mental conversions for close-fit work, use a reliable unit reference, especially when translating pattern dimensions from an international tutorial.
External calculation tool — NIST Unit Conversion Reference
Useful for converting repair measurements between U.S. customary and metric units. NIST identifies one inch as exactly 2.54 centimeters.
How to Repair Felt Without Making It Rigid
Felt behaves differently from ordinary woven cloth because its fibers form a consolidated nonwoven structure and cut edges generally do not unravel in the same way as a shirt fabric. This makes it particularly convenient for crafts, costumes, patches, school projects, decorative appliqués, and soft accessories. The tradeoff is absorbency. A heavy liquid application can sink into felt rather than staying only at the bonding interface, increasing stiffness and sometimes creating a darker or harder zone.
When bonding two felt pieces, apply the adhesive thinly and distribute it only where meaningful contact is needed. For a patch, secure the perimeter carefully because edge lift is often noticed before center separation. If the felt is a decorative component on clothing, bend the garment before permanent installation to see whether the patch has enough flexibility. A very thick felt shape on a soft T-shirt may feel fine on a table but become uncomfortable or pull on the fabric when worn.
For small craft projects, GleamGlee Fabric Glue can be considered when the repair or decoration falls within its documented textile uses. Its precision-application design is useful for narrow edges, patches, ribbons, and decorative details where uncontrolled application would create unnecessary mess. Fully cured flexibility is especially relevant for wearable felt decorations, but correct glue quantity remains essential because a flexible formulation cannot completely compensate for severe oversaturation.

4. How Should You Repair Polyester, Jersey, Knit, and Stretch Fabrics?
Polyester is one of the clearest examples of why fiber name alone cannot determine a repair. It can appear as a stable woven lining, a smooth blouse, fleece, jersey, mesh, high-stretch athletic fabric, coated outerwear, or part of a blended textile containing elastane. These materials do not have the same movement, absorbency, surface chemistry, or heat response. A useful repair guide therefore separates stable polyester fabric from knitted and highly elastic structures before choosing adhesive, thread, patch, or specialist repair.
Repair Stable Woven Polyester Only After a Surface Test
A woven polyester hem, lining, decorative strip, or loose fabric layer can often be repaired at home when the damaged area has low structural stress. Begin by removing ordinary dust and contaminants in a manner consistent with the garment care instructions, then allow the area to become completely dry. Smooth synthetic surfaces can respond differently to adhesives, so use a hidden test to evaluate wetting, adhesion, cured flexibility, shine, discoloration, and seepage before treating a visible panel.
If the test is acceptable and adhesive is appropriate for the location, use a narrow film rather than applying extra product because the material feels smooth. Increasing quantity is not a reliable way to compensate for an incompatible surface. For a sewn repair, select an appropriate fine needle and avoid excessive thread tension, especially on lightweight polyester where puckering can remain visible. Heat should also be approached according to the garment label rather than assuming every polyester textile uses the same ironing temperature.
Treat Jersey as a Moving Fabric, Not a Flat Repair Surface
Jersey and many other knits are constructed to flex. A repair that is neat and strong when the garment lies on a table can become uncomfortable or fail as soon as it is pulled over the body. When a small hole appears in a knit, first allow the fabric to rest naturally without stretching it. Identify whether the damage is simply a localized yarn break or part of a seam carrying regular extension. Small knit holes can sometimes be stabilized with careful hand stitching or darning, while structural seams generally need a repair capable of moving with the garment.
Needle choice matters because a sharp needle intended for stable woven fabric is not always ideal for looped knit structure. SCHMETZ’s current guidance identifies Jersey ball-point needles for knits and some stretch fabrics, while Stretch needles are designed for elastic and highly elastic materials. The exact needle still depends on fabric weight and machine setup, but the distinction reinforces an important household repair principle: the tool must suit the textile construction.
Downloadable reference — SCHMETZ Needle ABC
A useful printable reference for comparing needle types, fabric categories, and applications when the repair method involves sewing.
Repair Legging and Activewear Seams With Stretch in Mind
A structural seam in leggings, compression clothing, fitted workout tops, swim-style materials, or other high-stretch garments experiences repeated extension. Waistbands, crotches, inner thighs, knees, armholes, and underarms are especially demanding because movement repeatedly opens and closes the seam. Merely bonding the two sides flat can interrupt the original stretch behavior and move strain to the edge of the bonded zone.
When sewing a stretch seam, keep the garment close to its natural resting shape instead of pulling it tight during repair. Reconstruct the original seam line using a method appropriate for the elastic textile, and avoid thread tension so high that the repaired section puckers before it is even worn. After completing the repair, test movement gradually. First bend the material, then use only modest extension similar to normal wear. Stop if the seam becomes a rigid hinge or the neighboring fabric begins stretching much more than the repaired section.
iFixit’s legging-seam guide follows a sewing-based repair path for this type of damage and illustrates an important distinction between a flat fabric bond and a structural elastic seam. The guide identifies the defect, prepares the repair, and reconstructs the damaged seam rather than approaching it as a decorative surface repair.
Step-by-step evidence — iFixit Torn Legging Seam Repair
Useful for readers dealing specifically with a split seam in stretch leggings or a similar knitted garment.
Use Hand Stitching Carefully on Small Knit Holes
When a knitted fabric has a localized hole outside a major seam, the objective is often to stabilize loops and prevent the opening from enlarging rather than compressing the entire area into a hard knot. Use thread appropriate to the material and keep stitches light enough to preserve the original fabric shape. Gather only the damaged structure necessary for closure, and periodically flatten the repair to check whether the surrounding knit remains smooth.
A useful practice is to compare the repaired area with the same undamaged section on the opposite side of the garment. If the repaired textile becomes much shorter, tighter, or less elastic, loosen or redesign the repair before normal wear. This comparison is often more meaningful than asking whether the thread feels “strong.” Strength without compatibility can simply move the next tear to the first undamaged loop beside the repair.
Evidence — iFixit Knitted Textile Hole Repair
The guide specifically addresses repairing a hole in stretchy knitted textile using hand stitching and is useful for understanding why knit holes should be treated differently from stable woven tears.
5. How Should You Repair Wool, Silk, Lace, Velvet, and Delicate Fabrics?
Delicate textiles deserve a more conservative repair philosophy because adding the wrong material can cause damage that is more visible and harder to reverse than the original tear. Fine silk may darken or stiffen when saturated, chiffon can reveal needle holes and puckering, velvet can retain pressure marks, lace offers only a limited bonding surface, and a fine wool knit can lose its shape if repair thread is pulled too tightly. When the garment is expensive, vintage, ceremonial, or sentimental, the threshold for professional repair should be considerably lower.
Repair Wool Knit Holes by Rebuilding the Structure
A moth hole or worn area in a wool sweater is different from a split seam. When yarn is actually missing, bringing the remaining edges tightly together can distort the knit and create a puckered repair. Darning is often more appropriate because it creates a supporting thread network across the missing area. The replacement thread should be reasonably compatible in weight, flexibility, and care requirements, and the new structure should extend into sound material rather than relying on the damaged edge alone.
Work with the garment resting in its natural shape and resist the temptation to pull every thread tight. After several passes, flatten the area and compare it with surrounding knit. The objective is not to make the darning as dense as possible; it is to provide enough support for the hole while preserving drape and movement. A visible-mending approach can intentionally use contrasting yarn, while a less conspicuous repair can use a closer color and yarn weight.
Video evidence — Darning Technique
This sewing-technology instructional video demonstrates the basic concept of building thread across a damaged textile area and is useful for wool, sweater, and similar yarn-based repair projects.
Treat Silk and Chiffon as High-Visibility Materials
Silk and chiffon may react to very small changes in surface structure. Even a clear adhesive can alter how light passes through or reflects from the fabric, making a repaired spot appear darker, glossy, or stiff. A needle that looks fine for cotton can create noticeably larger holes in an extremely fine textile. For this reason, a hidden sample is not optional when an adhesive or unfamiliar sewing method will be used on a valuable fine fabric.
If a low-value test garment has a loose decorative edge, the user can test a very small amount of compatible fabric adhesive at an interior seam allowance and inspect the fully cured result. A central tear in an expensive silk dress, formal gown, scarf, or collectible garment is a very different risk. Professional repair may be able to use fine supporting fabric, specialized stitching, or access to internal construction that is not possible without partially dismantling the garment.
The same caution applies to heat. Never select an ironing temperature from an adhesive tutorial without checking the clothing label. An adhesive that survives moderate ironing does not protect the fibers, dye, finish, or decorative elements of the garment from heat.
Repair Lace by Following the Actual Threads
Open lace provides less continuous surface contact than a solid woven cloth. A heavy adhesive layer can bridge open spaces, become visible, and make a delicate edge stiff. For loose lace trim on a stable garment, carefully controlled adhesive points or fine hand stitching may be effective after testing. For an actual torn lace pattern, following the existing yarn structure with matching thread often produces a more natural mechanical repair than filling the opening with glue.
Before sewing torn lace, study the repeating pattern and identify the strongest intact threads surrounding the break. Connect the repair to those sound sections rather than repeatedly piercing the fragile torn edge. Use thread close in color and scale to the lace, and keep tension low enough to preserve the original open pattern. If the lace belongs to an expensive bridal, historical, or ceremonial garment, specialist repair becomes the safer option.
Evidence — iFixit Torn Lace Repair Guide
This repair guide demonstrates sewing torn lace with matching thread and provides a useful visual reference for preserving open textile structure.
Protect Velvet and Other Pile Fabrics From Pressure Damage
Velvet can be damaged without tearing because the raised pile itself contributes strongly to its appearance. A clamp, iron, hard weight, or adhesive contacting the visible face can flatten or bind the pile and create a mark that remains obvious even if the original tear has been repaired. Work from the reverse side wherever practical, keep the nap direction aligned, and avoid treating the visible face as a flat pressing surface.
When a velvet seam has opened but the fabric itself remains sound, careful hand stitching through the original seam allowance is often less risky than introducing adhesive near the visible pile. If a decorative edge requires bonding, test the adhesive where the pile will not be seen and protect the face from compression while the repair stabilizes. Do not assume that placing a heavy object over the area is harmless simply because this is a common way to hold flat woven fabrics.
Use Hidden Stitches When Appearance Matters
For hems and folded edges where visible thread would be distracting, blind or slip-style stitches can hide most of the thread within the construction. The key is to catch only a small amount of the garment face and avoid pulling the thread until the fabric dimples. Fine hand sewing is often slower than adhesive application, yet it can offer valuable control on materials where glue penetration, surface shine, or stiffness would be unacceptable.
A blind hem should not be chosen solely because it looks invisible. The material must still tolerate the needle, the fold must be structurally sound, and the thread must be suitable for the garment. The repair is most successful when the user periodically turns the garment to the visible side and checks the result rather than completing a long line before noticing puckering.
Video evidence — Hand-Sewn Blind Hem
This tutorial demonstrates how a blind hem can secure a folded edge while keeping most thread hidden, making it useful for skirts, trousers, and suitable fine fabrics where visible stitching is undesirable.
Know When Delicate Fabric Is Not a DIY Project
The most helpful repair advice sometimes tells the user not to proceed. High-value silk, vintage textiles, heavily lined formalwear, complex embroidery, antique lace, large visible tears, garments with failing interfacing, and items already damaged by previous adhesive are poor places for trial-and-error repair. The potential saving from a quick home fix can be much smaller than the value lost if the fabric becomes permanently stained, distorted, or hardened.
Consider professional repair when:
- The item is valuable, rare, vintage, or irreplaceable.
- Damage sits in a highly visible central panel.
- Several layers or internal structures are involved.
- Fine fabric has already begun running or fraying beyond the visible tear.
- Previous glue has left a hard or discolored area.
- The garment is dry-clean-only and compatibility is uncertain.
- The user cannot test the planned method on comparable hidden fabric.
- The repair would require irreversible cutting before the result is known.
6. How Should You Repair Waterproof, Coated, and Technical Fabrics?
Technical textiles deserve their own category because closing the visible tear may restore appearance without restoring the original function. A waterproof jacket may combine woven synthetic fabric, a water-resistant finish, laminated membrane, seam tape, insulation, and specialized trims. An outdoor backpack may use coating plus load-bearing webbing. Repairing these items as though they were ordinary polyester can compromise weather resistance or create new needle holes even if the visible opening disappears.
Identify the Functional Layer Before Repairing the Hole
Before applying ordinary fabric adhesive or sewing a coated textile, inspect both sides of the damaged location. Look for seam tape, membranes, films, coatings, insulation, reflective elements, or multiple laminated layers. If the garment manufacturer provides a repair procedure for the particular product category, use it as the primary reference because the manufacturer understands the functional construction better than a generic repair article.
For a small puncture in the shell of an insulated jacket, the immediate goal may be preventing insulation loss and sealing the opening without adding unnecessary holes. A structural tear along a pocket or major seam is a different problem and can require sewing plus restoration of seam sealing. The visible size of the damage does not determine the complete repair.
Use Technical Repair Tape Where the Material Manufacturer Recommends It
Patagonia’s current small-hole guidance provides a useful example of a specialist pathway. The company recommends fabric repair tape for small holes in down or synthetic-insulated jackets and notes its suitability for synthetic items such as waterproof shells and backpacks, while also noting limits on natural and stretchy materials. The specific repair tape referenced by Patagonia is described as washable after its own product-specific waiting period. These instructions should not be generalized to unrelated adhesives.
The broader lesson is important: technical repair tape and general fabric glue do not occupy exactly the same repair category. A technical patch is engineered for particular outdoor substrates and surface conditions, while a textile adhesive for clothes is designed around ordinary fabric bonding. Users should select the system designed for the real substrate and functional requirement rather than assuming every adhesive-based repair is interchangeable.
Evidence and repair instructions — Patagonia Small Hole Repair Guide
This guide explains patch-based repair for small holes in insulated jackets and compatible synthetic outdoor fabrics.
Do Not Create New Needle Holes Without Considering Waterproofing
Sewing is essential for many structural repairs, but it is not automatically risk-free on a waterproof laminate. Each stitch penetrates the material. On some constructions, a repaired seam may require suitable seam-sealing work afterward. On others, the manufacturer may prefer a technical patch or professional repair. The decision depends on whether the damage is simply a shell puncture or part of a structural seam carrying force.
Technical garments used for safety, professional work, severe-weather exposure, flotation, climbing, or similar high-consequence applications should not be treated as ordinary DIY clothing. General fabric repair instructions cannot verify restored protective performance. If the repair affects a safety function, use the equipment manufacturer’s repair or replacement procedure rather than relying solely on the fact that the opening appears closed.
External evidence — Patagonia DIY Repair Guides
This resource provides manufacturer-specific repair pathways for several categories of Patagonia clothing and gear, useful for demonstrating when technical products need product-specific instructions.
7. How Do You Test, Repair, Cure, Wash, and Iron Fabric Safely?

A repair should be judged after it returns to real use, not at the moment the adhesive first becomes tacky or the last stitch is tied. Textile repairs fail through several different mechanisms: bond edges peel, thin fabric tears beside a stiff patch, stitches pucker the surface, adhesive becomes visible through a pale cloth, elastic fabric loses movement, and laundering exposes weak contact that looked acceptable while dry. A disciplined repair sequence reduces these failures without requiring specialized laboratory equipment.
Use a Hidden Test That Reproduces the Real Repair
A useful compatibility test should answer more than “Does the adhesive stick?” If the permanent repair will bond two fabric layers, test two layers. If the area will be bent, bend the cured sample. If the garment stretches normally, compare mild stretch after the repair has completely stabilized. If the fabric is pale, translucent, patterned, or pile-covered, inspect the visible face under ordinary room light and daylight.
Check the sample against untreated fabric rather than judging it in isolation. A small difference in stiffness may be acceptable on a canvas pouch but unacceptable on a shirt cuff against the skin. Slight darkening might be invisible on dark denim yet obvious on pale silk. Repair compatibility is therefore application-specific, and a test is useful because it lets the user discover these tradeoffs before altering the visible garment.
Hidden compatibility checklist:
- Does adhesive bleed through to the visible face?
- Has the color darkened after full cure?
- Does the treated area reflect light differently?
- Has the fabric become noticeably thicker or harder?
- Does the repair bend without cracking?
- Does required stretch remain acceptable?
- Are patch or trim edges lifting?
- Has a pile surface flattened or become shiny?
- Does stitching pucker the surrounding cloth?
- Does the repair still look acceptable from normal viewing distance?
Suggested on-site downloadable asset: Hidden-Fabric-Compatibility-Test-Record.xlsx
Recommended fields include fabric type, construction, thickness, stretch, coating, repair method, glue amount, test location, cure time, front-side appearance, stiffness, bend result, stretch result, edge security, and final decision. This type of static worksheet gives users a repeatable process without requiring an interactive generator.
Apply Fabric Adhesive as a Thin Bond Line, Not a Filler
Fabric-specific adhesive performs best when the quantity matches the surface and repair geometry. The objective is to create contact between materials, not to fill the textile with a thick mass of glue. Too much adhesive can migrate through absorbent fibers, squeeze beyond patch edges, lengthen practical drying time, and produce a region that feels much harder than the untreated material. The more delicate and absorbent the fabric, the more important controlled application becomes.
The confirmed GleamGlee Fabric Glue usage sequence is straightforward: work on clean, dry fabric, apply a thin and even amount, align the materials, press them together, allow the repair to gain initial hold, and leave it undisturbed until fully cured before normal washing, ironing, or high-frequency use. The documented product uses a fine application structure intended to improve control at edges, narrow gaps, patches, lace, ribbon, sequins, and similar detailed textile areas.
When bonding a patch, the best adhesive pattern depends on the patch and fabric. A narrow textile patch may need even coverage near the perimeter so corners do not curl. A thicker decorative patch may benefit from controlled edge coverage without saturating the entire center. If pressing causes large beads of adhesive to emerge around the border, the application was probably heavier than necessary. Practice on scrap fabric until the user understands the applicator flow before working on a valuable item.
Distinguish Initial Set From Full Cure
One of the most common adhesive-repair mistakes is assuming the project is finished as soon as the pieces stop sliding. Initial hold means the materials have begun staying in position; it does not necessarily mean the adhesive has developed its final resistance to bending, washing, detergent exposure, or heat. Moving the repair too early can disturb the bond internally even when nothing obvious separates at the surface.
For the GleamGlee Fabric Glue referenced in this guide, the confirmed product information gives approximately 6–10 minutes for initial positioning and about 24 hours for full curing. These figures are product-specific, not industry-wide rules. Another adhesive may specify very different timing, so users should always follow the product actually in their hands rather than copying a time from an unrelated tutorial.
| Repair Stage | What It Means for This Referenced Adhesive | Recommended Action |
|---|---|---|
| First 0–10 minutes | Bond begins establishing initial position | Keep the repair aligned and avoid movement |
| 10 minutes to about 24 hours | Adhesive continues developing | Do not wear, wash, iron, or aggressively bend |
| Around 24 hours | Product-specific full-cure reference | Inspect appearance, edges, and flexibility |
| Before first washing | Repair is cured but not yet proven in laundering | Recheck garment-care instructions |
| After first wash and drying | Real-use inspection point | Check lift, stiffness, puckering, cracking, or reopening |
Writing the completion time on removable tape near the repair is a simple way to avoid guessing later. This is particularly useful when several garments or craft pieces are being repaired in one session. If more adhesive than intended was applied, the room is unusually cool, or a thick patch limits airflow, there is little benefit in rushing to the earliest possible wear time. Waiting longer is usually less disruptive than repeatedly flexing a repair to “see if it is ready.”
Return a Repaired Garment to Washing Gradually
Once the specified cure has completed, inspect every repair edge before washing. If a patch corner is already lifting while dry, laundering will not improve it. Remove clips, temporary pins, backing papers, and positioning aids. Turn suitable clothing inside out to reduce direct friction against the repaired face, and avoid washing it together with garments containing exposed hooks, rough metal, or open zippers that could catch a patch or trim.
Use a washing procedure within the garment’s care-label limits instead of deliberately choosing hotter water or stronger agitation as a durability test. The first wash is better treated as a controlled return to normal use. After washing, dry the garment according to its original instructions, then inspect the repair only after the textile has returned to normal temperature and dryness. Wet cloth and warm adhesive regions may feel temporarily different from their everyday condition.
Iron Only When Both the Fabric and the Repair Permit It
Ironing introduces two independent limits: the repair material and the original textile. GleamGlee Fabric Glue is documented as iron-safe after full curing for appropriate textile projects, but this does not override a garment label prohibiting ironing or limiting temperature. A safe sequence is to confirm full cure, read the care label again, work from the reverse side where practical, and use a clean press cloth for sensitive materials.
Avoid leaving an iron stationary over the repair for unnecessary periods. Prints, sequins, coated surfaces, synthetic decoration, patch backings, and technical finishes may have different heat tolerance from the surrounding fabric. When the care label is unclear, test a hidden area first or avoid applying direct heat until the textile requirements are confirmed.
External care-symbol reference — GINETEX
Useful for readers who need help interpreting standardized washing, bleaching, drying, ironing, and professional textile-care symbols after completing a repair.
Inspect the Repair After the First Real Care Cycle
A repair that survives curing but fails during the first normal wash gives useful diagnostic information. Edge lifting usually suggests insufficient contact, contamination, incompatible surfaces, or stress at the perimeter. A stiff region that becomes uncomfortable after laundering may indicate too much adhesive or an excessively heavy patch. New tearing directly beside the repair often indicates the repaired zone is much stronger or stiffer than already-weakened surrounding fabric.
Do not automatically respond to every failure by adding more adhesive. Remove loose debris where this can be done without damaging sound material, identify why the first repair failed, and choose a method addressing the cause. For example, a repeatedly lifting denim knee patch may need perimeter stitching rather than a third adhesive layer, while a worn area continuing to tear beyond a small patch may need a larger reinforcement reaching healthier textile.
Suggested on-site downloadable asset: Fabric-Repair-Aftercare-Checklist.pdf
A practical printable version can include repair date, method, initial-set time, full-cure time, first-wash date, washing method, drying method, ironing status, edge condition, flexibility, appearance, and a field noting whether additional reinforcement is required.
8. When Should You Use Fabric Glue, Sewing, a Patch, or Professional Repair?
The final choice becomes easier when users stop focusing on the size of the damage and instead ask what the repaired area must do after completion. A two-centimeter opening in a decorative hem and a two-centimeter opening in a crotch seam are the same length but not the same repair problem. The hem mainly needs controlled edge retention, whereas the crotch seam repeatedly carries body movement. Repair method should therefore follow function and load rather than visible dimensions alone.
Choose Fabric Glue for Compatible Low-Stress Textile Bonding
Flexible textile adhesive is a useful option for loose hems, decorative trims, fabric patches, ribbons, lace, appliqués, selected lining edges, fabric crafts, and other projects where reasonably broad textile contact can carry the required load. It is particularly helpful for users without sewing equipment and for repairs where visible stitches would interfere with appearance. The repair area still needs to remain stable during curing, and users should confirm compatibility with a hidden test.
Fabric glue is less appropriate as the sole structural solution for crotch seams, heavily stressed shoulders, waistbands, zipper attachments, underarms on tight garments, load-bearing bag straps, backpack harnesses, or similar areas where repeated force is transferred through a narrow construction. Even a strong surface bond may not reproduce the original load distribution of a sewn seam. In these cases, glue may occasionally help with temporary positioning, but mechanical reconstruction normally does the structural work.
GleamGlee Fabric Glue fits naturally into the first group. Its product facts describe a clear, flexible, washable-after-full-cure, iron-safe-after-full-cure textile adhesive with precision application for common fabrics, patches, trims, clothing repairs, and craft projects. This makes it a practical candidate when a flexible no-sew textile bond has already been identified as the suitable repair category rather than as an automatic answer for every garment problem.
Choose Hand or Machine Sewing for Structural Connections
Sewing is generally more suitable when the original failure occurred in a seam that carries movement or load. Ordinary side seams, shoulders, waistbands, crotches, underarms, pockets, and zipper attachments often need thread to reconnect garment structure. Hand backstitch is useful for many short seams, while machine stitching becomes efficient for longer areas, heavier fabrics, and stretch seams requiring consistent stitch geometry.
Thread strength alone does not guarantee a successful repair. If stitches are placed only in frayed weakened fabric, the thread may remain intact while the cloth tears away from it. A sound structural repair should extend into healthy material on both sides of the damage and use tension appropriate to the textile. On stretch materials, the stitch must also allow the garment’s normal extension instead of acting like a rigid line.
Video evidence — Five Common Garment Hand Stitches
This instructional video is useful after the decision has been made to sew rather than glue. It demonstrates common hand-sewing approaches including running, back, slip, blind, and related garment stitches.
Choose a Patch When Material Is Missing or Surrounding Fabric Is Weak
A patch provides something neither glue nor thread alone can create: replacement structural material. When a hole is larger because fibers are missing, when denim has become thin around the opening, or when a canvas area has worn through, a patch can bridge the defect and transfer load into healthier surrounding textile. It may be installed from behind for a quieter appearance or visibly on top as part of the design.
Patch selection should consider weight and flexibility. Heavy canvas placed behind a lightweight shirt can create a stiff plate, while an extremely thin patch may not support worn denim. Before attaching anything, place the patch behind the damage and flex the garment naturally. The patch should support the weak area without making normal movement dramatically different from adjacent fabric.
For frequent-wash clothing, school garments, workwear, knees, elbows, or locations that bend continuously, perimeter stitching may provide greater security even when adhesive is used to help position the patch. This combination is particularly useful when the user wants precise alignment but also needs mechanical edge reinforcement.
Choose Darning When the Textile Structure Needs to Be Rebuilt
Darning is especially appropriate for holes and thin areas in wool knits, socks, sweaters, and other yarn-based fabrics. Instead of covering the entire defect with a separate fabric layer, darning builds replacement thread across the missing structure. The technique can preserve flexibility when thread weight and tension are chosen well and can be either discreet or intentionally decorative.
It is less appropriate when the entire surrounding material is rotten or mechanically weak. Darning needs sound textile around the hole to anchor the reconstructed network. If a broad region is severely worn, a larger patch or professional textile conservation approach may provide more reliable support.
Choose Professional Repair When the Cost of Mistakes Is High
Professional repair becomes the more rational choice when failure has consequences beyond an unattractive seam. Expensive formalwear, silk garments, historical textiles, intricate lace, heavily lined coats, protective clothing, technically laminated outerwear, safety equipment, load-bearing outdoor gear, and garments with damaged internal interfacing often contain construction that cannot be evaluated adequately from the visible surface.
A professional may be able to open a lining, reinforce the defect internally, reproduce a specialized stitch, restore a seam seal, or use material better matched to the original garment. Home repair is most valuable when the damage and material are well understood. Refusing an uncertain DIY repair is not a failure; it is often the decision that preserves the garment.
A Note for Textile-Adhesive and Repair-Kit Product Development
For brands, retailers, sewing-kit companies, or organizations developing textile-repair products, a meaningful fabric-glue claim should be connected to representative substrate testing rather than one generic piece of cloth. Stable woven cotton, lightweight polyester, denim, felt, and elastic knit place different demands on wetting, penetration, cure, bend resistance, wash performance, and user application. A formula intended for clothing should be evaluated with its real use conditions in mind rather than only static bond strength.
The company facts supplied for this project describe an R&D group of more than 25 chemists, material scientists, and process engineers, supported by application work involving adhesive performance, surface compatibility, humidity, temperature variation, and repeated wear conditions. The same company materials describe in-house formulation, packaging, printing, and manufacturing capabilities, including support for customized adhesive products and private-label development. These capabilities are relevant for customers requiring a textile adhesive or repair-kit configuration tailored to their market, while published consumer instructions should remain specific and conservative.
The practical advantage of formulation customization is not simply making an adhesive “stronger.” Different projects may prioritize viscosity, precision application, flexibility, drying appearance, package size, wash resistance, or compatibility with selected textile groups. A children’s craft kit, clothing alteration adhesive, patch application kit, and heavy textile repair product may benefit from different performance priorities. Custom development should therefore begin with actual end-use substrates and repair conditions rather than a generic request for maximum bond strength.
Conclusion
The most reliable fabric repair method is rarely determined by the fiber label alone. Cotton can be stable woven fabric or flexible jersey. Polyester can be a lining, athletic knit, or waterproof shell. Denim can have a small visible opening surrounded by a much larger weak zone. Wool may need reconstructed yarn rather than a surface patch, while silk and velvet can suffer permanent appearance damage from repair techniques that would be completely acceptable on canvas.
A useful repair begins with observation. Identify the fabric structure, inspect how far the damage extends, determine whether material is missing, and watch how the location moves during normal use. Then select the least disruptive method capable of doing the real job. Use flexible textile adhesive for appropriate low-stress surface bonding, sewing where structure must carry repeated force, patches when healthy replacement material is needed, darning for suitable knit damage, and manufacturer or professional repair for technical, valuable, or high-risk items.
Successful repair also depends on what happens after the method is chosen. Thin adhesive application, representative hidden testing, correct needle selection, appropriate patch size, reasonable thread tension, adequate full cure, and careful first laundering all influence whether a repair remains comfortable and stable. The strongest-looking repair on day one is not always the best repair six months later. A better goal is a repair that restores useful function while changing the original textile as little as practical.
For users choosing a no-sew route, a purpose-designed flexible fabric adhesive can make many household hems, patches, trims, decorations, and ordinary textile repairs considerably easier. GleamGlee Fabric Glue is one example developed around clear drying, controlled application, flexibility, washing after full cure, and common clothing and craft fabrics. It should be used where those properties solve the actual repair problem, while stitching, reinforcement, technical patches, or professional service should remain part of the decision whenever the material or load calls for them.
Frequently Asked Questions
What is the best method for repairing fabric?
The best method depends on fabric construction, damage type, and load rather than fiber name alone. A stable woven hem may be repaired with fabric adhesive or a blind stitch, while a conventional structural seam usually benefits from sewing. Missing or badly weakened textile normally requires a patch, and knitted wool holes can respond well to darning. Technical fabrics may require material-specific patch systems. Before repairing anything important, identify how the fabric moves, check whether surrounding fibers remain healthy, and test any unfamiliar repair method in a hidden location.
Can fabric glue replace sewing on clothes?
Fabric glue can replace sewing in many compatible low-stress projects, including selected hems, decorative trims, fabric patches, ribbons, appliqués, lace, and similar textile bonding jobs. It should not be treated as a complete replacement for structural stitching in crotches, shoulders, waistbands, zipper attachments, highly stretched seams, or load-bearing straps. The deciding factor is not whether glue can stick to the fabric, but whether a surface bond can safely carry the movement and force expected during normal use.
How do I repair a hole in denim?
Inspect an area larger than the visible hole before repairing denim because abrasion commonly weakens surrounding yarns. If the fabric around the opening is thin, fuzzy, translucent, or full of broken threads, use a backing patch large enough to extend into healthier denim and secure it appropriately, usually with stitching for areas experiencing regular wear. Avoid pulling weak torn edges tightly together simply to hide the hole, because this can concentrate stress in already damaged fibers and cause another tear beside the repair.
Can fabric glue be used on polyester?
Fabric adhesive can work on many polyester textiles, but polyester describes the fiber rather than the complete fabric structure. A stable woven polyester hem or decorative trim can be a reasonable adhesive project after hidden compatibility testing. Polyester-elastane leggings, stretch jersey, and coated outdoor polyester require different treatment because movement or surface finishes may change performance. Test adhesion, front-side appearance, flexibility, and any required stretch before committing to a visible repair, and use sewing for structural elastic seams when necessary.
How should I repair stretch fabric or leggings?
A split structural seam in leggings or highly elastic activewear usually needs a stitch capable of moving with the material. Keep the garment relaxed while positioning the repair and avoid creating a short rigid section across an area that extends repeatedly. After sewing, perform only a gentle progressive movement test rather than immediately stretching the garment to its limit. If surrounding fabric takes dramatically more strain than the repaired zone, reconsider the stitch or reinforcement before returning the garment to vigorous use.
How long should fabric glue cure before repaired clothing is washed?
The correct waiting period comes from the specific adhesive rather than a universal fabric-glue rule. For GleamGlee Fabric Glue, the documented product information indicates approximately 6–10 minutes for initial positioning and around 24 hours for full cure. Users should not treat initial hold as washing readiness. After the specified cure period, inspect the bond and follow the garment’s original care label for washing and drying. Other adhesive brands may specify different cure and laundering intervals, so their own instructions should be followed instead.
Which fabrics should not be repaired with ordinary fabric glue?
Ordinary textile adhesive should be approached cautiously on very delicate silk, chiffon, pile fabrics, highly elastic structural seams, coated or laminated technical textiles, safety garments, heavily weakened fabric, and high-value clothing where an unsuccessful repair may be difficult to reverse. Some of these materials can still be bonded in specific low-stress applications after testing, but the category name alone is not enough to recommend glue. When the material’s coating, stretch, value, or structural role is uncertain, sewing, a specialized repair system, or professional service may be the safer choice.





















