Skip to content

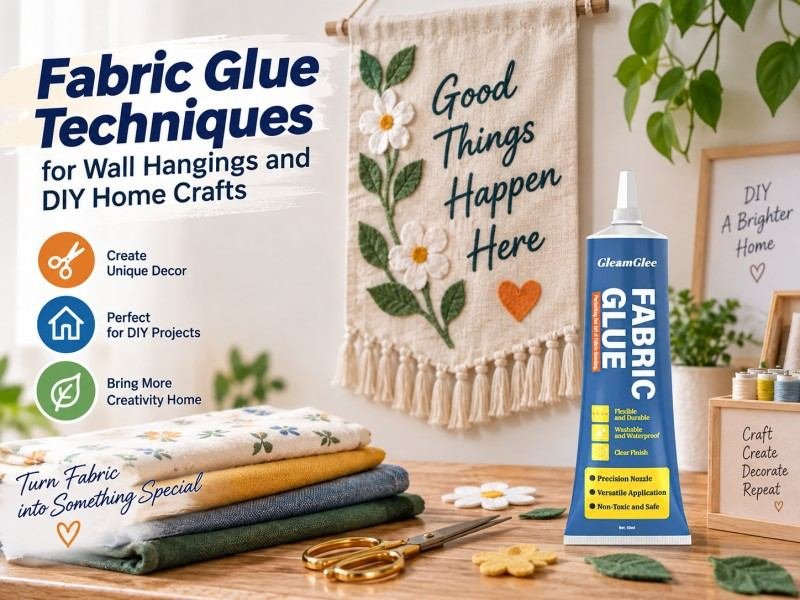
A fabric banner looks simple when it is hanging on a wall, but the project combines several small decisions: the fabric must be stable enough to stay flat, the letters must remain aligned, the adhesive must not bleed through the face, and the hanging method must carry the weight of the finished piece. For lightweight indoor décor, fabric glue can remove much of the sewing work without turning the banner into a stiff craft board. The best results come from treating decorative bonding and structural hanging as separate jobs, testing the exact materials before committing, and allowing the adhesive to reach full cure before the banner is folded, rolled, cleaned, or displayed.
This guide is written for people making birthday banners, classroom signs, wedding décor, nursery wall hangings, seasonal bunting, felt-letter banners, and similar textile projects. It focuses on practical decisions rather than a single brand or a single construction method. Fabric glue is useful when it matches the fabric, the joint is mainly decorative, and the user can control the amount applied. Hot glue, fusible web, textile tape, or sewing may be better in other areas. By the end, you should be able to choose a method, calculate spacing, build a clean no-sew banner, diagnose common failures, and know when reinforcement is the more responsible choice.
| Project or connection | Good starting method | Reason |
|---|---|---|
| Felt letters on cotton or canvas | Fabric glue | Flat, lightweight fabric-to-fabric bond with good visual control |
| Decorative fabric shapes or appliqués | Fabric glue or fusible web | Both can create a flat decorative layer; fusible web requires heat |
| Fast temporary party banner | Fabric glue or hot glue | Speed may matter more than long-term flexibility |
| Long straight textile hem | Fabric glue or textile/banner tape | A continuous straight bond is easier to control with a line or tape |
| Heavy outdoor banner or flag | Sewing/tape plus structural reinforcement | Wind and repeated flexing load the edge far more than a decorative letter |
| Grommet, pole pocket, hanging loop | Mechanical or sewn reinforcement | These points carry the weight of the entire banner |
1. Can You Use Fabric Glue for Fabric Banners?
Yes, fabric glue can work very well for many fabric banners, especially indoor decorative pieces made from cotton, felt, canvas, polyester, ribbon, lace, or other lightweight textiles. The important qualifier is the kind of joint being made. A felt letter bonded to a cotton panel carries little load, while a top hem, eyelet area, or hanging loop may carry the mass of the entire banner and may also experience pulling, folding, or wind. A useful rule is simple: use fabric glue confidently for compatible decorative bonds, but evaluate structural attachment points separately instead of assuming one adhesive should do every job.
Fabric banner projects that are usually good candidates
For a typical home or event project, fabric glue is most attractive when the banner is relatively small, used mainly indoors, and assembled from pieces with broad, flat contact areas. Birthday pennants, classroom name banners, wedding table signs, nursery wall hangings, seasonal felt banners, and simple wall décor all fall into this category. The adhesive is doing the kind of work fabric adhesive handles best: joining soft materials over a moderate area without asking the bond to act like a structural seam. Felt is particularly forgiving because it does not fray like many woven fabrics, and thicker cotton or canvas gives the user more tolerance against visible bleed-through than a very thin, pale fabric.
- Felt letters, numbers, logos, and simple shapes on a fabric background.
- Cotton, canvas, or felt pennants for birthdays, classrooms, holidays, or nurseries.
- Ribbon, lace, trim, and lightweight decorative overlays.
- Small appliqué-style fabric pieces with broad surface contact.
- Indoor banners that can remain flat while the adhesive cures.
Where glue should not be the only source of strength
The upper edge of a banner deserves more caution than the lettering. A decorative letter might weigh only a few grams, but the hanging system must support every layer in the banner plus movement from people brushing past it, repeated installation, or outdoor wind. For larger textile signage, professionals routinely use sewn hems, purpose-made textile tape, pole pockets, grommets, tabs, or other reinforced systems. This does not mean liquid fabric glue is weak; it means load path matters. In practical adhesive work, a bond can be excellent for one function and inappropriate for another even when both surfaces are technically compatible.
Evidence source: Hobbycraft demonstrates a real cotton-and-felt fabric banner project in which the felt lettering is positioned first and then secured with fabric glue; the tutorial also uses eyelets as a separate structural feature for hanging.
Reference video 1: Gathered Makes shows the full construction of fabric bunting, including cutting triangles, measuring the binding, and attaching the flags. It is useful for understanding where decorative pieces end and the structural top connection begins.
2. How to Choose the Right Fabric Glue and Fabric for a Banner
The phrase “fabric glue” covers products with different viscosity, cure speed, wash resistance, flexibility, and material compatibility. A banner does not need the most aggressive adhesive available; it needs a controlled bond that fits the fabric and the way the finished piece will move. For decorative work, clear drying and flexibility are usually more valuable than a rigid, thick bond. The user should also check whether the product is intended for the actual fabrics being joined, whether the banner may be cleaned later, and how long the adhesive needs before the project can safely be moved, rolled, or hung.
What makes a good fabric glue for banners
A banner adhesive should give the maker enough control to place a narrow line, thin film, or small dots without flooding the fabric. It should remain flexible after cure so the banner can drape naturally instead of developing board-like hard zones. Clear drying matters on pale fabrics, along cut edges, and around letters where even a small residue can be visible. Washability is helpful for reusable décor, but it should never be confused with outdoor structural durability. Finally, the product instructions matter more than generic online cure-time claims because one fabric adhesive may allow handling quickly while still requiring a day or more before it reaches a stable final bond.
- Clear-drying finish for visible decorative areas.
- Flexible cured film rather than a brittle or board-like patch.
- Compatibility with both the banner base and the letter/trim material.
- Enough working time to align letters before the bond becomes difficult to adjust.
- Controlled dispensing that supports thin application.
- Wash resistance when the finished banner will be cleaned.
- Published cure guidance that the user can realistically follow.
Fabric compatibility matters more than the label on the bottle
Two fabrics with the same fiber name can behave differently because weave density, coatings, dyes, finishes, and thickness alter how quickly adhesive wets and penetrates the surface. A tightly woven polyester panel may accept a thin surface film, while a loose burlap can draw adhesive deep into the openings. Pale quilting cotton may show a dark wet mark if over-saturated, even when the same glue is invisible on thick felt. This is why a small test is not an optional beginner ritual; it is the fastest way to discover the real behavior of the exact materials you are about to use.
| Banner material | General suitability | Main risk to watch | Common banner use |
|---|---|---|---|
| Felt | Excellent for many fabric glues | Absorbs excess glue and can become locally stiff | Letters, shapes, pennants |
| Cotton | Very good | Thin or pale cotton may show bleed-through | Main panel, flags, letters |
| Canvas | Very good | Thickness may require firmer contact and longer support | Wall banners, sturdier signs |
| Polyester | Good when the adhesive is compatible | Smooth finishes can reduce wetting; some types are heat-sensitive | Decorative panels and flags |
| Burlap | Good with testing | Open weave can consume more adhesive and show it through gaps | Rustic wedding or seasonal banners |
| Ribbon and lace | Good for trim | Stretching or over-wetting can distort narrow pieces | Borders, bows, decorative detail |
| Very thin or coated fabric | Use caution | Visible staining, stiffness, or poor adhesion | Only after a successful hidden test |
A four-part sample test before the real project
Prepare a scrap that uses the same base fabric and the same letter or trim material as the final banner. Apply the adhesive in the same amount you plan to use, press it with the same method, and let it reach the product’s full stated cure. Then inspect four things: appearance, bleed-through, flexibility, and edge security. Bend the sample gently, view it from the front in normal room lighting, and check whether the adhesive has created a darker patch or hard ridge. If the sample fails, changing the amount or method before touching the final banner is far easier than trying to hide a glue mark later.
Evidence source: Gorilla lists cotton, denim, polyester, felt, ribbon, sequins and other materials for its fabric glue, advises testing on scrap fabric, and states a minimum 24-hour full cure for that specific product. This is useful industry evidence for the test-first and cure-time principles, not a universal timing rule for every adhesive.
Evidence source: Aleene’s Fabric Fusion describes a permanent fabric-to-fabric bond that dries clear and remains flexible after washing, illustrating the common performance targets users should look for in a banner adhesive.
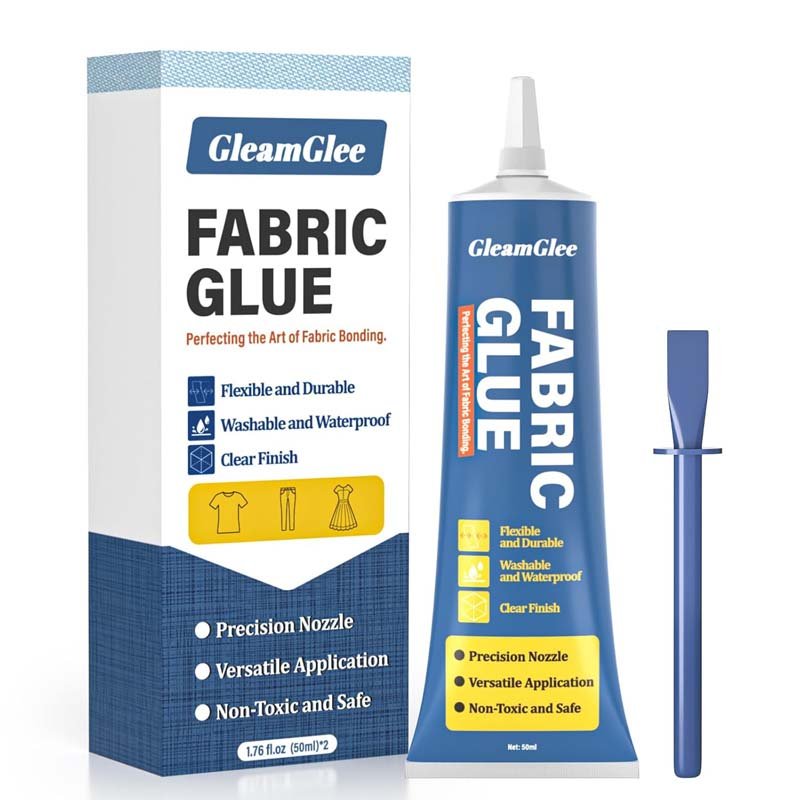
GleamGlee Fabric Glue fits this kind of decorative use because its current product specification describes a clear-drying, flexible, washable no-sew adhesive for materials including cotton, polyester, canvas, felt, ribbon, and lace. The 50 ml format and precision application approach are practical for lettering, trim, and other controlled areas rather than flooding a large panel. Its current directions call for a thin, even coat, about 6-10 minutes for initial setting, and roughly 24 hours for full cure. Those timings should be treated as product-specific instructions, while the banner fabric itself still needs a small compatibility test before a visible project is assembled.
3. How to Plan Banner Size, Flag Count, Letter Spacing, and Materials
Most visibly uneven banners are not adhesive failures; they are planning failures. Once glue touches a porous textile, every late correction becomes harder. Before cutting fabric, decide the finished display width, the length needed at each end for tying or hanging, the number of flags or letters, the width of each piece, and the amount of clear space between them. A dry layout on the real fabric is more valuable than a beautiful screen mock-up because fabric stretches, letters have irregular shapes, and folds or seams can change the visual center. A few minutes of measuring can save an hour of lifting, re-gluing, or recutting pieces later.
Start with the finished length, not the number of scraps you have
For a pennant string, define the usable display length after reserving the two hanging tails. If the total cord or tape length is 180 cm and you want 25 cm free at each end, the usable decorated length is 130 cm. From there, calculate whether your planned flags actually fit. If there are N equal flags of width W with equal gaps G between adjacent flags, a practical layout equation is: required decorated length = N × W + (N – 1) × G. If you also want equal side margins inside the decorated zone, add 2 × margin. Working from this arithmetic prevents the common last-flag problem where the final piece is squeezed in with a visibly different gap.
Use equal-spacing math for letters and repeated motifs
When identical objects need equal spacing across a fixed opening, there is one more gap than there are objects if you want equal clear space at both ends. The formula becomes: gap = (opening width – number of objects × object width) ÷ (number of objects + 1). For eight 5 cm letters arranged across 90 cm, the remaining clear width is 50 cm, so nine equal gaps are about 5.56 cm each. Real letters are rarely identical widths, so this method is most useful for same-size pennants, icons, circles, or block letters; mixed-width words are better aligned with a baseline and optical spacing rather than pure arithmetic.
External calculation tool: ToolHuts Even Spacing Calculator can calculate equal edge gaps and center-to-center spacing from total opening width, object width, and object count. It is useful for repeated pennants or equal-size decorative shapes and does not require any conversational generator on your page.
Dry-lay everything before applying adhesive
Place the finished banner panel or all pennants on a large flat surface, arrange the letters and decorative pieces without glue, and step back at least one to two meters. Check the visual center, not only the ruler. Rounded letters such as O and C often need slightly different optical spacing from straight letters such as H and I. Take a reference photo once the layout looks right, then use removable marks for a baseline, center points, or top edges. Only after the whole word or motif has been reviewed should the first piece be bonded. This order is especially important for names, dates, and long phrases because a 2-3 mm error repeated ten times can become visibly obvious at the final letter.
External layout tool: Cricut Design Space can be used to size text, shapes, uploaded graphics, and project guides before cutting. Its Canvas is helpful for planning proportions, but the physical fabric should still be dry-laid and measured before gluing.
Optional visual mock-up tool: Canva’s banner maker can help a user test colors, text balance, and general visual hierarchy before committing materials. It is a visual planning aid, not a substitute for real dimensions or fabric test pieces.
4. How to Make a No-Sew Fabric Banner with Fabric Glue Step by Step
A clean no-sew banner is built in stages: stabilize the fabric, verify the template, cut consistently, dry-position every decorative element, apply a controlled amount of adhesive, support the bond while it sets, and wait for full cure before hanging. The temptation is to treat glue as the shortcut that eliminates planning, but glue works best when the planning is already finished. Keep the project flat and clean throughout the active work. Avoid working on a bed, carpet, or soft sofa where the panel can distort under pressure, and protect the table with paper or a smooth disposable sheet so accidental adhesive does not transfer back onto the fabric.
Tools and materials
- Banner fabric such as cotton, felt, canvas, burlap, or compatible polyester.
- Felt or fabric for letters, numbers, logos, or decorative shapes.
- Fabric glue suitable for the exact materials being joined.
- Paper or card for a reusable pennant or letter-position template.
- Fabric scissors, ruler or tape measure, removable fabric marker, and clips.
- A clean protective surface, release paper or similar protective sheet, and flat weights if appropriate.
- Ribbon, twill tape, cord, dowel, eyelets, or another hanging system selected separately from the decorative glue joints.
Eight practical steps
- Make one paper or card template and test its size in the actual display location before cutting the entire set.
- Cut the banner pieces consistently and check directional prints so flowers, text, or stripes do not end up upside down.
- Dry-lay all letters and decorative pieces, establish a centerline or baseline, and photograph the approved layout.
- Clean loose fibers and dust from the bonding zones and run a small compatibility test on scrap material.
- Apply a thin, controlled line or film of adhesive. Keep the wet adhesive slightly inside visible cut edges rather than squeezing it directly onto the perimeter.
- Place each piece once, press evenly, and use clips or a flat weight when the material allows. Do not slide the piece repeatedly after contact.
- Keep the banner flat and undisturbed through initial setting, then continue to follow the adhesive manufacturer’s full-cure time rather than hanging as soon as the surface feels dry.
- Before hanging, inspect every letter edge and then inspect the top hem, ribbon, eyelet, loop, or pole connection separately. A perfect decorative bond does not certify a structural hanging point.
For GleamGlee Fabric Glue, the current product guidance uses a thin application, an initial setting window of roughly 6-10 minutes, and about 24 hours for full cure. That makes it suitable for a project planned the day before it will be displayed, not for a banner that must be glued and immediately hung under tension. The distinction between initial set and full cure is one of the most important adhesive habits to learn. Initial set tells you the pieces are becoming stable; full cure is the more relevant stage for folding, repeated handling, cleaning, or asking the bond to tolerate normal flexing.
Reference video 2: OnlineFabricStore’s fabric bunting tutorial shows template use, flag spacing, bias tape, and hanging allowances. Even though the construction is sewn, it is a clear visual lesson in how repeated pennants are planned and how the top connection carries the completed banner.
Reference video 3: Anthony Crammen’s fabric bunting tutorial is a beginner-friendly sewn comparison. It helps a no-sew user see how conventional bunting manages the difficult top attachment before deciding which parts can reasonably be replaced by adhesive.
Evidence source: Paper & Stitch documents a no-sew banner made with fabric scraps, string, and iron-on adhesive, including example dimensions of 2.5 × 5 inch rectangles, 2-3 feet of extra string at the start, and 1-2 inch spacing. Those are project examples rather than universal dimensions, but they show how no-sew construction still depends on measured layout.
5. How to Glue Felt Letters, Fabric Shapes, Ribbon, and Trim Without Visible Marks
Visible glue marks usually come from one of three things: too much adhesive, adhesive placed too close to the exposed edge, or a fabric that absorbs liquid faster than the maker expected. The goal is not to coat every square millimeter until the piece feels saturated. For felt letters and fabric shapes, a thin, even layer near the perimeter plus enough internal coverage to stop the center from bubbling is generally more controllable. For narrow ribbon or lace, a fine line or small dots can be easier to hide. Every choice should be validated on scrap because a pale cotton, loose burlap, shiny polyester, and dense felt will all show excess adhesive differently.
Felt letters: position first, glue second
Felt letters are among the easiest banner elements to bond because felt has a broad fibrous surface and does not have the loose raw edge of many woven fabrics. Cut or place the entire word first, then establish a baseline and check letter spacing from a normal viewing distance. Lift one letter at a time, apply a controlled layer to its back, and return it to the marked position without sliding. Press from the center outward so trapped air and excess adhesive are not pushed toward the visible edge. If a weight is used, place a clean protective layer between the weight and the felt so fibers, dirt, or accidental adhesive do not transfer.
Reference video 4: Doctor Fashion demonstrates applying fabric appliqués with fabric glue. The project is clothing rather than a banner, but the placement, thin application, and pressure concepts transfer directly to felt letters and fabric motifs.
Fabric shapes and appliqué: choose glue or heat based on the finish you want
Fabric shapes are less forgiving than felt when their cut edges fray. Liquid fabric glue is useful for irregular shapes, small details, and materials that should not be ironed, while fusible web can create a very flat appliqué layer on heat-compatible fabrics. The trade-off is process: fusible web requires an iron, correct heat, and manufacturer-specific timing, while liquid adhesive needs controlled wet application and curing. If the banner will be viewed closely, the cleaner option is the one that produces the best sample on the actual fabrics, not the one that is theoretically strongest on a product label.
Evidence source: Utah State University Extension’s appliqué guidance explains that fusible web should be fused according to the timing directions for the specific product and then stitched if the design calls for it. This is a useful authority reference when comparing liquid glue with heat-activated methods.
Reference video 5: Needlepointers’ raw-edge appliqué tutorial visually explains fusible-web appliqué. It is useful as a side-by-side method reference for users deciding between fabric glue and a heat-activated web.
Ribbon, lace, and trim: control tension as carefully as glue amount
Narrow trim can look wavy even when the adhesive bond is sound because the maker stretched the ribbon while positioning it or compressed the base fabric under clips. Mark the trim line first, lay the ribbon in its relaxed state, and work in manageable sections rather than pulling a long strip tight from one end. Lace needs special caution because open areas expose the adhesive beneath; test whether small dots or a very fine line at denser lace sections gives the cleaner result. On a reusable banner, check trim ends and corners after full cure because those points experience more handling than the middle of a straight strip.
How to reduce bleed-through and stiff spots
The fastest prevention method is to reproduce the final joint on scrap and compare a thin application with a deliberately heavier one. After full cure, hold both samples against the light, bend them 90 degrees, and look from the front at normal viewing distance. If the heavy sample has a dark patch or hard ridge and the thin sample remains flat, you have direct evidence for the amount your fabric can tolerate. On highly absorbent felt or burlap, several small controlled deposits can be cleaner than one wet continuous flood. On very thin textiles, moving the bond slightly farther inside the cut edge can also hide the transition.

6. Fabric Glue vs Hot Glue vs Fusible Web vs Fabric Tape vs Sewing
There is no single best construction method for every fabric banner because each option optimizes a different part of the job. Liquid fabric glue offers flexibility and precision without heat. Hot glue is fast and useful for quick decorative assembly but can produce thicker, harder ridges. Fusible web is excellent for flat appliqué when the fabrics tolerate heat. Textile tape is efficient on long straight hems. Sewing remains the benchmark for many structural seams and high-load hanging details. A thoughtful banner often uses two methods: one for clean decorative placement and another for the top edge or other load-bearing parts.
| Method | Best use on a banner | Main advantage | Main limitation |
|---|---|---|---|
| Fabric glue | Felt letters, fabric shapes, ribbon, trim, lightweight hems | No heat; flexible and visually controlled when thinly applied | Needs cure time; can bleed through if over-applied |
| Hot glue | Very fast party décor and some thicker craft materials | Immediate grab and simple equipment | Can create thick or stiff areas; heat can affect some fabrics |
| Fusible web | Flat letters and appliqué on heat-safe fabric | Thin, even bond across the shape | Requires iron/heat and product-specific timing |
| Textile/banner tape | Long straight hems and professional soft-signage edges | Fast, even, no liquid mess | Less convenient for intricate small shapes |
| Sewing | Structural seams, hanging loops, high-use banners | High mechanical reliability and repairability | Requires skill, time, and equipment |
| Glue plus sewing/tape | Reusable or heavier banners | Separates positioning from structural reinforcement | More steps, but often the most robust system |
Fabric glue vs hot glue
Choose liquid fabric glue when the finished textile needs to remain soft, when the bond line is visible, or when you need time to make a precise placement. Choose hot glue when speed is the main objective and a slightly thicker bond line is acceptable. A hot-glue banner made for a one-evening party can be entirely sensible; a rolled, reusable nursery banner with delicate letters may benefit from a softer cured film. Heat is another variable: some synthetic fabrics can deform or mark under hot adhesive, so material testing remains important even when the glue itself sets instantly.
Reference video 6: Becca Beach’s “Quick and Easy No Sew Banner” uses a glue gun and hot glue to attach decorative elements and fabric triangles to ribbon. It provides a direct visual comparison with the slower, more flexible liquid-fabric-glue approach.
Fabric glue vs fusible web
Fusible web is often the cleanest choice for broad, flat shapes because the adhesive layer is distributed before the shape reaches the banner. It is particularly useful for crisp appliqué letters when the fabric can accept heat. Liquid fabric glue wins when the shape is irregular, the material is not heat-safe, the project is already assembled and difficult to iron, or the maker wants to add narrow trim or small details. Neither method should be judged only by speed; the final appearance, fabric hand, edge security, and compatibility with future cleaning matter more than shaving a few minutes from the active assembly time.
Fabric glue vs textile tape vs sewing
Long straight hems are a different geometry from small letters. A purpose-made double-sided textile tape can place a consistent adhesive strip across several feet without the maker having to control liquid thickness continuously. For heavy, reusable, or outdoor banners, sewing or a professional tape system can also create a more predictable load path at the top edge. This is one reason the best advice is not “glue everything.” Use the least complicated method that still matches the joint: precise liquid adhesive for decorative pieces, a straight-line system for hems, and mechanical reinforcement where the banner is actually supported.
Evidence source: Banner Ups describes TexTape as a double-sided fabric hem tape engineered for textile banners and flags, available in 3/8-inch and 3/4-inch widths and intended for no-heat, no-sew hemming. It is a useful example of how professional soft-signage edges are treated as a separate engineering problem.
7. How to Prevent and Fix Common Fabric Banner Problems
Troubleshooting is easier when the symptom is separated from the cause. A letter lifting at one corner does not automatically mean the adhesive is too weak; the corner may have been under-coated, the surface may contain lint, or the banner may have been folded across the letter before full cure. A dark glue mark does not necessarily mean the adhesive dries colored; the fabric may simply be saturated. A stiff patch can be caused by excess thickness even when the cured adhesive is described as flexible. Diagnose the geometry, the fabric condition, the application amount, and the cure history before adding more adhesive.
| Problem | Likely cause | Best first action | When to change method |
|---|---|---|---|
| Dark or shiny glue mark | Too much adhesive or a very thin/absorbent fabric | Stop adding glue; recreate the joint on scrap with a thinner coat | If every tested amount remains visible, use fusible web, stitching, or a different fabric |
| Letter or shape lifts at edge | Poor edge coverage, lint, early handling, incompatible surface | Clean the accessible area, test, then rebond the edge with controlled adhesive | If thick pieces repeatedly lift on a high-flex area, add edge stitching |
| Banner feels stiff | Over-application or too large a fully coated area | Reduce adhesive thickness and bonded area on future pieces | Use stitching or a lighter bonding method if drape is critical |
| Wrinkling or puckering | Fabric stretched during placement or wet adhesive distributed unevenly | Flatten and support the piece before cure; avoid pulling the fabric | Use fusible web/interfacing or sewing if the base fabric is too unstable |
| Uneven letters or flags | No baseline, center marks, or spacing calculation | Re-measure the usable width and mark positions before the next bond | Recut/reposition if the visual error is too large to hide |
| Top edge or hanging point fails | Decorative adhesive was asked to carry structural load | Stop using the banner and reinforce the hanging system | Switch to sewn hem, textile tape, eyelets, pole pocket, or other structural method |
If glue is showing through the front
Do not try to solve a visible wet mark by immediately rubbing the face of the fabric with water, solvent, or cleaner. Rubbing can spread the adhesive beyond the original boundary and may alter the dye or finish. If the adhesive is still fresh and a small amount has squeezed out at an edge, use a clean tool to lift the excess without smearing it across a larger area, following the adhesive manufacturer’s cleanup instructions. For a future piece, reduce the amount, keep the glue farther inside the visible edge, and test a narrower line. If the mark is internal saturation rather than surface residue, waiting for full cure before judging the final appearance is usually more sensible than aggressive cleaning.
If a letter or appliqué starts lifting
Lift only the loose portion; do not peel back a section that is still securely bonded. Remove obvious lint or loose fibers from the accessible area, check whether the lifted surface feels glossy or coated, and repeat a small compatibility test if you have matching scrap. Apply a thin layer just inside the loose edge, press it back to the original position, protect the surface, and support it through the product’s cure period. If the same thick letter repeatedly lifts where the banner is folded or rolled, the real solution may be changing storage practice or adding a few discreet edge stitches rather than continuing to build up more adhesive.
If the banner is wrinkled or the flags are uneven
Wrinkles can be created by pulling the base fabric tight while the decorative piece is relaxed, or by pressing one area heavily while another remains unsupported. Work on a rigid flat surface and keep the base fabric in its natural, unstretched state. Uneven spacing is a measurement problem, so solve it with a new baseline and center marks rather than trying to “eyeball” the next pieces into balance. If the adhesive is not yet fully cured and the product instructions permit repositioning, correct the layout early; otherwise, forcing a cured joint apart may damage the fabric more than the spacing error is worth.
8. Indoor, Outdoor, Reusable, and Large Fabric Banners: How Durable Does the Construction Need to Be?
The environment changes what “durable” means. An indoor birthday banner may hang for four hours in still air, while a classroom banner can be installed and removed repeatedly for years. An outdoor textile sign may face humidity, ultraviolet light, temperature cycling, rain, and thousands of small flexing movements from wind. These are not equivalent service conditions. A washable fabric adhesive can be useful for a reusable banner, but wash resistance alone does not prove long-term outdoor performance or structural capacity. Decide how often the banner will be handled, how it will be stored, and what loads reach the hanging points before choosing the final construction method.
Indoor decorative banners
For indoor décor, fabric glue is often enough for letters, appliqués, trim, and other lightweight pieces because the project experiences little environmental stress. The bigger practical issue is handling: people tend to hang a banner as soon as the surface feels dry, then discover a corner lifting because the bond had not reached full cure. Build the banner at least one full cure cycle before the event whenever possible. If the top edge is attached to ribbon, dowel, or eyelets, inspect those connections separately and make sure the wall hook, cord, or rod is appropriate for the completed banner rather than only for the empty textile panel.
Reusable banners: storage can matter as much as adhesive choice
A banner that survives its first event can still be damaged by careless storage. Tight folding across a felt letter places a sharp bend directly through the bond line, while stacking the banner before full cure can transfer adhesive or compress raised decorations. When practical, store a finished banner flat or loosely rolled around a large tube, with decorative elements facing outward and protected from abrasion. Before each reuse, inspect corners, letter tips, ribbon ends, and the top attachment. If the banner is washable, follow both the fabric care limits and the adhesive instructions rather than assuming every component can tolerate the same water temperature, drying method, or ironing temperature.
Outdoor banners: moisture is only one of several stresses
A product may be described as waterproof or washable, yet the banner can still fail outdoors because wind repeatedly flexes the top edge, ultraviolet exposure weakens a textile, or a wet fabric becomes heavier. Treat outdoor use as a system question: fabric, adhesive, seam or hem, hardware, and mounting all need to match the environment. For a small sheltered porch decoration used for a weekend, a tested flexible fabric adhesive may be reasonable for decorative pieces. For a large banner exposed to wind, use a reinforced hem and a hanging method designed for outdoor loads instead of relying on the same glue line used for the lettering.
Large or commercial textile banners
Scale increases both weight and the consequences of failure. Once a banner becomes several feet wide, the top edge can see meaningful tension even indoors, and outdoor gusts multiply the load. Large soft-signage banners are normally finished with techniques developed specifically for textile hems and mounting. Liquid fabric glue can still be useful for a decorative applique, label, or small repair, but it should not automatically replace engineered edge finishing. If a banner will hang above people, span a public walkway, or be installed outdoors for extended periods, use a purpose-made structural system and follow the mounting hardware manufacturer’s guidance rather than improvising with a craft-only joint.
Final pre-hanging quality check
Before the banner leaves the worktable, check it as a finished object rather than a collection of successful glue spots. Confirm the adhesive has reached its stated full cure, every letter and trim end lies flat, no visible wet or dark patch remains, and the banner still drapes naturally. Measure the outer dimensions once more, confirm the hanging tails or hardware are symmetrical, and lift the banner gently by the actual hanging points for a short inspection. If any structural edge opens, stop and reinforce it before display. This simple final check catches the kind of failure that a beautiful front-facing photo can easily hide.
Conclusion
Fabric glue is a practical way to build many fabric banners without sewing, but the cleanest and most durable results come from using it for the jobs it handles best. Choose a flexible, clear-drying adhesive that suits the actual fabrics, test a sample, calculate the layout before cutting, apply a thin controlled layer, and allow full cure before hanging or storing the project. Treat the top edge and hanging hardware as structural elements that may require tape, sewing, eyelets, or another reinforcement method. For users who prefer a precise no-sew liquid adhesive, GleamGlee Fabric Glue offers a 50 ml clear, flexible format designed for common craft fabrics and detailed application; it should still be used with the same test-first, thin-coat, full-cure discipline described throughout this guide. A good banner is not the one with the most glue. It is the one where every material, joint, measurement, and load has been considered before the first drop is applied.
Frequently Asked Questions
Can fabric glue hold felt letters on a fabric banner?
Yes, felt letters are one of the more suitable banner applications for fabric glue because felt provides a broad fibrous contact surface and the letters are usually lightweight. The best method is to dry-position the full word first, mark a baseline, apply a thin controlled layer to each letter, and press without sliding. Test the exact felt and base fabric first, especially on thin or pale cotton, then allow the adhesive to reach its full stated cure before hanging the banner.
What is the best fabric for a no-sew fabric banner?
Felt, medium-weight cotton, and light-to-medium canvas are forgiving choices because they are easy to cut, relatively stable, and usually provide enough body for letters and decorations. Felt is especially convenient because cut edges do not fray in the same way as woven cloth. Burlap can work for rustic décor, while polyester depends more on finish and heat sensitivity. The most important step is to test the chosen adhesive on the exact fabric because thickness, coating, dye, and weave can change the result.
How long should fabric glue dry before I hang a banner?
Use the full-cure time published for the adhesive rather than the moment when the surface first feels dry. Many fabric adhesives become stable enough for light handling before they reach final strength. As one product-specific example, the current GleamGlee Fabric Glue instructions use roughly 6-10 minutes for initial setting and about 24 hours for full cure. Other brands use different schedules, so the bottle or technical instructions should control. If the event is tomorrow, make the banner today rather than gluing it immediately before display.
Is fabric glue better than hot glue for fabric banners?
Neither is always better. Fabric glue is usually preferable when flexibility, a clean visible finish, and controlled fabric-to-fabric bonding are important. Hot glue is useful when the banner is a fast temporary craft and immediate grab matters more than a soft bond line. Hot glue can create thicker or stiffer areas and introduces heat, while liquid fabric glue needs more waiting time. A strong project can also use different methods in different areas, such as fabric glue for letters and a reinforced system for the top edge.
Can I use fabric glue on an outdoor banner?
Possibly for decorative details on a small, sheltered banner, but outdoor suitability cannot be decided from the word “washable” alone. Outdoor banners face water, ultraviolet exposure, temperature change, repeated flexing, and wind load. Test the adhesive and fabric combination, then give special attention to hems, grommets, loops, or other hanging points. A larger outdoor textile sign should normally use reinforced edge construction or a purpose-made banner finishing system instead of relying on a craft glue line as its only structural support.
How do I stop fabric glue from showing through a banner?
Start with a scrap test using the exact two fabrics. Apply less adhesive than you think you need, keep the wet line slightly inside the visible edge, and avoid soaking thin or open-weave cloth. Press evenly rather than crushing the joint until glue squeezes out. On very thin fabrics, compare liquid glue with fusible web or a stitched method if every test remains visible. Do not aggressively rub a wet mark with an unverified solvent, because spreading the adhesive or changing the dye can create a larger permanent blemish.
Should I sew a fabric banner even if I use fabric glue?
For many lightweight indoor banners, you may not need to sew the decorative letters or shapes at all. Sewing becomes more valuable at structural points: long hems, hanging loops, pole pockets, high-flex edges, large reusable banners, or outdoor installations. A hybrid construction is often sensible because glue can place decorative pieces accurately while stitching or textile tape carries the repeated mechanical load. The decision should be based on where the force travels through the finished banner, not on a blanket rule that every glued project must or must not be sewn.