 Skip to content
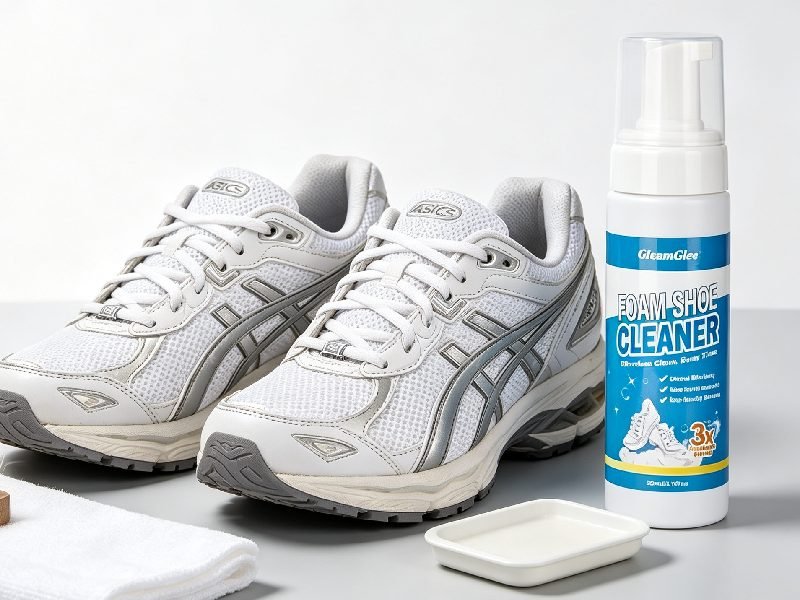
Shoe cleaning looks simple until a harmless-looking shortcut leaves a permanent mark. Dish soap may work beautifully on a rubber sole but dry out certain leather finishes. Baking soda may brighten white canvas while becoming trapped inside mesh. A washing machine may remove visible dirt yet place unnecessary stress on bonded overlays, foam padding, printed graphics, and sole edges. Good shoe care begins by asking what the shoe is made from, not merely what color it is.
The best solution for cleaning shoes is a mild, low-residue cleaner chosen for the shoe material and stain. Canvas, mesh, rubber, and many synthetic uppers usually tolerate diluted mild soap or a dedicated sneaker cleaner. Smooth leather needs a leather-safe product, while suede and nubuck require dry brushing and specialist care. Patch-test first, use limited moisture, clean by hand, and air-dry away from heat.
Imagine two pairs of white sneakers cleaned after the same rainy weekend. One pair is brushed dry, cleaned panel by panel, wiped carefully, and left to dry naturally. The other is soaked in strong detergent, scrubbed until the fabric feels rough, and placed near a heater. Both may look cleaner at first, but only one has been cleaned without quietly shortening the life of the materials, coatings, and adhesive joints.
What Is the Best Shoe Cleaning Solution?
The best shoe-cleaning solution is a mild formula that removes dirt without leaving residue, fading color, drying the surface, or soaking the construction. Diluted mild soap can handle routine soil on many washable materials, while dedicated shoe-cleaning foam offers more controlled application. Leather, suede, nubuck, coated uppers, and mixed-material sneakers require products developed for their specific surface characteristics.
Cleaning Power and Surface Safety
A cleaner should do more than create dramatic foam. Effective cleaning depends on how well a formula wets the dirty area, loosens particles, surrounds oily soil, keeps removed dirt from settling back onto the surface, and wipes away without leaving a sticky film. A formula that produces heavy foam may feel powerful, but foam volume alone does not prove better cleaning or safer material compatibility.
Everyday shoe dirt is rarely a single substance. Dust, dried mud, skin oil, food splashes, road residue, salt, and pollution can appear together on the same pair. Dry particles usually respond best to brushing before moisture is added. Greasy marks require better oil-lifting performance, while mineral deposits may need controlled spot treatment. Treating every mark with a stronger concentration often removes surface finish along with the dirt.
A practical shoe cleaner should provide enough working time for gentle brushing while remaining easy to wipe away. Low residue is especially important on mesh, knit, stitching, and padded collars because detergent can become trapped in absorbent structures. Once dry, trapped product may leave stiffness, dull patches, renewed dirt attraction, or an unpleasant feel. Results should always be judged after complete drying rather than while the material is wet and temporarily darker.
Mild Soap or Dedicated Cleaner
A few drops of clear, mild soap mixed into approximately 240 milliliters, or one cup, of lukewarm water can be a sensible starting point for washable canvas, durable mesh, synthetic uppers, and rubber. That dilution is a conservative household method rather than a universal technical formula. The care label supplied by the shoe manufacturer should always take priority when it gives specific cleaning instructions.
Household soap remains popular because it is inexpensive and immediately available. Its weakness is inconsistency. Dishwashing liquids may contain strong degreasers, fragrance, colorants, moisturizing agents, antibacterial ingredients, or additives developed for cookware rather than footwear. A product that performs well on a rubber outsole may behave very differently on a printed overlay, coated fabric, absorbent lining, or finished leather panel.
A dedicated shoe cleaner is often the more predictable choice when footwear is cleaned frequently, contains several materials, has a high purchase value, or needs a consistent finish for resale, retail display, content creation, or professional service. Purpose-developed formulas can be adjusted for foam density, viscosity, application control, fragrance, wipe-off performance, packaging stability, and compatibility with common footwear materials.
What “Best” Really Means
“Best” changes with the job. A parent cleaning playground dirt from a child’s white sneakers needs speed, easy wiping, and material safety. A sneaker collector caring for suede trainers needs minimal moisture and careful nap restoration. A hotel, school, footwear store, or cleaning service may value repeatable dosage, low residue, pleasant odor, efficient labor, and packaging that prevents leaks during storage and transport.
| Cleaning Situation | Recommended Starting Method | Moisture Level | Main Risk |
|---|---|---|---|
| Light dust on canvas | Dry brushing, then mild cleaner | Low | Water rings or dye transfer |
| General dirt on mesh | Low-residue cleaning foam | Low | Snagging or deformation |
| Dirt on smooth leather | Leather-safe cleaner | Very low | Finish removal or drying |
| Soil on rubber soles | Mild soap or sneaker cleaner | Medium | Dirty-water transfer |
| Surface marks on suede | Dry brush or suede eraser | Minimal | Flattened nap |
| Mixed-material sneaker | Clean each area separately | Low | Cross-contamination |
| Grease on textile | Compatible degreasing cleaner | Controlled | Expanding the stain |
| Unknown mark | Patch-test and begin mildly | Minimal | Chemical incompatibility |
No universal mixture can deliver the lowest risk across every material. Reliable shoe care depends on matching cleaning strength to the surface and stopping when the risk of further treatment becomes greater than the visual benefit. A faint remaining mark is often preferable to a bright patch surrounded by faded dye, flattened texture, or damaged coating.
When Stronger Treatment Is Needed
Stronger cleaning may be necessary for oil, transferred dye, aged grime, adhesive residue, grass stains, or contamination that has moved below the visible surface. Escalation should begin by choosing a more appropriate product rather than simply doubling the amount of soap, increasing brush pressure, or soaking the entire shoe for a localized problem.
Allow the first treatment to dry fully before deciding whether it failed. Canvas, mesh, suede, and leather often appear darker while damp. Reapplying cleaner too soon can create uneven brightness, tide marks, or residue. Once dry, inspect whether the remaining discoloration is removable soil or a permanent change caused by wear, oxidation, heat, sunlight, aging foam, or adhesive migration.
A controlled escalation sequence reduces unnecessary damage:
- Confirm the material and finish again.
- Identify the stain as closely as possible.
- Select a stain-specific, material-compatible product.
- Patch-test in a hidden area.
- Increase contact time carefully before increasing concentration.
- Wipe away loosened soil between attempts.
- Stop immediately if color, gloss, flexibility, or texture changes.
Some yellowing and fading cannot be reversed through cleaning because the material itself has changed. Honest product guidance should distinguish cleaning from restoration. Promising complete recovery for every aged white shoe may create unrealistic expectations and encourage unsafe over-treatment.
Which Cleaner Is Safe for Each Material?
Cleaner safety depends on the upper, surface finish, lining, color system, and construction method. Canvas and many synthetic textiles can usually tolerate gentle water-based cleaning. Smooth leather needs limited moisture and finish protection. Suede and nubuck call for dry methods or specialist products. Mixed-material footwear should be cleaned section by section according to the most sensitive component.
Canvas and Mesh
Canvas is usually more tolerant of water-based cleaning than leather or suede, but heavy soaking can still cause rings, dye migration, stiffness, shrinkage, or stress around seams. Begin with dry brushing, remove the laces, and apply a mild solution using a soft brush or microfiber cloth. Small working areas make it easier to control dirty water and prevent uneven treatment.
Mesh and knitted uppers need a lighter touch because fine yarns, bonded reinforcements, printed overlays, and foam-backed structures can distort under aggressive brushing. A brush should glide across the surface rather than dig into the openings. Repeated gentle passes are safer than one hard scrub, especially around toe boxes, collars, logos, and decorative films.
Foam should be placed on the brush or cloth rather than pumped across the entire shoe. Clean one panel for roughly 20 to 30 seconds, wipe away loosened soil, and inspect before repeating. The timing is only a practical reference; delicate mesh may need less contact, while textured synthetic fabric may require several mild passes.
White canvas can sometimes tolerate mildly alkaline household treatment, but colored canvas needs careful dye-transfer testing. Press a lightly damp white cloth against a hidden area and check whether color moves onto the cloth. Any transfer signals that wet cleaning should be limited and that prolonged soaking or machine washing carries greater risk.
Leather and Coated Uppers
The term “leather shoe” covers several surfaces that behave differently. Smooth finished leather, aniline leather, patent leather, coated split leather, synthetic leather, and polyurethane-coated fabric may appear similar in photographs while responding differently to water, degreasers, alcohol, conditioner, and friction.
For ordinary dirt on smooth finished leather, apply a leather-safe cleaner to a soft cloth and wipe in even movements. Avoid pouring cleaner directly onto the shoe because concentrated liquid can darken absorbent areas or enter seams. A second, lightly damp cloth can remove loosened soil and remaining product before the shoe is allowed to dry naturally.
Some natural leather benefits from a compatible conditioner after drying, especially when cleaning has removed surface oils. Conditioner should not be applied automatically to patent leather or synthetic coatings. Products developed for natural hides may create unwanted gloss, smear marks, or sticky residue on artificial surfaces.
Patent leather generally needs gentle wiping rather than brushing. Faux leather should receive minimal moisture, particularly when cracking, peeling, or edge lifting has already begun. Cleaning cannot repair a coating that is separating from its backing. Strong degreasers, bleach, abrasive powders, and prolonged soaking can make the existing damage more visible.
Suede and Nubuck
Suede and nubuck carry a higher cleaning risk because their appearance depends on a fine raised fiber structure. Water can create rings and dark patches, while aggressive brushing can flatten or roughen the nap. Oil may move beneath the surface and become difficult to remove without changing the color or texture around the stain.
Allow wet mud to dry completely before brushing. Use a dedicated suede or nubuck brush and work in a consistent direction. A suede eraser can help with dry surface marks, but pressure should remain controlled. Vigorous rubbing may polish the fibers and create a shiny area that looks different from the surrounding material.
When liquid treatment is necessary, apply a specialist cleaner sparingly. Repeatedly treating one small spot can create a clean circle, so a light and even treatment across the visible panel may produce a better result. After full drying, brush gently to lift the nap and restore a more uniform appearance.
Oil stains on suede often require patience or professional care. Absorbent powder may reduce a fresh mark, but old oil can penetrate deeply. Valuable, hand-dyed, vintage, or limited-edition footwear should not become a test surface for several household chemicals used one after another.
Mixed-Material Shoes
Modern sneakers often combine mesh, smooth synthetic overlays, suede, reflective film, rubber, painted foam, textile lining, printed logos, and bonded decorative panels. One cleaning liquid may touch several surfaces within a few centimeters, creating a much greater compatibility challenge than cleaning a simple canvas shoe.
| Material | Preferred Tool | Suitable Cleaner Type | Main Cleaning Risk |
|---|---|---|---|
| Canvas | Soft brush | Mild water-based cleaner | Rings and color bleeding |
| Mesh or knit | Very soft brush or cloth | Low-residue foam | Snagging and distortion |
| Smooth leather | Soft cloth | Leather-safe cleaner | Finish loss |
| Faux leather | Microfiber cloth | Gentle surface cleaner | Peeling and cracking |
| Patent leather | Soft cloth | Mild wipe-on product | Scratching and dullness |
| Suede | Suede brush | Dry method or specialist cleaner | Flattened nap |
| Nubuck | Nubuck brush | Specialist nubuck product | Darkening and texture change |
| Rubber outsole | Medium brush | Mild detergent solution | Soil transfer to the upper |
| Foam midsole | Soft or medium brush | Low-residue cleaner | Surface abrasion |
| Printed overlay | Cloth or very soft brush | Mild cleaner | Lifting or fading |
Clean the most delicate material first, using separate tools where practical. Protect nearby panels with a clean cloth and keep outsole brushes away from pale uppers. Dirty water from rubber tread can permanently grey mesh, stitching, or laces even when the cleaning formula itself is safe.
When the material cannot be identified confidently, follow the footwear care label or contact the manufacturer. Synthetic suede and coated textiles can closely imitate natural materials, making visual guessing unreliable. Conservative cleaning is the better choice whenever the surface construction remains uncertain.
How Do You Clean Shoes Step by Step?
Safe shoe cleaning follows a controlled hand-cleaning process: identify the materials, remove laces and loose soil, test the cleaner in a hidden area, work in small zones, wipe away residue, and air-dry at room temperature. Small amounts of product and repeated gentle passes are usually safer than soaking, machine agitation, heavy scrubbing, or forced heat.
Inspect and Prepare
Start by examining the footwear in strong natural light. Look for cracks, loose stitching, lifted sole edges, peeling coatings, weak decorations, color transfer, and old water marks. Cleaning may make existing wear more noticeable, so understanding the starting condition prevents later confusion about whether a defect was already present.
Remove laces and removable insoles. Laces hold a surprising amount of visible soil and are easier to clean separately. Insoles should also be treated outside the shoe because soaking the entire construction to reach them can trap moisture inside foam, lining, and padded collars.
Prepare several tools instead of using one brush for every surface:
- A dry, soft brush for dust and loose mud.
- A very soft brush or microfiber cloth for the upper.
- A medium brush for rubber soles and textured tread.
- A clean cloth for wiping away soil and residue.
- A white cloth for checking dye transfer.
- White absorbent paper for supporting the shape during drying.
Knock the soles together outdoors and remove as much dry dirt as possible before adding cleaner. Every dry particle taken away early reduces the volume of muddy liquid that must later be managed. Existing separation points should remain as dry as possible until a suitable repair method is selected.
Patch-Test the Cleaner
A patch test should reproduce the planned cleaning method on a discreet area. Choose a section approximately one to two centimeters wide near the inner heel, tongue edge, or low side panel. Use the same dilution, tool, contact time, and wiping process intended for the visible surface.
Allow the test to dry completely before judging it. Wet fabric, leather, and suede may temporarily appear darker, and early inspection can lead to unnecessary reapplication. Compare the test area under daylight and indoor lighting because gloss or color shifts may appear differently from various angles.
Check for fading, darkening, dye transfer, stiffness, stickiness, loss of gloss, unusual shine, powdery residue, flattened nap, rough fibers, or lifted printed details. A successful patch test lowers the risk but cannot guarantee identical behavior across every panel. Different sections may use separate coatings, dyes, or material batches.
Professional cleaning services and retailers should photograph the starting condition and test result. Basic documentation creates a clear record and supports consistent staff training. It also helps distinguish normal wear from damage that could result from cleaning.
Clean by Zones
Work one material and one panel at a time. Applying cleaner across the whole shoe before brushing may allow liquid to dry unevenly, carry soil into seams, or reach sensitive areas. Controlled zones keep the process manageable and make it easier to stop when the surface responds unexpectedly.
Apply a small amount of cleaner to the brush or cloth. A ready-to-use foam may need only one or two pumps for a small section, although the product label remains the correct dosing reference. Brush lightly for 20 to 30 seconds, wipe away loosened dirt, and inspect before repeating.
Keep separate tools for the outsole and upper. Rubber tread collects road grime, oils, and dark particles that can transfer onto white mesh or stitching. Rinse brushes frequently and change cloth sections as they become grey. Continuing with a dirty tool can redeposit soil faster than the cleaner removes it.
Clean laces in a separate mild solution and rinse them thoroughly when the material permits. Removable insoles should receive minimal moisture unless their care instructions allow washing. Foam-backed insoles can take a long time to dry and may develop odor when reinserted too soon.
Dry Without Heat
After cleaning, blot away excess moisture and open the tongue so air can move through the interior. Place the footwear in a ventilated room away from radiators, tumble dryers, heat guns, hair dryers, and strong direct sunlight. Rapid heating may alter foam shape, leather flexibility, coatings, printed details, and bonded joints.
White absorbent paper can support the shape and draw moisture from the lining. Avoid colored newspaper because ink may transfer onto damp material. Pack the shoe gently rather than forcing the upper outward, and replace the paper when it becomes wet.
| Cleaning Level | Approximate Drying Range | Typical Conditions |
|---|---|---|
| Light surface wipe | 2–6 hours | Good airflow and minimal moisture |
| Moderate hand cleaning | 6–12 hours | Textile upper in a ventilated room |
| Damp padded sneaker | 12–24 hours | Thick tongue or foam lining |
| Heavily wetted shoe | More than 24 hours | Absorbent materials or humid air |
| Leather surface cleaning | Several hours | Minimal moisture and no direct heat |
| Suede spot treatment | Several hours to overnight | Natural drying before brushing |
Drying times vary with humidity, airflow, padding, material thickness, and the amount of liquid used. A shoe may feel dry outside while moisture remains inside the tongue or insole. Reinsert laces and insoles only when every component is fully dry, and avoid wearing footwear while bonded areas remain damp.

How Do You Remove Common Shoe Stains?
Effective stain removal begins with identifying the contamination and selecting the lowest-risk method. Let mud dry before brushing, blot fresh oil before adding liquid, and treat white shoes according to their material rather than color alone. Work from the outer edge inward, wipe away lifted soil promptly, and allow complete drying before deciding whether another treatment is necessary.
Mud and Ground-In Dirt
Fresh mud spreads easily and can be pushed deeper into fabric when rubbed. Allow heavy mud to dry on canvas, mesh, leather, suede, and nubuck before beginning. Flex the shoe gently, tap the soles together, and brush off loose deposits with a tool suited to the material.
Use soft bristles on textile uppers and a medium brush on durable rubber. An old toothbrush or blunt dirt pick can reach outsole tread, but sharp metal objects may cut rubber or slip into the upper. Remove as much dry soil as possible before introducing liquid.
Apply a mild cleaner to remaining marks, working from the upper sections downward. Dirty water naturally moves with gravity, so top-to-bottom cleaning prevents runoff across finished panels. On pale footwear, rinse the brush or change cloth sections frequently to avoid grey streaks.
Mesh can trap fine mineral particles below the visible surface. One hard scrub may damage yarns without reaching the soil. Two or three light passes, with wiping between each pass, usually provide better control. Some dark marks on rubber are abrasion or pigment transfer rather than removable dirt, and excessive scrubbing can wear down texture without improving appearance.
Oil and Grease
Blot fresh oil with a clean, absorbent white cloth and avoid rubbing. Friction can enlarge the stain and push contamination further into fibers. Adding water immediately may also spread oil, especially on absorbent canvas, mesh, suede, or uncoated leather.
A dry absorbent powder may help draw out some recent oil from suitable textiles, but the material must be patch-tested first. Powder can become trapped in dark mesh, stitching, or suede nap. Remove every trace before applying a liquid cleaner.
Use a material-compatible product with controlled degreasing ability. Apply a small amount around the outer boundary and move inward. That direction reduces spreading. Blot away lifted contamination instead of forcing it through the material, and allow the area to dry before judging whether another pass is needed.
| Stain Type | First Action | Cleaning Approach | Main Mistake to Avoid |
|---|---|---|---|
| Dry mud | Brush before wetting | Mild cleaner after dry removal | Smearing wet soil |
| Fresh oil | Blot and absorb | Controlled degreasing cleaner | Rubbing or flooding |
| Grass | Treat promptly | Material-safe stain product | Bleach on unknown surfaces |
| Salt marks | Brush, then spot-treat | Mild specialist treatment | Saturating leather or suede |
| Food residue | Remove solids first | Low-residue cleaner | Hot water on unknown stains |
| Rubber scuff | Wipe, then brush lightly | Mild cleaner | Heavy abrasion |
| Odor | Remove and dry insoles | Interior-safe treatment | Covering dampness with fragrance |
| White-shoe soil | Identify the material | Material-specific cleaning | Treating every white shoe alike |
Old grease may have oxidized or penetrated foam, leather, or suede. Strong treatment can lighten the mark while leaving a different texture. Professional care is often safer for valuable suede, delicate leather, or large oil stains.
White Shoes and Yellowing
White shoes reveal dirt quickly, but “white” is not a material category. Canvas, mesh, coated leather, natural leather, rubber, foam, synthetic suede, and painted surfaces all require different cleaning methods. Identify every panel before selecting a product.
Clean the upper and sole with separate tools. Dirty outsole water is a common source of grey streaks on pale mesh and stitching. Remove laces, dry-brush the upper, apply cleaner with a soft tool, wipe away residue, then clean the midsole and outsole separately.
Baking soda can help on selected white canvas or durable rubber, but abrasive scrubbing may roughen fibers and make future dirt attach more easily. Powder can also remain inside mesh or seams. A low-residue sneaker foam is often easier to control for frequent white-shoe maintenance.
Yellowing does not always mean dirt. Foam oxidation, heat exposure, sunlight, adhesive migration, previous chemical treatment, and material aging can permanently change color. Stronger cleaner may produce one bright patch while leaving the surrounding material yellow. Cleaning should stop when the remaining discoloration is clearly part of the material rather than a removable surface deposit.
Odor and Interior Cleaning
Shoe odor often comes from damp insoles, sweat residue, slow-drying padding, and trapped debris rather than the visible upper. Cleaning only the outside may create a fresh appearance while the odor returns after the next wear.
Remove insoles and dry them separately. Use minimal liquid because foam-backed components can retain water for more than a day. A lightly damp cloth or an interior-safe cleaner offers better control than pouring solution into the shoe.
Clean the toe area, heel cup, and tongue lining carefully because moisture and debris often collect there. Fragrance may improve the immediate experience but cannot replace soil removal and complete drying. A strong scent can simply cover dampness for several hours.
Reduce recurring odor by rotating footwear, drying shoes after rain or exercise, removing insoles when appropriate, wearing clean socks, and storing shoes in a ventilated area. Severely contaminated or physically damaged insoles may need replacement rather than repeated soaking and fragrance treatment.

Are Household Cleaners Safe for Shoes?
Household cleaners can work on selected footwear when diluted and used cautiously, but none is safe for every material. Mild dish soap may clean durable canvas, mesh, synthetics, and rubber. Baking soda can help on some white surfaces but may leave residue. Vinegar and alcohol are limited spot treatments. Bleach and strong solvents present much greater risks.
Dish Soap
Clear, mild dish soap can remove ordinary dirt and light oily residue from many washable surfaces. Its availability and low cost make it a common starting point. The drawback is that dishwashing formulas are created for hard kitchen surfaces rather than the combination of textiles, foams, coatings, prints, dyes, and adhesives found in footwear.
Some formulas contain strong degreasers, dyes, heavy fragrance, moisturizers, antibacterial ingredients, or specialty additives. Those components may be harmless on plates yet unpredictable on finished leather, reflective film, absorbent mesh, or coated synthetic materials.
Dilute only a few drops in lukewarm water and apply the mixture with a damp brush or cloth. Remove residue using a second clean cloth. Concentrated dish soap should never be poured directly onto canvas, mesh, suede, or leather.
A stiff or tacky feel after drying often indicates remaining detergent rather than remaining dirt. Adding more product will worsen the problem. Dish soap is best reserved for uncomplicated, washable footwear and should not be the first choice for suede, nubuck, vintage shoes, metallic finishes, or expensive mixed-material sneakers.
Baking Soda and Vinegar
Baking soda offers mild alkalinity, odor absorption, and gentle abrasive action. It can help on selected white canvas or rubber, but powder may remain inside mesh, stitching, or textured soles. Heavy scrubbing can roughen delicate surfaces and create a dull patch.
Vinegar is acidic and may assist with certain salt or mineral marks. On suede or nubuck, only a tiny, controlled amount should be considered, followed by complete drying and gentle brushing. Broad application may create water rings, darkening, or uneven texture.
Mixing baking soda and vinegar creates visible bubbling, but the reaction partly neutralizes both ingredients. The fizz looks active without guaranteeing better cleaning. Residue can remain on absorbent materials, and the mixture may be difficult to distribute evenly.
Natural ingredients can still affect dyes, coatings, leather finishes, and adhesive systems. Household mixtures should be used as narrow, material-specific treatments rather than universal formulas. A dedicated cleaner usually provides more predictable concentration, application, stability, and wipe-off behavior.
Alcohol and Strong Solvents
Rubbing alcohol can dissolve certain isolated marks and evaporates faster than water, but it may also affect dyes, printed graphics, coatings, synthetic films, and bonded components. Use it only as a small spot treatment after a complete patch test.
Apply a tiny quantity to a white cloth or cotton swab rather than pouring it onto the shoe. Work in a ventilated area, keep the product away from flames and heat, and stop immediately if color transfers or the finish becomes dull.
Acetone, nail-polish remover, paint thinner, and industrial solvents carry far greater risk. They may soften plastics, dissolve coatings, remove pigment, deform foam, or weaken adhesive systems. Their ability to remove a mark does not mean they can preserve the surface underneath.
Adhesive residue on footwear should not automatically be treated with strong solvent. Mechanical lifting, a specialist remover, or professional treatment may protect the original finish more effectively. Solvent damage is often permanent and more visible than the residue that prompted the cleaning attempt.
Bleach and Chemical Mixing
Bleach may whiten a limited range of durable white materials, but it can also remove color from the material itself. An area can appear cleaner because the fibers or coating have been chemically altered rather than because soil has been safely removed.
Potential problems include yellowing after drying, weakened fibers, damaged colored stitching, uneven pale patches, changed rubber appearance, lifted graphics, and lingering odor. Bleach should only be considered when the footwear care instructions explicitly permit it.
Never mix bleach with vinegar, ammonia, alcohol, disinfectants, toilet cleaners, or unknown products. Dangerous gases or unpredictable reactions may occur. Good ventilation and label compliance are essential whenever a strong household chemical is handled.
Before escalating to bleach, determine whether the remaining problem is dirt, oxidation, transferred pigment, aging foam, or previous chemical damage. Bleach cannot restore an aged material to its original condition and may make the contrast worse.
Do Shoe Cleaners Damage Shoes?
Shoe cleaners can damage footwear when the formula is unsuitable, too concentrated, applied excessively, or combined with soaking, hard brushing, and forced heat. Common results include fading, residue, stiff fabric, flattened suede, dry leather, lifted graphics, and stress around bonded seams. Material identification, patch-testing, limited moisture, clean tools, and natural drying reduce those risks considerably.
Discoloration and Residue
Color change can come from the cleaner, dirty tools, uneven wetting, unstable dye, or the shoe finish itself. Dark materials may fade, while pale materials can become grey when outsole dirt is transferred by a contaminated brush.
Inspect a patch test only after complete drying. Look for color loss, darkening, increased shine, dull areas, powdery residue, stickiness, stiffness, rings, or dye transfer onto a white cloth. Some changes become visible only under daylight or when viewed from an angle.
Residue is common when too much detergent is used on mesh or canvas. Rinsing repeatedly can then create a second problem by saturating the shoe. Prevention works better: start with a small amount of low-residue cleaner and wipe the area several times using a clean, lightly damp cloth.
Claims such as “safe for every shoe” deserve caution unless supported by broad testing. A formula that performs well on white coated synthetic leather may behave differently on red mesh, black suede, metallic film, or printed textile. Clear compatibility guidance is more useful than an unlimited promise.
Water and Bonded Construction
Modern footwear may combine stitching, contact adhesives, heat-activated films, pressure-sensitive components, molded foam, laminated fabric, and decorative bonded overlays. Brief surface cleaning does not automatically cause separation, but prolonged soaking increases the chance of moisture reaching hidden interfaces.
Water can enter through stitch holes, worn sole edges, cracked coatings, eyelets, exposed foam, or existing separation points. Internal materials then dry slowly and may swell, distort, transfer dye, or place stress on bonded areas.
Keep brushes damp rather than dripping and avoid leaving liquid pooled along the sole edge. Blot seams promptly and do not immerse the whole shoe unless the manufacturer explicitly allows it. Machine washing introduces saturation, repeated flexing, and impact at the same time.
Existing sole separation should be treated as a repair problem. Clean carefully around the area, allow complete drying, and prepare the surface according to the chosen repair adhesive. Soap, oil, moisture, and old adhesive residue can all reduce the reliability of a new bond.
Heat and Drying Damage
Forced heat is one of the most preventable causes of cleaning-related damage. Hair dryers, radiators, tumble dryers, heat guns, and intense sunlight may speed evaporation but can also create uneven shrinkage and stress.
Heat may reduce leather flexibility, deform foam, dull synthetic coatings, affect rubber appearance, lift printed graphics, shrink textiles, and weaken bonded joints. A shoe can feel dry on the outside while moisture remains inside padding and insoles.
Air movement is safer than high temperature. Open the tongue, remove the insole, support the shape with white paper, and leave the shoe in a ventilated room. Replace damp paper and rotate the footwear occasionally so different areas receive airflow.
Conditioner, waterproofing spray, polish, or repair adhesive should only be applied after complete drying. Trapped moisture can interfere with finish, adhesion, odor control, and product performance. Wearing damp shoes also adds repeated flexing before the construction has fully stabilized.
Mistakes That Shorten Shoe Life
Most cleaning damage comes from process errors rather than one ingredient. Choosing a method by color instead of material is one of the most common mistakes. White suede, white canvas, white leather, and white foam cannot be treated as interchangeable surfaces.
High-risk habits include:
- Using the outsole brush on the upper.
- Pouring concentrated cleaner onto absorbent fabric.
- Scrubbing harder when a stain does not move.
- Treating suede like canvas.
- Soaking the entire shoe for one small mark.
- Mixing several household chemicals.
- Repeating treatment before the first application dries.
- Drying footwear beside a heater.
- Ignoring loose seams, cracks, or sole separation.
- Expecting cleaner to reverse permanent aging.
- Wearing shoes before the lining and insole are dry.
Regular light maintenance is gentler than occasional aggressive restoration. Brush off dry soil after muddy wear, spot-clean recent marks before they penetrate, and perform a deeper clean only when needed. A well-maintained shoe does not need to look factory-new after every use. The more practical goal is to control dirt, stains, and odor while preserving flexibility, shape, comfort, color, and useful life.
GleamGlee develops and manufactures shoe-cleaning foam, liquid cleaners, suede-care products, white-shoe cleaners, complete sneaker-care kits, and related home-care products for retail brands, distributors, marketplace sellers, cleaning companies, and private-label programs. Formula development can focus on low residue, controlled foam, material compatibility, fragrance, stain performance, packaging stability, and convenient consumer application.
Custom projects may use an established formula with new branding or begin with a reference product and defined performance target. Available support includes formula adjustment, packaging selection, bottle and applicator development, multilingual artwork, label printing, filling, assembly, leak testing, export documentation, and FBA-ready shipping. Eligible projects can begin from 200 units, while samples are commonly prepared within 7 to 14 days after requirements are confirmed.
To request pricing or a custom shoe-cleaner proposal, send GleamGlee the target shoe materials, preferred product format, reference product, required bottle size, expected order quantity, sales countries, packaging language, and launch date. Our technical and commercial teams can then recommend a suitable formula, testing plan, packaging system, sample schedule, and production route.





















