 Skip to content
How to Use Adhesive Remover for Apple Product Stickers: A Cleaning Guide
Your trusted adhesives glue & cleaner manufacturer

Apple products are not cheap items people throw away casually. A MacBook may stay on a desk for five years. An iPad may be passed from one family member to another. An iPhone case may be replaced often, but the phone itself usually needs to stay clean, presentable, and easy to resell. That is why sticker residue feels more annoying on Apple products than on ordinary household items. A small glue mark on a laptop lid, phone case, iPad cover, or Apple box can make the whole item look older, dirtier, and less cared for.
Adhesive remover for Apple product stickers can clean safely when it is used on suitable exterior hard surfaces, applied in a small amount, tested on a hidden area first, and kept away from screens, ports, speakers, seams, keyboards, leather, fabric, and coated display areas. The safer method is to soften the sticker glue first, wait about 15 seconds, then wipe gently or lift the residue with a plastic scraper.
The real problem is not always the sticker itself. Most stickers peel off in seconds. The trouble starts when the thin adhesive layer stays behind. It catches dust, feels tacky to the hand, and spreads into a dull smear when rubbed too hard. Many people try fingernails, metal blades, alcohol wipes, dish soap, or rough paper towels first. Sometimes that works. Sometimes it leaves scratches, cloudy plastic, wet edges, or an oily-looking patch. This guide explains how to look at the surface first, choose the right cleaning method, and use GleamGlee adhesive remover in a more controlled way.
What Is Adhesive Remover?
Adhesive remover is a residue-cleaning product made to soften sticker glue, label adhesive, tape marks, decal residue, and other sticky buildup so they can be wiped away with less scraping. For Apple product stickers, it is most useful on hard exterior surfaces, removable cases, packaging, plastic covers, desk accessories, and storage items—not on screens, ports, speakers, keyboards, fabric, or leather.
A sticker may look thin, but the glue layer underneath can hold tightly after weeks or months. Heat from a laptop, hand oil from daily use, pressure from bags, and dust in the air can make the adhesive harder to remove. Once the top sticker layer is peeled away, the remaining glue often feels tacky, looks shiny, and turns gray as it collects dirt.
On Apple-related items, this small glue mark can affect appearance, touch, and resale presentation. A MacBook lid with old decal glue looks less clean. An iPhone case with barcode residue feels sticky in the hand. An Apple box with shipping-label glue looks poorly stored. Adhesive remover helps by softening the glue first, so the surface can be cleaned with less rubbing and lower scratch risk.
Adhesive Remover Basics
Adhesive remover is different from water, dish soap, and normal surface cleaner because sticker residue is not just dirt. Dirt sits on top of a surface. Sticker glue bonds to it. That is why wiping with a wet tissue may remove dust but leave the same sticky patch behind. In many cases, the glue only spreads wider when rubbed dry.
A practical adhesive remover should handle three things: soften the glue, reduce scraping, and wipe away cleanly. This matters for Apple product stickers because many surfaces are visible and touched often. A phone case, laptop shell, iPad cover, or product box should not be left with a greasy mark after cleaning.
| Common Cleaning Method | What Often Happens | Better Use Case |
|---|---|---|
| Water only | Softens paper, not glue | Fresh paper label only |
| Fingernail scraping | Can dent plastic or spread glue | Very small loose edges |
| Alcohol wipe | May dry fast and leave residue | Light marks on suitable surfaces |
| Metal blade | High scratch risk | Not recommended |
| Adhesive remover | Softens glue before wiping | Sticker glue, tape marks, label residue |
For most Apple-related sticker residue, the goal is not heavy cleaning. The goal is controlled glue softening. Apply a small amount, wait about 15 seconds, then wipe gently.
Apple Sticker Glue
Apple sticker glue appears on more than the actual Apple device. It is often found on MacBook decals, iPhone cases, iPad covers, Apple boxes, charger packaging, screen protector packaging, storage boxes, cable organizers, and desk accessories. These are usually better places to use adhesive remover because many of them can be cleaned separately from the electronic device.
The glue becomes harder to remove when it has stayed on the surface for a long time. A fresh barcode label on a phone case may come off in one cleaning cycle. A MacBook sticker that has been pressed onto the lid for two years may need several light passes. Old glue can become flat, dry around the edges, and sticky in the center.
| Sticker Source | Common Residue Type | Cleaning Difficulty |
|---|---|---|
| Price label on case | Thin rectangular glue | Low |
| Barcode sticker | Paper fiber plus glue | Medium |
| MacBook decal | Edge glue or full patch | Medium to high |
| Double-sided tape | Thick gummy adhesive | High |
| Apple box label | Paper glue residue | Medium, needs light touch |
The surface decides the method. Hard plastic cases can usually be cleaned more directly after testing. Apple boxes need less liquid. MacBook shells need careful control. Screens and ports should be avoided.
Sticky Residue Problems
Sticky residue causes three everyday problems: it looks dirty, it feels unpleasant, and it attracts more dust. On a clear iPhone case, a small glue patch can make the case look old. On an Apple box, label residue can reduce the clean resale look. On an iPad cover used for school or work, old name-label glue makes the item look messy before a new label is even applied.
The wrong cleaning method can make the problem worse. Dry rubbing may spread the glue into a larger cloudy area. Too much liquid may stain packaging. Hard scraping may leave fine scratches. Rough paper towels may tear and stick to the glue. This is why softening first is important.
A safer cleaning decision can be made with this simple check:
| Question | If Yes | If No |
|---|---|---|
| Is the surface hard and smooth? | Adhesive remover may help | Avoid or test carefully |
| Can the item be removed from the device? | Clean separately | Use very little liquid |
| Is it away from ports and screens? | Safer to proceed | Do not spray directly |
| Can you test a hidden area? | Test first | Do not risk visible area |
The best result is a surface that feels smooth after wiping, without sticky film, heavy oil marks, or visible residue.
Which Apple Stickers Need Adhesive Remover?
Apple stickers need adhesive remover when the sticker peels off but the glue remains as a tacky film, gray patch, shiny rectangle, paper fiber layer, or thick gummy buildup. It is most useful for stickers on hard exterior surfaces, removable cases, packaging, storage items, desk accessories, and non-porous Apple-related surfaces.
Fresh stickers do not always need remover. If a price label or barcode sticker is removed slowly and cleanly, a soft cloth may be enough. Adhesive remover becomes useful when the residue still catches dust, feels sticky under the finger, or leaves a visible outline after normal wiping. The longer a sticker has stayed in place, the more likely the glue has bonded tightly to the surface.
The surface matters as much as the sticker. A hard plastic iPhone case can usually be cleaned more safely after removing the phone. An Apple box needs lighter treatment because paperboard can stain. A MacBook lid needs careful control because ports, hinge, keyboard, and screen edges are nearby. Screens, speakers, ports, leather, fabric, and soft linings should be avoided.
| Sticker Location | Residue Type | Adhesive Remover Use | Caution |
|---|---|---|---|
| MacBook lid decal | Thin glue film or edge residue | Yes, carefully | Avoid ports, hinge, keyboard, screen |
| iPhone case label | Barcode glue or price tag mark | Yes | Remove phone first |
| iPad cover label | Name tag or asset label glue | Depends on material | Avoid fabric, leather, keyboard areas |
| Apple box label | Paper glue and shipping-label residue | Yes, lightly | Do not soak paperboard |
| Screen protector glue | Film adhesive near display | Not recommended on screen | Avoid actual display |
| Charger/cable label | Small sticker residue | Very carefully | Avoid connector ends |
MacBook Stickers
MacBook stickers often need adhesive remover because they usually stay on the laptop for a long time. University decals, brand stickers, company labels, travel stickers, skin edges, and decorative vinyl can sit on the aluminum shell for months or years. During that time, laptop warmth, hand contact, bag pressure, and sunlight can press the adhesive flatter and make it harder to peel cleanly.
The most common residue appears as a dull rectangle, sticky edge line, or darkened glue patch. If the sticker was vinyl, the top layer may come off in one sheet while the adhesive remains around the edges. If it was paper-based, tiny paper fibers may stay mixed with glue. If the laptop has been used daily, dust and oil can make the mark look gray.
A safer MacBook cleaning process should be slow and limited:
Step 1: Shut down the MacBook and unplug all cables.
Step 2: Keep the residue area facing upward.
Step 3: Apply a small amount only to the glue mark.
Step 4: Wait about 15 seconds.
Step 5: Wipe with a soft cloth.
Step 6: Repeat lightly if residue remains.
Step 7: Use a plastic scraper only on softened glue.
Do not spray toward ports, hinge areas, keyboard gaps, vents, or screen edges. Do not use metal blades. The goal is to soften and lift the glue, not polish or grind the laptop surface.
iPhone Case Stickers
iPhone case stickers are usually good candidates for adhesive remover because the case can be removed from the phone. This gives more control and lowers the risk of moisture reaching the device. Price labels, barcode stickers, warehouse labels, product stickers, and protective film tabs often leave residue on clear plastic, hard shells, and packaging.
Clear cases show residue more easily than dark cases. A small glue patch can look cloudy or dirty, especially under light. Matte cases may show a shiny mark if rubbed too hard. Printed cases may lose part of the design if cleaned aggressively. Silicone-style cases may react differently from hard plastic, so testing first is important.
| Case Type | Residue Issue | Cleaning Note |
|---|---|---|
| Clear hard case | Cloudy glue patch | Use light pressure |
| Glossy case | Visible label outline | Wipe with soft cloth |
| Matte case | Shiny cleaning spot risk | Test hidden area |
| Printed case | Ink or pattern may lift | Avoid hard scraping |
| Silicone-style case | Surface may become tacky | Use very small amount |
Remove the phone before cleaning. Spray lightly on the residue or apply to a cloth, wait about 15 seconds, then wipe. If glue remains, repeat a short cycle instead of soaking the case.
iPad Cover Stickers
iPad cover stickers often come from schools, offices, rental programs, repair shops, warehouses, and family labeling. Name stickers, asset tags, classroom labels, shipping labels, and tape strips may leave glue when removed. Adhesive remover can help, but only when the residue is on a hard, smooth, non-absorbent exterior area.
Many iPad covers are mixed-material products. One cover may include hard plastic, fabric texture, leather-like coating, microfiber lining, magnetic edges, hinges, and keyboard sections. These materials do not clean the same way. A hard back shell may handle light adhesive remover after testing, while the fabric hinge or inner lining may stain.
Use adhesive remover only when the surface is suitable:
Hard plastic back shell: usually suitable after testing.
Smooth exterior cover: possible, depending on coating.
Keyboard case: avoid keys, gaps, and electrical areas.
Fabric cover: not recommended.
Leather or leather-like cover: not recommended unless manufacturer-approved.
Microfiber lining: avoid completely.
For school and office devices, removing old label glue matters because new labels stick better to clean surfaces. Old glue under a new tag can cause bubbles, curled corners, and dirty edges. Clean in small sections and let the cover dry fully before re-labeling.
Apple Box Labels
Apple box labels often need adhesive remover because shipping labels, price stickers, barcode tags, warehouse stickers, and tape marks can leave visible residue. Many people keep Apple boxes for resale, gifting, storage, moving, or warranty organization, so a clean box matters more than people expect.
Apple boxes need a lighter method than plastic or glass. The surface may look smooth and premium, but it is still paperboard. Too much remover can darken the surface, soften the coating, or leave a wet patch. For this reason, adhesive remover should usually be applied to a cloth first, not sprayed directly onto the box.
A safer Apple box method:
Step 1: Peel the label slowly from one corner.
Step 2: Remove loose paper fibers by hand.
Step 3: Put a small amount of remover on a cloth.
Step 4: Dab the glue area lightly.
Step 5: Wipe in short strokes.
Step 6: Stop if the surface darkens or softens.
For resale photos, even small improvements can help. A clean box looks better in listing images and gives the impression that the product was stored carefully. But do not chase perfection if the box surface starts reacting. A faint glue shadow is better than a large liquid stain.

How to Use Adhesive Remover?
Adhesive remover should be used in small, controlled amounts: remove loose sticker film first, test a hidden area, apply lightly to the glue mark, wait about 15 seconds, then wipe gently or lift softened residue with a plastic scraper. For Apple product stickers, the safest rule is simple: soften the glue before using pressure.
Sticker residue is easier to remove when it is treated in layers. A thin price-label mark on an iPhone case may clean in one pass. A MacBook decal that stayed on the lid for two years may need two or three light cycles. Thick tape glue should not be attacked with one heavy spray or hard scraping. Repeating a small, careful process gives a cleaner result and lowers scratch risk.
Before cleaning, separate the item from the device whenever possible. Remove the iPhone from its case. Take the iPad out of the cover. Unplug chargers and cables. Keep liquid away from screens, ports, speakers, keyboard gaps, hinges, leather, fabric, and paper interiors. Adhesive remover is useful for residue, but it should not be used like a full-device cleaning spray.
| Residue Level | What It Looks Like | Suggested Method |
|---|---|---|
| Light | Thin sticky film, fresh label mark | 1 light spray, 15 seconds, wipe |
| Medium | Visible glue patch, dusty rectangle | 2 short cleaning cycles |
| Heavy | Thick tape glue, gummy decal residue | Spray, wait, scrape gently in layers |
| Paper glue | Label fibers mixed with adhesive | Dab with cloth, wipe slowly |
| Box label glue | Faint sticky mark on paperboard | Very small amount, no soaking |
Test First
Testing first prevents the most common cleaning problems. Apple-related items often use mixed surfaces: glossy plastic, matte coating, printed graphics, aluminum, coated paperboard, silicone-style material, or soft-touch finishes. These surfaces may react differently to the same cleaner.
Step 1: Choose a hidden spot.
Use the inside corner of a phone case, the bottom flap of an Apple box, the rear edge of an iPad cover, or a small side area on a hard accessory.
Step 2: Apply a tiny amount.
Do not spray heavily. Put a small amount on a cloth or apply one light spray to the test area.
Step 3: Wait about 15 seconds.
This gives enough time to see whether the surface reacts.
Step 4: Wipe and check.
Look for cloudiness, color fading, shiny patches, softened coating, sticky feel, or paper darkening.
Step 5: Continue only if normal.
If the surface looks and feels unchanged after drying, clean the visible residue area with the same light method.
For business cleaning, testing is even more important. A reseller, repair shop, school, or office may clean many cases or covers at once. One quick test can prevent repeated damage across a full batch.
Spray Lightly
Light spraying is safer than soaking. Too much remover can spread glue, leave extra film, or run into areas that should stay dry. For Apple product stickers, control is more important than using a large amount.
Step 1: Remove loose sticker pieces.
Peel off the top sticker layer slowly. If paper fibers remain, remove the loose parts by hand before applying cleaner.
Step 2: Apply only to the glue mark.
For removable accessories, spray lightly over the residue. For MacBook shells, Apple boxes, cables, or areas near electronics, apply the remover to a cloth first.
Step 3: Keep the area flat.
Place the case, cover, box, or accessory on a stable surface. Keep the residue facing upward so liquid does not run.
Step 4: Work in small sections.
Clean a 2–3 cm area at a time if the residue is large. This keeps the remover from spreading too far.
Step 5: Avoid sensitive areas.
Do not spray near charging ports, speaker holes, camera openings, keyboard gaps, hinges, screens, leather, fabric, or microfiber lining.
A light spray should make the glue mark damp, not wet. If liquid starts running, too much product has been applied.
Wait 15 Seconds
Waiting allows the remover to soften the adhesive before wiping. This step reduces rubbing and helps the glue lift more cleanly. Many sticker marks look stubborn because they are wiped too soon, before the glue has loosened.
Step 1: Start with 15 seconds.
For fresh price labels, barcode stickers, and thin glue film, about 15 seconds is often enough.
Step 2: Watch the residue.
The glue may look shinier, softer, or slightly lifted around the edge. That means it is ready to wipe.
Step 3: Do not let sensitive surfaces stay wet too long.
On Apple boxes, matte plastic, coated cases, and MacBook shells, short contact time is safer than long soaking.
Step 4: Repeat if needed.
If residue remains, repeat another short cycle instead of leaving a heavy amount on the surface.
Step 5: Treat thick glue in layers.
Double-sided tape, old decal glue, and gummy buildup may need several passes.
| Residue Type | First Wait Time | Better Follow-Up |
|---|---|---|
| Fresh sticker glue | 15 seconds | Wipe once |
| Barcode label glue | 15 seconds | Repeat if rectangle remains |
| Old decal edge | 15–20 seconds | Lift gently with scraper |
| Thick tape residue | 15–30 seconds | Remove in layers |
| Apple box glue | 10–15 seconds | Dab, do not soak |
The waiting time should help the cleaner work, not flood the surface. Short cycles give better control.
Wipe Gently
Gentle wiping finishes the job without scratching or spreading the glue. Use a soft cloth, microfiber towel, or non-abrasive wipe. Avoid rough paper towels, hard brushes, abrasive pads, metal tools, and sharp blades.
Step 1: Wipe from the edge inward.
Start at the outer edge of the glue mark and wipe toward the center. This helps keep softened glue from spreading.
Step 2: Use short strokes.
Long rubbing motions can smear adhesive across a wider area. Short strokes give more control.
Step 3: Use the scraper only after softening.
Hold the plastic scraper low and flat. Push slowly under the softened residue. Do not dig downward.
Step 4: Change to a clean cloth area.
A cloth loaded with glue can smear residue back onto the surface. Fold the cloth or use a new one.
Step 5: Do a final clean wipe.
After the glue is gone, wipe again to remove leftover cleaner and loose adhesive.
Step 6: Let the surface dry.
Do not put the phone back into the case or re-label an iPad cover until the surface is fully dry.
A good result should feel smooth under the finger. If the area still feels tacky, repeat one light cycle only where residue remains.

Is Adhesive Remover Safe?
Adhesive remover is safe for Apple product stickers when it is used on the right surface, in a small amount, and away from sensitive parts. It is best for hard, smooth, non-porous exterior surfaces such as removable phone cases, hard iPad covers, Apple box label areas, plastic organizers, glass items, and desk accessories.
The main safety question is not only the cleaner itself. The surface decides the risk. A hard plastic iPhone case can usually handle careful cleaning after testing. A paper Apple box needs a lighter touch. A MacBook lid needs careful control because ports, hinges, keyboard gaps, and screen edges are nearby. A screen, speaker hole, charging port, leather cover, fabric sleeve, or microfiber lining should not be cleaned with adhesive remover.
Most damage happens when too much liquid is used, when residue is scraped before it softens, or when one cleaning method is used on every Apple-related surface. Safe use means slowing down: test first, use a small amount, wait briefly, wipe gently, and stop if the surface changes color, texture, shine, or feel.
| Surface Area | Safety Level | Adhesive Remover Use | Main Risk |
|---|---|---|---|
| Hard iPhone case | High | Suitable after testing | Clouding on clear plastic |
| Apple box label area | Medium | Use very lightly | Paperboard staining |
| MacBook exterior lid | Medium | Careful spot cleaning only | Liquid near ports or hinge |
| Hard iPad cover | Medium | Depends on coating | Soft-touch finish change |
| Glass protector before installation | High | Suitable if separate from device | Smears if not wiped clean |
| Screen/display | Low | Avoid | Coating damage |
| Keyboard area | Low | Avoid | Liquid in gaps |
| Speaker/charging port | Low | Avoid | Moisture entry |
| Leather/fabric cover | Low | Avoid | Staining or texture damage |
Safe Surfaces
Safe surfaces are hard, smooth, and easy to wipe dry. These areas allow better control because the remover can sit on the glue mark briefly, soften it, and be removed without soaking into the material. Removable accessories are usually safer than the actual Apple device.
Good surfaces for careful use include hard plastic iPhone cases, hard iPad back covers, plastic cable organizers, smooth Apple box label areas, glass protectors before installation, storage bins, desk trays, monitor stands, and hard accessory packaging. These surfaces are commonly affected by barcode labels, price tags, shipping stickers, name labels, and tape marks.
A safer use checklist:
Test a hidden area first.
Remove the device from the case or cover.
Keep the surface flat and residue facing upward.
Use a small amount, not a heavy spray.
Wait about 15 seconds.
Wipe with a soft cloth.
Dry fully before reuse.
For hard plastic cases, check for cloudiness after testing. For Apple boxes, avoid soaking. For MacBook lids, keep the liquid far from openings. For glass accessories, wipe twice to avoid streaks.
Risky Areas
Risky areas are places where liquid can enter, stain, soften, or damage the surface. Adhesive remover should not be used like a full-device spray because Apple products often have small openings and delicate coatings.
Avoid using adhesive remover on screens, display edges, charging ports, speaker grilles, microphone holes, keyboard gaps, trackpad edges, hinge areas, camera openings, leather covers, fabric sleeves, microfiber linings, soft-touch coatings, and paper interiors. Even a small amount of liquid can move along seams or soak into absorbent material.
High-risk examples:
Sticker residue close to a MacBook hinge.
Label glue near an iPhone charging port.
Tape residue beside speaker holes.
Sticker mark on a screen protector while it is still on the screen.
Name-label glue on fabric iPad covers.
Barcode residue on a leather-style case.
Adhesive near keyboard keys.
If the glue is close to a risky area, use a cloth instead of spraying, use very little product, and keep the device tilted away from openings. If the residue is actually on a screen, keyboard, speaker mesh, leather, or fabric, adhesive remover is not the right choice.
Screen Warning
Screens need special care because they are not ordinary glass. A display may have coatings that improve touch feel, reduce glare, or resist fingerprints. Strong cleaners, scraping, and repeated rubbing can leave marks that do not wipe away.
Adhesive remover should not be used on iPhone screens, iPad screens, MacBook displays, Apple Watch displays, or any coated screen surface. It should also not be sprayed near screen edges because liquid can move into seams.
If the residue is from a screen protector, first check whether the glue is on the protector or the actual screen. If it is on the removed protector, clean or replace the protector separately. If it is on the actual display, use only a screen-safe method and avoid scraper tools.
What not to do on screens:
Do not spray adhesive remover.
Do not use the scraper.
Do not rub with rough paper towels.
Do not use metal blades.
Do not leave liquid sitting on the display.
Do not clean near the screen edge with excess liquid.
For Apple product sticker residue, the safest approach is to keep adhesive remover for cases, covers, boxes, packaging, and hard exterior surfaces—not display cleaning.
Port Protection
Ports and openings are one of the biggest safety concerns. Liquid does not need to be poured into a device to cause trouble. A small amount can run along an edge, gather near a seam, or enter a port by accident.
Before cleaning, look for every opening around the residue. On an iPhone, check the charging port, speakers, microphone holes, buttons, camera ring, and screen edge. On a MacBook, check USB-C ports, vents, keyboard gaps, trackpad edges, hinge areas, and the display edge. On AirPods cases, check the charging port, hinge, lid seam, and speaker area.
Port-safe cleaning habits:
Power off and unplug before cleaning.
Keep the residue area facing upward.
Apply remover to a cloth, not directly to the device.
Use a very small amount.
Keep cloth movement away from openings.
Wipe dry immediately after the waiting time.
Do not clean connector ends on cables.
If cleaning a case, cover, box, or accessory, remove it from the device first. This one step removes most moisture risk and gives better control.
What Mistakes Hurt Apple Products?
The biggest mistakes are using too much liquid, scraping before the glue softens, cleaning screens with adhesive remover, and letting moisture reach ports, speaker holes, keyboard gaps, hinges, or seams. Most surface damage does not happen because sticker residue is impossible to remove. It happens because the cleaning method is too aggressive for the surface.
Apple-related items often combine several materials in one product. A MacBook has aluminum, glass, keyboard parts, ports, vents, rubber feet, and display edges. An iPad cover may include plastic, fabric, microfiber, magnets, and a hinge. An iPhone case may be clear plastic, matte coating, silicone-style material, leather, or printed plastic. One cleaning habit cannot fit every surface.
A safer method is to slow the process down: test first, use a small amount, wait about 15 seconds, wipe gently, and repeat only where residue remains. If the surface starts to turn cloudy, shiny, darker, sticky, soft, or rough, stop immediately. A small glue shadow is easier to accept than permanent coating damage.
| Mistake | What Can Happen | Safer Choice |
|---|---|---|
| Heavy spraying | Liquid runs into seams or stains boxes | Use small amounts |
| Hard scraping | Scratches, dents, shiny marks | Soften first |
| Cleaning screens | Coating damage, cloudy patches | Avoid remover on displays |
| Wet ports | Moisture inside device openings | Apply to cloth only |
| No spot test | Plastic clouds or print fades | Test hidden area |
| Metal tools | Permanent scratches | Use plastic scraper |
| Long soaking | Softened coating or paper stain | Short cleaning cycles |
Too Much Spray
Too much spray is one of the easiest mistakes to make. A sticky patch looks stubborn, so more liquid feels like the obvious answer. In reality, heavy spraying can create a larger problem. The remover may run beyond the glue mark, carry loosened adhesive across the surface, or seep into edges that should stay dry.
On Apple boxes, too much spray can darken the paperboard or leave a visible wet mark. On clear iPhone cases, excess liquid can mix with softened glue and create a cloudy smear. On MacBook lids, liquid can move toward the hinge, ports, keyboard edge, or display seam if the laptop is not positioned carefully.
A better process is small-area cleaning:
Step 1: Place the item flat with the residue facing upward.
Step 2: Spray lightly only on the glue mark, or apply remover to a cloth.
Step 3: Wait about 15 seconds.
Step 4: Wipe before the liquid spreads.
Step 5: Repeat with another light pass only if glue remains.
The surface should look slightly damp, not soaked. If liquid is running, dripping, or pooling, too much product has been used.
Hard Scraping
Hard scraping can remove glue quickly, but it can also leave permanent marks. A metal blade, knife, scissors edge, key, or screwdriver may lift residue, but it can scratch aluminum, cut plastic, remove printed graphics, or create shiny lines on matte surfaces. Even fingernails can leave dents on soft plastic or silicone-style cases.
The scraper should only be used after the adhesive has softened. It should glide under the residue, not dig into the surface. If the glue does not move, the answer is not more pressure. The answer is another light application and a short wait.
Safer scraper use:
Step 1: Soften the residue first.
Step 2: Hold the scraper low and almost flat.
Step 3: Push slowly from the edge of the glue.
Step 4: Stop if resistance feels high.
Step 5: Wipe loosened glue away before scraping again.
Do not use a scraper on screens, coated displays, fabric covers, leather cases, keyboard areas, speaker mesh, printed graphics, or soft-touch coatings. These areas can be damaged faster than the glue can be removed.
Wet Ports
Wet ports are risky because liquid can enter small openings even when only a little product is used. Charging ports, speaker holes, microphone openings, USB-C ports, keyboard gaps, vents, trackpad edges, camera rings, and hinge seams should stay dry during residue cleaning.
This mistake often happens when sticker residue is close to an opening. A label near a charging port, a decal near a MacBook hinge, or tape residue near speaker holes may look safe at first. Once cleaner is applied, gravity and surface tension can move liquid into areas that are hard to dry.
Port-safe habits:
Power off the device before cleaning.
Unplug all cables.
Keep openings lower-risk by facing the residue upward.
Apply remover to a cloth instead of spraying directly.
Use very small amounts.
Wipe dry immediately after the short waiting time.
Avoid cleaning connector tips on cables and chargers.
When possible, clean the accessory instead of the device. Remove the iPhone from the case. Take the iPad out of the cover. Clean Apple boxes separately. This simple step removes much of the moisture risk.
No Spot Test
Skipping the spot test is a common reason surfaces end up with cloudy marks, shiny patches, faded graphics, or darkened paper. Two products can look almost identical but react differently because the plastic, coating, print layer, or finish is different.
A clear hard case may clean well, while another clear case may turn hazy. A matte case may develop a glossy cleaning patch. A printed cover may lose part of its design. A coated Apple box may tolerate light dabbing, while an uncoated area may stain quickly.
A proper spot test takes less than one minute:
Step 1: Pick a hidden area.
Step 2: Apply a tiny amount of remover.
Step 3: Wait about 15 seconds.
Step 4: Wipe clean.
Step 5: Check color, texture, shine, and feel after drying.
If the test area changes, do not use the remover on the visible surface. For resellers, offices, schools, repair shops, and bulk cleaning work, this step is especially important. One failed test is a warning; skipping the test can damage an entire batch of cases, covers, or packaging.

Why Choose GleamGlee Adhesive Remover?
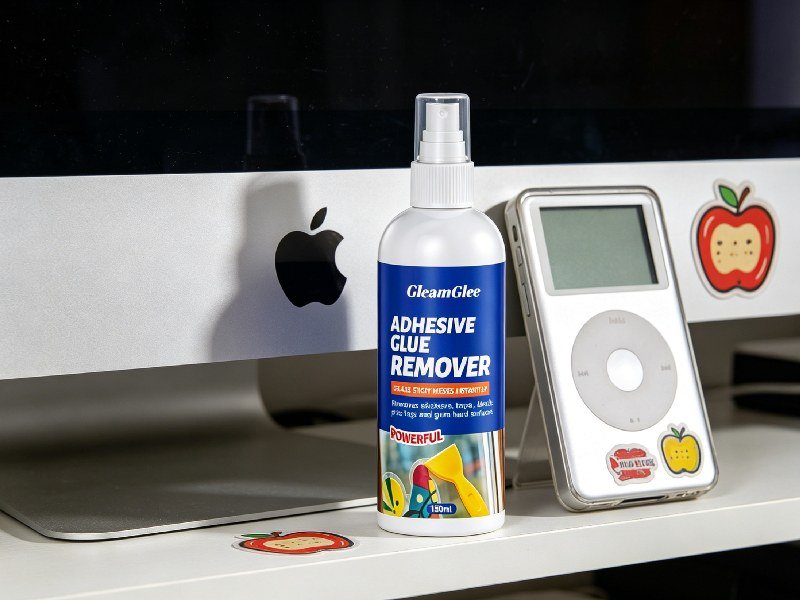
GleamGlee adhesive remover is designed for sticky residue that normal wiping cannot remove cleanly, including sticker glue, label residue, tape marks, light silicone residue, grease mixed with adhesive, wax marks, gum residue, and old glue buildup. For Apple product stickers, it helps soften the residue first, so the surface can be cleaned with less rubbing and less scraping.
The product is especially useful when a clean finish matters. A MacBook sticker shadow, iPhone case label mark, iPad cover asset tag, or Apple box shipping label can make an item look older or poorly kept. GleamGlee adhesive remover uses a spray format for even coverage and includes a scraper to help lift softened residue from suitable hard surfaces.
GleamGlee also supports branded product supply and private-label customization. With R&D, packaging, label printing, filling, and logistics capabilities, GleamGlee can help retailers, Amazon sellers, Shopify brands, distributors, and cleaning product companies develop adhesive remover products for household cleaning, office labeling, packaging reuse, car care, DIY projects, and electronics accessory cleanup.
| Need | GleamGlee Advantage |
|---|---|
| Fast sticker glue cleanup | Softens residue in about 15 seconds |
| Less hard scraping | Helps loosen glue before wiping |
| Better control | Spray bottle applies cleaner evenly |
| Thick residue removal | Included scraper helps lift softened buildup |
| Daily cleaning use | Works on many suitable hard surfaces |
| Online sales | Clear before-and-after visual selling points |
| Private label | Supports formula, packaging, and label customization |
Fast Residue Removal
GleamGlee adhesive remover is made for quick sticky residue cleanup. The use process is simple: spray lightly, wait about 15 seconds, then wipe or gently scrape the softened glue. This matters for small daily problems, such as barcode glue on an iPhone case, label residue on an Apple box, or sticker marks on a hard iPad cover.
Fast action reduces repeated rubbing. When the glue softens first, there is less need to press hard with a cloth or scrape aggressively. This helps lower the chance of cloudy plastic, shiny matte spots, widened glue smears, and fine surface scratches.
Different residue needs different cleaning cycles:
| Residue Type | Suggested Method | Cleaning Notes |
|---|---|---|
| Fresh price label | 1 light spray, 15 seconds, wipe | Often cleans quickly |
| Barcode glue | Spray, wait, wipe, repeat if needed | Paper fibers may remain |
| Old decal edge | Apply lightly, wait, scrape gently | Remove in thin layers |
| Double-sided tape | Spray, wait, scrape, repeat | Do not force in one pass |
| Apple box label | Apply to cloth, dab, wipe | Avoid soaking paperboard |
For thicker adhesive, several short cycles are safer than one heavy spray. This keeps the surface under control and gives a neater finish.
Spray and Scraper
The spray and scraper design makes cleaning more practical. Sticky residue usually needs two actions: softening and lifting. The spray helps cover the glue area evenly, while the scraper helps remove softened residue from suitable hard surfaces.
A spray bottle is easier to control than pouring liquid. It helps apply a thin layer over the residue without flooding the whole item. This is useful for phone cases, hard covers, packaging, glass, metal, plastic, tables, counters, tools, and other non-porous surfaces.
The scraper is useful for thicker residue, but it should be used correctly:
Step 1: Spray lightly on the residue.
Step 2: Wait about 15 seconds.
Step 3: Hold the scraper low and flat.
Step 4: Push gently from the edge of the softened glue.
Step 5: Wipe away loosened residue.
Step 6: Repeat only where glue remains.
The scraper should not be used on screens, soft coatings, leather, fabric, keyboard gaps, speaker mesh, or printed areas that may lift. Used correctly, it helps replace unsafe tools such as metal blades, keys, scissors, or fingernails.
Clean Finish
A good adhesive remover should not leave the surface feeling greasy, sticky, or dirty after cleaning. GleamGlee adhesive remover is designed to wipe clean and help leave suitable hard surfaces smooth after the residue is removed.
This is important for Apple-related items because they are often touched, photographed, stored, or resold. A phone case should not feel slippery after cleaning. An Apple box should not look oily in resale photos. An iPad cover should be clean enough for a new label. A desk accessory should not collect dust again because of leftover film.
A clean finish depends on the final wipe:
Step 1: Remove softened glue with cloth or scraper.
Step 2: Fold the cloth to a clean side.
Step 3: Wipe the same area again.
Step 4: Check the surface under light.
Step 5: Let it dry before use or re-labeling.
| Item | Why Clean Finish Matters |
|---|---|
| iPhone case | Better hand feel, cleaner look |
| Apple box | Better storage and resale appearance |
| iPad cover | New labels stick more smoothly |
| MacBook shell | Less dust and fingerprint buildup |
| Desk organizer | Cleaner workspace presentation |
The final surface should feel smooth, not tacky. If a sticky film remains, one more light cleaning cycle is better than heavy rubbing.
Multi-Surface Use
GleamGlee adhesive remover is useful beyond Apple product stickers. It can help remove sticker residue, label glue, tape marks, silicone residue, grease, wax, gum residue, and sticky buildup from many suitable hard surfaces, including glass, metal, plastic, wood, car surfaces, windows, tables, counters, tools, and household hard surfaces.
This wider use makes the product practical for daily life. The same bottle can help with Apple box labels, kitchen jar stickers, storage bin labels, car window decals, craft glue marks, office tape residue, packaging stickers, and removable hook residue on suitable hard surfaces.
Common use scenes include:
Home cleaning: jars, windows, mirrors, tables, counters.
Office use: file folders, desks, whiteboards, plastic trays.
Car care: windows, bumper sticker residue, interior trim.
DIY projects: acrylic sheets, craft tools, finished wood surfaces.
Packaging reuse: boxes, bags, containers, product labels.
For brands and distributors, this multi-surface positioning makes the product easier to sell. One adhesive remover can be promoted for household cleaning, car care, office organization, DIY cleanup, packaging reuse, and electronics accessory cleaning, while clear surface warnings help reduce misuse.
Custom Supply Support
GleamGlee is not only a finished adhesive remover supplier. The company can support custom adhesive remover projects for Amazon sellers, Shopify brands, retailers, distributors, and private-label cleaning product companies.
Customization can include bottle size, spray head, scraper kit, label design, outer box, multilingual instructions, barcode layout, safety icons, packaging style, and formula direction. Low-MOQ customization is available from around 200 units depending on project needs, which is helpful for new brands testing the market.
GleamGlee’s production system supports:
Formula development and benchmarking.
Bottle and packaging material selection.
Waterproof and chemical-resistant label printing.
English, German, French, Italian, Spanish, Dutch, Japanese, and Chinese packaging.
SDS, CLP, REACH, UKCA, and GHS-related label support.
FBA-ready packaging and logistics planning.
With R&D, raw material preparation, packaging, printing, filling, and export support under one supply chain, GleamGlee can help turn adhesive remover into a ready-to-sell product line for North America, Europe, the UK, Germany, Canada, Japan, and other markets.
Conclusion
Sticker residue on Apple-related items often looks small at first, but it can quickly make a MacBook, iPhone case, iPad cover, or Apple box feel older, dirtier, and poorly maintained. The safest cleaning method is not aggressive scraping or heavy spraying. A controlled process works better: test the surface first, use a small amount of adhesive remover, wait about 15 seconds, then wipe gently or lift softened residue with a plastic scraper. This helps reduce scratches, cloudy marks, sticky film, and moisture risks around sensitive areas.
GleamGlee adhesive remover is designed for practical everyday residue problems such as sticker glue, barcode labels, tape marks, decal residue, silicone residue, grease mixed with adhesive, wax marks, and old sticky buildup on suitable hard surfaces. The spray and scraper combination helps make the cleaning process easier and more controlled for phone cases, Apple boxes, hard covers, desk accessories, packaging, and many other surfaces used in homes, offices, stores, and repair environments.
For retailers, Amazon sellers, Shopify brands, distributors, and private-label cleaning companies, adhesive remover is also a strong product category with clear visual selling points and repeat-use demand. GleamGlee supports branded product supply, low-MOQ customization, formula development, multilingual packaging, FBA-ready logistics, and international compliance support. Whether the goal is launching a new adhesive remover brand or sourcing a ready-to-sell cleaning product, GleamGlee can provide flexible support for global markets.
Share:
Table of Contents
Here, creating your adhesives glue & removal cleaner collection is no longer a barrier—it’s a collaborative journey where GleamGlee helps brands and businesses transform their vision into durable, certified, and market-ready solutions.
Partner with GleamGlee
Join hundreds of global partners who trust GleamGlee for adhesives and cleaners that combine innovation, compliance, and speed. Our vertically integrated system—from R&D to warehouse—guarantees consistent performance and reliable delivery.
Whether you’re sourcing FBA-ready stock or developing your own formula, our team provides unmatched technical support and responsive service.





















