 Skip to content
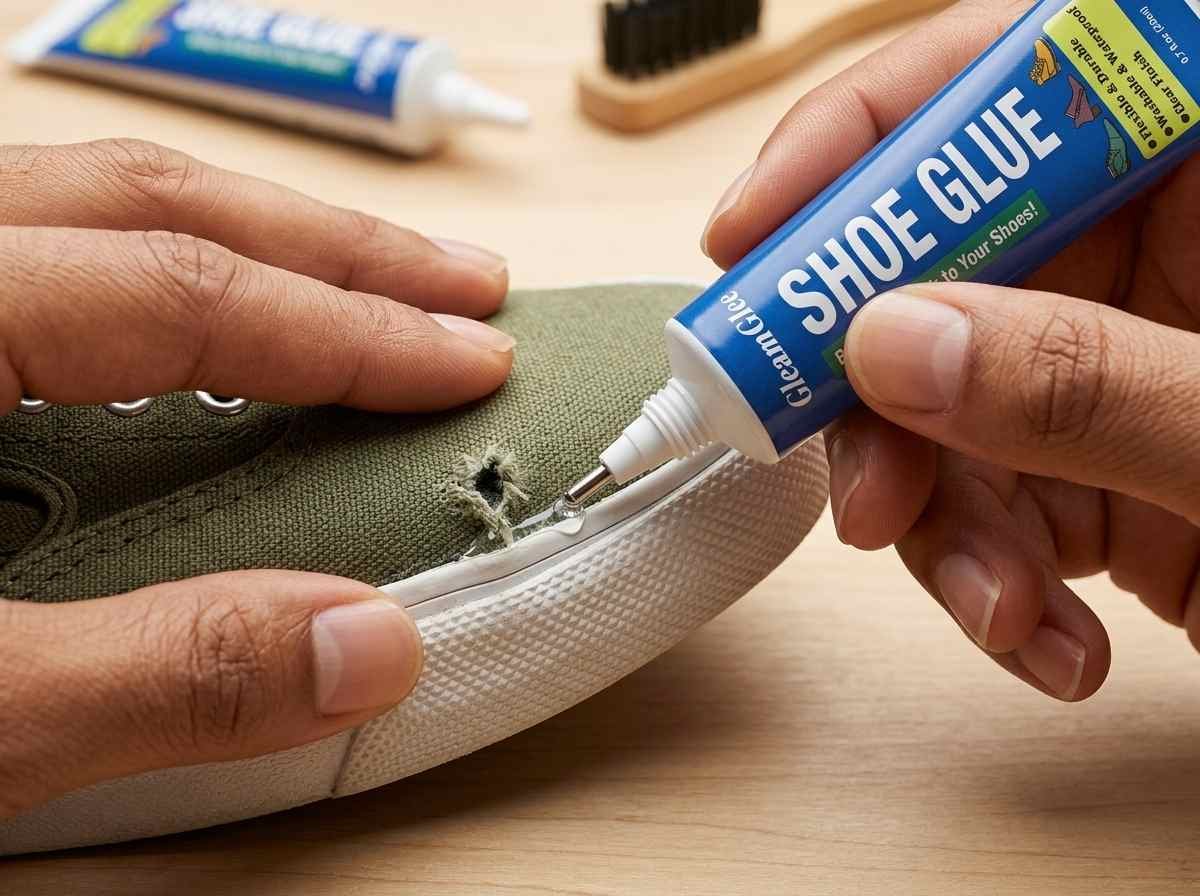
A loose shoe sole usually starts as a small problem. One corner lifts near the toe. The heel edge makes a soft clicking sound. A little dust gets into the gap. Then one rainy walk or one long workday makes the opening bigger. Many people throw the shoes away at this stage, even when the upper, cushioning, and fit are still good. That can be a waste, especially for sneakers, hiking boots, school shoes, work boots, dress shoes, or expensive everyday shoes that still have months of use left.
To reattach soles with shoe glue, clean the separated area, remove dust and old loose glue, lightly sand both bonding surfaces, apply a thin even layer of flexible waterproof shoe glue, press the sole firmly back into position, hold it with rubber bands or clamps, and let it cure for at least 24 hours before wearing. The strongest repair comes from clean surfaces, tight pressure, and full curing time—not from using too much glue.
The real secret is patience. A sole repair can look finished after 10 minutes, but the glue bond is still building strength inside the gap. If the shoe is worn too early, the repair may open again. If it is pressed firmly and left alone, the same pair of shoes may return to daily use instead of going into the trash.
What Is Shoe Glue?
Shoe glue is a flexible repair adhesive used to bond separated shoe parts such as soles, heels, insoles, toe caps, straps, and outsole edges. It is made for materials that move during wear, including rubber, leather, vinyl, canvas, PU, foam, and synthetic shoe parts.
A good shoe glue should not only “stick.” It should handle bending, walking pressure, light moisture, and daily friction. For sole repair, the most useful type is usually waterproof, clear-drying, and elastic after curing. This helps the repair stay neat and reduces the chance of cracking when the shoe bends at the toe.
For most home repairs, shoe glue is best used when the shoe is still in good shape but one part has come loose. If the sole is peeling, the heel edge is opening, or the insole is lifting, glue can often extend the shoe’s life without replacing the whole pair.
What Can Shoe Glue Fix?
Shoe glue can fix many common footwear problems, especially when the issue is separation, lifting, or small cracking rather than total wear-out. It is most useful when both repair surfaces are still present and can be pressed together tightly.
Common repairs include:
- Peeling soles on sneakers, boots, school shoes, and casual shoes.
- Loose heel edges on dress shoes, work shoes, and high heels.
- Lifting toe caps where the front sole starts to open.
- Slipping or curling insoles that move during walking.
- Loose sandal straps, flip-flop straps, and slipper soles.
- Small outsole gaps before water and dirt get deeper inside.
| Shoe Area | Common Problem | Shoe Glue Use |
|---|---|---|
| Toe sole | Front edge peeling | Reattach and seal the gap |
| Heel | Back edge opening | Bond loose sole or heel layer |
| Insole | Curling or slipping | Secure footbed in place |
| Sidewall | Small sole gap | Seal and prevent spreading |
| Sandal strap | Strap pulling loose | Rebond strap contact point |
| Outsole edge | Rubber lifting | Press back and reinforce |
Shoe glue works best on damage caught early. A 3–10 mm sole opening is usually easier to repair than a sole that has peeled halfway off. Once dirt, water, and old glue fill the gap, the repair becomes more difficult and needs more cleaning.
Is Shoe Glue Strong?
Shoe glue can be strong enough for daily shoe repair when the surface is clean, lightly sanded, pressed firmly, and cured long enough. The bond strength depends on the glue quality, but also on how carefully the repair is done.
For stronger results, focus on:
- Clean contact: remove dust, mud, loose old glue, and oil.
- Dry surface: do not glue damp shoes after rain or washing.
- Light sanding: roughen smooth rubber, leather, or plastic areas.
- Thin glue layer: avoid thick glue lumps that stop tight contact.
- Firm pressure: use rubber bands, tape, clamps, or weight.
- Full cure: wait at least 24 hours before wearing.
| Use Situation | Suggested Cure Time | Reason |
|---|---|---|
| Light casual shoes | 24 hours | Lower bending pressure |
| Daily sneakers | 24–36 hours | More toe flexing |
| School shoes | 24–36 hours | Frequent running and dragging |
| Work boots | 36–48 hours | Heavy pressure and rough ground |
| Hiking boots | 36–48 hours | Moisture, stones, and twisting |
| Sports shoes | 36–48 hours | Fast movement and side pressure |
GleamGlee Shoe Glue is made for strong sole, heel, and insole repair. It bonds leather, rubber, vinyl, canvas, and mixed shoe materials. The clear finish also helps keep repairs cleaner, especially on visible sole edges and light-colored sneakers.
Is Shoe Glue Flexible?
Shoe glue should be flexible because shoes bend thousands of times during normal use. A stiff glue may feel strong at first, but it can crack when the toe flexes or when the sole twists on uneven ground.
Flexibility matters most for:
- Sneakers that bend at the front with every step.
- Running shoes that compress under repeated impact.
- Work boots that carry body weight for long hours.
- Hiking boots used on rocks, mud, and uneven paths.
- Children’s shoes that twist, drag, and bend during play.
- Sandals and slippers that flex easily during walking.
Flexible shoe glue helps the repaired area move with the shoe instead of fighting against it. This reduces hard edges, cracking, and quick reopening. It also keeps the shoe more comfortable, because the repair does not feel like a hard patch under the foot.
For sole repair, flexibility should work together with waterproof performance. A repaired shoe may touch wet sidewalks, sweat, grass, or rain. GleamGlee Shoe Glue forms an elastic waterproof bond after curing, helping soles stay attached while keeping the repair neat and practical for everyday wear.
Why Do Soles Come Off?
Soles come off when the bond between the outsole and the shoe upper becomes weaker than the stress placed on it. This usually happens because of repeated bending, moisture, heat, dust, sweat, aging glue, or long-term daily wear.
The toe and heel areas often open first. The toe bends every time the foot pushes forward, while the heel takes impact with every step. Once a small gap appears, dirt and water can enter the opening, making the separation spread faster.
In many cases, sole separation does not mean the shoe is finished. If the sole is still complete, the upper is not torn, and the gap can be pressed closed by hand, shoe glue can often reattach the sole and extend the shoe’s usable life.
Why Do Shoe Soles Peel?
Shoe soles peel because the original adhesive slowly loses grip. This can happen even on good shoes, especially if they are worn often, stored poorly, or exposed to moisture and heat. The first sign is usually a small lifted edge near the toe, heel, or side sole.
Common causes include:
- Repeated toe bending during walking, running, or climbing stairs.
- Moisture from rain, wet grass, sweat, puddles, or washing.
- Heat from hot cars, heaters, sunlight, or warm storage areas.
- Dust and sand entering a small open edge.
- Old glue becoming dry, brittle, or weak over time.
- Heavy pressure from work, sports, hiking, or long daily wear.
| Cause | What Happens | Common Shoe Type |
|---|---|---|
| Toe bending | Front sole edge lifts | Sneakers, running shoes |
| Heel impact | Back sole separates | Work shoes, boots |
| Moisture | Glue line weakens | Rain boots, hiking shoes |
| Heat | Adhesive softens or ages faster | Stored shoes, summer shoes |
| Dust inside gap | New bond becomes weaker | Outdoor shoes |
| Old glue | Sole loses original hold | Older shoes |
A small peeling edge should be fixed early. When the opening is only a few millimeters wide, the sole still fits its original shape. Once the gap becomes larger, the sole may curl, collect debris, or stop lining up correctly.
Can Shoe Glue Stop Peeling?
Shoe glue can stop peeling when the repair is done before the sole becomes badly warped or damaged. It works best when both surfaces are clean, dry, and able to touch closely after pressing.
Shoe glue can help by:
- Rebonding the loose sole edge.
- Sealing the gap against dirt and water.
- Reducing further peeling during daily walking.
- Keeping the shoe usable instead of replacing it too soon.
- Reinforcing weak toe, heel, and side areas.
| Sole Gap Size | Repair Chance | Best Action |
|---|---|---|
| 1–3 mm | Very good | Clean, glue, press early |
| 4–10 mm | Good | Sand, glue, secure firmly |
| 1–3 cm | Medium | Clean deeply, press longer |
| Half sole open | Difficult | Needs careful alignment |
| Warped sole | Low | May need professional repair |
| Missing sole pieces | Poor | Replacement may be better |
For better results, do not wait until the sole flaps while walking. Once the gap opens wide, every step pulls on the repair area. Water can also get deeper into the shoe, especially around foam midsoles, fabric layers, or leather edges.
GleamGlee Shoe Glue is suitable for early peeling repairs because it dries clear, remains flexible, and forms a waterproof bond after curing. This helps the repaired sole move naturally while keeping the edge sealed.
When Should You Repair Soles?
You should repair soles as soon as you notice lifting, clicking, flapping, or a visible gap. Early repair is usually cleaner, stronger, and easier because the sole has not yet changed shape.
Repair the sole when you see:
- The toe edge lifting slightly.
- The heel corner opening.
- Dust collecting inside the sole gap.
- A soft flapping sound while walking.
- Water entering through the sole edge.
- The insole or footbed starting to curl.
| Shoe Condition | Repair Now? | Reason |
|---|---|---|
| Small edge lift | Yes | Easy to press back |
| Sole still lines up | Yes | Good bonding contact |
| Shoe upper still strong | Yes | Worth extending life |
| Tread still has grip | Yes | Shoe remains useful |
| Foam is crumbling | No | Glue may not hold well |
| Sole is badly warped | Not ideal | Hard to align |
| Outsole is worn smooth | Not ideal | Safety may be reduced |
For daily sneakers, repair before the next long walk. For school shoes, repair before playground use makes the gap larger. For hiking boots, work boots, or sports shoes, repair before heavy use, then allow 36–48 hours of curing time for a more dependable bond.
A simple rule is helpful: if the sole can still be pressed flat by hand, it is usually worth repairing. If the sole no longer matches the shoe shape, glue may only provide a short-term fix.

Which Shoe Glue Works?
The best shoe glue for reattaching soles should be strong, flexible, waterproof, clear after drying, and suitable for mixed shoe materials. It should bond rubber, leather, vinyl, canvas, PU, foam, and synthetic shoe parts without becoming hard or brittle after curing.
For sole repair, flexibility matters as much as strength. A shoe bends at the toe, twists slightly on uneven ground, and takes repeated heel impact. If the glue dries too stiff, the repaired edge may crack open again after a few wears.
A good shoe glue should also be easy to control. Narrow sole gaps need precise application, not messy overflow. This is why a fine nozzle, clear finish, and complete repair tools are important for clean home repairs.
Which Shoe Glue Bonds Rubber?
Rubber sole repair needs a glue that can grip smooth surfaces and still move after curing. Rubber bends, stretches, and absorbs road pressure, so ordinary hard glue often fails because it cannot flex with the outsole.
For better rubber bonding:
- Clean off mud, dust, oil, and loose old glue.
- Lightly sand smooth rubber until it feels slightly rough.
- Apply a thin, even layer instead of a thick lump.
- Press the rubber sole tightly against the shoe upper.
- Let the repair cure for at least 24 hours, or 36–48 hours for heavy shoes.
| Rubber Repair Area | Common Problem | Best Repair Focus |
|---|---|---|
| Toe outsole | Front edge peeling | Strong pressure while curing |
| Heel outsole | Back edge lifting | Full contact at both corners |
| Sidewall rubber | Small gap opening | Thin glue line, clean edge |
| Rain boot rubber | Crack or split | Waterproof seal after curing |
| Sneaker outsole | Edge separation | Flexible bond for toe bending |
| Work boot sole | Heavy rubber lift | Longer curing and firm clamping |
GleamGlee Shoe Glue works well for rubber sole repair because it forms a strong, flexible bond after curing. It is suitable for sneakers, work boots, hiking boots, rain boots, school shoes, and daily footwear where the outsole needs to bend without the repair cracking.
Which Shoe Glue Dries Clear?
Clear-drying shoe glue is best for repairs where the glue line may be seen from the outside. This matters for white sneakers, designer sneakers, leather shoes, high heels, sandals, and shoes with light-colored midsoles. A visible white or yellow glue mark can make a small repair look messy.
Clear shoe glue helps with:
- Cleaner sole edge repairs.
- Less visible marks on white or light shoes.
- Neater repairs on dress shoes and heels.
- Better appearance on designer sneakers.
- Lower risk of obvious glue residue around toe caps.
| Shoe Type | Why Clear Glue Helps |
|---|---|
| White sneakers | Avoids yellow or white repair marks |
| Leather dress shoes | Keeps sole edge cleaner |
| High heels | Reduces visible glue around thin soles |
| Designer sneakers | Makes repair less noticeable |
| Sandals | Keeps strap repair neat |
| Light midsoles | Prevents dark or cloudy repair lines |
Still, clear glue must be applied carefully. Too much glue can squeeze out and dry as a shiny ridge. For a clean repair, use a thin line, press the sole firmly, and wipe away extra glue before it dries.
GleamGlee Shoe Glue dries crystal clear and helps avoid the chalky white marks often left by common fast glues. Its metal needle nozzle also makes it easier to place glue inside the gap instead of spreading it across the shoe surface.
Which Shoe Glue Is Waterproof?
Waterproof shoe glue is important because shoes often touch rain, wet sidewalks, sweat, damp grass, mud, and cleaning water. A repair that cannot resist moisture may reopen quickly, especially around the toe, heel, or sidewall.
Waterproof glue is especially useful for:
- Hiking boots used on wet trails.
- Work boots exposed to outdoor ground.
- Rain boots with small gaps or cracks.
- School shoes worn in changing weather.
- Daily sneakers used on wet sidewalks.
- Sports shoes used on damp fields or courts.
| Shoe Use | Moisture Risk | Suggested Cure Time |
|---|---|---|
| Indoor shoes | Low | 24 hours |
| Casual sneakers | Medium | 24–36 hours |
| School shoes | Medium | 24–36 hours |
| Work boots | High | 36–48 hours |
| Hiking boots | High | 36–48 hours |
| Rain boots | High | 48 hours |
| Sports shoes | Medium to high | 36–48 hours |
Waterproof does not mean the repaired shoe should be soaked immediately. The glue needs enough curing time before water exposure. For most shoes, wait at least 24 hours. For boots, outdoor shoes, or sports shoes, 36–48 hours is safer.
GleamGlee Shoe Glue forms a waterproof, elastic seal after curing. This helps the repaired sole resist daily moisture while keeping enough flexibility for walking, bending, and outdoor use.
How to Reattach Soles?
To reattach soles with shoe glue, clean the separated area, lightly sand both surfaces, apply a thin layer of flexible shoe glue, press the sole tightly back into place, and let it cure fully before wearing. The repair is usually stronger when the sole is fixed early, before dirt, water, and bending enlarge the gap.
Most failed repairs happen because the shoe was dirty, damp, poorly pressed, or worn too soon. A strong sole repair depends more on preparation and curing than on using a large amount of glue.
For everyday repairs, patience matters. Giving the shoe enough curing time can help extend the life of sneakers, boots, school shoes, work shoes, sandals, and daily footwear instead of replacing them after one peeling edge appears.
How to Clean Soles?
Cleaning is the first step because shoe glue bonds poorly to dust, mud, oil, sand, or loose old adhesive. Even a strong glue may fail if the repair area is dirty inside.
Before applying glue:
- Open the sole gap gently without forcing it wider.
- Remove loose dirt using a brush, cloth, cotton swab, or toothpick.
- Peel away loose old glue only if it flakes off easily.
- Let wet shoes dry naturally before repair.
- Check that both surfaces still line up correctly.
| Cleaning Step | Why It Matters |
|---|---|
| Remove dust | Helps glue contact the real surface |
| Dry the gap | Moisture weakens bonding |
| Remove loose old glue | Improves surface contact |
| Check alignment | Helps sole fit correctly during pressing |
| Clean corners carefully | Toe and heel edges reopen easily |
Do not repair wet shoes directly after rain or washing. Water trapped inside the sole gap can weaken the glue bond. Let the shoes dry at room temperature first. Avoid strong heat from hair dryers or heaters because high heat may warp rubber, soften old glue, or damage synthetic materials.
For hiking boots, work boots, and children’s shoes, cleaning often takes longer because dirt gets deeper into the sole opening. Spending extra time here usually gives a much better repair result later.
How to Apply Shoe Glue?
Shoe glue should be applied in a thin, even layer. More glue does not always create a stronger repair. Thick glue can overflow, extend curing time, and prevent the sole from sitting flat against the shoe.
For cleaner application:
- Use the nozzle to guide glue deep into the gap.
- Apply a thin line instead of filling the opening completely.
- Cover both bonding surfaces lightly for larger gaps.
- Pay extra attention to toe corners and heel edges.
- Wipe away excess glue before it dries.
| Repair Area | Glue Amount | Best Method |
|---|---|---|
| Small toe gap | Very thin line | Push glue into the back edge |
| Heel separation | Thin even layer | Cover both corners fully |
| Side sole gap | Thin continuous line | Keep glue inside the gap |
| Insole lift | Small dots or lines | Avoid thick glue lumps |
| Sandal strap | Small controlled amount | Hold firmly during curing |
The goal is tight contact, not a thick glue layer. When the sole is pressed together, only a small amount of glue should appear at the edge. If glue pours out heavily, too much was used.
GleamGlee Shoe Glue includes a precision metal nozzle that helps place glue accurately inside narrow sole gaps. This is especially useful for sneakers, dress shoes, high heels, sandals, and shoes with visible sole edges where clean repair appearance matters.
How to Press Soles?
Pressing is what helps the glue form a tight bond between the sole and the shoe. Without enough pressure, tiny air gaps may remain inside the repair area. These weak spaces can allow moisture and dirt to enter again.
After applying the glue:
- Align the sole carefully before pressing.
- Press from the center outward to remove trapped air.
- Hold the toe edge tightly against the upper.
- Secure the shoe using rubber bands, clamps, tape, or weight.
- Keep pressure steady during curing.
| Pressure Tool | Best Use |
|---|---|
| Rubber bands | Sneakers, sandals, school shoes |
| Clamps | Boots and thick rubber soles |
| Heavy books | Flat sole sections |
| Tape | Small sidewall repairs |
| Shoe stuffing | Helps maintain shoe shape |
The GleamGlee repair kit includes rubber bands because steady pressure helps the sole cure in the correct position. For heavier boots or thick work shoes, clamps may work better. If clamps are used, place soft cloth or cardboard between the clamp and the shoe surface to avoid marks on leather, suede, canvas, or painted midsoles.
Good pressing also helps the repair look cleaner. When the sole sits tightly in its original position, there is less visible glue line around the edge.
How Long to Cure?
Most shoe sole repairs should cure for at least 24 hours before normal use. For work boots, hiking boots, sports shoes, and heavy-use footwear, 36–48 hours is usually safer.
Many people damage the repair by wearing the shoes too soon. The outside edge may feel dry, but the glue inside still needs time to build full strength. Early bending can reopen the gap before the bond is ready.
| Shoe Type | Minimum Cure Time | Better Cure Time |
|---|---|---|
| Indoor slippers | 24 hours | 24 hours |
| Casual sneakers | 24 hours | 36 hours |
| School shoes | 24 hours | 36 hours |
| Running shoes | 36 hours | 48 hours |
| Hiking boots | 36 hours | 48 hours |
| Work boots | 36 hours | 48 hours |
| Rain boots | 36 hours | 48 hours |
During curing:
- Keep the shoes in a dry room-temperature area.
- Avoid direct sunlight or strong heat.
- Do not pull on the repaired sole to “test” it early.
- Avoid water exposure before curing is complete.
- Start with light walking before heavy use.
For outdoor shoes and sports shoes, checking the repaired edge after the first few wears is a good habit. If a tiny corner begins lifting again, adding a small touch-up early is much easier than repairing a large reopened gap later.
What Shoe Glue Mistakes Matter?
The biggest shoe glue mistakes are using too much glue, skipping surface cleaning, forgetting to sand smooth areas, pressing the sole too weakly, and wearing the shoes before the glue has cured. These mistakes can make even a good shoe glue fail too soon.
Sole repair is not only about “sticking two parts together.” Shoes bend, twist, absorb body weight, touch wet ground, and rub against pavement. A repair that looks fine on the table may open again after walking if the glue layer is too thick, the sole is dirty, or the bond was not held tightly.
Most repair failures can be avoided with a simple rule: clean first, glue thinly, press firmly, and wait long enough. These four steps are more important than rushing the repair or adding more glue to “make it stronger.”
Do You Use Too Much Glue?
Using too much shoe glue is one of the most common mistakes. A thick glue layer may look stronger, but it often creates the opposite result. The sole cannot sit flat, curing takes longer, and excess glue may squeeze out around the shoe edge.
Too much glue can cause:
- A thick glue line that bends poorly.
- Shiny overflow around the outsole edge.
- Longer drying and curing time.
- Uneven pressure between the sole and upper.
- A hard or bulky feeling under the foot.
- Messy marks on white sneakers, suede, fabric, or leather.
| Repair Area | Common Glue Mistake | Better Method |
|---|---|---|
| Toe sole | Filling the whole gap | Apply a thin line inside |
| Heel edge | Adding thick glue at corners | Coat both surfaces lightly |
| Insole | Using large glue blobs | Use small dots or thin strips |
| Side sole | Letting glue overflow | Keep glue inside the gap |
| Sandal strap | Applying too much on fabric | Use a small controlled amount |
A good repair should use enough glue to wet the bonding surfaces, not so much that the shoe floats on adhesive. When the sole is pressed, only a little glue should appear at the edge. If a large amount pushes out, too much was applied.
For visible shoes, such as white sneakers, high heels, or dress shoes, extra glue should be wiped away before it cures. Once dried, overflow is harder to remove and may leave a visible ridge.
Do You Need Sanding?
Sanding is needed when the bonding surface is smooth, glossy, old, or covered with hardened adhesive. Many shoe soles are made from rubber, PU, plastic, leather, or synthetic materials that can be too smooth for strong bonding unless lightly roughened.
Sanding helps because it:
- Removes weak surface residue.
- Creates a slightly rough texture.
- Helps glue grip rubber and plastic better.
- Improves contact on old glue areas.
- Reduces the chance of the sole peeling again.
| Material | Sanding Need | Repair Note |
|---|---|---|
| Smooth rubber | High | Lightly roughen before gluing |
| PU sole | Medium | Sand gently, avoid damage |
| Leather sole edge | Medium | Sand only the hidden bonding area |
| Plastic heel part | High | Smooth plastic needs texture |
| Canvas | Low | Cleaning is more important |
| Suede | Low | Avoid visible surface damage |
| Foam midsole | Low to medium | Sand very gently |
Sanding should be light, not aggressive. The goal is to create grip, not remove large amounts of material. Use small sandpaper and focus only on the area that will be glued. After sanding, brush away the dust before applying shoe glue.
The GleamGlee Shoe Glue kit includes sandpaper because many real repairs need this step. It is especially useful for rubber outsole edges, smooth heel parts, work boots, sneakers, and older shoes with hardened glue residue.
Can You Wear Shoes Soon?
Wearing shoes too soon can ruin the repair even if the glue was applied correctly. The outside edge may feel dry within a short time, but the inside of the bond still needs time to cure. Walking too early bends the sole before the adhesive has built enough strength.
Wearing too soon may cause:
- The toe edge to reopen after a few steps.
- The heel gap to shift out of position.
- The glue layer to stretch before it is ready.
- Dirt and water to enter the weak repair line.
- A second repair that becomes messier than the first.
| Shoe Type | Risk If Worn Too Soon | Safer Cure Time |
|---|---|---|
| Casual sneakers | Toe gap opens again | 24–36 hours |
| School shoes | Playground bending weakens bond | 24–36 hours |
| Running shoes | Forefoot flex breaks repair | 36–48 hours |
| Work boots | Heavy pressure shifts sole | 36–48 hours |
| Hiking boots | Moisture and twisting stress bond | 36–48 hours |
| Rain boots | Water enters repair edge | 48 hours |
During curing, keep the shoe dry and held firmly. Do not keep checking the bond by pulling at the sole. That can create tiny weak points before the repair is ready.
A simple habit works well: repair shoes at night, secure them with rubber bands or clamps, and leave them untouched until the next day. For heavy-use shoes, give them an extra day. One more day of waiting is usually better than repairing the same sole twice.
Why Choose GleamGlee Shoe Glue?
GleamGlee Shoe Glue is made for people who want to repair shoes at home without making the repair messy, stiff, or easy to reopen. It is designed for soles, heels, insoles, toe caps, straps, and outsole edges on common daily shoes.
The glue bonds leather, rubber, vinyl, canvas, and other shoe materials. After curing, it forms a clear, waterproof, flexible bond, which is important because shoes bend, touch wet ground, and carry body weight every day.
For simple home repair, the kit also includes useful tools: 2 tubes of 20 ml shoe glue, an applicator, 2 sandpaper sheets, and 2 rubber bands. These accessories help users clean, prepare, glue, press, and cure the repair more correctly.
What Materials Does Shoe Glue Bond?
GleamGlee Shoe Glue is useful because most modern shoes are made from mixed materials. One pair of sneakers may include rubber outsoles, foam midsoles, fabric mesh, PU panels, plastic heel supports, and leather details. A good repair glue needs to work across these surfaces.
It can be used on:
- Rubber soles and outsole edges.
- Leather shoes, boots, and heel sections.
- Vinyl and synthetic shoe parts.
- Canvas sneakers and casual shoes.
- PU, foam, and mixed-material shoe areas.
- Insoles, toe caps, straps, and heel edges.
| Shoe Type | Common Repair | Why GleamGlee Helps |
|---|---|---|
| Sneakers | Peeling outsole edge | Flexible bond for toe bending |
| Running shoes | Small sole gaps | Helps resist repeated flexing |
| Work boots | Loose heel or sole | Stronger hold with longer cure |
| Hiking boots | Sole separation | Waterproof repair after curing |
| Dress shoes | Lifting sole edge | Clear finish looks cleaner |
| High heels | Thin outsole lift | Precise nozzle reduces mess |
| School shoes | Toe sole peeling | Practical for repeated home repair |
| Sandals | Loose straps | Bonds small contact points |
| Slippers | Foam sole separation | Flexible repair for soft soles |
This makes the glue helpful for households with several types of shoes. A parent may use it for school shoes, a runner may repair a peeling outsole, and someone with leather dress shoes may fix a lifting sole edge before it becomes worse.
What Is in the Shoe Glue Kit?
The GleamGlee Shoe Glue kit is built to solve the most common problems in shoe repair: poor surface preparation, messy glue application, and weak pressure during curing. Instead of only providing glue, the kit includes small tools that help the repair hold better.
Inside the kit:
- 2 × 20 ml shoe glue tubes.
- 1 applicator for spreading or guiding glue.
- 2 sandpaper sheets for surface preparation.
- 2 rubber bands for holding pressure while curing.
- Precision metal nozzle for narrow gaps and clean edges.
| Kit Item | What It Does | Why It Matters |
|---|---|---|
| 20 ml glue tubes | Provide repair adhesive | Enough for multiple shoe repairs |
| Metal nozzle | Controls glue flow | Useful for small sole gaps |
| Applicator | Helps spread glue | Better for wider repair areas |
| Sandpaper | Roughens smooth surfaces | Improves grip on rubber and plastic |
| Rubber bands | Holds sole tightly | Helps maintain pressure while curing |
The two-tube design is convenient because users do not need to open one large tube for every small repair. It also makes the kit easier to store for later use. For small repairs, such as toe gaps or loose insoles, only a small amount of glue is needed.
The full kit can repair more than 20 pairs of shoes, depending on the size of each repair. Small peeling edges use very little glue, while heavy boot soles or larger outsole separations need more.
How Many Shoes Can It Fix?
GleamGlee Shoe Glue can repair more than 20 pairs of shoes in many normal home repair situations. The exact number depends on the size of the gap, the shoe type, and how much glue is used.
Estimated use:
| Repair Type | Glue Use | Repair Capacity |
|---|---|---|
| Small toe gap | Very low | Many pairs |
| Heel corner lift | Low | Many pairs |
| Loose insole | Low | Many pairs |
| Sandal strap | Low to medium | Multiple pairs |
| Sneaker outsole edge | Medium | Several pairs |
| Full front sole lift | Medium to high | Fewer pairs |
| Thick boot sole repair | High | Depends on sole size |
For daily users, this means one kit can handle many common shoe problems around the home. It can be used for children’s school shoes, sneakers, slippers, sandals, work shoes, and boots instead of buying a new pair after every small separation.
The value is not only in the number of repairs. A single pair of sneakers, hiking boots, or dress shoes often costs much more than a repair kit. If one repair extends the life of a favorite pair by several months, the kit already saves money and reduces waste.
Conclusion
Reattaching soles with shoe glue is one of the easiest and most cost-effective ways to extend the life of shoes that are still comfortable and wearable. A small peeling edge does not always mean a pair of sneakers, boots, sandals, or work shoes needs to be replaced. In many cases, cleaning the gap properly, applying a thin layer of flexible waterproof shoe glue, pressing the sole firmly, and allowing enough curing time can restore the shoe for months of continued use. The most important part is repairing the damage early, before water, dirt, and repeated bending turn a small gap into a larger separation.
GleamGlee Shoe Glue is designed for practical everyday shoe repair. Its strong flexible bond, waterproof performance, clear finish, and precision metal nozzle help make repairs cleaner, stronger, and easier to control at home. Whether repairing running shoes, hiking boots, school shoes, leather dress shoes, sandals, or daily sneakers, the complete repair kit helps users handle common sole problems without complicated tools. For customers looking for reliable shoe repair products, private label options, or customized shoe glue solutions, GleamGlee also supports product inquiries, packaging customization, and long-term cooperation for different market needs.


