 Skip to content
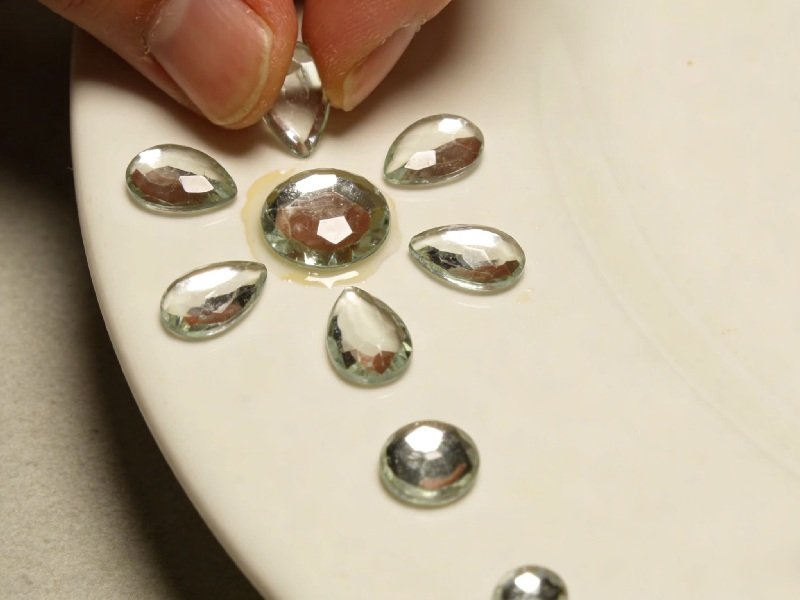
If you’ve ever tried to glue glass to glass, you already know the frustrating part: the repair looks perfect… until it doesn’t. A vase holds for two days, then separates when you lift it. A glass lid knob feels solid, then twists off the first time it’s warmed by steam. Even worse, the glue line turns hazy or “frosted,” and the item looks permanently damaged. The truth is, glass is one of the hardest everyday materials to bond reliably because it’s non-porous, ultra-smooth, and extremely sensitive to oils and residue.
To glue glass to glass successfully, you need three things working together: clean surface prep, the right glass-specific adhesive, and enough cure time for full strength. Skip any one of those, and the bond usually fails under water, heat, vibration, or simple handling.
A simple way to think about it: you’re not just “sticking” glass—you’re building a joint that has to survive real life. If you want the repair to stay clear, strong, and invisible, the next sections will show exactly what breaks glass bonds, and how to avoid it.
Why Does Glue Glass to Glass Often Fail?
Most glass-to-glass repairs don’t fail because the glue is weak. They fail because glass is unforgiving, and small mistakes that wouldn’t matter on wood or plastic become critical on glass. In customer feedback and real-world repairs, failures usually trace back to four predictable causes: surface smoothness, hidden contamination, unsuitable glue choice, and stress applied too early or in the wrong direction. Understanding these failure points upfront saves time, money, and repeat repairs.
Why Smooth Surfaces Make Glue Glass to Glass So Unreliable
Glass is almost perfectly smooth at a microscopic level. That means when you glue glass to glass, the adhesive has nothing to soak into or lock onto. Unlike wood fibers or fabric threads, glass offers no mechanical grip—only surface contact.
What this looks like in real use:
- The glue dries hard, but the bond peels off in one clean piece
- The repair feels solid until the first twist, bump, or wash
- The glue line separates exactly along the glass surface, not through the glue
In practical terms, this means contact area matters more than glue strength. A narrow edge-to-edge repair (like a thin stem or knob) is far more likely to fail than a wide, flat glass joint—even if the same glue is used.
Customer takeaway:
If the glass pieces touch at only a thin edge, the repair must be perfectly aligned and evenly bonded, or it will fail sooner rather than later.
How Invisible Contamination Ruins Glue Glass to Glass Bonds
One of the biggest surprises for customers is how often glass looks clean—but isn’t. Glass easily holds onto substances that block adhesion, even after washing.
Common hidden contaminants include:
- Finger oils from handling
- Dish soap residue
- Hard-water mineral film
- Household cleaners with silicone or polish
These contaminants prevent glue from spreading evenly. Instead of forming one continuous bond, the adhesive breaks into weak zones that later become failure points.
Based on typical adhesion behavior on smooth glass surfaces, real-world bond strength can drop dramatically:
| Glass surface condition | Typical customer description | Expected bond strength |
|---|---|---|
| Degreased, fully dry | “Squeaky clean, no streaks” | 100% (best case) |
| Light fingerprints | “Looks clean under normal light” | ~60–70% |
| Soap residue | “Feels slippery when wet” | ~55–65% |
| Hard-water haze | “Cloudy after drying” | ~65–80% |
| Silicone residue | “Water beads strongly” | Often fails immediately |
Practical rule for users:
If water beads or pulls away from the glass instead of spreading evenly, do not glue yet. The surface is still contaminated.
Why Using the Wrong Glue Breaks Glass to Glass Repairs
Many customers try super glue or general-purpose adhesive first because it’s convenient. While these can stick glass temporarily, they often fail under normal daily conditions.
Typical complaints include:
- “It held, but turned white around the edges.”
- “It snapped off when I washed it.”
- “It worked once, then failed weeks later.”
The reason is simple: most general glues are designed for porous or semi-porous materials, not glass. On glass, they tend to cure too brittle, too cloudy, or too sensitive to moisture and heat.
Here’s how different glue types behave on glass over time:
| Glue type | Short-term result | Common long-term issue |
|---|---|---|
| Super glue | Fast grab | Brittle failure, white haze |
| Epoxy | Strong bond | Visible seam, yellowing |
| Craft glue | Easy use | Never fully clears |
| Glass-specific glue | Clean, clear | Stable when cured properly |
Customer reality:
A glue that feels “very strong” at first is not always the one that lasts on glass.
How Stress and Early Handling Destroy Glue Glass to Glass Results
Even a well-glued repair can fail if stress is applied at the wrong time or in the wrong way. Glass bonds are especially sensitive during the first few hours after application.
Common stress mistakes customers make:
- Twisting a knob or lid to “test” it
- Picking up the item before full curing
- Letting gravity pull on the joint at an angle
- Exposing the repair to hot water too soon
Different types of stress affect glass bonds differently:
| Stress type | Example | Risk level |
|---|---|---|
| Twist | Turning a lid or handle | Very high |
| Peel | Lifting from one edge | High |
| Impact | Setting item down hard | Medium |
| Thermal | Hot-to-cold temperature change | Medium–high |
Most failures happen within the first 24 hours, even if the glue feels dry. Once micro-cracks form inside the bond, they rarely recover.
Which Glue Glass to Glass Works Best?
When people ask which glue glass to glass works best, they are rarely asking about chemistry. What they really want to know is: Will it stay clear? Will it hold under daily use? And will I have to redo the repair later?
The “best” glue depends on how the glass will be used, how visible the joint is, and how much stress the repair will see over time. Strength alone is not enough—clarity, flexibility, and resistance to water and heat matter just as much.
What Glue Glass to Glass Stays Truly Clear After Drying?
For most customers, appearance is the first deal-breaker. A repair that turns cloudy, frosty, or yellow ruins the item—even if it technically holds.
What users typically see in real life:
- A white haze forming around the joint after a few hours
- A faint “fog” that becomes obvious in sunlight
- Yellowing weeks later, especially near heat or light
These problems are not random. They are tied to glue type.
| Glue type | Visual result after curing | Common customer complaint |
|---|---|---|
| General super glue | Clear at first, then frosts | “Looks worse than the crack” |
| Two-part epoxy | Slight amber tint | “Strong but very visible” |
| Craft / hobby glue | Milky or cloudy | “Never really clears” |
| Glass-specific glue | Crystal clear | “You can’t see the joint” |
Why this matters:
Glass objects reflect and transmit light. Even a thin cloudy glue line becomes obvious from certain angles. If the item is decorative, on display, or used under bright light, clarity is not optional.
Which Glue Glass to Glass Balances Fast Set and Long-Term Strength?
Customers often face a trade-off: fast-setting glue vs glue that actually lasts. Many “instant” glues feel strong quickly but fail under repeated use.
Here’s how different options behave over time:
| Glue type | Initial hold | Strength after 24h | Typical failure |
|---|---|---|---|
| Super glue | Very fast | Low–medium | Brittle snap |
| Epoxy | Slow | High | Visible seam, long wait |
| Glass glue | Fast | High | Rare when cured |
What customers notice:
- Fast grab is helpful for alignment
- True durability shows up days or weeks later
- Repairs that survive washing, twisting, and light impact usually come from glass-specific formulas
The best glass glue locks quickly but keeps building strength after the initial set. That combination is what prevents “it held yesterday, but failed today” situations.
Why Glass-Specific Glue Glass to Glass Outperforms General Adhesives
Glass-specific glue isn’t just relabeled all-purpose adhesive. It is formulated for the exact problems glass presents.
Key differences customers feel in use:
- Glue spreads smoothly instead of beading up
- Less glue is needed to fully wet the surface
- The bond line stays thin and even
- The joint resists cracking under temperature changes
General adhesives are designed for porous materials. On glass, they often cure too brittle or fail to bond evenly.
Real-world implication:
If you glue glass to glass more than once, using a dedicated glass glue saves time, reduces rework, and delivers more predictable results—especially on visible repairs.
Which Glue Glass to Glass Handles Water and Heat Best?
Many glass items live in environments that destroy weak bonds: kitchens, bathrooms, outdoors, or near heat sources.
Customers often report failures like:
- Glue softening in hot water
- Clouding after steam exposure
- Cracking after sun exposure
Here’s how common glue types typically perform:
| Condition | Super glue | Epoxy | Glass glue |
|---|---|---|---|
| Hot water | Weakens | Holds | Holds |
| Steam / humidity | Turns cloudy | Stable | Clear |
| Sunlight / warmth | Brittle | Can yellow | Stable |
| Light vibration | Cracks | Holds | Holds |
Customer rule of thumb:
If the repaired item will ever see hot water, steam, or sunlight, water- and heat-resistant glass glue is the safest option.
How to Choose Glue Glass to Glass Based on Real Use
Instead of asking “Which glue is strongest?”, customers get better results by asking “How will this glass be used?”
| Use case | Best glue choice | Reason |
|---|---|---|
| Wine glass stem | Glass glue | Clear + resists twist |
| Glass lid knob | Glass glue | Handles torsion |
| Decorative vase | Glass glue | Invisible bond |
| Hidden structural repair | Epoxy | Strength over looks |
| Temporary craft project | Super glue | Speed over longevity |
This approach helps users avoid over-engineering or under-estimating the repair.

How to Glue Glass to Glass Correctly?
Most failed glass repairs don’t come from weak glue—they come from rushed steps. Gluing glass to glass is less forgiving than most DIY repairs. Small mistakes that wouldn’t matter on wood or plastic can quietly ruin a glass bond. The correct process isn’t complicated, but every step matters: surface prep, alignment, glue amount, and how the joint is handled in the first few minutes.
How to Clean Glass Before You Glue Glass to Glass
Cleaning is the single most important step, and the one customers skip most often. Glass that looks clean can still carry oils or residue that prevent proper bonding.
What actually works in real use:
- Wash with mild detergent Removes visible dirt, dust, and food residue.
- Rinse thoroughly Any soap film left behind weakens adhesion.
- Degrease with isopropyl alcohol (70–99%) This removes finger oils and invisible residues.
- Wipe dry with lint-free cloth or paper Avoid tissues that shed fibers.
- Do not touch the bonding area afterward Finger oils can undo all previous steps.
Simple test users can do at home:
Drip a little water on the cleaned area.
- If water spreads evenly → surface is ready
- If water beads or pulls away → contamination remains
| Surface behavior | What it means | Glue result |
|---|---|---|
| Water spreads evenly | Clean surface | Strong, even bond |
| Partial beading | Light residue | Weaker bond |
| Strong beading | Oil/silicone present | High failure risk |
How to Align Pieces When You Glue Glass to Glass
Alignment is where many glass repairs quietly fail. Once glue contacts both surfaces, repositioning becomes difficult and often introduces air gaps or stress.
Best practices from real repairs:
- Dry-fit the pieces before applying glue
- Identify the correct orientation (mark with tape if needed)
- Support both pieces so gravity doesn’t pull them apart
- Join in one smooth motion, not repeated adjustments
For cracked glass:
- Start alignment from one edge
- Let the crack close naturally
- Avoid forcing tight spots—this creates stress points
Why this matters:
Misalignment creates uneven glue thickness. Thin areas crack under stress; thick areas cure slowly and turn visible.
How Much Glue to Use When You Glue Glass to Glass
Using more glue does not make a stronger bond. In glass repairs, too much glue is one of the top causes of failure.
Correct amount in practice:
- Enough to fully wet both surfaces
- Thin, continuous layer
- A small, even squeeze-out at the edge is normal
What goes wrong with excess glue:
- Longer curing time
- Higher chance of cloudiness
- Thicker seam that concentrates stress
| Glue amount | Visual result | Strength outcome |
|---|---|---|
| Too little | Dry spots | Weak bond |
| Correct amount | Thin, clear seam | Strong, durable |
| Too much | Thick, visible line | Stress cracks later |
Precision-tip nozzles help users apply the right amount, especially on small repairs like stems, knobs, and chips.
How to Apply Pressure Without Breaking Glass
Glass does not like clamps. Traditional clamping can crack or shift glass parts.
What works better:
- Light hand pressure for initial set (10–20 seconds)
- Gentle support to keep parts from moving
- Let gravity assist instead of fighting it
Avoid:
- Heavy clamps
- Rubber bands pulling unevenly
- Pressing hard at one edge
A glass bond needs contact, not force. Even pressure keeps the glue line uniform and reduces internal stress.
How to Avoid Bubbles When You Glue Glass to Glass
Air bubbles weaken the joint and ruin clarity. They usually come from rushed application.
Bubble-prevention tips users find effective:
- Apply glue to one surface only
- Lower the second piece slowly
- Press from center outward
- Hold steady during the first seconds
If bubbles appear:
- Do not pull pieces apart
- Maintain light pressure
- Let the glue self-level if possible
A bubble-free bond spreads stress evenly and lasts longer under daily use.
What to Do in the First 10 Minutes After You Glue Glass to Glass
The first few minutes decide whether the repair lasts months or fails next week.
Do this:
- Keep the item still
- Maintain neutral positioning
- Protect from vibration
Do not:
- Twist, lift, or “test” the bond
- Wipe the glue line repeatedly
- Move the item to a new surface
Many users unknowingly weaken the bond by checking it too early. If it moves once during early set, strength is permanently reduced—even if it looks fine later.
How Long Should Glue Glass to Glass Cure?
When people glue glass to glass, the biggest mistake is assuming that “dry” means “ready.” Glass glue often feels firm within seconds, but internal strength develops much more slowly. Most failed repairs don’t happen during application—they happen hours later, when the item is picked up, twisted, washed, or heated too soon. Knowing exactly when you can touch, move, and use a repaired glass item is the difference between a repair that lasts and one that quietly weakens from day one.
How Fast Glue Glass to Glass Feels Set
Many glass glues grab quickly. This is helpful for alignment, but it can give users a false sense of security.
What users typically feel:
- After 10–20 seconds, the parts stop sliding
- After 1–3 minutes, the joint feels lightly secure
- After 10–15 minutes, the glue surface feels dry
What’s actually happening:
- The outer layer has set
- The center of the glue line is still forming
- Internal strength is only a fraction of the final bond
In real terms, early handling can reduce long-term bond strength by 20–40%, even if the repair looks fine afterward.
Clear rule for users:
If the bond feels firm but you can still dent the glue with a fingernail, it’s too early to use.
When Glue Glass to Glass Reaches Real Working Strength
“Working strength” is the point where the repair can handle normal handling without damage—but not full stress yet.
Typical curing timeline at room temperature (20–25°C / 68–77°F):
| Time after bonding | What’s safe | What to avoid |
|---|---|---|
| 0–5 minutes | Hold gently | Any movement |
| 5–30 minutes | Light repositioning only | Lifting or twisting |
| 1–4 hours | Careful handling | Water, heat, stress |
| 24 hours | Normal use | Extreme stress |
| 48 hours | Full durability | — |
For most household glass repairs, 24 hours is the point where users can safely return the item to daily use.
How Temperature and Humidity Change Glue Glass to Glass Cure Time
Environment matters more than many people expect. The same glue can cure very differently depending on where it’s used.
| Condition | Effect on curing | Practical advice |
|---|---|---|
| Warm (25–30°C) | Faster cure | Do not rush use |
| Cool (<15°C) | Slower cure | Wait extra 12–24 hrs |
| High humidity | Slightly slower | Keep item still |
| Dry indoor air | Ideal | Best results |
Customer mistake to avoid:
Moving a repair from a warm room to a cold garage during curing can create uneven strength inside the glue line.
Movement is the most common silent failure cause. Even tiny shifts during curing can break developing bonds.
Typical harmful movements:
- Picking up the item to “check” it
- Letting gravity pull on one side
- Placing the item on an uneven surface
Once internal bonding is disturbed, the glue does not “heal” itself later. The repair may survive light use but fail under stress weeks later.
Best practice:
Leave the item exactly where it was glued for at least 30 minutes, and avoid stress for 24 hours.
How to Know When Glue Glass to Glass Is Fully Cured
Instead of guessing, users can check readiness safely.
Signs of full cure:
- Glue line is fully clear
- No tackiness when lightly touched
- No odor near the joint
- Firm resistance to gentle pressure
Safe test method:
- Light tap near the joint (not on it)
- No movement or dull sound change
Unsafe tests to avoid:
- Twisting knobs or handles
- Pulling at edges
- Sudden hot or cold exposure
If the repair passes visual and light-pressure checks after 24 hours, it’s usually ready for normal use.
How Cure Time Changes by Glass Repair Type
Not all glass repairs behave the same. Stress level determines how patient users need to be.
| Repair type | Stress level | Recommended wait time |
|---|---|---|
| Decorative vase | Low | 12–24 hrs |
| Glass lid knob | High (twist) | 24–48 hrs |
| Wine glass stem | Medium–high | 24 hrs |
| Mirror chip | Low | 12 hrs |
| Craft project | Low | 4–12 hrs |
What Can You Fix When You Glue Glass to Glass?
Not every broken glass item should be glued—but many can be repaired safely and last for years if the job matches the stress level of the item. The key question customers should ask isn’t “Can I glue this?” but “What kind of stress will this glass see after repair?”
Glass-to-glass glue works best on items with good contact area, predictable handling, and low to moderate stress. Below are the most common real-world cases, broken down clearly.
What Household Glass Items Are Safe to Fix with Glue Glass to Glass
These are the most successful and lowest-risk repairs. They account for the majority of positive customer experiences.
Common examples:
- Wine glass stems and bases
- Glass lids and handle knobs
- Drinking glasses with clean breaks
- Glass jars and containers
- Small chips on glass shelves (non-load-bearing)
Why these work well:
- The contact surfaces match closely
- Stress is limited and predictable
- Repairs are usually at room temperature
Typical durability in real use:
When glued correctly and fully cured, these repairs often last months to years under normal household handling.
| Item type | Stress level | Repair success rate |
|---|---|---|
| Wine glass stem | Medium | High |
| Glass lid knob | High (twist) | Medium–High |
| Drinking glass | Medium | High |
| Glass jar | Low | Very high |
What Decorative Glass Items Work Best with Glue Glass to Glass
Decorative glass is ideal for glue glass to glass repairs because appearance matters more than heavy load strength—and glass glue excels at invisibility.
Common decorative repairs:
- Vases and bowls
- Crystal figurines
- Ornaments and collectibles
- Stained glass pieces
- Picture frame glass edges
Why glue works here:
- Stress is low
- Repairs are mostly static
- Clear glue lines preserve value and appearance
What customers value most:
- No visible seam under light
- No yellowing over time
- No cloudy edges
For collectibles, waiting the full cure time (often 24–48 hours) dramatically improves long-term stability.
What Craft and DIY Projects Can Use Glue Glass to Glass
Craft users are some of the most frequent glass glue customers. These projects often involve small pieces, light loads, and precision work.
Typical projects include:
- Glass mosaics
- Beads and charms
- Glass gems on décor
- Resin + glass combinations
- School or hobby projects
Why glass glue performs well:
- Precision tips allow controlled application
- Fast initial set speeds up workflow
- Clear finish keeps projects clean
| Project type | Load | Glue suitability |
|---|---|---|
| Mosaic tiles | Low | Excellent |
| Jewelry pieces | Very low | Excellent |
| Decorative panels | Low | Very good |
| Mixed media art | Low–medium | Good |
Craft insight:
Glass glue reduces rework compared to super glue, especially when clarity matters.
What Glass Repairs Should Be Avoided with Glue Glass to Glass
Some glass repairs should not rely on glue alone, regardless of glue quality. These failures aren’t about skill—they’re about safety.
High-risk repairs to avoid:
- Structural window glass
- Load-bearing shelves
- Large aquarium panels
- Vehicle windshields or windows
- Glass railings or balustrades
Why these are unsafe:
- Continuous load or pressure
- Risk of injury if failure occurs
- Legal or building-code concerns
| Repair type | Stress | Risk if failed |
|---|---|---|
| Window pane | High | Injury |
| Aquarium wall | Constant | Flooding |
| Windshield | Impact | Severe |
| Load-bearing shelf | High | Falling glass |
How to Decide If Your Glass Item Is Worth Gluing
Before gluing, customers can make a simple decision using three questions:
- Will this glass carry weight?
- Will it be twisted, pulled, or heated regularly?
- Is failure dangerous or just inconvenient?
| Answer pattern | Recommendation |
|---|---|
| Mostly “no” | Glue glass to glass is suitable |
| Some “yes” | Use caution, wait full cure |
| All “yes” | Do not glue; replace |
This quick check prevents most regrets and repeat repairs.

Why Do Professionals Trust Glue Glass to Glass Solutions?
Professionals don’t choose glass glue because it sounds specialized—they choose it because failed repairs cost time, money, and reputation. Whether it’s a repair shop, a craft studio, a small manufacturer, or a retailer handling returns, consistency matters more than shortcuts. A glue that works “most of the time” is not good enough when every failure means rework, refunds, or unhappy customers. That’s why professionals trust glass-to-glass solutions designed specifically for glass, not general-purpose adhesives.
Why Precision Application Matters in Glue Glass to Glass Work
Professionals deal with small tolerances. Many glass repairs involve narrow edges, thin seams, or visible surfaces where excess glue ruins the result.
What professionals need from application tools:
- Controlled flow, not sudden bursts
- Ability to reach tight cracks or corners
- Minimal cleanup after bonding
In real workshops, precision tips reduce:
- Glue waste
- Visible seams
- Time spent cleaning cured overflow
| Application method | Control level | Common issue |
|---|---|---|
| Open nozzle | Low | Over-application |
| Cut tube tip | Medium | Uneven flow |
| Fine precision tip | High | Clean joints |
How Consistent Formulation Builds Trust in Glue Glass to Glass Repairs
Professionals notice when glue behaves differently from one tube to the next. Inconsistent viscosity, cure speed, or clarity leads to unpredictable results.
What consistency gives professionals:
- Same working time every job
- Same clarity after curing
- Same strength under stress
Why this matters:
- Predictable results reduce mistakes
- Training staff becomes easier
- Fewer returns or customer complaints
In professional settings, a glue that performs the same way every time is worth more than one that’s slightly cheaper but inconsistent.
Why Fast Control Beats “Instant Stick” for Glue Glass to Glass
Many non-professionals chase instant grab. Professionals don’t. They want control first, lock-in second.
What professionals look for:
- Enough open time to align parts correctly
- Fast set once alignment is done
- No sliding during early cure
Too-fast glues cause:
- Misalignment
- Trapped bubbles
- Stress points that fail later
A balanced glass glue allows:
- Accurate placement
- Clean seams
- Strong bonds without rushing
Professional insight:
A repair that takes 30 seconds longer but avoids rework is always the better choice.
How Glass Glue Reduces Rework and Failure Rates
Rework is expensive. It costs labor, materials, and credibility.
Professionals report that glass-specific glue:
- Reduces break-off failures
- Minimizes clouding complaints
- Holds up better after washing and handling
| Repair outcome | General glue | Glass glue |
|---|---|---|
| Clean visual finish | Medium | High |
| Failure after curing | Higher | Lower |
| Need for rework | Frequent | Rare |
| Customer complaints | More | Fewer |
Over time, fewer failures matter more than a lower upfront glue cost.
Why Manufacturer-Grade Glue Glass to Glass Is Preferred
Professionals also care about supply reliability and support, not just performance.
Manufacturer-grade solutions offer:
- Stable long-term availability
- Clear technical guidance
- Batch-to-batch reliability
- Packaging designed for real use
This is especially important for:
- Retailers with repeat orders
- Brands offering warranties
- Workshops handling volume repairs
Professional reality:
A glue that disappears from the market or changes formula without notice creates risk. Professionals avoid that.
Conclusion
Gluing glass to glass works best when the repair matches how the item will actually be used. Most failures come from rushing the process, using the wrong glue, or stressing the joint too early—not from weak adhesive. With proper cleaning, the right amount of glass-specific glue, accurate alignment, and enough curing time, many everyday glass repairs can be clean, invisible, and long-lasting.
For home users, the key is knowing what to fix and what to avoid. Decorative items, drinkware, lids, crafts, and collectibles are all good candidates when stress levels are reasonable. High-risk or load-bearing glass should be replaced or professionally repaired instead. Making this distinction upfront saves time, money, and frustration.
For professionals and brands, reliability matters even more. Consistent performance, clear finishes, precise application, and low failure rates reduce rework and customer complaints. That’s why manufacturer-grade glass glue solutions—like those from GleamGlee—are trusted for both everyday repairs and scalable product programs, including custom formulations and private-label production.


