 Skip to content
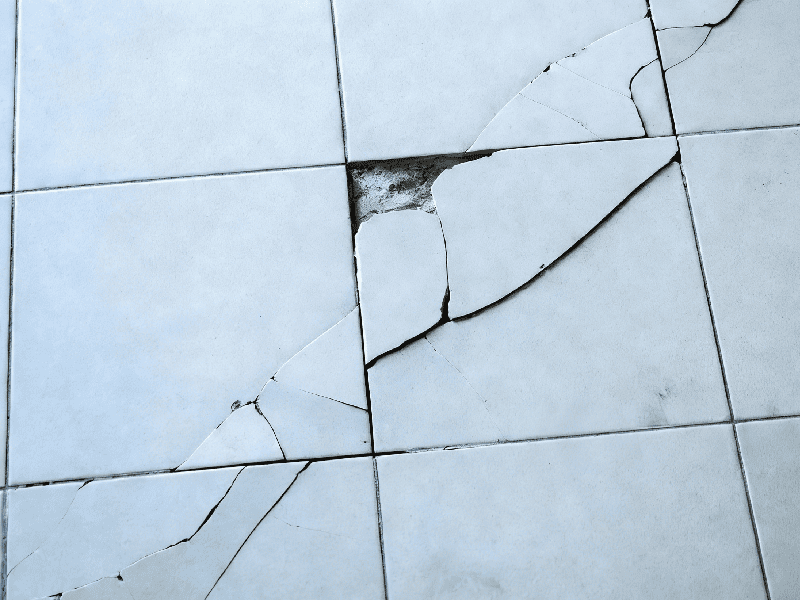
Porcelain breaks in the most annoying ways: a mug handle snaps clean off, a hairline crack spreads across a plate, a figurine’s tiny arm falls to the floor, or a tile corner chips and suddenly your bathroom looks “unfinished.” Most people try the glue they already have—then the repair turns white, feels brittle, or pops off the first time the item gets warm, wet, or bumped. The problem usually isn’t your hands. It’s that porcelain behaves more like glass than “regular ceramic,” so the wrong adhesive can fail even if it says “strong” on the label.
The best glue for porcelain is a purpose-made porcelain/ceramic glue that dries clear, bonds smooth non-porous surfaces, and holds up to daily heat and moisture. For most household repairs (mugs, plates, décor, figurines), it gives cleaner and more reliable results than super glue. For heavy structural breaks or tile load points, 2-part epoxy is often the safer choice.
If you’ve ever had a “perfect-looking” repair fail a week later, keep reading—because porcelain repairs succeed or fail on a few small details that most tutorials skip.
Why Is Porcelain Hard to Glue Properly?
Porcelain is hard to glue because it is extremely dense, very smooth, and often coated with glaze, which leaves almost nothing for glue to grip. Most household glues are designed for porous or slightly rough materials. On porcelain, they either fail to bond properly, cure too brittle, or break again once heat, water, or daily use is involved.
In short: porcelain looks solid, but from a glue’s perspective, it’s one of the most difficult surfaces in a home.
What Is Porcelain Made Of and Why Does That Matter for Glue?
Porcelain is fired at much higher temperatures than standard ceramic—often above 1,200°C (2,200°F). This high firing process melts the raw materials into a vitrified structure, meaning the body becomes glass-like rather than porous.
What this means in real life:
- Water absorption of porcelain is usually below 0.5%
- Many adhesives are designed for materials with 5–15% absorption
- Less absorption = less mechanical grip for glue
So instead of soaking in and locking, glue must cling to the surface itself. If the adhesive is not formulated for smooth, non-porous materials, it simply sits on top—and eventually releases.
This is why porcelain behaves more like glass or polished stone than like clay or earthenware when you try to glue it.
Why Do So Many “Strong” Glues Fail on Porcelain?
Most glue failures on porcelain are predictable—and repeatable.
Here are the most common reasons customers experience failure, even when the glue claims to be “extra strong”:
1. The glue cures too rigid
Porcelain expands slightly when heated (hot drinks, dishwashers) and contracts when cooled. Many fast-bond glues cure rock-hard with no flexibility. Over time, that rigid glue line cracks under micro-movement.
2. The glue cannot bond to smooth glaze
Glazed porcelain has a surface similar to glass. If the glue depends on surface roughness or absorption, adhesion will always be weak.
3. Heat and moisture slowly break the bond
Porcelain items are often used in:
- Kitchens
- Bathrooms
- Outdoor areas
Heat, steam, and repeated moisture exposure gradually weaken glues that are not designed for these conditions.
4. Excess glue reduces strength instead of increasing it
A thick glue layer prevents tight contact. Many failed repairs look “solid” but break cleanly at the glue line because the bond never fully formed.
Does Glazed Porcelain Make Repairs Even Harder?
Yes—glazed porcelain is significantly harder to glue than unglazed porcelain.
The glaze is essentially a thin glass coating fired onto the surface. It adds beauty and stain resistance, but from a repair standpoint, it creates problems:
- Even lower surface friction
- No absorption at all
- High visibility of residue, haze, or glue marks
This is why customers often report:
- “The glue held, but you can see it clearly.”
- “There’s a cloudy line I can’t remove.”
- “It looked fine until it fully dried.”
For glazed porcelain, glue must:
- Bond to glass-smooth surfaces
- Cure clear, not milky
- Stay stable when exposed to warm water and cleaning
Aggressive sanding can help adhesion, but it permanently damages the finish—often unacceptable for figurines, collectibles, or decorative dishes.
Why Are Porcelain Tiles Especially Difficult to Glue?
Porcelain tiles add weight and stress to the problem.
Compared with regular ceramic tile, porcelain tile is:
- Denser
- Harder
- Less absorbent
- Heavier
That combination creates several challenges:
| Tile issue | Why glue struggles |
|---|---|
| Low absorption | Adhesives can’t anchor |
| High hardness | Less surface “bite” |
| Tile weight | Higher shear stress |
| Moisture exposure | Weakens unsuitable glues |
| Temperature changes | Stresses rigid bonds |
This is why many tile repairs fail months later—not immediately. The glue holds at first, then releases once daily stress adds up.
It also explains why construction adhesives sometimes work for tile installation but perform poorly for small, visible porcelain repairs where precision and appearance matter.
What Most DIY Guides Don’t Tell You About Porcelain Repairs
One of the biggest misconceptions is that porcelain repair is about finding the strongest glue.
In reality, success depends on:
- Matching glue chemistry to porcelain’s surface
- Keeping glue layers thin and controlled
- Allowing full cure time
- Accepting that some porcelain items are better repaired for display, not heavy use
Many failed repairs aren’t caused by poor technique—they’re caused by using a glue designed for the wrong material.
Once users understand why porcelain is difficult to bond, choosing the right adhesive becomes far more logical—and far less frustrating.
Which Porcelain Glue Works Best for Different Repairs?
There is no single “best” porcelain glue for everything. The right glue depends on what broke, how the item is used, how visible the repair is, and how much stress it will face. Most repair failures happen because people choose glue based on speed or brand familiarity, not on how porcelain actually behaves in daily life.
To make this clearer, it helps to think of porcelain repairs in three real-world categories:
- Everyday-use items (mugs, plates, bowls)
- Decorative or detailed items (figurines, collectibles)
- Structural or load-bearing parts (tiles, trims, heavy breaks)
Each category needs a different glue strategy.
Is Porcelain Glue Better Than Super Glue?
For most porcelain repairs, yes—porcelain glue is more reliable than super glue, even though super glue feels convenient.
Super glue bonds fast, but speed is often misleading. On porcelain, it creates a very rigid bond line. That rigidity is the reason many repairs fail later, not immediately.
What customers commonly experience with super glue on porcelain:
- Holds for a few days, then snaps cleanly
- Turns white or cloudy around the joint
- Fails after exposure to hot water or steam
- Leaves visible residue that cannot be removed
Porcelain glue is formulated differently:
- Designed for smooth, non-porous surfaces
- Maintains slight flexibility after curing
- Dries clear, without white bloom
- Handles heat and moisture better over time
A realistic comparison based on daily use:
| Repair scenario | Super glue | Porcelain glue |
|---|---|---|
| Coffee mug handle | Often re-breaks | Holds with normal use |
| Plate edge chip | Weak edge bond | Strong, cleaner bond |
| Figurine arm | Fast but fragile | Slower, more durable |
| Decorative bowl | Visible haze | Nearly invisible |
Super glue can work for tiny, non-stressed repairs, but for anything you touch, wash, or heat regularly, porcelain glue is the safer choice.
When Is Epoxy a Better Glue for Porcelain?
Epoxy is not “better” across the board—but in certain cases, it is the right tool.
Epoxy excels when:
- The break is large or uneven
- The item carries weight or load
- The repair is not highly visible
- Strength matters more than appearance
Examples where epoxy makes sense:
- Porcelain tile corners
- Heavy planters or garden pieces
- Structural tile trims
- Thick porcelain parts under stress
However, epoxy has trade-offs that matter to customers:
- Thicker texture = harder to control
- Excess epoxy is difficult to clean
- Often cures slightly yellow or opaque
- Short working time increases alignment errors
How professionals usually decide:
| Situation | Porcelain glue | Epoxy |
|---|---|---|
| Mug, plate, bowl | Preferred | Too bulky |
| Figurines, décor | Cleaner | Only if hidden |
| Tile repair | Limited | Stronger |
| Outdoor heavy items | Depends | More durable |
In short:
- Porcelain glue = precision + appearance
- Epoxy = strength + structure
Why Clear Porcelain Glue Matters for Visible Repairs
Most porcelain repairs are visible. This is where many “strong” glues disappoint users.
Common complaints after repair:
- “The bond is strong, but it looks ugly.”
- “There’s a white line around the crack.”
- “The glue dried cloudy.”
Clear porcelain glue matters because:
- Glazed porcelain reflects light
- Any haze or residue stands out immediately
- Decorative items rarely hide mistakes
Clear-drying porcelain glue:
- Blends into glazed surfaces
- Minimizes visual seams
- Preserves the original look of the item
For figurines, collectibles, decorative plates, and gift items, appearance is part of success, not an afterthought.
Can Liquid Nails Be Used as a Porcelain Glue?
Liquid Nails and similar construction adhesives can be used on porcelain, but only in specific construction-related cases.
Where Liquid Nails can work:
- Installing porcelain tiles
- Attaching porcelain trim to walls
- Structural bonding where appearance is not critical
Where it performs poorly:
- Small porcelain repairs
- Decorative or detailed items
- Visible surfaces
- Fine cracks or chips
Limitations customers often discover too late:
- Thick, messy application
- Difficult cleanup
- Slow curing
- Not clear-drying
Liquid Nails is designed for installation, not restoration. Using it to fix a mug or figurine is like using concrete to fix fine china—it may hold, but it’s the wrong tool.

A Simple “Choose the Right Porcelain Glue” Table
This is how many professionals simplify decisions:
| What broke | Best glue choice | Why |
|---|---|---|
| Mug handle | Porcelain glue | Heat + water resistance |
| Plate or bowl | Porcelain glue | Clean bond, daily use |
| Figurine | Porcelain glue | Precision, invisible |
| Tile chip | Epoxy or tile adhesive | Load-bearing |
| Tile trim | Epoxy / construction adhesive | Shear strength |
| Outdoor planter | Epoxy or outdoor-rated porcelain glue | Weather exposure |
This approach prevents most common repair failures—and saves time, money, and frustration.
Why “Strongest Glue” Is the Wrong Question
One of the biggest mistakes customers make is asking:
“What is the strongest glue for porcelain?”
The better question is:
“What glue will last on this porcelain item in this situation?”
Porcelain repairs fail not because the glue is weak, but because:
- The glue is too rigid
- The glue is too thick
- The glue is wrong for heat, moisture, or stress
Once users match glue type to real use, porcelain repairs become far more predictable—and far less frustrating.
How Do You Choose the Right Glue for Porcelain Items?
Straightforward answer:
Choosing the right glue for porcelain is not about brands or marketing claims—it’s about how the porcelain will be used after the repair. Heat, water, weight, visibility, and frequency of handling all matter more than “maximum strength.” Most failed repairs happen because people choose glue based on speed or convenience, not on real-world conditions.
A simple way to think about it:
If you wouldn’t treat a porcelain mug the same way as a porcelain floor tile, you shouldn’t glue them the same way either.
What Is the Best Porcelain Glue for Plates and Cups?
Plates, cups, mugs, and bowls are some of the hardest porcelain items to repair successfully, because they face multiple stresses at once.
Daily stresses include:
- Hot liquids (often 60–90°C / 140–195°F)
- Repeated washing
- Handling and small impacts
- Occasional drops or knocks
Because of this, the glue must balance bond strength with stability, not just grab fast.
What works best in practice:
- Porcelain or ceramic glue designed for non-porous surfaces
- Clear curing, so the repair doesn’t stand out
- Resistance to warm water and steam
- Thin application for tight contact
What usually fails:
- Super glue (becomes brittle with heat)
- Craft glue (peels off)
- Silicone (flexible but weak bonding)
Important customer-facing reality:
- Even with the right glue, repaired tableware should be treated carefully
- Most people repair these items for sentimental or light use, not for dishwasher-heavy daily cycles
- Handles and exterior areas are safer to repair than rims or interiors
For many households, a repaired mug becomes a favorite desk cup—not a dishwasher test subject.
Which Porcelain Glue Works for Figurines and Collectibles?
Figurines, ornaments, and collectibles are a completely different category. Strength matters—but precision and appearance matter more.
Common challenges:
- Very small bonding areas
- Irregular break lines
- High visibility
- Irreplaceable value
For these items, the right glue should:
- Allow controlled, slow application
- Stay in place without running
- Dry clear with no haze
- Give enough working time to align parts perfectly
Why porcelain glue is preferred here:
- Fine-tip nozzles reduce over-application
- Thinner glue lines mean cleaner seams
- Less risk of visible residue or staining
Epoxy is rarely ideal unless:
- The break is large
- The joint is hidden
- Structural strength outweighs appearance
For collectibles, many users accept slightly longer curing time in exchange for a repair that looks original, not “fixed.”
What Porcelain Glue Is Best for Outdoor Use?
Outdoor porcelain introduces stresses that indoor items never face.
Outdoor conditions include:
- Temperature swings (day/night)
- Rain and humidity
- Wind and vibration
- UV exposure
Because of this, glue must remain stable—not just strong.
Good outdoor glue characteristics:
- Waterproof after curing
- Tolerates expansion and contraction
- Does not become brittle in cold weather
In real-world use:
- Porcelain glue works well for decorative outdoor items (statues, ornaments)
- Epoxy is often better for heavy planters or load-bearing parts
A common mistake is using indoor-only glue outdoors. It may hold initially, then fail months later once weather stress accumulates.
What Should You Not Use as Glue for Porcelain Tiles?
Porcelain tiles are often the most expensive porcelain items in a home—and also the most commonly repaired incorrectly.
Avoid using these on porcelain tiles:
- White glue or craft glue
- Hot glue
- Silicone sealant as a primary adhesive
- General “multi-purpose” household glues
- Super glue for anything larger than a tiny chip
Why these fail on tiles:
- Poor long-term adhesion
- Softening with moisture
- Brittleness under load
- Inability to handle shear stress
What actually works:
- Tile-rated adhesives for installation
- Epoxy for repairs or heavy stress areas
- Porcelain glue only for small, cosmetic fixes
Using the wrong glue on tiles often leads to delayed failure—which is worse than immediate failure because it damages surrounding areas.
A Practical “Choose the Right Porcelain Glue” Checklist
Many professionals use a quick checklist instead of guessing:
| Question | If yes → |
|---|---|
| Will it be exposed to heat? | Avoid brittle glues |
| Will it get wet regularly? | Choose waterproof glue |
| Is the repair visible? | Use clear-drying glue |
| Is the item heavy or load-bearing? | Consider epoxy |
| Is precision important? | Use porcelain glue |
| Is it decorative only? | Appearance > strength |
This checklist alone prevents most glue-selection mistakes.
Why Choosing the Right Glue Saves More Than It Costs
Customers often try multiple glues before succeeding—spending more money, time, and frustration than necessary.
Choosing the correct glue from the start:
- Reduces rework
- Protects valuable items
- Avoids surface damage
- Delivers predictable results
In porcelain repair, the right glue choice matters more than brand names or speed claims.
How Do You Apply Porcelain Glue the Right Way?
Porcelain repairs last when you treat them like a “clean bonding job,” not a quick patch. That means: remove invisible oils, keep the glue line thin, hold the joint steady during the first minutes, and give the glue a full cure before exposing it to water or heat. Most porcelain glue failures come from rushing cure time, using too much glue, or touching the bond area after cleaning.
How Should You Prepare Porcelain Before Using Glue?
Porcelain is smooth and non-porous, so the glue can only bond as well as the surface allows. Even a small amount of kitchen oil can weaken the bond dramatically.
Prep steps that work in real homes (and don’t require special tools):
Step 1: Wash and remove soap film
- Use warm water + mild dish soap
- Rinse thoroughly
- Dry completely
Step 2: Remove invisible oils (this is the step most people skip)
- Wipe bonding areas with 70–99% isopropyl alcohol
- Let it air-dry 2–5 minutes
- Do not touch the cleaned area with bare fingers
Step 3: Decide if light scuffing is appropriate
- For tiles or hidden joints, light scuffing can help
- For collectibles, glossy figurines, visible seams, skip sanding unless you accept cosmetic change
Step 4: Dry-fit before gluing
- Test how the pieces fit together
- Check alignment and contact area
- If it rocks or doesn’t sit flat, the repair needs gap-filling strategy (often epoxy), not just more glue
A quick “prep reality table”:
| Surface condition | What it causes | What to do |
|---|---|---|
| Greasy or handled | Bond pops off cleanly | Alcohol wipe + air dry |
| Soap film (bathroom) | Weak, slippery bond | Wash + rinse + alcohol |
| Moisture in crack | Cure slows, bond weakens | Dry fully; use warm airflow |
| Dust from sanding | Glue sticks to dust, not porcelain | Wipe clean after scuffing |
Most important prep rule:
If you can smell dish soap or feel slipperiness, the surface is not ready.
How Much Porcelain Glue Should You Apply?
More glue usually creates a weaker repair on porcelain.
Porcelain bonding works best with a thin glue line and tight contact. Thick glue layers:
- trap air
- prevent tight contact
- squeeze out messily
- cure unevenly
- leave visible residue
Simple guidelines customers can actually follow:
- For a crack or thin break: apply a thin bead (about the thickness of a hairline to 1 mm)
- For a chip: use micro-dots and press firmly
- For a handle: apply a thin layer on both sides, then press and hold
What “thin” means in practice:
- If glue squeezes out heavily on all sides, you used too much
- If the joint slides around like it’s floating, you used too much
- If the parts don’t fully seat together, you used too much or the fit is poor
Here’s a quick table that prevents common mistakes:
| You see this… | What it usually means | Fix |
|---|---|---|
| Glue floods out everywhere | Over-application | Use less; wipe immediately |
| Joint won’t sit flush | Too much glue or poor fit | Remove, clean, reapply thinner |
| Repair looks cloudy | Glue layer too thick / wrong glue | Thin layer; choose clear porcelain glue |
| Bond breaks cleanly | No real adhesion occurred | Improve cleaning + pressure |
Pro tip (very practical):
Use a toothpick, fine nozzle, or micro-tip to control glue. Precision beats force.
How Do You Hold and Clamp Porcelain Without Breaking It?
A lot of people avoid clamping because porcelain feels fragile. But steady pressure is one of the biggest factors in a long-lasting bond.
You don’t need expensive clamps. You need steady, even pressure.
Safe ways to hold porcelain pieces:
- Painter’s tape (light pressure, good for small parts)
- Rubber bands (mug handles, figurine limbs)
- Soft cloth + spring clamp (only for thick porcelain pieces)
- A small weight (for flat chip repairs on tiles)
Pressure rule:
Use enough force to keep parts fully seated—but not enough to crack porcelain.
Useful reference:
- A mug handle repair often needs constant pressure for 5–10 minutes, then gentle support for 1–2 hours.
- Figurine pieces often need tape + stable positioning, not heavy clamping.
How Long Does Porcelain Glue Need to Cure?
This is the #1 reason repairs fail.
Many users test the repair too soon. The glue feels “set,” but it hasn’t reached full strength.
A realistic timeline for many porcelain glues:
| Stage | What it means | Typical time |
|---|---|---|
| Initial set | Stops moving; alignment locked | 5–10 minutes |
| Light handling | Can be moved carefully | 1–2 hours |
| Full strength | Ready for real use | 12–24 hours |
What you should NOT do before full cure:
- Wash the item
- Expose it to steam or hot water
- Put weight on it
- Try to “stress test” the bond
If the item is used with heat/water (mug, plate, bathroom tile):
- Aim for 24 hours cure, even if the label says faster
In real life, waiting an extra day often means your repair lasts years instead of weeks.
How Do You Clean Up Porcelain Glue Without Ruining the Finish?
Cleanup is where repairs often look messy—especially on glossy porcelain.
Best practice: clean excess glue immediately
- Use a dry cloth or cotton swab first
- If needed, lightly dampen with isopropyl alcohol
- Avoid smearing glue across the glaze
If glue has already cured:
- Do not scrape aggressively (you can scratch glaze)
- If the glue is brittle, gentle mechanical removal may work
- If it’s rubbery or thick, removal becomes difficult without damaging the surface
This is another reason thin application matters: less squeeze-out = less cleanup risk.
Do this:
- Clean + alcohol wipe
- Dry-fit the pieces
- Apply a thin layer
- Hold steady 5–10 minutes
- Let cure 12–24 hours
Avoid this:
- Touching the bond area after cleaning
- Using thick glue blobs
- Washing the same day
- Testing strength too early
- Using construction adhesive for fine porcelain repairs

Is Porcelain Glue Safe and Durable for Daily Use?
Porcelain glue can be safe and durable for daily use if you match the glue to the job and respect full cure time. Many porcelain repairs hold up well to normal handling and hand washing. The biggest risks are heat, repeated soaking, dishwashers, and food-contact areas. For anything used with hot liquids or meals, safety depends on whether the adhesive is specifically rated for that purpose.
Is Porcelain Glue Heat and Water Resistant?
Most people don’t break porcelain because it’s weak—they break it because it’s used daily. Heat and water are the two biggest stressors, especially for mugs, bowls, bathroom accessories, and kitchen décor.
Real-world stress examples:
- A mug goes from room temperature to hot coffee, then to rinse water
- A plate gets warmed food and later soaked in a sink
- A bathroom soap dish stays wet for hours daily
A good porcelain glue should handle:
- Warm water exposure (hand washing)
- Humidity and steam
- Normal indoor temperature swings
But not all adhesives handle:
- Dishwashers (hot water + detergent + long cycles)
- Boiling water
- Soaking overnight
- Outdoor freeze–thaw cycles
Here’s a practical durability guide most customers find useful:
| Daily condition | Low-risk glue choice | High-risk / likely failure |
|---|---|---|
| Hand wash, warm water | Porcelain/ceramic glue | Craft glue, hot glue |
| Hot drinks (coffee/tea) | Porcelain/ceramic glue or epoxy (hidden joints) | Brittle super glue |
| Dishwasher cycles | Only if adhesive is explicitly dishwasher-safe | Most consumer glues |
| Long soaking in water | Epoxy (if appearance allows) | Many “quick fix” glues |
| Outdoor planter repair | Outdoor-rated epoxy / weather-stable glue | Indoor-only glues |
Is Porcelain Glue Food-Safe After Curing?
This is where people need a clear, honest answer.
Most glues are not meant for direct food contact.
Even if they cure hard and smell-free, that doesn’t automatically mean “food-safe.”
A safe way to think about it:
- Low risk: outside surfaces (e.g., mug handle exterior, decorative plate stand)
- Higher risk: rims, interiors, bowls, areas where food or drink touches
- Highest risk: cracks inside a cup or bowl where liquid can sit
A simple table:
| Where the glue sits | Practical guidance |
|---|---|
| Mug handle joint (outside only) | Usually acceptable for light use after full cure |
| Plate underside chip | Often fine for display / light handling |
| Plate rim or eating surface | Not recommended unless explicitly food-safe |
| Bowl interior crack | Not recommended for food/liquid use |
| Teapot spout / kettle area | High exposure; avoid for drinking use |
What many customers do in real life and it’s reasonable:
- Repair sentimental dishware for display
- Use repaired items for dry snacks, not soup/coffee
- Keep repaired mugs as pen holders or décor
- Avoid giving repaired foodware to kids
If the goal is daily eating/drinking, you want an adhesive that is clearly rated for that use. Otherwise, treat it as decorative or light-duty.
How Long Do Porcelain Glue Repairs Last?
When people ask “How long will it last?” they usually mean:
- Will it survive washing?
- Will it survive normal bumps?
- Will it re-break at the same spot?
With proper glue choice and correct application, porcelain repairs often last years, especially for décor and collectibles. But the lifespan is strongly affected by stress level.
Here’s a realistic expectation table:
| Porcelain item | Typical use stress | Expected repair lifespan (realistic) |
|---|---|---|
| Figurine / ornament | Low | Many years |
| Vase / décor bowl | Low–medium | Years (if not handled daily) |
| Mug handle | Medium–high | Months to years (hand wash improves life) |
| Plate edge chip | Medium | Years (if not soaked/dishwashed) |
| Bathroom soap dish | High moisture | Months to years (depends on glue type) |
| Tile trim / wall piece | Structural | Years (if correct adhesive used) |
What Makes a Porcelain Repair “Daily-Use Ready”?
If a customer’s goal is daily use, the repair should meet these checkpoints:
Daily-use readiness checklist:
- The bonding surfaces were cleaned and oil-free
- Glue was applied in a thin, tight layer
- Pieces were held steady during early set
- Full cure time was respected (often 24 hours)
- The repair area is not in constant food-contact (unless certified safe)
- The item is not being pushed into dishwasher/boiling conditions
If 2–3 of these are missing, the repair may still “hold,” but it often won’t stay reliable.
When Should You Avoid a Porcelain Glue Repair?
Sometimes the smartest call is to avoid repair—especially for safety.
Avoid using repaired porcelain for daily use when:
- The crack runs through the inside of a cup/bowl
- The repair line sits on an eating surface
- The item will be exposed to boiling water
- The porcelain is under structural load (heavy tile sections)
- The piece is thin and the break reduces its structural integrity
In those cases:
- Display repair is fine
- Replacement is safer
- Or use a professional restoration approach
Why Do Professionals Use Manufacturer-Grade Porcelain Glue?
Professionals use manufacturer-grade porcelain glue because it’s more predictable: it bonds better on glazed porcelain, cures cleaner, wastes less, and holds up longer under heat and moisture. For pros, a “cheap” glue becomes expensive when repairs fail, customers complain, or a visible seam looks messy. Manufacturer-grade glue reduces rework and delivers consistent results across different porcelain types.
What Performance Tests Matter for Porcelain Glue?
A professional doesn’t judge porcelain glue by “how fast it sticks.” They judge it by whether it survives real use: washing, temperature swings, vibration, and time.
Here are the performance tests that actually map to customer outcomes:
1) Shear strength (side-load resistance)
This matters for:
- mug handles
- tile trims
- decorative pieces that get picked up A repair can feel strong when pulled straight, but fail when twisted or bumped. Shear strength is the difference.
2) Heat cycling stability
Porcelain sees temperature changes constantly (hot drinks, warm rinse water, cold kitchens). A glue that becomes brittle or soft with heat cycling is a short-term fix.
3) Moisture resistance
Bathrooms, kitchens, planters, steam — moisture is usually what “finishes off” a weak bond.
4) Aging / yellowing resistance
A glue line that turns yellow or cloudy ruins decorative porcelain even if the bond holds.
A simple “what matters and why” table:
| Test / property | What it protects against | Where customers notice it |
|---|---|---|
| Shear strength | bumps, twisting, daily handling | mugs, trims, tiles |
| Heat cycling | cracking after hot/cold changes | cups, plates, teapots |
| Water resistance | bond softening over time | bathrooms, kitchens |
| Aging / yellowing | ugly seams months later | figurines, décor |
| Controlled viscosity | glue running, messy repair | fine cracks, chips |
Manufacturer-grade products are usually engineered around these stressors, because pros get repeat complaints if any one of them fails.
How Is Professional Porcelain Glue Different from Store Brands?
Most store glues are built for broad compatibility and fast first impression. Professional-grade glue is built for repeatable outcomes.
Here’s what customers and pros typically notice:
1) Better bonding on glazed porcelain
Glaze is the hardest surface. Many general glues “grab” at first but release later. A manufacturer-grade porcelain glue is formulated specifically to bond smooth, low-energy surfaces.
2) Cleaner curing
- Less haze or “frosty” residue
- Better clarity on shiny porcelain
- Fewer ugly glue lines that force rework
3) More consistent flow and thickness
If the glue is too thin, it runs. Too thick, it leaves a lump and prevents tight seating. Pros want a stable viscosity so the repair looks clean every time.
4) Lower clogging and waste
For professionals, packaging is not cosmetic — it’s performance. If a tube clogs after one use, it’s not “cheap,” it’s unusable. Manufacturer-grade systems often include anti-clog caps, better sealing, and precision tips.
5) Fewer “mystery failures”
A big reason pros source better glue is consistency. They don’t want a tube that works one month and fails the next because of formula drift or unstable raw materials.
A quick side-by-side view:
| What pros care about | Typical retail glue | Manufacturer-grade porcelain glue |
|---|---|---|
| Bonds glazed porcelain reliably | hit-or-miss | more consistent |
| Repair looks invisible | often hazy | cleaner clarity |
| Tube still usable later | clogs easily | better sealing |
| Works across batches | inconsistent | tighter QC |
| Less rework | more redo | fewer callbacks |
When Does Precision Nozzle Design Matter for Porcelain Glue?
Customers often think nozzles are “just a bonus.” They’re not — nozzles directly control whether the repair is clean or messy.
Precision nozzles matter most when:
- you’re filling a hairline crack
- you’re bonding tiny figurine parts
- the repair seam is highly visible
- you can’t afford squeeze-out on glossy glaze
Real-world impact customers feel:
- Less glue waste
- Better alignment (parts don’t “float” on a blob)
- Cleaner seam lines
- Less cleanup risk
A practical “where precision matters” list:
| Repair type | Why the nozzle matters |
|---|---|
| figurine arm/leg | tiny contact area, visible seam |
| plate chip | controlled dots avoid squeeze-out |
| mug handle | thin bead prevents shifting |
| decorative porcelain | glossy finish shows every mistake |
| fine crack | glue must go into the crack, not around it |
This is why many professional porcelain glues include multiple micro-tips: it’s not about marketing — it’s about making the repair controllable.
The Real Reason Pros Pay More: Fewer Failures and Fewer Redos
Professionals think in time and reputation, not just price.
A “cheap” glue becomes expensive when:
- the repair fails and must be redone
- the customer complains
- the seam looks bad and the item is ruined
- the job takes 2–3 attempts
If a better glue reduces even one redo, it often pays for itself.
For consumers, the same logic applies:
- fewer failed attempts
- less risk of making the damage worse
- better-looking repair the first time
What to Look for When Buying or Sourcing Porcelain Glue
If you’re shopping (or sourcing for resale/private label), these are the practical specs that matter:
For home users:
- clear curing (no haze)
- moisture resistance
- controlled flow / precision tip
- reasonable working time (not “instant panic”)
For retailers / B2B buyers:
- stable quality across batches
- packaging that doesn’t clog
- multilingual compliance packaging options
- the ability to customize viscosity, set time, and packaging size
That’s where working directly with a manufacturer becomes a real advantage — especially if you’re building a brand or need consistent supply.
Top 15 Best Ceramic & Porcelain Glues in the World
The table below compares the world’s top ceramic & porcelain glues across real-world performance factors such as clarity, water resistance, heat tolerance, ease of use, and typical use cases — not just brand reputation.
| Rank | Brand / Product | Glue Type | Best Use Scenario | Bond Strength* | Heat Resistant | Precision Control | Typical Users |
|---|---|---|---|---|---|---|---|
| 1 | Loctite Glass & Porcelain Glue | Specialty ceramic glue | Daily household porcelain repairs | High | Medium | Good | DIY users, home repair |
| 2 | J-B Weld ClearWeld | 2-part epoxy | Structural porcelain & mixed materials | Very High | High | Medium | Professionals, workshops |
| 3 | GleamGlee Ceramic Glue&Construction Adhesive | Manufacturer-grade ceramic glue | All-around porcelain repair (visible & functional) | High | Medium-High | Excellent | DIY + professional users |
| 4 | Gorilla Clear Glue | Clear hybrid adhesive | Decorative ceramics & crafts | Medium-High | Medium | Medium | Hobbyists |
| 5 | Devcon 2-Ton Epoxy | Industrial epoxy | Heavy-duty ceramic & tile repairs | Very High | High | Low | Contractors |
| 6 | E6000 Craft Adhesive | Flexible industrial glue | Craft ceramics & décor | Medium | Medium | Low | Crafters |
| 7 | Permatex High-Temp RTV | Silicone-based | Heat-exposed porcelain parts | Medium | Very High | Low | Automotive / utility |
| 8 | PC-Clear Adhesive | Clear epoxy | High-clarity porcelain & glass | High | Medium-High | Medium | Repair specialists |
| 9 | Super Glue Gel | Cyanoacrylate | Tiny chips & micro fixes | Medium | Low | Medium | Quick fixes |
| 10 | Aleene’s Ceramic & China Adhesive | China glue | Fine china & collectibles | Medium | Low | Good | Collectors |
| 11 | Titebond Instant Bond | CA adhesive | Fast ceramic spot repairs | Medium | Low | Medium | DIY users |
| 12 | 2-Part Epoxy Resin (Generic) | Epoxy | Tile & load-bearing repairs | Very High | High | Low | Construction |
| 13 | UHU Porcelain & Ceramic Adhesive | Household ceramic glue | General household fixes | Medium | Low | Medium | Home users |
| 14 | DAP Weldwood Contact Cement | Contact adhesive | Ceramic to wood/metal | Medium | Medium | Low | Trades |
| 15 | PC-11 Epoxy Paste | Epoxy paste | Gaps & structural porcelain | Very High | High | Low | Industrial repair |
- Bond strength is a comparative real-world assessment, not a lab-only number.
Why GleamGlee Ranks #3 in This Comparison
GleamGlee is ranked #3 because it sits in the most practical “sweet spot”:
- Strong enough for daily-use porcelain
- Clear and clean enough for visible repairs
- Easier to control than most epoxies
- More durable than hobby or craft glues
- Designed for non-porous glazed porcelain, not “everything”
In real life, that means:
- Fewer failed repairs
- Less mess
- Better-looking results
- Less need to re-do the job
For most households and professional light-repair users, that balance is often more valuable than extreme strength alone.

FAQs
Can you put porcelain in the dishwasher after using porcelain glue?
In most cases, no—at least not if you want the repair to last. Dishwashers combine three things that break many glue bonds:
- High heat (often 55–70°C / 130–160°F, sometimes higher in “sanitize” cycles)
- Strong detergents
- Long soak time + repeated cycles
A repaired mug may survive a few cycles and then fail suddenly. If you want maximum lifespan, hand washing is the safer routine.
Dishwasher reality guide:
| Use case | Best practice |
|---|---|
| Decorative porcelain | No dishwasher needed |
| Repaired mug handle | Hand wash only |
| Plate chip repair | Hand wash; avoid soaking |
| Tile repair | Dishwasher not relevant; moisture exposure still matters |
If you absolutely need dishwasher use, only do it if the adhesive explicitly states dishwasher-safe after full cure—and even then, expect higher long-term risk.
How long should porcelain glue cure before washing or using the item?
A common mistake is using the item as soon as it “feels set.”
Typical timeline:
- Initial hold: 5–10 minutes (pieces stop sliding)
- Careful handling: 1–2 hours
- Full strength: usually 12–24 hours
If the item will see heat or water (mug, bowl, bathroom accessory), the safest habit is:
- Wait 24 hours before washing
- Avoid hot water and soaking for the first few days if possible
A simple rule that prevents most failures:
If it’s a kitchen or bathroom item, treat “overnight” as the minimum, not the ideal.
Does porcelain glue turn yellow over time?
It depends on the glue chemistry and how the item is stored.
Yellowing is more likely when:
- The glue is exposed to UV/light (near windows, outdoor décor)
- The glue is thick at the seam
- The product is not designed for clear, visible repairs
To reduce yellowing:
- Use clear-drying porcelain glue
- Apply a thin glue line
- Avoid placing repaired items in direct sunlight for long periods
If you’re repairing collectibles, clarity matters as much as strength—because a strong repair that turns yellow can still feel like a “failed” result.
Why did my porcelain repair turn white or cloudy?
This is one of the top customer frustrations. The common causes are:
Most likely reasons:
- Wrong glue type (some fast glues leave haze)
- Too much glue (thick seam cures cloudy)
- Moisture trapped in the crack
- Glue “blooming” on glossy glaze
Quick fixes:
- Use a thinner glue line next time
- Make sure surfaces are fully dry
- Avoid touching the bond area after cleaning
- Choose a porcelain glue designed for clear finishes
In many cases, the bond is still strong—but visually the repair looks messy. Prevention is easier than cleanup.
Can you remove porcelain glue and redo the repair?
Sometimes, but it’s rarely easy.
Once porcelain glue is fully cured:
- It generally does not “peel off” cleanly
- Mechanical scraping risks scratching glaze
- Strong solvents can damage finish or paint
If you need to redo the repair:
- Try careful mechanical removal on hidden areas first
- Be gentle—glaze scratches easily
- If the piece is valuable, consider professional restoration
Best advice: take an extra minute to dry-fit and align before the glue sets. Redoing porcelain repairs often costs more than doing it carefully once.
Can liquid nails be used on porcelain?
Yes, but only in specific construction-style uses, not fine repairs.
Liquid Nails is a construction adhesive. It can be reasonable for:
- Attaching porcelain tile or trim to a substrate
- Installing porcelain pieces where appearance is not critical
But it’s a poor choice for:
- mugs, plates, bowls
- figurines and collectibles
- small chips or visible cracks
Why customers regret it:
- Thick, messy application
- Difficult cleanup
- Not clear-drying
- Not designed for precision seams
If you care about a clean, nearly invisible repair, choose porcelain glue instead.
What should you NOT use on porcelain tiles?
Avoid these on porcelain tiles (especially in wet areas):
- Craft glue / white glue
- Hot glue
- Silicone used as the main “glue”
- Generic household adhesives not rated for tile
- Super glue for anything beyond a tiny chip
Why they fail:
- Poor long-term moisture resistance
- Weak shear strength
- Brittleness under load
- Poor bonding to dense porcelain surfaces
For tiles, use tile-rated adhesives or epoxy depending on the repair type.
Is super glue good for porcelain?
Super glue can work for:
- tiny, low-stress decorative fixes
- repairs that never see heat or water
But it often fails for:
- mug handles
- items used daily
- repairs exposed to hot water or steam
It also commonly causes:
- white haze
- brittle bond lines
- sudden re-breaks after temperature changes
If the item is used daily, porcelain glue is usually the better choice.
What’s the best glue for a porcelain mug handle?
A mug handle is a “high-stress” porcelain repair:
- heat exposure
- gripping force
- twisting motion
- water and washing
Best approach:
- use a porcelain/ceramic glue designed for non-porous surfaces
- apply a thin, even layer
- hold steady 5–10 minutes
- allow full cure (aim for 24 hours)
- hand wash to extend repair life
If the break is large and the mug is heavy, epoxy may be considered, but porcelain glue typically looks cleaner.
Can you glue chipped porcelain and make it look invisible?
You can often make it nearly invisible, but “perfectly invisible” depends on:
- chip size
- edge fit
- glaze color and shine
- glue clarity
- application cleanliness
For best cosmetic results:
- clean and dry fully
- use a clear porcelain glue
- apply minimal glue
- remove squeeze-out immediately
For large missing chips, a filler/repair kit may be needed. Glue alone bonds—filler restores shape.
Is it worth repairing porcelain or should you replace it?
Repair is worth it when:
- the item is sentimental
- replacement is expensive
- the damage is clean and alignable
- the item will be used lightly or for display
Replacement is often smarter when:
- the crack runs through food-contact surfaces
- the item is exposed to heavy daily abuse
- the break is unstable or missing material
- safety is a concern
A simple “repair vs replace” guide:
| Situation | Better choice |
|---|---|
| Decorative figurine break | Repair |
| Mug handle break | Repair (hand wash) |
| Bowl interior crack | Replace / display only |
| Tile trim loosening | Repair with tile-rated adhesive |
| Heirloom porcelain | Repair (carefully) |
Conclusion
Porcelain is difficult to repair not because it is weak, but because it is dense, smooth, and exposed to heat, water, and daily handling. Most repair failures happen when the glue does not match how the item is actually used. There is no single “strongest” glue for every situation—successful porcelain repair depends on choosing an adhesive that fits the specific job, whether that means clean appearance, moisture resistance, or long-term durability.
For most visible, everyday repairs—such as mugs, plates, figurines, and decorative items—a high-quality porcelain or ceramic glue offers the best balance of strength, clarity, and control. Epoxy has its place for heavy or load-bearing repairs, while construction adhesives are better suited for installation work rather than fine porcelain restoration. Understanding these differences helps prevent repeat failures and protects valuable or sentimental items.
For users who want consistent results and fewer mistakes, manufacturer-grade porcelain glue is often the smarter choice. GleamGlee provides professional ceramic and porcelain adhesives designed for non-porous surfaces, along with options for bulk supply, private labeling, and custom formulations. Whether you’re repairing at home or sourcing products for your business, choosing the right glue—and the right manufacturer—makes the repair last.


