Skip to content


A repaired curtain hem, cushion cover, or bedsheet can often return to normal household use, including washing. The important part is choosing a cleaning method suitable for the entire item, including its new repair. Check the original care label, identify the adhesive or patch material, and complete the product’s required waiting period before the first wash. If the repair is already lifting, the surrounding cloth is thinning, or the cleaning instructions conflict, deal with the problem before putting the item into water.
The first wash is easier to manage when you treat washing, drying, and refitting as separate jobs. A cushion cover may survive the wash but split when pulled over a bulky insert. A curtain may remain bonded yet develop a puckered hem if its layers shrink differently. This guide explains how to prepare, clean, dry, and inspect common household textiles repaired with stitching, fabric glue, or iron-on materials. It includes practical demonstrations and product-specific examples, while keeping unfamiliar adhesives, special coatings, and delicate constructions out of one-size-fits-all advice.
Can You Wash Home Textiles After Repairing Them
Many repaired household textiles remain washable when the original item and every added repair material permit the same cleaning method. Check the fabric, lining, decoration, and repair together before choosing a cycle. A washable cover can become more restricted after an adhesive repair. Conversely, neat stitching does not make a dry-clean-only textile suitable for water washing. The whole construction determines the next step.
Check the Care Label and the Repair Instructions
Start with the care label sewn into the item, then compare it with the instructions for the exact repair product. Check washing, bleaching, drying, ironing, and professional cleaning separately. GINETEX explains the number inside a wash tub as the maximum washing temperature; bars beneath the symbol indicate reduced mechanical action. A label allowing washing at 40°C does not require every wash to reach 40°C, and it does not override a repair product with tighter restrictions.
- Source: GINETEX care symbols explains the separate care processes and the meaning of washing temperatures and cycle bars.
Consider a removable cotton cushion cover with a new glued trim. If the cover permits machine washing but the trim adhesive specifies hand washing, machine washing is no longer the shared permitted option. If one component requires dry cleaning and another prohibits the relevant solvents, there may be no suitable cleaning route without changing the repair. This comparison is more useful than choosing a gentle setting first and hoping the materials will tolerate it.
Identify Sewn Glued and Iron On Repairs
Look closely at the repaired area before deciding how much handling it can take. A sewn seam joins intact fabric edges with thread; a patch spreads a repair over a wider area; a glued hem depends on contact between bonded fabric layers. These constructions respond differently when wet fabric is lifted, folded, or pulled. Also distinguish broken thread from torn cloth: replacing stitches will not restore strength to a surrounding area already worn thin.
| Repair type | Check before washing | What it does not establish |
|---|---|---|
| Sewn seam or darn | Secure stitches, sound fabric, suitable thread and patch care | Permission to ignore the original care label |
| Liquid fabric adhesive | Exact product, wash waiting time, permitted cleaning and drying | Tolerance of every detergent, temperature, or solvent |
| Iron-on tape or patch | Correct bonding, product-specific waiting period, later care | Immediate washability after the material cools |
| Mixed or unknown repair | Records, packaging, material identity, professional advice if needed | Safety simply because the repair feels dry |
Recognize When Washing Should Wait
Postpone washing if a patch edge has lifted, the glue remains unexpectedly tacky, stitching is opening, or the fabric beside the repair looks thin and translucent. Cleaning adds handling to an area already struggling in ordinary use. Fixed upholstery, layered blackout curtains, and decorated textiles also need construction-specific instructions. A zip may exist for manufacture or assembly rather than routine removal, so its presence alone does not establish whether a cover can be machine washed.
- Continue only after confirming the item has an allowed cleaning method.
- Stabilize or redo an opening repair before another wash.
- Identify the lining, backing, filling, and decorative materials.
- Keep unknown repairs away from experimental solvent treatments.
- Show a cleaner both the original care label and the repair details.
How Long Should You Wait Before the First Wash
Use the waiting period printed for the exact repair product, even when its surface feels dry sooner. Initial setting, full curing, and permission to wash may be separate instructions. Pure stitching needs no adhesive cure, but mixed repairs still do. Record when the work was finished and keep the item resting in suitable conditions until the stated waiting period and other readiness requirements are met.
Understand Initial Set Full Cure and Wash Ready Time
An adhesive can hold two pieces of cloth in position before it is ready for laundering. Thin exposed edges may feel dry while thicker areas between folded layers need more time. Instructions may also specify a separate wash delay beyond a quoted drying or curing time. Follow the product’s wording instead of combining these stages into one estimate. Applying additional heat, pressing harder, or waiting until the glue turns clear is not a reliable substitute for the stated process.
Follow the Instructions for the Exact Product
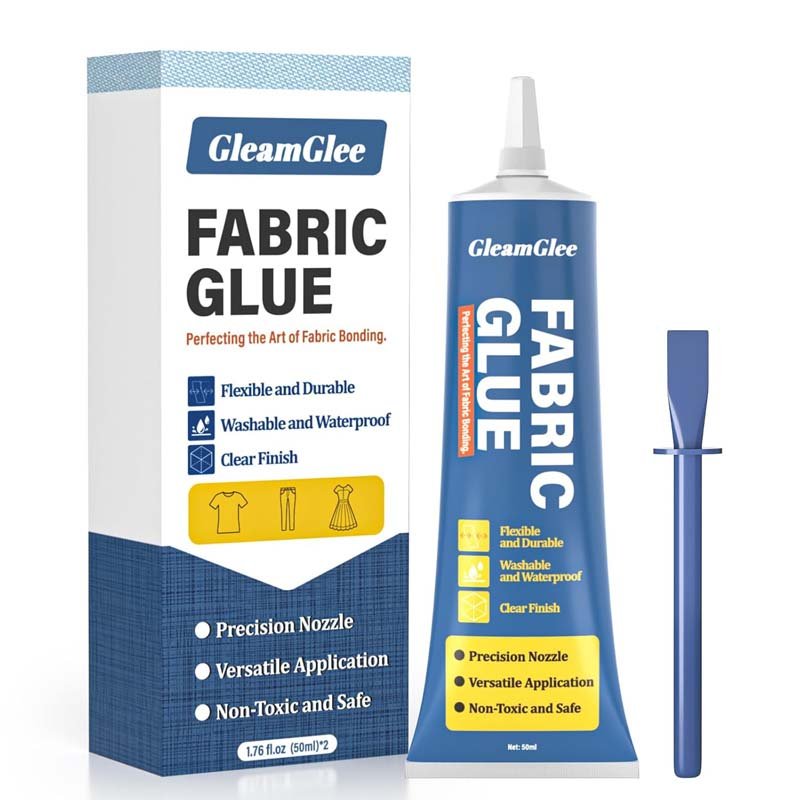
For a suitable low-stress hem or decorative repair, GleamGlee Fabric Glue instructions describe an initial set of approximately 6–10 minutes and advise allowing about 24 hours before washing, ironing, or frequent movement. A thin, even application helps avoid an unnecessarily thick repair. Treat these as manufacturer instructions for the intended application, not an independent guarantee covering every fabric, stain remover, washing temperature, or dryer setting. The current packaging remains the reference for the product in your hands.
- Product reference: GleamGlee fabric compatibility and application guidance describes thin application, the initial set, and the approximately 24-hour curing guidance.
| Product or repair | Published time before washing | How to use the figure |
|---|---|---|
| GleamGlee Fabric Glue | About 24 hours in its application guidance | Also check fabric compatibility and current package directions |
| Aleene’s Fabric Fusion Dual-Ended Pen | 48 hours | Use the wash delay rather than the shorter drying figure |
| HeatnBond Hem Regular Weight, linked model | 24–48 hours | Check the exact tape and its application directions |
| Stitching without adhesive | No adhesive curing interval | Inspect the seam and follow the textile’s care requirements |
These examples show the importance of keeping product names attached to numerical advice. The Aleene’s pen instructions separately describe drying and washing, while HeatnBond specifies a wait for its particular iron-on tape. Neither instruction establishes the correct interval for another manufacturer’s formulation. If a label gives a range, follow its qualifying directions; when no further explanation is available, allow the full stated interval before checking readiness instead of assuming the shortest figure always applies.
- Source: Aleene’s Fabric Fusion Dual-Ended Pen instructions states a 48-hour wash delay and gives product-specific laundering directions.
- Source: HeatnBond Hem Regular Weight instructions states a 24–48-hour wash delay and cautions against sewing through this particular product.
- Video: Helpful Tips for using Aleene’s Fabric Fusion shows an adhesive applique project on a pillow. Use it to understand application, not as a washing test for a different glue.
Calculate the Earliest Washing Time
Add the product’s wash waiting period to the time you finished the repair. For example, a 48-hour requirement following a repair completed on Monday at 6 p.m. reaches its time threshold on Wednesday at 6 p.m. This is a scheduling calculation, not a test of bond strength. If the repair was applied too thickly, became wet early, or remains abnormal, reaching the time threshold does not resolve the underlying problem or establish compatibility with the planned wash.
- External tool: Timeanddate Date and Time Calculator adds the specified hours to a repair completion time. It calculates elapsed scheduling time; it cannot determine whether an adhesive has cured correctly.
- Keep the product name and repair completion time together in your notes.
- If water reaches a fresh repair, support it without pulling and check the manufacturer’s recovery instructions.
- Do not assume an extra day makes a non-washable adhesive washable.
How Do You Prepare Repaired Textiles for Washing
Prepare the item before preparing the washing machine. Inspect the repair, check for loose hardware, and consider whether stains need treatment before the main wash. Then plan where the wet textile will go afterward. These small checks help you avoid handling a heavy, dripping item while searching for somewhere to dry it, or discovering an opening seam after the load has already started moving.
Inspect the Bond and the Surrounding Cloth
Lay the repaired section on a clean, well-lit surface. Examine the edges without peeling them back, and check both sides when accessible. A sound-looking adhesive line is only part of the picture: fraying fabric beyond it can still tear, and loose stitches can expose a patch edge to snagging. Photograph the area before washing so you can compare its position and shape later. Avoid a forceful pull test, particularly on lightweight curtains, fine bedding, or older cloth.
- Check whether the edges sit flat without gaps.
- Look for broken thread, loose knots, or fresh fraying.
- Feel gently for unexpected tackiness or a raised, uncomfortable ridge.
- Confirm trims and patch corners cannot easily catch nearby items.
- Check the original cloth around the repair, not only the repair itself.
- Remove forgotten pins and temporary positioning aids when the instructions require it.
Test Color Transfer and Treat Stains Carefully
For an item already approved for the proposed wet treatment, test the intended cleaning solution on an inconspicuous area. Use a clean white cloth to look for color transfer, then let the test area dry so you can check for a ring, altered texture, or visible residue. The original fabric and the patch may behave differently. A successful small test helps assess appearance, but it does not prove a full-sized item can tolerate machine agitation, prolonged soaking, or spin extraction.
Fresh liquid spills are easier to contain when you blot them gently instead of rubbing across a repair. Work with the stain-remover instructions and keep concentrated products away from an adhesive line unless compatibility is established. Bleach, alcohol, acetone, and household mixtures are not interchangeable fabric treatments. If a stain sits directly over an unfamiliar repair, identifying the repair material first is usually more useful than trying increasingly strong products and making the affected area larger.
- Source: American Cleaning Institute Laundry Basics covers sorting, detergent selection, and testing stain treatments in an inconspicuous area.
- Video: How to Remove Wine Stains — Fresh by Sunbrella demonstrates fresh-spill care on Sunbrella fabric. Apply its product-specific cleaning advice only where the textile and repair permit it.
Remove Snagging Hazards and Plan the Load
Remove detachable curtain hooks and other removable hardware before washing, while leaving permanently attached fittings in place unless the manufacturer says otherwise. Take inserts out of covers approved for removal, and handle zips according to the care instructions. Turning a suitable cover inside out can reduce exposure of its outer surface. A correctly sized mesh bag can help smaller pieces, but stuffing a large cover into a tight bag restricts movement and does not protect an already failing bond.
Prepare a clean basket, absorbent towels, and an appropriate drying surface before starting. Keep repaired textiles away from exposed hooks or heavy metal fasteners in the same load. If an item is too bulky for the machine’s permitted load or cycle, use a suitable larger machine or an approved alternative method. The fact you can close the drum door does not establish enough space for the textile to wash, rinse, and move as the appliance manufacturer intended.
Which Washing Method Should You Use
Choose machine washing, hand washing, or local cleaning only after establishing an allowed method for both the textile and its repair. Match the program, detergent, and water temperature to the shared requirements. Reduce unnecessary rubbing and strain around the repaired area, but retain enough cleaning action for the item. A gentler method still needs to remove soil and rinse away the cleaning product effectively.
Machine Wash When the Textile and Repair Both Allow It
For a machine-washable repair, the program name is only the starting point. Check the temperature, spin setting, and load guidance associated with the selected cycle on your machine. A quick wash is not automatically a delicate wash, and a bulky cycle may use settings unsuitable for a particular adhesive or fabric. Large pieces also need appropriate movement and load balance. If the appliance’s suitable cycle conflicts with the repair instructions, do not solve the conflict by guessing which restriction matters least.
- Confirm machine washing is permitted and the wash waiting period is complete.
- Inspect the repair and remove detachable hardware.
- Turn a suitable cover inside out and use a mesh bag only when appropriate.
- Add a compatible detergent at its labeled dose for the load and water conditions.
- Select the allowed cycle, temperature, and spin setting; avoid overloading.
- Remove the item after the cycle and support its weight while checking the repair.
Detergent quantity should follow the detergent and appliance instructions, rather than a universal spoonful or capful. Too little may leave soil behind; unnecessary excess creates more product to rinse out. If the repair looks different while wet, avoid immediately running another cycle with stronger detergent. Support the item, complete the permitted drying process, and assess whether you are seeing residue, a change in appearance, or an actual opening in the repair before choosing the next action.
- Appliance reference: Whirlpool washing cycle guide explains differences among cycle types. Use your own model’s manual for the actual settings and load limits.
Hand Wash Without Scrubbing or Wringing the Repair
Hand washing gives you control over handling, but it still needs a suitable container, detergent, water temperature, and lifting method. Start with the textile supported, and avoid making the repaired area the point from which you lift or squeeze everything else. A small cushion cover is easier to support than a saturated blanket. If the item is too heavy to manage gently when wet, choose another approved cleaning route before filling a bath or sink.
- Clean the basin and prepare the permitted water temperature.
- Add and disperse the specified detergent before introducing the textile, following its instructions.
- Lower the item gently, keeping the repair supported rather than stretched.
- Move the fabric carefully through the water without scrubbing the adhesive edge.
- Soak only when the textile and repair instructions allow it; there is no universal soaking time.
- Rinse thoroughly using a permitted method, without wringing or twisting the repair.
- Support the whole item when lifting it out and transfer it to the prepared drying area.
Wool needs its own detergent and care guidance rather than an automatic switch to ordinary laundry products. Woolmark advises checking the item’s care claim before selecting hand or machine washing. For a repaired wool cover or throw, also check the patch, thread, or adhesive used. A washable wool label describes the original textile; it cannot account for materials added afterward. Avoid adopting a sweater tutorial’s soaking time as a universal rule for a glued household repair.
- Source: Woolmark guidance on washing wool explains care-label checks and suitable wool washing products.
- Video: Woolmark Hand Wash demonstration helps illustrate gentle wool care. The example concerns garments; repaired home textiles still need their own washing permission and handling plan.
Spot Clean or Use Professional Cleaning When Necessary
For fixed upholstery or an item without permission for immersion, follow the manufacturer’s approved local-cleaning method. Remove loose surface dirt carefully, then use the permitted cleaner and amount of moisture. Preventing saturation of the filling matters as much as treating the visible face fabric. Water rings are another concern: some upholstery instructions call for cleaning a whole panel from seam to seam rather than creating a small wet circle. Follow the item’s guidance before enlarging the treated area.
Sunbrella’s upholstery guide is a useful example of construction-specific advice: it distinguishes care methods and tells owners to consult the furniture manufacturer before removing certain casings. Its cleaning formulas belong to the fabrics and applications covered by the guide. An added glue line may introduce a separate restriction. If professional cleaning is needed, identify the repaired location and product beforehand, so the cleaner can assess the fabric, adhesive, solvents, and drying method as one job.
- Downloadable reference: Sunbrella Upholstery Care and Cleaning PDF provides product-specific instructions for its upholstery fabrics. Its bleach or other treatment permissions do not apply automatically to unrelated textiles or repairs.
Set Water Temperature and Cleaning Products Carefully
Temperature is one variable alongside mechanical action, cleaning chemistry, exposure time, and drying conditions. Cold water cannot compensate for a repair already coming apart, and a delicate cycle cannot make an unsuitable solvent harmless. Choose settings within the conditions permitted for the complete item. If your machine displays Fahrenheit while the label uses Celsius, convert the actual numbers instead of assuming its cold, warm, or hot labels correspond to a fixed temperature.
| Setting or product | Practical decision | Useful numerical or label detail |
|---|---|---|
| Water temperature | Stay within every applicable limit | 20°C = 68°F; 30°C = 86°F; 40°C = 104°F |
| Wash program | Match fabric, repair, and machine guidance | A named delicate cycle does not specify one universal spin speed |
| Detergent dose | Follow product and machine directions | No single milliliter amount suits every load or concentration |
| Bleach or stain remover | Confirm compatibility with the textile and repair | Washable does not mean bleach-compatible |
| Softener or laundry additive | Use only when suitable for the complete item | Do not add it to try to restore a damaged adhesive joint |
The temperature conversions in the table are reference values, not suggested settings for every repaired textile. To convert Celsius to Fahrenheit, multiply by nine, divide by five, and add 32. For example, 30 multiplied by nine is 270; dividing by five gives 54; adding 32 gives 86°F. A converted limit remains a limit: the appropriate wash still depends on the item, repair product, detergent, and available machine settings.
- External tool: Celsius to Fahrenheit converter translates label temperatures when needed. It does not select a suitable temperature for an unknown fabric or adhesive.

How Should You Wash Different Repaired Home Textiles
Use the general washing method together with the demands of the particular item. A curtain needs support across its length; a fitted cushion cover needs to retain its dimensions; bedding must remain comfortable against skin. Fillings, coatings, and decorative details add further considerations. Focus on the features present in your textile instead of assuming all household fabrics can follow the same cleaning routine.
Curtains and Repaired Hems
Curtains combine large fabric areas with relatively small repaired hems, making handling especially important. Check the face fabric, lining, blackout coating, heading tape, and any weights before cleaning. Remove detachable hooks and rings as directed, and avoid pulling wet panels from the machine by their bottom edges. Gather and support the cloth instead. If the repaired hem contains a different fabric or tape, watch for puckering after washing rather than trying to pull the layers straight while they are wet.
Before a first wash, record the panel’s dry length between consistent points. An illustrative change from 200 cm to 196 cm is a 2% reduction, yet it leaves the curtain 4 cm shorter. This is a calculation example, not an expected shrinkage rate. Recording actual dimensions helps distinguish overall size change from a local repair problem and prevents repeated cutting or stretching when the underlying issue involves the textile’s response to cleaning.
- Remove only detachable hardware specified for removal.
- Support the panel across its body during lifting and drying.
- Check both face fabric and lining for changes in length.
- Do not use the curtain’s wet weight to pull a repaired hem straight.
- Source: Samsung curtain care guidance covers checking care instructions and removing detachable hardware. Follow your curtain manufacturer’s instructions for the complete construction.
- Video: How to Clean Sunbrella Window Treatments demonstrates care for that manufacturer’s window fabrics. Its machine-washing or cleaner permissions do not transfer automatically to other curtains or adhesive repairs.
Cushion Covers Sofa Covers and Chair Covers
A cover can look perfectly clean and still become difficult to refit after a small dimensional change. Measure a fitted cover before washing if shrinkage is a concern, using the same seams as reference points afterward. As an illustration, a 50 cm width becoming 49 cm is only a 2% reduction, but the lost centimeter can increase the pull needed to close a zip. Do not transfer this extra load to a repaired seam by forcing the cover over its insert.
Remove a cover only when the furniture instructions permit it, and keep the insert’s care separate from the cover’s. Check piping, zips, ties, and seat seams before washing. A repaired decorative edge and a seam supporting repeated sitting loads are different jobs; a small glue repair should not be expected to solve an unsuitable structural repair. During refitting, work around the cover progressively and stop if the fabric requires force beyond its normal fit.
- Source: Maytag guide to washing couch cushion covers discusses checking care instructions and shrinkage concerns. For removal and refitting, the furniture manufacturer’s directions take priority.
Bed Linen Pillowcases and Table Linen
Sheets and pillowcases need a repair which remains comfortable through use and ordinary cleaning. Examine the dried repair from the skin-contact side as well as the hidden side. A stiff ridge, exposed thread knot, or raised patch edge can make an otherwise neat repair unpleasant. Frequent-use seams may be better served by suitable stitching or a properly supported patch, particularly where people pull bedding into position or where the cloth is already weakened around a tear.
Table linens add stain-treatment questions because food oils, drinks, and repeated spot treatment may affect the repaired edge. Check whether the cleaning product is permitted for both the original textile and the added repair. If the normal cleaning process required for an item exceeds the repair material’s limits, choose a more suitable repair approach. Keeping an unsuitable repair intact by continually reducing necessary cleaning does not restore the textile to a useful household condition.
- Keep concentrated stain treatments away from an unverified adhesive line.
- Check pillowcase and sheet repairs for roughness after drying.
- Examine frequently pulled corners and fastenings before each wash.
- Use appropriate sewing or reinforcement when an ordinary seam repeatedly opens.
- Treat recurring repair failure as a reason to reassess the method or cloth, rather than applying thicker layers of glue.
Wool Throws Quilts and Decorated Textiles
Wool throws, quilts, and decorative textiles can contain several materials with different care needs. A patch may shrink differently from its background; a quilt includes filling and stitching as well as face fabric; a decorative cover may have trims unsuitable for immersion. Follow instructions for the assembled item. Where a repair introduces uncertainty, especially on a valuable or structurally delicate piece, establish a suitable method before attempting a full wash at home.
Woolmark’s blanket guidance starts with the blanket’s care instructions and describes machine washing only when the label allows it, using a suitable wool program and detergent. For a repaired blanket, support wet weight across a broad area and check the repair’s additional restrictions. An airing or permitted local clean may be sufficient for light refreshing, while a genuinely soiled blanket needs an effective approved wash. Avoid turning a general refresh habit into a fixed cleaning schedule for every household.
- Source: Woolmark guide to washing and drying wool blankets provides blanket-specific care guidance.
- Video: How to Wash Wool Blankets by Woolmark shows blanket airing, washing, and drying concepts. The blanket’s label and any added repair materials still determine the permitted process.
How Should You Dry and Iron Repaired Textiles
Drying and ironing need their own checks because permission to wash does not automatically include heat, tumbling, steam, or hanging while heavy. Follow the drying instructions for the textile and repair together. Plan support before lifting the wet item, avoid concentrating its weight on the repaired area, and check the finished result before returning a curtain, cover, or blanket to everyday use.
Support Wet Fabric and Follow the Drying Label
Transfer wet textiles with both the main fabric and repaired section supported. When flat drying is required, use a suitable clean surface or rack with enough airflow, reshape gently without stretching, and avoid leaving the item folded into a wet bundle. When hanging is allowed, distribute the weight rather than clipping only a repaired corner. The aim is to let the textile dry in a suitable shape without asking a small bond or seam to carry the entire wet load.
Check more than the exposed surface before storage or use. Folded hems, layered patches, and thick seams can remain damp after nearby fabric feels dry. Let the item finish drying under its permitted conditions, and check again before folding or enclosing it. A cover should also be refitted according to its manufacturer’s guidance; advice to refit some covers slightly damp is not a reason to force an unfamiliar repaired cover over an insert or leave damp filling enclosed.
Use a Tumble Dryer Only When Every Component Allows It
Read the drying instructions on the textile and repair product separately. Some adhesives allow low-temperature tumble drying after their wash waiting period, while other constructions require air drying. A no-heat cycle still tumbles the item, so it does not remove mechanical handling. For wool, Woolmark distinguishes products specifically labeled for tumble drying from those requiring other care. A newly added patch or adhesive can restrict the original drying permission, even if the fabric previously went through the dryer successfully.
- Source: Woolmark drying guidance discusses flat drying and the separate permission required for tumble drying suitable wool products.
- Video: Woolmark Machine Wash and Tumble Dry explains care for wool garments carrying the relevant permission. It does not establish tumble-dryer suitability for an unknown repaired blanket or glued cover.
Iron and Refit Without Pulling on the Repair
Iron only when the textile and repair material permit it, following their temperature and steam instructions. A pressing cloth or reverse-side approach may be appropriate when specified, but neither makes a prohibited heat treatment acceptable. Avoid placing an iron directly on exposed adhesive, and never assume heat will reactivate an unfamiliar bond. For an iron-on repair requiring reapplication, use its exact procedure instead of increasing temperature or extending pressing time until the area appears to stick again.
Refitting deserves the same care as washing. Support a cushion insert while easing the cover into position, distribute fabric around corners, and avoid using the repaired seam as a handle. Rehang a curtain without tugging its repaired lower edge. If the fit or drape has changed noticeably, stop and compare dimensions or photos before pulling harder. A successful wash should return the item to comfortable use without requiring new force to make it fit.
What Should You Do If the Repair Changes After Washing
Assess the repair after the permitted drying process, comparing it with its previous shape, feel, and photographs. An opening edge needs different treatment from a broken stitch, a water ring, or an uncomfortable ridge. Stop pulling on a damaged area and avoid another wash until the cause is clearer. The next action should address the observed problem and the surrounding cloth, not simply add more adhesive.
Separate Bond Failure from Broken Thread and Torn Fabric
Look at where the opening begins. If two otherwise intact layers have separated, the adhesive joint may need reassessment. If thread has broken while the cloth remains sound, resewing may be appropriate. If fibers have torn beside intact glue or stitches, the original material may need a wider reinforcement or replacement. These distinctions help prevent a repeated cycle of gluing the same narrow line while damage continues to spread through the weakened fabric around it.
| What you notice | First action | Avoid assuming |
|---|---|---|
| A lifting patch corner | Stop handling the edge and check the surrounding fabric | More glue on top will solve the original problem |
| Broken stitching | Inspect the thread path and seam allowance | An adhesive repair alone will suit the same loading |
| White or cloudy adhesive | Dry as permitted and check the product’s guidance | Every white change is normal or every change means failure |
| Tackiness or a hard ridge | Review application, washing products, and the dry result | Softener or heat will restore the bond |
| Puckering beside a repair | Compare dimensions and material behavior | Pulling the area straight while wet will permanently fix it |
| Tearing beyond the repair | Assess reinforcement, replacement, or professional repair | The original repair only needs to be made thicker |
Investigate Stiffness Discoloration and Puckering
A change in appearance does not identify its cause on its own. Residue, moisture, dye movement, excess adhesive, or a change in one of the joined materials can produce different problems requiring different responses. Check what changed during the wash: product used, dose, temperature, program, drying method, or load. If the adhesive manufacturer’s guidance does not explain the result, avoid solvent experiments or aggressive scrubbing. Preserve the product details and photographs for a more informed assessment.
For bedding and cushion covers, assess comfort as well as appearance. Lightly bend the dry repaired area and compare it with adjacent fabric without stretching it. If the repair forms a rigid lump or abrasive edge, another wash is unlikely to be a dependable correction. A thin, properly placed replacement repair or a suitable sewn construction may be needed. Adding fabric softener to disguise the feel does not establish whether the repair itself remains appropriate for skin-contact use.
Repair Failed Areas and Record the Next Wash
Choose a new repair based on the damage and care routine, rather than trying to preserve the original method at any cost. Small low-stress hems can suit an appropriate flexible textile adhesive; repeatedly loaded seams often need a suitable sewn repair or reinforcement. Follow removal and reapplication directions for old adhesive. Some iron-on materials specifically prohibit sewing through them, so adding stitches is a product-specific decision, not a universal upgrade for every glued repair.
- Tutorial: Needlepointers ladder stitch instructions explains closing suitable seams from the outside when access to the reverse is limited.
- Video: How to Hand Sew the Ladder Stitch demonstrates an invisible closure useful for small cushion openings with sound fabric edges. It does not replace reinforcement for missing, thin, or heavily loaded material.
Keep a brief record of the repair product, completion time, first wash, cycle, detergent, drying method, and observed result. A phone note with before-and-after pictures is sufficient; there is no need for a complicated tracking system. For several similar covers, label the records clearly so a successful result on one material is not mistakenly applied to another. Household observations help you maintain your own items, but they are not controlled evidence for promising a universal number of wash cycles.
- Record the exact product and repair location.
- Note the completed waiting period before the first wash.
- Save the wash and drying settings actually used.
- Check appearance, edge security, dimensions, and comfort after drying.
- Reassess the repair method when the same problem returns.
Bring the Textile Back into Everyday Use
A useful repair lets a household textile remain clean, comfortable, and practical. Start with its care instructions, add the repair product’s restrictions, and choose a method both allow. Give adhesive repairs the stated time before washing, support large pieces while wet, and treat drying and refitting as part of the same care job. These habits make the first wash easier to manage and help you notice small changes before they become another torn seam or detached hem.
For a low-stress home repair, a flexible fabric adhesive such as GleamGlee can be considered alongside sewing, provided the fabric, application, and future washing routine are compatible. Choose the repair around the life the item needs to lead: frequent bedding washes, occasional curtain cleaning, or routine cushion maintenance. If the repair cannot accommodate necessary care, changing the repair method is the practical solution. Clear instructions and realistic expectations are more useful than promises of permanent performance without stated test conditions.
Frequently Asked Questions About Washing Repaired Home Textiles
The questions below cover decisions which often arise once a textile has been repaired and its next wash is due. Use the answers alongside the detailed care steps above, keeping the exact fabric and repair product in mind. Similar-looking hems, patches, and covers can carry different restrictions, so an answer about one material should not become permission to wash every repaired item the same way.
Can You Machine Wash Fabric After Using Fabric Glue
Yes, when the original textile and the exact adhesive both permit machine washing, the stated wash waiting period is complete, and the repair is intact. Check the drying instructions separately before starting the load. The words fabric glue do not describe one universal laundering standard. If the product identity or its instructions are missing, cold water and a gentle cycle cannot establish compatibility; find the information before washing the whole item.
How Long Should Fabric Glue Dry Before Washing
Use the product’s specific wash delay rather than judging only whether the surface feels dry. Published instructions vary: the examples in this guide include approximately 24 hours for suitable GleamGlee applications, 48 hours for the cited Aleene’s pen, and 24–48 hours for the cited HeatnBond tape. These are product examples, not a general range for every adhesive. Abnormal tackiness, early wetting, or an unsuitable application still needs attention after the clock has run out.
Should You Wash Home Textiles Before or After Repairing Them
For a planned repair, clean and dry the materials as required by the textile and adhesive instructions before applying the repair. Some products also specify prewashing without fabric softener. However, do not put an unstable tear through an aggressive wash simply to prepare it; arrange a suitable cleaning and stabilization approach first. Once the repair is complete, follow its separate waiting period before the next wash and keep the original textile’s care restrictions in place.
Can You Use Bleach or Stain Remover on a Glued Repair
Only use a treatment compatible with the original textile, its colors and finishes, and the repair material. A bleach-safe fabric does not automatically make an added glue line bleach-safe, and washable adhesive is not the same as solvent-resistant adhesive. Check the cleaner’s directions and test an allowed treatment in an inconspicuous place. If compatibility remains unclear, avoid concentrated treatment across the bond and identify a suitable method before proceeding with the stain.
Can Repaired Curtains or Cushion Covers Be Dry Cleaned
They may be suitable for professional cleaning when the textile and repair materials permit the intended process. Tell the cleaner where the repair is located, what product was used, when it was applied, and which treatments have already been tried. Dry cleaning is not automatically a gentler alternative for every adhesive. If the textile requires professional care but the added repair is incompatible, the repair may need to be changed before cleaning can proceed.
How Many Washes Should a Fabric Repair Last
There is no reliable wash-count promise covering every fabric, adhesive, patch, and household routine. Durability depends on the cloth’s condition, repair design, application, loading, and care process. A claim such as 50 washes needs identifiable test conditions, including the fabric, cycle, detergent, drying method, and definition of failure. For your own item, check the repair after cleaning and address changes early rather than relying on an unsupported lifetime or cycle-count guarantee.