 Skip to content

A handmade ornament can take an afternoon to make and become something your family keeps for years. Yet storage often gets decided in the last few minutes of cleanup: fold the banner, squeeze the decorations into a box, and slide everything into the nearest cupboard. Problems become obvious later, when a ribbon stays flattened, a glued flower sticks to its neighbor, or a favorite piece comes out smelling damp.
Store fabric crafts clean, completely dry, and properly supported, after any adhesive or coating has completed its specified curing process. Choose packaging around the finished construction, then use a dark indoor location with a reasonably stable environment. The following methods cover everyday handmade decorations, felt projects, fabric bags, embroidery, quilts, and costume pieces. Irreplaceable heirlooms, original photographs, and fragile historical textiles need a more cautious approach because an ordinary craft repair can permanently change them.
1. What Should You Check Before Storing Fabric Crafts?
Before choosing a box, identify the materials, check their condition, and confirm whether cleaning is appropriate. A washable cotton backing does not automatically make its glued flowers, metallic trim, or paper label washable. Examine the entire construction, allow any suitable cleaning to dry fully, and separate pieces showing possible mold or insect activity. This short inspection prevents a storage problem from becoming a collection-wide problem.
Identify Every Material in the Finished Piece
Think of a craft as a small assembly of materials rather than simply a piece of fabric. A felt ornament might combine polyester felt, cotton thread, foam, painted wooden beads, and adhesive. Each component responds differently to water, pressure, and bending. Make a brief materials note while you still remember the supplies. Include the adhesive name and care instructions, particularly when you intend to give the finished piece to someone else.
Sort your projects by the decisions they require. An ordinary washable tote can follow its established care routine. A decoration with unknown coatings needs a cautious cleaning decision. A family sampler with brittle threads deserves specialist advice before treatment. A brief handwritten materials note keeps these differences visible when several projects share a storage shelf, helping you match the care routine to each finished piece.
- Record the base fabric, lining, filling, decorations, adhesive, and any surface coating.
- Keep packaging or a photograph of the relevant care instructions with your project records.
- Flag unknown materials instead of guessing from appearance alone.
- Separate irreplaceable pieces from projects intended for routine washing and everyday use.
Clean and Dry Only as the Materials Allow
Remove ordinary surface dirt only through a method suitable for the complete project. For a modern item with clear washing instructions, follow those instructions and allow the recommended adhesive cure before washing. For unstable dyes, loose embellishments, unknown glue, or delicate fibers, postpone wet cleaning until you have reliable guidance. A scrap made from the same materials is a better place to test compatibility than the most visible part of your finished work.
Pay particular attention to drying. The outside of a stuffed decoration can feel dry while a seam or dense filling still holds moisture. Let suitable washable pieces dry with support and appropriate airflow, following their care instructions, before packing. Do not use direct sunlight, a hot iron, or a hair dryer as a universal shortcut. If you cannot confidently establish dryness without risking damage, keep the piece out of closed storage and seek material-specific advice.
- Conservation guidance: The George Washington University Museum and The Textile Museum distinguishes routine household cleaning from the specialist treatment of historical textiles in Caring for Textiles.
- Video: Should my textile be cleaned? explains professional spot and wet cleaning and the circumstances in which these approaches are considered. Use it to understand the decision, rather than as permission to wet-clean a fragile heirloom yourself.
Check for Damage and Record the Current Condition
Look at both sides under ordinary room lighting. Note lifting edges, loose beads, rusty fasteners, tacky glue, unusual discoloration, new holes, insect debris, and possible mold. A musty smell calls for investigation but does not identify its cause on its own. Photograph the whole piece and any concerning detail before doing anything else. Comparison photographs taken from a similar angle are much more useful than trying to remember whether a mark was already there.
Avoid turning an inspection into a stress test. Do not repeatedly pull a glued appliqué or flex an old painted surface to discover its breaking point. Support the piece, note the problem, and decide whether it needs repair before storage. Keep detached original beads, labels, and other parts with the item in a separate labeled enclosure. For valuable work, retaining this information can matter as much as retaining the detached material itself.
2. Which Storage Materials and Containers Should You Use?
Choose materials for their suitability, cleanliness, and ability to support the finished piece. An appropriate acid-free box or suitable polypropylene or polyethylene container can work, but neither compensates for damp fabric or an unsuitable room. Use compatible linings, avoid unnecessary compression, and check the usable internal dimensions. The most useful storage purchase is often a better-fitting container, rather than a larger collection of elaborate accessories.
Choose Suitable Tissue, Fabric Linings, and Supports
For many textile applications, unbuffered acid-free tissue and prewashed, undyed cotton provide useful separation and gentle cushioning. Unbuffered tissue is especially relevant when wool, silk, sensitive dyes, or uncertain materials are involved. The terms acid-free and buffered describe different properties, so read the actual product description. Tissue can separate surfaces and soften a fold, but a sheet of paper cannot supply the structural support of a tray or board.
Use a layered approach suited to the job: a stable support underneath, a compatible contact layer, and protection from dust above. Ordinary newspaper, colored gift tissue, and exposed shipping cardboard are poor default contact materials for long-term storage. Likewise, placing a textile straight against unfinished wood introduces an avoidable material contact. For inexpensive contemporary work, a clean, suitable container and a reusable washed cotton lining can be a sensible starting point.
Compare Archival Boxes, Plastic Containers, and Bags
Plastic storage is not automatically unsuitable. The Canadian Conservation Institute, or CCI, lists appropriate polypropylene and polyethylene containers among textile storage options. However, a recycling symbol identifies a material category; it does not certify every additive, lining, closure, and storage condition. Food-contact suitability also answers a different question from long-term compatibility with a delicate textile. Choose a documented product when the piece has substantial financial or sentimental value.
| Storage material | Useful application | Main limitation |
|---|---|---|
| Suitable acid-free box | Flat work and protected padded folds | Cannot correct a damp room or prevent every leak |
| Suitable PP or PE container | Dry crafts with compatible linings | Requires suitable contents and environmental conditions |
| Prewashed undyed cotton | Reusable lining or dust cover | Does not support weight or stop water ingress |
| Unbuffered acid-free tissue | Separation and gentle shape support | Compresses and needs inspection over time |
| Rigid support tray | Fragile pieces and lifting a whole item | Must fit the container and have a suitable contact layer |
| Vacuum compression bag | Generally unsuitable for delicate decorated crafts | Pressure can flatten forms and concentrate fold stress |
For an embellished craft, assess compression before considering space savings. A vacuum bag presses across whatever stands highest, whether it is a bead, folded ribbon, glued flower, or stuffed nose. These pressure points can distort the appearance even when the base fabric remains intact. An ordinary bag used loosely as part of suitable protection is a different arrangement from a bag deliberately compressed around a three-dimensional object.
- Storage reference: CCI: Flat Storage for Textiles describes container materials, linings, overall support, and cushioning folds.
- Material-selection evidence: CCI: Products Used in Preventive Conservation explains how composition, contact, enclosure conditions, and changes over time affect suitability.
Measure the Supported Piece Before Choosing a Box
Measure the craft after adding its intended support, rather than squeezing it into a container and adjusting afterward. Record the length, width, and height of the protected arrangement, including bows, beads, and any raised lid clearance. Then check the container’s internal dimensions and opening. A box advertised by its outside size may have tapered sides or a lid fitting which reduces the space available where the craft actually rests.
For example, suppose a supported decoration occupies 35 x 25 x 8 cm. A container with a clear internal space of 40 x 30 x 12 cm may be a workable candidate, provided its shape and lid do not touch the decoration. This is an illustrative fit check, not a universal clearance rule. Two boxes with the same volume can have completely different usefulness: a tall narrow box will not protect a wide flat banner simply because both hold the same number of liters.
- Measure all three dimensions after arranging the support.
- Check the narrowest usable part of a tapered box.
- Close the lid without pressing on the contents.
- External tool: Use the inches-to-centimeters converter when comparing differently labeled containers. The conversion is exact: 1 inch = 2.54 cm. Material compatibility still needs a separate decision.
3. Should You Store Fabric Crafts Flat, Rolled, Folded, or Hanging?
Choose the method which supports the construction with the least unnecessary strain. Small or fragile pieces often benefit from flat storage. Suitable large, flexible textiles can be rolled around a covered support tube. Some bulky pieces require cushioned folds when space is limited. Hanging is appropriate only when the garment can carry its weight safely. Convenience matters, but the finished object’s condition must guide the choice.
Store Small, Fragile, or Heavily Decorated Crafts Flat
Flat storage is often the clearest starting point for a small embroidery, delicate appliqué, or heavily decorated panel. Arrange the support so the textile rests naturally, without pulling corners into alignment. Leave room around raised details and avoid placing another object directly on top. The useful test is simple: opening and closing the box should not require flattening the work, bending its support, or moving decorations out of the way.
- Prepare a clean work surface large enough for the complete piece.
- Line a suitable shallow container or support tray with a compatible material.
- Position the textile without stretching it.
- Add gentle support around raised details where necessary, without forcing their shape.
- Cover appropriately and close the container without pressure on the craft.
A rigid tray also makes future handling easier. Instead of lifting fragile fabric by its edge, lift the supported arrangement. This is particularly useful when several small ornaments belong to one set: each can occupy its own space on a tray, with a photograph showing the arrangement. Avoid packing the spaces so tightly you must pull on ribbons or beadwork to retrieve one piece; access is part of a workable storage design.
- Video: What is the best way to store a small or fragile textile? demonstrates the museum’s flat-storage method for small or fragile textiles.
- Download: CCI flat-storage illustrated PDF provides diagrams and further handling guidance.
Roll Suitable Flat Textiles on a Covered Tube
Rolling can reduce the need for folds in a large, flexible textile, but it is not appropriate for every banner or quilt. First confirm the piece lies flat and its layers move together without slipping or buckling. Stiff painted surfaces, brittle decoration, and incompatible layered constructions can crack or distort when curved. If the object resists rolling or develops ridges, stop and reconsider the method instead of increasing the pressure.
Use a support tube suited to the textile, with a diameter large enough to avoid a damaging bend and a length greater than the textile’s width. There is no single minimum diameter suitable for every craft. Prepare the tube and interleaving according to conservation guidance, then roll evenly with support across the width. Large pieces may need two people. Avoid folding a wide piece in half just to fit a short tube.
- Lay the suitable textile flat and remove accidental creases from the arrangement without forcing them out.
- Prepare a compatible covered support tube and appropriate interleaving.
- Roll slowly and evenly, checking for slipping layers or compressed decoration.
- Add a suitable dust cover and a loose securing arrangement.
- Label the roll and support it so the stored textile is not crushed against neighboring objects.
- Technical reference: CCI: Rolled Storage for Textiles covers tube preparation, unsuitable constructions, and different treatment of flat and raised surfaces.
- Video: What is the best way to store a flat textile? demonstrates rolled storage. Here, “flat textile” describes the object; it does not mean the demonstrated method is flat storage.
- Download: CCI rolled-storage illustrated PDF offers a practical reference alongside the demonstration.
Use Padded Folds When Flat Storage Is Impractical
Folding may be unavoidable for a large quilt or costume, particularly in a small home. Keep the number of folds down and support each bend with a suitable soft material instead of pressing a sharp crease. Place the folded arrangement in a container large enough to preserve the cushioning. If the only way to close the lid is to lean on it, the container is too small for this arrangement.
Consider how you will reopen the piece. Put an arrangement photograph with the storage record and note the support positions. At an appropriate inspection, assess whether the folds should be redistributed, while avoiding unnecessary handling of fragile work. Do not interpret periodic adjustment as a need to unfold everything every few weeks. The aim is to manage sustained stress without adding repeated handling damage or losing small components during each inspection.
- Video: Demo of folded storage for a quilt shows a quilt being prepared for folded storage and complements the cushioning principles described here.
Hang Only Items That Can Support Their Own Weight
A sturdy costume may fit better in a wardrobe than in a box, provided its shoulders and seams can carry the load. Use a suitably sized padded hanger and an appropriate dust cover. Thin wire hangers concentrate pressure and provide poor support. Heavy embellishments, weakened seams, stretchy knits, and bias-cut garments need a different assessment; their shape can gradually change under their own weight, even without anyone touching them.
Keep neighboring garments from pressing against decorations, and avoid using a fragile neckline or decorative ribbon as a suspension point. A costume which is comfortable to wear briefly does not necessarily tolerate months of unsupported hanging. For an awkward or valuable garment, ask a textile conservator about suitable support. When hanging is unsuitable, a supported flat or cushioned folded arrangement can offer a more manageable alternative within the available space.
- Technical reference: CCI: Hanging Storage for Costumes explains unsuitable garment types and padded supports.
- Video: Demo of folded storage for costume demonstrates a folded arrangement for a costume, providing an alternative to hanging when appropriate.
4. How Should You Store Glued, Embellished, and Mixed-Material Crafts?
Glued and decorated projects need attention to curing, surface contact, and shape support. Keep uncured adhesive out of closed storage, prevent exposed sticky areas from touching packaging, and protect raised details from pressure. Mixed-media keepsakes require separate decisions for their paper, photographs, metal, and coatings. A glue suitable for assembling an everyday craft does not automatically qualify as a material for conserving an irreplaceable original.
Let Glue and Coatings Cure Before Packing
In adhesive work, initial hold, surface dryness, and completed cure describe different stages. An appliqué can stay in place during careful handling while the bond is still developing. Packing it tightly at this stage can shift parts or press adhesive against another surface. Follow the specific product’s instructions for application and curing, including relevant environmental conditions. A clock reading is useful only when the product and the conditions match the instructions being followed.
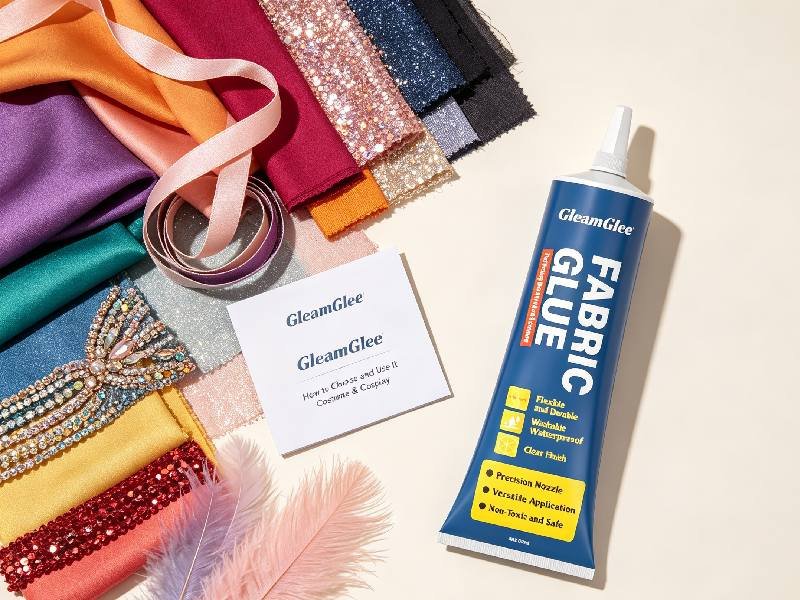
For ordinary modern fabric projects, GleamGlee Fabric Glue is intended for fabric bonding and decorative attachment, according to its manufacturer. Its guidance gives approximately 6–10 minutes for initial setting and recommends waiting approximately 24 hours before washing, ironing, or frequent use. These are manufacturer-provided instructions, not universal fabric-glue timings or independently established archival performance. Check the current label, use a thin application as directed, and assess the complete project’s condition before packing.
An easy planning example is a decoration finished at 3 p.m. on Saturday: an approximately 24-hour waiting instruction brings the earliest scheduled check to around 3 p.m. on Sunday, not Saturday evening. The check still matters. If the glue remains unexpectedly tacky, the filling is damp, or parts move under ordinary gentle handling, investigate before enclosing the piece. Do not add heat, extra glue, or a protective topcoat simply to force it through the schedule.
- Keep the curing arrangement supported and free from unnecessary contact or pressure.
- Retain a separate sample made with the same materials when testing a new combination.
- Follow the label for washing and ironing; the base fabric’s tolerance alone is insufficient.
- For repeat projects, record the application time and the instructions used for each batch.
Support Felt Ornaments, Fabric Flowers, Beads, and Stuffed Shapes
Three-dimensional decorations need space around their form, not merely padding around their perimeter. A felt animal’s ears, a ribbon bow, and a fabric flower can be flattened by the weight of other decorations. Give each piece a stable resting position and separate vulnerable details from neighboring objects. Support the body of an ornament rather than leaving its weight suspended from a small glued attachment throughout the storage period.
For a practical seasonal arrangement, group a set of ornaments in one suitable box while giving each its own supported compartment or tray position. Coil loose hanging cords separately so they cannot catch on sequins during removal. Cushion hollow forms only enough to maintain their natural shape; overstuffing adds another source of strain. This approach applies support principles used for costume accessories to comparable craft shapes, rather than claiming a tested lifespan for any particular ornament or adhesive.
- Conservation reference: CCI: Storage for Costume Accessories illustrates support for hats, bags, and other shaped objects, including gentle internal padding.
If you make coordinated decorations, gift sets, or small production runs, prepare one complete packing sample before ordering all the packaging. Check how the piece fits after curing, how it can be lifted out, and whether its care information stays with it. For a GleamGlee product or packaging customization inquiry, specifying the actual fabrics, decorations, expected handling, and care requirements makes the discussion more useful than requesting a general promise of permanent adhesion.
Treat Stiffened Surfaces, Original Photos, and Heirlooms Separately
Painted fabric, stiffened lace, coated faux leather, and mixed paper-and-textile projects should not inherit the storage method of their backing fabric automatically. A flexible backing can carry a brittle surface. Keep visible flakes or detached parts, minimize bending, and avoid direct pressure on unstable decoration. If you cannot identify a coating, document its appearance and previous care rather than experimenting with solvents or trying to determine its flexibility through repeated bending.
Original photographs and historical documents deserve particular restraint. For a new keepsake, using a copy in the decorative craft and storing the original separately may preserve both the creative idea and the source material. The Library of Congress advises against applying glue or self-adhesive materials directly to photographs. Photo-safe enclosures and appropriate non-adhesive attachment methods address a different preservation need from gluing ordinary contemporary fabric shapes together for a washable decoration.
- Photograph guidance: Library of Congress: Care, Handling, and Storage of Photographs explains handling and suitable enclosure principles.
- Keepsake guidance: Library of Congress: Preservation Measures for Scrapbooks and Albums addresses protective storage and attachment choices for albums and mixed collections.
5. Where Should You Store Fabric Crafts to Reduce Moisture, Light, and Pest Damage?
Use a stable indoor location away from direct sunlight, heat, leaks, and persistent damp. Keep containers off the floor and choose a position you can inspect without moving heavy furniture. Monitor the actual storage location instead of assuming every cupboard is dry. Packaging limits some exposure, but lasting protection also depends on the room, nearby building surfaces, housekeeping, and changes between seasons.
Choose a Stable Indoor Location Away from Leaks and Heat
An interior wardrobe or cabinet in a regularly occupied room is often easier to manage than a loft, garage, or damp basement. Look above and around the proposed shelf: water pipes, windows, roof leaks, radiators, and cold exterior walls all deserve attention. Room names are only clues. A well-controlled basement differs from a damp one, just as an interior cupboard beside a leaking pipe can be unsuitable despite its convenient location.
Arrange storage so routine inspection remains realistic. Keep the most frequently used seasonal items accessible, place heavy containers where they can be handled safely, and leave enough room to remove a box without dragging it against another. Avoid using the craft box as a support for household equipment. A photograph on the outside can prevent unnecessary opening and rummaging when several similar containers hold different holiday or family-event decorations.
- Video: How do I safely store my textile(s) at home? covers storage materials, home locations, and maintenance of the storage area.
- Location guidance: GW Museum: Storing Textiles provides practical information about storage environments and housekeeping.
Monitor Temperature and Humidity Instead of Guessing
Relative humidity, usually abbreviated RH, describes how close air is to saturation at its current temperature. The Textile Museum gives approximately 65–70°F, or 18–21°C, and 40%–50% RH as an ideal reference for textiles while emphasizing stability. Treat these figures as a reference, not a universal pass-or-fail test for every home or mixed-material craft. Persistent damp and large environmental swings deserve attention even when one isolated reading looks reassuring.
| Measurement or observation | Reference or example | Practical interpretation |
|---|---|---|
| Textile storage temperature | About 18–21°C / 65–70°F | Museum reference; assess the whole environment |
| Relative humidity | About 40%–50% RH | Reference range, not a guarantee against damage |
| Illustrative room condition | 24°C and 65% RH | Calculated dew point is approximately 17°C |
| Condensation on a cold surface | Surface near or below the air’s dew point | Investigate moisture and surface temperature |
| Recent leak or damp contents | Any occurrence | Act promptly rather than waiting for a scheduled check |
Place a suitable thermometer-hygrometer near the stored work and let it equilibrate before interpreting readings. Check at different times and during seasonal changes; one reading cannot describe a room for the entire year. If two inexpensive instruments disagree substantially, verify them rather than adjusting the room repeatedly around uncertain numbers. Keep a simple record of date, temperature, RH, and any leak or condensation, so you can recognize a pattern instead of reacting to a single measurement.
The relationship between temperature and moisture explains some surprising cupboard problems. Air at 24°C and 65% RH has an approximate dew point of 17°C; a sufficiently cold nearby surface can develop condensation even though the room feels comfortable. This is an illustrative calculation, not a test result from a particular home. Mold risk also depends on conditions over time and can develop without visible condensation, so a dew-point result cannot certify a storage location as mold-free.
- Environmental evidence: CCAHA: Temperature, Relative Humidity, and Dew Point for Collections explains the relationship and the limits of universal environmental targets.
- External tool: The Dew Point Calculator accepts temperature and RH to estimate dew point. Use measured indoor conditions; outdoor weather humidity is not a substitute for a cupboard reading.
Limit Light, Dust, and Pest Access
Keep stored textiles out of daylight, including indirect light reaching a transparent box. Light damage accumulates, and visible light can affect dyes even when ultraviolet exposure is reduced. A closed cabinet or appropriate opaque enclosure can simplify protection during storage. When you display a seasonal piece, choosing a less exposed location and limiting the display period reduces its light exposure; time in darkness does not reverse fading which has already occurred.
Good housekeeping also makes problems easier to detect. Remove dust and debris from shelves and the surrounding area, keep food away from craft storage, and inspect nearby natural-fiber items when insect evidence appears. Wool-containing felt and feathers deserve attention, but synthetic components do not make a mixed craft automatically immune to every pest problem. Fragrance, cedar, or a strong-smelling sachet should not replace observation, suitable packaging, and a response to actual insect activity.
- Environmental reference: CCI: Textiles and the Environment discusses light, humidity, and other environmental causes of deterioration.

6. How Do You Inspect, Display, and Reuse Stored Fabric Crafts?
Keep a basic record, inspect on a practical schedule, and assess the piece before its next use. For ordinary household crafts, a six-month check is a useful starting point, with additional checks after leaks, suspected pests, or major environmental changes. Look for changes without repeatedly stressing the construction. When a problem appears, document it and choose an appropriate response before repacking the item.
Label and Inspect Pieces Without Excessive Handling
Label the container or supporting arrangement so you can identify the contents without attaching sticky tape directly to the textile. Include a photograph, a materials note, care instructions, and the last inspection date. CCI’s costume-accessory guidance recommends checking for insect infestation at least every six months. Applying this interval to ordinary household crafts is a practical starting point, not a guarantee of protection or a rule requiring fragile heirlooms to be unfolded unnecessarily.
For seasonal decorations, combine inspection with the moments when the box is already open: before display and before returning the pieces to storage. Compare photographs, check supports for compression, and look at places where fabric, glue, metal, and packaging meet. Record a small change while it is easy to recognize. A dated note such as “left ribbon slightly flattened” is more useful at the next inspection than an undated judgment of “looks fine.”
- Keep: item name, photograph, materials, adhesive, and relevant care instructions.
- Add: packing date, container location, inspection date, and observed changes.
- Check: odor, moisture, insect evidence, color, folds, supports, seams, and attachments.
- Update: the packing arrangement when a support collapses or access becomes difficult.
Respond to Mould, Insects, Yellowing, and Loose Adhesive
Separate a suspect piece from unaffected crafts and limit handling while you work out the next step. Mold, insect debris, adhesive residue, and ordinary dirt require different responses; a photograph alone may not settle the diagnosis. Avoid improvised chemical treatment on unknown materials. For a valuable piece, a textile conservator can assess its construction and condition before cleaning or repair changes the evidence or causes additional damage.
| Problem noticed | First action | Avoid |
|---|---|---|
| Possible mold or dampness | Isolate, investigate moisture, arrange suitable drying or treatment | Leaving a wet piece sealed indefinitely; brushing mold into the room |
| Insect debris or new holes | Isolate and inspect neighboring objects and storage | Treating every material with the same freezer or pesticide routine |
| Sticky, yellowed, or lifting glue | Photograph, reduce strain, identify the adhesive and materials | Covering the problem with more glue or an unknown solvent |
| Flattened shapes or stressed folds | Reassess support and container space | Forcing the original shape back abruptly |
| Loose beads or damaged seams | Retain detached parts and evaluate repair | Pulling repeatedly to test the remaining attachments |
Dry and wet mold-affected items need different handling. CCI explains how isolation can limit spread, while damp material also needs prompt, appropriate drying or professional recovery. Do not seal a wet craft and leave it waiting for the next seasonal inspection. Avoid shaking it indoors or directing a household fan across suspected mold into occupied space. Extensive contamination or an irreplaceable object deserves professional advice before home treatment is attempted.
Adhesive damage also needs diagnosis before repair. A lifted appliqué edge could involve inadequate original contact, contamination, strain, or changes in the materials. Adding fresh glue over sticky residue may hide the problem without creating a sound bond. Keep the piece supported, consult the relevant product instructions, and test a proposed repair on a representative scrap where possible. Ordinary contemporary work and historical material should not automatically receive the same intervention.
- Recovery guidance: CCI: Mould Growth on Textiles distinguishes isolation, drying, and treatment considerations. It does not turn one household cleaning method into a universal solution.
Display with Support and Check the Piece Before Reuse
Bring out the whole supported arrangement when possible. Work with clean, dry hands, remove jewelry likely to snag, and use a tray for delicate pieces rather than lifting them by a ribbon or ornament. Plan the display around the item’s weight and condition. A broad, suitable support can distribute force more effectively than a small decorative hanging point, while weak or heavily embellished work may need a more supportive mounting approach.
Framing adds protection from dust, but the complete arrangement matters. In ordinary framed textile displays, appropriate spacing keeps the work from resting directly against glazing. Specialist pressure mounts are a separate technique and should not be copied casually. Before hanging a reused banner or wearing a stored costume, inspect the actual attachment points. A piece which looks attractive in its box can still have a weakened seam or hanging loop needing attention before use.
- Display guidance: GW Museum: Displaying Textiles explains structural support, framing choices, and spacing from glazing.
- Video: What cleaning or maintenance can I undertake on my own? introduces museum surface-cleaning practices and suitable home applications. Loose beads, shedding fibers, and unstable glue need assessment before vacuuming; ordinary high suction should not be applied directly to delicate work.
7. Conclusion: Keep Fabric Crafts Ready for Their Next Use
Successful storage begins with knowing what you have made and what each part can tolerate. Clean only as appropriate, let the entire piece dry, follow adhesive curing instructions, and give the finished construction enough support and space. Then choose a stable, dark location and keep an inspection record you will actually use. These ordinary decisions address the problems most likely to spoil the next occasion when you bring a handmade piece out again.
Start with the next box you pack rather than trying to rebuild your whole storage system at once. Replace an unsuitable contact layer, stop compressing a raised decoration, move a container away from a damp wall, or add a dated photograph. Preserve valuable originals cautiously and distinguish useful craft-product instructions from archival claims. No single box or adhesive can promise a fixed lifetime, but a thoughtful routine can reduce avoidable damage and make future care much easier.
8. Frequently Asked Questions About Storing and Preserving Fabric Crafts
The same storage questions arise with holiday ornaments, embroidered gifts, decorated clothing, and family keepsakes, but their answers depend on the finished construction. Use these answers alongside the preparation and packing methods above. If one component has unknown care requirements, treat the entire piece cautiously until you understand the limitation. For irreplaceable material, choose a conservation assessment before a cleaning or repair experiment.
Can I Store Fabric Crafts in Plastic Containers?
Yes, a suitable plastic container can be part of a sound storage arrangement. Check the material, use a compatible lining, and pack only clean, dry pieces after their adhesive has completed its specified curing process. Keep the container in a stable environment and inspect it periodically. A food-storage label or recycling code alone does not establish long-term compatibility with every dye, glue, coating, or historical textile.
Are Vacuum Storage Bags Safe for Fabric Crafts?
Vacuum compression is generally a poor choice for delicate, embellished, or three-dimensional fabric crafts. It can flatten bows and filling, press beads into surrounding fabric, and concentrate stress at folds. Some ordinary household textiles tolerate compression better, but their behavior does not establish suitability for a handmade mixed-material object. If space is limited, compare a shallower supported arrangement, fewer cushioned folds, or another storage location before compressing the work.
Should I Wash Fabric Crafts Before Storing Them?
Only wash a craft when its complete construction and care instructions support washing. A cotton base may carry water-sensitive decoration or adhesive requiring a longer wait before cleaning. Assess color stability and condition, and use a representative scrap for a new material combination where possible. Historical, fragile, or irreplaceable work should receive specialist advice before wet cleaning. Whatever appropriate cleaning method you use, complete drying is essential before closed storage.
How Long Should Fabric Glue Cure Before Storage?
Follow the instructions for the exact product rather than a generic fabric-glue timetable. Initial setting and surface dryness do not necessarily mean the recommended curing process is complete. Also check the whole craft for damp filling, tacky surfaces, and unstable attachments before packing. The manufacturer’s approximate waiting period is a planning aid under its stated conditions; it should not become an unconditional promise about every material combination, application thickness, or storage arrangement.
Should I Put Silica Gel in the Storage Box?
Silica gel can help manage humidity in a suitable enclosure, but it is not a substitute for fixing leaks or storing a dry object. Its required quantity and maintenance depend on enclosure leakage, ambient conditions, the desired humidity range, and the sorbent’s properties. Keep it contained and separated from the craft, follow the product and preservation guidance, and monitor humidity. Avoid applying a universal “one packet per box” rule.
- Technical evidence: CCI: Silica Gel — Passive Control of Relative Humidity explains the variables involved in sizing and maintaining humidity control.
How Often Should I Check Stored Fabric Crafts?
For ordinary household crafts, start with a check approximately every six months and inspect again when taking pieces out or putting them away. Check sooner after a leak, suspected insect activity, persistent damp, or an unusual environmental change. This is a practical maintenance schedule, not a guarantee against damage. Fragile pieces may benefit from inspection of the enclosure and accessible areas without repeated full unfolding or unnecessary handling.
How Many Years Can Fabric Crafts Last in Storage?
There is no reliable fixed lifespan for all fabric crafts. Fibers, dyes, adhesives, coatings, construction, previous use, light exposure, moisture, and mechanical stress all influence the result. A product described as flexible or washable has not necessarily been tested for decades of storage in your particular craft. Favor documented care, stable conditions, appropriate support, and condition records over promises of permanent clarity, permanent adhesion, or a guaranteed number of years.





















