 Skip to content
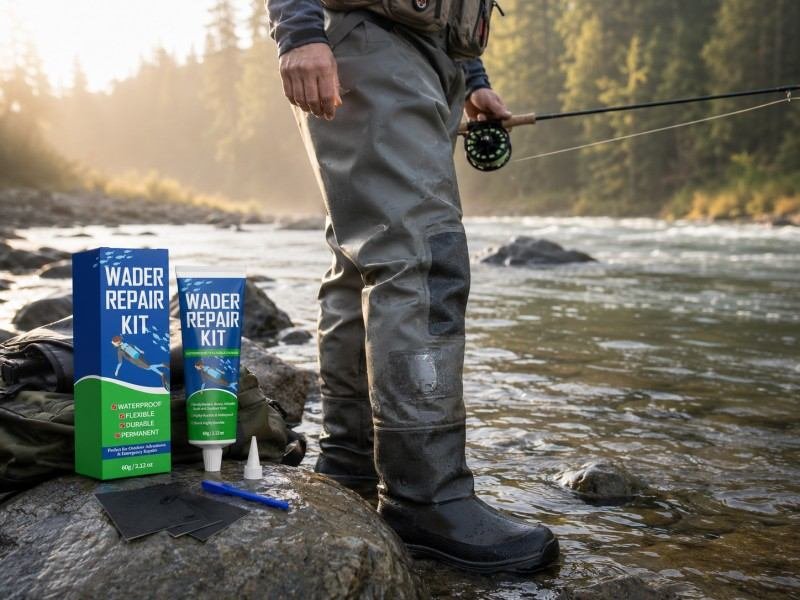
A tiny puncture in a pair of waders can feel harmless in the garage and become painfully obvious after ten minutes in cold water. Many repairs fail not because the adhesive lacks strength, but because the wrong spot was sealed, moisture remained inside a seam, too much adhesive was applied, or the waders returned to service before the bond had cured beneath the surface.
To apply wader adhesive correctly, locate the actual water-entry point, identify the wader material, clean and completely dry the damaged area, apply a thin continuous layer over the damage and surrounding sound material, add a flexible patch when the tear opens under tension, and allow the repair to cure fully before performing a controlled waterproof test.
Waders are built from materials that behave differently under pressure. Breathable laminates fold and flex, neoprene stretches and compresses, PVC presents a smooth bonding surface, and rubber boots are exposed to abrasion, mud, and repeated bending. A repair that works on one area may perform poorly on another when the preparation or adhesive type is unsuitable.
The good news is that most pinholes, short tears, localized seam leaks, and small boot cracks can be repaired at home. Careful inspection and measured application usually matter more than squeezing out a large amount of glue. A few extra minutes spent diagnosing the leak can protect an expensive pair of waders for many more fishing trips.
What Should You Check Before Applying Wader Adhesive?
Before applying adhesive, locate the true leak, identify the wader material, classify the damage, and examine the surrounding surface. Confirm whether the repair belongs inside or outside the garment and whether the material remains structurally sound. Localized punctures are often repairable, while widespread delamination, crumbling rubber, or major zipper damage may require professional service.
Find the Actual Leak
The wet area against clothing is not always directly behind the puncture. Water can enter through a tiny hole, move between laminated layers, travel along stitching, and appear several centimeters away. Sealing only the dampest area may leave the original entry point untouched, leading the user to believe that the adhesive has failed.
Dry the waders completely and inspect them under bright, directional light. Turn breathable waders inside out and examine the knees, seat, crotch seams, lower legs, ankle folds, and stocking-foot connections. A small lamp placed behind the fabric can reveal pinholes as sharp points of light. Move the fabric slowly rather than pulling it tightly, since excessive tension may distort the location.
Neoprene requires a slightly different inspection. Bend and gently stretch the bootie or panel so short splits become visible. A crack may close when the material is relaxed and open only during movement. Mark every suspicious point with removable tape or a washable marker before changing the garment’s position.
When visual inspection is inconclusive, test one manageable section at a time. Filling an entire pair of breathable waders with water can place unnecessary weight on seams and suspenders. Several nearby punctures are common after contact with thorns, hooks, wire, or rough gravel, so the surrounding area deserves the same attention as the first visible hole.
Identify the Damage Type
A pinhole, cut, seam failure, neoprene split, and boot separation do not require identical treatment. A small round puncture in stable fabric may need only a controlled adhesive coating. A cut that opens when the leg bends usually needs reinforcement. A seam leak may require adhesive beneath lifted tape or along a section of stitching rather than over one isolated point.
Examine the condition of the material around the damage. Healthy fabric should remain stable when gently flexed. Peeling coatings, permanently stretched fibers, powdery neoprene, crumbling rubber, and broad layer separation indicate that the substrate is weakening. Adhesive may bond to the surface, but the weakened material can tear beside the repair.
The following table provides a practical starting point for identifying common failures.
| Damage type | Common signs | Likely repair method | Main caution |
|---|---|---|---|
| Pinhole | Small isolated leak with no visible tear | Thin adhesive layer | Check for nearby punctures |
| Short cut | Edges separate during bending | Adhesive with reinforcement | Align the edges before curing |
| Seam leak | Moisture follows stitching or seam tape | Flexible seam sealing | Clean beneath loose tape where possible |
| Neoprene split | Crack opens when stretched | Flexible adhesive and patch if needed | Do not cure under excessive tension |
| Rubber crack | Visible opening in a boot or hip wader | Adhesive with optional patch | Remove dirt, oils, and degraded residue |
| Large rip | Irregular opening or missing material | Larger compatible patch | High-stress damage may need professional work |
| Delamination | Broad damp area without one clear hole | Usually not a local glue repair | Contact the manufacturer or repair service |
Decide Whether DIY Repair Is Practical
Localized punctures, short cuts, narrow seam leaks, and small boot cracks are usually suitable for a careful home repair. The surrounding material should still feel strong, and the damaged edges should return naturally to their original position. If the opening continues to spread under light pressure, a simple surface seal may not provide enough support.
Gently hold the material a few centimeters away from the damaged area and flex it in the same direction it moves during use. Sound fabric should maintain its structure. Material that flakes, splits in several directions, or separates from an inner layer is unlikely to support a dependable long-term bond.
Large crotch tears, damaged waterproof zippers, torn suspension anchors, widespread seam-tape failure, and major boot separation may require sewing, replacement panels, heat-applied tape, or specialist equipment. Adding thick adhesive over these areas can make later professional work more difficult without solving the structural problem.
Owners of premium technical waders should also check the original repair or warranty policy before making a large modification. A small puncture repair is generally straightforward, but removing factory seam tape or covering an extensive area with adhesive may affect future service options.
Choose the Repair Side
Many punctures in breathable waders are repaired from the inside. An internal application is less visible, protected from direct abrasion, and able to seal the back of a small puncture without changing the appearance of the outer face. However, the best working side depends on the material and the location of the damage.
External repairs are often practical on rubber boots, PVC surfaces, exposed abrasion points, and areas that cannot be reached easily from inside. A larger tear may benefit from a structural patch inside the garment and a thin external seal over exposed fibers. Certain seam failures may also need treatment from both sides when water has followed stitching or lifted tape.
Position the waders in a natural resting shape before deciding. If the opening widens significantly when the knee bends or the ankle flexes, the repair must tolerate that movement. Pulling the fabric unnaturally flat during curing can create a neat-looking repair that wrinkles, stiffens, or separates when the garment returns to its normal shape.
Which Wader Adhesive Works for Each Material?
The correct adhesive must remain waterproof and flexible while bonding to the specific wader material. Breathable laminates, neoprene, rubber, PVC, polyurethane coatings, and leather have different surface properties. Flexible polyurethane repair adhesive is a practical multi-material option because it cures into a rubber-like layer that can bend and stretch with outdoor equipment.
Breathable Wader Fabrics
Breathable waders normally combine a woven face fabric, waterproof membrane, and protective backing. The repair adhesive must bond without creating a hard spot that concentrates stress when the wearer walks, crouches, climbs, or sits. A rigid household glue may appear strong on a flat workbench but crack or peel after repeated folding.
Surface preparation should remain gentle. Heavy sanding can weaken the woven face or expose the membrane below it. Remove dirt, body oils, sunscreen, salt, and loose contamination, then allow every layer to dry fully. Avoid applying strong solvents unless both the wader and adhesive instructions confirm compatibility.
Apply a thin layer that extends beyond the puncture onto sound material. The goal is to create a flexible sealing margin rather than a thick plug. A heavy bead may take longer to cure, feel uncomfortable inside the garment, and create an abrupt stiff edge that places additional stress on the laminate.
When working from the inside, insert a suitable non-stick barrier behind the repair. Adhesive can pass through a puncture and accidentally bond the opposite side of the wader leg, especially when the fabric is folded or compressed during curing.
Neoprene and Stocking Feet
Neoprene stretches, compresses, and recovers during every step. The adhesive must move with the foam instead of forming a rigid line that cuts into the surrounding material. Flexible polyurethane adhesive is suitable for many neoprene repairs because its cured layer behaves more like rubber than brittle plastic.
A small puncture can often be sealed with adhesive alone. A longer split that opens during flexing usually benefits from a reinforcing patch. Bring the edges together naturally without overlapping them, guide adhesive into the opening, and add a flexible patch when the damage is located near the heel, toe, ankle, or boot connection.
Stocking-foot seams require broader inspection because pressure from wading boots can produce several closely spaced leaks. Sand, moisture, repeated ankle movement, and compression can weaken the stitch line and neighboring neoprene. Examine several centimeters around the damp area before choosing the repair size.
Do not stretch neoprene tightly while the adhesive cures. A repair formed under excessive tension may wrinkle or pull apart when the material relaxes. Support the section so it stays close to the shape it normally has inside the wading boot.
Rubber, PVC, and Polyurethane Surfaces
Rubber and PVC may appear easier to repair than layered fabric, but their smooth surfaces are highly sensitive to contamination. Boot conditioner, silicone, grease, oil, mud, oxidation, and manufacturing residue can prevent adhesive from spreading evenly. A bond formed over invisible contamination may lift after a short period of immersion.
PVC requires an adhesive that remains compatible with flexible vinyl. Some general-purpose products become hard, fail to wet the surface, or damage the material. Rubber formulations also vary, so a small test in a hidden area is sensible when the exact composition is unknown.
Polyurethane-coated fabrics generally pair well with a compatible polyurethane repair adhesive because the repaired layer can flex with the original coating. Loose or peeling material must still be handled carefully. Remove only coating that is already detached rather than scraping aggressively and enlarging the weak area.
| Wader material | Adhesive behavior needed | Preparation priority | Common repair |
|---|---|---|---|
| Breathable laminate | Flexible, waterproof, coating-compatible | Gentle cleaning and complete drying | Pinhole and seam sealing |
| Neoprene | Elastic and crack-resistant | Align edges without stretching | Bootie splits and punctures |
| Rubber | Flexible with strong surface wetting | Remove oils, mud, and oxidation | Boot cracks and small holes |
| PVC | Compatible with smooth flexible vinyl | Clean thoroughly and test adhesion | Cuts, punctures, and hip waders |
| Polyurethane-coated fabric | Flexible and coating-compatible | Remove loose coating only | Waders, dry bags, and rainwear |
| Leather boot section | Flexible and abrasion-resistant | Clean and prepare as instructed | Cracks and bonded joints |
Why Flexible Polyurethane Matters
Waders rarely remain flat. Fabric folds behind the knees, stretches across the seat, compresses inside boots, and rubs against rocks, brush, gravel, boats, and fishing equipment. A repair adhesive therefore needs more than initial bond strength. It must withstand bending, repeated wet-and-dry cycles, and routine abrasion.
Properly cured polyurethane adhesive forms a resilient layer that moves with the underlying surface. GleamGlee Wader Repair Glue is designed to cure into flexible polyurethane rubber and is intended for neoprene, rubber, PVC, polyurethane, leather, coated fabrics, and breathable materials. The cured seal is designed to remain waterproof, flexible, UV-resistant, and resistant to normal outdoor wear.
A multi-material formula is particularly useful for anglers, hunters, divers, campers, and outdoor workers who maintain several types of equipment. One repair kit may support work on breathable chest waders, neoprene gloves, rubber boots, waterproof jackets, coated-fabric bags, and flexible outdoor covers, provided every surface is compatible and properly prepared.

How Do You Prepare the Damaged Area?
Prepare the damaged area by removing mud, salt, oils, loose coating, and failed adhesive, then allow every layer to dry completely. Mark the leak, position the material flat without excessive tension, and place a non-stick barrier behind it. Aggressive sanding should be avoided on breathable laminates unless specifically permitted by the manufacturer.
Clean Without Weakening the Surface
Adhesive cannot bond reliably through dirt, algae, sunscreen, fish oil, insect repellent, boot treatment, or detergent residue. Begin by brushing away dry particles and wiping the area with a clean lint-free cloth. When washing is required, use a cleaner suitable for the material and rinse away all residue.
Prepare a wider area than the visible puncture. The adhesive needs to overlap onto stable material, so cleaning only the center leaves contamination beneath the sealing margin. For seam repairs, clean along the entire section that will receive adhesive rather than focusing only on the point where moisture was first noticed.
Old repair adhesive does not always need to be removed. Material that remains firmly bonded and compatible can often stay in place. Remove only sections that are peeling, cracked, contaminated, or no longer attached. A plastic scraper is generally safer than a metal blade around thin laminates and coatings.
After cleaning, avoid touching the prepared surface with bare fingertips. Skin oils can reduce adhesion on smooth materials. Disposable gloves also prevent polyurethane adhesive from transferring onto unaffected fabric, tools, and work surfaces.
Remove Moisture from Every Layer
A surface can feel dry while moisture remains inside a folded hem, stitched seam, neoprene foam, or multilayer laminate. Trapped water may limit direct contact between the adhesive and substrate, slow curing, and create a weak area that lifts after immersion.
Open folded sections and turn the waders so air can circulate on both sides. Neoprene stocking feet often need additional drying time because moisture can remain along seams and compressed foam. Gentle room-temperature airflow is useful, while strong heat from hair dryers, radiators, open flames, or direct sunlight may damage coatings and factory bonds.
Cold or humid conditions normally extend preparation and curing. An adhesive layer applied to damp material may look secure initially but soften or peel during use. When repairs must be made during a trip, move the equipment into a sheltered and reasonably warm location before opening the tube.
Rushing because the next fishing session is approaching rarely saves time. A repair applied several hours later to fully dry fabric is usually more dependable than one completed immediately on a damp seam.
Sand Only Suitable Materials
Sanding is often helpful on rigid plastic, wood, or metal, but breathable waders require much greater restraint. Waterproof performance depends on thin coatings and membranes that can be damaged easily. Heavy abrasion around a pinhole can create a larger weak area than the original puncture.
Thick rubber, PVC, or leather sections may sometimes benefit from light abrasion when the adhesive instructions allow it. The purpose is to remove gloss, oxidation, or loose residue rather than cutting deep grooves. Use fine abrasive material and stop when a stable, uniform surface appears.
When the exact material is unknown, conduct a small compatibility test in a hidden location. Apply a small amount, allow it to cure, and inspect for discoloration, swelling, softening, brittleness, or poor adhesion. The test also reveals whether the repaired spot remains flexible enough for normal use.
Avoid treating every wader surface as though it were a rigid workshop material. Gentle cleaning and complete drying often contribute more to a breathable-fabric repair than aggressive mechanical preparation.
Position the Repair Before Applying Adhesive
Lay the damaged area on a clean, stable surface without pulling it tightly. A pinhole should remain in its natural shape, while a cut should be aligned edge to edge without overlap. A seam should be positioned so adhesive can enter the stitch path instead of running away from it.
Insert a smooth non-stick sheet, silicone mat, or suitable release barrier behind the repair. The barrier prevents adhesive from passing through the opening and joining two unrelated fabric layers. Paper is a poor substitute because loose fibers may stick to the adhesive and produce an uneven surface.
Cut patches, prepare gloves, trim the nozzle, and arrange tools before opening the adhesive. Polyurethane products begin reacting after exposure, so the application should proceed without unnecessary delay. Keeping cloths, patches, scissors, applicators, and waste materials within reach supports a cleaner result.
Marking the puncture before turning the waders inside out is especially useful. Tiny holes can be difficult to find again once the garment has been repositioned and the lighting angle has changed.
How Do You Apply Wader Adhesive Step by Step?
Apply a thin, continuous adhesive layer that fills the damaged area and overlaps onto clean, stable material. Use a precision nozzle to control the flow, spread the adhesive evenly, and smooth the outer edge. Keep the repaired section flat and undisturbed, then wait for full curing before folding, wearing, flexing, or immersing the waders.
Control the Adhesive Amount
More adhesive does not automatically create a stronger repair. A large raised bead may develop a dry outer skin while remaining soft beneath the surface, particularly in cold or humid conditions. Thick layers can also create stiffness, collect debris, and rub uncomfortably inside a boot.
For a pinhole, begin with a small drop and spread it into a smooth area beyond the opening. For a short cut, work adhesive into the gap, align the edges, and cover the neighboring stable material. Along a seam, guide the nozzle into stitching or beneath lifted tape rather than placing a decorative bead only on top.
A precision applicator and customizable nozzle help control flow. A narrow opening is suitable for pinholes and stitch lines, while a slightly wider opening may improve coverage beneath a patch. Trim the nozzle gradually because an opening that is too large releases excessive material and makes accurate application difficult.
The correct amount forms a complete seal without unnecessary bulk. Inspect the wet layer for gaps, bubbles, dry areas, or places where the adhesive has failed to contact the substrate.
Create a Stable Sealing Margin
Adhesive must extend beyond the damaged fibers and onto sound material. Covering only the exact puncture leaves little protection when the fabric flexes or the opening changes shape. For many small repairs, a margin of approximately 6–12 millimeters around the damage is practical, although the product instructions and condition of the material should remain the final reference.
| Repair type | Practical adhesive coverage | Patch use | Application note |
|---|---|---|---|
| Tiny pinhole | Approximately 6–12 mm beyond the hole | Usually unnecessary | Use one thin continuous coat |
| Short cut | At least 12 mm around the opening | Often helpful | Align the edges before coating |
| Seam leak | Cover the stitch line and both sides | Depends on seam condition | Work adhesive into the water path |
| Neoprene split | Cover the split and surrounding sound foam | Common in high-flex areas | Cure without stretching |
| Worn knee or seat | Cover all thinned material plus a stable margin | Usually useful | Avoid a thick raised edge |
| Large irregular tear | Patch must extend beyond every edge | Normally required | Round all patch corners |
Smooth the outer boundary so the repair changes gradually from coated to uncoated fabric. A heavy ridge can catch on clothing, collect grit, or become a starting point for peeling. A feathered edge also makes future inspection and maintenance easier.
Repair Pinholes, Cuts, and Seams
For a pinhole, place the marked area upward and apply a small amount directly over the opening. Spread the adhesive evenly onto the surrounding material and inspect the nearby fabric again before curing. Multiple punctures often occur close together after contact with thorns, hooks, wire, or sharp gravel.
For a cut, guide adhesive into the opening and bring the edges together without overlapping them. Keep the material in a relaxed position and add reinforcement when the cut reopens during normal bending. Stretching the fabric tightly during repair may produce wrinkles or separation after the tension is released.
For a seam leak, follow the stitch line beyond the most obvious wet point. Water can travel along thread and beneath seam tape. When tape has lifted but remains intact, clean beneath the loose section, add a controlled amount of adhesive, press the tape back into place, and seal the perimeter.
Avoid pulling the seam straight under high tension while it cures. The repaired section should remain close to the shape it normally holds when the waders are worn.
Keep the Work Clean
Polyurethane adhesive transfers easily from gloves, tools, fabric folds, and work surfaces. Wear disposable gloves, protect the table, and keep other parts of the waders away from the wet area. Follow the product instructions for cleaning uncured adhesive, since removal becomes much harder after it has formed flexible rubber.
Complete one repair at a time. Applying adhesive to several areas before spreading it can allow the first bead to thicken or develop a skin. Close the tube between applications, keep the nozzle clean, and replace the cap promptly to limit moisture exposure and blockage.
A neat repair offers practical advantages beyond appearance. Smooth edges collect less sand, create less friction inside boots, and are easier to inspect later. Controlled application also reduces waste when the same 60 ml tube may be used on waders, gloves, rainwear, rubber boots, fishing bags, and other waterproof equipment.
Do not attempt to wipe or reshape the repair repeatedly after the adhesive has begun to set. Excessive handling can introduce contamination and disturb the developing bond.
Do You Need a Patch for Holes, Tears or Seam Leaks?
Adhesive alone is often enough for pinholes, narrow seam leaks, and small cuts that remain closed when the material is relaxed. Add a patch when a tear opens under tension, fabric is missing, or the damaged area experiences repeated abrasion. Adhesive creates the waterproof bond, while the patch spreads movement and stress across a wider area.
When Adhesive Alone Is Enough
Small localized defects are the strongest candidates for adhesive-only repair. A puncture caused by a thorn, hook, wire, or sharp stone may require only a thin layer that fills the hole and overlaps onto stable material. A narrow seam leak may also be sealed without a patch when the thread, fabric, and original seam tape remain sound.
Flex the area gently before applying adhesive. If the opening remains closed and the surrounding material does not separate, a controlled coating may provide sufficient support. When the gap widens during normal movement, mechanical reinforcement becomes more important.
Adhesive-only repairs are lighter, less visible, and often more comfortable inside breathable waders or neoprene booties. They also preserve flexibility when the layer remains thin. Applying several heavy coats is not a substitute for reinforcement and can create an unnecessarily stiff spot.
A repair that repeatedly reopens usually indicates tension, abrasion, or weak surrounding material rather than insufficient adhesive volume. In that situation, reassessing the damage and adding a suitable patch is more effective than building a thicker mound.
When a Patch Is Necessary
A patch transfers force away from the damaged edge and into healthy material. Reinforcement is useful for longer cuts, irregular tears, missing fabric, worn knees, seat abrasion, ankle flex points, boot junctions, and neoprene splits that open when stretched.
Patches are also valuable where waders regularly rub against rocks, boat surfaces, gravel, boots, or equipment. Adhesive may seal the opening initially, but repeated direct abrasion can gradually wear through an unsupported repair.
The patch material should remain flexible and must be compatible with both the adhesive and wader surface. A patch that is much stiffer than the original material can move stress to its edge and create a new tear beside the repair. Thickness, elasticity, and bonding compatibility matter more than appearance.
Cut rounded corners instead of sharp points. Corners concentrate peeling forces and may catch against clothing or boot linings. The patch should overlap every damaged edge while remaining compact enough to preserve natural folding and movement.
Apply the Patch Properly
Cut and test-position the patch before opening the adhesive. Confirm that it covers the complete damaged area with a stable bonding margin. Remove the patch, apply an even layer according to the repair system, and place it without stretching the patch or wader material.
Press from the center toward the outside to remove trapped air and distribute the adhesive. Moderate, even pressure is better than aggressive clamping, which can squeeze too much material from beneath the patch and leave dry sections.
Curved ankle or boot areas may need soft support so the patch maintains full contact while curing. Avoid rigid clamps that create pressure points or distort the normal shape of the equipment. The damaged section should remain relaxed throughout the curing period.
Inspect the perimeter for gaps and lifted edges. Where compatible with the repair system, apply a thin edge seal to reduce peeling and water entry. Do not pull on the patch to test its strength simply because the visible surface has stopped feeling tacky.
Choose Black or Clear Patches
Patch color mainly affects appearance. Black material blends naturally with neoprene stocking feet, dark rubber boots, hunting waders, gloves, and heavy outdoor equipment. Clear patches are useful where the original pattern or color should remain visible, particularly on lighter breathable fabrics and waterproof jackets.
The GleamGlee kit includes black and clear patch sheets so users can match different gear and repair locations. Performance still depends on flexibility, adequate overlap, clean preparation, and complete curing. A well-matched color cannot compensate for an unsuitable or overly rigid patch.
Avoid making a patch much larger than necessary. Excessive coverage may create stiffness, interfere with folding, or affect fit inside a wading boot. A patch that barely reaches the edge of the tear is equally unsuitable because it lacks a dependable bonding margin.
Balanced reinforcement should extend onto healthy material while allowing the repaired area to move naturally. The patch supports the tear, while the adhesive seals the interface and keeps water from reaching the damaged fibers.
How Long Should Wader Adhesive Cure Before Use?
GleamGlee Wader Repair Glue normally requires approximately 8–12 hours to cure under suitable conditions. Keep the repair flat, dry, ventilated, and undisturbed during that period. Thick applications, low temperatures, high humidity, limited airflow, and adhesive trapped beneath a patch may extend the required time, so surface dryness alone is not a reliable readiness test.
Understand Drying and Curing
Drying and curing are not the same process. The exposed surface may stop feeling tacky while adhesive inside a seam, beneath a patch, or in the center of a thick bead remains soft. Using the waders during that stage can stretch the bond, shift the patch, or allow water to enter before full strength develops.
An 8–12-hour period is the stated curing range for GleamGlee Wader Repair Glue under suitable conditions. Actual timing can change with temperature, humidity, airflow, adhesive thickness, and the ability of moisture or solvent to escape from beneath a patch.
A repair completed in the evening is often best left overnight. Additional time is particularly useful for deep seam gaps, reinforced tears, boot joints, and work completed in cold or damp environments.
Waiting a few extra hours is less disruptive than discovering a soft repair after entering the water. When any section remains tacky, unusually soft, or easily marked by light pressure, allow more curing time before testing.
| Time after application | Likely condition | Appropriate action |
|---|---|---|
| 0–30 minutes | Adhesive remains wet and easily displaced | Keep the area flat and untouched |
| 1–4 hours | Surface may begin to skin or lose tackiness | Do not fold, stretch, or press |
| 8–12 hours | Normal stated curing range in suitable conditions | Inspect carefully before testing |
| Beyond 12 hours | May be needed for thick, cold, or humid repairs | Continue curing if any area feels soft |
| After full cure | Adhesive should feel continuous and resilient | Perform a controlled waterproof test |
Control the Curing Environment
Place the waders in a dry, moderately ventilated location away from rain, condensation, direct flame, and excessive heat. Ordinary indoor conditions are usually more predictable than a damp basement, freezing garage, closed vehicle, or sunny windowsill.
High heat can damage breathable membranes, deform rubber, or soften original seam bonds. Trying to accelerate curing with a heater or hair dryer may create new problems that are more difficult to repair than the original puncture.
Arrange the damaged area so gravity does not cause the adhesive to run. A vertical seam may need to be laid horizontally, while a cracked boot can be supported so the opening remains naturally closed. A patch on a curved surface should maintain full contact without harsh clamping.
Protect the wet area from dust, pet hair, fabric fibers, and neighboring wader panels. Do not fold one leg over the repair. Even when the surface appears dry, pressure can leave marks, transfer adhesive, or distort the bond beneath a patch.
Inspect Before Water Testing
Examine the cured repair under bright light. Look for bubbles, gaps, thin sections, soft spots, lifted patch edges, and areas where the adhesive did not reach stable material. Flex the repair gently rather than pulling sharply. A sound seal should move with the substrate without cracking.
Use a controlled test instead of immediately wearing the waders in deep or cold water. A localized spray, damp-cloth test, or shallow-water check is safer for breathable garments than filling the entire pair. Support boots or neoprene sections so water weight does not strain unrelated seams.
When leakage remains, determine whether water is entering through the original damage, an adjacent pinhole, or an untreated section of seam. Covering everything with a thick second coat may hide the real failure without correcting it.
Clean and dry the area again before adding adhesive. A persistent cut that moves under tension may need reinforcement rather than another surface layer.
Protect the Cured Repair
Rinse repaired equipment after exposure to saltwater, mud, fine sand, and chemicals. Abrasive particles can wear the edge of a patch or cured adhesive layer. Dry the waders thoroughly before storage and avoid compressing the repair beneath boots, boxes, or heavy equipment.
Store the garment loosely in a cool, dry area. Repeated folding along the same line can stress factory coatings and repaired sections. Broad hanging support or relaxed flat storage reduces sharp creases near patches and seam repairs.
Inspect the knees, seat, crotch seams, stocking feet, and boot connections periodically. Early wear can often be sealed while the area remains small and structurally sound. Waiting until a thinned section becomes a full tear makes the repair larger and more visible.
A compact kit is valuable during long trips, but permanent work is best completed in a controlled environment. Field sealing can stop immediate leakage, while careful cleaning, reinforcement, and full curing at home provide a more dependable long-term result.

Is Wader Adhesive a Permanent Repair?
Wader adhesive can provide a durable long-term repair when the damage is localized, the surrounding material remains stable, preparation is thorough, and the bond cures completely. Service life depends on movement, abrasion, water exposure, and storage. Adhesive cannot permanently restore widespread delamination, severely degraded fabric, crumbling rubber, or major structural damage.
What Determines Repair Life?
The strongest adhesive cannot compensate for weak material. A bond formed on healthy neoprene, rubber, PVC, polyurethane coating, or breathable fabric is more dependable than one applied over brittle, peeling, powdery, or chemically degraded surfaces. The repaired area remains only as strong as the substrate beneath it.
Application quality is equally important. Thin gaps allow water to enter, thick ridges reduce flexibility, contamination prevents full contact, and premature use damages the developing bond. Repairs on knees, seat panels, ankles, and boot edges usually experience greater stress than punctures located high on the chest.
Long-term durability depends on the complete process: accurate leak detection, compatible materials, thorough cleaning, complete drying, controlled thickness, sufficient overlap, reinforcement when needed, and uninterrupted curing.
When all of these factors are handled correctly, flexible polyurethane adhesive can remain waterproof while moving with equipment through repeated bending and ordinary outdoor wear. No repair is immune to sharp objects or severe abrasion, but careful application can extend the working life of dependable gear.
Recognize the Limits
Localized adhesive repair is not the correct solution for every leak. Broad wetting across a breathable panel may indicate membrane failure. Repeated leakage along a long seam may result from deteriorated factory tape. Crumbling rubber, powdery neoprene, and widespread coating separation suggest that the base material is nearing the end of its useful life.
Adding more adhesive over a failing substrate can create a large, stiff area without correcting the underlying damage. It may also complicate later professional repair by covering original seams and making the material harder to inspect.
Large zipper failures, major boot separation, torn suspension points, and extensive panel damage often require replacement components or specialist equipment. When the surrounding fabric tears during gentle inspection, replacement may be safer than repeated patching.
For expensive technical waders, contact the original manufacturer or an experienced repair service before covering a large area. Professional assessment can determine whether the problem is localized or part of a broader structural failure.
Maintain Repaired Waders
Preventive maintenance directly affects repair life. Rinse waders after exposure to saltwater, mud, fine sand, agricultural residue, or contaminated water. Allow the garment to dry inside and outside before storage, since damp folds can encourage odor, contamination, and coating deterioration.
Avoid drying close to radiators, stoves, open flames, or powerful heaters. Store the waders loosely instead of leaving them tightly folded in a vehicle or compressed beneath other equipment. Broad hangers or relaxed flat storage help prevent sharp creases through repaired areas.
Inspect patch edges and adhesive seals after demanding trips. Slight lifting, abrasion, or a new nearby pinhole is easier to address before it becomes a larger tear. Regular checks are especially valuable around knees, seats, ankles, and boot connections.
A maintained repair can extend the usable life of waders, reduce replacement waste, and keep familiar equipment in service. Small inspections performed at home are far more comfortable than discovering a major leak while standing waist-deep in cold water.
Conclusion
Correct wader repair is a controlled process rather than a quick attempt to cover a damp spot. Accurate leak detection, material identification, surface cleaning, complete drying, measured application, suitable reinforcement, and full curing determine whether the final seal remains flexible and waterproof.
GleamGlee provides a 60 ml flexible polyurethane repair adhesive kit with black and clear patch sheets, a precision applicator, and a customizable nozzle. The adhesive is intended for neoprene, rubber, PVC, polyurethane, leather, coated fabrics, and breathable materials used in waders, wetsuits, boots, rainwear, gloves, waterproof bags, tents, and related outdoor equipment.
Retailers, outdoor brands, fishing-equipment suppliers, distributors, Amazon sellers, and private-label companies can request customized repair kits, formulas, package capacities, patch combinations, multilingual instructions, and regional compliance support. Custom projects can begin from approximately 200 units, with packaging artwork available in as little as two days and samples commonly prepared within 7–14 days.
For an accurate quotation, provide the target repair materials, preferred tube capacity, patch sizes, package language, destination market, expected order quantity, and required performance or compliance specifications. These details allow the formulation, packaging, and production teams to recommend a repair system suited to the intended users and retail channel.





















