 Skip to content
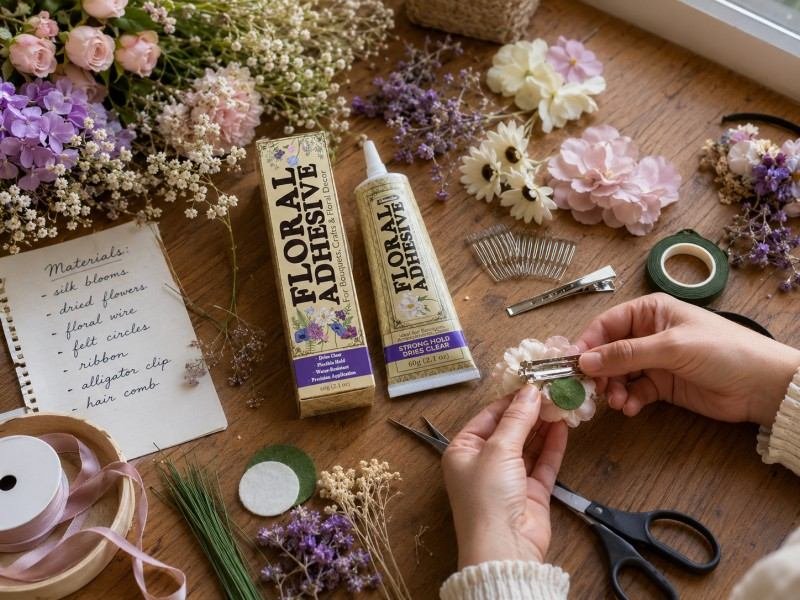
A flower hair accessory may look delicate, but it must handle movement, heat, moisture, repeated opening, and constant changes in direction. A clip flexes every time it opens. A comb shifts slightly as the wearer walks. Fresh stems release moisture, dried flowers fracture under pressure, and artificial blooms often have smooth plastic backs that ordinary craft glue cannot grip reliably. A flower may appear firmly attached on a worktable and still rotate, sag, or detach during a wedding, dance performance, photo session, or outdoor celebration.
To secure flowers on hair accessories, match the attachment method to the flower material, accessory base, weight, and wearing conditions. Clean and prepare the contact area, keep each flower close to the base, use a compatible floral or craft adhesive, add wire, ribbon, stitching, or felt reinforcement where needed, allow the bond to cure fully, and test both the construction and the accessory’s grip in the intended hairstyle.
The most dependable results rarely come from applying the largest possible amount of glue. They come from understanding how weight moves through the finished accessory. Imagine a bridal comb that looks perfect during preparation, only for its largest flower to turn downward as the bride walks toward the ceremony. The adhesive may remain intact, yet the design has failed because the bloom was mounted too far from the supporting base. Reliable floral accessories begin with sound material choices and careful structure long before the first drop of adhesive is applied.
What Should You Prepare Before Attaching Flowers?
Choose the flowers, accessory base, adhesive, reinforcement materials, tools, and wearing conditions as one connected system. Before assembly, check flower weight, moisture, backing material, base flexibility, expected wearing time, and exposure to heat or movement. A dependable flower accessory begins with compatible materials and a planned load path, not with adding more glue after the arrangement starts to loosen.
Match the Flower to the Project
Fresh, dried, preserved, fabric, foam, silk, crochet, and molded plastic flowers behave differently when placed on a wearable accessory. Fresh flowers contain moisture and remain biologically active, so their petals can wilt, bruise, or soften during wear. Dried flowers are usually lightweight, but their stems and petals may fracture instead of bending. Artificial flowers are more reusable, although their backing materials can range from porous fabric and yarn to smooth plastic, resin, foam, or wire.
Consider how long the accessory must remain attractive and functional. A fresh flower comb intended for a short portrait session has different requirements from an artificial flower barrette designed for repeated use over several months. Large blooms also create greater leverage than small flowers, even when the difference in weight appears modest. A broad flower mounted several centimeters above a narrow clip can twist as the wearer turns, walks, or dances.
The visible flower type is only the first part of the decision. Look closely at the structure beneath the petals. Some artificial flowers are held together by a plastic post, while others use thread, molded calyxes, foam centers, or glued fabric layers. Removing the wrong component can cause the entire flower to fall apart before it ever reaches the accessory.
| Finished flower load | Typical design | Suitable starting base | Common reinforcement |
|---|---|---|---|
| Under 5 g | Single bloom or small accent | Bobby pin or small alligator clip | Felt tab or light wire |
| 5–15 g | Medium cluster or side piece | Barrette, comb, or narrow headband | Felt backing and two attachment points |
| Over 15 g | Statement bloom or full arrangement | Wide comb or structured headband | Wire framework, broad backing, hidden pins |
These weight ranges are practical workshop categories rather than universal product standards. A light but wide flower may rotate more readily than a compact heavier bloom because its center of gravity sits farther away from the base.
Choose the Right Base
The accessory base must support the arrangement without excessive bending, twisting, or concentrated pressure. Metal combs work well in structured hairstyles because several teeth distribute the load across a prepared area of hair. Barrettes provide a wide decorative plate, but the top section may flex every time the clasp opens. Alligator clips are convenient for quick placement, although narrow versions are rarely suitable for large flowers positioned away from the center.
Headbands distribute weight across a broad area and can support fuller arrangements, particularly when flowers are placed near one side rather than directly on the highest point. Bobby pins suit small blooms and distributed accents but provide little direct bonding area. Claw clips may carry larger decorations, yet their curved bodies, moving jaws, and repeated flexing make direct attachment more difficult.
Examine four features before choosing a base:
- Contact area: A wider surface gives the flower or backing more room to connect.
- Surface finish: Polished metal and glossy plastic may need cleaning, light abrasion, ribbon, or felt.
- Movement: Adhesive applied across a bending area may crack or peel during normal use.
- Hair grip: A flower can be firmly attached while the entire accessory still slides out of the hairstyle.
Keep hinges, springs, teeth, clasps, and finger grips clear. Flowers should never prevent the accessory from opening fully or make the wearer press directly on fragile petals every time the piece is inserted.
Select Adhesive and Reinforcement
No single adhesive works equally well on fresh stems, dried botanical material, polyester petals, yarn, foam, painted metal, and low-energy plastic. Fresh flowers generally require a product specifically labeled for floral work. Artificial flowers may be secured with flexible craft adhesive, suitable hot-melt adhesive, stitching, wire, or a combination of methods. Dried flowers often need mechanical support because a powerful adhesive cannot stop a fragile stem from breaking beside the bonded area.
Keep reinforcement materials available even when adhesive is the primary attachment. Fine floral wire controls rotation and supports narrow stems. Felt increases the contact area and hides construction points. Grosgrain ribbon creates a fabric surface on a smooth clip or headband. Thread or stitching can secure crochet and fabric flowers without leaving a thick hardened glue deposit.
Read the adhesive instructions before beginning rather than after a problem appears. Check the recommended substrates, application temperature, open time, initial hold, full curing time, ventilation needs, and resistance to moisture or heat. Words such as “strong” or “multipurpose” do not confirm compatibility with every flower or accessory material.
A small material test is particularly important for commissioned work and production batches. Bond a spare flower or sample backing to the chosen base, allow the full stated cure, and then check for staining, softening, whitening, cracking, weak peeling, or deformation before using valuable materials.
Prepare a Controlled Workspace
A clean, organized work area reduces contamination and helps create a neater finished accessory. Useful tools include sharp scissors, wire cutters, tweezers, cotton swabs, lint-free cloths, fine abrasive paper, protective gloves when required, and a silicone or disposable work mat. Arrange the flowers by size and type before opening the adhesive so that placement decisions do not consume valuable working time.
Prepare supports that hold each accessory at its intended wearing angle. A foam block can secure a comb vertically, while a rolled towel can support the curve of a headband. Small clamps or clips can keep felt layers together without forcing the flowers out of position. The support should stabilize the accessory without touching wet adhesive or crushing the blooms.
Good lighting matters because many structural problems are visible from the back or side rather than from the decorated front. Rotate the piece frequently during assembly and inspect the flower angle, backing edges, wire placement, and opening mechanism. Thick glue deposits, exposed sharp points, unbalanced flowers, and blocked hardware are easier to correct before the adhesive begins to set.
Which Method Works for Each Flower Type?
Fresh flowers usually need purpose-made floral adhesive, light wiring, or both. Dried flowers benefit from gentle reinforcement that protects brittle stems, while artificial flowers may be bonded, stitched, wired, or mounted on felt according to their backing material. The most dependable method is determined by moisture, flexibility, contact area, weight, expected reuse, and the movement of the accessory base.
Fresh Flowers
Fresh flowers should be fully hydrated before they are turned into hair accessories. A firm attachment cannot compensate for blooms that were already heat-stressed, bruised, or poorly conditioned. Keep stems in clean water until preparation begins, remove damaged petals, and select flowers with firm centers and enough structural material beneath the bloom to support wiring or bonding.
Trim the stem only after the arrangement has been planned. Leave enough length for wire, tape, or adhesive contact, but avoid creating a long lever between the flower head and the accessory. Small compact blooms may be attached with a compatible cold floral adhesive when the manufacturer specifically identifies fresh floral use. Larger blooms often need fine wire positioned around a stable stem or calyx area, followed by floral tape and controlled adhesive at the base.
Apply adhesive sparingly and keep it away from visible petals. Some varieties react poorly to pressure, heat, or direct chemical contact, so test a spare bloom before an important event. The attachment should support the structural base of the flower rather than depend on a fragile petal layer.
Fresh floral accessories should be assembled as close as practical to the wearing time. Protect them from direct sunlight, warm vehicles, heaters, strong airflow, and repeated handling. For outdoor summer events or delicate flower varieties, preparing one or two replacement blooms can prevent a minor natural failure from affecting the entire design.
Dried and Preserved Flowers
Dried flowers often weigh less than fresh blooms, but their stems can be far more fragile. A brittle stem may break beside a perfectly intact adhesive joint, which means mechanical reinforcement is especially valuable. The goal is to transfer movement from the natural stem into wire, thread, ribbon, felt, or another stronger supporting component.
Group small dried stems before attaching them. Two to five lightweight pieces can often be handled more securely as one wired cluster than as separate flowers. Wrap the group gently with fine floral wire and cover the wire with floral tape, narrow ribbon, or thread. The reinforced section can then be connected to a comb, felt pad, mesh foundation, or fabric-covered clip.
Avoid pressing directly on brittle petals during assembly. Airy materials such as baby’s breath, statice, grasses, and seed heads reveal excess adhesive easily, so small controlled applications produce a cleaner appearance than a large bead. Flat preserved flowers may sit well on cushioned felt, while longer stems should be restrained along part of their length instead of being fixed at only one end.
Once the piece has cured, hold it over a clean surface and move it gently. Remove loose fragments before use. A finished dried-flower accessory should tolerate normal handling without continuous shedding, exposed wire, or sharp edges against the wearer’s head.
Artificial Flowers
Artificial blooms may look similar from the front while having very different construction underneath. One may have a flat polyester base, another a smooth molded plastic calyx, and another a foam center secured by a plastic stem. The attachment method should be chosen only after inspecting how the flower is assembled.
Fabric flowers can often be stitched to felt before the felt is bonded or sewn onto the accessory. Crochet flowers respond well to stitching because yarn is porous and flexible. Foam flowers may deform under high heat or aggressive solvents. Smooth plastic components often need cleaning, light abrasion, or a larger intermediate backing to create a dependable connection.
Remove unnecessary stems only after confirming that the stem is not the fastener holding the petals together. Many artificial flowers use a central plastic post that appears removable but is structurally essential. Test the cutting method on one sample before preparing an entire batch.
A reliable artificial-flower process usually follows seven practical steps:
- Expose the strongest structural area beneath the flower.
- Clean and prepare the accessory base.
- Add felt or ribbon when direct contact is limited.
- Secure the flower using adhesive, stitching, wire, or two methods.
- Keep the main bond away from flexing hardware.
- Allow the full stated cure before opening the accessory.
- Test repeated use before wearing, gifting, or shipping the piece.
Combine Adhesive and Mechanical Support
A combined attachment frequently performs better than adhesive alone. Adhesive holds the flower flat against the base, while wire, stitching, or thread controls rotation and peeling. Felt distributes the load across a broader area and conceals the construction. Ribbon can improve contact with smooth hardware while giving the accessory a cleaner finish.
Combined methods are particularly useful for statement flowers, premium bridal accessories, products intended for sale, and designs exposed to repeated opening. They also provide a margin of safety when the flower and accessory are made from unlike materials that respond differently to heat, moisture, and movement.
More reinforcement is not always better. Excessive layers can make an accessory bulky, stiff, or uncomfortable. Use enough structure to support the flower and control movement without creating an unnecessarily thick platform. The best finished pieces feel stable but still look light, balanced, and natural when viewed from the front and side.

How Do You Prepare the Flowers and Base?
Trim flowers to create a low-profile connection, clean the accessory, roughen suitable concealed surfaces, and add felt or ribbon when direct contact is too narrow or slippery. Preparation should increase the effective bonding area without weakening the flower, damaging the finish, or obstructing the accessory mechanism. Careful preparation usually improves long-term reliability more than simply applying additional adhesive.
Trim for a Low Profile
A flower should sit as close to the accessory as its natural or artificial construction allows. A long stem, thick post, or raised glue mound moves the bloom away from the support point and increases leverage. Every turn of the head can then cause the flower to tilt, rotate, or lift from one edge.
For fresh and dried flowers, retain enough stem for wiring, taping, or adhesive contact but remove unnecessary length. For artificial flowers, expose the broadest stable area beneath the petals without cutting through internal thread, staples, molded retainers, or structural plastic parts. Small filler flowers can be grouped before trimming so that several delicate stems form one manageable attachment point.
Long leaves, grasses, and decorative stems often need support at more than one location. Attaching only the base allows the outer end to swing and gradually loosen the connection. Laying part of the stem along the accessory or fixing it near both the base and midpoint can reduce repeated movement.
| Component | Preparation objective | Common risk |
|---|---|---|
| Large focal bloom | Keep the flower close to the base | Rotation caused by leverage |
| Small filler flowers | Combine into compact clusters | Individual pieces loosening |
| Long leaf or fern | Secure at two points | Tip lifting or swinging |
| Stemless flower head | Add a flat backing | Narrow, uneven contact |
| Wired decorative stem | Lay part of the stem along the base | Stress concentrated at one end |
Trim gradually and check the angle after every cut. Material can always be shortened further, but rebuilding an attachment point after excessive trimming is much more difficult.
Clean the Contact Area
Dust, manufacturing oil, hand cream, hair spray, polishing compounds, release residue, loose paint, and old adhesive can create a weak boundary layer between the adhesive and the accessory. Clean only the concealed bonding area using a method suitable for the material. Bare metal and some durable plastics may tolerate alcohol cleaning, while painted, plated, coated, or decorative finishes require a hidden compatibility test.
The flower backing also needs inspection. Artificial flowers may contain loose fibers, plastic flash, waxy residue, or partially detached components. Dried flowers can carry dust and brittle fragments around the stem. Fresh flower bases may remain wet after hydration and should be prepared according to the instructions of the floral adhesive being used.
Allow all cleaned surfaces to dry completely. Adhesive placed over remaining solvent, water, sanding dust, or loose fibers may appear stable at first but separate later. Handle the prepared area by the edges to reduce the chance of transferring skin oil back onto the contact surface.
Cleaning should remain controlled. An aggressive solvent that works on a glass workbench may discolor petals, soften plastic, remove plating, or damage painted hardware. Always match the cleaning method to the accessory rather than using the strongest available product.
Improve Grip Carefully
Highly polished surfaces provide little texture for mechanical grip. Lightly abrading a concealed bonding zone can improve contact when the accessory material is thick enough and the finish is not decorative. Use fine abrasive paper and stop when the shine has been reduced. Deep scratches are unnecessary and may weaken thin hardware.
Never sand hinges, springs, comb teeth, gripping surfaces, or areas that directly contact the wearer’s hair. Avoid abrasion on thin plated metal when it could expose a reactive or unattractive base material. When the finish should remain untouched, use ribbon, felt, mesh, or a stitched sleeve as an intermediate connection instead.
After abrasion, remove all dust with a clean compatible method. Loose particles create another weak layer, defeating the purpose of surface preparation. The final contact area should be clean, dry, stable, and slightly textured rather than rough or damaged.
Surface preparation is most useful when combined with suitable adhesive chemistry. Sanding cannot make every glue compatible with every plastic, and a stronger texture cannot compensate for an adhesive that remains rigid on a frequently flexing clip.
Add Felt or Ribbon
Felt and ribbon are useful when a flower has an irregular back, the accessory is smooth, the direct bonding area is narrow, or the construction needs to conceal wire and stem ends. An intermediate layer can widen the contact area, bridge unlike materials, cushion the arrangement, and create a more comfortable surface against the hair.
A felt pad can support a complete flower cluster before the arrangement is attached to a comb or barrette. Two felt pieces can form a sandwich around an alligator clip or headband. Grosgrain ribbon can be wrapped around metal or plastic to provide a fabric surface suitable for stitching and adhesive.
Keep the backing proportionate to the finished design. It should be wide enough to distribute the load without showing beyond the flowers. Round sharp corners, secure loose fibers, and confirm that the added layer does not obstruct the clasp or reduce the grip of the accessory.
Felt is not an automatic solution to poor adhesive compatibility. It must remain securely connected to both the flower and the base. Test the entire material combination after curing rather than checking only whether the flower sticks to the felt immediately after assembly.
How Do You Attach Flowers Step by Step?
Arrange every flower before applying adhesive, secure structural elements first, position focal blooms close to the strongest part of the base, and fill gaps with smaller pieces. Apply controlled amounts of adhesive, keep moving hardware clear, support the accessory during curing, and finish the back carefully. Do not open, wear, package, or test the piece until the selected adhesive has reached its stated full cure.
Plan the Arrangement
Position the accessory at the angle it will have when worn. A comb normally sits vertically or diagonally in the hair, while a clip may be placed horizontally, near the side, or above a bun. An arrangement that appears balanced while lying flat can shift dramatically when gravity acts from another direction.
Place all flowers, leaves, and decorative components without adhesive first. Begin with foliage, ribbon, mesh, or other structural pieces. Position the largest bloom close to the main support area, then arrange medium flowers around it and use smaller filler flowers to soften transitions and conceal mechanics.
Leave enough open space for fingers to operate the accessory. The wearer should be able to open a clip or insert a comb without pressing directly on delicate petals. Check the design from the front, side, top, and rear. The back deserves particular attention because exposed stems, wire, and hardened adhesive can catch hair or create pressure against the scalp.
A dramatic asymmetrical design can still be structurally balanced when the heaviest bloom sits over a wide support area and lighter foliage extends outward. Problems usually begin when a large flower is placed at the unsupported tip of a narrow clip or when all weight is concentrated on one side without rotation control.
Build in Layers
Attach the lowest structural layer first. Depending on the design, that layer may include ribbon wrapping, a felt foundation, wired foliage, mesh, or small leaves that will later be partly hidden. Allow each layer to develop enough initial support before adding a heavier component.
Place focal flowers next and press only at the structural base. Avoid pushing down on the petals, especially when working with fresh or dried material. When wire is included, use it to control the bloom’s angle and rotation before the adhesive begins to set. Add smaller flowers last so they can fill gaps and hide construction without carrying the main load.
Layering improves both appearance and mechanical performance. A flower supported by adhesive, felt, wire, and neighboring foliage is less dependent on one narrow point. The surrounding components can reduce rocking and distribute small movements across a wider area.
Avoid making the arrangement so dense that the hardware becomes difficult to inspect or clean. Excess material can also push the flowers farther from the base, increasing leverage and making the finished accessory feel heavy even when the actual flower weight is moderate.
Control Adhesive and Timing
Apply enough adhesive to cover the intended contact area without creating a thick unsupported mound. A thin continuous layer may suit a flat fabric or felt backing, while several controlled applications may be more suitable for irregular stems. Porous materials can absorb adhesive, so observe whether the surface remains properly wetted without allowing excessive seepage.
Adhesive timing usually includes several different stages, and confusing them can lead to premature failure. Initial grab does not mean the bond has reached its intended final strength. A component may remain in place after a few minutes while the adhesive is still vulnerable to bending, packaging pressure, or repeated opening.
| Stage | Practical meaning | Appropriate action |
|---|---|---|
| Open time | Period when positioning remains possible | Align the flower accurately |
| Initial hold | Time needed before the component supports itself | Press or fixture the piece |
| Handling time | Point when careful movement may be possible | Move only when necessary |
| Full cure | Bond has developed its intended properties | Begin opening and wear tests |
These stages vary according to chemistry, layer thickness, temperature, humidity, and materials. Follow the instructions for the exact adhesive rather than borrowing a curing time from another product.
Support the accessory at its intended angle throughout curing. A foam block, rolled towel, shaped jig, or small fixture prevents gravity from pulling the flowers out of alignment before the bond is ready.
Finish the Back
The back of the accessory should be smooth, controlled, and comfortable. Trim surplus wire only after the final arrangement has been confirmed. Bend sharp ends inward, wrap them securely, and cover them with felt, ribbon, or another suitable protective layer.
Remove adhesive strings and visible squeeze-out using a method compatible with the flowers and accessory. Avoid strong cleanup chemicals near fresh flowers, dyed fabric, foam, painted hardware, or unknown plastic. A clean finish should come mainly from controlled application rather than aggressive cleaning after the adhesive has hardened.
Inspect all moving parts. Open and close the clip slowly, checking whether flowers strike the hinge or whether the backing folds into the clasp. Comb teeth should remain clear, and headbands should retain enough flexibility to sit comfortably without a hard ridge pressing against the head.
A finished floral accessory should meet several basic checks before it is considered ready:
- No exposed sharp wire or rigid stem ends
- No wet, soft, or tacky adhesive
- No blocked hinge, clasp, spring, or comb teeth
- No visible flower movement under light pressure
- No backing showing from the intended viewing angle
- No thick hardened ridge against the wearer’s hair
- No loose petals likely to fall during normal use
How Do You Keep the Accessory Secure in Hair?
Match the base to the hairstyle, create a stable anchor in the hair, insert the accessory in the correct direction, and support heavy designs with concealed pins. A flower can be firmly bonded to its clip while the complete piece still falls because the hairstyle offers insufficient grip. Construction security and wearing security should therefore be evaluated as two separate requirements.
Match the Hairstyle
Combs perform best in structured areas such as buns, twists, braids, and pinned-up sections. Their teeth need resistance from the hairstyle. Pushing a heavy comb into loose, silky hair rarely provides enough support. Barrettes work well in half-up styles when the clasp closes around an appropriate volume of hair rather than only the smooth top layer.
Alligator clips suit side placements, children’s styles, and lightweight decorative pieces. Bobby pins are useful for distributing several small blooms through an updo. Headbands are often dependable for loose or short hair because their support does not depend on one clipped section. Hair vines can follow braids and twists but normally require several concealed pins.
Choose the base while the hairstyle is still being planned. Replacing the accessory after the flower arrangement has been completed can alter the balance, insertion angle, and support area of the entire piece.
| Hairstyle | Suitable base | Helpful secondary support |
|---|---|---|
| Low bun | Comb or barrette | Two crossed bobby pins |
| Braided updo | Comb or hair vine | Pins positioned along the braid |
| Half-up style | Barrette | Small hidden elastic |
| Loose fine hair | Headband or lightweight clips | Texture and a concealed micro braid |
| Side-swept style | Alligator clip | Crossed pin underneath |
| Large statement arrangement | Wide comb or structured band | Stylist-installed anchor points |
The base must also suit the wearer’s hair density and comfort. A large comb may be stable in thick hair but uncomfortable or visible in very fine hair, while a narrow clip may disappear neatly but fail to support a heavy flower cluster.
Create a Stable Anchor
Very smooth hair may not provide enough friction for a decorative comb or clip. A small hidden braid, lightly backcombed area, crossed pins, or concealed elastic can create a stable anchor. Styling products may add texture, but they should dry before the accessory is inserted so wet product does not transfer onto the hardware or flowers.
A comb can often be secured by inserting it slightly against the intended direction, catching the prepared hair, and then rotating or sliding it into the final position. A barrette should close around a stable section with enough hair to resist movement but not so much that the clasp remains under excessive tension.
Decorative clips can be supported by crossed bobby pins placed beneath them. The clip then grips the pinned structure instead of relying only on loose strands. For heavy designs, a stylist may use more than one hidden anchor to spread the weight and reduce pulling.
Comfort should be checked after several minutes rather than immediately after insertion. A concentrated pressure point may feel acceptable at first and become painful during a long event. A secure accessory should distribute the load without pulling sharply on a small group of hairs.
Control Weight and Rotation
Large flowers require a broad support area. Keep the heaviest bloom close to the strongest section of the accessory and use more than one attachment point whenever the flower can rotate. An additional concealed pin may be used to control the outer edge of a wide or asymmetrical design.
The direction of movement matters as much as the amount of weight. A bond may resist direct pulling but weaken when the flower rocks repeatedly from side to side. That rocking action creates peel stress along one edge. Felt, wire, supporting foliage, and secondary pins can reduce movement before it reaches the adhesive joint.
Ask the wearer to test ordinary actions before leaving:
- Turn the head fully in both directions
- Look down and return upright
- Walk at a normal pace
- Sit and stand several times
- Gently shake the head
- Put on and remove any veil, jacket, scarf, or outer layer
When the entire accessory shifts, correct the hairstyle anchor or weight distribution rather than attempting to add adhesive while the piece is already being worn. Wearing security is primarily a styling and balance issue, not a repair that should be handled near the hair and scalp.
Protect Fresh Flowers During Wear
Fresh flowers need both structural support and moisture management. Hydrate them well before construction, keep them cool, and reduce the time between assembly and wearing. Avoid direct sun, warm vehicles, heaters, hair dryers, and prolonged exposure to strong airflow.
Choose varieties suited to the expected environment. Compact blooms with firm petals generally tolerate handling better than flowers with very thin or easily bruised petals. Not every flower responds well to refrigeration, misting, wiring, or several hours outside water, so unfamiliar varieties should be tested before an important event.
Handle the accessory by its base rather than by the flowers. The wearer and stylist should know where the safe gripping points are, particularly when a veil or other accessory will be added later. Repeatedly touching the petals can bruise them even when the flower remains securely attached.
For outdoor summer ceremonies, long wedding days, or valuable commissioned work, keep replacement flowers available. A strong attachment can hold a bloom in position, but it cannot prevent wilting caused by poor conditioning, unsuitable flower selection, or excessive heat.

What Mistakes Make Flowers Come Loose?
Flowers commonly loosen because the base was dirty or too smooth, the adhesive was incompatible, the contact area was too small, the arrangement was top-heavy, or the accessory was moved before full cure. Failures also occur when rigid adhesive is placed across a flexing clip or when a brittle natural stem is expected to carry more load than its structure can support.
Using More Glue Instead of Better Contact
A large adhesive mound can look strong while creating a weak design. It may raise the flower above the base, increase leverage, remain soft internally, or form a rigid block on a flexible accessory. Excess adhesive can also seep into petals, obstruct the hinge, create visible lumps, or form a hard ridge against the wearer’s head.
A broad, thin, properly prepared contact area is generally more dependable than a thick bead. When the flower back is narrow, add felt or another backing rather than building a pedestal from adhesive. When the base is glossy, clean and prepare the surface instead of repeatedly applying more product to the same polished area.
Inspect both sides when a flower detaches. If the adhesive remains attached to the flower but separates cleanly from the clip, the likely problem is poor base preparation or material incompatibility. If the stem breaks beside the bond, the natural material needed reinforcement. If the adhesive tears internally, the layer may have been too thick, under-cured, or exposed to movement before it developed sufficient strength.
Understanding where the failure occurred is more useful than simply selecting a product advertised as stronger. The weakest part of the system may be the stem, backing, coating, or accessory rather than the adhesive itself.
Ignoring Flex and Heat
Clips, barrettes, headbands, and claw clips move during normal use. A rigid adhesive applied across a bending zone may crack, peel, or release even when the initial bond appears strong. Claw clips are particularly demanding because their curved bodies open repeatedly and may be made from plastics that are difficult to bond.
Hot-melt adhesive can also soften when an accessory is left in a warm vehicle, displayed near a window, or exposed to summer conditions. Some artificial flowers, foam components, and thin plastic hardware can deform during application. Fresh flowers may be damaged immediately by excessive heat.
Place the main bond on a stable, nonflexing section whenever possible. Use flexible adhesive, stitching, wire, or a backing when movement cannot be avoided. Do not allow a felt pad to bridge directly across a hinge or spring where every opening action will bend the bonded layer.
Test the completed accessory under conditions close to actual use. A piece that remains secure on a cool worktable may behave differently after repeated opening, body heat, sunlight, packaging compression, or several hours in the hair.
Allowing Flowers to Rotate
Flowers often twist because they are attached at one small round point. A long stem, wide bloom, or off-center arrangement magnifies the movement. Adding adhesive around the same narrow point may not solve the problem because the structure still lacks enough width to resist rotation.
Control rotation by widening the backing, adding a second attachment point, or laying part of the stem along the accessory. Long leaves can be restrained near both the base and midpoint. A felt disc can convert an irregular flower back into a flatter platform, while wire can prevent a focal bloom from rocking sideways.
Check three practical factors before curing:
- Center of gravity: Is the heaviest area positioned above the supporting base?
- Rotation control: Does the flower have a wide platform or at least two restrained points?
- Load direction: Will normal movement pull directly, bend the base, or peel one edge of the bond?
Peel forces are particularly damaging because they concentrate stress along one narrow edge. A joint that withstands a straight pull may still fail after repeated rocking. Better balance and secondary support usually improve durability more effectively than surrounding the flower with visible adhesive.
Skipping Final Tests
An accessory that looks finished is not necessarily ready to wear, sell, or ship. Many adhesives develop initial grab long before reaching full cure. Repeated opening, packaging pressure, heat, hair products, and normal movement can reveal weaknesses that are not visible immediately after assembly.
A practical workshop screening routine can include the following checks after full cure:
- Open and close the clip 10 times.
- Apply gentle pressure to every flower in four directions.
- Shake the accessory over a clean surface for 10 seconds.
- Wear it in the intended hairstyle for at least 30 minutes.
- Repeat normal head movements and accessory handling.
- Inspect for whitening, edge lifting, cracking, rotation, or loose fragments.
- Place retail pieces in their packaging and check for compression damage.
These checks are useful internal starting points rather than certified performance standards. Commercial producers should develop repeatable methods according to accessory type, material combinations, product claims, shipping conditions, customer use, and target climate.
For larger production runs, record the adhesive batch, flower material, base material, curing conditions, operator, and test result. Consistent records make it easier to identify whether recurring problems come from the formula, substrate, production method, or packaging process.
Conclusion
Secure floral hair accessories depend on material compatibility, careful preparation, balanced construction, controlled adhesive application, and realistic testing. Fresh, dried, and artificial flowers need different handling, and the hairstyle must support the finished accessory as effectively as the accessory supports the flowers. Reliable results come from managing weight and movement rather than treating every loose bloom as a need for more glue.
Choose Materials as a System
Begin with the exact flower backing and accessory substrate. Metal, coated metal, polypropylene, ABS plastic, polyester fabric, foam, felt, yarn, resin, and fresh botanical stems do not respond identically to one adhesive. The most appropriate product must wet the surface, cure without damaging the flower, and tolerate the expected movement of the base.
When the material combination is uncertain, prepare samples before assembling the final design. A small compatibility test can reveal staining, softening, poor wetting, excessive stringing, heat damage, slow curing, whitening, or weak peeling before expensive flowers and finished hardware are used.
The surrounding construction matters just as much as the adhesive. A strong bond on a narrow brittle stem may still fail, while a moderate adhesive supported by felt, wire, and a broad stable base can remain dependable. Evaluate the flower, backing, adhesive, hardware, hairstyle, and wearing conditions together.
Build and Test for Real Use
Keep heavy flowers close to the accessory, create enough contact area, control rotation, protect moving hardware, allow full cure, and perform repeat-opening and wear tests. A piece that remains secure only while lying untouched on a table has not yet demonstrated practical reliability.
Handmade sellers, bridal studios, craft retailers, and floral accessory brands benefit from consistent internal testing. Repeatable checks help distinguish a material incompatibility from an assembly error and allow improvements to be measured across later production batches.
Commercial products should also be examined after packaging. A flower may survive wearing tests but become crushed or detached when pressed against a box lid during shipping. Packaging inserts, protective cavities, and accessory restraints should hold the product by its base rather than pressing directly on decorative flowers.
Develop the Right Adhesive Format
Businesses creating floral accessory kits, wedding craft products, or private-label adhesives may need more than a generic bottle of glue. Useful development requirements can include controlled viscosity, a fine precision nozzle, low stringing, clean drying, flexibility, suitable initial hold, compatibility with selected flower and accessory materials, secure leak-resistant packaging, and clear multilingual instructions.
GleamGlee supports custom adhesive development, existing-formula private labeling, applicator selection, packaging design, multilingual artwork, quality-control planning, and market compliance preparation. Development can begin from a customer sample, target material combination, benchmark product, or written performance brief.
Custom projects can begin from approximately 200 units, depending on the formula and packaging format. Print-ready artwork may be prepared in as little as two days, typical samples can be delivered in approximately 7–14 days, and standard bulk production is commonly completed in about 20 days. Selected urgent projects may be arranged from approximately 15 days after specifications, packaging, and artwork are confirmed.
A useful inquiry should include the flower materials, accessory substrates, application process, target viscosity, package size, nozzle preference, sales market, expected annual volume, safety requirements, and any current failure problem. Clear technical information allows the formulation and packaging teams to recommend a more relevant development route, prepare samples, and provide an accurate OEM or private-label quotation.





















