 Skip to content
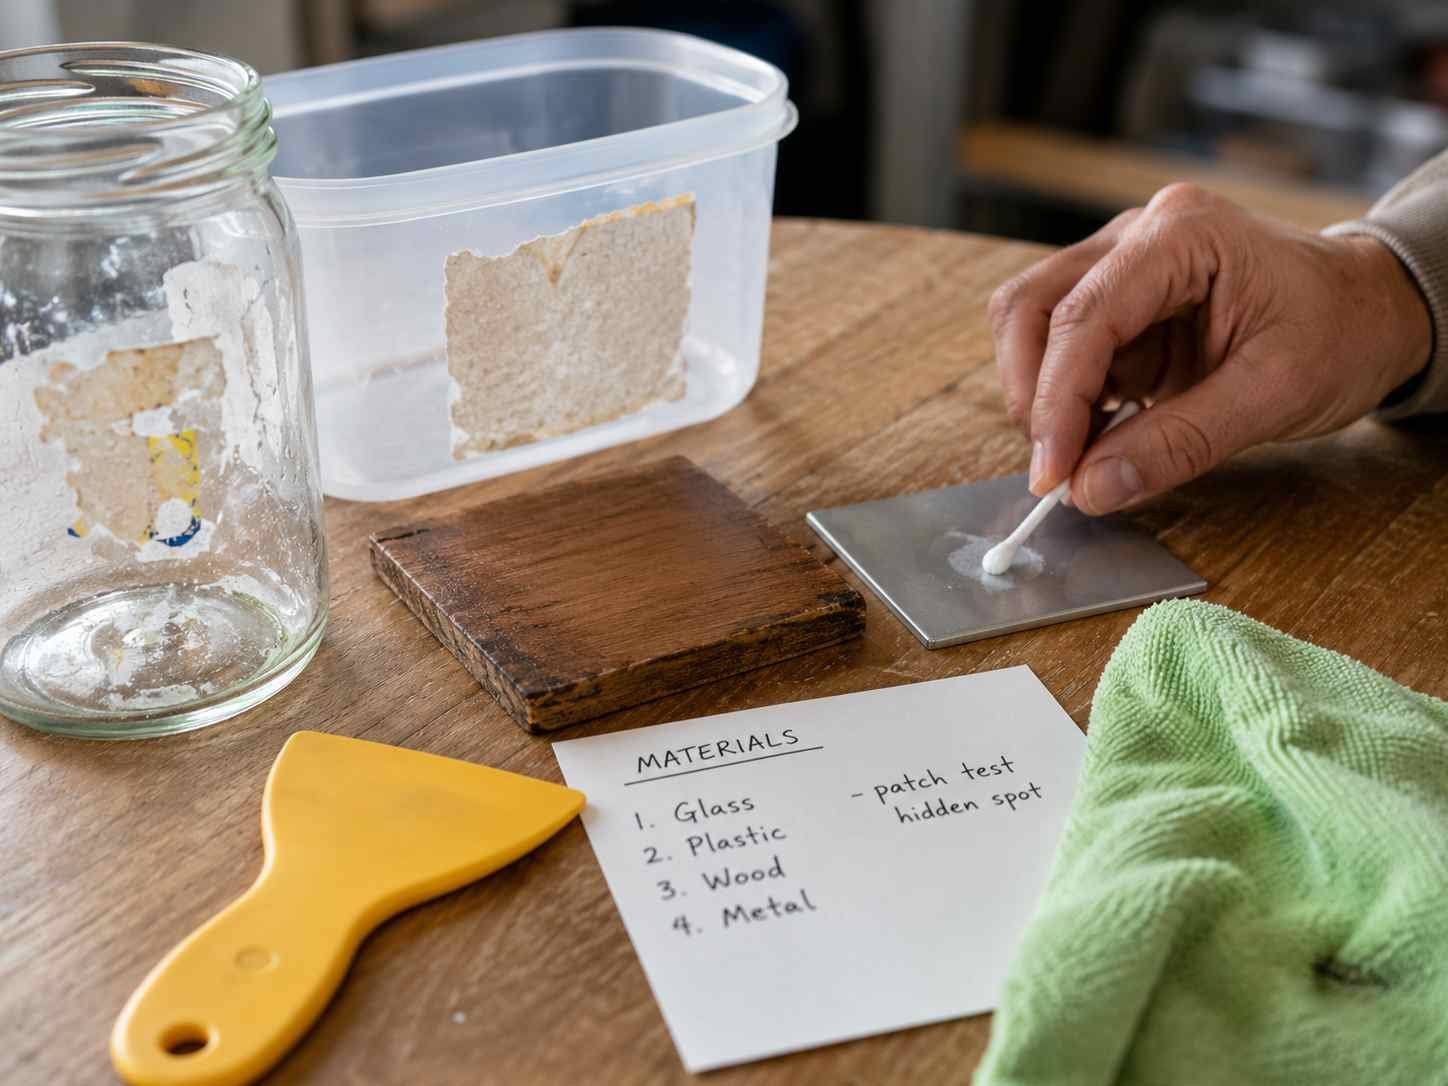
A sticky patch on a kitchen counter may look like a minor cleaning problem, yet the wrong treatment can leave a permanent dull spot, swollen laminate edge, discolored stone sealer, or scratched finish. The challenge is not simply finding something strong enough to dissolve glue. Safe removal depends on matching the cleaning method to two separate factors: the adhesive that created the residue and the countertop material underneath it. A soft label adhesive behaves very differently from hardened super glue, while marble, quartz, granite, laminate, wood, tile, acrylic, and stainless steel all have different chemical and abrasion tolerances.
To remove glue residue from a countertop safely, identify the adhesive and surface first, begin with warm soapy water, and move gradually to oil, rubbing alcohol, controlled temperature, or a compatible adhesive remover. Soften the residue before lifting it with a smooth plastic scraper, use short contact periods, test a hidden area, and stop immediately if the finish changes color, gloss, texture, or hardness.
The safest approach is a controlled progression rather than a single aggressive attempt. Imagine removing an appliance label from a new countertop just before guests arrive, only to discover a dark, sticky rectangle underneath. Reaching for a razor blade or strong solvent may feel efficient, but a careful sequence of testing, softening, lifting, and final washing usually produces a cleaner result without creating a much larger repair problem.
What Type of Glue Residue Are You Removing?
The correct cleaning method depends on whether the residue is tacky, rubbery, brittle, oily, or fully cured. Sticker glue often responds to mild cleaners, while super glue, silicone, and construction adhesive may require a different approach. Texture, thickness, age, and contamination usually provide enough clues to choose a safer first treatment.
Sticker and Label Adhesive
Sticker and label residue usually comes from pressure-sensitive adhesive, a material designed to remain slightly tacky so a label can bond quickly without a separate curing process. Common sources include product stickers, barcode labels, price tags, packaging seals, decorative decals, appliance labels, and protective films applied during shipping or installation.
Fresh residue may feel soft enough to roll into small pieces when rubbed gently with a fingertip. Older adhesive often becomes yellow, dark, or uneven because it collects dust, kitchen grease, soap film, and airborne particles. Sunlight and heat can also change the adhesive, making the edges dry while the center remains sticky.
Remove as much of the paper or plastic backing as possible before treating the glue. Pull slowly at a low angle instead of lifting straight upward. A steep pull can separate the label from its adhesive layer and leave more residue behind. For paper labels, a warm damp cloth placed over the remaining paper for one to three minutes can make peeling easier.
Once the label backing is gone, avoid rubbing the exposed glue with a dirty cloth. Pressure can spread a small patch into a larger film. A mild cleaner, a small amount of oil, or a compatible residue remover should soften the adhesive before it is wiped or lifted.
Tape and Mounting Residue
Tape residue is usually thicker and more elastic than label glue. Packing tape, painter’s tape, masking tape, double-sided tape, removable hooks, cable clips, anti-slip pads, and mounting strips can leave a rubbery layer that stretches, rolls, or smears when disturbed.
Heat, pressure, and time often make tape adhesive more difficult to remove. Residue near a cooktop, sunny window, countertop appliance, or heated backsplash may have bonded more strongly than residue in a cooler location. A tape strip left in place for several years can also become brittle on the surface while remaining sticky underneath.
Start by removing any remaining tape backing. Pull slowly and keep the tape close to the countertop. If the backing tears repeatedly, gentle warming may help, but the countertop should never become hot. Once the backing has been removed, test whether the adhesive will roll away with light pressure from a clean finger or plastic card.
Thick mounting residue is better removed in layers. Soften the upper portion, lift it gently, clean the scraper, and repeat. Attempting to remove the full thickness in one pass usually requires more force and increases the chance of scratching the countertop or pulling at a weak coating.
Dried Glue and Super Glue
Dried craft glue, repair adhesive, and super glue do not behave like pressure-sensitive label residue. Water-based craft glue may soften with controlled moisture, while cyanoacrylate super glue forms a hard, glass-like deposit that usually resists soap, oil, and ordinary wiping.
A hardened clear droplet may be super glue, although some two-part or repair adhesives can look similar. Construction adhesive is often thicker, beige, gray, or off-white and may remain slightly flexible after curing. Silicone usually forms a rubbery, peelable film rather than a brittle layer.
The shape of the residue can be informative. A raised bead suggests spilled repair adhesive, while a broad thin film is more likely to come from tape, labels, or protective plastic. A residue that smears when rubbed needs a different treatment from one that chips or flakes.
Strong solvent should not be the first response to an unknown cured adhesive. Some solvents can soften paint, acrylic, laminate coatings, quartz resin, stone sealer, or wood finish before they meaningfully affect the glue. Begin with a hidden compatibility test and a very small treatment area.
Grease-Mixed Residue
Kitchen glue residue is often contaminated with cooking oil, flour, dust, food particles, and detergent film. A label beside a cooktop may develop a dark, sticky layer that responds poorly to one-step cleaning because the outer grease prevents the treatment from contacting the adhesive evenly.
Begin by removing loose contamination with a mild cleaner suitable for the countertop. The first cleaning is not intended to dissolve the glue completely. Its purpose is to remove grease and gritty particles so they do not scratch the finish during later wiping or scraping.
Use a clean microfiber cloth and change to a fresh area frequently. A cloth loaded with dirt and dissolved adhesive can spread residue over a wider section of countertop. On polished stone, stainless steel, or glossy laminate, trapped particles can also create fine scratches that only become visible under reflected light.
After degreasing, inspect the remaining residue again. A tacky layer may respond to oil, alcohol, or a formulated adhesive remover. A hard raised patch may require controlled lifting or a surface-compatible solvent. The residue’s condition after the first wash often gives a more accurate diagnosis than its original appearance.
| Residue Type | Typical Texture | Common Source | Safer First Method |
|---|---|---|---|
| Label adhesive | Thin and tacky | Price labels, jars, packaging | Warm soapy water |
| Tape adhesive | Thick or rubbery | Packing tape, hooks, mounting strips | Oil or compatible remover |
| Craft glue | Dry or slightly flexible | School and DIY projects | Warm moisture test |
| Super glue | Hard and brittle | Small household repairs | Hidden compatibility test |
| Silicone trace | Flexible and rubbery | Sealing and installation work | Gentle mechanical lifting |
| Grease-mixed glue | Dark and sticky | Kitchen labels and tape | Degrease before treatment |
Which DIY Removers Work on Countertops?
Warm soapy water, cooking oil, rubbing alcohol, ice, and low heat can remove certain adhesives, but none is safe for every countertop. Start with the mildest practical method, apply only a small amount, and inspect the dry finish after every attempt. A DIY treatment is successful only when the glue disappears without staining, dulling, swelling, or softening the surface.
Warm Water and Dish Soap
Warm water with a small amount of dish soap is the most cautious starting method for fresh label glue, light tape residue, and some water-based craft adhesives. It is less aggressive than solvent-based treatments, although water can still damage unfinished wood, porous grout, lifted laminate, and poorly sealed joints.
Dampen a cloth rather than pouring water directly onto the counter. Place the cloth over the residue for approximately one to three minutes. The goal is to soften the adhesive, not soak the countertop. Remove the cloth and wipe in one direction using a clean section of microfiber.
If the glue begins to roll into small particles, continue gently. Avoid fast circular rubbing because it can spread the softened adhesive into a thin film. When the cloth becomes sticky, replace it or use a clean section before making another pass.
Dish soap also helps separate cooking grease from adhesive. A dark kitchen stain may require an initial wash to remove the oil layer before the glue becomes visible. When two short treatments produce no improvement, increasing the soaking time is rarely worthwhile. A different compatible method should be considered instead.
Cooking Oil
Vegetable oil, olive oil, or mineral oil can soften some pressure-sensitive label and tape adhesives. Oil is most practical on nonporous surfaces such as glass, stainless steel, and glazed tile, where the oily film can be removed completely after the adhesive has lifted.
Apply only a few drops to the residue. Allow approximately two to five minutes of contact, then test the edge with a smooth plastic scraper or microfiber cloth. The adhesive should begin to roll, stretch, or release with light pressure. A second short treatment is safer than applying a large amount at once.
Oil is not suitable for every countertop. Unfinished wood, unsealed natural stone, porous grout, and pale absorbent materials can develop darker stains. Even sealed surfaces should be tested because older or damaged finishes may absorb liquid unevenly.
After the residue has been removed, wash the area with dish soap and warm water until it no longer feels slippery. Oil left on a countertop attracts dust, creates streaks, and can interfere with future sealers, coatings, or adhesive work.
Rubbing Alcohol and Acetone
Rubbing alcohol can loosen thin adhesive film, sticker residue, and some tape marks. Apply it to a cloth or cotton pad rather than pouring it directly onto the surface. Begin with a brief contact period of approximately 15 to 30 seconds, then wipe, wash, dry, and inspect.
Alcohol can affect painted surfaces, clear coatings, acrylic, wood finishes, some laminate layers, quartz resin, and stone sealers. A surface may look normal while wet but reveal dullness after it dries. Hidden-area testing should include enough drying time to evaluate gloss and color accurately.
Acetone can soften certain cyanoacrylate adhesives, including some super glue, but it carries a much higher compatibility risk. It should never be treated as a general-purpose countertop cleaner. Many plastics, painted finishes, acrylic materials, laminate surfaces, and protective coatings can soften or discolor rapidly.
When acetone is approved by the countertop manufacturer, use the smallest practical amount and keep it concentrated on the adhesive. Do not allow it to spread into seams or surrounding finishes. Ventilation, suitable gloves, and strict control of ignition sources are essential.
Ice and Low Heat
Temperature can change adhesive behavior without immediately introducing a strong chemical. A sealed ice pack may make gummy or rubbery residue firmer and easier to lift. Place it over the affected area for one to two minutes, remove it, and test the edge with a plastic scraper.
Low heat works in the opposite way by softening old labels, tape, and protective-film adhesive. A hair dryer on the lowest setting may be held at a safe distance and moved continuously for approximately 15 to 30 seconds. The countertop should feel mildly warm rather than hot.
Heat requires caution on quartz, laminate, acrylic, wood finishes, and bonded seams. Concentrated temperature can alter resin, soften decorative layers, weaken underlying adhesive, or cause uneven expansion. Open flames, heat guns, boiling water, and hot cookware should never be used for routine residue removal.
Cold and heat are most useful as preparation methods. Once the adhesive becomes firmer or softer, it can often be lifted with a plastic tool and followed by a mild cleaner to remove the remaining film.
| DIY Method | Best Suited To | Initial Contact Time | Main Limitation |
|---|---|---|---|
| Warm soapy water | Fresh labels and light glue | 1–3 minutes | Avoid soaking seams |
| Cooking oil | Tacky tape and sticker adhesive | 2–5 minutes | May stain porous materials |
| Rubbing alcohol | Thin adhesive film | 15–30 seconds | Can affect coatings |
| Ice pack | Gummy or rubbery residue | 1–2 minutes | Limited effect on hard glue |
| Low heat | Old labels and tape | 15–30 seconds | Risk to resin and laminate |
| Acetone | Some cured super glue | Brief test only | Unsafe for many finishes |
How Do You Remove Glue Residue Step by Step?
A reliable process follows eight stages: identify the countertop, clear loose contamination, select a mild treatment, test a hidden area, soften the adhesive, lift it with a smooth plastic tool, remove the remaining film, and wash the surface. Several short cycles are safer than prolonged soaking or forceful scraping.
Prepare the Work Area
Move food, utensils, chopping boards, and small appliances away from the affected countertop. Dissolved adhesive can spread farther than expected, so clear approximately 20 to 30 centimeters around the residue. Good lighting is important because fine scratches and changes in gloss may be invisible from directly above.
Identify the countertop material before choosing a treatment. Engineered quartz, granite, marble, laminate, wood, tile, acrylic, and stainless steel can look similar in photographs but have very different tolerances. Manufacturer care instructions should take priority over general household advice.
Remove crumbs, dust, and loose label backing with a dry cloth. If the area is greasy, clean it with a mild surface-compatible detergent and allow it to dry. This prevents gritty contamination from becoming trapped beneath the scraper.
Ventilate the room before using rubbing alcohol or a formulated adhesive remover. Keep flammable products away from flames, cigarettes, heating elements, and sparks. Suitable gloves can protect the skin from repeated contact with dissolved adhesive and cleaning products.
Test the Treatment
Choose a hidden area made from the same material and finish as the stained section. A test spot approximately two to three centimeters wide is usually sufficient to identify obvious compatibility problems. Avoid testing only on an unfinished underside or a different edge material.
Apply a small amount of the proposed cleaner and use the same contact time planned for the visible residue. Wipe it away, wash the area if required, and allow it to dry fully. Check for color change, dullness, swelling, softening, stickiness, or a ring around the test area.
Inspect the result from more than one angle. Dark quartz, polished granite, stainless steel, and glossy laminate can hide changes when viewed from above. Reflected window or cabinet light often reveals cloudy patches that ordinary overhead lighting misses.
When the test area remains unchanged, treat one small corner of the actual residue. Successful release in that area confirms both compatibility and effectiveness. When there is no improvement, do not automatically extend the contact time. A different treatment may be more appropriate.
Soften the Adhesive
Apply the chosen solution directly to the residue rather than covering the surrounding countertop. A cotton pad, lightly dampened cloth, or controlled spray pattern keeps the treatment concentrated. Avoid flooding edges, seams, sink cutouts, or backsplash joints.
Allow the shortest effective contact period. Mild water-based methods may require several minutes, while a fast-acting adhesive remover may begin softening light residue within seconds. The adhesive should become easier to move without requiring heavy pressure.
Thick residue may soften only at the surface during the first application. Lift the softened layer, clean the tool, and apply another small amount. Layer-by-layer removal is slower than aggressive scraping but offers much better control.
Do not leave a saturated cloth on the counter while completing another task. Cleaning products can migrate beyond the visible stain, dry unevenly, or affect the finish after the adhesive has already softened.
Lift and Wipe
Use a smooth plastic scraper, expired gift card, silicone spatula, or similarly nonmetallic tool. Inspect the edge for chips and trapped grit before it touches the countertop. A damaged plastic edge can scratch a polished finish almost as easily as a metal tool.
Hold the scraper at a low angle, nearly parallel to the surface. Push gently beneath the softened adhesive and work from the outside toward the center. This direction helps contain the dissolved residue and reduces spreading.
When the scraper meets strong resistance, stop rather than increasing pressure. Reapply a small amount of cleaner and allow another brief softening period. The cleaner should perform most of the work, while the tool only separates adhesive that is already releasing.
Wipe the scraper after every pass. Residue carried on the edge can be redeposited onto a clean section of counter. Fresh microfiber cloths or disposable pads are useful when the adhesive becomes oily or stringy.
Wash and Inspect
After the visible glue has been lifted, a thin sticky film may remain. Use a fresh section of cloth with a small quantity of the compatible treatment. Wipe in short strokes and replace the cloth when it becomes loaded with dissolved residue.
Wash the treated area with mild dish soap and clean water unless the product label specifies another cleanup procedure. Use minimal moisture around seams, wood joints, sink edges, and damaged laminate. Dry the surface promptly.
Inspect the countertop after it has dried and returned to room temperature. Compare color, gloss, texture, and hardness with the surrounding area. A successful result should not leave a cloudy patch, oily ring, softened coating, or sticky film.
The following process offers a practical reference:
- Identify the countertop and adhesive.
- Clear food, tools, and loose debris.
- Degrease the surface when necessary.
- Test the treatment in a hidden area.
- Apply a controlled amount.
- Wait for the minimum effective period.
- Lift residue with a smooth plastic tool.
- Wash, dry, and inspect the finish.

How Do Methods Change by Countertop Material?
Countertop materials require different removal limits. Quartz contains polymer resin, granite depends partly on its sealer, marble is acid-sensitive, laminate can swell at seams, and wood can absorb oil or solvent. Stainless steel resists many liquids but scratches easily, while grout can absorb dissolved adhesive and cleaner.
Quartz and Solid Surfaces
Engineered quartz contains mineral particles held together with polymer resin. Although it resembles natural stone, its resin content means concentrated heat, aggressive solvents, and abrasive pads can change the color or sheen. Begin with dish soap, a soft cloth, and a smooth plastic scraper.
When residue remains, use a cleaner approved by the countertop manufacturer or test a small amount of rubbing alcohol in a concealed area. Avoid allowing any liquid to pool near seams, sink openings, or backsplash joints. Wipe and rinse promptly after the adhesive releases.
Acrylic and other solid-surface counters can also soften or become cloudy when exposed to strong solvents. Some solid-surface materials can be refinished, but that does not make aggressive cleaning harmless. Glossy finishes tend to show damage more clearly than matte finishes.
The phrase “multi-surface” should not replace a material-specific test. Countertop formulations vary between manufacturers and product lines. Age, color, surface texture, and previous cleaning history can also affect how a finish responds.
Granite and Marble
Granite itself is hard, but the sealer protecting it can be more chemically sensitive than the stone. Begin with a pH-neutral cleaner and a plastic lifting tool. If a solvent is being considered, test whether the treated area loses gloss or changes its water resistance.
Avoid prolonged soaking around sink openings and joints. Liquid can enter narrow gaps and affect adhesive, cabinetry, or substrate materials beneath the stone. Dry the surface and compare the treated area with an untreated section under reflected light.
Marble, limestone, and travertine require greater caution because acidic cleaners can etch their surface. Vinegar and lemon juice may remove part of the residue while leaving a pale, dull mark that is more visible than the original glue.
Begin with a stone-safe neutral cleaner. When hardened adhesive cannot be removed with cautious surface-compatible methods, professional stone-care advice may be less expensive than repairing an etched or scratched polished slab.
Laminate and Wood
Laminate consists of a decorative surface bonded to a wood-based core. The top layer may tolerate mild cleaning, but seams, chips, and exposed edges can absorb moisture and swell. Apply cleaner to a cloth instead of spraying heavily around joints.
Avoid razor blades and metal putty knives. A shallow cut can permanently damage the printed layer. Heat should also be controlled because it may soften the laminate or weaken the bonding adhesive underneath it.
Wood and butcher block must be evaluated according to the finish. Sealed, oiled, waxed, painted, and unfinished wood react differently to alcohol, oil, and water. Cooking oil may blend into an oiled butcher block while creating a dark stain on unfinished wood.
Use minimal liquid, work with the grain, and dry promptly. After successful removal, a compatible oil, wax, or finish may be needed to restore even protection and color. Do not refinish the area until all cleaner and adhesive residue has been removed.
Stainless Steel and Tile
Stainless steel is nonporous and generally responds well to controlled residue removal, but it scratches easily. Wipe in the direction of the grain and avoid steel wool, abrasive powder, rough scrub pads, and damaged plastic tools.
Oil or a compatible remover may soften label and tape residue. The steel should be degreased afterward to prevent streaks. A clean microfiber cloth followed by a dry polishing cloth usually restores a more even appearance.
Glazed ceramic tile often tolerates a wider range of cleaners than natural stone, but grout requires separate care. Porous grout can absorb oil, pigment, dissolved adhesive, and solvent. Keep the treatment concentrated on the tile and prevent liquid from collecting along grout lines.
Decorative, painted, hand-finished, or unglazed tiles should always be tested. A method suitable for standard glazed ceramic may lift paint, alter handmade decoration, or darken a porous surface.
| Countertop Material | Primary Risk | Safer Starting Method | Avoid as a Default |
|---|---|---|---|
| Quartz | Resin damage and dullness | Mild soap and plastic scraper | High heat and strong solvent |
| Granite | Sealer damage | Neutral cleaner | Prolonged solvent contact |
| Marble | Acid etching | Stone-safe neutral cleaner | Vinegar and acidic products |
| Laminate | Swollen seams and cuts | Minimal moisture | Razor blades and soaking |
| Wood | Absorption and finish loss | Finish-compatible cleaner | Long liquid contact |
| Stainless steel | Scratching and streaking | Wipe with the grain | Abrasive pads |
| Glazed tile | Grout contamination | Controlled spot treatment | Saturating grout |
| Acrylic surface | Softening and cloudiness | Approved mild cleaner | Acetone without approval |
What Glue Removal Mistakes Should You Avoid?
The most damaging mistakes include using a strong solvent before identifying the countertop, scraping before the glue has softened, leaving cleaner on too long, mixing products, and allowing liquid to enter seams. Successful removal preserves the original color, gloss, texture, sealer, and edge structure as well as removing the adhesive.
Scraping Too Hard
Heavy scraping is rarely the correct response when glue does not move. Strong resistance usually means the adhesive has not softened enough or the selected treatment is not appropriate. Razor blades, utility knives, metal putty knives, and abrasive pads can damage a countertop before they make meaningful progress.
Plastic tools are safer but not automatically harmless. A chipped scraper or trapped grain of sand may leave fine lines on polished stone, stainless steel, or glossy laminate. Clean both the surface and the tool before every pass.
Hold the scraper at a low angle and move it with short, controlled pressure. Do not chop downward or dig beneath the residue. When the glue begins to smear, stop rubbing. The adhesive may need cooling, additional softening, or a different compatible cleaner.
Mechanical force should only separate adhesive that has already begun releasing. When a treatment requires heavy pressure, reassess the glue type and countertop rather than attempting to overpower the bond.
Leaving Solvent Too Long
Longer contact does not always improve removal. A solvent may continue affecting the countertop after the adhesive has softened. Resin can lose gloss, stone sealer can weaken, paint can lift, acrylic can soften, and wood finish can become pale or sticky.
Use short cycles and observe the surface after each application. Apply cleaner only to the contaminated area. A cotton pad, cloth, or controlled spray pattern offers more control than pouring liquid directly onto the counter.
Never leave a saturated cloth unattended. Solvent may travel beyond the visible stain, seep into seams, or evaporate unevenly and leave a ring. The cleaner should be removed as soon as the glue is workable.
Wash, dry, and inspect between treatment cycles. Some damage remains hidden while the surface is wet and becomes visible only after complete drying.
Mixing Cleaning Products
Do not combine bleach, ammonia, acids, alcohol, acetone, or unidentified household cleaners. Mixing products can create hazardous fumes or unpredictable reactions. Applying a new cleaner directly over residue from a previous one can cause the same problem.
Wash and dry the countertop before switching methods. Use fresh cloths and clean tools. Ventilate the room and keep flammable cleaners away from cigarettes, flames, sparks, hot appliances, and electrical heating elements.
Natural household ingredients are not automatically safe. Vinegar can etch marble, oil can stain porous stone and unfinished wood, while baking soda may scratch some glossy surfaces. Compatibility depends on both the cleaning material and the countertop.
Read the instructions on any formulated remover. Contact time, ventilation, glove use, rinsing, and surface restrictions should be followed even when the affected area is small.
Ignoring Damage Signals
Stop immediately if countertop color transfers onto the cloth, the surface becomes soft or sticky, the finish turns cloudy, laminate begins swelling, stone darkens unevenly, or scratches appear. These changes indicate that the countertop is being affected.
Professional assistance is sensible when construction adhesive covers a large area, residue has entered a seam, the material cannot be identified, or the countertop is custom-made, valuable, historic, or already damaged.
Natural stone may need a restoration specialist, while lifted laminate may require repair rather than additional cleaning. Continuing to apply more solvent rarely corrects damage that has already begun.
Food-contact areas need careful final cleaning. Do not place food directly on the treated section until it is washed, dry, odor-free, and free from visible cleaner or adhesive film.
When Should You Use an Adhesive Remover?
A formulated adhesive remover becomes useful when mild household methods fail on old labels, protective-film glue, thick tape residue, gum, wax, light silicone traces, or adhesive mixed with grease. A suitable product should offer controlled application, clear contact-time instructions, surface-testing guidance, and a finish that can be washed away without heavy oiliness.
Persistent Residue
Household methods work best on small, fresh, and clearly identified adhesive. A formulated remover becomes more practical when the glue repeatedly smears, remains sticky after washing, or requires enough scraping pressure to threaten the finish.
Older pressure-sensitive adhesives change after exposure to heat, sunlight, oxygen, grease, and repeated cleaning. Barcode labels, mounting tape, protective film, double-sided tape, and automotive-style decals are often designed to resist water and temperature variation.
A suitable remover should soften the bond so the residue can be lifted with less mechanical force. Complete and immediate dissolution is not always necessary. Controlled softening is easier to manage and reduces the chance of spreading the adhesive.
Consider moving to a formulated remover when two careful applications of a mild method produce little visible improvement, when the residue covers a larger area, or when continued dry scraping would increase the risk of surface damage.
Choosing the Product
Surface compatibility matters more than broad claims such as “industrial strength” or “extra powerful.” Look for clear instructions covering suitable materials, restricted surfaces, contact time, final washing, ventilation, and hidden-area testing.
Controlled dispensing is valuable. A spray bottle can cover a thin film evenly, while a precision nozzle may be more appropriate for seams or narrow adhesive lines. Thick residue benefits from a smooth plastic scraper that reduces the need for force.
The residue range should match the intended application. A household product may need to handle sticker glue, tape, gum, wax, grease, protective-film residue, and light silicone marks. Automotive or professional users may require performance on decals or more weather-resistant adhesive.
Final cleanup also matters. A product that removes glue but leaves a heavy oily coating may require several washes. Kitchen, office, glass, packaging, and retail users generally benefit from a formula that can be wiped and washed away without persistent residue.
Safe Application
Begin by identifying the countertop and testing a hidden area. Remove loose label material, tape backing, wax, gum, or thick debris before applying the remover. Exposing the adhesive directly reduces unnecessary product use.
Apply a small, even quantity to the contaminated area. GleamGlee adhesive remover is designed to begin softening many common sticky residues after approximately 15 seconds, although surface condition, adhesive age, and residue thickness can change the actual working time.
Lift the softened material with a smooth plastic scraper or clean cloth. Work from the outside toward the center and clean the tool after every pass. Repeat with another brief application when necessary rather than flooding the countertop.
After removal, wash the surface with a material-compatible cleaner and dry it fully. Inspect the finish under reflected light before considering the job complete.
Retail and Custom Projects
Retailers, cleaning brands, distributors, Amazon sellers, and home-improvement businesses may need a product designed around their sales channel rather than a generic formula. Packaging size, spray pattern, accessory choice, label language, carton quantity, and compliance documentation can all affect commercial suitability.
An Amazon-oriented kit may prioritize compact FBA-ready packaging, leak protection, and an included scraper. A hardware retailer may prefer a larger bottle with bold surface icons, while an automotive distributor may need testing focused on glass, trim, decals, and painted exterior surfaces.
Private-label projects can use an existing formula or begin with targeted adjustments. Common requests include fragrance changes, evaporation speed, viscosity, residue range, bottle volume, spray format, multilingual instructions, scraper shape, and retail carton design.
GleamGlee supports standard, OEM, ODM, and private-label adhesive remover projects through an integrated development and manufacturing network. Eligible customized orders may begin from approximately 200 units. Design preparation can sometimes be completed within two working days, sample delivery commonly takes 7–14 days, and regular bulk production is generally targeted around 20 days, subject to formula, packaging, documentation, and material availability.
| Commercial Requirement | Practical Consideration | Typical Option |
|---|---|---|
| Initial customization | Testing market demand with lower inventory risk | Eligible projects from about 200 units |
| Packaging design | Localized branding and compliant label layout | Initial artwork in as little as 2 working days |
| Sample development | Formula, bottle, spray, and accessory review | Commonly 7–14 days |
| Bulk production | Filling, labeling, packing, and inspection | Commonly around 20 days |
| Urgent production | Faster launch or stock replenishment | Certain projects around 15 days |
| Packaging formats | Channel and application requirements | Bottles, sprays, tubes, jars, bags, and kits |
| Documentation | Regional sale and transport needs | SDS, CLP, REACH, GHS, and related support |
| Logistics | Retail, distributor, and marketplace delivery | FBA-ready and international shipping options |

Conclusion
Removing glue residue from a countertop is not simply a matter of selecting the strongest cleaner. A safe result comes from matching the method to both the adhesive and the surface. Begin by deciding whether the residue is tacky, rubbery, brittle, oily, or fully cured, then choose the mildest practical treatment.
Warm soapy water can manage fresh labels and some water-based glue, while cooking oil may loosen selected pressure-sensitive adhesives. Rubbing alcohol, controlled temperature, and formulated adhesive removers can address more persistent residue, but compatibility must be verified before treating a visible area.
Quartz, granite, marble, laminate, wood, tile, acrylic, and stainless steel should never be treated as interchangeable materials. Repeated short applications, smooth plastic tools, careful washing, and frequent inspection provide greater control than soaking, abrasive scrubbing, or aggressive scraping.
For retailers, importers, cleaning brands, distributors, e-commerce businesses, and professional users, adhesive residue removal also creates a practical product-development opportunity. Customers increasingly expect fast softening, clear surface guidance, controlled spraying, useful accessories, leak-resistant packaging, and simple instructions that reduce the risk of misuse.
GleamGlee can provide standard adhesive remover products as well as OEM, ODM, private-label, formula, packaging, and label-development support. Product samples, packaging selections, multilingual design, technical discussions, compliance documents, and quotations can be prepared according to the intended market and sales channel. Businesses planning a retail, wholesale, marketplace, or professional cleaning range can contact the team with their target residue, preferred bottle size, expected order quantity, country of sale, and benchmark product to receive a more relevant evaluation and quotation.





















