 Skip to content
Old tape residue can turn a simple cleaning task into a frustrating cycle of scraping, smearing, and worrying about the material underneath. A packing label left on a plastic storage container may become hard around the edges, while duct tape on a tool or window can leave behind a dark, rubbery layer that attracts dust. Double-sided mounting tape creates an even tougher problem because the foam backing may peel away while the adhesive remains firmly attached.
The challenge is not simply finding something strong enough to dissolve glue. The real goal is to remove the adhesive without clouding plastic, lifting paint, dulling wood, scratching glass, or damaging a vehicle finish.
Old tape residue is usually removed most safely by identifying the surface, softening the adhesive with controlled heat or a mild cleaner, and lifting it with a plastic scraper. Thick, aged, or widespread residue may require a compatible adhesive remover. Every method should begin with a hidden-area test, and treatment should stop if the surface changes color, gloss, texture, or hardness.
A careful sequence usually works better than aggressive rubbing. Start with the least invasive method, observe whether the adhesive becomes softer or more brittle, and increase cleaning strength only when the surface remains stable. The forgotten strip of tape behind a picture frame or the stubborn label on a reusable jar may look permanent, but it often needs patience and the correct combination of heat, dwell time, and controlled lifting.
What Makes Old Tape Residue Hard to Remove?
Old tape residue becomes difficult to remove because pressure-sensitive adhesive changes after prolonged exposure to heat, pressure, oxygen, sunlight, dust, and moisture. Some residue dries into a brittle layer, while other glue becomes soft and gummy. The tape backing may also deteriorate before the adhesive releases, leaving several layers that require different removal methods.
Adhesive Changes Over Time
Most household tapes use pressure-sensitive adhesive, which bonds when pressure pushes the tacky material into close contact with a surface. The adhesive settles into microscopic scratches, pores, grain patterns, and coating irregularities. It does not need to cure like a two-part epoxy, which explains why tape can hold almost immediately after application.
Age gradually changes the physical balance of the adhesive. Some formulas lose volatile components and become dry, yellowed, or brittle. Other adhesives absorb heat, oils, cleaning residue, or plasticizers from nearby materials and remain unusually soft. Once exposed, the sticky layer collects dust, fibers, grease, and airborne dirt, producing a dark buildup that ordinary soap may not remove.
The tape backing and adhesive rarely age at exactly the same rate. Paper masking tape often tears into small fragments while the glue stays firmly attached. Clear packaging tape may peel away in a single strip but leave a smooth transparent film. Foam mounting tape can split through the center, leaving foam and adhesive attached to both surfaces.
Aged residue should therefore be examined before treatment. Remove loose material, identify whether the remaining layer is hard or gummy, and avoid scraping aggressively until the adhesive has been softened. Mechanical force alone can damage the surface while leaving most of the residue behind.
Heat, Pressure, and Sunlight
Heat improves the flow of many pressure-sensitive adhesives. During normal application, that property helps the tape create better contact. Over months or years, however, environmental heat may allow the adhesive to move farther into textured paint, plastic grain, wood coatings, or tiny scratches in glass and metal.
Common high-temperature situations include tape left on sunny windows, decals applied to vehicles, labels stored near kitchen appliances, packing tape exposed in warehouses, and mounting strips installed behind warm electronic devices. Residue in these locations often becomes more difficult to lift evenly because the adhesive has spread beyond the original edge of the tape.
Pressure creates a similar effect. A shipping label compressed beneath stacked cartons develops more intimate contact than a loosely attached label. Double-sided mounting tape pressed firmly behind a frame or sign is designed to fill gaps and resist movement, so the remaining adhesive may continue holding even after the foam layer has been removed.
Ultraviolet light may weaken the tape backing while changing the adhesive underneath. Humidity can soften paper, move contaminants into the glue, or affect the coating beneath it. Outdoor residue therefore requires more caution than a recently removed label on an indoor jar, even when both originated from a similar tape.
Tape Type Matters
Tape formulations are designed around different loads, temperatures, surfaces, and service periods. Painter’s tape is intended for comparatively clean removal within a limited time, while duct tape prioritizes strength, flexibility, and resistance to demanding conditions. Mounting tape must support weight, and packaging tape must hold cartons under tension.
| Tape type | Typical aged residue | Common difficulty | Practical starting method |
|---|---|---|---|
| Painter’s tape | Thin adhesive film or dry edges | Weak paint may lift during peeling | Low heat and a lightly damp cloth |
| Masking tape | Brittle paper over hardened glue | Backing tears into small fragments | Gentle warming and plastic scraping |
| Packing tape | Clear or yellowed adhesive layer | Glue smears when rubbed dry | Heat or tested rubbing alcohol |
| Duct tape | Thick, rubbery, dirt-filled residue | Strong buildup resists mild cleaning | Heat followed by adhesive remover |
| Double-sided tape | Dense adhesive on both sides | Lower layer is difficult to reach | Remove gradually in thin layers |
| Foam mounting tape | Foam particles over strong glue | Foam separates before adhesive releases | Mechanical lifting, then chemical softening |
| Clear office tape | Thin, dry, yellowed film | Small pieces spread during wiping | Mild cleaner and microfiber cloth |
The original tape category is only one part of the diagnosis. Fresh duct tape on glass may be easier to remove than masking tape left on painted metal for several years. Exposure time, temperature, pressure, residue thickness, and surface condition should always be considered together.
Hard Residue and Gummy Residue
Hard residue often responds well to moderate warming because heat makes the adhesive more flexible. Once the edge begins to soften, a plastic scraper can lift the material without cutting into the underlying finish. Several short heating cycles are usually safer than one prolonged application.
Gummy residue behaves differently. Dry rubbing may spread it across a larger area, especially when the glue contains oil, dirt, or softened rubber. A suitable solvent or adhesive remover can reduce tack, allowing the residue to be collected rather than smeared.
Appearance provides useful clues. Pale, dry edges often indicate oxidation or prolonged environmental exposure. Dark, soft deposits may contain grease or dust. A smooth transparent film commonly comes from packing tape or protective film, while visible foam fragments usually point to mounting products.
A few moments of inspection can prevent unnecessary damage. When the residue is correctly identified, the cleaning method can be matched to its physical condition instead of relying on trial and error.
What Should You Check Before Removal?
Before removing tape residue, identify the base material, protective coating, residue thickness, and sensitivity to heat, water, oil, or solvents. Test the intended method in a hidden area, gather non-scratching tools, and begin with the mildest effective treatment. Stop immediately if the surface changes color, gloss, texture, shape, or hardness.
Identify the Real Surface
A material name alone rarely provides enough information. “Wood” may refer to unfinished timber, painted wood, veneer, laminate, lacquer, polyurethane coating, or oil-finished furniture. Each variation responds differently to moisture, heat, oils, alcohol, and stronger solvents.
Metal also includes several very different finishes. Bare stainless steel may tolerate controlled solvent use, while painted appliances, powder-coated shelving, anodized aluminum, and printed metal containers require greater caution. A method that cleans a steel tool safely may remove lettering from a decorated can.
Plastic presents the widest range of reactions. Polypropylene storage boxes, acrylic display panels, polycarbonate guards, vinyl trim, and soft-touch coatings can look similar while behaving very differently. Some plastics tolerate mild alcohol treatment, while others haze, crack, soften, or lose gloss.
Before cleaning, determine whether the surface is porous, coated, printed, laminated, polished, or heat-sensitive. Consider whether liquid could enter joints, electrical components, mirror edges, or furniture seams. The intended use afterward also matters because a surface prepared for painting, labeling, or bonding must finish dry and free from oil.
Test in a Hidden Area
A compatibility test should reproduce the planned cleaning method as closely as possible. Use the same product, dwell time, wiping pressure, scraper angle, and drying process. Apply the cleaner to an area smaller than a coin, preferably on the underside, back edge, or another inconspicuous location.
Immediate appearance can be misleading. Plastic may look normal while wet but develop haze after drying. Paint can become soft without changing color. Printed graphics may slowly transfer to the cloth. Wood may darken several minutes after oil or solvent reaches a worn section of coating.
| Test result | Likely meaning | Appropriate response |
|---|---|---|
| No visible change after drying | Method appears compatible in the tested area | Continue in small controlled sections |
| Color transfers to the cloth | Paint or printed ink is dissolving | Stop and choose a milder method |
| Surface becomes tacky | Coating or plastic may be softening | Remove cleaner and discontinue treatment |
| Gloss becomes uneven | Finish is being polished or dulled | Reduce friction or change methods |
| Plastic turns cloudy | Solvent or stress damage may be developing | Stop immediately |
| Wood becomes darker | Liquid may be entering exposed grain | Dry the area and avoid further saturation |
| Coating edges begin to lift | Laminate, paint, or film adhesion is weakening | Do not continue near the affected edge |
Testing reduces risk but cannot guarantee that every part of an object will react identically. Furniture finishes may be worn in one location and intact in another. Vehicle panels may contain repaired paint. Printed plastic may use different inks across the same package, so observation should continue throughout the cleaning process.
Choose Safe Tools
The safest tools lift softened adhesive without concentrating pressure through a sharp edge. Microfiber cloths, plastic scrapers, old loyalty cards, cotton pads, soft toothbrushes, paper towels, and silicone spatulas can handle many household jobs.
A plastic scraper should be held almost flat against the surface. A steep angle concentrates force on a small point and may gouge plastic, mark paint, or cut through a soft coating. When the residue refuses to move, increasing pressure is usually less effective than applying additional controlled softening.
A hair dryer provides moderate heat and allows the airflow to be moved continuously. Heat guns can become excessively hot within seconds and are unnecessary for most household tape residue. Metal razor blades may be suitable for trained use on specific uncoated glass surfaces, but they are not a safe general-purpose option.
Clean cloth sections are equally important. Once a cloth becomes saturated with dissolved adhesive, it may spread the glue back across the surface. Fold the cloth frequently and replace it when it becomes sticky.
Know What to Avoid
Cleaning chemicals should never be mixed casually. Combining acids, bleach, ammonia, alcohol, solvents, or commercial removers may produce fumes, splashing, heat, or unpredictable surface reactions. Use one method at a time, remove it completely, and ventilate the work area.
Avoid prolonged soaking on painted drywall, unfinished wood, electrical devices, furniture joints, laminated edges, and porous stone. Moisture can enter beneath coatings, swell fibers, weaken adhesives, or cause visible staining.
Acetone and other strong solvents can rapidly damage plastics, wall paint, printed surfaces, furniture coatings, and automotive finishes. Rubbing alcohol is milder than acetone but still requires testing because acrylic, polycarbonate, and some decorative coatings may be affected.
The underlying object is usually more valuable than the residue. A faint adhesive mark can be treated again, but a melted plastic panel, stripped finish, or scratched window may require replacement or professional repair.
Which DIY Methods Work Best?
Controlled heat, warm soapy water, vinegar, oil, baking soda, and rubbing alcohol can remove old tape residue when matched to a compatible surface. Heat works well on dry adhesive, soap suits light residue on washable objects, and oil can soften gummy glue. Alcohol acts faster on some hard surfaces but carries greater risk for paint, acrylic, printing, and coatings.
Heat and Gentle Lifting
Controlled heat is one of the most useful starting methods because it changes the physical behavior of many pressure-sensitive adhesives without immediately introducing liquid. Warm adhesive becomes more flexible and often releases with less scraping.
Use a household hair dryer on a low or medium setting. Hold it several inches away, keep it moving, and warm a small section for approximately 15 to 30 seconds. Test the edge with a plastic scraper or microfiber cloth before applying another short heating cycle.
These times are practical starting points rather than universal limits. Thin residue on glass may soften quickly, while thick mounting adhesive may require several brief cycles. Repeated short applications are safer than continuous high heat.
Heat is generally more suitable for durable glass and metal than for thin plastic, vinyl, acrylic, paint, electronics, seals, or laminated edges. Stop if the surface becomes noticeably hot, soft, flexible, distorted, or discolored.
Once the adhesive begins moving, roll it toward the center rather than spreading it. Clean the scraper after each pass so collected glue does not transfer back onto the surface.
Water, Soap, and Vinegar
Warm water with a small amount of dish soap works well on light residue attached to washable, nonporous items such as glass jars, ceramic containers, metal cans, and some durable plastics. A damp cloth held over the tape can soften paper backing while removing surface dirt.
Soaking may be helpful for removable bottles and jars, but it should not be used on drywall, electrical products, furniture, unfinished wood, or objects with open seams. Water can loosen the label while entering areas that are difficult to dry.
White vinegar may help soften some light adhesive films and dirt deposits. It is generally better suited to tested glass, ceramic, and selected metal surfaces than to natural stone, waxed furniture, aluminum, grout, or delicate coatings.
Apply vinegar to a cloth rather than pouring it directly onto the object. Allow a short contact period and wipe the area clean. Longer exposure does not always improve removal and may increase the chance of surface damage.
Vinegar and baking soda should not be combined simply because the reaction produces bubbles. The acid and alkaline material largely neutralize one another, reducing their individual cleaning properties.
Oil and Baking Soda
Cooking oil or mineral oil can penetrate gummy adhesive and reduce its tack. The method often works on reusable glass jars, metal containers, and durable plastic objects that can be thoroughly washed afterward.
Apply a small amount to a cloth, press it over the residue, and allow several minutes of contact. Rub gently or use a plastic scraper to lift the softened material. Thick glue may require a second controlled treatment.
Oil should not be used casually on unfinished wood, porous stone, fabric, paper, unsealed surfaces, or areas that will soon be painted or bonded. Even a thin invisible film can prevent new tape, paint, sealant, or adhesive from forming a reliable bond.
Baking soda provides mild abrasion when mixed with a little water or oil. It can help break up softened residue on durable surfaces, but repeated rubbing may dull polished metal, glossy plastic, acrylic, coated glass, or furniture finishes.
| DIY method | Typical starting contact | Suitable applications | Main caution |
|---|---|---|---|
| Hair dryer | 15–30 seconds per small area | Dry or rubbery adhesive | Heat may deform plastic or soften paint |
| Warm soapy water | 2–10 minutes | Washable glass, ceramic, metal, and jars | Avoid porous, electrical, or laminated items |
| White vinegar | 1–5 minutes | Tested glass, ceramic, and some metal | May affect stone, grout, and sensitive finishes |
| Cooking or mineral oil | 5–15 minutes | Gummy residue on washable hard surfaces | Leaves an oily film that requires degreasing |
| Baking soda paste | Brief gentle rubbing | Durable, non-delicate surfaces | Mild abrasion can dull glossy finishes |
| Rubbing alcohol | 15–60 seconds initially | Compatible glass, metal, ceramic, and tools | May damage acrylic, paint, ink, or coatings |
The ranges in the table are conservative starting points. Delicate materials should receive shorter contact, less heat, and lighter pressure. Every unfamiliar surface should be tested before visible treatment.
Rubbing Alcohol
Rubbing alcohol can dissolve or loosen thin adhesive films more quickly than soap or oil. Its comparatively fast evaporation makes it useful for small areas on compatible glass, stainless steel, ceramic, hard tools, and certain plastics.
Apply alcohol to a cloth or cotton pad rather than pouring it directly over the residue. Treat a small section, allow a brief contact period, and collect the softened glue before it spreads.
Alcohol is not automatically safe for plastic. Acrylic, polycarbonate, printed packaging, clear coatings, and soft-touch finishes may haze, crack, fade, become tacky, or lose gloss. It can also lift wall paint or damage some furniture finishes.
Higher concentration does not always produce a better household result. Faster solvent action may shorten cleaning time, but it also reduces the time available to notice an adverse surface reaction.
When several careful attempts produce little improvement, stop increasing pressure. A dedicated adhesive remover designed for stubborn residue may provide more controlled softening than repeated rubbing with a household solvent.

How Do You Clean Different Surfaces?
The safest removal method changes with the material. Glass and uncoated metal often tolerate controlled scraping, while plastic and acrylic require caution with solvents and heat. Painted walls need low moisture and light pressure. Finished wood must be protected from staining, and automotive surfaces require methods compatible with paint, trim, glass, tint, and protective films.
Glass and Metal
For ordinary uncoated household glass, remove loose tape backing, warm the residue, and apply warm soapy water or a suitable adhesive remover. Use a plastic scraper at a shallow angle and work from the outer edge toward the center.
Not every glass surface is plain glass. Windows may contain tint, privacy film, low-emissivity coatings, decals, or anti-reflective treatments. Mirrors have vulnerable backing around their edges. A technique that works on a food jar may not be safe for coated architectural glass or a vehicle window.
Metal surfaces also vary considerably. Bare stainless steel is usually more tolerant than painted appliances, powder-coated furniture, anodized aluminum, or printed containers. Follow the visible grain when cleaning brushed stainless steel, and avoid rough pads that create an uneven shine.
After the adhesive is removed, wash away the cleaner and dissolved glue. A thin remaining film may attract dust, leave streaks, or interfere with later labeling. Items intended for kitchen use should be thoroughly washed according to their normal use requirements.
Plastic and Acrylic
Begin plastic treatment with low heat, mild soap, and a soft cloth. Keep a plastic scraper nearly flat against the surface and apply only enough pressure to move softened residue. When the glue begins smearing, stop rubbing and switch to a compatible softening method.
Plastic identification is often difficult because visually similar objects may be made from different polymers. Polypropylene, polyethylene, acrylic, polycarbonate, PVC, ABS, and soft-touch coated plastic react differently to heat and solvents.
Acrylic requires particular caution. Alcohol, acetone, and aggressive solvents may cause haze, fine cracking, or permanent loss of transparency. Residue from protective film on acrylic sheets should ideally be removed according to the material supplier’s instructions.
For textured plastic, a soft toothbrush can reach shallow grooves after the adhesive has softened. Excessive brushing may polish raised texture or spread the residue, so use gentle circular movement and clean the brush frequently.
Inspect the surface under angled light after drying. Fine scratches, haze, and gloss differences are easier to detect from the side than when viewed directly from above.
Painted Walls and Finished Wood
On painted walls, begin by lifting thick residue with a dry plastic edge. Apply gentle warmth only when the paint is fully cured and firmly bonded. Use a lightly damp cloth instead of soaking the wall, and avoid prolonged rubbing.
Flat and matte paint can develop a shiny patch when repeatedly wiped, even if no color transfers to the cloth. The friction polishes the surface and changes how it reflects light. Stop as soon as the treated area begins looking different from the surrounding wall.
When paint transfers to the cloth, the coating is already being removed. Continued solvent use is likely to enlarge the damage. Old, chalky, poorly prepared, or moisture-damaged paint may release before the tape adhesive does.
Finished wood should be inspected for worn coating, scratches, exposed grain, and open edges. Apply cleaner to a cloth rather than spraying directly onto the furniture. Wipe promptly and watch for darkening, gloss loss, or softening.
Oil may loosen adhesive but stain exposed wood. Alcohol may affect lacquer, shellac, printed laminate, or clear coatings. Unfinished wood may require dry lifting followed by very light sanding, which should be treated as refinishing rather than ordinary cleaning.
Automotive Surfaces
Vehicle cleaning requires accurate surface identification because a single car includes glass, clear-coated paint, plastic trim, rubber seals, vinyl, soft-touch coatings, window tint, chrome, and protective film.
Work on a cool surface in the shade. Hot panels can cause cleaners to evaporate too quickly, spread softened adhesive, or increase the chance of paint marking. Remove dust and grit before wiping so particles do not scratch the finish.
Exterior glass may tolerate stronger treatment than painted panels, but tint is commonly installed on the interior side and can be damaged by unsuitable cleaners. Painted bodywork should be treated only with products confirmed as compatible with automotive finishes.
Hard interior trim may become unnaturally glossy when scrubbed. Soft-touch coatings can become sticky after solvent exposure. Rubber seals may swell, dry, or discolor depending on the cleaner.
Professional detailing is a sensible option when residue covers a large painted panel, sits near repaired paint, or affects valuable protective film. The cost of expert removal may be much lower than correcting damaged clear coat or replacing trim.
What Should You Do When DIY Methods Fail?
When household methods fail, stop increasing pressure and use a dedicated adhesive remover that matches the surface. Remove loose tape and foam first, treat a small area, allow the formula to soften the glue, and lift the residue in thin layers. Clean the area afterward and stop if the surface changes color, gloss, shape, texture, or hardness.
When to Use Adhesive Remover
A dedicated adhesive remover is useful when residue is old, thick, widespread, heavily contaminated, or too firmly attached for mild household methods. Common examples include duct tape glue, double-sided tape, foam mounting strips, decal adhesive, protective-film residue, and repeated label buildup.
The purpose of a specialized remover is not merely to introduce a stronger chemical. A suitable formula softens or breaks down the adhesive layer so that less scraping force is required. Repeated dry scraping often damages paint, plastic, coatings, and polished surfaces before the glue releases.
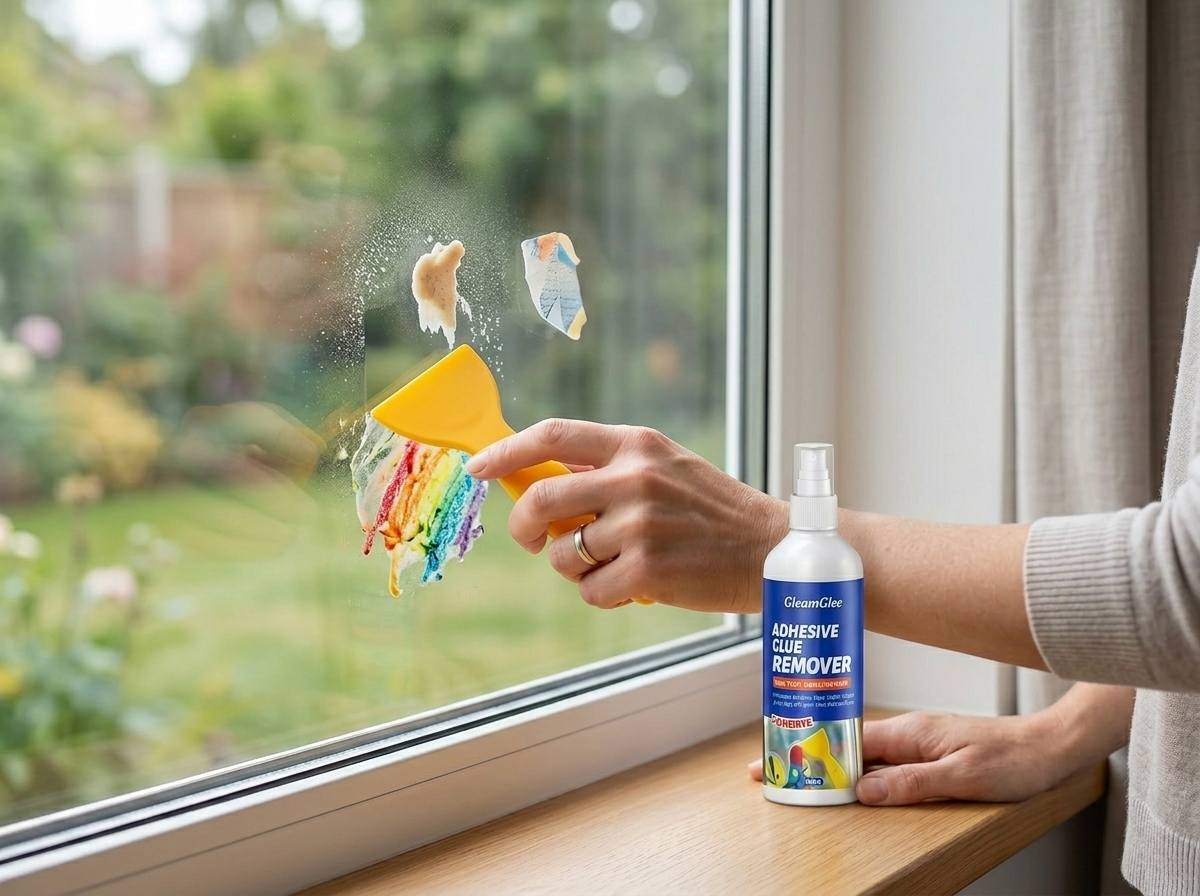
A spray format provides controlled coverage over an irregular deposit, while a plastic scraper helps lift softened residue. GleamGlee Adhesive Remover is designed for tape marks, stickers, labels, light silicone residue, grease, gum, wax, and related sticky deposits on compatible hard surfaces.
An initial dwell time of approximately 15 seconds may be sufficient for lighter residue. Thick, aged, or layered deposits may require repeated short treatments. Longer soaking is not automatically better, particularly on painted, printed, coated, or unfamiliar materials.
Commercial adhesive remover must still be tested. Surface coatings, printing inks, plastics, and furniture finishes vary widely, even when the base material appears identical.
A Controlled Removal Process
Begin by peeling away loose tape backing, paper, foam, or surface dirt. Removing the upper material allows the cleaner to contact the adhesive directly instead of being absorbed by the backing.
Test the remover on a hidden spot and allow the area to dry. When no adverse change appears, treat a limited section rather than spraying the entire object. Small working areas keep dissolved adhesive easier to collect and reduce unnecessary cleaner exposure.
A controlled process follows these steps:
- Remove loose tape, foam, paper, and debris.
- Test the cleaner on a hidden area.
- Apply a limited amount to the residue.
- Wait approximately 15 seconds or follow the product label.
- Hold the plastic scraper at a shallow angle.
- Lift the softened adhesive toward the center.
- Wipe the scraper and residue onto a clean cloth.
- Repeat only where glue remains.
- Clean and dry the treated surface.
Do not mix the remover with other cleaning products. Use suitable ventilation, avoid flames and excessive heat, wear gloves where required, and store the product away from children.
Remove Thick Buildup in Layers
Thick mounting tape and duct tape residue usually contain several distinct layers. The upper foam, fabric reinforcement, or paper backing should be lifted mechanically before the lower adhesive is treated.
Trying to dissolve the entire thickness in one application often wastes cleaner and produces a larger sticky area. Short, repeated treatments provide better control and reduce the time the surface remains wet.
Begin by removing the thickest material. Apply the remover to the exposed glue, allow the required dwell time, lift a thin layer, and wipe the surface before repeating. Change cloth sections frequently because adhesive-saturated fabric cannot collect additional residue effectively.
When the glue becomes softer but spreads, reduce the working area and use fresh absorbent material. When it remains unchanged after several careful attempts, reconsider whether the selected remover is compatible with that adhesive instead of adding force.
Layered removal takes more patience, but it protects the underlying finish and produces a cleaner final result.
Know When to Stop
Stop treatment when paint, ink, or finish transfers onto the cloth. The process should also stop if plastic becomes cloudy, soft, cracked, sticky, or distorted.
Wood darkening, laminate edges lifting, uneven gloss, persistent discoloration, or new scratches are signs that the surface is being affected. Remove the cleaner, dry the area, and do not continue with the same method.
A visible outline may remain after all adhesive has been removed. The covered section may have been protected from sunlight, oxidation, dust, and normal wear, leaving it a slightly different color from the surrounding surface. Additional solvent cannot correct uneven aging.
Professional assistance is appropriate for valuable furniture, historic materials, coated architectural glass, large vehicle panels, electronics, delicate plastics, and surfaces with unknown finishes. Recognizing the point where cleaning risk exceeds the value of further improvement is an important part of safe adhesive removal.
How Do You Prevent Tape Residue?
Tape residue is easier to prevent than remove. Choose tape designed for the surface, temperature, holding load, and expected removal period. Apply it to a clean and dry surface, remove it within the manufacturer’s recommended window, and peel slowly at a low angle. Use gentle warming when resistance develops rather than pulling suddenly.
Choose the Right Tape
Painter’s tape, masking tape, packaging tape, duct tape, and mounting tape are designed for different purposes. A stronger tape is not automatically a better choice, especially when clean removal matters.
Temporary wall decoration should use tape intended for painted surfaces. Packaging tape belongs on cartons rather than furniture. Duct tape performs well in demanding temporary repairs but may leave heavy residue after heat and sunlight exposure. Mounting tape should be selected according to load and surface type.
Consider the surface material, indoor or outdoor environment, temperature range, sunlight exposure, moisture, holding load, service period, and required removal method. The tape manufacturer’s clean-removal window should be treated as a practical limit rather than a suggestion.
A product rated for removal after several days should not be expected to release cleanly after several months. For reusable storage containers, removable labels or label holders may provide a better long-term solution than repeatedly applying general-purpose tape.
Prepare the Surface
Tape performs most consistently on a clean, dry, stable surface. Dust reduces uniform contact, while oil, polish, wax, silicone, and cleaner residue can cause the adhesive to move or transfer unevenly.
Allow freshly painted surfaces to cure fully before applying tape. Paint that feels dry may still be chemically soft underneath. Early tape application can leave an imprint, alter gloss, or pull the coating away during removal.
Avoid placing tape over damp walls, greasy kitchen surfaces, dusty tools, damaged coatings, or chalky paint. An unstable base may release before the tape adhesive does.
Commercial labeling and assembly processes benefit from documented preparation. Using the same cleaner quantity, wiping material, drying time, application temperature, and pressure across each production run improves consistency and makes quality problems easier to investigate.
Good preparation helps the tape bond evenly, perform reliably, and release more predictably when removal is required.
Remove Tape Correctly
Tape should be removed slowly rather than pulled sharply. Folding the released section back close to the surface creates a low peel angle, which usually places less upward stress on paint, paper coatings, and thin finishes.
When resistance increases, pause and warm a short section with a hair dryer. Keep the heat moving and avoid warming plastic, paint, glass edges, seals, or trim excessively.
Tape covered by dried paint may require careful separation along the paint line before peeling. Sharp tools should be used only with controlled movement and kept away from vulnerable surfaces.
Inspect the area immediately after removal. Fresh adhesive transfer is easier to clean than residue left exposed for days or weeks. Early treatment also prevents dust and grease from becoming embedded in the sticky layer.
A slow and controlled removal process often prevents both residue and surface damage without requiring additional cleaning products.
Prepare for the Next Bond
A surface can appear clean while still carrying oil, soap, dissolved adhesive, polish, solvent, or moisture. These invisible films may weaken fresh tape, labels, paint, sealant, or glue.
Wash compatible glass and metal with mild dish soap after using oil-based methods. Rinse and dry thoroughly. Painted, wooden, plastic, or automotive finishes should receive a final cleaner approved for that material.
Before applying new adhesive, confirm that the surface is free from old glue, dust, loose coating, wax, oil, and moisture. The material should also be within the application temperature recommended by the tape or adhesive manufacturer.
For manufacturing, packaging, and private-label applications, preparation conditions should be standardized. Recorded temperature, dwell time, cleaner quantity, drying time, and application pressure help reduce batch variation and customer complaints.
A clean final surface improves initial adhesion and makes later removal more predictable, particularly on frequently relabeled containers, retail fixtures, tools, and reusable packaging.

Conclusion
Old tape residue is best removed through a gradual, surface-aware process. Identify the material, inspect the residue, test a mild method, soften the adhesive, and lift it with a non-scratching tool. Heat, warm soapy water, vinegar, oil, baking soda, and rubbing alcohol can each be useful, but no household method is suitable for every surface.
A dedicated adhesive remover becomes valuable when residue is thick, aged, widespread, or resistant to mild cleaning. Controlled chemical softening can reduce repeated scraping and help protect the material underneath. GleamGlee Adhesive Remover is developed for tape marks, stickers, labels, double-sided tape, light silicone residue, grease, wax, gum, and other sticky deposits on compatible hard surfaces.
GleamGlee supports distributors, retailers, cleaning brands, Amazon sellers, Shopify businesses, hardware suppliers, and private-label companies seeking adhesive-removal products. Available services include existing formulas, custom performance development, packaging selection, spray-bottle options, multilingual label design, compliance documentation, samples, FBA-ready packing, and international shipping support.
Customized projects can begin from 200 units. Printable packaging artwork may be prepared in as little as two days for suitable projects. Sample production generally takes 7–14 days, while standard bulk manufacturing is commonly completed in approximately 20 days. Expedited production may be arranged for qualifying orders.
| Project requirement | Available capability |
|---|---|
| Existing adhesive remover formula | Branded or private-label production |
| Customized cleaning performance | Formula adjustment and application testing |
| Spray bottle and packaging selection | Multiple stock containers and closure options |
| Custom container development | Packaging mold development support |
| Label and box artwork | Multilingual design and in-house printing |
| Technical and compliance support | SDS, CLP, REACH, GHS, and related documents |
| Low-volume market testing | Custom projects from 200 units |
| Amazon preparation | FBA-ready labeling, packing, and shipment support |
| International distribution | Logistics support for North America, Europe, and Asia |
| Large production programs | Automated lines with annual capacity exceeding 12 million units |
Companies developing a household adhesive remover, sticker residue cleaner, automotive glue remover, professional cleaning spray, or private-label DIY range can request product samples, technical specifications, packaging options, compliance documents, and a customized quotation from GleamGlee.





















