 Skip to content
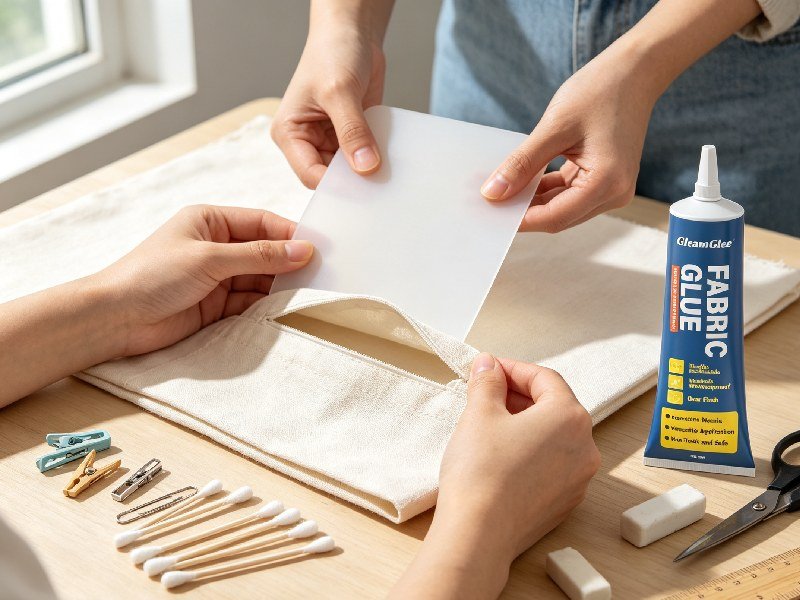
Fabric glue seems simple to use: apply it, press the materials together, and wait. In practice, the quality of the result depends on much more than whether the adhesive feels sticky. Fabric type, surface preparation, application thickness, pressure, alignment, temperature, and curing time all influence whether a repair remains clean and flexible or becomes stiff, visible, and easy to peel.
A common mistake is assuming that a thicker layer creates a stronger repair. In most textile applications, excessive glue causes more problems than it solves. It can bleed through thin fabric, squeeze beyond patch edges, extend drying time, and leave an uncomfortable hard area.
To apply fabric glue correctly, clean and dry the material, test the adhesive on a hidden area, spread a thin and even layer, align the pieces carefully, press the full bonding area, and leave the repair undisturbed until fully cured. GleamGlee Fabric Glue begins setting in approximately 6–10 minutes and reaches full cure within 24 hours.
Consider a favorite shirt repaired with an embroidered patch. The patch looks secure after ten minutes, so the shirt is worn the same afternoon. A few hours later, one corner begins to lift. The glue may not have failed—the repair was simply used before curing was complete. Understanding these small differences can turn a temporary-looking fix into a durable, professional result.
What Is Fabric Glue Used For?
Fabric glue is used to join, repair, hem, reinforce, or decorate textile materials without visible stitching. It works best on projects that need a flexible bond, such as clothing repairs, patches, curtains, appliqués, ribbons, costumes, soft furnishings, and fabric crafts. A suitable permanent fabric adhesive should dry clear, remain comfortable when the material bends, and tolerate normal washing after full curing.
What Makes Fabric Glue Different?
Fabric is constantly moving. A shirt bends at the elbows, jeans stretch at the knees, curtains fold under their own weight, and cushion covers experience repeated pressure. A general-purpose glue may grip textile fibers at first but dry into a rigid layer that cracks, feels uncomfortable, or separates when the material flexes.
Fabric glue is formulated to create a bond that moves with the textile. The adhesive must have enough wetting ability to contact the fiber surface, but it should not soak so deeply that it leaves a dark patch or stiff area. This balance is particularly important on lightweight clothing, visible hems, and decorative repairs.
A practical fabric adhesive should provide several properties at the same time:
- Controlled flow during application
- Consistent contact with textile fibers
- Flexible movement after curing
- A clear or low-visibility finish
- Resistance to normal handling and laundering
- Enough working time for accurate positioning
The bond is not created by glue thickness alone. It depends on effective contact between the adhesive and both textile surfaces. A thin, continuous film generally performs better than a heavy bead that remains trapped between the materials without spreading evenly.
GleamGlee Fabric Glue is designed to dry transparent and remain soft and elastic after curing. This makes it suitable for repairs where comfort and appearance matter as much as initial bonding strength.
When Can Fabric Glue Replace Sewing?
Fabric glue can replace sewing when the bonded area is broad enough, the materials can lie flat, and the repair does not support a heavy load. It is particularly useful for people who do not own a sewing machine or need to complete a neat alteration without visible thread.
Common no-sew applications include:
- Shortening trousers, skirts, and curtains
- Attaching decorative patches to jeans or jackets
- Securing lace, ribbon, appliqués, and fabric trim
- Closing small tears in low-tension areas
- Reinforcing loose fabric edges
- Repairing detached linings
- Adding sequins, rhinestones, or fabric decorations
- Building felt ornaments, banners, and school projects
Fabric glue can also hold a patch in position before stitching. This combined method prevents movement during sewing and may reduce edge lifting.
The repair area should still be evaluated realistically. A decorative patch on the front of a jacket experiences different forces from a side seam pulled every time the jacket is worn. A curtain hem may remain stable for years because it hangs freely, while a trouser hem is exposed to repeated washing, walking friction, and accidental pulling.
For most no-sew projects, the adhesive should cover the contact area instead of being placed only at a few isolated points. Broad and even contact distributes stress more effectively and reduces the chance of peeling.
Are Permanent and Temporary Glues the Same?
Permanent and temporary fabric glues are designed for different jobs. Permanent adhesive is intended to remain in the textile and continue holding during normal use. Temporary adhesive is generally used to position fabric before sewing, embroidery, quilting, cutting, or fitting.
Using temporary glue for a permanent repair can lead to early peeling during washing or repeated handling. Using strong permanent glue for temporary positioning can cause the opposite problem because the material may not separate cleanly when adjustment is required.
| Adhesive Type | Main Purpose | Typical Use | Expected Removal |
|---|---|---|---|
| Permanent fabric glue | Long-term bonding | Hems, patches, repairs, decorations | Not intended for removal |
| Temporary fabric glue | Short-term positioning | Quilting, embroidery, pattern placement | Often repositionable or washable |
| Spray fabric adhesive | Broad surface coverage | Templates, craft layers, large layouts | Depends on the formula |
| Fusible adhesive | Heat-activated bonding | Hems, appliqués, interfacing | Usually permanent after heating |
The product label should state whether the adhesive is permanent, temporary, washable, flexible, or heat-activated. These terms describe different performance characteristics and should not be treated as interchangeable.
GleamGlee Fabric Glue is intended for permanent repairs and crafts. It begins setting in approximately 6–10 minutes and fully cures within 24 hours. The repaired item should not be washed, stretched, ironed, or heavily handled during that period.
When Is Sewing Still Better?
Sewing remains the better option when a repair carries weight, experiences repeated pulling, or affects safety. Adhesive can spread force across a surface, but it cannot replace the mechanical reinforcement of thread in every application.
Sewing or professional repair is usually more appropriate for:
- Backpack shoulder straps
- Load-bearing bag handles
- Tight waistbands
- Main garment seams
- Heavy upholstery joints
- Safety equipment
- Climbing and outdoor load systems
- Child-restraint products
- Seat belts
- Heavily stretched sportswear
The condition of the surrounding textile is also important. If the fabric around a tear is thin, sun-damaged, chemically weakened, or badly worn, the glue may hold while the fibers tear next to the repaired area. A larger backing patch or stitched reinforcement may be needed.
A combination of fabric glue and sewing often works well on denim, workwear, costumes, bag linings, and upholstery details. The adhesive keeps the layers flat and stable, while stitches carry repeated tension.
A practical test is to consider what would happen if the repair failed. If failure would only loosen decorative trim, adhesive may be sufficient. If failure could drop a heavy object, damage valuable equipment, or create a safety risk, glue should not be the only reinforcement.
Which Fabrics and Projects Work Best?
Fabric glue generally works best on clean, stable, moderately absorbent materials such as cotton, denim, canvas, felt, and many polyester blends. Thin, delicate, coated, highly elastic, waterproof, or loosely woven fabrics require testing because the glue may bleed through, change the appearance, restrict stretch, or struggle to bond with the surface treatment.
Which Fabrics Bond Well?
Cotton is usually straightforward because its fibers offer a textured surface for adhesive contact. Denim is also well suited to patching and reinforcement because it is thick, stable, and less likely to show minor adhesive penetration. Canvas, felt, and many woven polyester blends are commonly used in bags, costumes, curtains, crafts, and home textiles.
The weave and surface finish are often more important than the fiber name alone. Two polyester fabrics can behave very differently if one is untreated and the other has a stain-resistant or water-repellent coating.
Materials that are commonly suitable for fabric adhesive include:
- Cotton
- Denim
- Canvas
- Felt
- Linen blends
- Polyester blends
- Fabric ribbon
- Many upholstery textiles
- Non-stretch craft fabrics
- Woven patches and appliqués
Dense fabrics may require enough adhesive to reach the fiber surface, but the applied layer should remain thin. Highly absorbent materials may draw the adhesive inward, so a second light application can sometimes be more controlled than one heavy layer.
After curing, bend the test sample several times. A bond that looks good while flat may reveal stiffness or separation when folded. For clothing, comfort is part of performance. The repaired area should not create a hard plate that rubs against the skin or changes how the garment hangs.
Which Fabrics Need Patch Testing?
Patch testing is particularly important on silk-like materials, satin, velvet, lace, dark textiles, coated outdoor fabrics, stretch fabrics, and very thin polyester. The goal is not only to confirm that the glue bonds, but also to verify that it does not leave a visible mark.
Thin textiles can allow adhesive to pass through the weave and create a darker or shinier area. Velvet may lose its raised texture under pressure. Lace may provide too little continuous surface for an even bond. Stretch fabrics may become restricted if the adhesive layer is too thick or wide.
Waterproof and stain-resistant finishes create another challenge. These treatments are designed to prevent liquids from wetting the surface, which may also reduce adhesive contact. Washing can remove some production residue, but permanent coatings may remain.
A useful patch test should reproduce the actual repair method:
- Use the same two materials planned for the project.
- Apply the same approximate amount of glue.
- Use the same pressure.
- Allow a full 24-hour cure.
- Bend, stretch, and inspect the sample.
- Wash only if both the fabric and adhesive are washable.
Check for discoloration, gloss, bleed-through, yellowing, reduced stretch, stiffness, and edge lifting. A test patch can prevent irreversible damage to an expensive garment, costume, curtain, or upholstered item.
Which Repairs Suit Fabric Glue?
The best fabric-glue projects provide enough bonding area to distribute stress and can remain undisturbed during curing. Hems and patches are reliable examples because adhesive can be applied across a wide overlap instead of being concentrated along a narrow torn edge.
| Project | Practical Bonding Method | Useful Overlap or Working Area |
| Trouser or skirt hem | Thin line inside a pressed fold | Usually 10–20 mm |
| Denim patch | Even layer across the patch back | Extend 10–20 mm beyond damage |
| Curtain hem | Work in short measured sections | About 20–30 cm per section |
| Appliqué | Thin coverage with a clean outer margin | Cover most of the back surface |
| Cushion tear | Add a backing patch behind the tear | At least 10 mm beyond weak fibers |
| Ribbon or lace trim | Narrow continuous line or controlled dots | Match the width of the trim |
These measurements are practical starting points, not fixed engineering standards. Thick, heavy, or highly stressed fabrics may require a larger overlap, while small decorations may need only a controlled dot of adhesive.
Fabric glue is also useful for costumes, banners, table runners, fabric book covers, holiday decorations, tote bags, felt crafts, plush-toy repairs, loose linings, and decorative work on hats or caps.
For tears, an internal backing patch is usually more dependable than gluing the two torn edges directly together. The backing patch creates a larger contact surface and supports the weakened fibers surrounding the damage.
Are Heavy-Stress Repairs Suitable?
Heavy-stress repairs require careful evaluation because fabric glue behaves differently under shear, stretching, and peeling. A broad patch pulled evenly across its surface may remain secure, while a narrow edge repeatedly lifted upward can peel even when the adhesive itself is strong.
High-stress areas include:
- Knees and elbows
- Waistbands
- Pocket openings
- Underarm seams
- Bag handles
- Shoe straps
- Upholstery seams
- Stretch leggings
- Work uniforms
- Children’s play clothing
Rounded patch corners generally perform better than sharp corners because they are less likely to catch and concentrate force at one point. The patch should extend beyond the damaged fibers into stronger surrounding material. For moderate repairs, an overlap of approximately 1–2 cm around the damage is often a practical starting point.
Movement during curing is especially damaging in these applications. If a stretched garment is glued while under tension, the repaired area may wrinkle or pull when the fabric returns to its normal shape. The item should usually be positioned in its relaxed state during bonding.
Repeated hot washing, tumble drying, sweat, abrasion, and body movement can increase stress. In these situations, a larger patch, more complete edge coverage, or additional stitching may be needed.
How Do You Prepare Fabric?

Prepare fabric by removing dirt, oil, lint, fabric softener, old adhesive, and loose fibers, then allow the area to dry completely. Prewash new washable materials when appropriate, test the glue on a hidden section, flatten the repair zone, and gather protective sheets, clips, applicators, and weights before applying adhesive.
Do You Need to Prewash Fabric?
Prewashing is useful for many new washable fabrics because manufacturing residue, sizing agents, loose dye, and finishing treatments may affect adhesion. It also reveals whether the material shrinks before the repair is completed.
Use the garment care label as the first guide. Cotton, denim, washable polyester, and many craft fabrics can usually be washed before bonding. Structured garments, coated outdoor materials, delicate textiles, upholstery, and dry-clean-only items may require local cleaning instead.
When prewashing is appropriate:
- Do not use fabric softener.
- Follow the care-label temperature.
- Rinse away detergent thoroughly.
- Dry the material completely.
- Avoid starch and ironing spray.
- Flatten wrinkles before applying glue.
Fabric softener is a common source of weak adhesion because it leaves lubricating compounds on the fibers. These substances make fabric feel smooth but may reduce the glue’s ability to wet the surface.
Existing garments do not always need a full wash. A small repair area can often be cleaned with a damp cloth and a little mild detergent. Any soap should be rinsed away, and thick seams or folded areas need additional drying time.
Never apply fabric glue to damp material. Moisture can slow curing, dilute the adhesive at the bonding surface, and create an uneven result.
How Do You Clean and Dry the Area?
Begin by trimming loose threads that prevent the materials from lying flat. Use a lint roller, soft brush, or clean cloth to remove hair, dust, and fiber fragments. Oily marks should be cleaned with a method suitable for the specific textile.
Old adhesive requires caution. Remove only loose or unstable residue. Pulling hardened glue away from a delicate weave may damage the fibers and enlarge the tear. If old adhesive has soaked deeply into the material, test whether the new product can bond to that surface.
The prepared area should be:
- Clean
- Completely dry
- Flat
- Free from lint
- Free from oil and fabric softener
- Supported from underneath
- Large enough for a stable overlap
Place wax paper, a silicone sheet, or another non-stick barrier behind a tear or seam. This prevents the adhesive from bonding the front and back of the garment together.
Ordinary paper is not a suitable protective layer because wet glue may attach to the paper fibers. Plastic film can work in some situations, but it may wrinkle or trap moisture. A smooth, non-stick sheet is usually easier to remove after setting.
For hems, pressing the fold before gluing improves alignment. Use only the temperature permitted by the fabric care label.
How Do You Test the Glue?
A useful glue test checks adhesion, appearance, and flexibility. Apply the product to a hidden seam allowance, inside hem, spare patch, or fabric offcut. Use the same materials and approximate application thickness planned for the final repair.
Allow the test to cure for the full recommended period. Judging the result after ten minutes only shows early handling strength. It does not reveal final flexibility, appearance, or wash performance.
After 24 hours, inspect the sample for:
- Darkening
- Gloss changes
- White or cloudy marks
- Yellowing
- Stiffness
- Bleed-through
- Edge lifting
- Reduced stretch
- Surface damage
Bend the sample several times and lightly pull the materials in the direction they will move during normal use. For washable items, conduct a gentle wash test only after full curing.
Testing is especially valuable for dark textiles because transparent adhesive may still create a visible shine. It is also important for stretch materials, where a glue can hold strongly but restrict movement.
For private-label product evaluation, testing should cover multiple fabric groups. Cotton, denim, felt, polyester, canvas, and stretch blends should be assessed separately because one successful result does not prove universal compatibility.
What Tools Should You Prepare?
Preparing tools before opening the adhesive reduces rushed decisions. Once glue is placed on the fabric, there may be only a few minutes to spread, align, and secure the materials.
Useful tools include:
- Fabric glue
- Precision nozzle or applicator
- Non-stick protective sheet
- Fabric scissors
- Tweezers
- Tailor’s chalk
- Measuring tape
- Fabric clips
- Small flat weights
- Cotton swabs
- Scrap fabric
- Disposable spreading tool
- Gloves when required
The protective sheet should be positioned before dispensing glue. Clips and weights should also be tested on the fabric to make sure they do not leave permanent marks.
For small decorations, tweezers help position sequins, rhinestones, lace, and appliqués without spreading glue onto visible surfaces. For larger patches, a flat applicator creates a more consistent film than thick beads.
Long hems are easier to manage when divided into sections of approximately 20–30 cm. Applying adhesive across an entire curtain width at once can cause one end to begin setting before the other end is aligned.
A clean work surface, good lighting, and enough time for full curing are as important as the adhesive.
How Do You Apply Fabric Glue?
Apply fabric glue as a thin, even film, then align the materials carefully and press the entire bonding area. Secure the project so it cannot shift, remove excess adhesive before it cures, allow approximately 6–10 minutes for initial setting, and leave GleamGlee Fabric Glue undisturbed for up to 24 hours before washing, ironing, stretching, or heavy use.
How Much Glue Should You Apply?
Use enough adhesive to create continuous contact between the materials without saturating the textile. A thin, even film generally provides better flexibility and a cleaner appearance than a raised bead.
Too little glue leaves dry gaps, particularly around patch edges. Too much glue can bleed through, squeeze out, increase curing time, or leave a stiff repair. The right amount depends on the fabric’s thickness, absorbency, and surface texture.
| Application Appearance | Likely Meaning | Adjustment |
| Separate dots with visible dry gaps | Insufficient coverage | Spread into a continuous film |
| Thin, slightly wet layer | Suitable starting point | Press and inspect |
| Raised ridges or wet pools | Excess adhesive | Remove extra glue before bonding |
| Glue squeezing from every edge | Too much glue or pressure | Reduce the applied amount |
| Dry patch edge after pressing | Incomplete coverage | Add a very small amount locally |
On felt, canvas, and coarse fabric, adhesive may absorb quickly. Apply a controlled amount and observe the surface instead of immediately adding a heavy second layer.
For patches, spread glue across most of the back while avoiding a thick ridge at the outer edge. For hems, use a narrow continuous line inside the fold. For sequins and small decorations, one controlled dot is often enough.
More adhesive does not compensate for dirty fabric, weak fibers, or insufficient curing time.
How Do You Spread It Evenly?
Hold the nozzle close to the material and dispense slowly. Long strands of glue are difficult to control and may land outside the repair area. Use the included applicator or a disposable flat tool to spread the adhesive from the center toward the edges.
For an internal patch:
- Place a non-stick sheet behind the tear.
- Position the patch beneath the damaged area.
- Lift one side without moving the patch.
- Apply a thin layer.
- Repeat on the other side.
- Close the fabric and press outward.
For a folded hem, apply adhesive inside the fold rather than on the visible edge. This reduces squeeze-out and produces a cleaner finish.
Do not continue brushing the adhesive after it begins developing a surface skin. Reworking partially setting glue can create lumps, uneven thickness, and weak areas.
Large projects should be divided into smaller sections. Since the product begins setting in approximately 6–10 minutes, the working process should be planned before application begins.
Even coverage is most important near the edges. A patch may feel secure in the middle but begin failing if one uncovered corner catches on another surface.
How Do You Align and Press the Fabric?
Mark the intended position before applying glue. Tailor’s chalk, measured fold lines, or small pieces of low-tack tape can help maintain alignment without leaving permanent marks.
Lower one edge of the patch or folded fabric first, then gradually place the remaining surface. This reduces wrinkles and trapped air. Press from the center outward so the adhesive distributes evenly.
Pressure should be firm enough to create full contact but not so strong that the glue is forced through the weave. Delicate fabrics require lighter pressure than denim or canvas.
Suitable holding methods include:
- Hand pressure for small details
- Flat weights for patches
- Fabric clips for hems
- Non-marking clamps for thick materials
- Low-tack tape for temporary positioning
- Shaped supports inside hats or bags
Curved items should be supported in their normal shape. Flattening a hat, cushion, or bag during curing can create tension when the object returns to its original form.
Check the visible side immediately after pressing. Remove squeeze-out according to the product instructions before it hardens. Avoid rubbing wet adhesive across the material because this can enlarge the mark.
Once the materials are aligned, do not repeatedly lift and reposition them. Each movement can reduce coverage and introduce lint into the bond.
How Long Should It Set?
Initial set time and full cure time refer to different stages. Initial setting means the materials have begun to hold together. Full curing means the adhesive has developed its intended flexibility, durability, and resistance to handling.
GleamGlee Fabric Glue begins setting in approximately 6–10 minutes. During this period, the repair should remain pressed or secured. Even when the pieces no longer slide, the adhesive underneath may still be wet.
Allow up to 24 hours for full curing. Thick fabric, excessive glue, cool conditions, folded seams, and limited airflow may slow the process.
| Time After Bonding | Appropriate Handling |
| First 6–10 minutes | Align, press, and secure |
| 10–60 minutes | Keep flat and avoid movement |
| First several hours | Do not stretch, wear, or load |
| Up to 24 hours | Allow complete curing |
| After full cure | Wash or iron only as permitted |
Do not use a hot iron, hair dryer, or radiator to force faster curing unless the instructions specifically allow it. Direct heat can damage the fabric, cause uneven curing, or drive adhesive through thin material.
Using the repaired item too soon is one of the most common avoidable mistakes. Waiting a full day often improves durability more than adding extra glue.

What Mistakes Should You Avoid?
Avoid using fabric glue on dirty, damp, coated, or untested material. Do not apply a thick layer, leave dry edges, move the project during curing, or wash and iron it too early. Most failures result from poor preparation, excessive adhesive, incomplete contact, unsuitable stress conditions, or treating initial set time as full cure time.
Does More Glue Create a Stronger Bond?
A thicker glue layer does not automatically improve strength. Once both surfaces are adequately coated, excess adhesive often creates a soft internal mass that takes longer to cure and may become stiff after drying.
Strength comes from effective surface contact. A thin film spread across a wide patch is generally more reliable than a thick bead placed only around a tear. The wider patch distributes movement across a larger area and reduces concentrated stress.
Excess adhesive may cause:
- Visible squeeze-out
- Bleed-through
- Longer curing time
- Stiffness
- Uneven drying
- Glossy marks
- Uncomfortable repairs
- Increased dirt collection around the edges
If a repair fails, examine the failure pattern. If glue remains firmly attached to one material but separates from the other, surface contamination or incompatibility may be the cause. If the entire patch peels away cleanly, the fabric may have a coating. If only the corners lift, the edges may not have received enough adhesive.
Adding more glue without identifying the cause often repeats the same problem.
A larger overlap, cleaner surface, rounded patch shape, and uninterrupted curing period usually improve durability more effectively than simply increasing adhesive volume.
Why Does Glue Bleed Through?
Bleed-through occurs when liquid adhesive travels through gaps between fibers and reaches the visible side. It is most common on thin, loose, sheer, or highly absorbent textiles.
Typical causes include:
- Applying a heavy bead
- Pressing too firmly
- Using glue that flows too quickly for the fabric
- Leaving wet pools beneath a patch
- Applying directly to the thinner material
- Skipping a hidden-area test
Apply the adhesive to the thicker or less visible material when possible. Spread it into a thin layer before bringing the surfaces together. On sheer fabric, even a small dot can spread farther than expected.
A non-stick sheet behind the repair prevents glue from passing through a tear and bonding separate garment layers together.
If adhesive appears on the visible side, do not rub it aggressively. Rubbing may enlarge the affected area and push glue deeper into the fibers. Follow the cleanup instructions for the specific product and test any cleaning method first.
For valuable silk, formalwear, antique textiles, or very sheer material, professional repair or fine stitching may provide a safer visual result.
Why Do Edges Lift or Peel?
Edges lift because peeling force is concentrated along a narrow line. A patch can be firmly bonded across the center while one uncovered corner begins separating.
Common causes include:
- Insufficient adhesive near the edge
- Dirty or coated material
- Sharp patch corners
- Inadequate pressure
- Movement during curing
- Washing before full cure
- A patch that is too small
- Weak surrounding fibers
- Repeated stretching in one direction
Rounded corners are less likely to catch than square points. A patch should extend into sound fabric beyond the damaged area. An overlap of approximately 1–2 cm is often useful for everyday repairs, although heavier or weaker materials may require more.
If an edge has already lifted, inspect it before adding new glue. Lint, dirt, and hardened residue can prevent fresh adhesive from contacting the textile. Clean the area and remove only loose material that can be lifted without damaging the weave.
A repair that repeatedly lifts at the same point may need a larger patch or discreet stitching. The failure may be caused by the movement pattern of the item rather than basic adhesive strength.
When Can You Wash or Iron Fabric?
Wait until the adhesive is fully cured before washing or ironing. For GleamGlee Fabric Glue, the recommended full curing period is up to 24 hours.
A repair washed too soon is exposed to water, detergent, bending, friction, and spinning before the adhesive has developed its final properties. Even if it survives the first cycle, early washing may weaken the edges.
For the first wash:
- Follow the garment care label.
- Use a gentle cycle when practical.
- Turn the item inside out.
- Avoid unusually high water temperatures.
- Do not overload the washing machine.
- Dry without pulling the repaired area.
- Inspect the edges before ironing.
A washable adhesive does not change the fabric’s care requirements. If the garment should only be washed in cold water, the repaired garment should still be washed cold.
When ironing is permitted, use the fabric’s recommended temperature. Avoid placing a very hot iron directly over exposed adhesive or decorative materials. A pressing cloth can reduce direct heat exposure.
Wash durability depends on patch size, fabric type, application thickness, curing conditions, detergent, temperature, and laundering frequency—not only on the adhesive formula.
Is GleamGlee Fabric Glue Right for Your Project?
GleamGlee Fabric Glue is suitable for many clothing repairs, hems, patches, curtains, crafts, appliqués, ribbons, sequins, and home-textile projects requiring a clear and flexible bond. It is available in 50 g single-tube and two-tube formats, begins setting in approximately 6–10 minutes, and reaches full cure within 24 hours.
Is the Bond Clear and Flexible?
The adhesive is designed to dry transparent and non-yellowing, helping visible repairs blend into the surrounding material. This is useful for hems, patches, lace, ribbon, decorative trim, appliqués, costumes, curtains, and multi-colored fabric projects.
The cured layer remains soft and flexible rather than becoming hard and brittle. This allows the repair to move with normal bending and folding.
Flexibility should still be assessed according to the project. A curtain hem moves very little compared with stretch leggings. A decorative jacket patch experiences less movement than a patch placed across a knee. Highly elastic garments should always be tested because any adhesive layer can reduce stretch when applied too widely or thickly.
The transparent finish is most discreet when the correct amount is used. Excess glue can create a visible raised area even when the adhesive itself becomes clear. Dark fabrics may also show a slight gloss difference under direct light, so a hidden-area test remains worthwhile.
A successful textile bond should achieve four practical results:
- The materials remain attached.
- The repair stays comfortable.
- The fabric can bend normally.
- The adhesive does not dominate the appearance.
Strength alone is not enough for clothing and visible textile work.
Can the Repair Be Washed and Ironed?
The cured adhesive is designed to tolerate washing and ironing when application and curing instructions are followed. Leave the repair for up to 24 hours before exposing it to water, detergent, stretching, or heat.
The garment care label remains important. Washable fabric glue does not make silk, coated textiles, decorative trim, or delicate material suitable for aggressive laundering.
For dependable results:
- Apply a thin, even layer.
- Press the full bonding area.
- Allow a complete 24-hour cure.
- Follow the garment care instructions.
- Use a gentle first wash.
- Inspect the repair before applying heat.
Different projects face different wash demands. Curtains may be washed only occasionally, while children’s clothing, workwear, and jeans may be laundered frequently. Patch placement also matters. An area exposed to rubbing experiences more wear than a decorative section on the front of a shirt.
Private-label buyers should define wash claims carefully. Meaningful evaluation may include repeated wash cycles, bending after drying, edge inspection, and comparisons across cotton, denim, polyester, and blended fabrics.
Does the Applicator Improve Control?
The fine-point nozzle allows glue to be placed accurately on narrow hems, small tears, patch edges, appliqués, lace, ribbons, sequins, and craft details. The included applicator helps spread adhesive across broader surfaces without leaving thick lines.
The cap includes a built-in pin designed to help keep the nozzle clear between uses. This matters because dried adhesive at the tip can cause users to squeeze the tube too firmly, leading to sudden over-dispensing.
Controlled application provides several practical benefits:
- Less adhesive waste
- Lower risk of bleed-through
- Cleaner patch edges
- More even coverage
- Easier work on small details
- Reduced buildup on visible fabric
- Better control over bond thickness
The 50 g format provides enough adhesive for multiple ordinary repairs without being unnecessarily large for household storage. The two-tube option is useful for users handling several garments, curtains, costumes, craft projects, or repeated repairs.
The applicator does not replace correct technique. It should be wiped before the adhesive hardens, and the nozzle should be closed securely after use. Follow the storage instructions on the package to maintain product consistency.
Can Brands Request Custom Fabric Glue?
GleamGlee supports OEM, ODM, and private-label fabric glue projects for retailers, distributors, craft brands, Amazon sellers, Shopify businesses, importers, and textile-care companies.
Customization can include:
- Existing mature fabric-glue formulas
- Formula adjustments
- Customer logos
- Custom tube or bottle sizes
- Single-unit and multi-pack formats
- Precision nozzles and applicators
- Multilingual labels
- Instruction design
- Retail packaging
- FBA-ready preparation
- Market-specific documentation support
Custom projects can begin from approximately 200 units, depending on the formula, packaging, and production requirements. Printable artwork may be prepared in as little as 2 days for suitable projects. Sample development and delivery commonly require around 7–14 days, while standard bulk production is typically around 20 days. Expedited production may be completed in approximately 15 days when materials and production capacity allow.
Buyers should provide the target fabric types, intended repair scenarios, package size, destination market, expected volume, washability requirements, curing expectations, and any benchmark product.
Samples are particularly important when a product will be marketed for several applications. Cotton, denim, felt, polyester, canvas, curtains, patches, and stretch fabrics should not be treated as identical surfaces.
A clear sourcing brief allows the technical team to recommend a suitable formula, packaging system, label structure, testing plan, production schedule, and quotation without relying on vague “all-fabric” claims.
Conclusion
Applying fabric glue correctly is not about using the largest possible amount of adhesive. Reliable results come from matching the glue to the textile, preparing the surface carefully, applying a thin and continuous layer, aligning the materials accurately, using even pressure, and allowing enough time for complete curing.
For most hems, patches, appliqués, curtains, costumes, ribbons, and household fabric repairs, the process can be reduced to five practical steps:
- Clean, dry, and test the material.
- Apply a thin, even layer.
- Align the surfaces without repeated repositioning.
- Press and secure the entire bonding area.
- Wait for complete curing before washing, stretching, wearing, or ironing.
GleamGlee Fabric Glue is available in 50 g single-tube and two-tube formats. It is designed to produce a transparent, flexible bond that remains soft after drying and can tolerate washing and ironing after full curing.
For retailers, distributors, fabric-care brands, Amazon sellers, and private-label buyers, GleamGlee can provide mature formulas, performance adjustments, custom packaging, multilingual artwork, samples, compliance support, and international logistics solutions.
To request a quotation, prepare the following project details:
- Target fabric types
- Main application scenarios
- Preferred package size
- Single-unit or multi-pack format
- Destination country
- Branding or private-label requirements
- Estimated order quantity
- Curing, flexibility, and wash-performance expectations
- Benchmark product or sample, when available
Contact GleamGlee to discuss ready-to-order fabric glue, bulk purchasing, product samples, custom formulas, private-label packaging, or regional distribution opportunities.





















