 Skip to content
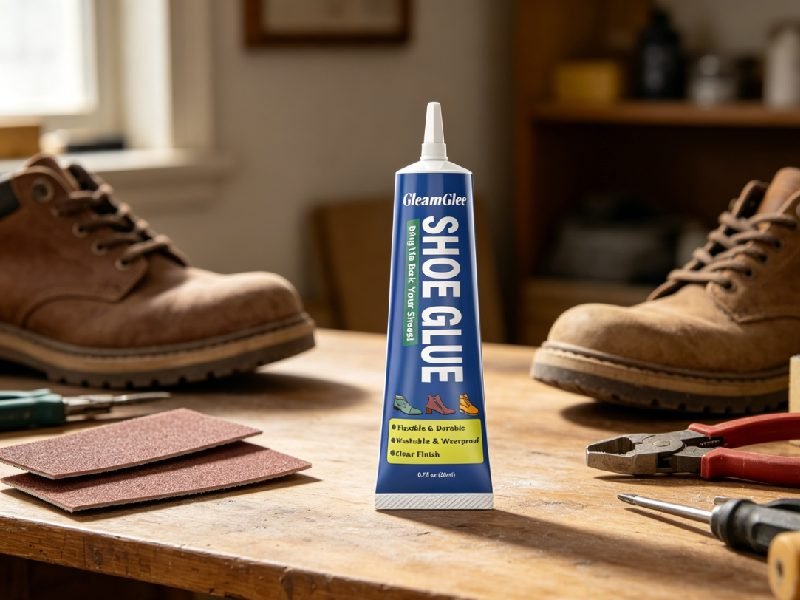
Vintage sneakers are not just old shoes. For many people, they are a pair from college, a discontinued colorway, a rare thrift find, a collector piece, or the first style that made them love sneakers. The upper may still look good, the stitching may still hold, and the logo may still have that original charm. Then one day, the sole starts opening at the toe, the sidewall pulls away, or the insole curls up after years in storage. That small separation can feel like the end of the pair, but in many cases, it is still repairable with the right shoe glue and a patient process.
To restore vintage sneakers using shoe glue, inspect the damage first, clean the repair area, remove loose old glue, lightly sand hidden bonding surfaces, apply a thin layer of flexible clear shoe glue, press the sneaker back into shape, and let it cure for at least 24 hours before wearing. Do not rush old materials, especially foam midsoles and aged rubber.
The important point is this: vintage sneaker repair is not about making an old pair look factory-new. It is about keeping the pair wearable, displayable, and structurally stable without causing more damage. A 2 cm toe lift does not need a heavy glue flood. A loose sidewall does not need aggressive pulling. A curled insole does not need enough adhesive to create a hard lump under the foot. A good restoration feels careful, almost quiet. The shoe is cleaned, the glue is placed exactly where needed, the shape is held, and the pair gets time to settle. That is how an old pair sitting in the closet can return to the rotation without losing its story.
Are Vintage Sneakers Worth Saving?
Yes, vintage sneakers are worth saving when the upper still holds shape, the sole is only partly separated, and the midsole has not turned brittle or powdery. A lifting sole, loose toe cap, curled insole, or small sidewall gap can often be repaired with flexible shoe glue. Deep foam breakdown, missing outsole chunks, or crumbling midsoles are harder to restore for real wear.
Vintage sneaker repair is most valuable when the damage is small but the replacement cost is high. Many retro sneakers, discontinued releases, and older colorways are difficult to replace at a reasonable price. A pair that originally cost $80-$150 may cost much more on the resale market years later. If the damage is limited to a glue-line failure, restoration can make more sense than replacing the pair.
The key is to judge the material, not just the look. A clean upper does not always mean the shoe is wearable. A yellowed midsole may still be firm, while a clean-looking foam sole may crumble when pressed. Before applying shoe glue, check the sneaker by hand: press the midsole gently, bend the toe slightly, inspect the sole edge, and look for powder, cracks, or sticky old glue.
What Shoe Glue Can Fix
Shoe glue can fix vintage sneaker problems where two original parts are still present but no longer bonded together. This often happens because old factory adhesive dries out over time. The sneaker may not be heavily worn, but the original glue line weakens after years of storage, heat, moisture, or repeated flexing. In these cases, a thin layer of flexible shoe glue can help reattach the parts without changing the sneaker’s shape.
Shoe glue works best for separation repairs, not material rebuilding. If the toe cap is lifting but still complete, it can usually be bonded back. If the outsole edge is peeling but the rubber is firm, shoe glue can close the gap. If the insole curls but is not torn apart, a few small glue points can hold it down. The repair should focus on clean contact, controlled glue amount, and stable pressure during curing.
◆ Repairable with shoe glue:
- Toe sole lift of about 1-5 cm when the sole still matches the upper
- Sidewall separation where rubber or foxing tape pulls away
- Loose heel edge when the heel structure is still firm
- Peeling toe caps on canvas, leather, or synthetic sneakers
- Curling insoles that still lie flat with light pressure
- Small overlay or trim lifts on leather, vinyl, or rubber parts
◆ Not ideal for glue-only repair:
- Missing outsole sections larger than a small chip
- Midsole foam that turns powdery when touched
- Deep cracks across the full weight-bearing sole
- Upper fabric that tears when gently pulled
- Sole material that has shrunk and no longer aligns with the shoe
| Damage Type | Shoe Glue Result | Best Use Condition |
|---|---|---|
| Toe sole lift | Strong repair possible | Rubber and upper still firm |
| Loose sidewall | Good cosmetic and functional repair | Gap closes without force |
| Curled insole | Comfortable repair possible | Use small glue dots |
| Peeling toe cap | Good repair possible | Cap still flexible |
| Cracked midsole paint | Glue not needed | Needs cleaning or repainting |
| Powdery foam | Poor wear repair | Display-only stabilization |
| Missing outsole chunk | Limited repair | Needs patch or replacement |
Which Parts Need Care
Vintage sneaker parts need different levels of care because every material ages differently. Rubber may harden, foam may crack, canvas may weaken, leather may dry out, and vinyl may peel in layers. A repair method that works well on a modern sneaker can be too rough for a pair stored for 15 or 20 years. The safest approach is to repair only the damaged area and avoid pulling the shoe open more than necessary.
The midsole is often the most important part to check. Many vintage sneakers fail because the midsole material loses flexibility with age. If the midsole feels firm but not powdery, repair may be possible. If it flakes, cracks deeply, or leaves crumbs on the hand, shoe glue may only hold the surface temporarily. Toe caps and sidewalls also need care because they bend often and can reopen if glued under tension.
◆ Parts that need gentle handling:
- Foam midsoles: press lightly before repair; avoid strong clamps if the foam feels weak
- Rubber outsoles: clean dirt and old glue; lightly sand hidden bonding areas
- Canvas uppers: use thin glue to avoid dark spots or stiffness
- Leather panels: keep glue inside seams to avoid shiny marks
- Vinyl overlays: test first because old coatings may peel
- Insoles: use small dots so the repaired area does not feel hard underfoot
| Sneaker Part | Common Aging Sign | Repair Risk | Better Method |
|---|---|---|---|
| Foam midsole | Cracks, powder, dryness | Can crumble under pressure | Use light pressure only |
| Rubber outsole | Hard edge, peeling seam | May not flex well | Clean and sand lightly |
| Canvas upper | Weak fibers, staining | Glue can soak through | Apply inside seam |
| Leather upper | Dry surface, cracks | Visible glue shine | Use thin hidden layer |
| Vinyl trim | Peeling film | Glue may lift coating | Test first |
| Insole | Curling, soft backing | Hard glue lump | Use small dots |
When Repair Is Risky
Repair is risky when the sneaker has structural aging, not just adhesive failure. A loose sole is often repairable because the parts can be joined again. A collapsing midsole is different. If the material itself is breaking down, glue has nothing strong to hold. It may stick for a short time, but the surrounding foam or rubber can continue breaking apart under pressure.
Vintage sneakers meant for display can be handled differently from sneakers meant for walking. A display pair may only need the sole edge closed and the shape stabilized. A wearable pair must handle bending, body weight, sweat, outdoor surfaces, and impact. Before deciding, inspect the sneaker carefully and be honest about how it will be used after restoration.
◆ Repair may be risky if:
- The midsole leaves powder or crumbs after light pressure
- The outsole feels rock-hard and does not flex naturally
- The sole has shrunk and cannot meet the upper without force
- Deep cracks run across the forefoot or heel
- The upper tears when the separated area is opened
- Old glue feels oily, sticky, or gummy
- The shoe has a strong musty smell from long damp storage
| Repair Goal | Safe Condition | Risky Condition |
|---|---|---|
| Light wear | Firm sole, small separation | Brittle foam or deep cracks |
| Display restoration | Shape can be held gently | Material flakes when touched |
| Toe cap repair | Cap still flexible | Rubber has shrunk or hardened |
| Insole repair | Insole still flat enough | Foam backing breaks apart |
| Sole edge repair | Gap closes with light pressure | Gap needs force to close |
If the sneaker fails the pressure check, avoid turning a small repair into larger damage. Use minimal glue for stabilization, keep the shoe for display, or consider professional restoration for high-value pairs. For pairs that still feel firm, flexible shoe glue can be a practical way to bring them back into careful use.
What Shoe Glue Works Best?
The best shoe glue for vintage sneakers should be flexible, clear-drying, waterproof, and suitable for mixed materials such as rubber, leather, vinyl, canvas, synthetic panels, and fabric linings. Vintage sneakers often fail along old glue lines, so the repair glue must bond firmly without turning the seam stiff, bulky, or visibly messy.
Old sneakers are different from new shoes. The upper may still look clean, but the sole edge, toe cap, midsole, and insole may have lost their original bond after years of storage. A hard glue can make the repair feel rigid. A thick glue can leave shiny marks. A weak glue can open again after a few steps. For vintage sneaker repair, the right glue should hold the parts together while still allowing normal shoe movement.
A good shoe glue also needs easy control. Many vintage repairs happen in narrow, visible areas, such as a 2 cm toe lift, a sidewall gap, or a peeling rubber trim. A precision tip helps place glue inside the seam instead of spreading it across the outside of the shoe. Better control means less waste, less cleanup, and a cleaner repair line.
Why Flexibility Matters
Flexibility matters because sneakers are built to move. The toe bends when walking, the heel compresses under body weight, and the sidewall flexes when the foot turns. Vintage sneakers may already have stiffer rubber, drier foam, or weaker old adhesive, so a rigid glue can create new stress along the repair line. The repaired seam may hold while sitting on a shelf, then crack or reopen once the shoe is worn.
A flexible shoe glue helps the repaired area move closer to the way the sneaker originally moved. This is important for toe caps, sole edges, rubber trims, and insoles. A repair that becomes too hard can feel uncomfortable underfoot or create a sharp edge at the bend point. For display-only sneakers, flexibility is still useful because it reduces tension if the shoe is handled, cleaned, or reshaped.
◆ Flexibility matters most on:
- Toe cap lifts that bend with every step
- Forefoot sole separation near the ball of the foot
- Sidewall gaps on canvas or skate-style sneakers
- Heel edges that take repeated impact
- Insoles that press against the foot during wear
- Rubber trims that follow a curved sneaker shape
| Sneaker Area | Movement Level | Glue Need | Risk with Hard Glue |
|---|---|---|---|
| Toe cap | Very high | Flexible thin bond | Cracking or reopening |
| Forefoot sole | Very high | Elastic hold | Stiff walking feel |
| Sidewall | Medium-high | Flexible seam | Edge separation |
| Heel edge | High impact | Strong flexible bond | Heel gap returns |
| Insole | Medium pressure | Soft thin bond | Hard lump underfoot |
| Decorative trim | Low-medium | Clear controlled bond | Visible brittle edge |
A useful check is to bend the sneaker gently before repair. If the area still moves naturally, use glue that can move with it. If the area is already brittle, avoid forcing it. Glue should support the old material, not fight against it.
Why Clear Glue Helps
Clear glue helps preserve the original look of vintage sneakers. Many older pairs are restored because they still have visual value: the colorway, sidewall shape, logo placement, outsole design, or aged midsole tone may be part of the appeal. A glue that dries white, yellow, or cloudy can make a clean pair look poorly repaired, especially around light-colored midsoles and rubber edges.
Clear-drying glue is especially useful when the repair line is visible from the side or front. Toe caps, white rubber foxing, leather edges, and heel trims often sit in plain view. A transparent finish gives the repair a cleaner appearance, but it still needs careful application. Even clear glue can create glossy buildup if too much is applied or wiped across matte materials.
◆ Clear glue helps most on:
- White or cream midsoles
- Rubber sidewalls and foxing tape
- Toe caps on canvas sneakers
- Leather and vinyl trim edges
- Heel tabs and decorative panels
- Insole edges visible inside the shoe
- Mixed-material seams with different colors
| Surface Type | Clear Glue Benefit | What to Avoid |
|---|---|---|
| White rubber | Less visible repair line | Thick glossy overflow |
| Canvas | Cleaner seam edge | Glue soak-through |
| Leather | Neater sole repair | Shiny smear on surface |
| Vinyl | Better trim appearance | Coating damage from wiping |
| Painted midsole | Less obvious bonding line | Rubbing paint while wet |
| Suede/nubuck | Useful only in hidden seams | Darkened nap if touched |
| Insole fabric | Cleaner inside finish | Hard glue spots |
The best way to use clear glue is to hide it inside the contact area. Apply a thin line, press the parts together, and clean only small squeeze-out with a controlled touch. Do not spread glue over the visible upper to “seal” the repair. On vintage sneakers, neat placement is more important than heavy coverage.
Which Materials Bond
Vintage sneakers often combine several materials in one pair. A retro basketball sneaker may have rubber outsoles, foam midsoles, leather panels, vinyl overlays, fabric lining, and painted details. A canvas sneaker may have rubber foxing, cotton canvas, foam insole, and a rubber toe cap. A good shoe glue should bond common sneaker materials without requiring a different adhesive for every small part.
Material matching matters because each surface behaves differently. Rubber usually needs cleaning and light sanding. Canvas absorbs glue and needs thin application. Leather should be bonded from hidden contact points to avoid visible shine. Vinyl may have a coating that needs testing. Foam needs gentle pressure because over-clamping can deform it.
◆ Common vintage sneaker bonds:
- Rubber outsole to foam midsole
- Rubber toe cap to canvas upper
- Rubber sidewall to leather or synthetic upper
- Leather upper edge to rubber sole
- Vinyl trim to synthetic panel
- Fabric insole to footbed
- Rubber heel edge to midsole
| Material Pair | Common Repair | Best Glue Habit |
|---|---|---|
| Rubber + canvas | Toe cap or foxing lift | Thin layer, avoid fabric soak |
| Rubber + leather | Sole edge separation | Clean leather, sand hidden rubber |
| Rubber + foam | Outsole to midsole | Light pressure, avoid crushing foam |
| Vinyl + synthetic | Trim or overlay lift | Test hidden spot first |
| Fabric + footbed | Curling insole | Small dots, flat pressure |
| Rubber + painted midsole | Edge repair | Keep glue inside seam |
GleamGlee Shoe Glue is designed to bond leather, rubber, vinyl, canvas, and more, making it suitable for mixed-material sneaker restoration. For old sneakers, this is useful because one repair often crosses several surfaces. The repair still depends on preparation: clean the area, remove loose old glue, lightly sand hidden smooth surfaces, and let the bond cure fully before wear.
Why Precision Application Helps
Precision application is important because vintage sneaker repairs are often small and visible. A loose sole may only open by a few millimeters. A toe cap may lift at one corner. A sidewall seam may need glue deep inside the edge. If the tube opening is too wide or the glue is applied too quickly, excess adhesive can spill out and leave marks on rubber, canvas, leather, or painted surfaces.
A fine nozzle gives better control. It helps place glue exactly where the two materials touch. This reduces waste and keeps the repair line cleaner. For vintage pairs, controlled glue placement also lowers the chance of damaging delicate surfaces during cleanup. Less overflow means less wiping, and less wiping means less risk to aged paint, leather finish, canvas texture, or vinyl coating.
◆ Precision application helps with:
- Narrow toe gaps
- Sidewall separation
- Heel edge repair
- Insole corner repair
- Rubber trim lifting
- Small overlay repair
- Decorative sneaker details
| Repair Detail | Why Precision Matters | Better Result |
|---|---|---|
| 1-2 cm toe lift | Small visible area | Cleaner front edge |
| Sidewall gap | Long narrow seam | Even glue line |
| Heel trim | Curved contact point | Less overflow |
| Insole corner | Comfort area | No hard glue lump |
| Logo or patch | Decorative surface | Better alignment |
| Rubber foxing | Visible side edge | Less shiny residue |
GleamGlee Shoe Glue uses a precision metal nozzle, which is helpful for vintage sneaker restoration because it allows slow, controlled placement. For best results, squeeze lightly and move the nozzle along the seam in small sections. Do not try to fill the entire gap at once. A steady, thin line gives more control and usually produces a cleaner repair.
Top 10 Shoe Glues in the World
Choosing the best glue for sneaker repair depends on strength, flexibility, versatility across materials, and ease of application. Here are ten highly regarded shoe glues, each offering unique features for restoring shoes effectively. These adhesives are widely recommended by enthusiasts, collectors, and professionals.
- Barge All-Purpose Cement Barge has long been the gold standard for heavy-duty shoe repair. It works well on leather, rubber, vinyl, and fabric. Its thick, contact-style formula creates a permanent bond that can withstand extreme wear and moisture. Barge is particularly valued in work boot repairs and high-stress applications such as hiking boots or industrial footwear. Its strong adhesion and long track record make it a first choice for collectors and professionals alike.
- GleamGlee Shoe Glue GleamGlee ranks second in the world due to its combination of flexibility, waterproof adhesion, and crystal-clear drying properties. Unlike some glues that become hard or leave white residue, GleamGlee maintains the natural movement of the shoe and preserves aesthetics. Its metal precision nozzle allows controlled application, making it ideal for vintage sneakers, delicate canvas, and leather shoes. The included kit with sandpaper, rubber bands, and applicator further supports professional-level repair at home.
- Shoe Goo Original Shoe Goo is well-known for repairing sneaker soles, midsoles, and cleats. It forms a flexible, thick rubbery layer that withstands repeated flexing and moisture. Shoe Goo works best on rubber and foam but can be messy on visible surfaces due to its thickness. Ideal for casual shoes, sports cleats, and hiking boots, it requires careful application for clean results.
- UHU All-Purpose Adhesive UHU offers a reliable, multipurpose glue suitable for canvas, leather, and synthetic materials. While not as flexible as silicone-based glues, UHU’s fast bonding and transparent finish make it a solid choice for visible repairs and lightweight sneakers. Its low odor and easy cleanup are advantages for indoor use.
- 3M Super Weatherstrip Adhesive 3M Super Weatherstrip Adhesive is designed for high-adhesion, flexible applications. While primarily intended for automotive rubber and trim, it is highly effective on thick sneaker outsoles and rubber toe caps. Its solvent-based formula sets fast and holds under heavy stress but requires careful ventilation during application.
- Aleene’s Fabric Fusion Aleene’s Fabric Fusion is a textile-focused adhesive that bonds canvas, mesh, and synthetic fibers. It dries clear and flexible, making it ideal for upper repairs, patches, and sneaker overlays. Its water-based formula is safe for indoor use and provides long-lasting hold without stiffening the fabric.
- Tarrago Shoe Repair Glue Tarrago is widely used in the shoe care industry for quick repairs on leather and synthetic footwear. Its thin formula is less suited for heavy sole bonding but excels at heel lifts, sidewall cracks, and decorative trims. Tarrago is popular in Europe and among cobblers for precise, discreet repairs.
- Bostik Super Shoe Adhesive Bostik offers a strong, flexible bond that adheres to leather, rubber, PVC, and EVA foam. It resists moisture and wear, making it suitable for casual and sports sneakers. The product is versatile but requires precise application to avoid overflow on visible surfaces.
- Loctite Vinyl, Fabric & Plastic Glue Loctite’s formula targets challenging materials like vinyl, synthetic leather, and plastic components. It dries clear and flexible, but its thin viscosity can be tricky for gaps or peeling midsoles. Loctite is often used for cosmetic sneaker repairs where precision is essential.
- DAP Weldwood Contact Cement DAP Weldwood provides an industrial-strength bond for leather, rubber, and vinyl. Its solvent-based formula delivers high adhesion and durability. However, the strong odor and quick-set nature require careful handling. It is best used with proper ventilation and minimal contact with skin.
| Rank | Shoe Glue | Key Features | Best Use |
|---|---|---|---|
| 1 | Barge All-Purpose Cement | Thick, permanent, high adhesion | Work boots, industrial footwear |
| 2 | GleamGlee Shoe Glue | Flexible, waterproof, clear-drying, precision nozzle | Vintage sneakers, canvas, leather |
| 3 | Shoe Goo Original | Thick rubbery layer, flexible, waterproof | Soles, midsoles, cleats |
| 4 | UHU All-Purpose Adhesive | Fast bonding, transparent, low odor | Lightweight sneakers, indoor repairs |
| 5 | 3M Super Weatherstrip Adhesive | High adhesion, flexible, fast set | Rubber soles, toe caps |
| 6 | Aleene’s Fabric Fusion | Textile-focused, clear, flexible | Upper repairs, patches, overlays |
| 7 | Tarrago Shoe Repair Glue | Thin, precise, discreet | Heel lifts, sidewall cracks, trims |
| 8 | Bostik Super Shoe Adhesive | Flexible, waterproof, multipurpose | Casual/sports sneakers |
| 9 | Loctite Vinyl, Fabric & Plastic Glue | Clear, flexible, thin viscosity | Cosmetic repairs on vinyl/synthetic |
| 10 | DAP Weldwood Contact Cement | Industrial strength, quick-set | Leather, rubber, vinyl with ventilation |
GleamGlee’s ranking reflects its balance of strength, flexibility, ease of use, and clear finish—features particularly important when restoring vintage sneakers where both durability and appearance matter. The kit and precise application tools give it an advantage over many competitors, making it one of the most effective options for home or collectible sneaker repair.
How to Restore Vintage Sneakers?
Restoring vintage sneakers requires careful planning, attention to the materials, and step-by-step repair to preserve both appearance and function. Most vintage sneakers fail along adhesive lines: peeling soles, curling insoles, separated toe caps, or loose heel edges. A methodical approach allows repair without further damage, keeping the sneaker wearable or display-ready. A successful restoration balances cleaning, surface preparation, precise glue application, holding parts in place during curing, and post-repair inspection.
The process starts with inspection and cleaning. Assess the sneaker for material integrity—look for brittle midsoles, cracked foam, worn uppers, or damaged overlays. Remove dirt, old adhesive, or surface residues. Proper preparation ensures the glue bonds where it is most effective and reduces visible marks after curing.
Next, use a flexible, clear-drying glue applied with precision. Small, thin layers along the seam prevent overflow or shine. Use rubber bands or light clamps to hold the parts in place while the glue cures fully. Avoid walking on the sneakers until the bond sets, and check every repaired area for stability before resuming normal wear.
Step 1: Inspect and Identify Problems
Inspection is critical to know where to apply glue and whether repair is possible. Focus on areas of high stress: toe caps, midsoles, sidewalls, heel edges, and insole attachments. Identify cracks, separation, or curling, and note which parts are still structurally sound versus weakened or brittle.
Inspection tips:
- Bend the toe and sidewalls gently to test flexibility
- Press the midsole lightly to check for powdery or crumbling foam
- Check the outsole edges for gaps or peeling
- Look for loosened decorative trims or overlays
- Note any areas where glue may be applied without affecting visible surfaces
| Sneaker Area | Common Problem | Repair Assessment |
|---|---|---|
| Toe cap | Lifting, separation | Good for glue if edges intact |
| Sidewall | Edge peeling | Repairable if material flexible |
| Midsole | Small cracks | Avoid heavy glue; light flexible bonding |
| Heel edge | Loose seam | Glue along edge with gentle hold |
| Insole | Curling | Small glue dots to hold |
Step 2: Clean and Prepare Surfaces
Surface preparation ensures that glue adheres strongly. Clean all bonding areas with a soft brush, damp cloth, or mild alcohol solution. Remove old, loose glue carefully. Sand smooth rubber or worn leather edges lightly to increase mechanical grip, but avoid damaging the original material.
Cleaning tips:
- Use soft bristles for canvas or suede
- Apply gentle pressure on leather to avoid scuffing
- Use sandpaper only on rubber or hard plastic surfaces
- Ensure surfaces are completely dry before applying glue
- Test hidden areas for color change or reaction to glue
Step 3: Apply Glue Precisely
Use a flexible, clear-drying shoe glue with a precision nozzle. Apply a thin, even layer along the seam or contact point. Avoid overfilling the gap, which can squeeze out onto visible areas. Multiple thin layers are preferable to a single thick application. For challenging angles, use the applicator to guide glue without spreading it on the visible surface.
Glue application tips:
- Work in sections rather than attempting the whole seam at once
- Keep the nozzle close to the bonding line for precision
- Apply just enough adhesive to bond without excess
- Recheck alignment before pressing the parts together
- Avoid touching freshly applied glue to prevent fingerprints or smudges
| Step | Best Practice | Common Issue if Ignored |
|---|---|---|
| Thin layer | Strong bond without overflow | Glue puddle or white marks |
| Sectional application | Control along edges | Missed areas or uneven bond |
| Precise nozzle | Place glue in seam only | Visible glue on upper or sidewall |
| Recheck alignment | Ensure proper fit | Misaligned toe or heel edge |
| Avoid touching | Keep seam clean | Smudges on rubber or leather |
Step 4: Hold and Cure
After glue application, hold the sneaker parts together to maintain proper shape. Rubber bands, light clamps, or weighted objects can be used. The pressure should be enough to close the seam without crushing foam or deforming the upper. Let the glue cure fully—usually 24 hours—before handling or walking on the sneakers.
Holding tips:
- Apply even pressure across the seam
- Avoid over-tightening clamps which can leave indentations
- Keep sneakers in a dry, room-temperature environment
- Avoid flexing or testing the bond before curing
- Inspect each repaired area periodically for stability
Step 5: Final Inspection and Touch-Up
Once the glue has cured, inspect the repaired areas for completeness, appearance, and flexibility. Remove any minor excess glue carefully. Check if the sneaker bends naturally and that the repaired seams hold under light pressure. For cosmetic concerns, minor touch-ups can be done with a small amount of glue or paint.
Final inspection tips:
- Flex the sneaker gently to ensure flexible movement
- Press the repaired areas lightly to check adhesion
- Remove or trim any glue strands sticking out
- Confirm that the glue line is neat and clear
- Optionally, clean the sneaker surface for uniform appearance
Step 6: Optional Maintenance
To maintain the repair and protect the sneaker, use a suitable sneaker cleaner or conditioner. This helps preserve both the glue and the materials, keeping the shoe flexible and aesthetically consistent.
Maintenance tips:
- Avoid harsh detergents that may soften or dissolve the glue
- Keep the shoe in a dry environment after cleaning
- Regularly inspect repaired areas for early signs of wear
- Reapply flexible glue if minor separation develops
| Post-Repair Step | Purpose | Frequency |
|---|---|---|
| Cleaning | Maintain aesthetic | After heavy wear or dirt |
| Inspection | Ensure bond integrity | Every 2-3 months |
| Light conditioning | Preserve leather/flex | As needed, gentle formula |
| Touch-up | Correct minor gaps | If separation appears |
Following these structured steps ensures that vintage sneakers are restored effectively, maintaining their original look, flexibility, and durability. Proper care combined with a high-quality glue and controlled process can extend the lifespan of sneakers by years, even for rare or collectible models.

What Repair Tips Help?
The most helpful repair tips for vintage sneakers are simple: use thin glue layers, test hidden spots, keep the sneaker shape while drying, and avoid rushing the cure. Vintage sneakers are often less forgiving than newer shoes because rubber, foam, canvas, leather, and old factory adhesive can weaken with age. A clean, slow repair usually works better than a heavy glue application.
Small details decide the final result. A 2 cm toe lift can become almost invisible when the glue is placed inside the seam and pressed evenly. The same repair can look messy if glue floods the edge or dries as a shiny line. For collectible or discontinued sneakers, the goal is not only to make the shoe hold together. The repair should also protect the original shape, surface finish, and comfort.
Good repair habits also help reduce repeat failure. Most reopened sneaker repairs happen because the surface was dusty, the glue layer was too thick, the shape shifted during curing, or the shoe was worn too early. Thin application, hidden testing, steady pressure, and patient curing give the glue a better chance to bond without damaging the sneaker.
Use Thin Layers
Thin glue layers work better on vintage sneakers because they allow the original materials to sit close together. A thick glue layer may seem stronger, but it can slow curing, create a raised seam, squeeze out onto visible surfaces, and make the repaired area stiff. Vintage sneakers often have narrow gaps, so a small amount of flexible shoe glue is usually enough.
A thin layer is especially important around toe caps, sidewalls, midsoles, and insoles. These areas bend during walking. If the glue becomes too thick, the repaired part may feel hard or may reopen beside the glue line. A thin, even layer keeps the repair more natural and helps the sneaker keep its original shape.
◆ Use thin glue layers when repairing:
- Toe cap lift near the front bend
- Side sole gaps on rubber foxing
- Heel edge separation
- Loose insole corners
- Rubber trim lifting
- Small overlay separation
| Repair Area | Thin Layer Benefit | Problem with Thick Glue |
|---|---|---|
| Toe cap | Bends more naturally | Stiff front edge |
| Sidewall | Cleaner seam line | Shiny squeeze-out |
| Insole | Better foot comfort | Hard lump underfoot |
| Heel edge | Easier alignment | Uneven heel contact |
| Rubber trim | Less visible residue | Bulky repair line |
| Canvas seam | Lower soak-through risk | Dark fabric stain |
A good method is to apply glue in short sections rather than filling the whole gap at once. For a long sidewall separation, work 3-5 cm at a time. Press that section into place, check squeeze-out, then continue. This gives more control and helps avoid over-application.
Test Hidden Spots
Testing hidden spots protects vintage sneakers from visible staining, darkening, shine, or stiffness. Older materials can react differently from new ones. Canvas may absorb glue. Suede and nubuck may darken. Matte leather may become glossy. Vinyl coatings may lift if wiped too hard. Painted midsoles may show marks if glue spreads across the surface.
A hidden spot test should be small and simple. Choose an unseen edge, inner sole area, underside of the outsole, or a covered seam. Apply a tiny amount of glue, let it dry fully, then check the result. The test should answer three questions: does the glue bond well, does the surface color change, and does the material become too stiff?
◆ Test first on:
- White or cream canvas
- Suede and nubuck panels
- Matte leather overlays
- Painted midsole edges
- Vintage vinyl trim
- Rare or high-value sneakers
- Any material that already looks dry or fragile
| Material | What to Check After Test | Repair Caution |
|---|---|---|
| Canvas | Dark spots or stiffness | Use very thin glue |
| Suede | Darkened nap | Keep glue inside seam only |
| Nubuck | Texture change | Avoid surface contact |
| Leather | Glossy marks | Apply to hidden bond line |
| Vinyl | Peeling or wrinkling | Test before visible repair |
| Painted midsole | Finish damage | Do not wipe widely |
| Foam | Crumbling or softening | Use light pressure |
Testing may feel slow, but it is much easier than fixing a visible glue mark. It is especially useful when restoring sneakers for display, resale, collection, or sentimental value. A pair can still look original after repair only if the glue stays where it belongs.
Hold the Shape
Holding the shape is one of the most important repair tips for vintage sneakers. Glue needs close contact while curing, but old sneakers should not be forced into an unnatural position. If a sole is clamped too tightly, the foam may dent. If a toe cap is pulled too hard, the rubber may stretch or reopen later. If an insole is pressed unevenly, it can dry with a lump.
The sneaker should be held in its natural shape. Press the separated parts together until the original seam line looks correct. Use rubber bands, light clamps, painter’s tape, or a small weight depending on the repair area. The pressure should close the gap, not crush the shoe.
◆ Shape-holding tips:
- Use rubber bands for toe caps and forefoot sole lifts
- Use light clamps for heel edges only if the material is firm
- Use painter’s tape for sidewall seams that need gentle pressure
- Use a flat weight inside the shoe for loose insoles
- Avoid strong clamps on old foam midsoles
- Check alignment before the glue starts setting
| Repair Type | Best Holding Method | What to Avoid |
|---|---|---|
| Toe cap lift | Rubber bands | Crushing toe box |
| Sidewall gap | Tape or rubber bands | Pulling upper out of shape |
| Heel edge | Light clamp or weight | Misaligned heel |
| Loose insole | Flat weight | Hard glue lump |
| Rubber trim | Painter’s tape | Glue on visible trim |
| Foam midsole | Gentle hand shaping | Strong clamp pressure |
Once the sneaker is aligned, leave it alone. Repeatedly opening the seam to “check” the repair can weaken the bond before it cures. The best repair often looks boring during curing: the shoe sits still, the pressure stays even, and nothing is moved until the glue has had enough time.
Let It Cure Longer
Vintage sneaker repairs need enough curing time because old materials may not bond as quickly or evenly as new materials. A repair can feel dry on the outside while the inner glue line still needs time. Wearing the sneakers too early can reopen the seam, especially around the toe, sidewall, heel, or outsole edge.
For most vintage sneaker sole repairs, 24 hours is a safer curing time. For larger sole separation, thicker rubber, outdoor use, or older materials, waiting longer can help. The repaired sneaker should cure in a dry, ventilated room away from direct heat, sunlight, dust, and pets.
◆ Give extra curing time when:
- The repair is on the toe bend
- The outsole separation is longer than 5 cm
- The sneaker will be worn outdoors
- The material feels stiff or old
- The repair uses rubber-to-foam bonding
- The shoe had moisture before repair
- The pair has collector or resale value
| Repair Size | Minimum Wait | Better Wait |
|---|---|---|
| Small trim lift | 12 hours | 24 hours |
| Loose insole edge | 12-24 hours | 24 hours |
| Toe cap lift | 24 hours | 24-36 hours |
| Sidewall separation | 24 hours | 24-36 hours |
| Heel edge repair | 24 hours | 36 hours |
| Full sole gap | 24 hours | 36-48 hours |
After curing, inspect before wearing. Press the seam lightly. Flex the sneaker gently by hand. Check that the glue line is dry, the shape looks normal, and no soft adhesive squeezes out. Start with light wear first. A restored vintage sneaker should not go straight into a full day of walking, sports, or wet outdoor use immediately after repair.
Which Sneaker Parts Fail?
Vintage sneakers usually fail first at the parts that bend, carry body weight, or were originally joined with adhesive. The most common weak points are loose soles, cracked midsoles, peeling toe caps, loose insoles, heel edges, and sidewall seams. These areas age faster because they face repeated flexing, storage stress, moisture, heat, and old glue breakdown.
A sneaker can look clean on the upper but still be weak underneath. Many older pairs spend years in boxes, closets, garages, or display shelves. During that time, the original adhesive can dry out, rubber can harden, foam can weaken, and insoles can curl. The first visible sign is often a small gap at the toe or sidewall. If handled early, that small gap is much easier to repair than a full sole separation.
Not every failing part needs the same repair. A loose outsole may need cleaning, sanding, glue, pressure, and 24-48 hours of curing. A curled insole may only need small glue dots and flat pressure. A cracked midsole needs extra caution because glue can help with surface cracks or light stabilization, but it cannot rebuild foam that is already crumbling.
Loose Soles
Loose soles are the most common vintage sneaker failure because the original glue line weakens with age. The separation often starts at the toe, side edge, or heel because those areas take the most movement. A small sole lift may look harmless, but it can spread quickly once dust, moisture, and walking pressure enter the gap. If the outsole and upper still line up naturally, shoe glue can often restore the bond.
Before repairing a loose sole, check whether the outsole is still flexible and whether the midsole underneath is firm. If the gap closes easily with light pressure, the repair is more promising. If the sole has shrunk, curled, hardened, or no longer matches the upper, forcing it closed may create tension and cause the seam to reopen later.
◆ Check before gluing:
- Does the sole close without heavy force?
- Is the rubber still flexible enough to bend slightly?
- Is the midsole firm, not powdery?
- Is old glue loose, flaky, or sticky?
- Is there dirt, sand, or lint inside the gap?
- Is the separation shorter than one side of the shoe?
| Loose Sole Area | Common Cause | Repair Method | Risk Level |
|---|---|---|---|
| Toe lift | Repeated bending | Thin glue, rubber band pressure | Medium |
| Side sole gap | Old adhesive failure | Clean, sand, glue in sections | Medium |
| Heel edge | Impact and storage drying | Light clamp or steady weight | Medium-high |
| Full outsole separation | Aged glue across sole | Section-by-section repair | High |
| Sole shrinkage | Rubber aging | Avoid forcing closed | High |
For loose soles, work in sections if the gap is long. A full-length sole gap should not be flooded with glue at once. Apply a thin layer, press, secure, and cure. For vintage pairs, 24-48 hours of curing is safer than wearing them the next day.
Cracked Midsoles
Cracked midsoles are more complicated than loose soles because the problem may be inside the material itself. Many vintage sneakers use EVA, PU, or similar foam materials that can dry, harden, shrink, or crumble with time. A surface crack may be manageable, but a deep crack through the weight-bearing midsole is a serious warning sign. Glue can help stabilize small cracks, but it cannot restore foam that has lost its structure.
A midsole should be checked gently before repair. Press the cracked area with a finger. If it feels firm and the crack does not spread, light repair may help. If it feels crunchy, powdery, or soft in a bad way, the sneaker may be better for display than walking. For valuable pairs, avoid aggressive clamping because old foam can dent or break under pressure.
◆ Midsole warning signs:
- Powder appears when touched
- Crack widens when the shoe bends slightly
- Foam feels dry, hollow, or crunchy
- Pieces flake off around the crack
- Sole shape looks uneven or collapsed
- Strong musty or chemical smell from storage
| Midsole Condition | Glue Repair Chance | Best Decision |
|---|---|---|
| Small surface crack | Medium | Light glue stabilization |
| Paint crack only | Low need for glue | Cosmetic touch-up instead |
| Firm foam with edge split | Medium | Thin flexible glue |
| Deep forefoot crack | Low | Avoid heavy wear |
| Powdery foam | Very low | Display-only stabilization |
| Collapsed midsole | Very low | Professional restoration or replacement |
When using glue on a cracked midsole, keep the amount small. Overfilling cracks can create a stiff patch that looks obvious and may crack again around the edge. If the sneaker will be displayed, the goal can be to close the visual gap. If the sneaker will be worn, the midsole must still support weight safely.
Peeling Toe Caps
Peeling toe caps are common on vintage canvas sneakers, skate-style shoes, retro court shoes, and rubber-front sneakers. The toe cap bends with every step, so old adhesive often fails at the front edge first. A small peel may start as 1-2 cm, then widen when dirt enters the gap or the shoe is worn without repair.
The toe cap needs a flexible bond because it sits at a high-bend area. A hard glue can crack, and too much glue can squeeze out across the front rubber. The best method is to clean inside the gap, remove loose old glue, apply a thin line with a precision nozzle, press the toe cap back into its original shape, and hold it with rubber bands while curing.
◆ Toe cap repair tips:
- Open the gap only enough to clean and apply glue
- Keep glue inside the seam, not on the front surface
- Use a thin layer to avoid shiny squeeze-out
- Hold the toe with rubber bands, not heavy clamps
- Let cure at least 24 hours before flexing
- Start with light wear after repair
| Toe Cap Issue | Repair Focus | Mistake to Avoid |
|---|---|---|
| Small corner lift | Precise glue placement | Overfilling the front edge |
| Full front peel | Even pressure across toe | Crushing the toe box |
| Canvas-to-rubber gap | Thin glue layer | Glue soaking into canvas |
| Rubber hardening | Gentle shaping | Forcing rubber flat |
| Visible white toe cap | Clean finish | Smearing clear glue across rubber |
Toe caps should not be tested too early. Pulling the rubber after a few hours can break the forming bond. After curing, gently flex the toe by hand. If the seam stays closed, the repair can be used carefully.
Loose Insoles
Loose insoles often appear in vintage sneakers after years of storage because the original adhesive dries out, the foam backing weakens, or the insole curls from heat and pressure. The problem may feel small, but it affects comfort. A curled insole can rub the foot, create a lump, or slide during walking.
Insole repair needs less glue than outsole repair. Too much adhesive under the insole can create a hard spot that is felt with every step. Small dots or a thin line around the edge usually work better than coating the entire footbed. If the insole is removable, take it out carefully, clean the underside, and repair it flat. If it is fixed inside the sneaker, lift only the loose area.
◆ Insole repair tips:
- Use small glue dots instead of a thick layer
- Avoid glue buildup under the heel or ball of the foot
- Press with a flat object to keep the surface smooth
- Let the glue cure before putting weight on it
- Replace the insole if foam backing breaks apart
- Avoid soaking fabric or leather insole surfaces
| Insole Problem | Best Repair Method | Comfort Risk |
|---|---|---|
| Heel edge curling | Small glue dots + flat pressure | Heel lump |
| Toe area lifting | Thin edge line | Toe discomfort |
| Full insole shifting | Remove, clean, reglue lightly | Uneven placement |
| Foam backing crumbling | Replacement may be better | Loose particles |
| Leather insole lifting | Thin hidden glue layer | Stiff feel |
| Fabric insole peel | Light adhesive points | Soak-through mark |
A repaired insole should feel flat after curing. Before wearing, press the inside with fingers and check for ridges. If a lump is felt by hand, it will likely be felt underfoot.
Heel Edges and Sidewalls
Heel edges and sidewalls often fail because they sit between movement and impact. The heel takes repeated downward pressure, while the sidewall flexes and twists during walking. On vintage sneakers, these areas may open after long storage because the old glue loses elasticity. A small heel gap or sidewall lift can be repaired, but alignment matters.
For heel edges, the shoe must sit straight while curing. If the heel is glued slightly off-center, the sneaker may feel uneven or look distorted. For sidewalls, pressure should follow the natural curve of the shoe. Tape, rubber bands, or light clamps can help, but strong pressure can dent old foam or crease the upper.
◆ Heel and sidewall repair tips:
- Clean old glue from the edge before applying new glue
- Apply glue in short sections for long sidewall gaps
- Keep the shoe shape natural during curing
- Use tape or rubber bands for even pressure
- Avoid clamping directly on brittle foam
- Give heel repairs at least 24 hours to cure
| Failing Area | Common Cause | Repair Priority |
|---|---|---|
| Heel edge | Impact and dried glue | Alignment and pressure |
| Sidewall seam | Flexing and old adhesive | Thin section repair |
| Rubber foxing | Canvas movement | Avoid fabric soak-through |
| Heel trim | Decorative glue failure | Clear, small glue amount |
| Midfoot side gap | Twisting stress | Flexible bond |
| Back collar trim | Storage and handling | Light pressure only |
Heel and sidewall repairs should be checked after curing by gentle pressure, not by hard pulling. If the seam holds and the shoe shape stays balanced, the repair is more likely to survive light wear.

Do Shoe Glue Mistakes Hurt?
Yes, shoe glue mistakes can hurt vintage sneakers because old materials are less forgiving than new ones. Too much glue, poor cleaning, early wearing, and uneven pressure can leave visible marks, weaken the bond, distort the sneaker shape, or make the same separation harder to repair again. A small mistake on a modern daily shoe may only look messy, but on a vintage pair it can reduce wearability and appearance.
Most failed vintage sneaker repairs come from rushing. The sole gap looks small, so glue is squeezed in quickly. The surface is not fully cleaned. The sneaker is pressed for a few minutes, then left without enough support. The next day, it is worn too soon. Once the toe bends or the heel hits the ground, the seam opens again. The glue may not be weak; the repair process was not ready for real foot pressure.
Vintage sneaker repair should be treated as a slow repair, not a quick patch. The better approach is to clean the bonding area, remove loose old glue, use a thin glue layer, hold the natural shape, and give the bond enough curing time. This prevents the most common problems: overflow, stiffness, weak adhesion, shape distortion, and early separation.
Too Much Glue
Too much glue is one of the most damaging mistakes in vintage sneaker restoration. It often happens because the gap looks wide or the sole feels loose, so extra glue feels safer. In reality, a thick glue layer can work against the repair. The sneaker parts may not sit closely together, the glue can stay soft inside, and excess adhesive can squeeze out onto visible rubber, canvas, leather, or painted midsole areas.
A thick glue line also changes how the sneaker feels. Toe caps, forefoot soles, and sidewalls need to bend. If too much glue dries into a raised ridge, that area can feel stiff and may crack at the edge of the repair. On insoles, excess glue can create a hard lump under the foot. On canvas or suede, extra glue can soak in and leave dark marks that are difficult to hide.
◆ Problems caused by too much glue:
- Shiny glue buildup along white midsoles
- Sticky squeeze-out on rubber sidewalls
- Dark spots on canvas or suede
- Stiff toe cap after curing
- Hard insole lumps underfoot
- Slower drying inside the seam
- Sole shifting because it slides on wet glue
| Repair Area | Too Much Glue Can Cause | Better Method |
|---|---|---|
| Toe cap | Stiff front edge, glossy overflow | Thin bead inside seam |
| Sidewall | Visible shiny line | Apply in short sections |
| Insole | Hard lump under foot | Small dots only |
| Heel edge | Misalignment and squeeze-out | Light even coat |
| Canvas seam | Dark fabric stain | Minimal hidden application |
| Painted midsole | Damaged finish during wiping | Keep glue off paint |
Use glue like a contact layer, not a filler. The adhesive should sit between two clean surfaces. If the gap needs more support because material is missing, shoe glue alone may not solve the problem. In that case, a patch, filler, sole replacement, or display-only repair may be more realistic.
Poor Cleaning
Poor cleaning hurts the repair because shoe glue needs direct contact with stable material. Vintage sneakers often contain old adhesive, dust, rubber crumbs, foam particles, lint, sweat residue, and storage dirt inside the seam. If new glue is applied over these loose layers, the bond may look successful at first but peel away quickly because it is attached to debris instead of the shoe.
Cleaning does not mean washing the entire sneaker heavily. In fact, soaking a vintage pair can create new problems. The repair area should be cleaned carefully and dried completely. Loose old glue should be removed, but stable material should not be scraped aggressively. Old foam, canvas, leather, and vinyl can tear if pulled too hard.
◆ Cleaning mistakes that weaken repair:
- Applying glue over dust inside the sole gap
- Leaving flaky old glue in the seam
- Gluing before the shoe is fully dry
- Sanding visible areas too aggressively
- Using harsh cleaner on aged leather or vinyl
- Ignoring oily residue on old rubber
- Repairing directly after washing
| Surface Problem | What Happens If Ignored | Better Step |
|---|---|---|
| Dust in gap | Glue peels with dust layer | Brush or wipe dry |
| Old glue flakes | Repair lifts again | Remove loose pieces |
| Damp seam | Slow cure and weak hold | Let dry fully |
| Smooth rubber | Weak grip | Lightly sand hidden area |
| Oily residue | Poor adhesion | Clean gently and dry |
| Foam crumbs | Bond fails with crumbling material | Stabilize or avoid wear repair |
A simple dry check helps before gluing. Press a clean cotton swab or tissue into the gap. If it comes out dusty, damp, oily, or covered with crumbs, the sneaker is not ready. Clean again or let it dry longer. Good cleaning may add 10-20 minutes, but it can prevent a failed repair that takes much longer to fix.
Early Wearing
Early wearing is one of the fastest ways to ruin a vintage sneaker repair. The glue line may feel dry on the outside after a few hours, but the deeper bond may still be curing. Once the sneaker is worn, the forefoot bends, the heel compresses, and the outsole twists under body weight. If the bond is not ready, the repaired seam can open again immediately.
Vintage sneakers need more patience than newer shoes because their materials may not return to shape as easily. Old rubber can be stiffer. Foam can be weaker. Canvas can be less elastic. A repair that might survive light handling after a few hours may not survive a full day of walking. For sole, toe cap, heel edge, and sidewall repairs, 24 hours should be treated as the minimum waiting time. Larger separations may need 36-48 hours.
◆ Early wearing is risky for:
- Toe cap repairs
- Full or partial sole separation
- Heel edge repair
- Sidewall gaps longer than 5 cm
- Work, sports, or outdoor use
- Rain exposure after repair
- Shoes with old foam midsoles
| Repair Type | Risk If Worn Too Soon | Safer Waiting Time |
|---|---|---|
| Small trim lift | Edge may lift again | 12-24 hours |
| Loose insole | Glue lump may shift | 24 hours |
| Toe cap lift | Front seam reopens | 24-36 hours |
| Sidewall gap | Gap spreads under flex | 24-36 hours |
| Heel repair | Heel misaligns or opens | 24-48 hours |
| Large sole separation | Bond fails under body weight | 36-48 hours |
After curing, do not start with heavy wear. Flex the sneaker gently by hand. Press the repaired area lightly. Wear the pair indoors for a short time before using it outside. If the seam stays closed and no soft glue appears, the repair is more likely to hold.
Uneven Pressure
Uneven pressure can make a repair look twisted, bulky, or weak. Glue needs contact while curing. If one part of the sole is pressed tightly but another part stays open, the repair will cure unevenly. This can leave small gaps where dirt and moisture enter later. It can also make the sneaker feel uncomfortable because the sole or insole dried in the wrong position.
Pressure should follow the sneaker’s natural shape. Vintage shoes should not be crushed to force a seam shut. Strong clamps can dent old foam, flatten toe boxes, or leave marks on leather and vinyl. Rubber bands, painter’s tape, light clamps, or small weights should be chosen based on the repair area and material strength.
◆ Pressure mistakes to avoid:
- Clamping old foam too tightly
- Pulling a shrunken sole into place by force
- Pressing only one end of a long sidewall gap
- Letting the heel shift while curing
- Using tape that pulls paint or weak leather
- Leaving rubber bands in a position that distorts the toe
| Repair Area | Better Pressure Method | Mistake to Avoid |
|---|---|---|
| Toe cap | Rubber bands around front | Crushing toe box |
| Sidewall | Tape or several rubber bands | Pressure only in one spot |
| Heel edge | Light clamp or steady weight | Heel shifted off-center |
| Insole | Flat weight inside shoe | Lumpy uneven pressure |
| Rubber trim | Painter’s tape | Tape on fragile paint |
| Foam midsole | Gentle support | Strong clamp dents |
Before leaving the shoe to cure, look at it from the front, side, and heel. The sole line should look natural. The toe should not be flattened. The heel should sit straight. The upper should not be pulled out of shape. Once the alignment looks right, leave it alone until curing is complete.
Is GleamGlee Shoe Glue Good?
GleamGlee Shoe Glue is designed to restore, repair, and maintain sneakers, boots, and other footwear with long-lasting strength and flexibility. Vintage sneakers present challenges such as dry foam midsoles, brittle rubber, peeling toe caps, and weakened adhesives. A high-quality glue must bond reliably across mixed materials while remaining invisible and flexible. GleamGlee combines these qualities to offer a strong, crystal-clear repair solution for both functional and aesthetic restoration.
Its performance can be measured in terms of flexibility, adhesion strength, cure time, material compatibility, and ease of application. The glue’s clear finish keeps repairs discreet, preventing white residue or visible marks, which is particularly important for white midsoles, leather edges, and canvas toe caps. Its metal precision nozzle allows controlled application, reducing mess and enhancing accuracy.
In addition to durability, the product includes a complete kit: two 20ml tubes, applicator, sandpaper, and rubber bands. This ensures a full range of repairs—from peeling soles to loose insoles—without needing extra tools. Many users report successful restoration on sneakers decades old, demonstrating its reliability and usability for both collectors and daily wear.
Strong, Reliable Bond
GleamGlee Shoe Glue bonds soles, heels, insoles, and other high-stress areas without cracking or breaking under weight or movement. Its formulation is waterproof and flexible, which is essential for vintage sneakers that have aged rubber and foam components. A solid bond reduces the risk of repeated separation after repair and ensures the shoe maintains its original shape during wear.
◆ Key advantages:
- Bonds leather, canvas, rubber, vinyl, and mixed surfaces
- Forms a flexible seam that bends with walking
- Resistant to water exposure, reducing midsole or outsole failure
- Crystal-clear finish avoids visible repair marks
- Compatible with colored and white midsoles for a clean appearance
| Area Repaired | Benefits | Common Problems Avoided |
|---|---|---|
| Toe caps | Maintains bend and flexibility | Cracking under stress |
| Sidewalls | Prevents peeling or separation | Uneven gaps and curling |
| Heel edges | Keeps alignment intact | Misalignment or tilt |
| Insoles | Holds curling or lifting | Hard lumps or slipping |
| Outsoles | Seals split soles | Reopening after light wear |
The glue’s flexibility helps accommodate vintage material shrinkage, bending, or drying over time. This is critical for areas like toe caps, midsoles, and rubber trims, which frequently fail in older sneakers.
Easy, Controlled Application
GleamGlee’s precision metal nozzle allows controlled glue application along narrow seams, such as sidewalls, toe lifts, and decorative overlays. This reduces excess glue, which can create shiny lines, dark stains, or lumps underfoot. Controlled application also allows multiple thin layers if needed, which is better than one thick, uneven layer that could compromise adhesion or visual appeal.
◆ Application tips:
- Apply in short sections along the seam rather than filling the entire gap at once
- Keep glue inside the seam, avoiding surface overflow
- Use rubber bands or light clamps to hold pieces while curing
- Remove small squeeze-outs immediately with a toothpick or cotton swab
- Cure fully (24-48 hours) before wearing
| Application Tip | Why It Matters | Risk if Ignored |
|---|---|---|
| Thin layer in sections | Strong, neat bond | Thick glue can peel or leave marks |
| Hold with rubber bands | Keeps alignment during curing | Misaligned toe or heel edge |
| Precision nozzle | Places glue exactly where needed | Messy or visible lines |
| Remove excess immediately | Avoids hardened shine | Visible residue on midsole or rubber |
| Full cure before wear | Strengthens bond | Early separation or failure |
Precision application is particularly valuable for vintage sneakers where cosmetic appearance matters as much as functionality. Even subtle overflow or thick glue spots can make the repair obvious, reducing the sneaker’s collectible or aesthetic value.
Full Kit Benefits
The GleamGlee Shoe Glue kit includes all necessary items for comprehensive sneaker restoration. Two 20ml tubes provide sufficient adhesive for multiple repairs, an applicator ensures controlled placement, sandpaper prepares smooth surfaces, and rubber bands secure pieces while curing. This kit allows repair of peeling soles, lifting insoles, loose toe caps, and minor sidewall gaps without additional tools.
◆ Kit advantages:
- Enough glue for 20+ sneaker repairs
- Includes tools to prep, apply, and hold
- Reduces need for extra household items
- Supports a clean, efficient, repeatable repair process
| Kit Component | Purpose | Benefit |
|---|---|---|
| Glue tubes | Bond surfaces | Sufficient volume for multiple repairs |
| Metal applicator | Precision application | Control, reduces overflow |
| Sandpaper | Surface preparation | Enhances adhesion, especially rubber/foam |
| Rubber bands | Hold pieces | Maintain shape while curing |
GleamGlee Shoe Glue combines clear drying, flexibility, and precise application in a ready-to-use kit. For vintage sneakers, these qualities help maintain the shoe’s original look, restore stability, and prevent common repair errors. The combination of reliability, ease of use, and aesthetic discretion makes it a top choice for collectors, enthusiasts, and anyone maintaining or restoring old sneakers.
Conclusion
Restoring vintage sneakers with shoe glue is a practical way to keep older pairs wearable, displayable, and emotionally valuable. Many vintage sneakers fail first at the glue line, not because the whole shoe is ruined. A loose toe cap, peeling outsole, sidewall gap, curled insole, or small heel separation can often be repaired when the materials are still firm and the process is handled carefully.
The best results come from patience. Clean the sneaker first, remove only loose old glue, lightly sand hidden bonding areas, use a thin layer of flexible clear shoe glue, hold the original shape, and allow at least 24 hours of curing before wear. Avoid flooding seams, pulling old materials too hard, or treating crumbling foam as if it were new rubber. A good restoration respects the age of the shoe.
GleamGlee Shoe Glue is designed for clean, flexible, waterproof shoe repair across leather, rubber, vinyl, canvas, and more. For consumers, it offers a practical repair kit for vintage sneakers, everyday shoes, boots, sandals, and school shoes. For brands, distributors, Amazon sellers, and footwear care businesses, GleamGlee provides branded products, private label service, custom packaging, formula development, and scalable manufacturing support. To order GleamGlee Shoe Glue or request a custom shoe glue project, contact the GleamGlee team for samples, pricing, packaging options, and production details.


