 Skip to content

Plastic Glue for Small Home Repairs
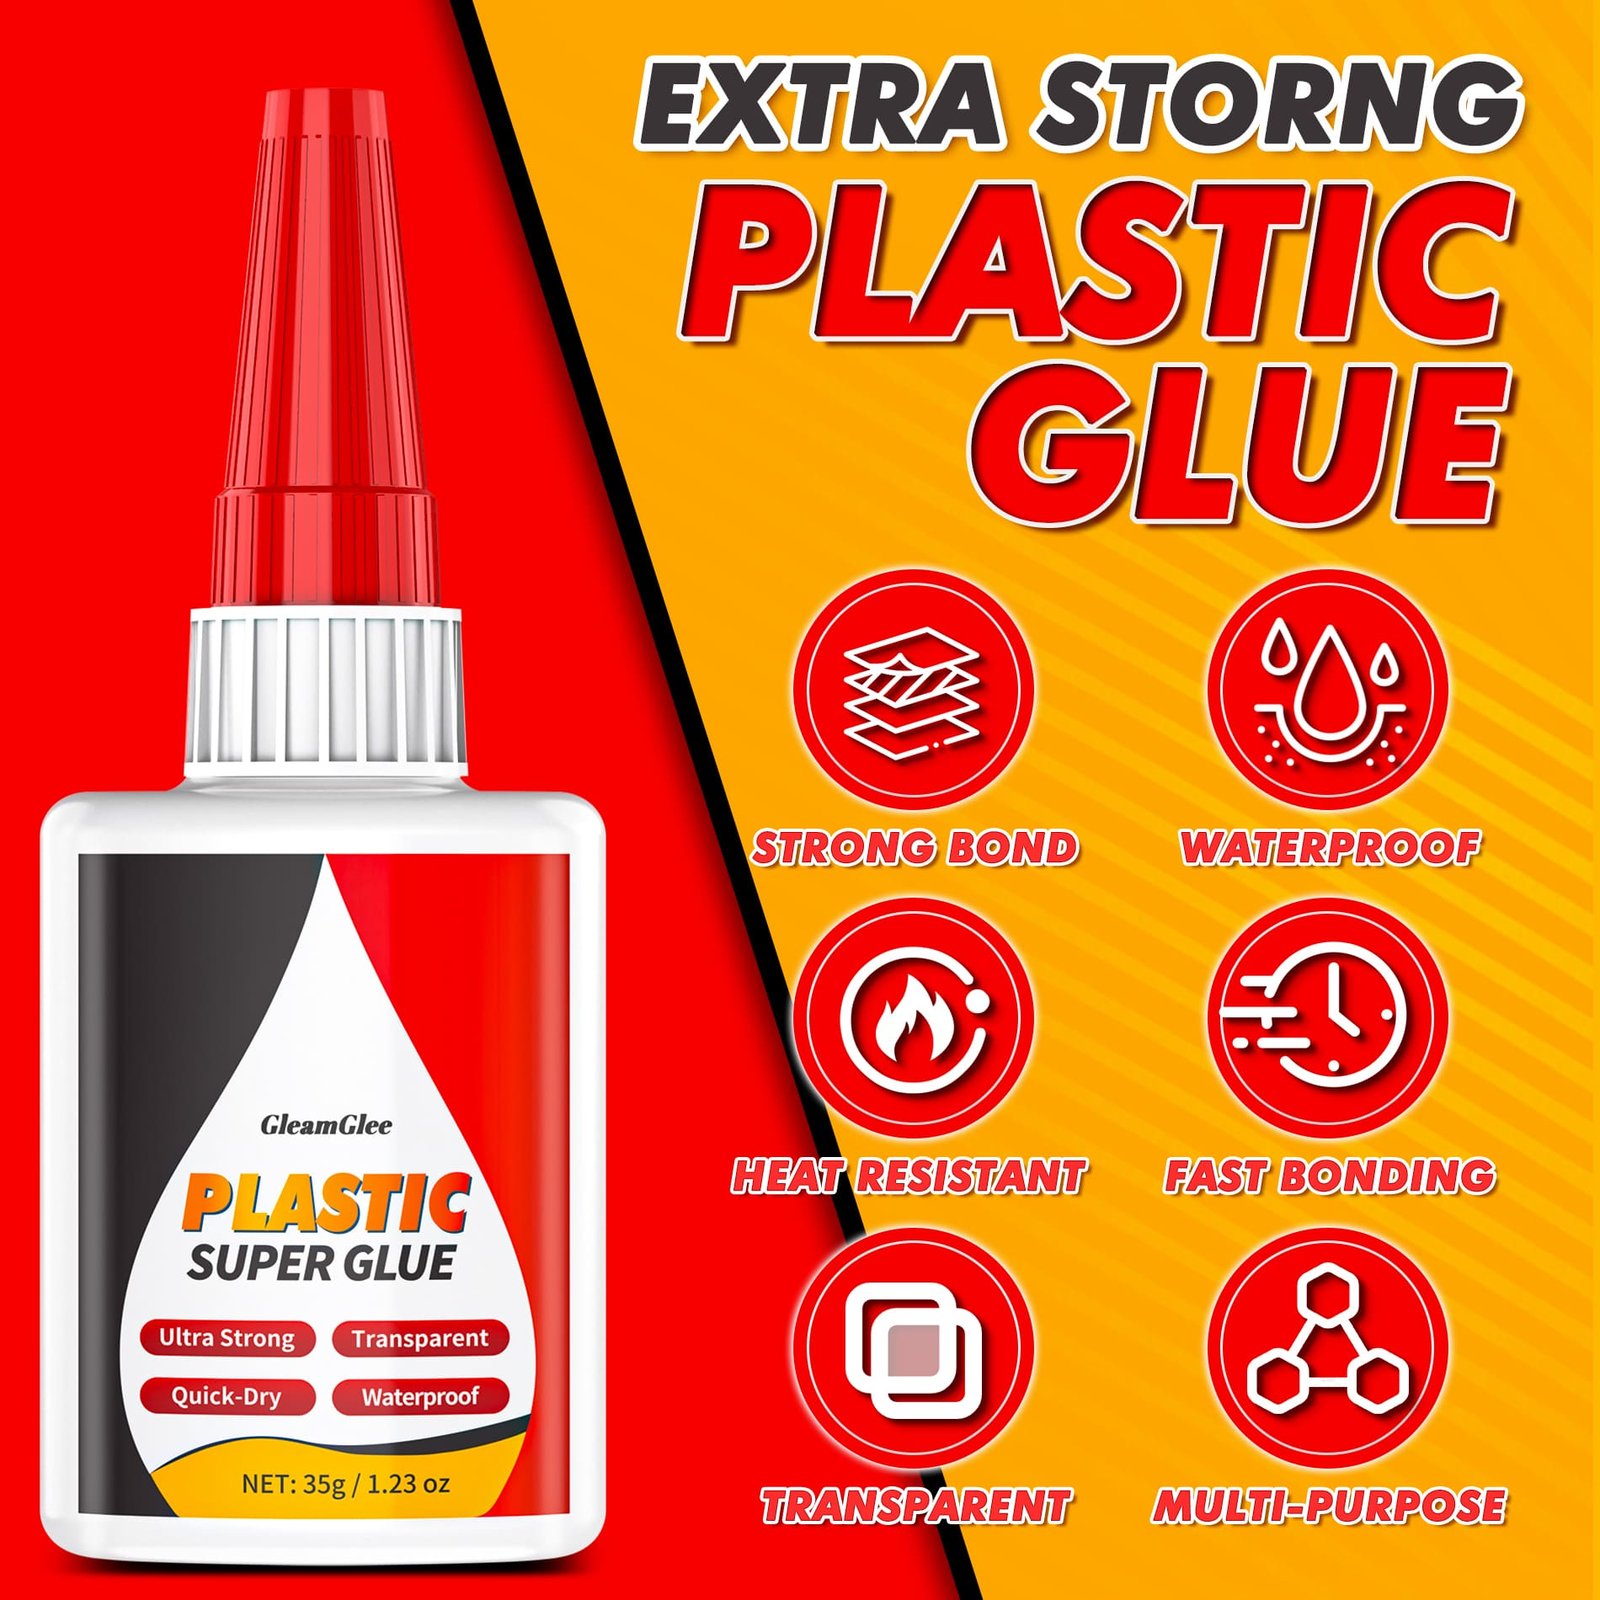
Fast, clear, controlled bonding for small rigid plastic parts found throughout the home, hobby area, garage, and craft space.
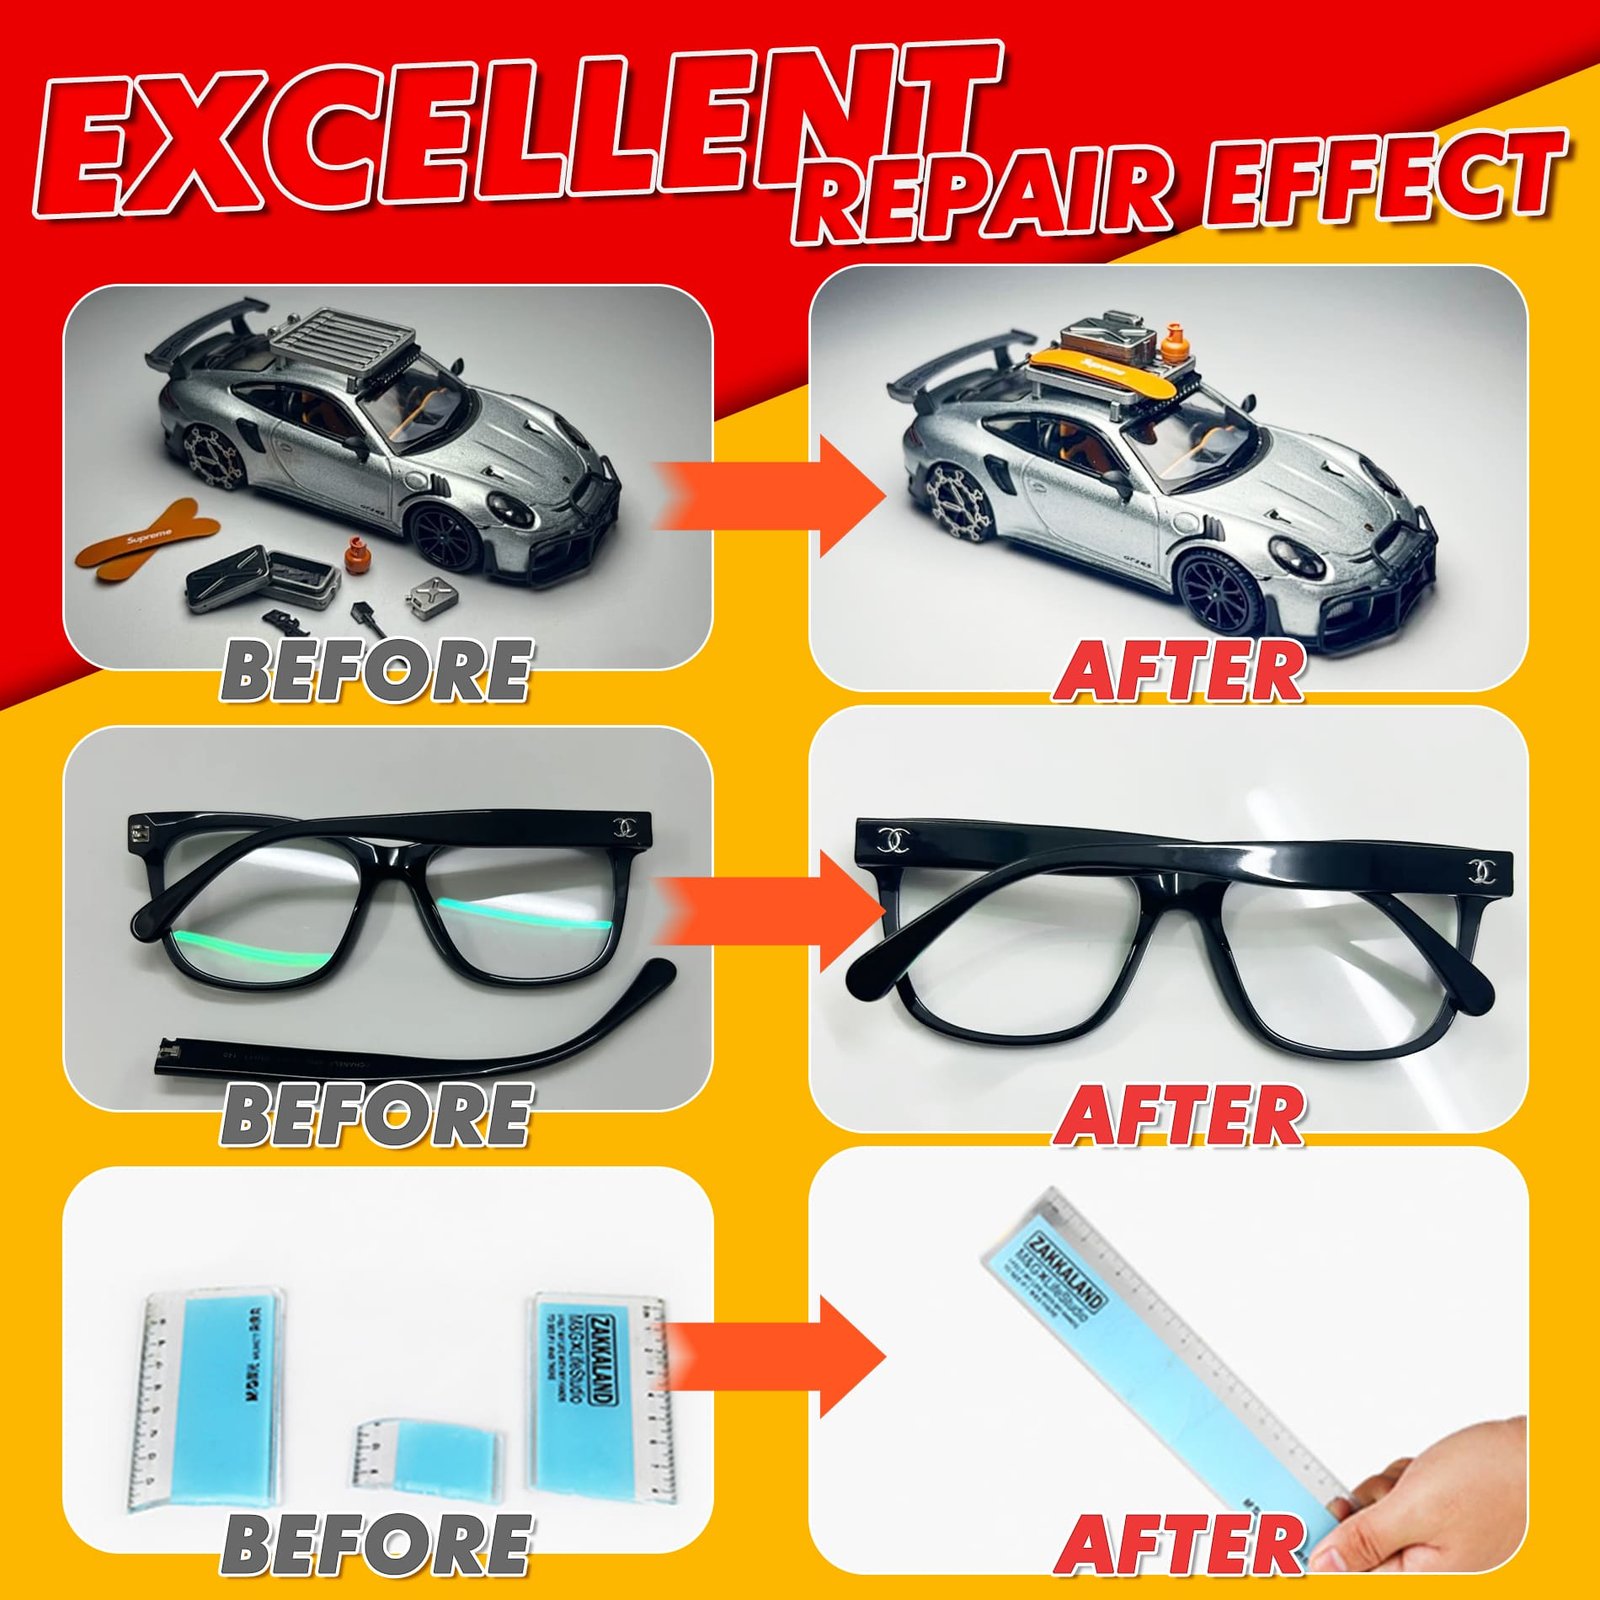
Small plastic damage does not always require a replacement part. GleamGlee Plastic Glue helps reconnect close-fitting rigid pieces with a medium-viscosity liquid formula designed for controlled application.
- Sets in seconds for brief hand-positioned repairs
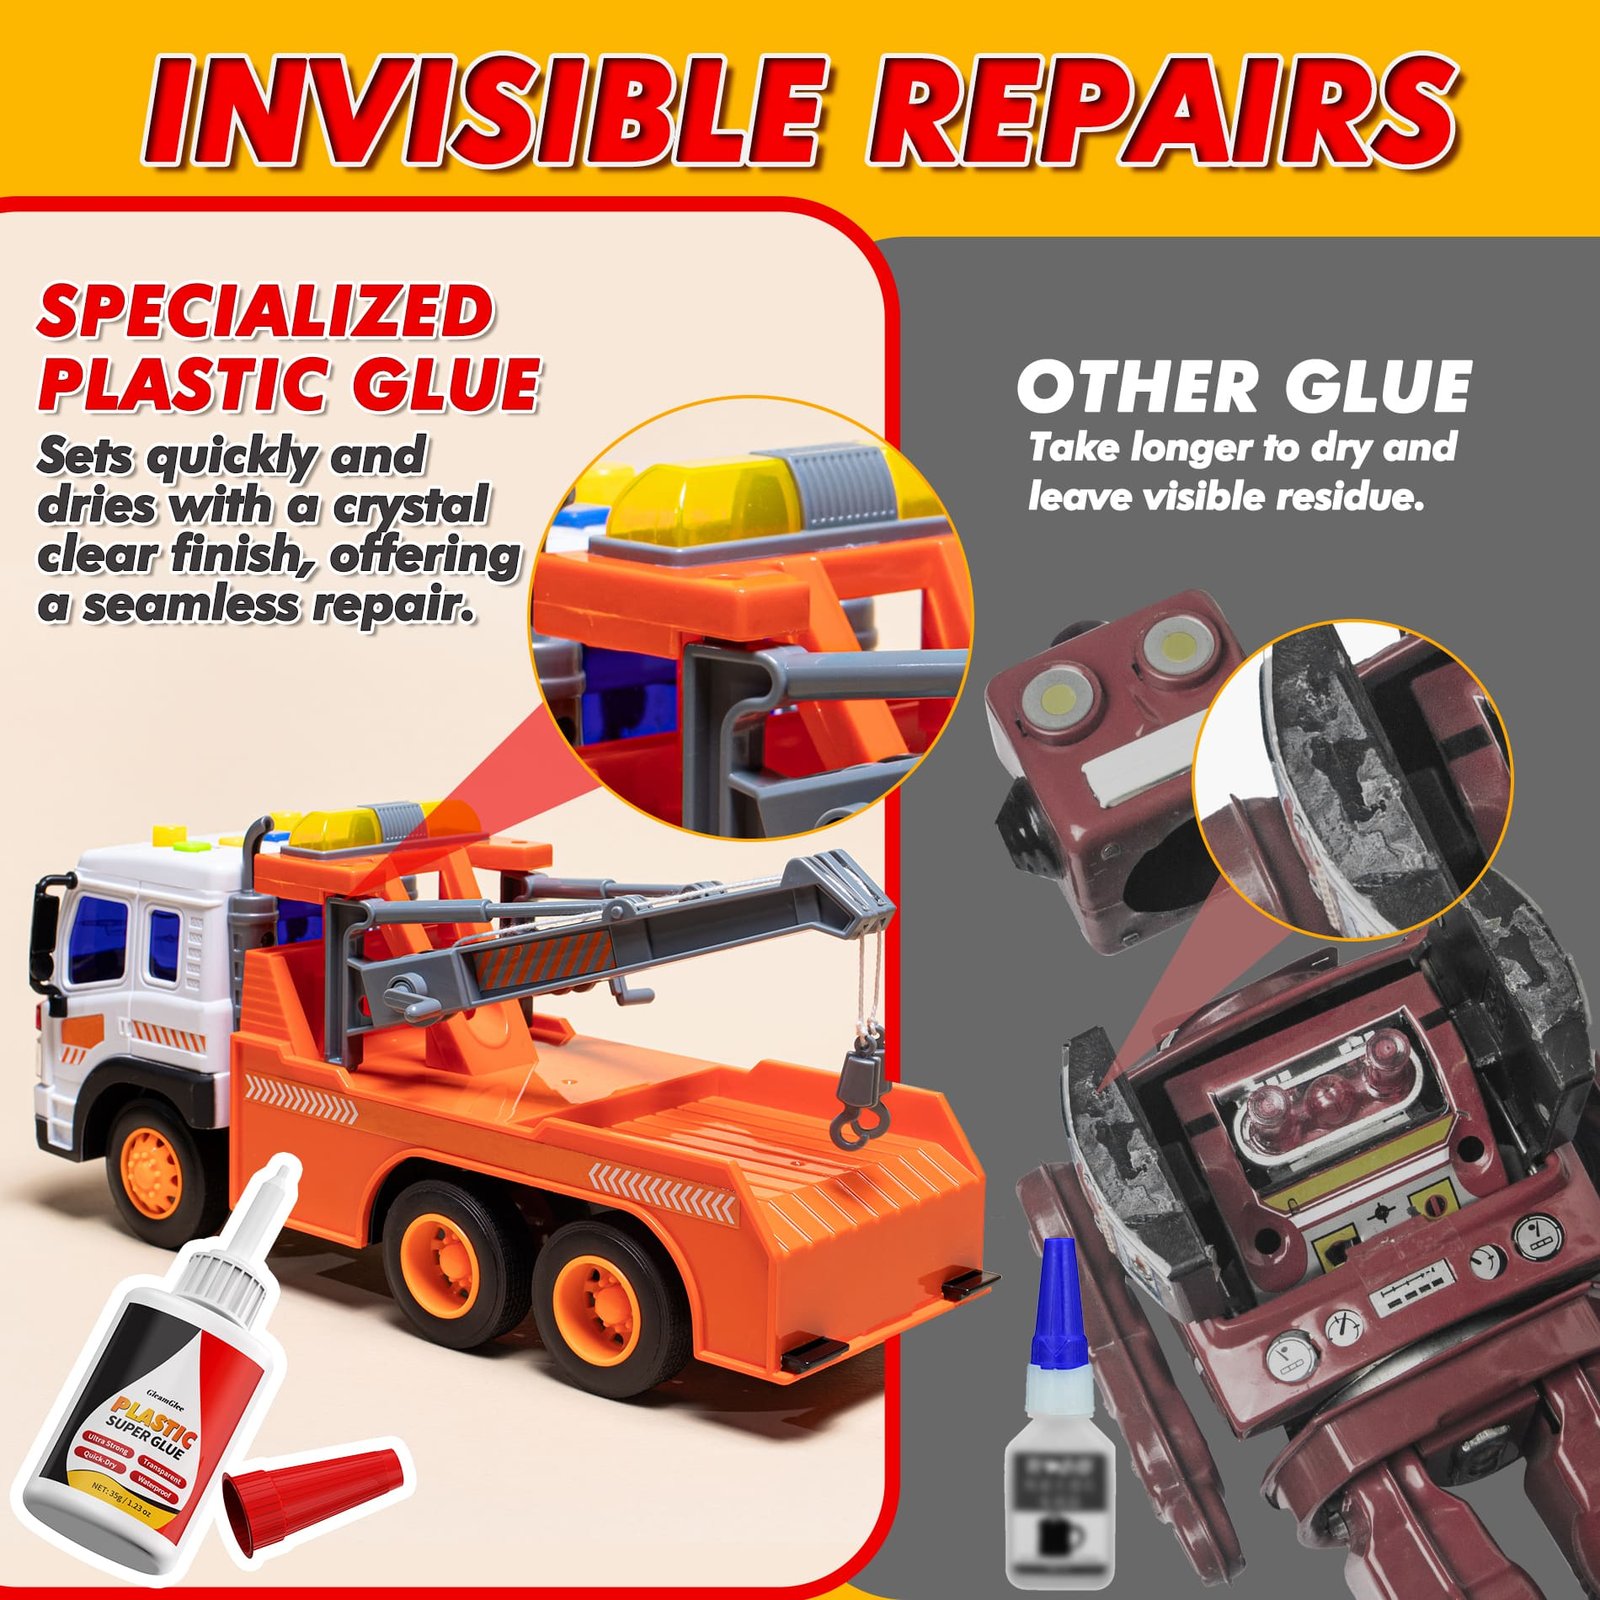
- Dries clear for a cleaner-looking bond line
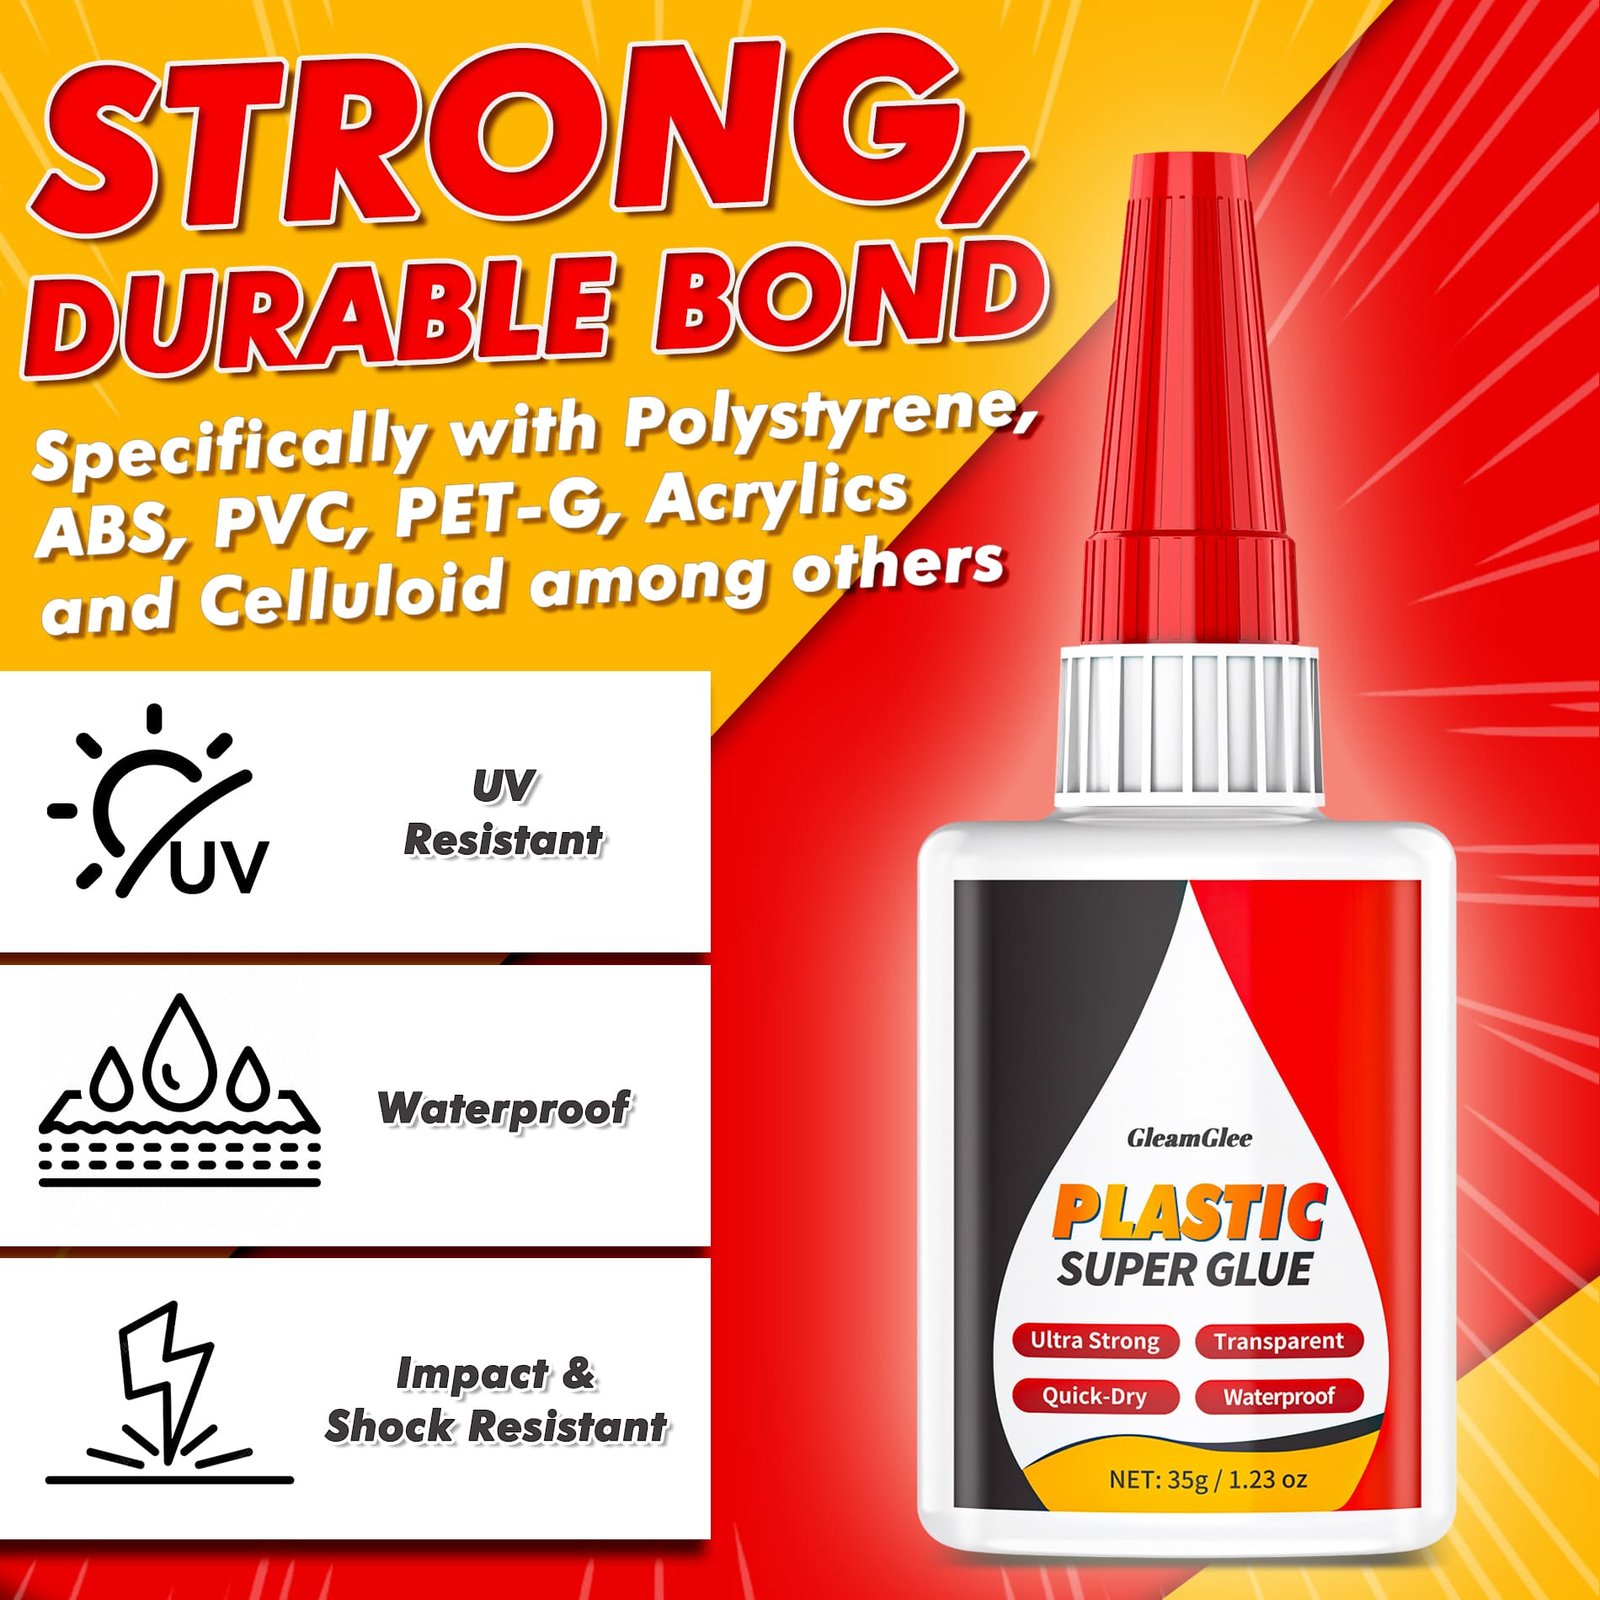
- Bonds PVC, ABS, acrylic, and PLA
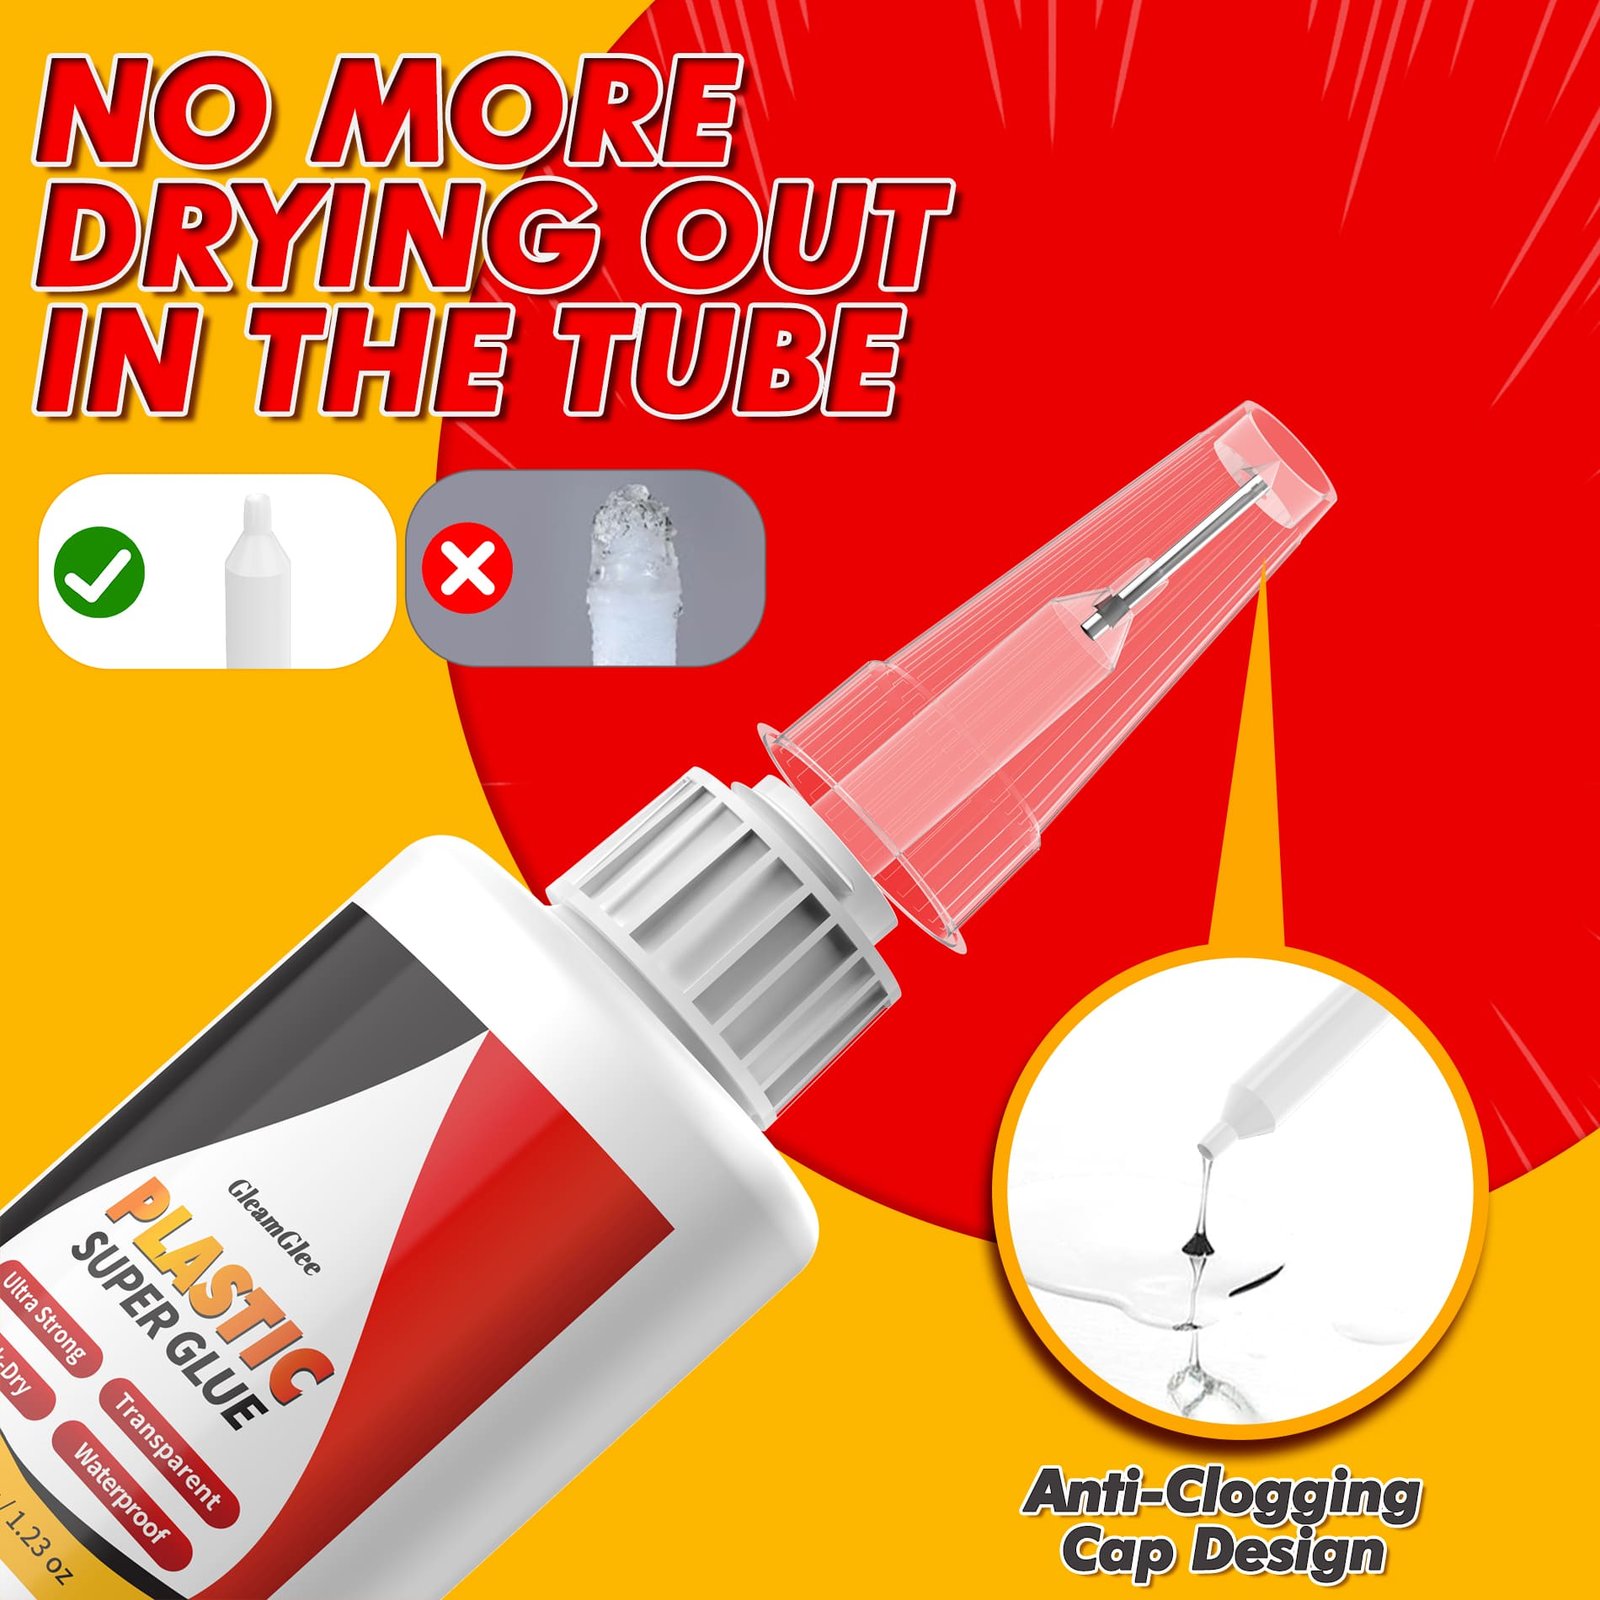
- Includes four precision nozzles for narrow joints and detailed work
Made for Everyday Fixers and Detail-Focused Repair Work
Small household breaks call for an adhesive that is easy to position, simple to control, and suitable for the material being repaired.
Household DIY Fixers
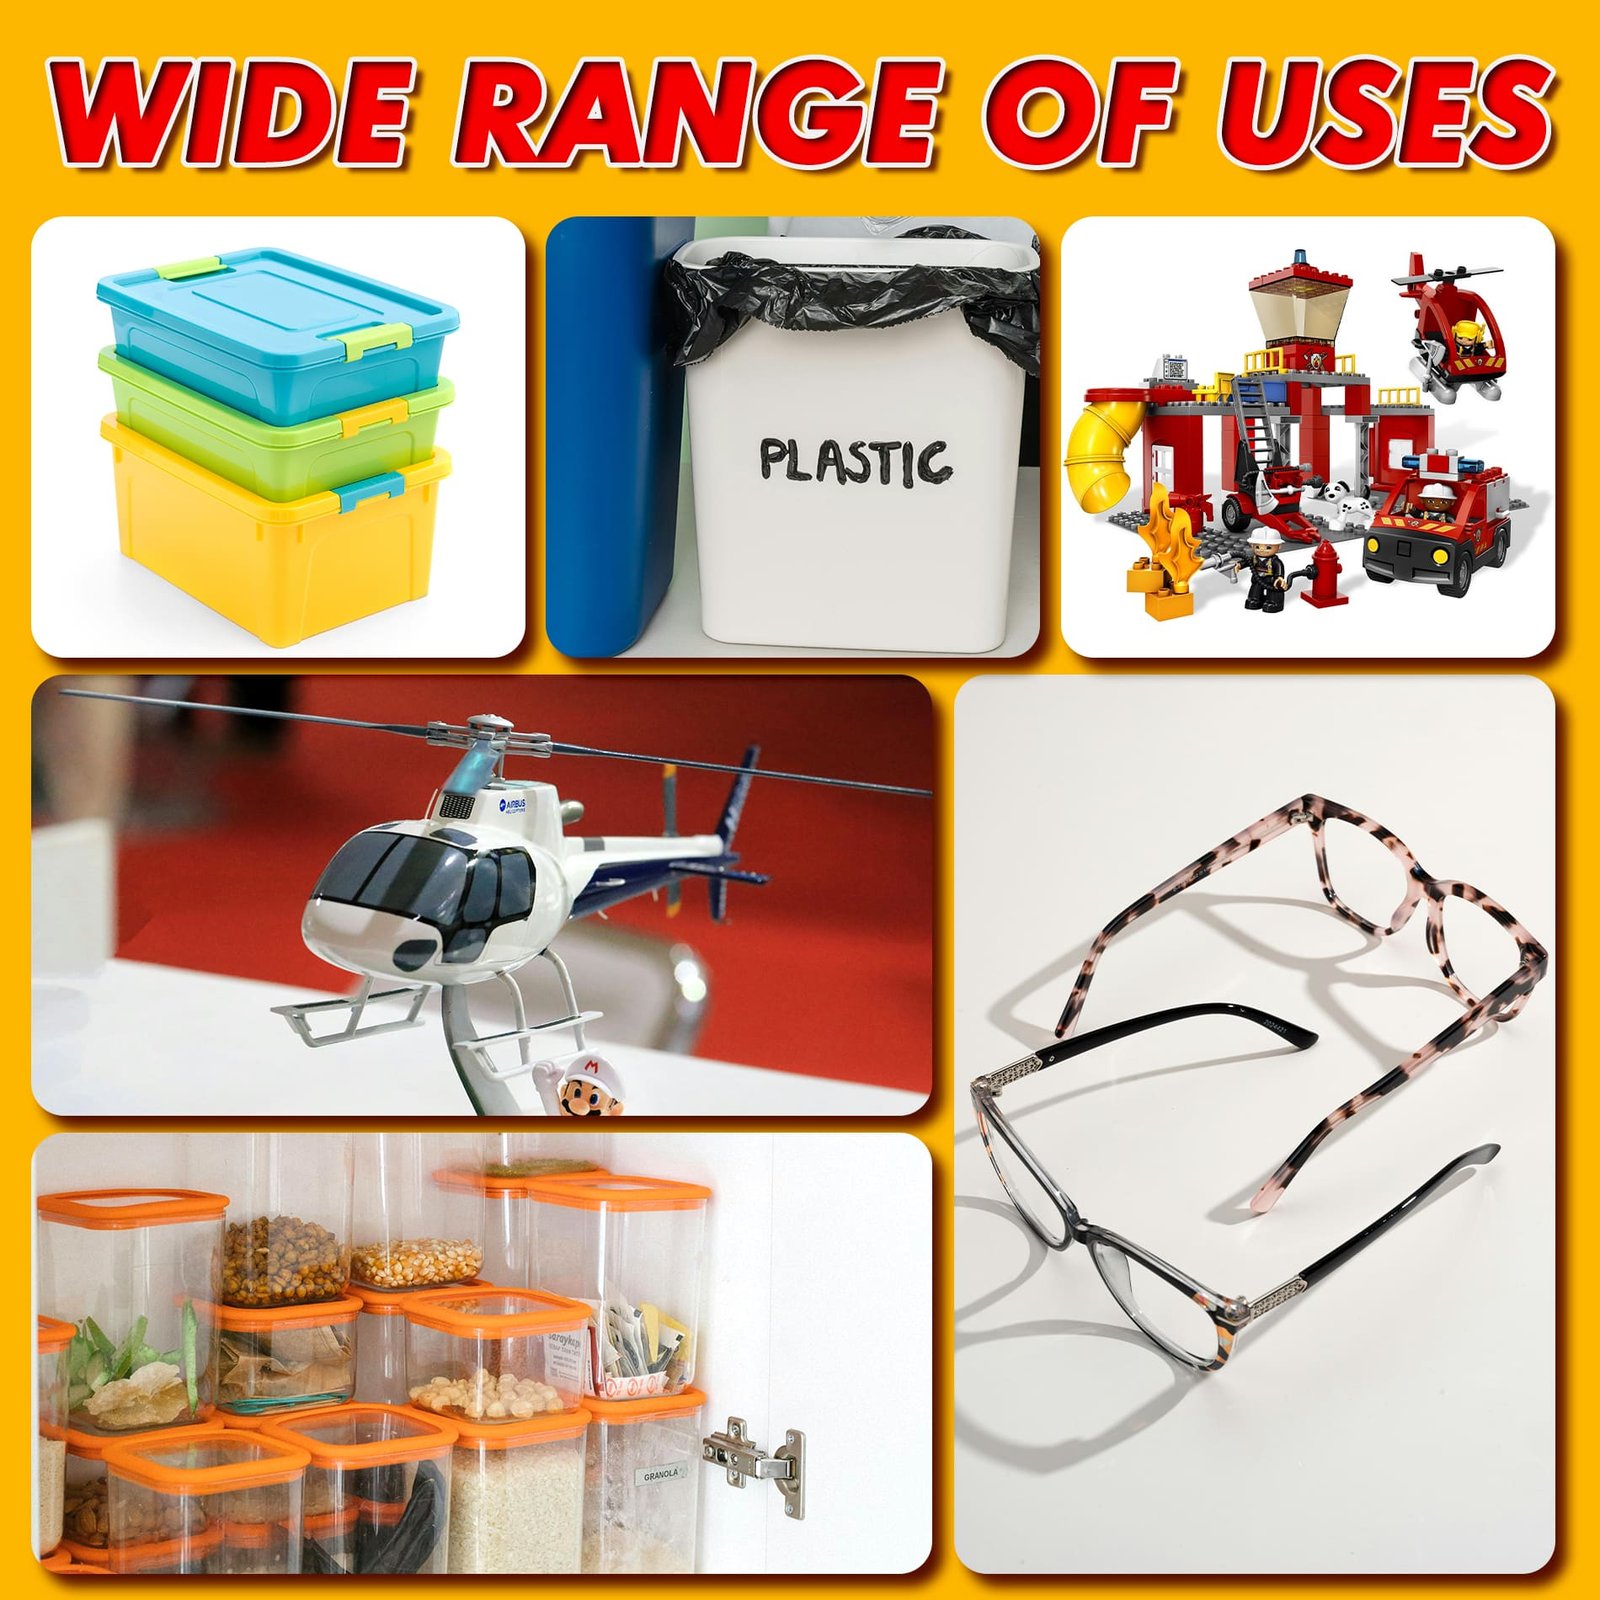
A cracked organizer, snapped plastic clip, loose decorative piece, or broken battery cover can often be repaired without replacing the whole item. GleamGlee gives homeowners and renters a fast-setting option for small rigid parts when both sides still fit together closely and can be aligned by hand. Material checks keep each fix properly matched.
Hobby and Model Builders
Small model joints and miniature components leave little room for excess adhesive. Four precision nozzles help place glue along narrow seams, tiny cracks, and detailed assemblies. The clear-drying formula also supports repairs where a thick colored bond line would distract from the finished model. Dry fitting protects alignment before the fast initial bond begins.
Craft and Decor Makers
Acrylic displays, plastic ornaments, frames, and decorative components often have visible joints. Controlled application helps keep adhesive near the intended bond area, while the clear finish supports a cleaner appearance. Test delicate finishes first, especially on transparent or coated surfaces. Good lighting makes overflow easier to spot during application.
Family Repair Kits
Families regularly encounter broken toy accessories, storage clips, plastic covers, and small household fittings. A 35 ml bottle provides a useful supply for multiple appropriately sized jobs without claiming a fixed repair count. Material identification and adult handling remain important before every repair attempt begins.
One Bottle for Many Small Rigid Plastic Repairs
Keep a focused plastic adhesive ready for close-fitting household breaks, detailed assemblies, and repair jobs where controlled placement matters more than bulk filling.

A Useful Size for Home, Hobby, and Workshop Repairs
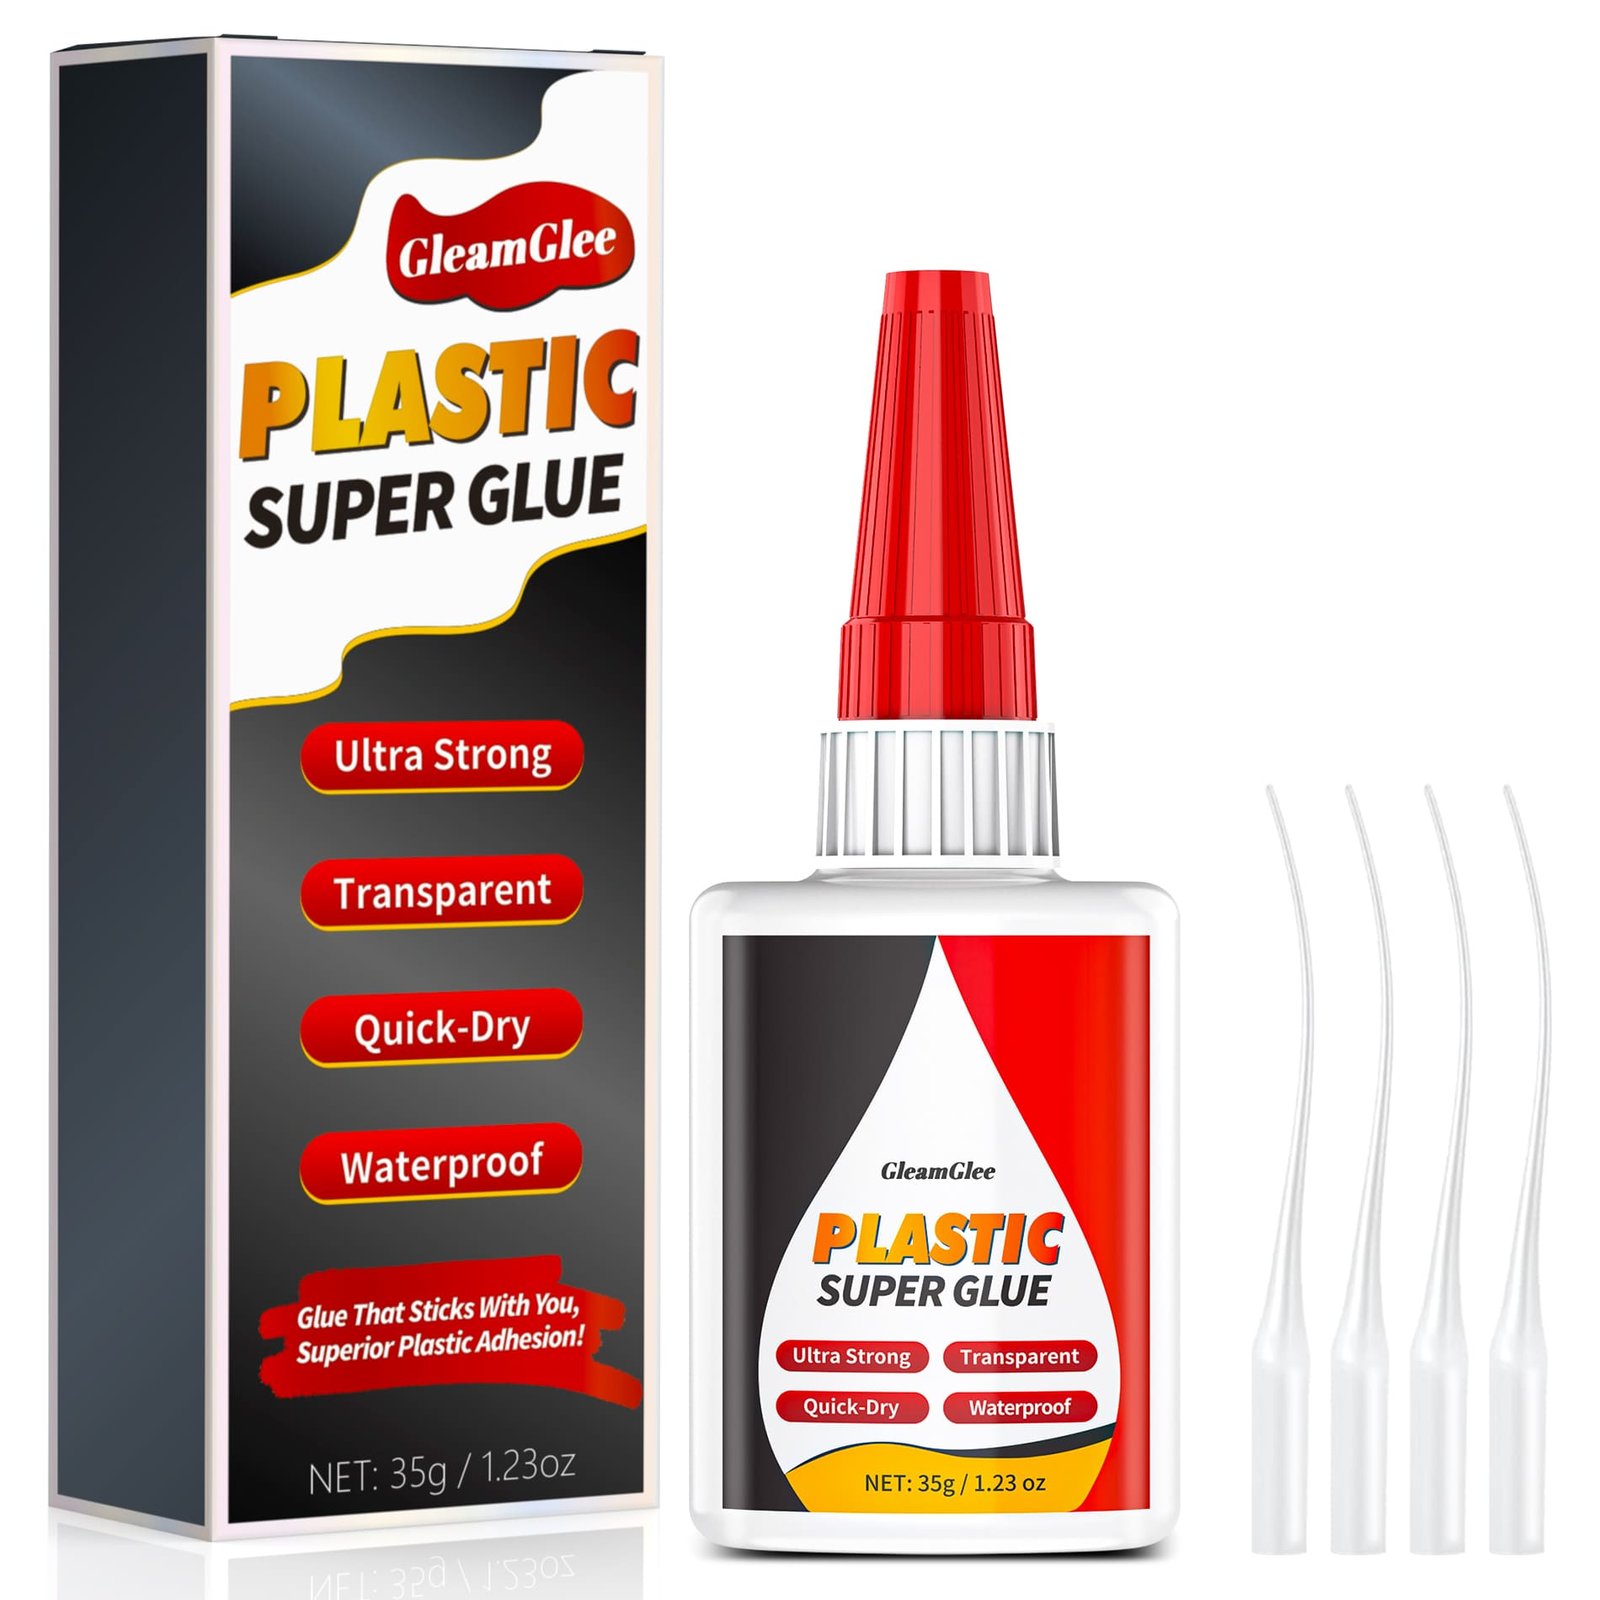
GleamGlee Plastic Glue comes in a 35 ml / 1.23 oz bottle, a useful format for households that encounter more than one small plastic repair. The bottle is compact enough for a toolbox, hobby bench, garage cabinet, or organized repair drawer, yet it carries more adhesive than a single-use mini tube. Four precision applicator nozzles extend the product beyond general squeeze-bottle use by helping reach fine cracks, narrow joints, miniature parts, and recessed contact areas.
The product is not positioned as a universal filler or structural adhesive. Its strongest use case is a small rigid component whose broken faces still meet closely. Common examples include an ABS housing tab, a PVC accessory, an acrylic display part, or a PLA print with a clean break. Apply a controlled amount, align the parts before the initial bond develops, and hold them briefly. A medium-viscosity liquid formula balances flow with placement control, while the transparent cure supports visible repairs where appearance matters.
Different repair jobs may require different adhesive systems. Large voids usually need a gap-filling epoxy or repair putty. Flexible pieces often perform better with a flexible adhesive. PE, PP, PTFE, silicone, and unknown plastics should not be assumed compatible without verified guidance or a careful test. Keeping those boundaries clear makes the 35 ml bottle more useful: it becomes the right tool for repeated, well-matched small repairs instead of an overpromised answer for every broken object.
Why Small Plastic Repairs Fail Before They Hold
Bond failure often begins with material mismatch, contamination, poor contact, or excess adhesive rather than a simple lack of advertised strength.

Wrong Plastic Type
Plastic is a material family, not a single surface. ABS, PVC, acrylic, and PLA are confirmed core materials for GleamGlee, while PE, PP, PTFE, silicone, and unknown flexible plastics are not verified in the available product facts. Identify the material or test first instead of relying on a broad plastic label.
Contaminated Surfaces
Skin oils, cooking residue, dust, polish, mold-release residue, and loose fragments can sit between the adhesive and the plastic. Clean both bonding faces and let them dry completely. Glue placed over contamination may harden, yet the hardened layer can separate from the surface during normal handling.
Poor Part Contact
Fast CA adhesive performs best when the broken faces meet closely. Warped parts, missing chunks, crushed edges, or wide openings reduce effective contact area. Dry-fit the pieces before opening the bottle. If a visible gap remains, a gap-filling epoxy or moldable repair material may be a better match.
Excess Adhesive
More liquid does not automatically create a stronger joint. Excess glue can spread beyond the seam, interfere with close contact, produce a more visible repair, and make small pieces harder to align. Use the precision nozzle to place a controlled amount only where the two surfaces will meet.
Identify the Plastic Before Opening the Glue Bottle
A quick material check can prevent wasted adhesive, damaged finishes, weak joints, and frustration after a repair appears complete.
Start with Marks, Product Information, and a Small Test
Look for molded abbreviations or recycling symbols on the underside, inside a cover, near a battery compartment, or behind a removable panel. ABS, PVC, acrylic, and PLA are the confirmed material group for GleamGlee Plastic Glue. PLA is common in hobby and 3D-printed parts; acrylic often appears in clear displays, frames, and decorative components; ABS is widely used in rigid housings, toys, and interior parts; PVC appears in many rigid accessories and hobby components.
Do not identify plastic by color alone. Two black housings can be made from very different polymers, and a clear part may be acrylic, polycarbonate, PET, or another material. Packaging, manufacturer documentation, replacement-part listings, and molded resin codes offer stronger evidence than appearance. When no reliable identification is available, apply a tiny amount in a hidden area and observe adhesion and surface appearance before treating the main break.
Low-surface-energy plastics deserve extra caution. PE and PP are common in flexible lids, storage products, and household containers, but many ordinary CA adhesives need a specialized primer to bond them reliably. The current GleamGlee fact set does not verify PE, PP, PTFE, or silicone compatibility. Avoid converting an unknown material into an unsupported promise. A thirty-second inspection before repair is faster than cleaning a failed joint and starting again with a different adhesive system.
Rigid and Flexible Plastics Need Different Repair Strategies
Movement at the joint changes adhesive demands, so check whether the part stays rigid or repeatedly bends during normal use.
Rigid Plastic Repairs
Rigid plastic keeps its basic shape when pressed lightly and usually presents a defined broken edge. Small ABS housings, PVC accessories, acrylic display pieces, PLA prints, hard toy components, and decorative parts often fall into this group. GleamGlee is best positioned for a close-fitting rigid break that can be aligned before the adhesive sets. A thin, controlled bond line lets the two surfaces meet directly, while the seconds-level initial set reduces the need for bulky clamps on many small hand-positioned parts. Joint shape still matters: a broad face-to-face break offers more bonding area than a thin tab under constant leverage.
Flexible Plastic Repairs
Flexible parts bend, stretch, fold, or twist during normal use. Soft lids, squeeze components, vinyl pieces, flexible hinges, straps, and rubber-like plastics place repeated movement across the joint. A rigid CA bond may not match that motion, even when the adhesive initially sticks. Flexible repair adhesive, urethane, silicone-based material, or another formulation designed to move with the substrate can be a better choice. Do not use the word plastic alone as proof of suitability. If the part depends on flexibility to work, select the adhesive around movement, material type, and load rather than around fast set time.
Match the Adhesive to the Shape of the Break
Clean breaks, narrow cracks, stressed tabs, and missing material create different bonding conditions even when every object is made from plastic.

Clean Snap
A clean snap is often the strongest candidate for a fast CA repair. Both faces remain intact, fit together closely, and can be aligned by hand. Clean and dry the surfaces, confirm the fit, apply a controlled amount, and press briefly without sliding the pieces out of position.
Fine Crack
A fine crack may benefit from a precision nozzle that reaches the narrow opening without flooding the surrounding surface. Stabilize the part, keep the crack in its natural alignment, and avoid forcing excessive adhesive into the area. Confirm the crack is not part of a highly stressed safety component.
Broken Tab
A tab can look small while carrying substantial peel or leverage force. Check how the tab works before gluing. A decorative locating tab may be repairable, while a latch pulled repeatedly from one edge can fail again unless the design, contact area, and loading direction are addressed.
Missing Material
Liquid CA cannot recreate a missing corner, stripped thread, crushed edge, or absent section by itself. A gap-filling epoxy, moldable repair material, replacement part, or reinforced mechanical solution may be more suitable. Do not bridge a wide empty space with repeated layers of liquid glue.
Test the Fit Before Applying a Fast-Setting Adhesive
Dry fitting gives you time to confirm alignment, hand position, contact area, and the most controlled path for the precision nozzle.

Plan the Repair While the Parts Can Still Move Freely
Bring the broken pieces together without glue. Check whether the edges meet naturally or require force. Look from several angles, especially when a visible seam must follow an existing contour. A close fit supports a thin bond line; a persistent opening signals lost material, deformation, or an incorrect orientation. Do not rely on the adhesive to pull warped parts back into shape.
Choose where your fingers will hold each piece and how you will avoid touching the wet bond line. Small components can rotate during alignment, and a seconds-level initial set leaves little time to correct a poorly planned position. If the object cannot rest securely, prepare painter’s tape, a simple support, or a soft fixture before applying glue. Bulky clamps are often unnecessary for a light small repair, but stable positioning remains essential.
Select the nozzle during the dry fit. A fine tip is useful when the seam is narrow or recessed; the regular opening may be sufficient for a broader accessible face. Plan a route that keeps the bottle upright enough for control and keeps the tip away from finished surfaces. Once the fit, hand position, and application route are clear, separate the parts, complete final cleaning, allow full drying, and proceed without rushing.
Decide Whether to Repair, Change Adhesive, or Replace
A good repair decision considers material, break geometry, movement, load, safety, and the consequences of another failure.
Good Repair Candidate
Choose GleamGlee when a small rigid part is made from confirmed PVC, ABS, acrylic, or PLA; the broken faces are clean and close-fitting; the repair is non-structural; and brief hand pressure can hold alignment. Decorative pieces, covers, models, and light-duty clips are representative candidates. A visible joint can also benefit from the transparent cured appearance. Always plan alignment before opening the bottle.
Choose Another Adhesive
Select a different system when the joint has a wide gap, the part repeatedly flexes, or the material is a difficult low-surface-energy plastic. Gap-filling epoxy, flexible adhesive, primer-assisted plastic adhesive, or moldable repair compound may better match those conditions than fast liquid CA. The extra working time or movement capacity can matter more than seconds-level positioning. Choose by joint behavior, not package slogans.
Replace the Part
Replace rather than glue parts involving pressure, braking, electrical protection, microwave door interlocks, child safety, food contact, or meaningful load-bearing duties unless the original manufacturer provides an approved repair. A small component can still have a major safety function, making replacement the responsible choice. Replacement also avoids hidden damage that adhesive cannot correct. When consequences are uncertain, consult the manufacturer or a qualified repair professional.
Choose the Repair Method from the Joint Condition
Four common break patterns lead to four different repair paths, reducing guesswork before adhesive touches the surface.
Tight Small Break
Use a fast CA adhesive when two small rigid pieces fit closely, the material is compatible, and quick hand-positioned assembly is valuable. GleamGlee supports the job with a medium-viscosity liquid formula, clear cure, and seconds-level initial set. Accurate alignment matters because repositioning time is short. Clean both faces, dry them fully, and protect the joint from early service load. Precision application keeps the repair focused on the contact area.
Narrow Accessible Crack
Use a precision nozzle when the crack or seam is narrow and the surrounding finish should stay clean. Stabilize the part, place a controlled amount along the intended bond area, and prevent the crack from opening during initial bonding. Avoid flooding transparent or decorative surfaces. Test clear acrylic and coated finishes in a hidden area first. A fine tip improves access, while gentle bottle pressure still controls the released volume.
Wide or Uneven Gap
Choose a gap-filling epoxy or repair compound when the faces cannot meet, an edge is crushed, or material has disappeared. Thick repair systems can occupy space and allow more alignment time. Liquid CA should not be layered repeatedly as a substitute for missing plastic. Roughening, mixing, or clamping requirements will vary by product. Read its instructions and match the cured color to any visible repair area.
Flexible Moving Part
Choose a flexible adhesive when the object bends during ordinary use. Movement concentrates stress at a rigid bond line and can cause renewed failure. Match flexibility, plastic type, water exposure, and temperature conditions rather than selecting an adhesive only because it sets quickly. Soft lids, straps, vinyl pieces, and living hinges need movement-compatible performance. A rigid household adhesive may attach initially yet fail after repeated bending.
Four Product Strengths for Clean Small Plastic Repairs
The value comes from a coordinated repair system: quick positioning, transparent appearance, everyday holding power, and controlled access to detailed joints.
Sets in Seconds
Fast initial bonding reduces the time spent holding a small piece in position. Apply a controlled amount, align the parts promptly, and press briefly while the bond develops. Seconds-level set is especially useful for light components where a bulky clamp would block access or disturb alignment.
Dries Clear
A clear bond line supports a cleaner finished appearance on acrylic displays, decorative plastics, models, toys, and visible housing seams. Clear does not mean invisible under every lighting condition, so careful placement and minimal excess remain essential for the best-looking result. Test polished or coated surfaces first and avoid aggressive cleanup on cured residue.
Strong Everyday Bond
GleamGlee is positioned for durable everyday plastic repairs exposed to normal handling. Strength depends on compatible material, clean surfaces, close contact, adequate bond area, and sensible loading. Avoid translating strong into unsupported structural, safety-critical, or unbreakable claims. Joint design and early waiting remain part of performance.
Four Precision Nozzles
Four fine applicator nozzles help deliver adhesive into small cracks, narrow joints, miniature assemblies, and recessed repair areas. Controlled placement can reduce waste and surrounding mess, but the user still controls bottle pressure, angle, and the amount released. Keep each tip clean before contact with a prepared surface.
GleamGlee Plastic Glue Specifications at a Glance
Verified product details give home repair decisions a clear foundation without invented strength values, temperature limits, or cure-time figures.
| Specification | Verified Product Detail |
|---|---|
| Brand | GleamGlee |
| Product category | Plastic Glue / Plastic Super Glue |
| Adhesive type | CA / cyanoacrylate instant adhesive |
| Form | Liquid |
| Viscosity | Medium |
| Bottle size | 35 ml / 1.23 oz |
| Package quantity | 1 bottle |
| Initial bonding | Sets in seconds |
| Cured appearance | Clear |
| Included applicators | 4 precision nozzles |
| Confirmed core plastics | PVC, ABS, acrylic, PLA |
| Listed properties | Strong, waterproof, heat resistant, cold resistant, fast drying |
Check Plastic Compatibility Before Starting the Repair
Material identification narrows the risk of weak adhesion and helps separate confirmed applications from surfaces needing testing or a specialized system.
| Material Group | Status for GleamGlee | Typical Small-Repair Examples | Guidance |
|---|---|---|---|
| ABS | Confirmed core material | Rigid housings, toys, interior plastic pieces | Clean, dry, test fit, and apply a controlled amount |
| PVC | Confirmed core material | Rigid accessories, hobby parts, small household components | Confirm the part is rigid and the joint fits closely |
| Acrylic | Confirmed core material | Clear frames, displays, decorative components | Test appearance first and control excess near visible surfaces |
| PLA | Confirmed core material | 3D prints, figures, prototypes, hobby parts | Align printed faces carefully and avoid loading the joint early |
| Unknown rigid plastic | Test first | Unmarked covers, clips, decorative pieces | Check manufacturer information and test in a hidden area |
| PE, PP, PTFE, silicone | Not verified in current facts | Flexible lids, oily-feeling plastics, soft components | Use a verified primer-assisted or material-specific adhesive system |
Test Unknown Plastics and Visible Finishes Before Full Application
A small hidden-area test can reveal material compatibility, surface change, flow behavior, and cured appearance before the main repair becomes permanent.

Use a Small Test to Protect the Part and Improve Control
Choose an area that will not be seen during normal use. Clean and dry it in the same way planned for the main joint. Place only a tiny controlled amount, taking care not to damage the object during the test itself. Observe whether the adhesive wets the surface, remains where applied, and cures without an unwanted visible change. Transparent acrylic, glossy finishes, painted plastic, and coated decorative parts deserve particular care because overflow or surface marks can remain noticeable.
A test does not reproduce every force in the finished joint. The main repair may have different contact area, loading direction, surface texture, or environmental exposure. Use the test as an early compatibility screen, not a promise of final performance. Examine the actual break as well: a narrow face under peel force is more demanding than a broad face loaded evenly.
Stop if the plastic softens, discolors, crazes, becomes cloudy, or shows poor adhesion. Do not keep adding adhesive to force a result. For PE, PP, PTFE, silicone, flexible plastics, or material with no reliable identification, select a product whose manufacturer explicitly supports the substrate. Careful testing protects the object and keeps GleamGlee within its verified use profile. Record the result before moving to the main seam.
Small Plastic Repairs Found Throughout the Home
Use the adhesive on compatible rigid parts with close-fitting breaks, normal handling demands, and no critical safety or structural function.

Storage Box Clips
Rigid clips, lid tabs, and organizer components can be good candidates when the broken faces remain intact. Check whether the clip carries repeated peel force before repairing. Clean storage residue, dry both sides, test fit, and keep the repaired area unloaded while the bond develops. Replace heavily stressed latches.
Remote Battery Covers
A snapped locating tab or cracked external battery cover may be repairable when no electrical contact, heat protection, or safety interlock is involved. Remove batteries before work, keep adhesive away from contacts, and reinstall the cover only after the joint has developed adequate strength. Inspect alignment before powering the device.
Plastic Toy Parts
Rigid decorative toy pieces and model-like accessories can suit precise CA repair. Adult handling is required. Do not repair parts intended for chewing, food contact, load-bearing play, or child safety. Confirm the material and inspect for sharp edges after the repair. Keep adhesive away from children.
Acrylic Frames
Clear acrylic frames, display stands, and decorative supports benefit from a transparent bond line and controlled placement. Test a hidden area before the main repair. Apply minimal adhesive near polished faces because overflow, fingerprints, or surface marks are more visible on clear plastic. Use bright side lighting.
Bathroom Accessories
Small rigid toothbrush holders, soap-dispenser components, shower caddy pieces, and decorative bathroom accessories may encounter everyday moisture. Keep claims within the listed waterproof property and avoid implying suitability for continuous immersion, pressurized water, drinking-water systems, or unverified sanitary applications. Apply only to dry, prepared surfaces.
Decorative Plastic Pieces
Ornaments, seasonal decorations, frame trim, and plastic figurines often have light-duty joints where appearance matters. Align the design before applying glue, use a precision tip around small details, and keep the repaired item undisturbed instead of testing the joint immediately. Store repaired pieces safely afterward.
How to Use Plastic Glue for a Cleaner Repair
Follow the sequence in order; careful preparation and alignment matter as much as the adhesive selected for the job.
Identify the Plastic
Look for a molded material code, product documentation, or reliable manufacturer information. GleamGlee has confirmed positioning for PVC, ABS, acrylic, and PLA. Test unknown rigid plastic before full application, and do not assume compatibility with PE, PP, PTFE, silicone, or flexible materials.
Clean the Surface
Remove dust, grease, polish, adhesive residue, and loose fragments from both broken faces. Use a cleaning method safe for the specific plastic and finish. Avoid touching prepared surfaces with bare fingers because skin oil can return contamination to the joint.
Dry Completely
Allow both surfaces to dry fully before adhesive application. Moisture, cleaner residue, or trapped debris can interfere with contact and placement. Check narrow cracks and recessed areas where liquid may remain after the surrounding surface appears dry. Wait rather than wiping moisture into the seam.
Test Fit First
Join the parts without glue. Confirm orientation, contact, and the final seam from several angles. Plan where to hold each piece and decide whether tape or a simple support will help keep the repair stable after initial alignment. Repeat the motion once before application.
Choose a Nozzle
Select a precision nozzle for narrow cracks, small faces, recessed joints, or detailed assemblies. Use the bottle opening only when the bond area is accessible and flow can be controlled. Keep the tip clear of finished surfaces and surrounding objects. Fit the nozzle securely before tilting the bottle.
Apply a Controlled Amount
Place a thin, controlled amount on the intended contact area. Do not flood the joint or coat the entire object. Excess adhesive can squeeze outward, delay clean alignment, and leave a more visible result around transparent or decorative plastic. Stop bottle pressure before reaching the edge.
Align and Press
Bring the parts together promptly and accurately. Press lightly without sliding the pieces across one another. Maintain the planned position while the seconds-level initial bond develops, keeping fingers away from wet adhesive and following all label safety directions. Do not reopen the seam to inspect wet glue.
Leave It Undisturbed
Initial set is not the same as full performance. Place the object where the joint will not be twisted, flexed, dropped, or loaded. Follow product-label guidance before returning the repaired item to normal use. Keep children and pets away from the resting repair.
Use Less Glue and Preserve Direct Surface Contact
Controlled application supports close fitting, cleaner seams, easier alignment, and less cured residue around small household repair areas.

More Adhesive Does Not Automatically Create More Holding Power
CA adhesive works across the contact area between two compatible surfaces. When a clean break fits closely, a thin controlled layer allows the plastic faces to meet with minimal separation. Flooding the joint can push the pieces apart, spread liquid over finished surfaces, and make a small component harder to hold. A large puddle cannot replace missing plastic or compensate for a warped edge.
Start by dry-fitting the pieces and identifying the actual contact faces. Install a precision nozzle when the bond area is narrow, then apply only enough adhesive to cover the intended interface without creating a heavy pool. Keep bottle pressure gentle and stop before liquid reaches the outer edge. Join the parts promptly; do not repeatedly separate and reconnect them after the initial bond begins.
If the joint remains open after accurate alignment, reassess the repair rather than adding more glue. The part may be deformed, the break may contain crushed material, or a fragment may be missing. A gap-filling epoxy or moldable compound can be more suitable in those conditions. Precision is a repair method, not merely a nozzle feature: correct material, clean surfaces, close contact, controlled volume, accurate alignment, and appropriate waiting all work together.
Four Precision Nozzles Turn Access into Better Control
Fine applicators help reach small bond areas while giving the user more control over placement, pressure, and surrounding surface exposure.

Use the Tip as a Placement Tool, Not a Measuring Device
The four included precision nozzles extend the bottle opening into narrow cracks, miniature joints, recessed tabs, and detailed assemblies. A fine tip can place adhesive nearer the intended contact area, reducing the need to smear liquid with a separate tool. It also helps keep fingers and improvised applicators away from the wet joint. The nozzles do not dispense an automatically fixed volume, so bottle pressure must remain light and deliberate.
Choose a clean nozzle and fit it securely before aiming at the repair. Hold the bottle at an angle that allows control without forcing liquid to rush toward the tip. Approach the joint slowly, place the outlet close to the target, and release only a small amount. Avoid scraping the tip across painted, polished, or transparent surfaces. If the nozzle contacts dust or old adhesive, replace or clean it according to product guidance before another use.
After application, remove the bottle from the work area before aligning the pieces. Keep the cap and unused nozzles organized so they do not collect debris. A precision applicator improves access, but good results still depend on compatible plastic, clean surfaces, close-fitting geometry, and timely alignment. Treat the nozzle as part of a controlled repair process rather than proof that overflow cannot occur.
Initial Set Is Fast but Bond Development Continues
Seconds-level positioning reduces holding time, yet the repaired joint should remain protected from load, twist, impact, and repeated handling afterward.

Separate Fast Positioning from Readiness for Normal Use
GleamGlee is listed as setting in seconds. The phrase describes the rapid formation of an initial bond after compatible, prepared surfaces are joined. It is especially useful for small parts that can be aligned and lightly pressed by hand. The short set window also means the position must be planned before application; sliding, rotating, or reopening the seam after bonding begins can disturb the joint.
Initial set does not mean the repair has reached every aspect of its later performance. Adhesive continues developing after the part can hold its own position. Place the item on a stable surface and keep the repaired area free from bending, peel force, vibration, water exposure, and normal operational load. Follow the bottle instructions for the appropriate waiting period because the verified product facts supplied for the site do not provide a numerical full-cure claim.
Judge readiness by the product directions and the demands of the object, not by touching or flexing the repair repeatedly. A decorative piece may require very little service load, while a latch or handle concentrates force at the joint. When the repair would fail dangerously or damage expensive equipment, replace the part or follow manufacturer-approved service guidance rather than relying on a quick initial set.
Understand Waterproof Performance in Real Household Conditions
The listed waterproof property supports moisture-related applications, but exposure conditions and joint design still determine whether a repair is appropriate.

Use Water Resistance as a Fit Factor, Not an Unlimited Promise
Small household plastic parts may encounter splashes, damp rooms, wet hands, outdoor humidity, or occasional rain. GleamGlee’s product information lists the adhesive as waterproof, making moisture exposure a relevant advantage for compatible repairs. Examples can include rigid bathroom accessories, garden decorations, outdoor storage components, or small plastic fittings exposed to ordinary household water contact.
Waterproof does not automatically establish suitability for every wet environment. The available facts do not provide duration, pressure, temperature, chemical, dishwasher, drinking-water, or continuous-submersion test conditions. Avoid using the product for pressurized plumbing, aquariums, food-contact assemblies, submerged equipment, or safety-critical wet systems without verified application-specific documentation. Ordinary splash exposure and permanent immersion are not equivalent service conditions.
Prepare the joint while the surfaces are clean and dry. Water or cleaner trapped between the two faces can interfere with application even when the cured adhesive is listed as waterproof. Protect the repair while the bond develops before exposing it to moisture. Examine the object as a complete system: compatible plastic, adequate contact area, controlled adhesive amount, and a load direction that does not peel the joint apart remain important in both dry and damp settings. Inspect the seam after ordinary exposure without twisting it as a test. Stop using the item if the joint changes.
Bond Strength Depends on More Than the Glue Label
Material, surface condition, contact area, joint geometry, load direction, movement, and waiting time shape the performance of every adhesive repair.
Build a Stronger Repair by Controlling the Conditions You Can See
Begin with material compatibility. GleamGlee is positioned for PVC, ABS, acrylic, and PLA, but the word plastic covers many polymers with different surface behavior. A bond can only perform through the area where adhesive contacts suitable, prepared material. Grease, dust, coating residue, and loose fragments reduce that area even when the pieces appear joined.
Next, examine geometry. Broad overlapping surfaces distribute force more evenly than a thin edge or narrow tab. A joint pulled straight across its bonded face behaves differently from one peeled repeatedly from a corner. Fast CA can be an excellent fit for close, rigid, accurately aligned surfaces, but it is not a substitute for missing material, mechanical reinforcement, or a flexible hinge.
Finally, protect the repair after initial set. Early twisting, impact, vibration, water exposure, or repeated testing can stress the joint while bond development continues. Heat-resistant and cold-resistant are listed product properties, but no verified numerical temperature limits are supplied for site use. Keep claims qualitative until formal range data becomes available. Clear boundaries create a more dependable choice than unsupported superlatives and help users select another method when the object demands more than a small adhesive repair. Surface preparation cannot compensate for an unsafe application.
Choose CA or Epoxy from the Repair Geometry
Fast CA and two-part epoxy solve different problems; use joint fit, working time, appearance, and missing material to decide.
| Decision Factor | GleamGlee CA Plastic Glue | Plastic Epoxy |
|---|---|---|
| Best repair shape | Small, rigid, close-fitting break | Uneven faces, larger gaps, or missing edge volume |
| Preparation | Clean, dry, identify material, test fit | Clean, dry, often roughen, then measure or dispense components |
| Components | One-part liquid adhesive | Two components mixed before application |
| Initial positioning | Sets in seconds | Usually offers a longer alignment window |
| Application control | Bottle plus 4 precision nozzles | Syringe, mixing tray, stick, or static mixer |
| Cured appearance | Clear | Varies by formula; may be clear, tan, cream, gray, or black |
| Gap filling | Not the primary use | Common strength of plastic repair epoxies |
| Best reason to choose | Speed, fine access, clean-looking tight joints | Filling space, rebuilding shape, or allowing more adjustment |
PE, PP, PTFE, silicone, and flexible plastics require separate material-specific evaluation. A primer-assisted plastic adhesive, flexible formulation, or moldable repair compound may be more appropriate than either standard CA or epoxy.
Troubleshoot a Plastic Bond Before Trying More Glue
Find the likely cause, clean away unsuitable residue safely, and correct the repair conditions before attempting another bond.
Surface Was Dirty
Symptom: Adhesive hardens but releases from the plastic face. Likely cause: Oil, dust, polish, cleaner residue, or loose fragments blocked direct contact. Correction: Remove old adhesive without damaging the part, clean using a method safe for the plastic, allow complete drying, and avoid touching the prepared faces. Inspect recessed edges where residue may remain. Repeat the repair only after both sides are visibly clean.
Plastic Was Not Compatible
Symptom: Glue beads on the surface or the joint separates with little resistance. Likely cause: The object may be PE, PP, PTFE, silicone, flexible plastic, or another unverified polymer. Correction: Identify the material and select a primer-assisted or material-specific product with explicit manufacturer support. Do not keep building layers over a surface that has already shown poor adhesion. Material fit must be corrected first.
Too Much Glue
Symptom: Liquid squeezes around the seam, the parts slide, or the joint remains visibly thick. Likely cause: Excess adhesive separated the close-fitting faces and complicated alignment. Correction: Clean the repair as allowed by product guidance, dry-fit again, install a precision nozzle, and use a thinner controlled application. Reduce bottle pressure and stop before liquid reaches the outer edge. Protect polished or transparent areas during the second attempt.
Contact Area Was Small
Symptom: A tiny tab bonds but breaks again during normal use. Likely cause: The joint has little bonded area or experiences leverage and peel force. Correction: Reassess whether adhesive alone is appropriate. Replacement, redesign, mechanical reinforcement, or a different repair compound may provide a safer solution. Examine what the tab actually holds and how force reaches it. A safety-related latch should be replaced, not repeatedly reglued.
Parts Were Misaligned
Symptom: The seam is stepped, twisted, or unable to seat correctly. Likely cause: The repair was not dry-fitted or the seconds-level set began before alignment finished. Correction: Plan hand positions, supports, and nozzle access first. Join the pieces once, promptly, and without sliding them repeatedly. View the dry fit from the front and side. Prepare tape or a stable rest before opening the bottle.
Joint Was Stressed Early
Symptom: The repair holds initially but fails after immediate testing. Likely cause: Initial set was treated as full readiness for load. Correction: Keep the joint undisturbed, follow label waiting instructions, and delay twisting, impact, water exposure, or functional use until adequate bond development has occurred. Do not flex the seam merely to check it. Place the item where other household members will not move it.
Show Precision Application Where a Wide Nozzle Cannot Reach
A macro photograph should demonstrate controlled access to a real narrow joint rather than displaying loose nozzles without a repair context.

Make the Nozzle, Adhesive Placement, and Joint Visible Together
Choose a small rigid ABS tab, acrylic display corner, PLA figure seam, or PVC accessory with a narrow accessible bond area. Position the camera close enough to show the nozzle outlet beside the joint, while keeping enough of the object visible for scale and context. Use soft side lighting to reveal the clear liquid without making it appear thick, stringy, colored, or artificially luminous.
The nozzle should release a small controlled amount directly onto the contact face. Keep surrounding plastic clean and leave hands in a natural working position. Avoid showing adhesive poured across the entire crack, coating decorative surfaces, or bridging an empty gap. Include the bottle in a secondary position when possible, but do not let packaging dominate the repair action.
Create separate crops for desktop and mobile use. The desktop version can show the bottle, nozzle, and full joint; the mobile crop should prioritize the nozzle tip and adhesive landing point. Add alt text describing the material, repair type, and controlled application. The image should visually support precise placement, small-crack access, and cleaner application without claiming an automatically measured dose or a completely mess-proof process. Keep the seam sharp enough to judge at a normal screen size.
Download the Small Plastic Repair Checklist
Give every repair a consistent starting point with a printable sequence covering material fit, preparation, application, alignment, waiting, and troubleshooting.

Keep a One-Page Guide Beside the Home Repair Kit
The downloadable PDF should begin with a fit check: confirmed PVC, ABS, acrylic, or PLA; rigid part; close-fitting break; non-critical function; and no meaningful missing material. Add a stop-and-reassess box for flexible plastics, PE, PP, PTFE, silicone, large gaps, food-contact parts, pressure systems, electrical safety components, and load-bearing repairs.
The center section should present eight actions: Identify, Clean, Dry, Test Fit, Choose Nozzle, Apply a Controlled Amount, Align and Press, Leave Undisturbed. Each action needs one short sentence, not a long technical explanation. Add reminders to protect finished surfaces, keep fingers away from wet adhesive, follow the product label, and avoid early stress.
Finish with a six-point troubleshooting checklist covering contamination, wrong material, excessive adhesive, inadequate contact area, misalignment, and early loading. Include the 35 ml / 1.23 oz bottle size, four precision nozzles, confirmed material group, and Amazon ASIN B0DWK6DNMK in a compact product reference area. Keep the PDF useful even when printed in grayscale, and link back to the full repair instructions for readers who need more detail. Provide a revision date so saved copies can be checked against later guidance. Add a blank line for users to record the plastic type, repair date, and any waiting instruction printed on the current package.
What Comes with GleamGlee Plastic Glue
The package focuses on a useful bottle size and fine applicators for repeated small repairs, detailed assemblies, and narrow household joints.

35 ml Adhesive Bottle
The package contains one 35 ml / 1.23 oz bottle of medium-viscosity liquid CA adhesive. The size suits a home repair drawer, toolbox, hobby bench, or workshop cabinet and provides material for multiple appropriately sized jobs. No fixed repair count is claimed because coverage depends on contact area, amount applied, joint geometry, and waste. The bottle is designed for fast, clear, controlled bonding of confirmed PVC, ABS, acrylic, and PLA applications rather than wide-gap filling or flexible repair.
Four Precision Nozzles
Four fine applicator nozzles are included for tiny cracks, narrow joints, model parts, detailed plastic assemblies, and recessed repair areas. The tips help bring the adhesive outlet closer to the target and support controlled placement with gentle bottle pressure. They do not automatically measure each dose or make overflow impossible. Keep unused tips clean and organized, inspect a tip before use, and follow packaging instructions for capping and storage. No brush, mixing tray, primer, putty, glove, or clamp is included in the confirmed package facts.
Plastic Glue Frequently Asked Questions
Clear answers help confirm material fit, repair size, application method, finished appearance, moisture exposure, and situations requiring another adhesive system.
1. What plastics does GleamGlee Plastic Glue bond?
The confirmed core material group is PVC, ABS, acrylic, and PLA. Plastic families vary widely, so identify the material before repair. The available facts do not verify PE, PP, PTFE, silicone, or every flexible plastic. Test unknown rigid plastics in a hidden area or choose an adhesive with explicit manufacturer support for the material.
2. Is it suitable for small household plastic repairs?
Yes, when the part is rigid, non-critical, compatible, and close-fitting. Representative jobs include organizer clips, external covers, rigid toy accessories, acrylic displays, decorative pieces, and hobby parts. Avoid using adhesive alone on pressure systems, electrical safety parts, food-contact assemblies, major load-bearing components, or repairs where another failure could create danger.
3. How quickly does the adhesive set?
GleamGlee is listed as setting in seconds. Plan the alignment before applying adhesive, join the pieces promptly, and press briefly. Initial set is not the same as full readiness for normal service. Keep the joint undisturbed afterward and follow the product-label waiting instructions before loading, twisting, wetting, or operating the repaired part.
4. Does GleamGlee Plastic Glue dry clear?
Yes. The adhesive is listed as clear and clear-drying. A transparent cure supports cleaner-looking repairs on visible joints, acrylic pieces, models, and decorative plastics. Appearance still depends on careful application. Excess adhesive, fingerprints, surface damage, or overflow can remain visible, especially on polished or transparent parts, so test and apply sparingly.
5. Can it repair flexible plastic parts?
Flexible parts repeatedly bend, stretch, or twist, placing movement across the bond line. GleamGlee is best positioned for small rigid plastic repairs. A flexible adhesive may be a better match for soft lids, straps, living hinges, vinyl pieces, or rubber-like materials. Identify the substrate and choose a formulation designed for both the material and movement.
6. Does it work on PE or PP plastic?
PE and PP compatibility is not verified in the current GleamGlee product facts. Those low-surface-energy plastics often require a specialized primer-assisted bonding system. Do not rely on a generic plastic claim. Check the molded material code and select an adhesive whose manufacturer explicitly supports PE or PP when either polymer is present.
7. How much plastic glue should I apply?
Use a thin, controlled amount on the intended contact area. The exact volume varies with joint size and geometry, so no universal drop count is provided. Excess glue can spread beyond the seam, interfere with close contact, and complicate alignment. A precision nozzle helps position the adhesive, while light bottle pressure controls release.
8. Do small repairs need a clamp?
Many small close-fitting components can be aligned and lightly pressed by hand during the seconds-level initial set, making a bulky clamp unnecessary. A stable support or painter’s tape may still help after positioning. If strong clamping is required to force warped pieces together, reassess the fit and consider a different repair method.
9. Is GleamGlee Plastic Glue waterproof?
Waterproof is listed in the product information. The property is relevant to compatible household parts exposed to ordinary moisture or occasional water. No verified duration, pressure, dishwasher, drinking-water, or continuous-submersion conditions are supplied. Apply to clean, dry surfaces and allow adequate bond development before moisture exposure.
10. When should I choose plastic epoxy instead?
Choose plastic epoxy when the broken faces have a larger gap, need more alignment time, or require a material-filling repair. Choose a flexible adhesive for moving parts and a primer-assisted system for verified difficult plastics such as PE or PP. GleamGlee CA is strongest as a choice for small, rigid, close-fitting, precision repairs.
Choose GleamGlee for the Right Small Plastic Repair
Make the final decision from material, rigidity, joint fit, appearance, application access, and the consequence of another failure.

Choose GleamGlee When Speed, Clarity, and Precision Match the Job
GleamGlee Plastic Glue is a strong fit when the object is made from confirmed PVC, ABS, acrylic, or PLA; the damaged part is small and rigid; the broken faces meet closely; and the joint performs a normal, non-critical household function. The medium-viscosity liquid formula supports controlled flow, while four precision nozzles help reach narrow seams, tiny cracks, and detailed components. Seconds-level initial bonding shortens hand-positioning time, and the clear cure supports a cleaner finished appearance on visible joints.
Good candidates include rigid organizer clips, external covers, decorative plastic pieces, acrylic displays, model parts, PLA prints, and small toy accessories handled by an adult. Clean, dry, test fit, apply a controlled amount, align promptly, press briefly, and protect the repair afterward. Choose the product because the repair conditions fit the formula, not because every object with a plastic surface should be glued. A repair with broad face-to-face contact is usually more favorable than a narrow tab loaded from one edge. Keep the joint free from water, impact, and functional load while bond development continues, and follow all safety and waiting directions printed on the package. Good preparation reduces rushed corrections after the fast initial bond begins and helps preserve a clean visible seam.
Choose Another Method When the Material or Joint Demands More
Use a verified primer-assisted system for PE, PP, or another difficult low-surface-energy plastic. Choose a flexible adhesive for parts that bend during ordinary use. Select a gap-filling epoxy or moldable compound when faces are uneven, material is missing, or more working time is needed. Replace a component when it carries pressure, meaningful load, electrical protection, food-contact duty, child-safety function, or another role where adhesive failure could cause harm.
The right boundary strengthens the recommendation. GleamGlee is not being presented as a filler, flexible sealant, structural repair system, or universal plastic solution. It is a focused choice for fast, clear, precise bonding of appropriately matched small rigid plastic parts. For a compatible household repair, review the product details and current availability on Amazon before purchase. Check the actual material mark and dry-fit the pieces before ordering when possible. If the plastic cannot be identified, the part bends, or the break contains a wide empty space, solve that uncertainty first. A correctly matched adhesive saves more time than repeating a rushed repair with the wrong chemistry. When the fit is favorable, prepare a clean work area, plan the hand position, and keep the repaired object protected until label guidance permits normal use.





















