 Skip to content
Leather Glue for Clarks Shoes: Repair Guide That Works
Your trusted adhesives glue & cleaner manufacturer

Clarks shoes are known for comfort, craftsmanship, and timeless design. From Desert Boots to everyday leather loafers, many people choose Clarks because they expect them to last for years—not months. So when a sole starts separating, a leather seam lifts, or the upper begins to peel, the instinct is often the same: “Can I fix this instead of replacing the whole shoe?”
This is where many repairs go wrong. People grab super glue, craft glue, or “all-purpose” adhesive, only to watch the repair crack, turn white, or peel off after a few wears. Leather is not plastic, and shoes are not static objects. Every step bends, twists, stretches, and compresses the materials. A glue that works on a broken mug or plastic toy may fail completely on a Clarks shoe.
Behind a successful Clarks repair is not just the glue—but understanding why leather behaves differently, which Clarks materials matter, and how flexible bonding preserves comfort. Let’s break it down step by step, starting with the most common problems Clarks owners face.
What Problems Do Clarks Shoes Commonly Have That Need Leather Glue?
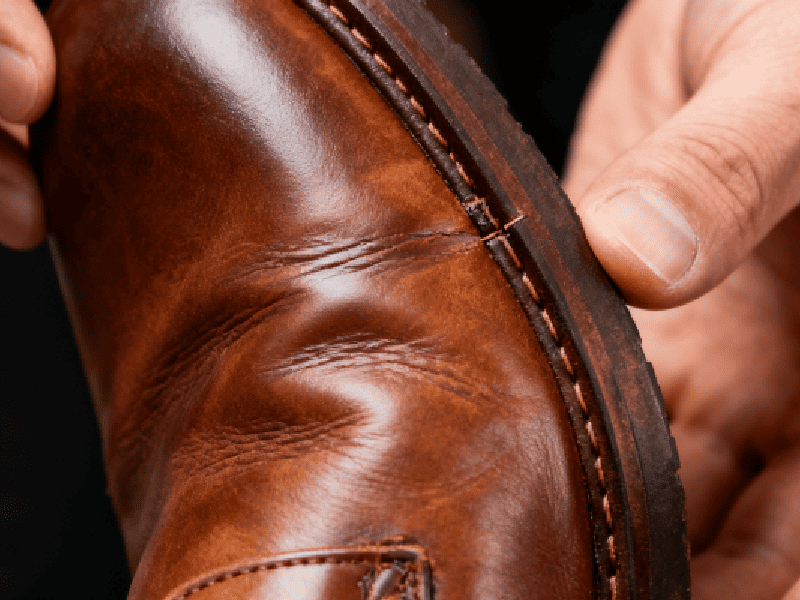
Clarks shoes most commonly need leather glue for sole separation, lifted toe or heel edges, peeling leather uppers, loose seams, and detached linings. These issues are usually caused by repeated flexing, moisture exposure, and aging adhesives rather than poor shoe quality. When the shoe structure is intact, leather glue can effectively restore function and extend the life of Clarks footwear.
Clarks shoes are designed for comfort, which means they flex more than many stiff dress shoes. That flexibility is great for walking—but it also puts long-term stress on adhesive joints. Below are the most frequent, repairable problems where leather glue is the right solution.
Are Clarks soles separating at the toe or heel?
Sole separation is the single most common issue reported by Clarks owners. It usually starts subtly:
- A small gap at the toe bend
- A loose heel edge that catches when walking
- A faint clicking or lifting sensation
This happens because the toe and heel zones experience maximum flex and impact. Over time, factory adhesive can weaken—especially with daily wear or exposure to rain.
When leather glue works best here:
- The sole material is still solid (rubber or EVA)
- Separation is partial, not full detachment
- The midsole is intact
A flexible leather or shoe glue can often restore a bond that lasts as long—or longer—than the original.
What if the crepe sole is crumbling or sticky—can glue fix it?
Some Clarks models (notably Desert Boots and Wallabees) use natural crepe soles. These age differently from synthetic soles.
Common crepe problems:
- Sticky or gummy texture
- Crumbling edges
- Strong rubber odor
- Yellowing and brittleness
Important reality check
This is material degradation, not adhesive failure. Leather glue cannot reverse oxidation or chemical breakdown.
Glue will fail if:
- The crepe is soft, melting, or powdery
- Pieces break off when touched
Correct solution:
- Professional resoling or sole replacement
This distinction is critical for user trust and avoids repeated, frustrating repairs.
Which upper leather issues on Clarks can be fixed with glue?
Leather glue is highly effective for upper-related problems, especially when stitching is still intact.
Common glue-friendly upper issues:
- Lifted leather overlays
- Split seams along stress lines
- Peeling decorative panels
- Detached leather trims
- Loose interior linings or insoles
Because leather glue dries flexible and clear, it preserves:
- Natural leather texture
- Comfort around pressure points
- Clean, professional appearance
These repairs are especially popular for Clarks loafers, boots, and casual leather shoes.
What problems look like glue issues—but actually aren’t?
Not every Clarks shoe problem should be glued. Misdiagnosis is a major cause of failed repairs.
| Problem | Looks Like | Why Glue Won’t Work | Better Solution |
|---|---|---|---|
| Cracked midsole | Sole separation | Structural failure | Resoling |
| Sticky crepe | Loose sole | Material oxidation | Sole replacement |
| Torn leather | Peeling panel | Fiber breakage | Patch or professional repair |
| Collapsed heel | Loose heel | Internal support failure | Cobbler repair |
Understanding this saves users time, money, and frustration.
When should you stop gluing and choose resoling or replacement?
Leather glue is ideal for adhesive failures, not structural collapse.
You should stop gluing if:
- The same area separates repeatedly
- The sole material is breaking down
- The shoe twists unnaturally when worn
- Comfort or stability is compromised
In contrast, if the shoe is comfortable, well-shaped, and structurally sound, leather glue repair is often the most cost-effective and sustainable choice.
Quick decision guide: Is leather glue right for your Clarks repair?
| Shoe Condition | Use Leather Glue? |
|---|---|
| Partial sole separation | Yes |
| Lifted leather upper | Yes |
| Loose insole or lining | Yes |
| Aged crepe sole | No |
| Structural cracks | No |
| Cosmetic peeling only | Yes |
Which Clarks Materials Are You Repairing—and Why Does It Matter?
Clarks shoes use multiple materials—including smooth leather, suede, nubuck, faux leather, rubber, EVA, and crepe soles—and each requires a different repair approach. Choosing leather glue without considering the exact material combination is one of the main reasons Clarks shoe repairs fail. Matching the adhesive to both the upper and sole material is critical for long-lasting results.
Clarks is known for combining comfort-focused design with a wide range of materials. That variety is great for wearability—but it also means one glue does not fit every repair. Understanding what you are actually gluing determines whether the bond lasts weeks or years.
What leather types are most common on Clarks shoes?
Clarks uses several leather categories across different collections, and each behaves differently when glued.
| Leather Type | Common Models | Surface Traits | Glue Considerations |
|---|---|---|---|
| Smooth leather | Dress shoes, loafers | Dense, sealed | Bonds well with leather glue |
| Nubuck | Casual shoes, boots | Lightly sanded | Needs careful prep to avoid dark spots |
| Suede | Desert-style shoes | Open fibers | Requires low-viscosity, clear glue |
| Faux leather | Budget lines | Coated surface | Glue bonds to backing, not coating |
Smooth leather is the most forgiving and easiest to repair. Suede and nubuck require restraint—too much glue stiffens fibers and leaves visible marks.
How does leather condition affect glue performance?
Even the right leather type can fail if its condition is ignored.
Leather that has been:
- Heavily conditioned
- Waterproof-sprayed
- Polished repeatedly
often carries oils and waxes that block adhesion. In these cases, leather glue may peel cleanly unless the surface is properly degreased first.
This explains why some users say “leather glue didn’t work”—when the real issue was surface chemistry, not adhesive quality.
Which sole materials are used on Clarks shoes—and why does glue choice change?
Clarks uses multiple sole materials, each reacting differently to adhesives.
| Sole Material | Flexibility | Aging Behavior | Glue Compatibility |
|---|---|---|---|
| Rubber | Medium–high | Stable | Excellent |
| EVA | High | Stable | Excellent |
| Crepe | Very high | Degrades over time | Limited / conditional |
Leather-to-rubber and leather-to-EVA repairs are ideal use cases for leather glue. These materials flex but remain chemically stable.
Crepe soles are the exception: once they oxidize, no adhesive can restore reliable bonding.
Why leather-to-leather and leather-to-rubber need different bonding logic
A common repair mistake is assuming all bonds behave the same.
- Leather-to-leather repairs prioritize flexibility and invisibility
- Leather-to-rubber repairs require higher initial tack and water resistance
High-quality leather glue is engineered to balance both—unlike super glue, which bonds fast but becomes brittle, or epoxy, which is strong but too rigid for footwear.
How do finishes, coatings, and treatments change the repair outcome?
Many Clarks shoes receive factory or aftermarket treatments:
- Anti-stain coatings
- Burnished edges
- Waterproof sprays
These layers act as adhesion barriers. Leather glue bonds best to raw or lightly finished surfaces. Removing coatings only in the bonding zone dramatically improves success without damaging appearance.
Why misidentifying materials causes most failed Clarks repairs
Most repair failures trace back to one root cause: the wrong glue for the material combination.
| Mistake | Result |
|---|---|
| Treating suede like smooth leather | Dark stains, stiff patches |
| Gluing aged crepe | Repeated detachment |
| Using rigid glue on flexible soles | Cracking and pop-off |
| Ignoring coatings | Clean peel failures |
Correct material identification is more important than glue brand.
Quick material-based decision guide for Clarks repairs
| Upper Material | Sole Material | Leather Glue Recommended? |
|---|---|---|
| Smooth leather | Rubber | Yes |
| Smooth leather | EVA | Yes |
| Nubuck | Rubber | Yes (careful application) |
| Suede | Rubber | Yes (test first) |
| Any leather | Aged crepe | No |
Which Types of Glue Work Best for Clarks Leather Shoe Repairs?
The best glue for Clarks leather shoe repairs is a flexible leather-specific adhesive that dries clear, remains elastic, and resists water. Leather glue works far better than super glue or epoxy because Clarks shoes bend and flex with every step. Rigid adhesives often crack or pop off, while leather glue moves with the shoe and delivers longer-lasting results.
Not all “strong” glues are suitable for shoes. In fact, many failed Clarks repairs happen because people choose adhesives based on initial strength, not long-term flexibility. Below is a clear breakdown of which glue types work—and why.
Does leather glue really work—and why is it different from regular glue?
Yes, leather glue really works—but only because it is engineered differently from common household adhesives.
Leather glue is formulated to:
- Stay flexible after curing
- Stretch slightly without cracking
- Bond to both porous (leather) and semi-porous (rubber/EVA) surfaces
- Maintain adhesion under repeated bending and compression
Clarks shoes flex thousands of times per day. A glue that dries rock-hard may feel strong at first but will fail quickly in real use. Leather glue succeeds because it behaves more like a rubberized bond, not a rigid plastic joint.
What is the best glue to hold leather together for Clarks repairs?
For leather-to-leather repairs on Clarks shoes—such as lifted seams, peeling panels, or detached trims—the ideal glue must balance strength, elasticity, and appearance.
The best leather glue should:
- Dry clear and non-yellowing
- Avoid whitening or stiffening the leather
- Allow thin, precise application
- Hold under daily wear without cracking
This is why professional cobblers and footwear repairers avoid general-purpose glue and rely on leather-specific adhesives for visible areas.
What glue will stick leather to leather without turning brittle?
Leather-to-leather bonding is one of the most demanding repair scenarios. Both surfaces move, stretch, and respond to humidity.
| Glue Type | Leather-to-Leather Result |
|---|---|
| Leather glue | Flexible, durable, clean |
| Super glue (CA) | Brittle, cracks |
| Epoxy | Too stiff |
| Craft glue | Weak, water-sensitive |
Leather glue forms a bond that flexes with the leather grain, preventing seam splitting and surface cracking—especially important for Clarks uppers that emphasize comfort.
Will super glue hold Clarks shoe repairs long term?
Super glue is one of the most common causes of failed Clarks repairs.
While it bonds instantly, super glue:
- Dries glass-hard
- Turns white on leather
- Cracks when flexed
- Pops off suddenly without warning
It may work for temporary cosmetic fixes, but for functional areas like soles or seams, it almost always fails. This explains why many users report “the glue worked for a day—then fell apart.”
Is epoxy glue strong enough for Clarks shoe soles?
Epoxy is strong—but strength alone is not enough.
| Factor | Epoxy Performance |
|---|---|
| Initial strength | Very high |
| Flexibility | Very low |
| Comfort impact | Stiff |
| Appearance | Visible seams |
Epoxy can be acceptable for non-flexing areas (e.g., decorative pieces), but for Clarks shoes—designed to flex naturally—it often compromises comfort and durability.
Which glue works best for leather-to-rubber or leather-to-EVA soles?
Leather glue is specifically formulated to handle mixed-material bonds, making it ideal for:
- Leather uppers to rubber soles
- Leather uppers to EVA midsoles
It offers:
- Strong initial tack
- Waterproof sealing after cure
- Elasticity under foot movement
This makes leather glue the most reliable choice for partial sole separation repairs on Clarks shoes.
HGlue comparison table: What actually works for Clarks shoes?
| Glue Type | Flexibility | Waterproof | Appearance | Long-Term Use |
|---|---|---|---|---|
| Leather glue | ⭐⭐⭐⭐⭐ | ⭐⭐⭐⭐ | ⭐⭐⭐⭐⭐ | Best choice |
| Super glue | ⭐ | ⭐⭐ | ⭐ | Not recommended |
| Epoxy | ⭐⭐ | ⭐⭐⭐⭐ | ⭐⭐ | Limited |
| Craft glue | ⭐⭐ | ⭐ | ⭐⭐ | Poor |
| Construction adhesive | ⭐⭐ | ⭐⭐⭐ | ⭐ | Too thick |
What glue should you avoid on Clarks leather shoes?
Avoid any glue that:
- Dries rigid or brittle
- Leaves white or yellow residue
- Is too thick to spread evenly
- Is not designed for leather or footwear
These adhesives often damage the look, comfort, and longevity of Clarks shoes.
How Do You Prep Clarks Leather and Soles So the Glue Actually Holds?
To make leather glue hold on Clarks shoes, you must fully remove oils, dirt, and old adhesive, lightly roughen only the bonding areas, and ensure the shoe is completely dry before gluing. Skipping preparation is the leading cause of repair failure—even when the correct glue is used.
If leather glue repairs fail, it’s rarely because the glue is weak. In most cases, the bond fails because the surface was never truly ready. Clarks shoes are often conditioned, polished, or weather-treated, which creates invisible barriers to adhesion. Preparation is what turns leather glue from “hit or miss” into a reliable repair.
How do you clean Clarks leather and soles without damaging them?
Clarks leather is usually treated to stay soft and comfortable, but those same treatments—oils, waxes, conditioners—block glue.
Best cleaning approach:
- Wipe the area with a dry, lint-free cloth
- Use a small amount of isopropyl alcohol (70–90%) on a cotton pad
- Gently wipe only the bonding zone
- Let the surface air-dry completely
Avoid soaking leather or scrubbing aggressively. Over-cleaning dries out fibers and weakens the surface.
For rubber or EVA soles:
- Remove dirt with warm water
- Dry fully before proceeding
Why removing old glue matters more than adding new glue
New glue does not bond well to old adhesive. It bonds to the weakest layer—causing peel-off failure.
Safe ways to remove old glue:
- Plastic scraper or wooden stick
- Gentle rubbing with alcohol
- Light sanding on the sole side only (not visible leather)
| Old Glue Left Behind | Repair Result |
|---|---|
| Thin residue | Weak, short-lived bond |
| Thick residue | Clean peel-off |
| Fully removed | Strong, lasting bond |
This step alone can double the lifespan of a repair.
Do you need sanding or roughening—and where exactly?
Yes—but only selectively.
Use fine-grit sandpaper (320–400 grit) to:
- Lightly roughen the inside edge of a separating sole
- Scuff the underside of lifted leather panels
Do not sand:
- Visible leather uppers
- Suede or nubuck faces
- Decorative areas
Roughening increases surface area and mechanical grip without harming appearance.
How dry should Clarks shoes be before gluing?
Leather absorbs moisture from:
- Rain
- Sweat
- Cleaning agents
- Humid air
Before gluing:
- Let shoes dry at room temperature for at least 12 hours
- Remove insoles if damp
- Never use heat dryers (they warp leather)
| Moisture Level | Glue Outcome |
|---|---|
| Fully dry | Strong, clear bond |
| Slightly damp | Cloudy glue, weak hold |
| Wet | Bond failure |
Dryness is non-negotiable for successful repairs.
Should you remove polish, waterproof spray, or edge coatings first?
Yes—at least in the bonding zone.
Common adhesion blockers:
- Shoe polish
- Waterproof spray
- Edge paint or burnishing wax
Remove them only where glue will be applied. You don’t need to strip the entire shoe—just create a clean bonding window.
This explains why many users say “the glue didn’t stick at all” even with premium products.
Why test-fitting and alignment save your repair
Before applying glue:
- Press parts together dry
- Check alignment from all angles
- Use painter’s tape or pencil marks as guides
Once glue is applied, repositioning weakens the bond. Dry-fitting prevents rushed corrections and uneven seams.
How Do You Glue Clarks Shoes Step by Step for a Strong, Clean Repair?
To glue Clarks shoes properly, apply a thin, even layer of flexible leather glue to clean, dry surfaces, press firmly, clamp gently, and allow a full 24-hour cure before wearing. Thin layers, correct pressure, and patience create stronger, cleaner repairs than using excess glue or rushing the process.
Even the best leather glue can fail if applied incorrectly. Most DIY shoe repairs fail not because of weak adhesive—but because of too much glue, uneven pressure, or wearing the shoes too early. The steps below reflect how professional cobblers approach leather shoe repairs, simplified for home use.
Step 1: Dry-fit and confirm the repair area
Before opening the glue:
- Press the loose parts together without glue
- Check alignment at the toe, heel, or seam
- Make sure the shoe still sits flat on the ground
- Mark alignment points with painter’s tape if needed
This step prevents last-second repositioning, which weakens adhesive bonds.
Step 2: Apply a thin, controlled layer of leather glue
Less glue creates a stronger bond.
Best practice:
- Apply a thin, even coat to both bonding surfaces
- Focus on full coverage, not thickness
- Use a fine metal tip or toothpick for precision
| Glue Thickness | Result |
|---|---|
| Too thick | Messy squeeze-out, weak cure |
| Uneven | Gaps and stress points |
| Thin & even | Strong, flexible bond |
Leather glue works by surface contact—not by filling gaps.
Step 3: Allow proper tack time (if required)
Some leather glues benefit from a short tack phase:
- Wait 1–2 minutes after application
- Glue becomes slightly tacky, not wet
This improves initial grip and reduces slipping during pressing.
Always follow the glue’s instructions—this step varies by formulation.
Step 4: Press the parts together firmly and evenly
Once aligned:
- Press firmly with both hands
- Hold pressure for 1–5 minutes
- Ensure edges meet cleanly without gaps
Avoid sliding the parts once they touch. Sliding breaks the forming adhesive film.
Step 5: Clamp or secure the repair correctly
Clamping maintains pressure while the bond sets—but gentle pressure is key.
Recommended methods:
- Rubber bands (even pressure)
- Painter’s tape
- Shoe trees (for shape support)
Avoid heavy clamps that:
- Deform leather
- Leave dents or marks
- Push glue out of the joint
| Clamping Method | Best Use Case |
|---|---|
| Rubber bands | Sole edges |
| Tape | Seams & uppers |
| Shoe tree | Toe alignment |
Step 6: Clean excess glue immediately
If glue squeezes out:
- Wipe gently with a dry cloth while wet
- Do not smear glue across leather
- Avoid solvents on visible areas
High-quality leather glue dries clear, but cleanup is always easier before curing.
Step 7: Respect curing time—this determines success
This is the most ignored step.
| Stage | Time |
|---|---|
| Initial set | 6–10 minutes |
| Handling safe | 6–10 hours |
| Full cure | 24 hours |
Do not:
- Walk in the shoes
- Flex the sole
- Expose to water or heat
before full curing. Early use causes delayed failure days later.
Step 8: Post-repair check before wearing
After 24 hours:
- Gently flex the shoe by hand
- Check for lifting edges
- Ensure no stiffness at pressure points
If the bond feels elastic and secure, the repair is ready for normal wear.
Common mistakes that ruin otherwise good repairs
| Mistake | Why It Fails |
|---|---|
| Too much glue | Weak internal cure |
| No clamping | Bond separates under stress |
| Wearing too early | Adhesive film breaks |
| Using rigid glue | Cracks with movement |
| Skipping prep | Glue peels off |
Avoiding these mistakes dramatically increases repair lifespan.
FAQs: What Else Should You Know About Leather Glue for Clarks?
Below are the most common and most searched questions Clarks owners ask before and after using leather glue. These answers are practical, experience-based, and written to help you avoid common repair mistakes.
Does leather glue really work on Clarks shoes?
Yes—leather glue really works on Clarks shoes when the problem is adhesive-related, not structural. Most Clarks repair needs involve sole separation, lifted leather panels, or loose seams, all of which are ideal use cases for flexible leather glue.
Failures usually happen because:
- The wrong glue was used (e.g., super glue)
- The surface was oily or damp
- The shoe was worn before full curing
When applied correctly, leather glue repairs can last months or even years, often outlasting the original factory bond.
What is the best glue to hold leather together on Clarks shoes?
The best glue for Clarks leather repairs is a leather-specific adhesive that:
- Dries flexible, not rigid
- Bonds leather-to-leather and leather-to-rubber
- Dries clear without whitening
- Is waterproof after curing
General-purpose glue may stick initially, but it lacks the elasticity needed for daily walking. Leather glue is specifically designed for footwear movement.
What glue will stick leather to leather without cracking?
Leather-to-leather repairs require a glue that can stretch slightly with the leather grain. Leather glue creates a rubberized bond that flexes naturally.
Avoid:
- Super glue (brittle, cracks)
- Epoxy (too stiff)
- Craft glue (weak, water-sensitive)
For seams, overlays, and leather trims on Clarks shoes, leather glue is the most reliable option.
Is leather glue waterproof enough for rain and daily wear?
Yes. Once fully cured (usually after 24 hours), quality leather glue is water-resistant to waterproof for normal use.
That said:
- Occasional rain is fine
- Puddles and soaking should be avoided
- Air-dry shoes naturally after getting wet
Leather glue is designed for real-world footwear conditions, not indoor-only repairs.
How long do leather glue repairs on Clarks shoes last?
Longevity depends on:
- How well the shoe was prepped
- Where the repair is located
- Walking habits and environment
| Repair Area | Typical Lifespan |
|---|---|
| Sole edge reattachment | 6–24 months |
| Leather seam repair | 1–3 years |
| Decorative panel fix | Often permanent |
Proper preparation and full curing dramatically extend lifespan.
Can I glue Clarks crepe soles back on?
It depends on the condition of the crepe.
- Yes, if the crepe is intact and only separating
- No, if the crepe is sticky, crumbling, or powdery
Aged crepe breaks down chemically. No glue can restore degraded material. In those cases, resoling by a cobbler is the correct solution.
Is leather glue safe for suede or nubuck Clarks shoes?
Yes—but with caution.
Tips:
- Always test in a hidden area
- Use minimal glue
- Apply only to the bonding edge, not the surface fibers
Too much glue stiffens suede and leaves dark marks. Precision matters more than strength here.
Can leather glue replace stitching on Clarks shoes?
Leather glue can reinforce or supplement stitching, but it should not fully replace stitching in high-load areas.
Use leather glue to:
- Secure loose stitched seams
- Prevent further separation
For torn stitching or structural seams, professional repair is recommended.
Why did my Clarks repair fail even though the glue felt strong at first?
This is a common frustration. Early strength does not equal long-term durability.
Most delayed failures are caused by:
- Wearing the shoes before 24-hour curing
- Gluing over old adhesive
- Moisture trapped in leather
- Using rigid glue that cracked after flexing
Redoing the repair with proper prep usually fixes the issue.
Can leather glue damage Clarks leather or comfort?
When used correctly, no. Leather glue is designed to:
- Dry flexible
- Preserve softness
- Avoid hard spots or pressure points
Damage usually comes from:
- Over-application
- Using the wrong adhesive type
- Applying heat to speed drying
Thin layers and patience protect both comfort and appearance.
Is it worth repairing Clarks shoes instead of replacing them?
In many cases, yes.
If:
- The shoe is comfortable
- The leather is in good condition
- The problem is adhesive-related
Then leather glue repair is often far more cost-effective than replacement—and more sustainable.
Many Clarks shoes are discarded with less than 20% material wear, simply due to minor adhesive failures.
Conclusion
Clarks shoes are built for comfort—but comfort depends on flexibility. That’s why the right leather glue matters. When you choose a flexible, waterproof, leather-specific adhesive and apply it with patience and preparation, repairs stop being temporary fixes and become long-term solutions.
For everyday Clarks owners, leather glue offers a smarter alternative to replacement—saving money, preserving comfort, and reducing waste. For professionals, retailers, and brand owners, it represents consistent performance and customer trust.
Whether you’re repairing your favorite Clarks shoes—or building your own leather care brand—GleamGlee is ready to support you from formula to fulfillment.
Share:
Table of Contents
Here, creating your adhesives glue & removal cleaner collection is no longer a barrier—it’s a collaborative journey where GleamGlee helps brands and businesses transform their vision into durable, certified, and market-ready solutions.
Partner with GleamGlee
Join hundreds of global partners who trust GleamGlee for adhesives and cleaners that combine innovation, compliance, and speed. Our vertically integrated system—from R&D to warehouse—guarantees consistent performance and reliable delivery.
Whether you’re sourcing FBA-ready stock or developing your own formula, our team provides unmatched technical support and responsive service.





















