 Skip to content
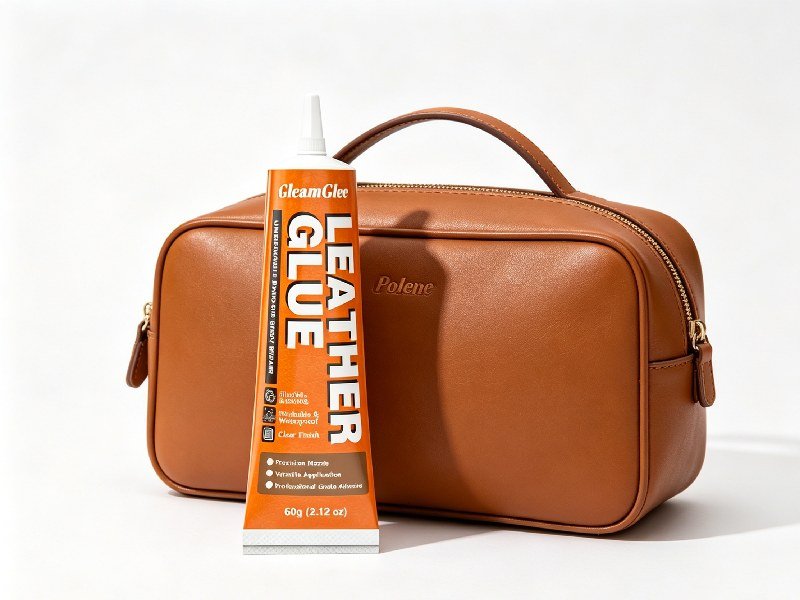
A damaged leather strap can make a good bag feel useless even when the rest of the bag still looks fine. The zipper may still run smoothly. The body may still hold shape. The lining may still be clean. But once a handle cracks, a strap edge splits, or a leather tab starts pulling away, the whole bag becomes risky to carry. This is why strap repair is worth doing early. A 1 cm split is usually easier to fix than a full strap break. A loose edge can often be bonded neatly before it spreads across the handle.
To repair leather straps on bags, clean the damaged area, remove loose dirt or old glue, apply a thin layer of flexible leather glue, press the strap firmly, hold it flat with clips or tape, and let it cure fully before carrying weight. Clear, flexible, waterproof leather glue is usually better than hard super glue because bag straps bend, pull, and rub during daily use.
The real repair goal is not just “make it stick.” A bag strap carries weight and stays visible. A poor repair can leave shiny glue marks, hard ridges, cracked edges, or a weak bond that fails when the bag is full. A careful repair should keep the strap clean, flexible, and strong enough for normal use. Think of a favorite handbag with one peeling handle, a work tote with a strap tab lifting, or a travel bag starting to split at the edge. Fixing the problem early can save the bag, save money, and prevent an embarrassing break when the bag is being carried.
What Hurts Leather Straps on Bags?
Leather straps on bags usually get damaged from repeated bending, heavy weight, hand oil, sweat, moisture, edge rubbing, poor storage, and weak layer bonding. The first signs are often small cracks, lifted edges, loose tabs, peeling coating, darkened handles, or broken stitches near the strap base.
A bag strap carries most of the pulling force, even when the rest of the bag still looks new. A daily handbag may hold 2–5 kg of items, while a work tote with a laptop, charger, books, water bottle, and cosmetics may carry 5–8 kg or more. That weight is not spread evenly across the whole bag. It concentrates on the handle curve, metal ring, buckle hole, stitched tab, and folded strap end.
Small strap damage often spreads because the same area bends and pulls every day. A 5 mm edge split can turn into a long opening after repeated carrying. A fine crack near a buckle hole can become a full tear when the bag is lifted quickly. Early repair with flexible leather glue is usually cleaner and safer than waiting until the strap breaks across the full width.
What Causes Cracks?
Leather strap cracks usually start in areas that bend over and over again, especially the handle curve, shoulder contact area, buckle holes, folded strap ends, and strap base. These points are under repeated tension every time the bag is lifted, carried, adjusted, or stored. When leather becomes dry, overloaded, or rubbed too often, the surface loses flexibility and begins to show fine lines. Those fine lines may look harmless at first, but they can deepen into visible cracks if the strap keeps bending under weight.
Common causes include:
◆ Carrying heavy items every day, such as laptops, water bottles, tablets, and books.
◆ Hanging the bag by one strap instead of supporting both handles.
◆ Folding straps sharply inside a closet or suitcase.
◆ Leaving the bag near heat, direct sunlight, or inside a hot car.
◆ Using harsh cleaners, alcohol wipes, or strong detergents on leather.
◆ Letting small surface lines go untreated for months.
| Crack Area | Main Cause | Early Sign | Repair Risk |
|---|---|---|---|
| Handle curve | Repeated hand bending | Fine cross-lines | Crack spreads with carrying |
| Strap base | Heavy load | Small lifting tab | Strap may pull away |
| Buckle holes | Pulling and adjustment | Oval holes, side splits | Hole may tear open |
| Folded strap end | Sharp crease | Edge opening | Layers may separate |
| Shoulder area | Friction and sweat | Dark dry patch | Surface becomes brittle |
| Faux leather strap | Coating fatigue | Peeling surface | Repair may be temporary |
For small cracks with lifted edges, a thin line of flexible leather glue can help close the opening and slow further splitting. If the leather is already powdery, missing, or torn through the full thickness, glue alone may not be enough. A patch, stitching, or strap replacement may be safer.
Why Do Edges Split?
Leather strap edges split because many straps are made from bonded layers, not one solid piece. A handbag strap may use folded leather, two glued leather strips, faux leather over fabric backing, or leather wrapped around filler. When the inner bond weakens, the strap opens from the edge like a sandwich. This often begins as a tiny lift, then grows as dust, oil, and moisture enter the gap. Once the layers stop lying flat together, every bend makes the split longer.
Edge splitting often happens near:
◆ Handle edges touched by hand oil and sweat.
◆ Strap ends folded around metal rings.
◆ Buckle areas pulled during adjustment.
◆ Corners where the leather rubs against clothing.
◆ Faux leather edges where the coating separates from backing.
◆ Old repair areas where hard glue has cracked.
| Edge Split Type | What It Means | Best Repair Timing | Glue Suitability |
|---|---|---|---|
| Tiny lift under 1 cm | Early layer separation | Repair immediately | High |
| Long handle edge split | Bond between layers failed | Repair before curling | Medium to high |
| Strap tab opening | Load point weakening | Repair carefully | Medium |
| Split near buckle hole | High-tension damage | Reinforce if needed | Medium to low |
| Faux leather peeling | Surface coating failure | Remove loose coating first | Medium |
| Full edge curl | Leather shape changed | Harder to hide | Low to medium |
A clean edge split is one of the easiest strap problems to repair at home. Apply a thin line of flexible leather glue inside the opening, press the layers flat, and hold them with padded clips. Avoid thick glue because overflow can leave shiny lines along the strap edge. If the split is close to a load-bearing tab, stitching or reinforcement may be needed after gluing.
Are Loose Straps Fixable?
Loose straps are fixable when the leather is still stable and the damage is limited to lifted layers, loose folded ends, small tab separation, or broken surface bonding. The repair becomes more difficult when the stitching has failed, the metal hardware is pulling out, the leather is torn across the full width, or the strap carries heavy weight every day. Before applying glue, the damaged area should be checked carefully so the repair method matches the real problem.
Check these points before repair:
◆ Is the strap only opening at the edge?
◆ Is the leather tab pulling away from the bag body?
◆ Are the stitches broken or stretched?
◆ Is the metal ring loose or tearing through the leather?
◆ Is the strap cracked through the full thickness?
◆ Does the bag usually carry heavy items?
| Loose Strap Problem | Glue Repair Chance | Better Fix |
|---|---|---|
| Small edge opening | High | Glue, press, cure |
| Loose folded end | High | Thin glue and clips |
| Strap tab slightly lifting | Medium | Glue plus long pressure |
| Broken stitches | Medium | Restitch plus glue |
| Metal ring pulling out | Low | Hardware reinforcement |
| Full strap tear | Low | Patch, stitch, or replace |
| Laptop bag strap | Medium to low | Glue plus stitching support |
For light handbags, small loose strap areas can often be repaired neatly with flexible leather glue. For work totes, backpacks, travel bags, or laptop bags, glue may help bond the leather layers, but extra stitching or a reinforcement patch is often safer. A strap repair should not only look closed; it should be strong enough for the way the bag is actually used.
Which Glue Repairs Leather Straps on Bags?
The best glue for leather straps on bags is a flexible, clear-drying leather glue that can handle bending, pulling, and repeated hand contact. Bag straps are not flat decorative pieces. They carry weight, rub against clothing, bend around the hand or shoulder, and often sit in the most visible part of the bag.
A good strap glue should stay flexible after drying, dry clear without turning white or yellow, and cure strongly enough for normal daily use. Hard instant glue may look convenient, but it can become brittle on straps and crack near the repair line. For handbags, purses, totes, backpacks, and travel bags, flexibility is often more important than instant hardness.
GleamGlee Leather Glue is suitable for leather strap repairs because it forms a strong flexible bond, dries clear, uses a precision metal tip, and fully cures in 24 hours into a waterproof repair. It works on genuine leather, faux leather, and suede, making it useful for strap edges, handles, wallet corners, bag trim, belts, and small leather accessories.
Which Glue Works?
Flexible leather glue works best for bag straps because the repaired area must still move after drying. A strap bends every time the bag is lifted, carried, set down, or adjusted. If the glue dries hard, the strap may crack beside the bond line, especially near handle curves, buckle holes, and metal rings. The right adhesive should bond the layers while keeping the strap close to its original feel.
For strap repair, look for these features:
◆ Flexible bond after drying.
◆ Clear, non-yellowing finish.
◆ Thin application control.
◆ Waterproof or water-resistant cure.
◆ Works on genuine leather, faux leather, and suede.
◆ Does not dry white or brittle.
◆ Allows careful pressing before full cure.
| Strap Material | Common Repair Need | Best Glue Feature |
|---|---|---|
| Genuine leather | Cracks, split edges, loose layers | Flexible clear bond |
| Faux leather | Peeling coating, edge lift | Thin controlled application |
| Suede | Small splits, trim repair | Minimal glue, hidden test |
| PU leather | Surface lift, strap separation | Clear glue with light pressure |
| Bonded leather | Layer separation | Edge bonding, realistic expectations |
| Coated leather | Visible edge repair | Non-yellowing finish |
GleamGlee Leather Glue fits this type of repair because the metal tip helps place glue inside narrow splits instead of spreading it across the visible strap surface. This is especially useful for handbag handles, purse straps, travel bag edges, wallet seams, watch straps, and belt-like bag straps. The glue bonds in 6–10 minutes, but the strap should be left for a full 24-hour cure before carrying weight.
Is Super Glue Bad?
Super glue is usually not the best choice for leather straps because many super glues dry too hard. Bag straps bend and pull every day, so a rigid glue line can become a weak point. The repair may hold at first, but once the strap curves around the hand or shoulder, the hard glue can crack, peel, or separate from the leather.
Super glue can also create appearance problems. It may dry white, cloudy, shiny, or stiff. On black leather, white residue is easy to notice. On tan or brown leather, a glossy hard line can stand out. On suede, super glue can flatten the fibers and leave a dark patch. On faux leather, it may bond to a weak peeling coating instead of the stronger backing underneath.
Super glue may only be useful for a tiny trim piece that does not bend or carry weight. It is not a good first choice for:
◆ Split strap edges.
◆ Handbag handles.
◆ Shoulder straps.
◆ Strap tabs.
◆ Buckle areas.
◆ Suede straps.
◆ Faux leather peeling layers.
| Repair Area | Super Glue Risk | Better Choice |
|---|---|---|
| Strap edge split | Brittle hard line | Flexible leather glue |
| Handle curve | Cracks after bending | Soft flexible bond |
| Strap tab | Weak under weight | Glue plus stitching if needed |
| Buckle hole | Splits under tension | Reinforcement plus flexible glue |
| Suede strap | Dark stiff mark | Test-safe leather glue |
| Faux leather | Coating may keep peeling | Thin flexible adhesive |
If the repaired part bends, choose flexible leather glue. If the repaired part carries weight, let it cure fully. If the repaired part is visible, use a clear-drying glue and apply it thinly.
Does Flex Matter?
Flex matters a lot for leather straps on bags because the repair area keeps moving after the glue dries. A strap may look still when the bag is on a table, but during use it bends around the hand, twists near metal hardware, pulls downward from weight, and rubs against clothing. A glue that cannot move with the strap can fail quickly.
A flexible glue helps reduce common repair problems:
◆ Cracking beside the glue line.
◆ Edge lifting after several uses.
◆ Hard spots on the handle.
◆ White stress marks on dark leather.
◆ Peeling near buckle holes.
◆ Uncomfortable stiffness on shoulder straps.
GleamGlee Leather Glue is specially formulated to stay flexible after drying. This makes it more suitable for bag straps than ordinary hard glue. It is useful for handbag handles, purse straps, backpack trim, travel bag handles, wallet straps, belts, watch straps, and leather loops.
| Strap Zone | Movement Type | Why Flex Matters |
|---|---|---|
| Handle grip | Hand bending and squeezing | Prevents stiff raised repair |
| Shoulder strap | Curving over shoulder | Reduces cracking |
| Buckle area | Pulling and adjustment | Helps resist splitting |
| Strap base | Downward load | Supports layered repair |
| Folded end | Edge tension | Keeps layers closed |
| Wallet strap | Repeated folding | Prevents hard break points |
The strap should cure in its natural shape. A flat strap should dry flat. A curved handle should dry in a gentle curve. A strap near hardware should not be pulled tight during curing. If the repair dries under tension, it may open again when the bag is used.
Is Waterproof Glue Needed?
Waterproof or water-resistant glue is useful for bag straps because bags are exposed to more moisture than many people realize. Hand sweat, light rain, damp clothing, makeup residue, spilled drinks, and cleaning cloths can all reach the strap. Moisture is especially common on handles because they are touched repeatedly throughout the day.
A strap repair should not weaken the first time the bag meets humidity or a damp hand. Waterproof curing is especially important for:
◆ Everyday handbags.
◆ Work totes.
◆ Travel bags.
◆ Backpacks.
◆ Outdoor bags.
◆ Bag handles used in rainy weather.
◆ Straps near metal rings where moisture can collect.
| Moisture Source | Strap Risk | Glue Need |
|---|---|---|
| Hand sweat | Weakens edge repair over time | Waterproof cured bond |
| Light rain | Softens poor glue lines | Water-resistant repair |
| Damp clothing | Transfers moisture to strap | Flexible waterproof glue |
| Cleaning cloth | Moisture enters split edge | Full cure before wiping |
| Travel use | Weather and handling exposure | Durable bond |
| Metal hardware area | Moisture trapped near rings | Strong cured seal |
GleamGlee Leather Glue fully cures in 24 hours into a waterproof bond. The strap should stay dry during that curing period. Do not test water resistance early. A glue can feel dry in minutes but still need more time to reach final strength. For bag straps, curing overnight before use is one of the simplest ways to improve repair durability.

How to Repair Leather Straps on Bags
Repairing leather straps on bags starts with one rule: fix the damage before the strap becomes unsafe. A small split edge, loose folded end, lifted tab, or cracked surface can often be repaired neatly at home with flexible leather glue. A strap that is torn across the full width, detached from metal hardware, or carrying heavy laptop weight may need glue plus stitching or a reinforcement patch.
The best repair process is simple but needs patience. Clean the strap, apply a thin layer of glue, press the damaged area tightly, then let it cure fully before carrying the bag again. GleamGlee Leather Glue bonds in 6–10 minutes, but a full 24-hour cure gives the repair better strength and water resistance.
A strap repair should look clean and feel flexible after drying. Thick glue, rushed curing, or poor pressure can leave shiny marks, stiff spots, or weak edges. The goal is not to fill the damage with a big glue layer. The goal is to bond the leather layers back together while keeping the strap flat, natural, and usable.
Step 1: Clean First
Cleaning is the first repair step because bag straps collect more oil and dirt than most parts of the bag. Handles are touched every day by hands with sweat, lotion, makeup, sanitizer, dust, and natural skin oil. Shoulder straps rub against clothing, hair products, rain jackets, denim dye, and perfume residue. If glue is applied over those layers, it may bond to the dirt instead of the leather, causing the repair to peel open after a few uses. A clean strap gives the glue direct contact with stable material and makes the repair stronger.
Use a dry cloth first to remove dust and loose particles. If the strap feels greasy, wipe gently with a slightly damp cloth and a mild leather-safe cleaner, then let it dry fully. Do not soak the strap. Too much water can darken leather, soften backing material, and slow the glue cure. For suede or nubuck straps, use a soft brush instead of water. For faux leather or PU straps, remove loose peeling coating before gluing because glue cannot hold well to a layer that is already separating.
◆ Remove hand oil, dust, sweat, and lotion residue.
◆ Clean inside the split edge as much as possible.
◆ Let the strap dry fully before applying glue.
◆ Do not use alcohol, bleach, acetone, or harsh detergent.
◆ Remove only loose old glue; do not scrape stable leather.
| Strap Type | What Usually Needs Cleaning | Best Method |
|---|---|---|
| Smooth leather | Hand oil, dust, polish | Dry cloth, light damp wipe if needed |
| Faux leather | Peeling coating, surface dirt | Trim loose pieces, wipe gently |
| Suede strap | Dust, loose fibers | Soft brush, avoid soaking |
| Coated leather | Lotion, gloss residue | Gentle wipe, test first |
| Old repaired strap | Loose glue, dirt in gap | Remove unstable residue |
| Strap tab near ring | Dust around stitching | Clean carefully around seams |
The strap should feel dry, clean, and stable before gluing. If it feels slippery, damp, dusty, or crumbly, wait or clean again. A few extra minutes of preparation can prevent the repair from failing after the first day.
Step 2: Glue Thinly
Thin glue works better than thick glue on bag straps. A strap repair needs close contact between leather layers. If too much glue is squeezed into the split, the layers may not sit flat, and the repaired area can dry with a raised ridge. Thick glue also takes longer to cure and may squeeze out onto the visible surface, leaving shiny marks along the strap edge.
For a split strap edge, gently open the gap just enough to place glue inside. Do not force the leather open wider than needed. Apply a fine line of GleamGlee Leather Glue along the inner split with the metal tip. For a loose folded end, apply a thin coat between the layers. For a strap tab, apply glue only where the tab touches the bag body. Avoid coating the outside face of the strap.
◆ Use a fine line for edge splits.
◆ Use a thin film for wider lifted layers.
◆ Keep glue inside the repair area.
◆ Wipe fresh overflow before it dries.
◆ Do not use glue as a filler for missing leather.
| Damage Type | Where to Apply Glue | Amount Needed |
|---|---|---|
| Small edge split | Inside the opening | Fine line |
| Long strap split | Along the inner layer | Thin continuous line |
| Folded handle end | Between folded layers | Light coat |
| Strap tab lifting | Under contact area | Thin even film |
| Surface crack with lifted flap | Under the flap only | Tiny amount |
| Decorative trim lift | Under trim edge | Pinpoint line |
If the strap has a hole, missing leather, or a tear across the full width, glue alone is not enough. Add a backing patch or reinforcement strip, then use glue to bond the leather to the support. A thin glue layer with support usually holds better and looks cleaner than a thick glue lump.
Step 3: Press Tight
Pressing is what turns glue into a real bond. After applying glue, the leather layers must touch closely while the adhesive sets. If the split is left slightly open, the repair may dry with a gap, and that gap can start peeling again once the bag is carried. Good pressure keeps the repair line flat and helps the strap keep its original shape.
Align the strap first. Make sure the edges match before applying clips or tape. For thin straps, use small binder clips with cloth, paper, or thin cardboard underneath to prevent dents. For wider handles, place several clips along the repair line instead of one clip in the middle. For curved handles, use rubber bands or a soft wrap to hold the curve naturally. For strap tabs, painter’s tape or light pressure can help keep the tab against the bag body.
◆ Press firmly but do not crush the leather.
◆ Use even pressure along the full split.
◆ Protect soft leather from clip marks.
◆ Keep the strap flat or in its natural curve.
◆ Do not open the repair to check strength too early.
| Repair Area | Best Holding Tool | Practical Detail |
|---|---|---|
| Thin strap edge | Small padded clips | Space clips evenly |
| Wide handle split | Binder clips | Use cloth under clips |
| Curved handle | Rubber bands or soft wrap | Keep natural curve |
| Strap tab | Painter’s tape or flat press | Avoid pulling near hardware |
| Wallet strap | Small clip | Use very little glue |
| Decorative trim | Tape | Remove gently after setting |
GleamGlee Leather Glue bonds in about 6–10 minutes, but holding the repair longer is better for strap areas that carry weight. Overnight pressure is ideal for handles, tabs, and long splits. A strap that cures flat and closed usually looks better and lasts longer.
Step 4: Cure Fully
Curing is the step that gives the repair real strength. A glue may feel dry after several minutes, but that does not mean the strap is ready to carry weight. GleamGlee Leather Glue dries in 6–10 minutes and fully cures in about 24 hours. The early drying stage holds the strap in place; the full cure builds final strength, flexibility, and waterproof performance.
Do not use the bag during the curing period. Do not hang it by the repaired strap, fill it with heavy items, bend the strap sharply, or pull the repair open to test it. These actions can break the bond before it finishes curing. The safest method is to repair the bag in the evening and use it the next day with a light load first.
◆ Keep the bag empty while curing.
◆ Keep the strap dry for 24 hours.
◆ Avoid heat guns or strong hair dryer heat.
◆ Do not bend the repaired area during curing.
◆ Start with a lighter load after the first 24 hours.
| Time After Gluing | What to Do | What to Avoid |
|---|---|---|
| 0–10 minutes | Align and press | Moving the strap |
| 10–30 minutes | Keep pressure steady | Pulling to test strength |
| 30 minutes–6 hours | Leave flat or clipped | Carrying the bag |
| 6–24 hours | Keep dry and unloaded | Hanging by the strap |
| After 24 hours | Use gently first | Overloading immediately |
For light handbags, a well-cured glue repair can work well on small splits and loose edges. For work totes, backpacks, and travel bags, the first use after repair should be cautious. If the strap base carries heavy weight, add stitching or reinforcement instead of relying on glue alone.
What Tips Help Repair Leather Straps on Bags?
Repairing leather straps on bags works better when the glue is used lightly, the strap is held in the right shape, and the leather is tested before visible repair. Bag straps are narrow, handled often, and usually easy to see, so small mistakes can show quickly.
The best repair habits are simple: use less glue, keep the strap flat or naturally curved, test a hidden area first, and avoid moisture during curing. These steps help prevent shiny glue marks, hard ridges, dark stains, weak bonding, and peeling after the bag is used.
A strap repair should not only look closed. It should stay flexible, feel smooth in the hand, and hold under normal daily carrying. For heavy totes, laptop bags, backpacks, or travel bags, glue can bond layers neatly, but stitching or reinforcement may still be needed at load-bearing points.
Use Less Glue
Using less glue is one of the most important tips for repairing leather straps on bags. A thick glue line does not make the strap stronger. In many cases, it does the opposite. Too much glue can stop the leather layers from sitting flat, slow down curing, and leave shiny marks along the edge. Since bag straps are touched and seen every day, a bulky repair can make the whole bag look poorly maintained.
For a small split edge, apply a fine line inside the opening. For a wider lifted layer, spread a thin film between the layers. For a strap tab, apply glue only on the contact area, not around the whole surface. GleamGlee Leather Glue has a metal tip, which helps place glue inside narrow gaps without flooding the visible strap surface.
◆ Apply glue inside the split, not across the outside of the strap.
◆ Start with less glue, then add a tiny amount only if needed.
◆ Wipe fresh overflow before it dries.
◆ Avoid thick glue beads on light-colored leather.
◆ Do not use glue as filler for missing leather.
| Strap Damage | Better Glue Amount | What Too Much Glue Causes |
|---|---|---|
| Tiny edge split | Fine inner line | Shiny edge residue |
| Long split edge | Thin continuous line | Hard raised seam |
| Folded handle end | Light inner coat | Bulky handle feel |
| Strap tab lift | Thin film on contact area | Overflow near stitches |
| Suede strap split | Minimal glue | Dark flattened fibers |
| Faux leather peel | Small amount under stable layer | Surface staining |
A clean strap repair should feel almost flat after pressing. If the repaired area feels like a hard ridge, too much glue was likely used. Thin glue, firm pressure, and full curing usually give a cleaner and stronger result.
Keep Straps Flat
Keeping the strap flat, straight, or in its natural curve while curing helps the repair hold better. A strap that dries twisted or bent under tension may reopen when the bag is used. Leather remembers shape during repair, so the curing position matters.
For flat tote straps, lay the strap straight and press the split evenly. For rounded handbag handles, keep the handle in its soft natural curve instead of forcing it flat. For adjustable shoulder straps, avoid gluing while the strap is bent sharply around the buckle. If the damage is near a metal ring, make sure the ring does not pull on the repair during curing.
Useful holding methods include:
◆ Small padded clips for narrow strap edges.
◆ Binder clips for wider handles.
◆ Painter’s tape for flat strap tabs.
◆ Rubber bands for curved handles.
◆ Light weights for folded strap ends.
◆ Soft cloth under clips to prevent dents.
| Strap Type | Best Cure Position | Holding Method |
|---|---|---|
| Flat tote strap | Straight and flat | Several padded clips |
| Curved handle | Natural gentle curve | Rubber band or soft wrap |
| Shoulder strap | Flat, not twisted | Clips or tape |
| Buckle strap | Relaxed, not pulled tight | Keep away from tension |
| Strap tab | Pressed against bag body | Painter’s tape or flat pressure |
| Thin purse strap | Straight and aligned | Small padded clips |
Even pressure is better than hard pressure in one spot. If the split is long, use several light clips along the repair line. One strong clip in the center may leave the ends loose, causing the split to reopen later.
Test First
Testing a hidden area helps prevent visible mistakes on leather straps. Different leather finishes react differently to glue. Smooth leather, faux leather, suede, nubuck, coated leather, bonded leather, and PU leather may absorb glue differently or show changes in color, shine, or texture. A bag strap is usually very visible, so even a small glue mark can be frustrating.
Before repairing the main damage, apply a tiny amount of glue to an unseen part of the strap or inner leather edge. Let it dry completely, then check the result under normal light. Do not judge while the glue is still wet because the final look can change after curing.
Check for:
◆ Darkening on tan or light leather.
◆ Shiny marks on matte leather.
◆ White or cloudy residue on black leather.
◆ Texture flattening on suede.
◆ Coating lift on faux leather.
◆ Sticky residue after drying.
| Bag Strap Material | Testing Need | Main Risk |
|---|---|---|
| Black leather | Medium | Shiny or white glue line |
| Brown leather | Medium | Gloss change |
| Tan leather | High | Darkened repair mark |
| White leather | High | Visible residue |
| Suede | Very high | Flattened nap, dark spot |
| Faux leather | High | Coating lift |
| Coated leather | High | Surface shine mismatch |
Testing is especially important for expensive bags, light-colored straps, suede handles, vintage bags, and faux leather straps that already show peeling. A hidden test takes little time and can prevent a repair mark that is harder to fix than the original split.
Avoid Moisture
Moisture can weaken leather strap repair before the glue has fully cured. Wet leather blocks proper bonding, slows drying, and can create dark marks on sensitive materials. Bag straps often meet moisture from rain, hand sweat, damp clothing, cleaning cloths, or recently applied leather conditioner.
Do not glue a strap immediately after cleaning or conditioning. The surface may look dry while moisture remains inside the split edge or seam. Let the strap dry fully before applying glue. After repair, keep the strap dry for 24 hours so the bond can cure properly. GleamGlee Leather Glue fully cures in about 24 hours into a waterproof bond, but the repair should not be exposed to water during that curing period.
◆ Do not repair rain-wet straps.
◆ Avoid gluing over leather conditioner or oil.
◆ Let cleaned straps dry fully first.
◆ Keep repaired straps away from water for 24 hours.
◆ Avoid humid rooms during curing.
◆ Do not use high heat to force drying.
| Moisture Source | Repair Problem | Better Action |
|---|---|---|
| Rain-wet strap | Weak glue bond | Air-dry fully before repair |
| Hand sweat | Oil and moisture block adhesion | Wipe and dry first |
| Recent cleaning | Slow cure | Wait until fully dry |
| Leather conditioner | Glue may peel | Clean repair area carefully |
| Damp suede | Dark stains | Brush and dry longer |
| Humid room | Uneven curing | Cure in a dry space |
A dry repair area gives the glue better contact and a cleaner finish. For best results, repair the bag in a dry room at normal temperature, leave the strap still overnight, and use the bag gently the next day.

What Mistakes Hurt Leather Straps on Bags?
Leather strap repairs usually fail because the wrong glue is used, the strap is not cleaned well, the repair is moved too soon, or the bag is loaded before the glue has fully cured. A strap may look repaired while lying flat, but the real test starts when the bag is lifted, pulled, filled, or carried on the shoulder.
Bag straps are different from flat leather patches. They move, bend, twist, and carry weight every day. A small purse strap may carry light pressure, while a work tote or travel bag may carry several kilograms of load. If the repair becomes too hard, too thick, or too weak at the strap base, the damage can reopen quickly.
A good strap repair should close the split, stay flexible, feel smooth in the hand, and hold under normal use. Small edge splits can often be repaired with flexible leather glue. Broken stitches, torn hardware areas, or full strap tears usually need stitching, patch support, or strap replacement.
Using Hard Glue
Using hard glue is one of the most common mistakes in leather strap repair. Many instant glues dry fast, but they often become stiff after curing. That stiffness is a problem because bag straps bend around the hand, curve over the shoulder, twist near metal rings, and pull downward when the bag is full. A hard glue line may look strong at first, but it can crack beside the repair after repeated movement.
Hard glue can also make the strap uncomfortable. A repaired handle may feel raised, sharp, or plastic-like. On a shoulder strap, the stiff area can rub against clothing or press into the shoulder. On a thin purse strap, the hard spot may become the next place to split. Appearance can also suffer because hard glue may dry white, cloudy, glossy, or brittle, especially on black, tan, white, or suede straps.
Avoid hard glue when repairing:
◆ Split strap edges.
◆ Curved handbag handles.
◆ Shoulder straps.
◆ Strap tabs near metal rings.
◆ Buckle-hole areas.
◆ Faux leather peeling layers.
◆ Suede or nubuck straps.
| Strap Area | Hard Glue Problem | Better Repair Choice |
|---|---|---|
| Handle curve | Cracks after bending | Flexible leather glue |
| Split edge | Brittle raised line | Thin flexible bond |
| Shoulder strap | Stiff uncomfortable spot | Soft, flexible repair |
| Strap tab | Fails under weight | Glue plus stitching if needed |
| Buckle hole | Splits under pulling | Reinforcement plus flexible glue |
| Suede strap | Dark hard patch | Minimal glue and hidden test |
A simple rule works well: if the strap bends, do not use glue that dries like glass. Choose flexible leather glue that can move with the strap instead of fighting against it.
Skipping Prep
Skipping preparation can make even good leather glue peel away. Bag straps collect hand oil, sweat, lotion, dust, makeup, leather conditioner, polish, and old glue residue. These layers may be thin, but they block the adhesive from touching the leather properly. When glue bonds to oil or dirt instead of the strap material, the repair can lift after only a few uses.
Preparation matters most around handles and strap bases. Handles are touched constantly, so they often hold body oil and lotion. Strap bases near metal rings collect dust and friction debris. Old repairs may have loose glue inside the split. Faux leather straps may have peeling coating that must be trimmed before bonding. If these unstable layers remain, the new glue cannot form a strong repair.
Before applying glue, check that the strap is:
◆ Dry, not damp or cool to the touch.
◆ Clean, not greasy or dusty.
◆ Stable, not crumbling or shedding loose coating.
◆ Free from loose old glue.
◆ Able to close neatly when pressed.
◆ Not freshly conditioned with oil or wax.
| Surface Problem | What It Does | Better Prep Step |
|---|---|---|
| Hand oil | Blocks glue contact | Wipe with clean cloth |
| Dust in split edge | Creates weak bond | Brush or clean the gap |
| Lotion residue | Makes surface slippery | Clean gently, dry fully |
| Old loose glue | Causes peeling | Remove unstable pieces |
| Wet leather | Slows curing | Let dry completely |
| Peeling faux leather | Glue bonds to weak coating | Trim loose coating first |
Do not use harsh cleaners such as bleach, acetone, or strong alcohol on bag straps. These may dry, discolor, or damage the leather finish. A gentle clean and full drying time are usually safer.
Rushing Cure
Rushing the cure is a major reason strap repairs fail. Leather glue may feel dry after a few minutes, but that does not mean it is ready to carry weight. GleamGlee Leather Glue dries in about 6–10 minutes, but full curing takes around 24 hours. The early stage holds the parts in position; the full cure builds stronger bonding and better water resistance.
A repaired strap should not be pulled, bent, loaded, or tested too early. When the bag is picked up, the strap immediately takes downward force. If the glue is still developing strength, the repair may shift or reopen. This is especially risky on strap tabs, handle curves, shoulder straps, buckle areas, and long split edges.
Better curing habits include:
◆ Repair the bag at night and use it the next day.
◆ Keep the strap flat or in its natural curve.
◆ Keep clips or tape in place for several hours.
◆ Leave the bag empty during curing.
◆ Keep the repair dry for 24 hours.
◆ Do not pull the split open to test strength.
| Time After Repair | Strap Condition | What To Avoid |
|---|---|---|
| 0–10 minutes | Glue begins to set | Moving or sliding the strap |
| 10–30 minutes | Surface may feel dry | Pulling to test the bond |
| 30 minutes–6 hours | Bond is still developing | Carrying or bending |
| 6–24 hours | Strength is increasing | Hanging the bag by the strap |
| After 24 hours | Full cure expected | Overloading immediately |
After the first 24 hours, start with a lighter load. A repaired strap can be strong, but a fresh repair should not be pushed to the heaviest use on the first day.
Ignoring Heavy Loads
Ignoring the weight inside the bag can turn a small repair into a failed repair. A small handbag may only carry light items, but a tote, backpack, work bag, or travel bag can carry a heavy load every day. Laptop bags are especially demanding because the strap must handle steady downward pull, swinging movement, and sudden lifting force.
Glue can bond leather layers, but it cannot always replace stitching, hardware, or structural reinforcement. If the strap base is lifting, the metal ring is pulling out, or the leather tab is torn through, flexible glue may improve the repair, but it should not be the only support for heavy carrying.
Extra support is safer when:
◆ The bag carries a laptop or books.
◆ The strap tab is pulling away from the bag body.
◆ Stitching is broken or stretched.
◆ The strap is torn across the width.
◆ The damage is close to a metal ring.
◆ The same repair has failed before.
| Bag Type | Load Level | Repair Advice |
|---|---|---|
| Small purse | Light | Glue repair may be enough for small splits |
| Daily handbag | Light to medium | Flexible glue with full cure |
| Tote bag | Medium to high | Glue plus reinforcement if strap base is loose |
| Laptop bag | High | Stitching or patch support recommended |
| Backpack | High | Reinforce load points |
| Travel bag | Very high | Do not rely on glue alone for torn straps |
A repaired strap should match the way the bag is used. For light edge splits, flexible leather glue can be very useful. For heavy-load straps, glue should work with stitching, patches, or hardware repair so the bag remains safe to carry.
Why Use GleamGlee for Leather Straps on Bags?
GleamGlee Leather Glue is a strong choice for repairing leather straps on bags because it is made for flexible, visible, everyday leather repairs. Bag straps bend, pull, rub against clothing, and carry weight, so the glue needs to hold firmly without drying into a stiff, brittle line.
This glue dries clear and non-yellowing, which matters on handbag handles, purse straps, wallet edges, and leather trim where the repair can be seen up close. It also bonds in 6–10 minutes and fully cures in 24 hours into a waterproof seal, giving the strap enough time to build strength before the bag is carried again.
Its precision metal tip is especially useful for narrow strap splits and lifted edges. Instead of spreading glue across the visible leather surface, the tip helps place a thin line inside the damaged area. That makes the repair cleaner, reduces waste, and helps the strap keep a more natural look and feel.
Flexible Bond
GleamGlee Leather Glue stays flexible after drying, which is important for bag strap repair. A strap does not stay still after it is fixed. It bends around the hand, curves over the shoulder, twists near metal rings, and pulls downward when the bag is filled. If the glue dries hard, the repaired area can crack beside the glue line or peel open after repeated use. A flexible bond allows the repaired strap to move closer to the way leather naturally moves.
This is especially useful for handbag handles, tote straps, purse shoulder straps, backpack leather trim, folded strap ends, and wallet-style closures. On these areas, the repair needs to hold but still feel comfortable in the hand. A stiff repair may feel rough, raised, or sharp. A flexible repair is more suitable for daily carrying.
GleamGlee Leather Glue helps with:
◆ Split strap edges that need to close flat.
◆ Handle curves that bend during carrying.
◆ Strap tabs that face downward pulling force.
◆ Belt-like adjustable straps with repeated movement.
◆ Wallet corners and small leather loops that fold often.
◆ Bag trim that needs a clean, soft repair line.
| Repair Area | Daily Stress | GleamGlee Benefit |
|---|---|---|
| Handbag handle | Bending and hand pressure | Flexible bond reduces cracking |
| Shoulder strap | Curving and pulling | Helps repair move with leather |
| Strap base | Weight load | Supports layered bonding |
| Folded end | Edge tension | Helps keep layers closed |
| Wallet strap | Repeated folding | Reduces hard spots |
| Backpack trim | Rubbing and bending | Helps prevent edge lift |
For heavy strap damage, glue should be paired with stitching or reinforcement. But for split edges, lifted layers, loose folded ends, and small cracks, a flexible leather glue gives a cleaner and more practical repair than hard instant glue.
Clear Finish
GleamGlee Leather Glue dries clear and non-yellowing, helping repaired bag straps look cleaner after drying. This matters because straps are one of the most visible parts of a bag. A white mark on a black handle, a yellow line on a white strap, or a shiny patch on tan leather can make the repair look worse than the original damage.
A clear finish is useful on many common bag colors and materials. Black leather often shows white residue easily. Brown and tan leather can show dark glue marks if too much adhesive is used. White and light-colored straps need a non-yellowing finish. Suede and faux leather need careful testing because texture and coating can change if glue spreads onto the surface.
Best results come from thin application. GleamGlee dries clear, but any glue can look obvious if too much is left on the outside of the strap. Keep the glue inside the split, press the layers flat, and wipe away fresh overflow before it dries.
GleamGlee is useful for:
◆ Black handbag handles.
◆ Brown leather tote straps.
◆ Tan purse edges.
◆ White leather bag straps.
◆ Faux leather trim.
◆ Wallet corners.
◆ Watch straps and belt-style accessories.
| Strap Color or Finish | Common Worry | GleamGlee Advantage |
|---|---|---|
| Black leather | White residue | Clear drying |
| Brown leather | Glossy repair line | Thin controlled use |
| Tan leather | Dark edge marks | Hidden test and light glue |
| White leather | Yellowing | Non-yellowing finish |
| Faux leather | Coating marks | Apply inside stable layer |
| Suede | Darkened fibers | Use minimal glue, test first |
| Colored leather | Visible mismatch | Clear bond line |
A clean-looking repair is often just as important as strength on handbags and purses. The repaired strap should not draw attention every time the bag is picked up.
Metal Tip
The metal tip makes GleamGlee Leather Glue easier to use on bag straps because most strap damage is narrow. A split edge may only open a few millimeters. A handle layer may lift along a thin seam. A wallet strap may need a tiny amount of glue at one corner. A large nozzle can release too much glue and create overflow.
The metal tip helps place glue inside the damaged area instead of across the outside surface. This is important for visible leather straps, where a clean line makes the repair look more natural. It also helps reduce waste because a strap repair usually needs only a small amount of glue.
The tip is helpful for:
◆ Thin split edges on handles.
◆ Narrow openings near strap tabs.
◆ Wallet seams and corners.
◆ Watch strap cracks.
◆ Belt-style bag straps.
◆ Decorative leather trim.
◆ Faux leather edges.
◆ Small craft repairs.
| Repair Scene | Problem With Wide Nozzle | Metal Tip Benefit |
|---|---|---|
| Narrow strap split | Too much glue comes out | Thin line inside split |
| Handle edge lift | Glue spreads onto surface | Cleaner edge placement |
| Strap tab gap | Mess near stitching | More accurate application |
| Wallet corner | Hard glue lump | Small controlled amount |
| Watch strap | Overflow on tiny repair | Fine placement |
| Decorative trim | Uneven glue line | Neater finish |
Precise application also helps prevent the most common strap repair problems: shiny glue marks, stiff edges, slow drying, and uneven bonding. For anyone repairing a visible handbag strap, control is not a small detail. It is what makes the repair look acceptable after drying.
Bag-Friendly Repair
GleamGlee Leather Glue is bag-friendly because it matches the real needs of handbag, purse, tote, backpack, travel bag, and accessory repair. It works on genuine leather, faux leather, and suede, which covers many common strap materials. It can be used for straps, handles, trim, wallet edges, belt loops, watch straps, gloves, and other small leather items.
The drying and curing time also fits home repair. The glue bonds in 6–10 minutes, so small repairs do not feel complicated. Full curing takes 24 hours, which gives the strap time to build final strength and water resistance. For bag straps, that full cure matters because the repaired area will later carry weight.
Common bag repair uses include:
◆ Handbag strap edge splitting.
◆ Purse handle layer lifting.
◆ Tote bag strap cracks.
◆ Backpack leather trim repair.
◆ Travel bag handle separation.
◆ Wallet corner reinforcement.
◆ Belt and watch strap cracks.
◆ Bag lining and leather trim bonding.
◆ Decorative leather patch attachment.
| GleamGlee Feature | Bag Repair Benefit |
|---|---|
| Flexible bond | Better for bending straps |
| Clear finish | Cleaner visible repair |
| Non-yellowing drying | Better for light straps |
| Waterproof after cure | More reliable daily use |
| 6–10 minute drying | Fast initial hold |
| 24-hour full cure | Stronger final bond |
| Metal tip | More precise repair |
| Genuine leather, faux leather, suede use | Fits many bag materials |
For light strap splits, loose edges, and small cracks, GleamGlee Leather Glue can help restore the strap neatly at home. For heavy-load strap bases, broken stitching, or full strap tears, it can be used together with stitching, backing patches, or reinforcement for a safer repair.
Conclusion
Repairing leather straps on bags is often worth doing before the damage becomes serious. A small split, lifted edge, cracked handle, or loose folded end can usually be repaired more cleanly than a fully torn strap. The best repair starts with clean, dry leather, a thin layer of flexible glue, steady pressure, and enough curing time before the bag carries weight again.
The right glue makes a big difference. Bag straps need a bond that stays flexible, dries clear, and handles normal pulling and bending. Hard glue may look strong at first, but it can crack or leave visible marks on leather. GleamGlee Leather Glue is designed for these practical repair needs, with a flexible bond, clear non-yellowing finish, precision metal tip, 6–10 minute drying time, and 24-hour waterproof cure.
GleamGlee welcomes direct product orders, brand cooperation, and custom adhesive inquiries. For Amazon sellers, Shopify brands, distributors, repair product companies, and private-label customers, GleamGlee can support leather glue formulas, packaging design, sample development, bulk production, FBA-ready supply, and global shipping. Whether the goal is repairing one favorite bag or building a complete leather repair product line, GleamGlee can provide reliable adhesive solutions and tailored manufacturing support.


