 Skip to content
How to Do DIY Tent Maintenance for Cleaner Outdoor Gear: A Complete Guide
Your trusted adhesives glue & cleaner manufacturer
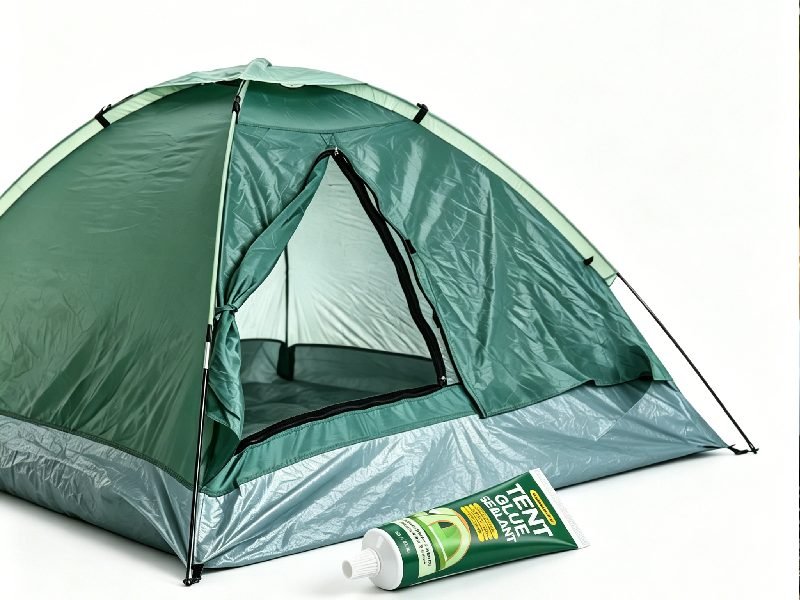
A tent usually does not fail all at once. It starts with a damp smell after storage, a zipper that feels gritty, a tiny hole in the floor, peeling seam tape, or a corner that feels thinner than the rest of the fabric. These small signs are easy to ignore at home, but they become much harder to handle when rain starts at midnight or cold air enters through a damaged panel. For campers, hikers, families, and outdoor gear owners, DIY tent maintenance is not just about keeping a tent clean. It is about keeping the shelter dry, comfortable, safe, and ready for the next trip.
To do DIY tent maintenance, clean the tent by hand, dry it fully, inspect seams, fabric, zippers, poles, and floor areas, repair small holes or tears with flexible waterproof tent glue, reseal weak seams, restore water resistance when needed, and store the tent in a dry, breathable place. A 20–40 minute check after each trip can prevent leaks, mold, fabric cracking, and costly gear replacement.
A good tent may cost $100, $300, $800, or more depending on the size and use. A family tent, rooftop tent, event canopy, or expedition shelter can cost even more. But many tents are damaged by the same simple habits: packing them wet, scrubbing them with harsh detergent, ignoring small holes, storing them compressed for months, or using ordinary glue that dries hard and cracks when the fabric folds. This guide walks through DIY tent maintenance in a practical way, so the next time your tent comes out of the bag, it feels reliable instead of risky.
What Is DIY Tent Maintenance?
DIY tent maintenance is the regular care process used to keep a tent clean, dry, sealed, and ready for outdoor use. It includes removing dirt, drying the fabric, checking seams, repairing small holes, sealing weak areas, protecting waterproof layers, and storing the tent correctly. The goal is simple: stop small problems before they turn into leaks, mold, torn fabric, or a failed shelter during a trip.
A tent is exposed to more stress than it may seem. During one camping trip, the fabric can touch wet grass, mud, sand, rocks, tree branches, pet claws, food crumbs, body moisture, UV light, and repeated folding. The floor handles pressure from sleeping pads and gear. The rainfly takes rain and sun. The seams take pulling force. The zippers collect dust and grit. Without maintenance, these small stresses build up over time and reduce the tent’s waterproofing, strength, and comfort.
Good DIY tent maintenance does not mean washing the tent after every light use or making it look brand-new. It means knowing what matters most: keep moisture out, keep dirt from rubbing into coatings, keep seams sealed, repair small damage early, and avoid storage habits that cause mildew or sticky fabric. For most tents, a quick 20–40 minute check after each trip is enough, while a deeper check is useful before rainy seasons, long trips, or storage longer than 2–3 months.
| DIY Tent Maintenance Task | Why It Matters | When to Do It |
|---|---|---|
| Shake out dirt and sand | Prevents coating wear and zipper damage | After every trip |
| Spot clean fabric | Removes mud, sap, food, and odor sources | When visible dirt appears |
| Fully dry the tent | Prevents mold, mildew, and bad smell | Before every storage |
| Check seams | Finds early leak points | Before and after rainy trips |
| Repair holes | Stops tears from spreading | As soon as damage is found |
| Seal weak areas | Improves water resistance | Before wet-weather use |
| Store correctly | Protects coating and fabric life | Between trips |
Why DIY Tent Maintenance Matters
DIY tent maintenance matters because tent damage usually starts small. A 2 mm floor puncture, a short loose seam, or a gritty zipper may not look serious at home, but outdoors these problems become much bigger. Rain, wind, ground pressure, and repeated movement can turn a tiny weak point into a wet sleeping area, a ripped floor, or a door that no longer closes properly.
The real cost is often more than the tent itself. A leaking tent can wet sleeping bags, clothes, phones, power banks, food bags, and camping mats. A damp sleeping bag may take hours to dry. A wet floor can make the whole tent feel cold. For a family tent, one leak near a corner can affect several people at once. For hiking or remote camping, poor tent condition can become a safety concern, especially in cold or rainy weather.
Regular maintenance gives clear practical value:
- It helps extend the service life of the tent.
- It reduces the chance of rain leaks during use.
- It prevents mildew smell during storage.
- It keeps zippers moving smoothly.
- It reduces the need for emergency campsite repairs.
- It helps avoid replacing a tent too early.
- It keeps outdoor gear cleaner and easier to pack.
A tent that costs $150–$500 can often be protected with basic cleaning, drying, and small repairs. A large family tent, rooftop tent, canvas tent, or event canopy may cost much more, so catching damage early is even more important. A small tube of flexible waterproof tent glue can often repair several seams, holes, or worn spots before they become expensive problems.
What DIY Tent Maintenance Covers
DIY tent maintenance covers every part of the tent that affects shelter performance. This includes the tent body, rainfly, floor, seams, mesh panels, zippers, pole sleeves, stake loops, guylines, and storage bag. Each part has a different job, so each part needs a slightly different type of care.
The tent floor usually needs the most attention because it touches rough ground. Rocks, sticks, pine needles, shoes, pet claws, and heavy gear can create small punctures or worn spots. The rainfly needs regular checking because it takes sun, rain, wind, tree sap, and bird droppings. Seams need care because stitch holes are common water-entry points. Zippers need cleaning because sand and grit can make them jam or separate.
A practical tent care check can be divided like this:
| Tent Part | Common Issue | Maintenance Action |
|---|---|---|
| Tent floor | Pinholes, worn coating, damp spots | Clean, inspect, patch, seal |
| Rainfly | Small tears, coating wear, leaks | Clean, dry, repair, reseal |
| Seams | Peeling tape, stitch leaks | Apply flexible sealant |
| Mesh panels | Snags, insect holes | Patch or reinforce |
| Zippers | Grit, sticking, separation | Brush clean, avoid forcing |
| Corners | Tension tears, loose stitching | Reinforce early |
| Pole sleeves | Fraying, fabric rub | Patch weak areas |
| Stake loops | Pull damage | Repair before next setup |
| Storage bag | Dirt, trapped moisture | Clean and dry separately |
DIY tent maintenance also includes repair product choice. Ordinary household glue may dry too hard, which can crack when the tent is folded or stretched. A tent repair adhesive should stay flexible after curing, resist water, and bond common outdoor materials such as nylon, vinyl, canvas, polyester, PVC-coated fabric, tarps, rainflies, awnings, and groundsheets.
GleamGlee Tent Repair Glue is made for tent repair and surface sealing. It works as both an adhesive and a sealant, forming a clear flexible rubber-like seal after curing. It is suitable for repairing seams, holes, cracks, and tears in tents, tarps, awnings, groundsheets, sleeping bags, pop-up shelters, and outdoor covers. Each 2.12 fl oz tube can cover up to 60 feet of seams or fabric, making it useful for both small repairs and longer maintenance work.
When to Do DIY Tent Maintenance
DIY tent maintenance should be done after each trip, before long storage, and before important outdoor use. The level of care depends on how the tent was used. A dry one-night backyard camp may only need shaking out and airing. A rainy mountain trip needs full drying, seam checking, floor inspection, and possible waterproof repair.
The best time to check a tent is when there is no pressure. It is much easier to find and repair a leak at home than at a campsite in bad weather. A tent should be opened and checked before the first trip of the season, especially if it has been stored for several months. Fabric can smell fine from the outside of the bag but still have damp corners, coating stickiness, or hidden seam problems inside.
Use this timing guide:
| Situation | What to Do |
|---|---|
| After a dry short trip | Shake out dirt, air dry, quick visual check |
| After a rainy trip | Fully dry, check seams, inspect floor and rainfly |
| After beach camping | Remove sand from fabric, corners, and zippers |
| After muddy camping | Hand clean dirty areas, dry longer |
| After pet or kids’ use | Check floor, mesh, doors, and corners |
| Before a long trip | Set up tent, test zippers, inspect seams and holes |
| Before rainy season | Reseal weak seams and repair worn areas |
| Before storage over 2–3 months | Clean, dry, repair, and store in a cool dry place |
A useful habit is to divide maintenance into two levels. Light maintenance takes about 20 minutes and includes shaking, drying, and quick inspection. Deep maintenance may take 1–2 hours, especially if the tent needs cleaning, seam sealing, patching, or waterproof treatment. Drying and curing time may take longer, so repair should not be left until the night before a trip.
What Problems Can DIY Tent Maintenance Prevent?
DIY tent maintenance can prevent many common tent problems, including leaks, mold, bad smell, zipper failure, fabric tears, seam damage, floor seepage, and coating breakdown. Most of these problems are easier to prevent than to fix after they become serious.
The most common preventable issue is moisture damage. A tent packed even slightly damp can develop mildew smell or dark spotting, especially in warm storage areas. Another common issue is seam leakage. Seam tape and stitch lines can weaken over time, but early resealing can stop water before it enters the sleeping area.
A simple prevention chart:
| Problem | Early Sign | Prevention Method |
|---|---|---|
| Rain leak | Damp seam or corner | Clean, dry, reseal seam |
| Mold smell | Musty odor after storage | Dry fully before packing |
| Floor seepage | Wet spot under sleeping pad | Patch pinholes, use footprint |
| Zipper jam | Rough zipper movement | Remove sand and grit early |
| Fabric tear | Small snag or cut | Patch before it spreads |
| Coating wear | Sticky or flaky surface | Clean gently, avoid heat |
| Mesh hole | Tiny broken strands | Patch early |
| Corner stress | Loose stitching or stretching | Reinforce with flexible glue |
For outdoor gear, flexibility matters. Tent fabric moves every time it is folded, packed, pitched, pulled tight, or pushed by wind. A repair that becomes hard may fail faster than the fabric around it. That is why flexible waterproof adhesive is useful for maintenance. It seals damage while still allowing movement.
Good maintenance also makes the next trip easier. The tent comes out of storage clean, dry, and checked. There is less guessing, less last-minute repair, and less worry when the weather forecast changes. For anyone who depends on a tent for camping, hiking, overlanding, events, fieldwork, or family outdoor use, this kind of preparation is worth the time.
How to Clean for DIY Tent Maintenance?
Cleaning is one of the most important steps in DIY tent maintenance because dirt does more than make a tent look used. Sand can grind against waterproof coating. Mud can hold moisture. Tree sap can harden on fabric. Food residue can attract insects. Salt from beach camping can affect zippers and metal parts. If these materials stay on the tent during storage, they can slowly reduce fabric performance and create odor.
To clean for DIY tent maintenance, first shake out loose dirt, then wipe dirty areas by hand with cool water and mild soap when needed. Focus on the floor, corners, door areas, rainfly edges, zipper tracks, and muddy spots. After cleaning, rinse away soap residue and air-dry the tent completely before packing or repairing.
A tent should not be cleaned like normal laundry. Washing machines, strong detergent, bleach, stiff brushes, hot water, dryers, and pressure washers can damage waterproof coatings, seam tape, mesh, and fabric strength. For most tents, careful hand cleaning is safer and more useful than aggressive washing. The goal is not to make the tent look brand-new; the goal is to remove the dirt, moisture, and residue that shorten its service life.
| Tent Cleaning Area | Common Dirt | Best Cleaning Method | Risk If Ignored |
|---|---|---|---|
| Tent floor | Mud, sand, grass, small stones | Shake, wipe with damp cloth | Coating wear, floor holes |
| Door area | Shoes, dust, crumbs | Brush and wipe | Odor, insects, zipper grit |
| Rainfly | Tree sap, bird droppings, dust | Spot clean gently | Stains, coating damage |
| Zippers | Sand, dried mud, salt | Soft brush and clean water | Jamming, zipper separation |
| Seams | Mud, moisture, old residue | Wipe lightly and dry | Weak bonding during repair |
| Mesh panels | Dust, insects, small debris | Soft cloth, gentle brushing | Snags, airflow reduction |
| Stuff sack | Damp fabric, soil, odor | Turn out, clean, dry | Mold smell transfers back |
How to Shake Off Dirt
Shaking off dirt should always come before washing. Loose sand, leaves, pine needles, small stones, crumbs, and dry mud are easier to remove when the tent is dry. If water is added too early, dry dirt can turn into sticky grime and spread across the fabric.
Open all tent doors and windows first. If the tent is small enough, turn it upside down and shake it gently from different corners. For a large family tent, spread it over a clean tarp or dry grass and sweep debris toward the door with a soft brush or clean cloth. Do not drag the tent across concrete, gravel, or rough ground because the floor coating can be scratched.
Pay close attention to hidden areas:
- Floor corners where dirt collects
- Door threshold where shoes step in
- Pole sleeves where sand can hide
- Rainfly folds where leaves and dust gather
- Zipper tracks where grit causes sticking
- Stuff sack bottom where damp dirt often remains
Sand needs extra care, especially after beach camping. Fine sand can stay inside zipper teeth and folded seams. When the tent is packed tightly, that sand can rub against coated fabric. A few minutes of brushing can prevent long-term abrasion.
How to Wash Tent Fabric
Tent fabric should be washed by hand with cool water and a soft sponge, cloth, or non-abrasive brush. Mild soap can be used only when water alone cannot remove dirt. Use a small amount, clean the dirty area gently, and wipe again with clean water so soap does not remain on the coating.
A safe hand-cleaning process is:
- Remove dry dirt first.
- Lay the tent on a clean surface or pitch it loosely.
- Wet only the dirty area with cool water.
- Apply a small amount of mild soap if needed.
- Wipe gently in one direction instead of hard scrubbing.
- Rinse the area with clean water.
- Check that no slippery soap film remains.
- Dry the fabric fully before packing or repairing.
Different stains need different handling:
| Stain Type | What to Do | What Not to Do |
|---|---|---|
| Fresh mud | Let it dry slightly, brush off, then wipe | Do not smear wet mud everywhere |
| Dried mud | Soften with cool water, wipe slowly | Do not scrape with sharp tools |
| Tree sap | Spot clean patiently in small steps | Do not use strong solvents |
| Bird droppings | Remove quickly, rinse well | Do not leave for long storage |
| Food residue | Clean with mild soap and rinse | Do not pack with sweet or oily residue |
| Salt marks | Wipe with clean water | Do not leave salt on zippers |
| Mold smell | Air out, clean gently, dry fully | Do not cover smell with fragrance |
The floor often needs the most cleaning, but it should also be treated carefully. Tent floors usually carry important waterproof layers. Heavy scrubbing can thin the coating. If the floor has stubborn dirt, clean it in several gentle passes instead of one rough pass.
If repair is needed later, the cleaned area must be completely dry. Flexible waterproof tent glue works best when the surface is free from dirt, oil, soap film, and moisture. For seam sealing, hole repair, or patch bonding, surface preparation is just as important as the glue itself.
How to Dry the Tent
A tent must be fully dry before storage. This includes the outside fabric, inside floor, seams, rainfly hems, pole sleeves, zipper edges, mesh corners, and stuff sack. A tent that feels dry on the main panels may still hold moisture in folded areas.
Air drying is the safest method. Pitch the tent in shade with good airflow or hang it over a clean line, railing, or drying rack. Turn the tent during drying so the floor underside and rainfly edges can dry evenly. If outdoor drying is not possible, use a clean indoor space with ventilation.
Drying time depends on weather and fabric type:
| Tent Condition | Approximate Drying Need |
|---|---|
| Light morning dew | 1–2 hours with airflow |
| Spot-cleaned fabric | 2–4 hours depending on area |
| Rain-soaked nylon tent | Half day or longer |
| Thick canvas tent | Often longer than one day |
| Wet floor underside | Extra drying time needed |
| Damp seams and hems | Check again before packing |
Before packing, check these areas by touch:
- Four floor corners
- Floor underside
- Rainfly edges
- Door folds
- Pole sleeves
- Seam lines
- Mesh attachment points
- Stuff sack interior
If any area feels cool, heavy, damp, or sticky, keep drying. Packing a damp tent can lead to mildew smell, dark spots, coating damage, and a sticky feel. If a wet tent must be packed at the campsite, unpack and dry it immediately after returning home.
What Cleaning Mistakes to Avoid
The biggest cleaning mistake is treating a tent like clothing. A tent has coatings, seams, mesh, zippers, and waterproof layers that can be damaged by harsh cleaning. Machine washing may twist and stress the fabric. Dryers and direct heat can damage coatings. Strong detergent can leave residue or weaken water resistance.
Avoid these common mistakes:
| Mistake | Why It Causes Problems | Better Method |
|---|---|---|
| Machine washing | Twists fabric and weakens seams | Hand clean only |
| Using bleach | Damages fabric and coatings | Use mild soap sparingly |
| Hard scrubbing | Wears waterproof layers | Wipe gently |
| Pressure washing | Forces water into seams | Use low-pressure rinsing |
| Hot drying | Can damage coating and plastic parts | Air dry naturally |
| Packing damp | Causes mold and odor | Dry fully first |
| Gluing over soap residue | Weakens repair bonding | Rinse and dry before repair |
| Ignoring zippers | Grit causes jamming | Brush and wipe tracks |
Another mistake is cleaning only the visible outer fabric. The dirtiest areas are often the floor, door entry, corners, and zipper paths. These areas affect performance more than a light stain on the wall panel.
For tents that need repair, cleaning should always come first. A small hole, seam leak, or worn floor spot should be cleaned, dried, and then repaired. GleamGlee Tent Repair Glue is designed for outdoor fabric repair and surface sealing, but even a good adhesive needs a clean dry surface. A thin, controlled layer on properly prepared fabric will usually perform better than a thick layer applied over dust or damp material.

How to Check DIY Tent Maintenance Problems?
Checking tent problems is one of the most useful parts of DIY tent maintenance because most serious tent failures begin as small, easy-to-fix damage. A pinhole in the floor, a 2 cm loose seam, a gritty zipper, or a thin worn corner may not look urgent at home. But once the tent is pitched under tension, exposed to rain, stepped on, folded, or packed tightly, that small problem can quickly become a leak, tear, or failed entry point.
To check DIY tent maintenance problems, set up the tent in good light and inspect the seams, floor, rainfly, mesh, zippers, pole sleeves, corners, stake loops, and high-stress areas. Look for holes, peeling seam tape, water marks, sticky coating, rough zippers, loose stitching, thin fabric, and damaged waterproof layers before the next trip.
A proper tent check should be done slowly, section by section. Do not only look at the clean outer panels. The most important problems often appear in hidden or high-pressure areas: the floor underside, door threshold, rainfly ridge seam, four corners, pole contact points, and places where the tent folds repeatedly. A 10–20 minute inspection after a normal trip is usually enough. After rain, beach use, rocky ground, pet use, or long storage, a deeper 30–60 minute check is safer.
| Area to Check | Common Problem | Early Sign | Why It Matters |
|---|---|---|---|
| Tent seams | Seam leakage | Peeling tape, dark water marks | Rain often enters through stitch lines |
| Tent floor | Punctures, coating wear | Pinholes, thin spots, damp patches | Ground moisture can enter at night |
| Rainfly | Worn waterproofing | Fabric wets out, peeling coating | First defense against rain weakens |
| Mesh panels | Snags and holes | Broken strands, tiny tears | Insects enter and tears spread |
| Zippers | Grit or separation | Rough pull, stuck teeth | Door may fail to close properly |
| Corners | Tension damage | Loose stitching, stretched fabric | Can tear under wind or pitching force |
| Pole sleeves | Fabric abrasion | Fraying, rub marks | Poles can push through weak areas |
| Stake loops | Pull damage | Loose thread, fabric splitting | Tent loses stable setup tension |
How to Check Tent Seams
Tent seams should be checked first because they are one of the most common leak points. A tent seam is not just a stitched line. It is a high-stress connection between fabric panels. It may also include seam tape, coating, glue, or sealant. When this area weakens, rainwater can enter through tiny stitch holes or gaps even when the fabric itself still looks waterproof.
Start with the rainfly seams because they take the most direct rain. Then check the floor seams, door seams, corner seams, and any seam that runs across the roof. Use your fingers as well as your eyes. A weak seam may feel raised, flaky, brittle, sticky, or uneven. If seam tape is lifting, bubbling, cracking, or peeling away, that area should be repaired before the next wet-weather trip.
Check seams in this order:
- Pitch the tent or spread the fabric flat.
- Follow each seam slowly from one end to the other.
- Look for peeling seam tape or loose stitching.
- Touch the seam to feel for rough, sticky, or raised areas.
- Check the inside and outside when possible.
- Mark weak spots with removable tape.
- Clean and dry the seam before sealing.
| Seam Location | Damage to Look For | Repair Priority |
|---|---|---|
| Rainfly ridge seam | Peeling, cracks, water marks | High |
| Floor seam | Damp corners, worn coating | High |
| Door seam | Stretching, zipper stress | Medium to high |
| Corner seam | Loose thread, fabric pull | High |
| Window seam | Small gaps, aging tape | Medium |
| Pole sleeve seam | Friction marks, fraying | Medium |
A small seam leak can often be repaired with a thin controlled line of flexible waterproof tent glue or seam sealant. For this type of repair, more glue does not always mean better repair. A smooth, even line that follows the seam and extends slightly past the weak area usually bends better and looks cleaner. GleamGlee Tent Repair Glue can be used for seam sealing because it forms a clear flexible rubber-like seal after curing, helping the seam move with the tent fabric instead of turning stiff.
How to Find Small Holes
Small holes are often harder to find than large tears, but they can cause just as much trouble during rain or on damp ground. A tiny floor puncture may let water soak into a sleeping pad area. A pinhole in a rainfly can drip slowly for hours. A small mesh hole can become a larger tear after several uses.
The best way to find small holes is to use light. Set the tent up in daylight or place a flashlight behind the fabric. Look from the opposite side. Pinholes often appear as bright dots. This method works especially well on tent floors, rainflies, and darker fabric panels. For mesh, gently stretch the area and look for broken strands or uneven gaps.
Check these common hole locations carefully:
- Floor area under sleeping pads
- Corners near stakes
- Door threshold where people step in
- Rainfly edges near poles
- Fabric near clips and hooks
- Mesh near zippers
- Areas rubbed by backpacks or gear boxes
- Places where pets or children touched the fabric
- Groundsheet or footprint contact areas
| Hole Size | What It Usually Means | Suggested Fix |
|---|---|---|
| Pinpoint to 2 mm | Small puncture from stone, thorn, or grit | Seal with flexible tent glue |
| 3–10 mm | Fabric has opened enough to weaken | Glue plus small patch |
| 1–3 cm tear | Tear may spread under tension | Patch with sealed edges |
| Over 3 cm | Higher stress damage | Larger patch, possibly both sides |
| Shredded fabric | Material strength is badly reduced | Stronger repair or replacement section |
After finding a hole, do not pull at it to “test” it. That can make it larger. Trim only loose threads if needed, and keep the repair area flat. For small punctures, a flexible waterproof adhesive can seal the opening. For larger tears, use a patch and seal the patch edges to stop water and peeling.
For tent floors, patch strength matters more than appearance because the area faces pressure and friction. For rainflies, keep the repair neat and thin so the fabric still folds easily. For mesh panels, use a suitable mesh patch or careful edge repair so airflow remains good.
How to Test Tent Leaks
A leak test is useful before a rainy trip, after long storage, or after repairing seams and holes. It is much better to discover a leak at home than inside the tent at night. Leak testing also helps separate real leakage from condensation, which is a common source of confusion.
To test tent leaks, pitch the tent correctly, attach the rainfly, close doors as they would be used in rain, and spray water gently over the tent. Use a soft rain-like spray instead of strong pressure. Start from the top and move down slowly. After 5–10 minutes, go inside and check for damp spots, drips, darkened seams, and water trails.
A simple leak test process:
- Pitch the tent with normal tension.
- Attach the rainfly properly.
- Place the tent on a dry surface if possible.
- Use a hose with gentle spray or a watering can.
- Wet the roof, rainfly seams, corners, and door areas.
- Spray the lower walls and floor edges.
- Wait several minutes.
- Check inside with a flashlight.
- Mark damp areas before they dry.
- Let the tent dry fully before repair.
| Leak Location | Possible Cause | What to Check Next |
|---|---|---|
| Water near roof seam | Rainfly seam leak | Seal ridge seam |
| Wet floor corner | Floor seam or pinhole | Inspect inside and underside |
| Drip near door | Door seam or zipper flap issue | Check door seam and pitch angle |
| Damp wall panel | Rainfly touching inner tent | Improve tension and spacing |
| Water under sleeping area | Floor puncture or ground seepage | Check floor and footprint |
| Moisture on inner roof | Condensation | Improve ventilation |
| Wet patch area | Patch edge not sealed | Reseal patch edges |
Do not use a pressure washer. It can force water through areas that would not normally leak and may damage coatings. The goal is to copy natural rain, not extreme pressure.
If water appears inside, remember that the entry point may not be directly above the wet spot. Water can travel along seam lines, fabric folds, and zipper flaps. Mark the inside damp area and then inspect the outside path carefully. Always clean and dry the area before applying tent glue or sealant.
What Damage Needs Repair
Not every mark on a tent needs repair. Light stains, faded color, small scuffs, and cosmetic marks may not affect performance. The damage that needs repair is damage that affects waterproofing, fabric strength, setup tension, zipper function, or insect protection.
Repair is needed when there is a hole, tear, seam gap, peeling seam tape, floor puncture, worn coating area, mesh opening, loose stake loop, or corner stress damage. These issues can become worse during wind, rain, packing, or repeated folding. The earlier they are repaired, the easier the repair usually is.
Use this repair decision table:
| Damage Found | Repair Now? | Reason |
|---|---|---|
| Small dirt stain | No, clean if needed | Usually cosmetic |
| Pinpoint floor hole | Yes | Can let water in and spread |
| Peeling seam tape | Yes | Common future leak point |
| Small rainfly puncture | Yes | Can drip in steady rain |
| Light fabric fading | Not urgent | Usually UV wear, monitor it |
| Sticky coating | Yes, inspect further | May affect waterproofing |
| Mesh hole | Yes | Insects enter and tear spreads |
| Rough zipper | Yes, clean first | Forced zipper can fail |
| Loose stake loop | Yes | Setup tension may fail |
| Corner tear | Yes | High-stress area can rip larger |
A good repair should match the damage. Tiny holes may need only a small amount of flexible tent glue. Larger holes need a patch. Seam gaps need a thin sealing line. Floor wear may need both patching and edge sealing. Mesh damage needs a patch that does not block ventilation too much.
Before repairing, prepare the area:
- Remove dirt and dust.
- Wipe away mud or residue.
- Let the fabric dry fully.
- Trim loose threads carefully.
- Keep the damaged area flat.
- Use a controlled amount of adhesive.
- Allow enough curing time before folding.
GleamGlee Tent Repair Glue is suitable for many of these repair needs because it works as both an adhesive and a sealant. It can repair nylon, vinyl, canvas, PVC-coated fabric, tarps, groundsheets, rainflies, awnings, sleeping bags, and outdoor covers. Once cured, it forms a flexible waterproof seal that can handle folding, stretching, and outdoor use better than hard-drying household glue.
For best results, repairs should be done before a trip rather than at the campsite. Emergency repairs are possible, but home repairs are usually cleaner, stronger, and easier to cure properly.

How to Repair During DIY Tent Maintenance?
Tent repair is the part of DIY tent maintenance that keeps small damage from becoming trip-ending damage. A tiny hole in the floor, a short tear in the rainfly, a loose seam, or a worn corner may still look harmless when the tent is dry. Once the tent is pitched, loaded with gear, pushed by wind, folded tightly, or exposed to rain, that weak point can spread fast. Repair should be done as soon as damage is found, not after the next storm.
To repair during DIY tent maintenance, clean and dry the damaged area first, choose a flexible waterproof tent glue, apply a thin controlled layer, bond or seal the damaged fabric, press the repair flat when needed, and allow enough curing time before folding, packing, or using the tent in wet weather.
A tent repair must stay flexible. Tent fabric bends, stretches, folds, and moves in wind. Ordinary household glue may feel strong on a hard surface, but it can dry too stiff for tent fabric. A stiff repair can crack, peel, or create a hard edge that cuts into the surrounding fabric. A good tent repair adhesive should seal water, hold fabric, stay clear if possible, and move with nylon, vinyl, canvas, polyester, PVC-coated fabric, tarps, rainflies, groundsheets, and awnings.
| Tent Damage | Best Repair Method | Repair Area Size | Main Goal |
|---|---|---|---|
| Pinpoint hole | Small glue seal | 5–10 mm around hole | Stop water entry |
| 3–10 mm puncture | Glue plus patch | 1–2 cm beyond damage | Add strength |
| Short seam leak | Thin glue line | 2–5 cm beyond weak area | Block stitch-hole leaks |
| 1–3 cm tear | Patch and seal edges | 2–3 cm beyond tear | Stop spreading |
| Worn floor spot | Patch or protective glue layer | Larger than worn area | Reduce abrasion and seepage |
| Rainfly tear | Patch plus edge seal | Rounded patch | Keep rain out |
| Loose fabric edge | Bond and press | Full loose section | Prevent peeling |
| Tarp crack | Flexible seal layer | Cover crack fully | Restore water barrier |
Which Tent Glue to Use
Use a tent glue that is waterproof, flexible after curing, suitable for outdoor fabrics, easy to control, and strong enough for folding, stretching, abrasion, and rain. The glue should work as both an adhesive and a sealant because tent repair often requires bonding fabric and blocking water at the same time.
A good tent glue should meet these practical needs:
- Bonds common tent materials such as nylon, vinyl, canvas, polyester, PVC-coated fabric, and coated tarps.
- Forms a waterproof barrier after curing.
- Stays flexible instead of drying hard and brittle.
- Works on seams, holes, cracks, patch edges, and worn fabric points.
- Dries clear or neat enough for visible areas.
- Handles folding, packing, stretching, and outdoor movement.
- Allows controlled application without flooding the fabric.
- Has enough coverage for more than one repair.
GleamGlee Tent Repair Glue is designed for tent repairs and surface sealing. It can be used on tents, rainflies, groundsheets, tarps, awnings, pop-up shelters, car awnings, rooftop tents, sleeping bags, dry bags, outdoor covers, and other camping gear. Once cured, it forms a clear rubber-like seal that stays flexible and helps resist water, cracking, peeling, and rough outdoor use.
Each 2.12 fl oz tube can cover up to 60 feet of seams or fabric, depending on the application thickness and surface condition. This makes it useful not only for one small puncture, but also for seam maintenance, patch edge sealing, floor repair, and repeated campsite gear care.
| Glue Feature | Why It Matters for Tent Repair |
|---|---|
| Waterproof seal | Helps stop rain and ground moisture |
| Flexible cure | Moves with folded and stretched fabric |
| Clear finish | Looks cleaner on rainflies and visible panels |
| Dual adhesive/sealant use | Bonds patches and seals leak paths |
| Abrasion resistance | Supports outdoor use on floors and tarps |
| High coverage | Useful for seams and multiple repairs |
| Outdoor fabric compatibility | Works across different tent materials |
Avoid hard craft glue, paper glue, wood glue, hot glue, and general indoor adhesives for tent fabric repair. These may not bond well to coated fabric, may fail in moisture, or may crack when the tent is folded.
How to Seal Tent Seams
Seal tent seams by cleaning the seam, drying it fully, removing only loose peeling material, applying a thin line of flexible waterproof tent glue along the weak seam, smoothing it neatly, and letting it cure before folding or exposing the tent to rain.
Seams are common leak points because needle holes pass through the fabric. Even if the fabric panel itself is water-resistant, water can still move through stitch lines, seam gaps, or old seam tape. Rainfly ridge seams, floor seams, door seams, and corner seams deserve the most attention because they take more water and tension.
A practical seam sealing process:
- Pitch the tent or lay the seam flat.
- Wipe away dust, mud, soap residue, and old dirt.
- Let the seam dry completely.
- Check whether seam tape is loose, cracked, or peeling.
- Remove only loose tape that lifts easily.
- Apply a thin line of tent glue along the seam.
- Extend the glue 2–5 cm beyond the weak area.
- Smooth the glue lightly if needed.
- Keep the seam flat while curing.
- Test the seam after curing if rain protection is important.
| Seam Area | Repair Priority | Suggested Action |
|---|---|---|
| Rainfly top seam | High | Seal before rainy trips |
| Floor corner seam | High | Seal and check underside |
| Door seam | Medium to high | Seal if water marks appear |
| Window seam | Medium | Seal gaps and worn edges |
| Pole sleeve seam | Medium | Reinforce frayed areas |
| Storage seam on stuff sack | Low | Repair only if needed |
For seam repair, thickness control matters. A very thick glue line can create a raised ridge that folds poorly. A thin even layer usually bends better and looks cleaner. If the seam is in a high-water area, it is better to apply a neat continuous line than several uneven blobs.
Let the seam cure fully before packing. If the tent is folded while the glue is still soft, the seam may stick to itself, wrinkle, or weaken. If the repaired seam will face heavy rain, allow a longer curing period whenever possible.
How to Patch Tent Holes
Patch tent holes by cleaning and drying the damaged area, trimming loose threads, cutting a rounded patch larger than the hole, bonding it with flexible tent glue, pressing it flat, sealing the patch edges, and letting it cure without movement.
A patch is better than glue alone when the fabric has lost strength. Glue can seal a tiny puncture, but a tear or larger hole needs reinforcement. A patch spreads stress across a wider area so the original damage does not continue tearing when the tent is pitched or folded.
Patch size should be larger than the damaged area:
| Damage Size | Patch Size Guide | Repair Note |
|---|---|---|
| Pinpoint hole | Glue may be enough | Add small patch on floor if needed |
| 3–10 mm puncture | At least 1–2 cm overlap | Round patch corners |
| 1–3 cm tear | At least 2–3 cm overlap | Seal all patch edges |
| Over 3 cm tear | Larger patch, possibly both sides | Keep repair flat |
| Floor damage | Larger patch recommended | Must handle pressure |
| Rainfly damage | Neat patch and clear edge seal | Appearance matters more |
| High-tension corner | Reinforced patch | May need stronger backing |
A good patch should have rounded corners. Square corners peel more easily because each sharp corner becomes a lifting point. Rounded patches are smoother when folded and less likely to catch on fabric or gear.
Patch repair steps:
- Clean the repair area with water and mild soap if needed.
- Rinse away any soap residue.
- Dry the fabric fully.
- Trim loose threads without enlarging the tear.
- Cut a patch with rounded corners.
- Apply a thin layer of tent glue around the damage.
- Place the patch flat over the hole.
- Press from the center outward to remove air bubbles.
- Seal the patch edges with a thin glue line.
- Let it cure flat before use.
For tent floors, patching both sides can improve strength if the area takes pressure from knees, sleeping pads, or gear. For rainflies, one neat outer patch with sealed edges may be enough for small damage. For tarps and awnings, use a larger patch because these areas often face wind pull and abrasion.
How Long Repairs Need to Cure
Tent repairs need enough curing time before the repaired area is folded, packed, stretched, pressed, or exposed to rain. The surface may feel dry earlier, but the inside of the glue layer may still be soft. For dependable outdoor use, allowing about 24 hours before heavy use is a safer habit, especially for patches, seams, and floor repairs.
Cure time depends on several conditions:
| Factor | Effect on Repair |
|---|---|
| Glue thickness | Thicker glue needs longer curing |
| Temperature | Cold weather slows curing |
| Humidity | Damp air may slow drying |
| Airflow | Good airflow helps curing |
| Fabric coating | Some coated surfaces cure more slowly |
| Patch size | Larger patches need more time |
| Repair location | Floor repairs need stronger cure before pressure |
| Folding pressure | Early folding can wrinkle or weaken repair |
A practical repair timing guide:
| Repair Type | Light Touch Time | Safer Use Time |
|---|---|---|
| Tiny glue dot | Wait until surface is dry | Several hours |
| Short seam seal | Avoid touching while soft | Overnight if possible |
| Patch on rainfly | Keep flat while curing | Around 24 hours |
| Floor patch | Avoid pressure early | Around 24 hours |
| Large tear repair | Keep flat and supported | 24 hours or longer |
| Tarp or awning repair | Avoid tension early | 24 hours or longer |
Do not rush curing before a trip. A repair done the night before camping may not be ready for rain, folding, or strong wind. It is better to inspect and repair the tent several days before departure. This leaves time to cure, check the patch edges, and fix any missed spots.
If an emergency repair must be done at the campsite, clean and dry the area as much as possible first. Apply the glue carefully and keep the repair protected from dirt, rain, and pressure while it sets. Emergency repair can help get through the trip, but the repaired area should still be checked again at home.
What Repair Mistakes Should Be Avoided
Repair mistakes can make tent damage worse, especially when glue is applied too thickly, placed on dirty fabric, folded before curing, or used on the wrong material. A neat repair starts with preparation. The fabric should be clean, dry, flat, and free from loose threads before any adhesive is applied.
Common tent repair mistakes include:
| Mistake | What Can Go Wrong | Better Method |
|---|---|---|
| Applying glue over dirt | Weak bond, peeling repair | Clean and dry first |
| Using too much glue | Thick stiff area, messy finish | Apply a thin controlled layer |
| Folding too early | Glue sticks, wrinkles, weak seal | Let it cure flat |
| Using hard indoor glue | Cracking when fabric bends | Use flexible waterproof tent glue |
| Skipping patch edges | Water enters under patch | Seal edges after bonding |
| Leaving square patch corners | Corners peel faster | Round the corners |
| Repairing wet fabric | Poor adhesion | Dry fully before repair |
| Ignoring seam leaks | Water keeps entering | Seal seams properly |
| Pulling damaged fabric | Tear grows larger | Keep area flat and stable |
Repair should also match the location. A rainfly repair should be light, smooth, and waterproof. A floor repair should be stronger because it handles pressure and abrasion. A corner repair should be reinforced because it takes tension. A mesh repair should close insect gaps without blocking airflow too much.
For tents, flexibility is often the difference between a repair that lasts and one that fails after a few folds. GleamGlee Tent Repair Glue is designed for outdoor fabric movement, creating a clear flexible waterproof seal after curing. This makes it suitable for many DIY tent maintenance repairs, including seams, pinholes, floor patches, rainfly tears, tarp cracks, and awning fabric repair.

How to Waterproof for DIY Tent Maintenance?
Waterproofing is one of the most important parts of DIY tent maintenance because a tent can look clean and still fail in rain. Water usually enters through weak seams, worn floor coating, small punctures, damaged rainfly fabric, loose patch edges, or areas where the rainfly touches the inner tent. Before adding any waterproof treatment, the tent should be clean, fully dry, and checked for real damage.
To waterproof for DIY tent maintenance, inspect the rainfly, floor, seams, corners, and worn fabric areas first. Repair holes and tears, seal weak seams with flexible waterproof tent glue, and restore water resistance only after the fabric is clean and dry. Waterproofing works best when damage is fixed before coating or sealing.
A good waterproofing job does not mean covering the whole tent with a thick layer of product. Too much coating or glue can make the fabric stiff, sticky, heavy, or harder to fold. The better method is to find the leak path and treat it correctly. Seam leaks need seam sealing. Holes need patching. Floor seepage needs puncture repair or worn-area reinforcement. Rainfly wetting needs surface restoration. Condensation needs better airflow, not more glue.
| Waterproofing Area | Common Problem | Warning Sign | Best Action |
|---|---|---|---|
| Rainfly seams | Stitch-hole leaks | Drips from roof seam | Clean, dry, seal seam |
| Tent floor | Pinholes or worn coating | Damp sleeping pad area | Patch and seal |
| Floor corners | Tension and moisture | Wet corner after rain | Reinforce and seal |
| Rainfly fabric | Loss of water beading | Fabric darkens and absorbs water | Clean and restore water resistance |
| Patch edges | Edge lifting | Water under patch | Reseal patch edge |
| Door seams | Splash and zipper stress | Water near entry | Seal seam and check pitch |
| Inner roof | Condensation | Droplets without outer leak | Improve ventilation |
| Groundsheet | Punctures and dirt | Wet underside | Clean, repair, or replace |
Why Tent Waterproofing Fails
Tent waterproofing fails because fabric coatings wear down, seams age, stitch holes open, small punctures spread, and dirt slowly damages the waterproof surface. Sunlight, folding, abrasion, rain, mud, salt, heat, and damp storage can all reduce water resistance over time.
The most common waterproofing failures are easy to understand:
- Sand rubs against coated fabric and slowly wears it thinner.
- Mud holds moisture against the floor and seams.
- UV exposure weakens rainfly fabric and coating.
- Repeated folding stresses the same crease lines.
- Old seam tape starts lifting, cracking, or peeling.
- A small floor puncture lets ground moisture enter.
- A damaged rainfly allows water to drip onto the inner tent.
- A poorly pitched rainfly touches the inner wall and transfers moisture.
- Damp storage causes mildew smell and coating problems.
- Strong detergent or heat damages waterproof layers.
Not all moisture inside a tent is a leak. Condensation is very common, especially in cool weather when warm breath and body moisture meet cold tent fabric. If droplets appear on the inside roof but the rainfly seams and outer fabric look fine, the problem may be airflow instead of waterproofing.
A simple way to separate leaks from condensation:
| Moisture Sign | More Likely Cause | What to Do |
|---|---|---|
| Water follows a seam line | Seam leak | Seal the seam |
| Wet spot under sleeping pad | Floor puncture or seepage | Check floor and patch |
| Droplets spread across inner roof | Condensation | Open vents and improve airflow |
| Drip from one small point | Pinhole or rainfly tear | Patch and seal |
| Damp corner only | Floor seam or poor pitch | Inspect corner and tension |
| Fabric darkens outside in rain | Worn water resistance | Restore rainfly surface |
| Water enters near door | Door seam or splashback | Seal, pitch, and angle correctly |
For practical use, waterproofing should start with finding the source. If the tent has one leaking seam, seal that seam. If the rainfly absorbs water everywhere, restore the fabric’s water resistance. If the floor has pinholes, patch the floor. Guessing wastes time and may leave the real problem unfixed.
How to Reseal Tent Fabric
Reseal tent fabric by cleaning the damaged or worn area, drying it fully, repairing holes and tears first, then applying the correct sealant or waterproof treatment to the problem area. For seams, holes, cracks, and patch edges, a flexible waterproof tent glue is often more useful than a general spray because it can seal the actual leak path.
Before resealing, check the fabric condition. If the fabric is still strong and only has small leaks, DIY resealing can work well. If the coating is sticky, flaking heavily, or peeling across large areas, the tent may need deeper restoration or replacement parts.
A safe resealing process:
- Set up the tent or lay the fabric flat.
- Find the exact leak or worn area.
- Remove dirt, dust, and loose coating.
- Wipe the area with clean water.
- Use mild soap only if needed.
- Rinse away soap residue.
- Let the fabric dry completely.
- Repair holes, tears, and seam gaps first.
- Apply a thin, even seal layer.
- Keep the area flat during curing.
- Test gently before the next rainy trip.
Different fabric areas need different waterproofing actions:
| Area | Best Resealing Method | Notes |
|---|---|---|
| Seam line | Thin line of flexible sealant | Extend 2–5 cm past weak area |
| Small hole | Glue dot or patch with sealed edge | Keep repair flat |
| Rainfly tear | Patch plus edge seal | Round patch corners |
| Floor pinhole | Patch or glue seal | Floor faces pressure, so reinforce well |
| Worn floor area | Protective patch and sealant | Bigger patch may last longer |
| Tarp crack | Flexible glue layer | Must handle folding |
| Awning seam | Seam seal and tension check | Wind pull can stress repair |
GleamGlee Tent Repair Glue is suitable for resealing because it works as both an adhesive and a sealant. It forms a clear flexible rubber-like seal after curing, which helps the repaired area bend with the fabric. This matters for tents because they are folded, packed, stretched, and exposed to movement during use.
Use a controlled amount. A thin smooth layer usually performs better than a thick uneven layer. Thick glue can feel bulky when folded and may take longer to cure. For visible rainfly areas, a clean application also keeps the repair looking neat.
How to Protect the Rainfly
The rainfly should be protected because it is the tent’s first barrier against rain. It takes the most weather exposure, including UV light, falling rain, wind, tree sap, bird droppings, dust, and repeated folding. Once the rainfly becomes weak, the inner tent may feel damp even when the main tent body is still in good condition.
Protect the rainfly by keeping it clean, dry, correctly tensioned, and repaired. A sagging rainfly can touch the inner tent and transfer moisture. A dirty rainfly can hold moisture and reduce water beading. A small tear can drip during steady rain. Weak seams can leak along the roof line.
Rainfly care checklist:
- Shake off leaves, needles, sand, and dust after each trip.
- Remove bird droppings and sticky residue before storage.
- Dry both sides fully, especially hems and folded edges.
- Check the roof seam and side seams before rainy trips.
- Hold the fabric up to light to find pinholes.
- Patch small holes before they stretch.
- Seal patch edges so water cannot enter underneath.
- Pitch the rainfly with even tension.
- Keep space between the rainfly and inner tent.
- Avoid long unnecessary sun exposure when not in use.
Rainfly waterproofing problems often appear in several ways:
| Rainfly Problem | What It Looks Like | Best Fix |
|---|---|---|
| Pinhole | Tiny light dot or drip point | Seal or patch |
| Small tear | Short cut or snag | Patch and seal edges |
| Seam leak | Wet line under seam | Apply thin seam seal |
| Worn surface | Rain no longer beads well | Clean and restore coating |
| Sagging fly | Fabric touches inner wall | Adjust guylines and tension |
| Dirty hems | Mud, dust, sap buildup | Clean gently and dry |
A rainfly should not be folded and stored while damp. Hems and seam areas hold moisture longer than flat panels. If the rainfly was used in rain, dry it separately if needed. Many tent odors start because a wet rainfly was packed tightly against the tent body.
For rainfly repairs, appearance matters more than floor repairs because the rainfly is visible. Use clear flexible glue, round patches, and thin edge sealing. A clean repair helps the tent look cared for and avoids stiff spots that catch during folding.
When to Recoat Old Tents
Old tents may need recoating when water no longer beads on the rainfly, the floor feels sticky, seam tape peels, the fabric absorbs moisture, or leaks continue after small holes and seams have been repaired. Recoating is useful only when the fabric is still strong enough to support continued use.
A tent does not always need full recoating. Often, targeted repair is enough. If only one seam leaks, seal the seam. If only one floor corner is worn, patch and seal that corner. If the entire rainfly wets out quickly in rain, a broader waterproofing treatment may be needed.
Use this guide to decide:
| Tent Condition | What It Means | Best Action |
|---|---|---|
| One small seam leaks | Local seam failure | Clean and reseal seam |
| A few pinholes | Small puncture damage | Seal or patch |
| Rainfly wets out in many areas | Surface water resistance is weak | Clean and restore coating |
| Floor has one worn spot | Local abrasion | Patch and seal |
| Floor feels sticky across large area | Coating breakdown | Clean, assess, possibly recoat |
| Seam tape peels in short sections | Aging tape | Remove loose parts and reseal |
| Fabric tears easily | Material is weakened | Replacement may be safer |
| Large coating flakes off | Advanced breakdown | Repair may not last long |
Before recoating, clean the tent carefully and let it dry. Loose old coating should be handled gently. Do not scrape aggressively because damaged fabric can tear. If the tent is valuable, large, or used for serious weather protection, test repairs on a small area first.
Recoating is usually worth considering when:
- The tent frame and fabric are still strong.
- Zippers and poles still work well.
- Damage is mostly waterproof coating wear.
- The tent is expensive enough to justify the time.
- The tent has sentimental or special-use value.
- Replacement is not convenient before the next trip.
Recoating may not be worth it when:
- Fabric tears easily by hand.
- The coating is failing across most panels.
- Several large seams are damaged.
- Zippers, poles, and floor are also failing.
- The tent smells strongly of mildew after cleaning.
- Repair cost and time are close to buying a new tent.
For waterproof repair work, flexible sealing is important. A tent moves every time it is folded, packed, stretched, or hit by wind. GleamGlee Tent Repair Glue is designed to stay flexible after curing, making it useful for seam sealing, floor pinholes, rainfly patches, tarp cracks, awning repairs, and waterproof fabric reinforcement. Each 2.12 fl oz tube can cover up to 60 feet of seams or fabric, which is practical for seasonal tent maintenance and multiple small repairs.

How to Store After DIY Tent Maintenance?
Storage is the last step in DIY tent maintenance, but it affects tent life more than many people expect. A tent can be cleaned, repaired, and waterproofed properly, then still develop mold, odor, sticky coating, zipper corrosion, or fabric weakness if it is packed damp or stored in the wrong place. Most long-term storage problems come from four things: moisture, heat, pressure, and dirt left on the fabric.
To store after DIY tent maintenance, make sure the tent is fully dry, repair work has cured, zippers and stakes are clean, and the fabric is packed in a cool, dry, breathable place. Avoid storing tents in damp basements, hot attics, car trunks, wet bags, or tightly compressed sacks for months.
A tent should be stored differently for short-term travel and long-term rest. The original stuff sack is useful for carrying the tent to a campsite because it saves space. For long-term storage, a larger breathable bag is often better because it reduces hard creases and lets the fabric relax. This is especially important for repaired seams, coated floors, rainflies, canvas tents, and larger family tents.
| Storage Factor | Good Practice | Risky Practice | Possible Problem |
|---|---|---|---|
| Moisture | Store only when fully dry | Pack damp or “almost dry” | Mold, mildew, odor |
| Temperature | Cool indoor storage | Hot attic or car trunk | Coating breakdown |
| Compression | Loose storage for long periods | Tight stuff sack for months | Crease stress, sticky folds |
| Dirt | Clean before packing | Store with mud, sand, food residue | Abrasion, insects, smell |
| Airflow | Breathable bag if possible | Sealed plastic with damp fabric | Trapped moisture |
| Repairs | Cure before folding | Fold glue while soft | Weak repair, sticking |
| Hardware | Dry poles and stakes | Store wet metal parts | Rust, stains, fabric damage |
How Dry the Tent Should Be
The tent should be completely dry before storage. “Dry enough” is not enough. Moisture often hides in seams, hems, corners, pole sleeves, zipper flaps, floor folds, and the underside of the rainfly. These areas dry slower than flat fabric panels, and they are the first places where musty odor or mildew spots usually appear.
A safe drying check should include both touch and smell. The fabric should feel dry, light, and neutral. If a corner feels cool, heavy, tacky, or slightly damp, keep drying. If the tent smells musty or like wet fabric, it should not be packed yet.
Check these areas before storage:
- Four tent floor corners
- Floor underside
- Rainfly hems
- Door folds
- Window flaps
- Seam lines
- Pole sleeves
- Zipper covers
- Mesh attachment points
- Stuff sack interior
| Tent Area | Why It Holds Moisture | Storage Risk |
|---|---|---|
| Floor corners | Multiple fabric layers fold together | Mildew spots, odor |
| Rainfly hems | Water collects along edges | Damp smell, coating stress |
| Seam tape | Layers trap moisture | Peeling or sticky seam |
| Pole sleeves | Narrow fabric channels dry slowly | Hidden dampness |
| Door folds | Overlapping fabric blocks airflow | Mold near entry |
| Stuff sack | Absorbs moisture from tent | Smell transfers back |
Drying time depends on fabric and weather. A lightly damp nylon tent may dry in 1–2 hours with good airflow. A rain-soaked tent may need half a day or longer. A thick canvas tent may need 24 hours or more, especially in humid weather. If a tent must be packed wet at the campsite, unpack it at home the same day and dry it fully before storage.
Do not use high heat to speed up drying. A clothes dryer, heater, heat gun, or strong direct heat can damage coatings, plastic parts, seam tape, elastic cords, and waterproof layers. Shade with airflow is safer. Sun can help for a short time, but long sun exposure can age fabric.
Where to Store the Tent
Store the tent in a cool, dry, clean indoor place. A closet, storage shelf, spare room, or dry utility area is usually better than a garage floor, damp basement, hot attic, shed, or car trunk. Temperature swings and moisture are two of the biggest storage risks for tent fabric and coatings.
Good storage should protect the tent from:
- Damp air
- High heat
- Direct sunlight
- Dust and insects
- Rodents
- Heavy pressure
- Sharp tools
- Chemical fumes
- Wet metal stakes
- Dirty ground contact
| Storage Location | Suitable or Risky? | Reason |
|---|---|---|
| Indoor closet | Suitable | Stable temperature and low moisture |
| Dry shelf in spare room | Suitable | Clean and easy to check |
| Large breathable cotton bag | Suitable | Reduces compression and trapped moisture |
| Original stuff sack | Good for travel | Can be too tight for long storage |
| Hot attic | Risky | Heat can weaken coatings |
| Damp basement | Risky | Mold and mildew risk |
| Car trunk | Risky | Heat and compression |
| Garage floor | Risky | Moisture, pests, dirt |
| Sealed plastic box | Only if fully dry | Traps moisture if not completely dry |
For long-term storage, avoid placing heavy boxes on top of the tent. Constant pressure can create sharp creases, flatten insulation-like fabric structure in some gear, stress repaired areas, and press sticky coatings together. If the tent has recently been repaired with tent glue, make sure the repair has cured fully before packing and avoid folding directly on the repaired point if possible.
Stakes and poles should be stored clean and dry. Muddy stakes can transfer dirt and moisture to the tent. Sharp stake tips can puncture fabric if packed loosely in the same bag. Poles should be dried before storage, especially if they were used in rain or wet grass. If elastic shock cords are weak, note it before the next trip.
How to Prevent Mold
Prevent mold by cleaning dirt and food residue, drying the tent fully, storing it in a dry place, and airing it out after wet use. Mold needs moisture and organic material. Dirt, grass, leaves, food crumbs, sweat, and damp fabric create the right conditions for smell and spotting during storage.
Mold prevention starts before packing. A tent used in rain, morning dew, fog, wet grass, beach air, or muddy ground should always be dried carefully. Even if the main fabric feels dry, seams and corners may still hold moisture. A damp tent stored in a warm place can begin to smell quickly.
Mold prevention steps:
- Remove food crumbs, leaves, and mud.
- Spot clean dirty areas.
- Dry the tent body and rainfly separately if needed.
- Dry the floor underside.
- Check seams and folded areas by touch.
- Make sure the stuff sack is also dry.
- Store in a dry indoor area.
- Open and inspect before the next season.
| Mold Risk Factor | Why It Causes Problems | Prevention |
|---|---|---|
| Damp fabric | Provides moisture for mold growth | Dry fully before storage |
| Food residue | Attracts insects and feeds odor | Clean before packing |
| Mud and grass | Hold moisture and organic matter | Brush and wipe off |
| Warm storage | Speeds odor and mildew development | Store cool and dry |
| Sealed damp bag | Traps moisture | Use breathable storage when possible |
| Forgotten wet tent | Damage grows unnoticed | Unpack same day after wet trips |
If a tent already has a musty smell, open it outdoors and air it out before using it. Clean affected areas gently and dry completely. Avoid using strong fragrances to cover odor because they do not solve the moisture problem and may leave residue. Bleach or harsh cleaners can damage fabric and waterproof coatings, so gentle cleaning is safer for most tents.
For tents stored over 2–3 months, checking once during storage is useful, especially in humid climates. Open the storage bag, smell the fabric, and confirm there is no dampness or sticky surface. This takes only a few minutes and can prevent a surprise before the next trip.
How to Prepare Next Time
Preparing for the next trip should start before the tent is packed away. After cleaning, drying, repairing, and storing, keep the tent organized so the next setup is easier. Missing stakes, a damaged zipper, a loose pole cord, or an uncured repair can cause problems at the campsite even if the tent fabric is in good shape.
A pre-storage and pre-trip note can save time. If one corner was repaired, if a pole section looked bent, if a zipper felt rough, or if extra stakes are needed, write it down and store the note with the tent. This avoids rediscovering the same problem months later.
Before the next trip, check:
- Tent body condition
- Rainfly waterproofing
- Floor patches
- Seam repairs
- Zipper movement
- Pole condition
- Stake quantity
- Guylines and tensioners
- Footprint or groundsheet
- Repair glue and patch kit
- Storage smell
- Stuff sack condition
| Pre-Trip Item | What to Confirm | Why It Matters |
|---|---|---|
| Tent body | No holes, odor, or sticky fabric | Basic shelter comfort |
| Rainfly | Seams sealed and fabric ready | Rain protection |
| Floor | No pinholes or worn corners | Ground moisture protection |
| Zippers | Smooth opening and closing | Entry and ventilation |
| Poles | No cracks or missing sections | Proper structure |
| Stakes | Enough pieces, no sharp rust | Secure setup |
| Guylines | Not tangled or missing | Wind stability |
| Repairs | Fully cured and edges secure | Prevents repair failure |
| Tent glue | Packed for emergency repair | Quick field fixes |
| Footprint | Clean and not torn | Protects tent floor |
A small repair kit should stay with the camping gear. It does not need to be complicated. A useful kit can include flexible waterproof tent glue, patch material, a clean cloth, small scissors, removable tape, and a few spare cord pieces. This helps handle sudden damage to tents, tarps, groundsheets, awnings, sleeping bags, dry bags, and outdoor covers.
GleamGlee Tent Repair Glue is practical for this kind of kit because it can work as both adhesive and sealant. It is designed for nylon, vinyl, canvas, PVC-coated fabric, tarps, awnings, rainflies, groundsheets, sleeping bags, pop-up shelters, and outdoor covers. Once cured, it forms a clear flexible waterproof seal, which is important for gear that folds, stretches, and faces rain. Each 2.12 fl oz tube can cover up to 60 feet of seams or fabric, making it useful for both at-home maintenance and repeated outdoor gear repair needs.
Conclusion
DIY tent maintenance is the easiest way to keep outdoor gear cleaner, drier, and more reliable before the next trip. A tent should be shaken out, spot cleaned, fully dried, checked for seam leaks, inspected for small holes, repaired with flexible waterproof tent glue, and stored in a cool dry place. These simple steps help prevent mold smell, floor seepage, rainfly leaks, zipper problems, and fabric damage.
The most important habit is to repair small damage early. A tiny floor puncture, loose seam, or worn rainfly edge may not look serious at home, but it can become a real problem in rain, wind, or cold weather. Using a flexible waterproof adhesive such as GleamGlee Tent Repair Glue can help seal holes, reinforce seams, bond patches, and protect outdoor fabrics without making the repair area stiff or easy to crack.
For campers, outdoor gear owners, retailers, Amazon sellers, and private-label brands, GleamGlee offers practical tent repair and maintenance solutions for nylon, vinyl, canvas, PVC-coated fabric, tarps, awnings, groundsheets, rainflies, sleeping bags, and outdoor covers. If you need ready-to-order branded tent repair products, wholesale supply, custom packaging, or private-label adhesive formulas, GleamGlee can support product ordering, sample requests, and custom project inquiries.
Share:
Table of Contents
Here, creating your adhesives glue & removal cleaner collection is no longer a barrier—it’s a collaborative journey where GleamGlee helps brands and businesses transform their vision into durable, certified, and market-ready solutions.
Partner with GleamGlee
Join hundreds of global partners who trust GleamGlee for adhesives and cleaners that combine innovation, compliance, and speed. Our vertically integrated system—from R&D to warehouse—guarantees consistent performance and reliable delivery.
Whether you’re sourcing FBA-ready stock or developing your own formula, our team provides unmatched technical support and responsive service.





















