 Skip to content
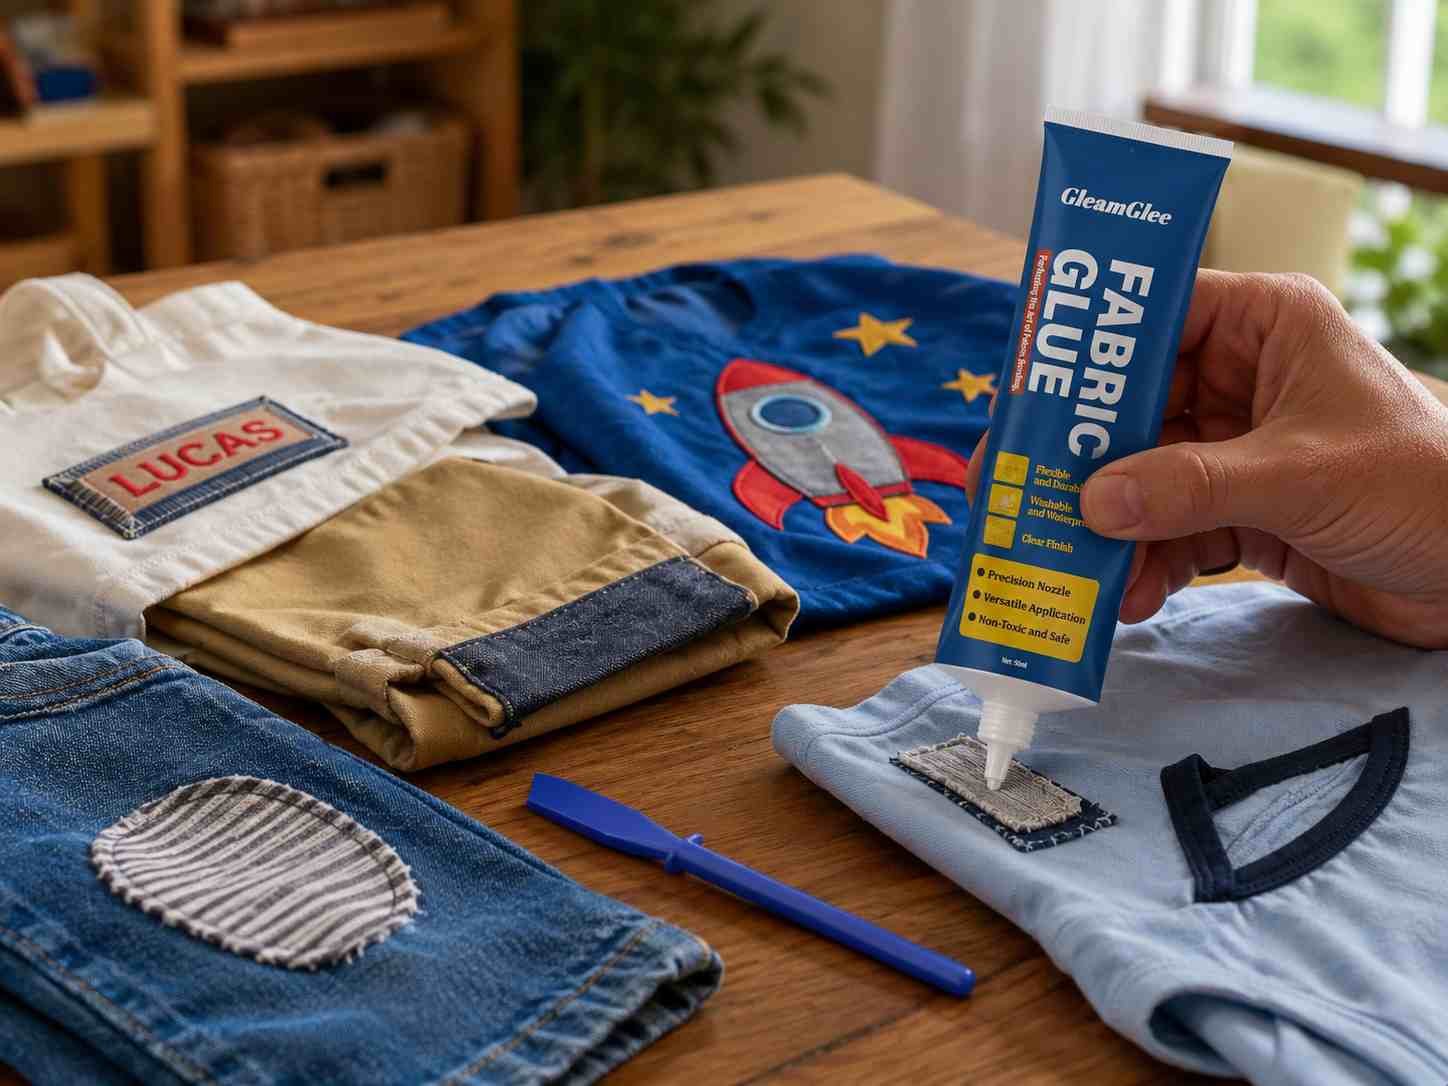
A quilt may contain hundreds of carefully measured fabric pieces, yet one small movement during positioning can distort an entire row or pull an otherwise sharp point out of alignment. Fabric adhesive gives quilters another way to control those movements. It can hold appliqué shapes, stabilize small patches, support quilt labels, keep narrow trims straight, reduce pinning, and simplify decorative no-sew projects.
The challenge is that “fabric adhesive” describes several very different products. A temporary basting spray designed for quilt layers does not perform the same job as permanent liquid fabric glue. A washable glue pen used for short-term positioning is also different from fusible web activated by an iron. Choosing the wrong format may leave the fabric stiff, cause adhesive to bleed through, create residue on a sewing needle, or produce a bond that fails after washing.
Fabric adhesive can be used in quilting and patchwork to position fabric pieces, hold quilt layers, attach appliqué, reinforce edges, complete small repairs, and create selected no-sew designs. Good results depend on choosing the correct adhesive format, applying a thin layer, testing the actual fabrics, and allowing the bond to cure fully before sewing, washing, folding, or ironing.
Imagine spending an afternoon arranging a detailed star block, only to find that a central point moved by a few millimeters under the presser foot. A few well-placed dots of adhesive could have prevented the problem. The real skill lies not in using more glue, but in knowing exactly where glue adds control and where thread should remain responsible for strength.
What Fabric Adhesive Works Best for Quilting?
The best adhesive depends on the job. Temporary spray works well for holding quilt layers before stitching, glue pens help position small patchwork pieces, fusible products support heat-set appliqué, and flexible liquid fabric glue is better for permanent patches, decorative bonding, repairs, and selected no-sew projects. No single adhesive format is ideal for every quilting stage.
Temporary or Permanent
The first question is whether the adhesive should remain in the finished quilt. Temporary adhesives are intended to control movement during preparation, sewing, embroidery, or quilting. They hold fabric long enough for another construction method, usually stitching, to create the permanent connection.
Temporary spray adhesive is often used between the quilt top, batting, and backing. Its purpose is to reduce movement while quilting lines are sewn through the three layers. A washable glue pen or glue stick can perform a similar temporary role on small seams, folded edges, bindings, or paper-pieced sections.
Permanent fabric adhesive becomes part of the final construction. It is more appropriate for decorative appliqué, fabric collage, quilt labels, ribbons, small repairs, edge reinforcement, and no-sew projects that are not exposed to heavy structural stress.
Confusing these categories creates avoidable failures. A temporary adhesive may release before a permanent patch has completed its useful life. A permanent liquid glue spread across an entire quilt sandwich may add unnecessary stiffness, increase needle contact, and prevent repositioning.
Before opening the adhesive, determine what it must do after the next stage of work:
- Release or wash away after stitching
- Hold the fabric temporarily during sewing
- Remain permanently beneath an appliqué
- Reinforce a damaged textile area
- Replace stitching in a decorative project
- Support positioning before mechanical reinforcement
The product with the strongest wording on its package is not automatically the right choice. The bond role matters more than maximum advertised strength.
Adhesive Formats
Each format offers a different balance of coverage, precision, curing method, flexibility, and permanence. Many experienced quilters use more than one adhesive type in a single project because large quilt layers and tiny appliqué shapes require different levels of control.
| Adhesive format | Best quilting use | Application control | Bond role | Main caution |
|---|---|---|---|---|
| Temporary spray | Quilt sandwich basting | Medium | Temporary | Overspray and ventilation |
| Glue pen | Small pieces, binding, paper piecing | High | Temporary or washable | Limited surface coverage |
| Washable glue stick | Folded edges and alignment | High | Temporary | Heavy use may leave buildup |
| Liquid fabric glue | Patches, appliqué, collage, repairs | Very high | Permanent | Requires full curing |
| Fusible web | Heat-set appliqué shapes | High | Permanent | Requires suitable iron temperature |
| General craft glue | Paper-heavy mixed crafts | Medium | Varies | May dry stiff or wash poorly |
Temporary spray covers broad areas efficiently but is less precise than a glue pen or fine nozzle. Liquid fabric adhesive can place a controlled line around a patch, but it is not normally the best format for coating a full quilt backing. Fusible web provides even coverage for shaped appliqué, although the added heat may not suit every fabric or embellishment.
A useful approach is to begin with the physical size of the bonding area. Large layers usually need a wide-coverage product. Small corners, narrow strips, labels, and patch edges benefit from precise application.
Fabric Compatibility
Quilting cotton is generally easier to bond than heavily coated, extremely smooth, oily, loosely woven, or highly elastic fabric. Even two cotton fabrics may respond differently because weave density, surface finish, dye treatment, thickness, and previous washing affect adhesive absorption.
Thin fabric reveals overapplication quickly. A heavy bead may darken the front surface or form a visible ring. Loose-weave linen can allow adhesive to pass through the openings. Felt absorbs more product but may hide uneven coverage. Stretch jersey creates a different challenge because the glue, base fabric, and attached patch may not expand at the same rate.
Extra testing is worthwhile for:
- Pale or semi-transparent cotton
- Silk and satin
- Velvet and brushed fabric
- Coated outdoor textiles
- Stretch jersey
- Elastic blends
- Metallic or printed finishes
- Loose-weave linen
- Thick felt
- Water-repellent fabric
A label stating that a product works on fabric does not guarantee identical performance across every textile combination. Cotton bonded to cotton behaves differently from cotton bonded to felt, polyester lining, synthetic ribbon, denim, or coated nylon.
Testing becomes especially important when the finished piece will be washed, ironed, worn against the skin, or preserved for many years.
Performance Priorities
Initial strength is only one part of fabric adhesive performance. Quilting also depends on flexibility, clarity, wash resistance, application control, fabric feel, and compatibility with later sewing.
For permanent appliqué and repairs, a useful adhesive should dry clear, remain flexible, resist yellowing, and tolerate the intended care method after full curing. For temporary basting, repositioning, low residue, and sewing compatibility matter more than permanent bond strength.
Consider the finished item rather than evaluating glue in isolation:
- Will the quilt be washed weekly, occasionally, or never?
- Will the bonded area touch the body?
- Will it be folded repeatedly?
- Is the project decorative or functional?
- Must the bond tolerate ironing?
- Will a needle pass through or near the adhesive?
- Is invisible drying important?
- Could the piece require future alteration or restoration?
A framed wall quilt can tolerate slightly more firmness than a baby blanket. A decorative label requires a different construction decision from a bag handle. A small patch may remain secure with adhesive alone on a display item, while a washable quilt benefits from adhesive positioning plus edge stitching.
Which Quilting Projects Suit Fabric Adhesive?
Fabric adhesive works best in projects that need controlled positioning, decorative bonding, edge stabilization, or low-stress assembly. It is especially practical for quilt basting, appliqué, patch alignment, fabric collage, quilt labels, miniature quilts, wall hangings, repairs, and no-sew decorations. Structural seams and heavily used quilts usually still need stitching.
Quilt Basting
A quilt sandwich normally contains three layers: the quilt top, batting, and backing. These layers must remain smooth and aligned while quilting stitches are added. If they shift, the backing may fold, the batting may bunch, or the top may develop puckers around stitched lines.
Temporary spray adhesive is commonly used because it can cover a large area without requiring dozens of safety pins. It is generally applied section by section rather than across the entire quilt at once. Working in sections makes it easier to smooth each layer from the center toward the edges.
The backing should first be placed flat on a clean surface. It should not be stretched excessively because it may contract after release. The batting should rest naturally without being pulled out of shape. The quilt top can then be added and checked from several directions.
Adhesive cannot repair poor preparation. If a wrinkle is present before spraying, the adhesive may hold that wrinkle in place. If the batting has been stretched unevenly, additional spray will not restore its original dimensions.
Large quilts may still benefit from a few pins or clips around the edges or in high-movement areas. The temporary adhesive reduces shifting during handling, while the quilting stitches create the permanent connection.
Patchwork Alignment
Small patchwork pieces often move before the first stitch is completed. Narrow strips, triangles, curved units, bias-cut pieces, and blocks with several intersecting points are particularly difficult to keep aligned.
A small amount of adhesive can stabilize the layout before sewing. Tiny dots or a thin line are usually more useful than covering the entire seam allowance. When possible, adhesive should be kept away from the exact needle path to reduce residue on sewing tools.
Common uses include:
- Matching triangle points
- Holding narrow strips straight
- Positioning curved sections
- Aligning repeated printed motifs
- Stabilizing foundation-pieced blocks
- Holding quilt labels before stitching
- Controlling binding before topstitching
Traditional quilt piecing often uses a 1/4-inch seam allowance. Within such a narrow area, a broad bead of glue can create more needle contact than necessary. Precise placement provides enough stability without forming a thick bonded seam.
Glue supports accurate work, but it cannot compensate for inaccurate cutting. A square cut 3 mm too small will remain too small after bonding. Pieces still need to be measured, trimmed, dry-fitted, and checked for grain direction before adhesive is applied.
Appliqué and Collage
Appliqué places a decorative fabric shape over a background. The design may later be stitched around the edge, embroidered, heat-fused, or left as part of a no-sew textile composition.
Adhesive is particularly useful when the shape contains small points, narrow stems, curves, internal openings, or details that are difficult to pin. A fine nozzle allows the glue to remain slightly inside the edge, reducing visible squeeze-out and leaving space for decorative stitching.
Fabric collage follows similar principles but may combine materials with different absorption rates and surface structures:
- Quilting cotton
- Denim
- Felt
- Lace
- Ribbon
- Embroidered fabric
- Printed canvas
- Lightweight lining
- Fabric labels
- Flat sequins or embellishments
Dense fabric may require less adhesive than absorbent felt. A combination that feels secure immediately may become noticeably different after folding, washing, or exposure to heat.
Wearable appliqué and washable home textiles often benefit from edge stitching, even when permanent adhesive is used. Framed textile art, seasonal décor, and low-stress wall pieces may be suitable for adhesive-only construction.
No-Sew Projects
No-sew quilting works best when the finished object is decorative, lightly handled, and not required to carry weight. The construction should provide enough overlapping surface area for the adhesive to distribute stress.
Suitable projects include:
- Miniature wall quilts
- Framed patchwork pictures
- Fabric greeting cards
- Seasonal banners
- Table decorations
- Felt ornaments
- Decorative cushion fronts
- Fabric-covered storage boxes
- Quilted name signs
- Low-stress fabric pouches
- Classroom craft projects
An overlap of approximately 6–12 mm often provides more reliable contact than placing two cut edges directly against each other. The exact amount depends on fabric thickness, design, and visibility, but wider contact generally reduces edge lifting.
No-sew construction is less suitable for shopping bags, heavy bedding, garment seams, quilted floor mats, load-bearing straps, or items exposed to repeated pulling. These projects experience stress that adhesive alone may not distribute safely.
A decorative wall quilt can remain flat for years with very little movement. A tote bag seam may be pulled hundreds of times within a few months. Both can be called fabric crafts, but their bond requirements are completely different.
How Do You Prepare Fabric Before Gluing?
Prepare fabric by checking whether it needs prewashing, removing lint and surface residue, pressing out wrinkles, testing the adhesive on scrap material, and completing the layout before applying glue. Proper preparation improves direct fiber contact, reduces staining and bleed-through, and prevents rushed adjustments after the adhesive begins to set.
Prewash or Not
Prewashing removes loose dye, sizing, starch, manufacturing residue, and part of the fabric’s initial shrinkage. It is often useful when the completed project will be washed regularly or when fabrics from different sources may shrink at different rates.
However, many quilters prefer to use coordinated cotton unwashed because it remains crisp and easier to cut. Some also like the lightly puckered texture created when a completed quilt is washed for the first time.
Consistency matters more than following one universal rule. Mixing heavily prewashed material with unwashed material can create uneven shrinkage. Bonding a prewashed patch to an unwashed base may produce tension after laundering because the two pieces change dimensions differently.
Prewashing deserves consideration when:
- The final item will be washed frequently
- Dark dye may transfer
- Several fabric types are being combined
- The fabric has a noticeable factory finish
- Shrinkage could distort precise alignment
- Recycled clothing is being used
When fabric is washed, avoid oily softeners, allow it to dry completely, and press it flat before measuring or cutting. Residual moisture can interfere with accurate sizing and adhesive contact.
Clean and Press
Adhesive performs best when it contacts fabric fibers directly. Lint, pet hair, chalk, thread fragments, hand cream, body oils, detergent residue, starch buildup, or surface coatings can create a weak layer between the glue and textile.
Use a lint roller or soft brush to remove visible debris. Press the bonding area at a temperature suitable for the material. Flat fabric provides closer contact and makes it easier to apply an even adhesive layer.
Recycled garments and household textiles deserve additional care because contamination may not be visible. Clothing can contain body oil, perfume, laundry additives, or stain-treatment products. Washing and drying the repair area may be necessary before bonding.
The work surface matters as well. A small thread trapped beneath the material can create a ridge that affects patch alignment. Rulers, mats, applicators, pressing sheets, and hands should be free from wet or cured adhesive.
Adding more glue does not correct surface contamination. Excess adhesive may soak into the fabric without reaching a clean bonding surface. Clean material, close contact, and a thin adhesive film are more dependable than heavy application.
Test a Sample
A sample test should reproduce the real project as closely as possible. Use the same fabric combination, adhesive amount, pressure, curing time, wash cycle, and iron temperature planned for the finished item.
A sample around 10 × 10 cm is usually large enough to reveal staining, stiffness, and edge behavior while using very little material. After curing, inspect both sides under strong light. Bend the sample, fold it, and gently pull the layers in the direction they will experience stress.
| Test point | What to check | When to inspect |
| Color | Darkening, yellowing, cloudy marks | After drying |
| Bleed-through | Visible glue on the front | Immediately and after cure |
| Flexibility | Hard spots or cracking | After 24 hours |
| Edge hold | Lifting at corners or curves | After bending |
| Wash response | Separation, residue, distortion | After first wash |
| Iron response | Softening, transfer, discoloration | After protected pressing |
| Needle contact | Buildup or resistance | During sample stitching |
Testing is particularly important for silk, satin, pale cotton, coated nylon, velvet, elastic fabric, and loose weaves. It also reveals whether less adhesive is needed. When the sample feels noticeably harder than untreated fabric, application should be reduced before work begins on the full quilt.
Plan the Layout
Complete the dry layout before opening the adhesive. Arrange every piece, confirm orientation, and check how colors and printed patterns flow across the block. A phone photograph is useful when pieces need to be moved during construction.
Mark center points, seam intersections, grain direction, and any edges that will later be trimmed. Decide which pieces genuinely require adhesive. Straight cotton squares may remain stable with normal pinning, while a narrow curve or small appliqué point may need extra support.
For stitched patchwork, plan adhesive placement around the seam allowance. For appliqué, keep the glue slightly inside the cut edge. For collage, attach lower layers first so upper pieces do not hide reference marks.
A reliable preparation sequence is:
- Wash the material when needed.
- Dry it completely.
- Press it flat.
- Cut and label the pieces.
- Arrange the full design.
- Check seam allowances and grain.
- Test the adhesive.
- Prepare a clean curing area.
- Apply glue only where necessary.
Selective application keeps the finished project softer, lighter, and easier to sew.

How Do You Glue Quilt and Patchwork Pieces?
Apply a thin, controlled adhesive layer, align the fabric before applying firm pressure, smooth from the center outward, and leave the bond undisturbed while it sets. GleamGlee Fabric Glue reaches an initial set in approximately 6–10 minutes and a full cure in about 24 hours. Washing, ironing, folding, and heavy handling should wait until curing is complete.
Apply Less Glue
Fabric is porous, so excessive adhesive can pass through the weave, darken the surface, create a raised ridge, or remain wet between layers. More glue does not always produce a stronger bond. A thin film or a few carefully placed dots usually create better contact.
The application pattern should match the piece:
| Piece type | Practical application pattern | Main purpose |
| Small appliqué | Tiny dots inside the edge | Prevent lifting |
| Narrow strip | One fine line | Keep the strip straight |
| Medium patch | Thin perimeter with light center coverage | Control edges and bubbling |
| Quilt label | Light line around the back edge | Hold before stitching |
| Felt shape | Sparse dots across the surface | Limit absorption |
| Large quilt layer | Wide-area temporary basting product | Avoid heavy liquid coverage |
Test the nozzle flow on scrap material before touching the project. A tube that has been stored for a while may release a thicker first drop. Starting on scrap keeps that drop away from visible fabric.
Stop applying before the textile looks saturated. The objective is close contact between the fibers, not a visibly wet layer.
For a permanent patch, the edge requires enough adhesive to prevent lifting, but the center should not be flooded. For an appliqué that will later be stitched, adhesive is primarily needed to maintain position.
Align Carefully
Begin alignment from a reliable reference point. Position one edge, corner, central mark, or pattern intersection first, then lower the remaining fabric gradually.
Smoothing from the center outward reduces trapped folds and air pockets. With geometric blocks, check the most visible intersections before pressing firmly. A misplaced star point or repeated stripe will be more noticeable than an edge that will later be trimmed.
Use moderate, even pressure. Heavy rubbing may stretch bias-cut edges, move wet adhesive, or distort lightweight cotton. Clean fingers, a pressing tool, or a protective sheet can be used depending on the material.
If adhesive appears at the edge, remove it while it is wet according to the product instructions. Do not continue pressing with the same contaminated finger or tool because the residue may spread across the quilt surface.
Once the piece is aligned, avoid repeatedly lifting it unless the adhesive is specifically designed to be repositionable. Repeated movement can create uneven coverage, dry areas, and weak contact along narrow points.
Set and Cure
Initial setting and full curing describe different stages. During the initial set, the fabric becomes stable enough to remain in position. During full curing, the adhesive develops its intended internal strength and resistance to movement, washing, or heat.
GleamGlee Fabric Glue requires approximately 6–10 minutes for the initial set and about 24 hours for full curing under normal conditions. Thick application, low temperature, limited airflow, or highly absorbent textiles may affect practical drying behavior.
During curing:
- Keep the project flat when possible
- Avoid folding the bonded area
- Do not repeatedly pull corners to test the bond
- Keep loose threads and dust away from wet glue
- Avoid crushing raised embellishments
- Do not stack unfinished pieces together
- Keep the work away from children and pets
For layered collage, allow the lower pieces to stabilize before adding heavier upper materials. This reduces movement in the base design while the next layer is pressed into position.
Curing time should be included in the project schedule. A costume needed tomorrow morning should not be glued late at night and washed immediately. A full day of undisturbed curing protects the time already spent cutting and aligning the design.
Sew and Finish
When adhesive is used only for positioning, sewing may begin after the bond has set and the surface no longer feels wet. Avoid repeatedly sewing through thick deposits. Where the design permits, keep narrow adhesive lines slightly away from the exact needle path.
Washing and ironing should wait until the complete 24-hour cure has passed. Even when the adhesive is described as washable and iron-compatible, the fabric, ribbon, trim, or embellishment may require gentler treatment.
A sensible finishing process is:
- Allow approximately 24 hours of curing.
- Inspect corners and narrow points.
- Add stitches where the item carries stress.
- Use a pressing cloth during the first ironing test.
- Select a wash cycle suitable for the fabric.
- Avoid high heat on synthetic trim.
- Inspect the bond after the first wash.
Iron-compatible adhesive does not make every textile suitable for maximum iron temperature. The care limit of the most delicate material should control the final method.
What Mistakes Weaken Fabric Bonds?
Weak fabric bonds are usually caused by excessive glue, incorrect adhesive selection, contaminated or wrinkled fabric, early handling, insufficient curing, or failure to consider the stress placed on the finished item. Most problems begin during preparation and application rather than after the quilt has already been used.
Too Much Adhesive
Heavy application is one of the most common causes of unattractive and unreliable bonding. A thick layer can soak through thin fabric, create a dark patch, remain wet in the center, and make the bonded area stiff after drying.
The outer surface may appear dry while the center remains soft. When the fabric is moved, the uncured adhesive can shift and leave areas with poor contact. Later, corners may lift even though the patch initially felt secure.
Common signs of overapplication include:
- Glue squeezing from several edges
- A shiny or wet appearance through the fabric
- Hard ridges beneath the patch
- Tackiness lasting longer than expected
- Residue on the needle or presser foot
- Dark rings around the bonded area
- Noticeably reduced flexibility
Begin with the minimum amount needed to create contact. A test on scrap material is more useful than attempting to remove cured adhesive from a completed quilt.
Pale cotton, thin synthetic fabric, open weaves, and highly visible decorative surfaces require particular control. Even a transparent adhesive can alter their appearance when too much product is applied.
Wrong Product
A strong adhesive may still be unsuitable for a particular quilting task. Temporary spray should not be expected to hold a permanent patch through years of washing. Permanent liquid glue should not automatically be spread across a full quilt sandwich. Hot glue may form a thick ridge, while some general craft adhesives become brittle or soften during laundering.
Match the product to the function:
- Temporary positioning: basting spray, glue pen, or washable stick
- Permanent decorative bonding: flexible liquid fabric glue
- Heat-set appliqué: fusible adhesive
- Structural seam: stitching, optionally supported by glue
- Broad layer control: wide-area basting adhesive
- Fine patch repair: precision liquid adhesive
Material compatibility matters as much as adhesive category. Cotton, denim, felt, polyester, coated fabric, and stretch jersey absorb and move differently.
Avoid products that provide no meaningful information about flexibility, washability, curing, or intended materials. “Multi-purpose” does not necessarily mean suitable for a washable quilt or flexible garment repair.
The more demanding the finished use, the more specific the adhesive choice should be.
Moving Too Soon
A patch that feels stable after several minutes may not be fully cured. Folding, pulling, sewing through wet glue, ironing, or washing too early can interrupt bond formation.
Premature handling commonly causes:
- Shifted appliqué shapes
- Misaligned patchwork points
- Lifted corners
- Wrinkled bonded layers
- Uneven glue distribution
- Weakness after the first wash
- Cracks caused by early folding
The setting period begins after the piece has been correctly positioned and pressed. Repeated lifting and adjustment delay stable contact.
For GleamGlee Fabric Glue, approximately 6–10 minutes is the initial set period rather than the full service time. Washing, ironing, stretching, and repeated flexing should wait until the full curing period of around 24 hours has passed.
Temperature, airflow, absorption, and adhesive thickness affect drying. A thin film in a ventilated room behaves differently from a saturated patch in a cool, enclosed space. Visual dryness alone is not reliable proof of complete cure.
Ignoring Stress
A decorative patch on a wall hanging experiences little movement. The same patch on a child’s trouser knee may be bent, rubbed, stretched, and washed several times each week. Bond design must reflect the real use of the finished item.
High-stress areas include:
- Quilt borders handled during folding
- Blanket corners repeatedly pulled
- Garment knees and elbows
- Bag handles
- Cushion closures
- Stretch panels
- Frequently washed bedding
- Thick quilts compressed in storage
- Children’s textile items
- Upholstery edges
In these locations, adhesive and stitching often work better together. Glue keeps the patch flat and correctly positioned, while thread distributes mechanical force.
The attached materials should also have similar movement. A rigid patch placed across highly elastic fabric concentrates stress at the bond line. Choosing a patch with compatible weight and stretch can improve durability more effectively than simply adding more adhesive.
Can Fabric Adhesive Replace Sewing?
Fabric adhesive can replace sewing in decorative, low-stress, and lightly handled projects, but it should not automatically replace stitches in structural seams, full-size functional quilts, heavy blankets, frequently washed bedding, or load-bearing items. In many patchwork applications, adhesive provides the best results when it controls positioning and sewing supplies the long-term strength.
Glue-Only Projects
Glue-only construction works best when the project remains flat, carries little weight, and receives limited washing or flexing. Framed textile art, seasonal banners, felt ornaments, fabric cards, decorative table pieces, and miniature wall quilts are suitable examples.
It can also be useful for people who do not own a sewing machine, users with limited hand mobility, classroom groups, and anyone completing a straightforward decorative project under time pressure.
The design still needs to support the bond. Rounded corners generally resist lifting better than sharp unsupported points. Wider overlaps distribute force more effectively than narrow edge-to-edge joins. Lightweight decorations are more suitable than heavy beads or metal components.
Before relying on adhesive alone, consider:
- How often the item will be handled
- Whether it will be washed
- Whether it carries weight
- Whether the base fabric stretches
- Whether future repairs are likely
- Whether the object is temporary or long-term
A party banner used for one event has very different durability requirements from a family quilt intended to remain in use for decades.
When Sewing Is Better
Sewing creates a mechanical connection through the fabric, while adhesive depends on surface contact. Both methods can be durable, but they respond differently to stretching, folding, laundering, heat, abrasion, and aging.
Stitching remains the safer primary method for:
- Full-size bed quilts
- Baby blankets
- Frequently washed throws
- Structural patchwork seams
- Garment seams
- Bag handles
- Cushion closures
- Heavy textile assemblies
- Heirloom quilts
- High-stretch areas
Sewing also allows easier alteration. A stitched patch can often be removed and replaced. A permanently bonded patch may leave residue or damage fibers when removal is attempted.
For valuable vintage textiles, archival repairs, and heirloom quilting, reversibility deserves particular attention. Permanent glue may not be the preferred method where future restoration is expected.
Glue should not be presented as universally better or faster than sewing. It solves certain positioning and bonding problems, while stitches remain more suitable for structural loads and long service life.
Hybrid Construction
Hybrid construction combines adhesive positioning with stitching. It is often the most practical method for detailed patchwork because it uses the strongest characteristic of each technique.
Adhesive can:
- Hold appliqué before edge stitching
- Prevent patches from shifting
- Control curved fabric sections
- Position binding
- Stabilize narrow trim
- Match complex intersections
- Hold quilt labels before sewing
Thread then provides permanent mechanical support. This combination is valuable for washable items, garments, children’s projects, cushions, and areas exposed to regular movement.
Apply adhesive sparingly and avoid thick deposits directly under the stitch line. Allow the bond to set before sewing. This reduces the chance of wet glue reaching the needle or presser foot.
Hybrid construction may also reduce the number of pins required. For people who find pins difficult to handle, adhesive positioning can make the sewing process calmer and more accurate without sacrificing durability.
Finished Performance
A successful quilt should remain comfortable, flexible, balanced, and suitable for its intended use. Adhesive can affect drape, breathability, weight, edge appearance, wash behavior, and future repairability.
A well-made bonded section should:
- Remain visually discreet
- Flex with the surrounding material
- Resist edge lifting
- Avoid obvious hard spots
- Tolerate the intended care method
- Preserve the quilt’s drape
- Avoid transferring to nearby layers
- Support the design without distortion
Permanent adhesive should be concentrated only where needed. Covering broad areas can make a soft quilt heavier, less breathable, and more difficult to sew.
Compare a bonded sample with an untreated piece of the same fabric. Fold both, hold them against light, wash them, and feel the difference. That direct comparison gives a more realistic assessment than judging the product only by its initial tack.

Is GleamGlee Fabric Glue Suitable for Patchwork?
GleamGlee Fabric Glue is suitable for permanent decorative patchwork, appliqué, fabric collage, quilt labels, small repairs, ribbons, patches, trims, and selected no-sew projects. It dries clear, remains flexible, supports washing and ironing after full curing, and uses a precision nozzle. It is not intended to replace temporary spray across an entire quilt sandwich.
Clear and Flexible
Visible adhesive can distract from carefully coordinated colors, printed patterns, and quilting details. The formula is designed to dry transparent and resist yellowing, helping permanent bonded areas remain visually discreet.
The cured layer remains soft and flexible rather than hard or brittle. This matters for quilt labels, patches, ribbons, appliqué shapes, and repaired areas that need to move with the surrounding fabric.
A flexible finish does not remove the need for careful application. Even clear adhesive can alter the appearance of thin white fabric when applied too heavily. The glue should remain slightly inside visible edges, and pressure should not force excessive product outward.
For cleaner results:
- Test the fabric combination first
- Apply a thin controlled film
- Keep adhesive away from exposed edges
- Press evenly
- Remove wet excess promptly
- Allow the complete cure period
- Add stitches in high-stress areas
The product is most useful where a precise permanent bond is needed. A wide quilt sandwich should still be handled with a temporary basting product designed for broad coverage.
Wash and Iron Care
The cured bond is designed to tolerate washing and ironing, making it practical for many household textiles, clothing repairs, decorative patches, and washable craft projects.
The full curing period must be completed before care testing. The adhesive reaches an initial set in approximately 6–10 minutes and a full cure in about 24 hours. Washing or ironing before that point may interrupt bond development.
The care method should still follow the limitations of the fabric and embellishments. Washable glue does not make delicate lace suitable for a harsh hot-water cycle. An iron-compatible bond does not protect sequins or synthetic ribbon from excessive heat.
A practical care sequence is:
- Allow at least 24 hours of curing.
- Inspect every bonded edge.
- Use a wash method suitable for the fabric.
- Avoid aggressive twisting during the first wash.
- Use a pressing cloth for ironing.
- Begin with the lowest effective temperature.
- Check the bonded area after drying.
Testing the exact fabric combination remains important because weave, thickness, surface treatment, and stretch affect finished performance.
Precision Nozzle
Patchwork regularly involves narrow edges, small shapes, fine corners, and visible surfaces where a broad applicator would create unnecessary mess.
The fine-point nozzle supports controlled dots, narrow lines, and perimeter application. The cap includes a built-in pin intended to reduce blockage between uses, which is helpful when a project is completed across several sessions.
Suitable precision applications include:
- Appliqué edges
- Small quilt repairs
- Quilt labels
- Narrow fabric strips
- Ribbon and lace
- Felt shapes
- Lifted patch corners
- Decorative trim
- Fraying edges
- Lightweight embellishments
Before using the product on the final piece, dispense a small amount onto scrap fabric to confirm the flow. Wipe the nozzle after use and replace the cap securely.
Controlled application improves both appearance and product efficiency. A 50 ml tube can support multiple small repairs and craft projects when the adhesive is applied as a thin film instead of a heavy bead.
Product and Custom Options
The standard product is available as a 50 ml single tube and a two-tube pack. These options are suitable for home craft use, repair kits, classroom projects, sewing retailers, e-commerce stores, and sampling programs.
For wholesale, distribution, and private-label projects, formulation, packaging, instructions, artwork, and market requirements can be discussed according to the intended application.
| Project item | Available support |
| Standard size | 50 ml tube |
| Pack formats | Single tube or two-tube pack |
| Initial set | Approximately 6–10 minutes |
| Full cure | Approximately 24 hours |
| Finish | Clear and flexible |
| Care | Washable and iron-compatible after curing |
| Application | Fine-point nozzle |
| Custom MOQ | From 200 units, depending on project |
| Sample lead time | Commonly 7–14 days |
| Bulk production | Commonly around 20 days |
| Expedited projects | Approximately 15 days when eligible |
| Artwork support | Printable design may be prepared in as little as 2 days |
The broader manufacturing operation integrates adhesive formulation, raw-material sourcing, packaging production, label printing, filling, assembly, and quality control. An internal technical team of more than 25 chemists, material specialists, and process engineers supports formulation evaluation and application testing. More than 18 packaging and graphic designers support multilingual artwork and market-specific presentation.
Business customers can discuss standard products or customized requirements involving:
- Bond strength and flexibility
- Drying and curing behavior
- Wash and ironing resistance
- Tube, bottle, pouch, or alternative packaging
- Precision nozzle options
- Single-unit and multipack formats
- Multilingual instructions
- Private-label artwork
- Market-specific warning information
- Sample and benchmark evaluation
Retailers, craft brands, distributors, Amazon sellers, Shopify businesses, and private-label operators should provide the target fabric types, package size, sales country, estimated quantity, required product claims, and benchmark product. Clear project information helps the technical and commercial teams match the formula, instructions, packaging, and documentation more accurately.
Conclusion
Fabric adhesive can make quilting and patchwork cleaner, faster, and easier to control, but its value comes from precise use rather than replacing every traditional technique. Temporary adhesive is useful for stabilizing quilt layers and holding small components before sewing. Flexible permanent fabric glue is better suited to appliqué, decorative patchwork, fabric collage, quilt labels, edge reinforcement, small repairs, and selected no-sew designs.
The most dependable process is straightforward: identify whether the bond should be temporary or permanent, test the real fabric combination, prepare a clean flat surface, apply less glue than expected, align the piece carefully, and allow the complete curing period. When a quilt or textile item will be heavily handled, stretched, washed frequently, or used for many years, adhesive and stitching usually provide better performance together than either method used carelessly.
GleamGlee welcomes product inquiries from fabric craft retailers, sewing brands, regional distributors, DIY chains, e-commerce sellers, Amazon FBA operators, Shopify businesses, and private-label customers. Standard 50 ml products, samples, custom packaging, multilingual artwork, formulation adjustments, and complete OEM or ODM projects can be discussed according to the target market. Buyers can provide their intended fabric, application, package format, sales country, expected order quantity, and benchmark product to receive a more accurate recommendation and quotation.





















