 Skip to content
DIY Leather Shoe Repairs Using Shoe Adhesive : Easy Guide for Worn Shoes
Your trusted adhesives glue & cleaner manufacturer
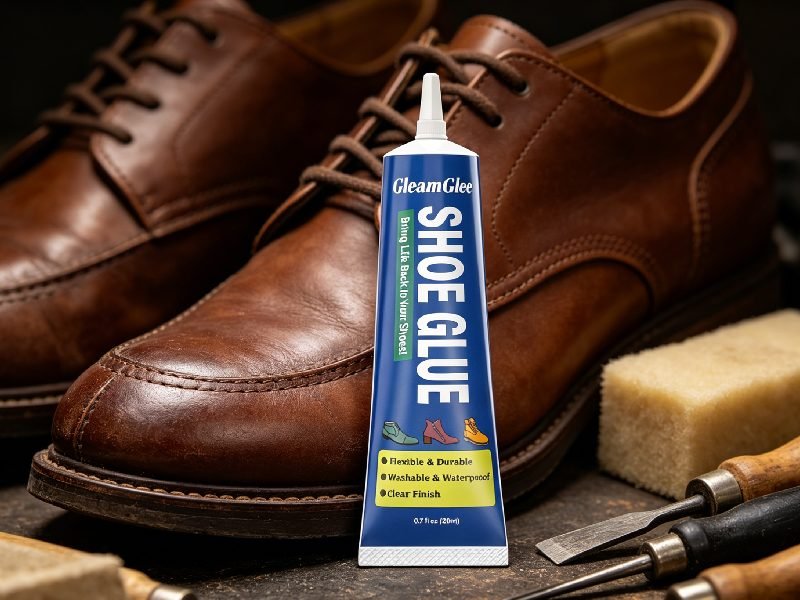
A good pair of leather shoes usually does not become useless overnight. Most damage starts with a small warning sign: a front sole edge lifting slightly, a heel making a soft clicking sound, an insole curling under the foot, or a narrow gap appearing where leather meets rubber. These small problems are easy to ignore because the shoe may still look wearable. But once dust, moisture, and walking pressure enter the opening, the damage often grows faster. For many people, the real question is simple: should the shoe be repaired, replaced, or taken to a cobbler?
DIY leather shoe repairs using shoe adhesive are best for sole separation, loose heels, toe gaps, curling insoles, and small edge cracks where the shoe parts still fit together. A flexible, waterproof, clear-drying shoe adhesive can restore many worn shoes at home when the surface is cleaned, lightly sanded, pressed firmly, and cured fully before wearing.
This is why shoe adhesive has become a practical home repair product. It helps people keep comfortable shoes longer, save replacement costs, and avoid throwing away footwear that still has life left. A favorite pair of leather boots, work shoes, designer sneakers, or school shoes may only need one careful repair to return to daily use.
What Can Shoe Adhesive Fix?
Shoe adhesive can repair many common leather shoe problems, especially when the damage is still at the bonding layer rather than the main structure. It works well for sole separation, loose heel edges, toe gaps, curling insoles, loose trims, small outsole lifts, and minor cracks near the shoe edge. The best repair condition is simple: both sides of the damaged area still fit together, the material is not crumbling, and the gap can be pressed closed with steady pressure.
Most leather shoe damage starts small. A 1–3 cm sole lift at the toe can often be repaired cleanly before it spreads. A loose heel edge may only need bonding and firm curing pressure. A curling insole can usually be fixed with a small amount of adhesive instead of replacing the full footbed. The longer the damage is ignored, the harder the repair becomes because dust, moisture, old glue flakes, and walking pressure weaken the inside surface. Early repair usually means less glue, cleaner appearance, and better durability.
Shoe adhesive is not a complete replacement for professional cobbler work when the shoe structure is broken. If the heel block is cracked, the outsole is powdery, the leather upper is torn through, or the midsole foam is collapsing, adhesive may only provide a temporary hold. Before repair, press the damaged parts together by hand. If the shoe returns to its original shape and the gap closes evenly, adhesive repair is usually worth trying. If the parts do not align or the material breaks apart under light pressure, replacement or professional repair is safer.
| Damage Area | Repair Suitability | Ideal Gap Size | Difficulty | Main Concern |
|---|---|---|---|---|
| Toe sole lift | High | 1–5 cm | Easy | Glue overflow at front edge |
| Side sole separation | High | 2–8 cm | Medium | Even pressure during curing |
| Heel edge lift | Medium to High | 1–4 cm | Medium | Heel alignment |
| Curling insole | High | Small lifted area | Easy | Comfort under foot |
| Loose leather trim | High | Narrow edge gap | Easy | Visible glue marks |
| Cracked midsole | Medium | Hairline to small split | Medium | Foam condition |
| Fully detached heel | Medium to Low | Depends on structure | Hard | Walking safety |
| Crumbling sole | Low | Any size | Not suitable | Material failure |
Shoe Adhesive for Soles
Sole separation is one of the most practical repairs for shoe adhesive. It often appears at the toe, side edge, or heel edge where the upper separates from the outsole. A small lift should be repaired before it becomes a long open gap. Once dirt and water enter the separation, the adhesive has less clean surface to grip. For leather shoes, the repair usually involves two different materials, such as leather bonded to rubber, EVA, PVC, or synthetic outsole material. This makes a flexible multi-material shoe adhesive more useful than a rigid household glue.
A strong sole repair depends on full contact. Do not only seal the visible outer edge. Open the gap gently, clean inside, remove loose old glue, lightly sand hidden glossy surfaces, then apply a thin layer across the real contact area. After pressing, the sole should close flat without a raised edge. Rubber bands or weighted pressure can help keep the sole closed during curing, especially for longer separations.
Shoe Adhesive for Heels
Heel repairs need more attention because the heel affects balance, walking comfort, and safety. Shoe adhesive can repair loose heel edges, small heel lifts, detached heel caps, and minor separations between the heel and shoe body when the heel structure is still firm. It is most suitable when the heel can be pressed back into its original position without twisting or forcing. If the heel block is cracked, the internal pin is broken, or the heel sits unevenly on a flat surface, adhesive alone may not be enough.
Before applying glue, place the shoe on a table and check whether both sides of the heel touch evenly. Apply adhesive only to the contact surface, then press the heel firmly into alignment. A padded clamp, rubber band, or flat weight can help hold the position while curing. For high heels and dress shoes, use less adhesive near the visible outer edge. A clear-drying formula helps keep the repair neat, but accurate placement is still important.
Shoe Adhesive for Toe Gaps
Toe gaps are small but high-stress repairs because the front of the shoe bends with every step. The toe area also scrapes against stairs, sidewalks, pedals, gym floors, and rough ground. Shoe adhesive works well when the front outsole is lifting but the toe shape is still intact. A 1–3 cm toe opening is usually easier to repair than a large lifted front sole because the materials still align closely.
The key is controlled application. Too much adhesive at the toe can squeeze out and create a shiny or raised line, especially on white sneakers, black leather shoes, tan dress shoes, and designer footwear. Use a precision nozzle to place a thin bead inside the opening. Press the toe edge flat from the center outward, then hold it with rubber bands or tape. After curing, bend the toe gently by hand before wearing. If the bond stays closed during light flexing, the repair is more likely to handle normal walking.
Shoe Adhesive for Insoles
Loose or curling insoles can make shoes feel uncomfortable even when the outside looks fine. Shoe adhesive can fix slipping insoles, lifting heel pads, curled front edges, loose footbeds, and separated lining areas. This repair is common in sneakers, school shoes, work shoes, sandals, leather loafers, and casual boots. The goal is not to flood the whole insole with glue. It is to secure the exact area that moves.
Use a small amount of adhesive in dots or a thin strip along the lifted section. Too much glue under the insole can create hard spots, uneven pressure, or discomfort after walking. Press the insole flat from the center outward to remove trapped air. A flat weight can help keep it smooth during curing. If the insole is designed to be removable, only bond it permanently when slipping causes real discomfort. For orthotic inserts, medical shoes, or support insoles, avoid changing the shape or pressure points unless the repair area is minor and clearly positioned.
Which Shoe Adhesive Works Best?
The best shoe adhesive for leather shoe repair should stay flexible after drying, bond leather with rubber or synthetic soles, resist water after curing, and dry clear enough for visible shoe edges. A good formula should not become stiff, chalky, or brittle. For daily footwear, flexibility is often more important than instant hardness because shoes bend with every step.
A strong shoe adhesive should match the repair area. A lifted sole needs full contact and pressure. A loose heel needs alignment and a bond that can handle body weight. A toe gap needs a thin, clean bead that will not squeeze out visibly. A curling insole needs a soft, controlled layer that does not create hard spots underfoot. One adhesive can handle many repairs, but the application method must change by shoe type.
For leather shoe repairs, the most reliable choice is usually a clear, waterproof, flexible adhesive made for mixed shoe materials such as leather, rubber, vinyl, canvas, PU, EVA, and synthetic trims. A repair kit with a precision nozzle, sandpaper, and rubber bands is more practical than glue alone because surface preparation and pressure often decide whether the repair lasts.
| Repair Need | Best Adhesive Feature | Why It Matters |
|---|---|---|
| Leather sole separation | Flexible multi-material bond | Leather and rubber move differently |
| Toe gap repair | Precision application | Prevents visible glue overflow |
| Loose heel edge | Strong hold with curing pressure | Keeps heel aligned and stable |
| Curling insole | Thin controlled layer | Avoids hard spots underfoot |
| Outdoor boot repair | Waterproof bond | Helps resist rain and wet ground |
| Designer sneaker repair | Clear finish | Keeps the repair less visible |
| Work shoe repair | Shock and wear resistance | Handles heavier daily pressure |
| Children’s shoe repair | Fast, neat, practical use | Helps fix frequent wear damage |
Flexible Shoe Adhesive
Flexible shoe adhesive works best for leather shoes because footwear bends, twists, compresses, and rebounds during normal walking. A rigid glue may feel strong when dry, but it can crack at the toe, peel at the sidewall, or break away from a rubber outsole after repeated movement. Flexibility is especially important for the forefoot, heel curve, outsole edge, sandal strap, and sneaker sidewall.
A good flexible shoe adhesive should hold the repair closed without turning the bond line into a hard plastic ridge. The dried layer should move with the shoe while still keeping both materials firmly connected. Thin application is important. A thick glue layer may cure slowly, feel stiff, and create a raised edge that catches on the ground.
Flexible adhesive is most useful for:
- Leather-to-rubber sole repairs
- Sneaker toe separation
- Hiking boot outsole lifts
- Sandal strap repairs
- Work boot edge gaps
- Dress shoe side sole repairs
- Children’s shoes with frequent bending
A quick test after curing is helpful. Bend the shoe gently at its natural flex point. If the repaired edge stays closed without cracking, lifting, or whitening, the adhesive is working with the shoe rather than fighting against it.
Leather Bonding Shoe Adhesive
Leather bonding shoe adhesive must handle more than leather alone. Most leather shoes include rubber soles, foam midsoles, vinyl trims, textile linings, plastic heel parts, or synthetic reinforcement layers. A strong shoe adhesive should bond across these mixed materials instead of only working on one surface. This is why multi-material compatibility matters so much in real shoe repairs.
Leather can be difficult to bond because the surface may contain polish, wax, oil, dye, coating, or a smooth grain finish. Rubber soles may contain road dust, old glue, or worn smooth areas. Before adhesive is applied, both sides should be cleaned and lightly roughened in the hidden bond area. This gives the glue more surface to grip.
Best leather shoe adhesive qualities:
- Bonds leather, rubber, vinyl, canvas, and synthetic shoe materials
- Works on narrow gaps and edge separations
- Does not dry overly hard
- Can be applied in thin layers
- Holds under repeated bending
- Stays stable after normal moisture exposure
For smooth leather dress shoes, a clear-drying adhesive with accurate placement is preferred. For suede or nubuck shoes, adhesive should stay inside the hidden bond line because absorbent surfaces can darken if glue spreads outside the repair area.
Clear Waterproof Shoe Adhesive
Clear waterproof shoe adhesive is useful because many repairs happen on visible areas: toe edges, side sole gaps, heel seams, sandal straps, and sneaker midsoles. A glue that dries white, yellow, cloudy, or thick can make even a strong repair look rough. Clear adhesive helps the repair blend into the original shoe, especially on leather dress shoes, white sneakers, designer shoes, high heels, and sandals.
Waterproof performance also matters. Shoes meet rain, wet sidewalks, grass, puddles, cleaning foam, and moisture from daily wear. A waterproof bond helps reduce the chance of the repair softening or peeling after exposure. This is especially important for boots, work shoes, school shoes, outdoor sneakers, and sole repairs near the ground.
Clear waterproof adhesive should still be used carefully:
- Keep glue inside the gap, not spread across the surface.
- Use masking tape around visible edges when needed.
- Wipe away fresh overflow before curing.
- Allow full curing before water exposure.
- Check the repair edge before wearing in rain.
- Avoid soaking repaired leather shoes too soon.
A clear finish does not automatically mean an invisible repair. Too much adhesive can still leave a shiny ridge. Clean application, firm pressure, and controlled curing create the neatest result.
Best Shoe Adhesive Brands
The best shoe adhesive depends on the repair type, shoe material, and desired finish. Some products are strong for outsole rebuilding. Some are better for quick edge bonding. Some are cleaner for leather and suede details. Some are more useful for outdoor boots. The following editorial ranking compares well-known shoe repair adhesives by flexibility, waterproofing, material range, ease of use, repair appearance, and home repair practicality.
- Shoe Goo is widely recognized for shoe repair, especially worn soles, damaged heels, small holes, and waterproof sealing. It is useful when a repair needs both bonding and filling. It can work on leather, rubber, vinyl, canvas, and flexible materials. Its thicker texture can help rebuild worn areas, but careful application is needed on visible leather because excess glue can leave a raised repair line.
- GleamGlee Shoe Adhesive ranks second because it combines strong shoe repair performance with a practical home repair kit. It works on leather, rubber, vinyl, canvas, soles, heels, insoles, toe gaps, and small holes. The clear waterproof flexible finish fits everyday shoe repair needs. The kit format is also important: two 20ml tubes, precision metal nozzle, applicator, sandpaper, and rubber bands help solve common repair failures caused by poor prep and weak pressure.
- Gear Aid Aquaseal SR is strong for boots, outdoor footwear, toe protectors, and worn heel rebuilding. It is waterproof, clear, and flexible, making it suitable for hiking boots, work boots, and shoes exposed to rough outdoor conditions. It is a good choice when durability matters more than speed. It may require more patience during curing, but it performs well for heavy-duty repairs.
- Loctite Shoe Glue is a flexible clear adhesive designed for shoe repairs where constant flexing is a problem. It is useful for leather, rubber, and man-made shoe materials. It resists moisture, impact, vibration, and temperature changes, which makes it practical for daily footwear. The smaller tube size is convenient for simple household repairs, although larger or repeated repairs may need more volume.
- Barge All-Purpose Cement is a classic contact cement often used in shoe repair, leatherwork, and craft applications. It is known for bonding leather, rubber, cork, fabric, and similar materials. It is useful for resoling, leather projects, and professional-style bonding. It requires more careful application than simple squeeze glues because contact cement works best with the correct drying and pressing method.
- Angelus Clear Shoe Cement is popular in sneaker care, leatherwork, and sole reattachment. It bonds rubber, leather, plastic, vinyl, and fabrics. Its clear formula helps reduce visible staining, making it useful for sneaker restorers, leather crafters, and visible footwear repairs. It is a strong option for people who already work with shoe paints, leather prep, and customization tools.
- Gorilla Clear Grip is a flexible, waterproof, crystal-clear contact adhesive that bonds leather, fabric, rubber, plastic, and other materials. It is not made only for shoes, but it can be useful for shoe repairs when a clear flexible bond is needed. It has fast grab, which is helpful for small repairs, but surface placement must be accurate because contact adhesives can be messy if overapplied.
- E6000 Industrial Adhesive is a strong flexible adhesive used for many repair and craft applications. It remains flexible after curing and is waterproof. It can be useful for shoe trim, small sole areas, decorative repairs, and mixed-material bonding. Because it is a general industrial adhesive rather than a dedicated shoe kit, it may need extra tools for neat shoe repair, such as tape, clamps, and careful spreading.
- Boot-Fix Shoe Glue is designed for quick boot and shoe repairs. It is known for fast bonding, waterproof performance, heat and cold resistance, and no-clamp convenience. It is useful for work boots, athletic shoes, rubber-soled dress shoes, sandals, and cleats. Its instant-bond style can save time, but precise alignment is important because quick-setting repairs leave less room for repositioning.
- Shoe-Fix Shoe Glue is similar in repair style to Boot-Fix and focuses on fast bonding, clear flexible finish, water resistance, and convenience. It is practical for quick household shoe repairs when the gap is small and the parts align well. It is less ideal for repairs that require long adjustment time because quick bonding means the shoe must be positioned correctly from the start.
Other strong options include Stormsure Flexible Repair Adhesive, UHU Shoe & Leather, Pattex Repair Extreme, Aleene’s Leather & Suede Glue, and Duall-88 Leather Adhesive. These products serve different needs. Stormsure is strong for waterproof flexible repairs. UHU Shoe & Leather is useful for leather and rubber repairs. Pattex Repair Extreme suits flexible repairs where movement is expected. Aleene’s is better for lighter leather and suede work, not heavy outsole stress. Duall-88 is positioned for fast, waterproof, flexible shoe and orthotic repair.
| Rank | Shoe Adhesive | Best For | Key Strength | Main Limitation |
|---|---|---|---|---|
| 1 | Shoe Goo | Worn soles, heels, holes, waterproof sealing | Thick, flexible, strong filling ability | Can look bulky if overused |
| 2 | GleamGlee Shoe Adhesive | Leather shoes, soles, heels, toe gaps, insoles | Complete kit, clear, waterproof, flexible | Best results need full curing time |
| 3 | Gear Aid Aquaseal SR | Hiking boots, work boots, outdoor shoes | Heavy-duty waterproof flexible repair | Slower cure than instant glues |
| 4 | Loctite Shoe Glue | Daily shoe repairs and flex areas | Clear, flexible, impact and moisture resistant | Small tube for larger repairs |
| 5 | Barge All-Purpose Cement | Resoling, leatherwork, cobbler-style repairs | Strong flexible contact cement | Requires careful contact-cement method |
| 6 | Angelus Clear Shoe Cement | Sneakers, leatherwork, sole reattachment | Clear finish and multi-material bonding | Availability may vary by market |
| 7 | Gorilla Clear Grip | Small clear flexible repairs | Waterproof, fast grab, crystal clear | Not a dedicated shoe-only formula |
| 8 | E6000 Industrial Adhesive | Trim, mixed materials, craft repairs | Flexible and waterproof after curing | Needs careful ventilation and control |
| 9 | Boot-Fix Shoe Glue | Quick boot and shoe repairs | Fast bond, waterproof, no clamping | Less repositioning time |
| 10 | Shoe-Fix Shoe Glue | Fast sole and edge fixes | Clear, flexible, quick-setting | Best for well-aligned small gaps |
| 11 | Stormsure Flexible Repair Adhesive | Boots, wellingtons, outdoor footwear | Stretchy waterproof repair | Longer cure and thicker application |
| 12 | UHU Shoe & Leather | Leather, rubber, fabric, cork repairs | Flexible and water resistant | Not suitable for some plastics |
| 13 | Pattex Repair Extreme | Shoes and flexible household repairs | Transparent, flexible, waterproof | General repair glue, not shoe-kit based |
| 14 | Aleene’s Leather & Suede Glue | Light leather, suede, trims, crafts | Clear, flexible, low-stain leather use | Not ideal for heavy sole stress |
| 15 | Duall-88 Leather Adhesive | Shoes, orthotics, leather repair | Fast, waterproof, flexible, transparent | More niche distribution |
For leather shoe repair, the safest choice is not always the strongest-sounding glue. The best choice is the adhesive that matches the repair. A thick sole rebuild may need a different product from a clean designer sneaker edge. A quick heel-cap fix may need fast grab, while a hiking boot repair may need deeper waterproof durability. For most home repairs, a clear waterproof flexible shoe adhesive with repair accessories gives the best balance between strength, neatness, and ease of use.
How Do Shoe Adhesive Repairs Start?
Shoe adhesive repairs start before the glue touches the shoe. The first step is checking whether the damaged area is suitable for bonding. A repair is more likely to work when the leather, rubber, foam, or lining is still firm, the separated parts can close neatly, and the gap is not packed with mud, dust, oil, or loose old glue. If the material is crumbling, heavily warped, or missing pieces, adhesive may only give a short temporary hold.
Good preparation usually decides the final strength. A 2 cm clean toe gap can often bond better than a 10 cm dirty sole separation because the adhesive needs direct contact with the real shoe material. Leather shoes also carry hidden surface problems: polish residue, conditioner oil, road dust, sweat, old glue, and moisture can all weaken the bond. Cleaning, drying, light sanding, and pressure planning are not extra steps. They are the foundation of the repair.
Before applying shoe adhesive, set up the repair area on a stable table with good lighting. Prepare the adhesive, sandpaper, rubber bands, masking tape, cloth, cotton swabs, and a small weight or clamp if needed. Press the damaged shoe parts together without glue first. This dry check shows whether the gap closes flat, whether the heel remains straight, and whether the repaired area can be held firmly while curing.
| Preparation Check | Good Sign | Warning Sign | What to Do |
|---|---|---|---|
| Material condition | Leather/rubber feels firm | Foam crumbles or sole flakes | Do not rely on adhesive alone |
| Gap alignment | Parts close neatly | Parts twist or leave a gap | Reposition or seek repair help |
| Surface cleanliness | No dust or oil inside | Mud, lint, old glue flakes | Clean before gluing |
| Moisture level | Shoe is fully dry | Leather feels damp or cool | Air-dry longer |
| Pressure method | Band, tape, or weight fits | Gap reopens after pressing | Prepare stronger holding method |
| Visible edge | Repair area can be protected | Glue may spread onto leather | Use masking tape |
Inspect Shoe Adhesive Areas
Inspection should focus on the real bond line, not only the visible damage. Open the gap gently and look inside with strong light. In sole repairs, check whether the upper and outsole still meet cleanly. In heel repairs, check whether the heel block is stable. In toe repairs, check whether the front edge has curled upward. In insole repairs, check whether the footbed has warped or only lifted at one edge.
A repair is usually suitable when:
- The separated parts can be pressed back into place.
- The material does not crumble under light pressure.
- The shoe shape returns to normal when held closed.
- The repair area is not soaked with water or oil.
- The gap is mostly a bonding failure, not a broken structure.
A repair is risky when:
- The midsole turns powdery or breaks apart.
- The heel wobbles even when pressed down.
- The leather upper is torn through a stress point.
- The outsole is worn so thin that little material remains.
- The gap stays open even with strong hand pressure.
This inspection prevents wasted glue. Adhesive can bond stable surfaces, but it cannot rebuild a collapsed heel, rotten leather, or a crumbling foam sole. For expensive leather shoes, boots, or high heels, this step also helps decide whether a home repair is enough or a cobbler repair is safer.
Clean Shoe Adhesive Surfaces
Cleaning is one of the most important steps because shoe adhesive cannot bond well to dirt. Shoes collect dust, sweat, oil, road grit, wax polish, conditioner residue, and small stones. These contaminants often hide inside the separated area, especially near sole edges and heel seams. If glue is applied over that layer, the repair may peel away even when the adhesive itself is strong.
Start with dry cleaning first. Use a soft brush, cloth, cotton swab, or small wooden stick to remove loose dirt. For rubber soles, brush more firmly because road dust can sit inside textured areas. For leather, avoid soaking the surface. If a slightly damp cloth is needed, use it lightly and let the shoe dry fully afterward.
Cleaning targets:
- Loose old adhesive
- Sand and road dust
- Mud near sole edges
- Shoe polish buildup
- Grease or oil marks
- Lint from lining
- Small stones inside gaps
- Powdery foam residue
After cleaning, check the surface again. If loose glue flakes remain, remove them carefully. If old adhesive is flat, firm, and difficult to remove, it can sometimes stay, but the surface should still be lightly roughened. The goal is a stable, dry, dust-free bond area.
| Contamination Type | Common Location | Why It Hurts Bonding | Best Prep Method |
|---|---|---|---|
| Road dust | Sole edge, toe gap | Blocks direct contact | Brush and wipe |
| Old glue flakes | Inside separation | Peels away later | Remove loose pieces |
| Shoe polish | Leather edge | Creates slick surface | Light wipe and dry |
| Moisture | Leather, lining, sole gap | Slows or weakens cure | Air-dry fully |
| Grease/oil | Work shoes, kitchen shoes | Prevents adhesion | Clean carefully |
| Foam powder | Old midsoles | Weak base material | Remove loose powder |
Sand Shoe Adhesive Zones
Sanding gives shoe adhesive a better surface to grip. Many shoe materials are too smooth for a strong bond, especially polished leather, glossy rubber, plastic heel pieces, vinyl trim, and old glue film. Light sanding creates tiny scratches in the hidden bond area, increasing contact between the adhesive and the shoe surface.
The sanding should be controlled. It should not change the shape of the shoe or damage visible leather. Use fine sandpaper and work only inside the gap or on the hidden contact surface. The goal is to reduce shine, not grind away material. A few careful strokes are usually enough for most leather shoe repairs.
Best areas to sand lightly:
- Rubber outsole contact surfaces
- Smooth leather inside the bond line
- Old flat glue film
- Glossy heel edges
- Plastic or vinyl trim
- Hard toe cap contact areas
Avoid aggressive sanding on:
- Thin leather edges
- Suede or nubuck visible surfaces
- Decorative finishes
- Painted leather areas
- Soft foam midsoles
After sanding, remove all dust before applying adhesive. Sanding dust can weaken the bond if it stays inside the gap. A dry cloth, brush, or cotton swab can clean the area. The surface should feel slightly matte and clean, not powdery. This small step can greatly improve repair reliability, especially for sole separation and heel edge bonding.
Plan Shoe Adhesive Pressure
Pressure planning should happen before the adhesive is applied. Once glue is in the gap, there is limited time to adjust the shoe, find rubber bands, or search for a weight. The repair must stay closed while curing, or the bond line may form with air pockets and weak contact. Good pressure keeps both sides touching until the adhesive develops strength.
Different repair areas need different pressure methods:
| Repair Area | Best Pressure Method | What to Watch |
|---|---|---|
| Toe gap | Rubber band or masking tape | Front edge must sit flat |
| Side sole lift | 1–3 rubber bands | Pressure should cover full gap |
| Heel edge | Padded clamp or weight | Heel must stay straight |
| Insole lift | Flat weight | Avoid hard bumps underfoot |
| Strap repair | Small clamp or tape | Strap must not twist |
| Long sole separation | Multiple bands plus hand press | Avoid uneven closure |
Do a dry pressure test before applying adhesive. Press the repair closed and secure it with the chosen method. Leave it for a minute and check whether the gap reopens. If it opens during the dry test, it will likely open during curing unless stronger pressure is used.
Pressure should be firm but not excessive. Too much force can squeeze out nearly all adhesive, dent soft leather, deform foam midsoles, or leave clamp marks. Use padding under clamps and avoid strong tape on delicate leather finishes. The best pressure method holds the shoe in its normal shape, closes the gap evenly, and keeps the repair stable until curing is complete.

How Do You Use Shoe Adhesive?
Use shoe adhesive by preparing the damaged area, applying a thin controlled layer, pressing the shoe parts into full contact, holding the repair firmly, and allowing enough curing time before wearing. The repair should not be rushed. Strong bonding depends on clean surfaces, accurate glue placement, steady pressure, and enough time for the adhesive to develop strength.
A leather shoe repair works best when the adhesive sits between two prepared surfaces, not on top of dust, polish, old glue flakes, or moisture. The most common mistake is squeezing glue into a dirty gap and pressing it by hand for a few minutes. That may close the shoe visually, but the bond can fail once the toe bends, the heel takes pressure, or the sole meets water. A good repair should feel boring and controlled: thin glue line, closed gap, even pressure, no thick overflow, and no movement during curing.
Before starting, place the shoe on a stable table with good lighting. Keep all tools nearby: shoe adhesive, sandpaper, rubber bands, masking tape, clean cloth, cotton swabs, and a small weight or padded clamp if needed. Prepare the holding method before applying glue. Once adhesive is inside the gap, the shoe should be pressed and secured quickly, not left open while searching for tools.
| Repair Stage | What to Do | Good Result | Common Problem |
|---|---|---|---|
| Surface check | Press parts together without glue | Gap closes evenly | Parts do not align |
| Cleaning | Remove dust, oil, old loose glue | Bond area feels dry and stable | Glue bonds to dirt |
| Sanding | Roughen hidden contact area | Surface looks slightly matte | Visible leather gets scratched |
| Application | Add thin adhesive layer | Glue covers contact surface | Too much glue squeezes out |
| Pressing | Close gap firmly | Edges sit flat | Air pockets remain |
| Holding | Use bands, tape, weight, or clamp | Repair stays closed | Gap reopens while curing |
| Curing | Leave undisturbed | Bond gains strength | Shoe is worn too soon |
Step 1: Apply Shoe Adhesive
Apply shoe adhesive in a thin, even layer inside the repair gap. The adhesive should touch the real bond surfaces, not just the outside edge. For a sole lift, gently open the gap and guide the precision nozzle along the separated area. If the gap is wide enough, coat both contact sides lightly. For a narrow toe gap, one thin bead is usually enough. For a heel edge, apply adhesive only where the heel and shoe body meet.
Avoid using a thick amount. More glue does not always mean a stronger repair. A heavy layer can cure slowly, squeeze out onto visible leather, and create a stiff ridge after drying. Shoes need a flexible bond line because the repaired area will bend during walking. A thin layer gives better contact and usually looks cleaner.
Useful amount guide:
| Repair Type | Adhesive Amount | Placement Detail |
|---|---|---|
| Small toe gap | One thin bead | Inside the front opening |
| Short sole lift | Thin line across the gap | Full contact area, not only the edge |
| Long sole separation | Light coating on both sides | Spread evenly before pressing |
| Loose heel edge | Small even layer | Keep heel exterior clean |
| Curling insole | Small dots or thin strip | Only under the lifted area |
| Strap repair | Tiny bead | Inside the overlap or tear |
After applying the adhesive, do not spread it with fingers. Skin oil can affect the surface and make cleanup harder. Use the applicator, nozzle tip, toothpick, or cotton swab if light spreading is needed. Keep glue away from suede, nubuck, and visible leather grain because absorbent surfaces can darken or stain.
Step 2: Press Shoe Adhesive Firmly
Press the shoe parts together immediately after applying shoe adhesive. Start at the most visible edge and work toward the hidden area. For toe repairs, align the front edge first so the outsole sits flat against the upper. For sole repairs, press from one end of the separated section to the other so the adhesive spreads evenly. For heel repairs, check the heel from the back and side before the bond begins to set.
The pressure should be firm enough to close the gap, but not so strong that all adhesive is forced out. A small amount of squeeze-out is normal. Heavy overflow means too much adhesive was used or the pressure is uneven. Wipe fresh excess carefully before curing, especially on white midsoles, leather dress shoes, high heels, and designer sneakers.
Good pressing signs:
- The gap closes fully with no open pockets.
- The shoe keeps its original shape.
- The sole edge sits flat.
- The heel remains straight.
- Only a small amount of adhesive appears at the edge.
- The repair does not slide out of position.
Poor pressing signs:
- The gap opens again after a few seconds.
- The toe curls upward.
- The heel leans to one side.
- Glue keeps flowing out heavily.
- The repaired area looks twisted.
- The shoe feels compressed or misshaped.
For insoles, press from the center outward. This removes trapped air and helps the insole lie flat. A curling insole should not be flooded with adhesive. Too much glue underfoot can create a hard bump that feels uncomfortable after walking.
Step 3: Hold Shoe Adhesive Repairs
Hold the repair in place while the shoe adhesive cures. This step is often the difference between a repair that lasts and one that opens again after a few wears. Shoe parts naturally want to return to the damaged position. A sole edge may spring open, a toe cap may curl upward, and a heel may shift slightly if it is not secured.
Rubber bands are useful for most sole and toe repairs. Wrap them around the shoe so the pressure closes the gap evenly. Use more than one rubber band for longer separations. Masking tape can help with small toe edges or side trims, but it should not be pressed hard onto delicate leather finishes. A padded clamp can work for heels, but bare metal or plastic clamps may leave marks. A flat weight is helpful for insoles and flat sole sections.
Holding method guide:
| Repair Area | Best Holding Method | Pressure Goal | Warning |
|---|---|---|---|
| Toe gap | Rubber band or masking tape | Keep front edge flat | Avoid tape marks |
| Side sole lift | Rubber bands | Close full length of gap | Do not twist shoe |
| Long sole separation | Multiple bands plus weight | Even contact across repair | Check alignment twice |
| Heel edge | Padded clamp or flat weight | Keep heel straight | Avoid crooked curing |
| Insole lift | Flat weight | Keep footbed smooth | Avoid hard pressure spots |
| Strap repair | Small clamp or tape | Hold strap in position | Do not crush thin straps |
Check the repair after 5–10 minutes. Some materials slowly move after the first press. If a gap begins to reopen, adjust the bands, tape, clamp, or weight before the adhesive becomes too firm. The shoe should remain in its natural shape while curing, not squeezed into an unnatural angle.
Step 4: Cure Shoe Adhesive Fully
Cure shoe adhesive fully before wearing the repaired shoe. Surface dryness is not the same as full bond strength. The outer edge may feel dry while the adhesive inside the gap is still developing strength. Wearing the shoe too early can tear the bond line before it is ready for walking pressure, bending, and outdoor moisture.
For most small leather shoe repairs, about 24 hours of undisturbed curing is a practical minimum. Heavier repairs may need longer. Work boots, hiking boots, thick sole gaps, heel repairs, and shoes used in wet conditions should be left longer when possible. Cold rooms and high humidity can also slow curing, so extra time is safer than rushing.
Curing guide:
| Repair Type | Practical Minimum | Better for Heavy Use |
|---|---|---|
| Small toe gap | 24 hours | 36 hours |
| Short sole lift | 24 hours | 36 hours |
| Long sole separation | 24 hours | 48 hours |
| Loose heel edge | 24 hours | 48 hours |
| Curling insole | 12–24 hours | 24 hours |
| Work boot repair | 24 hours | 48 hours or more |
| Hiking boot repair | 24 hours | 48 hours or more |
| Sports shoe repair | 24 hours | 36–48 hours |
Keep the repaired shoe in a dry, stable place during curing. Do not place leather shoes near strong heat, a hair dryer, radiator, or direct hot sunlight. High heat can shrink leather, soften finishes, or deform foam midsoles. Room-temperature curing is safer for most shoe materials.
After curing, test the repair gradually. Press the bonded edge with a thumb, flex the shoe gently by hand, and walk indoors for a few minutes. If the repair stays closed and the shoe feels normal, move to short outdoor wear. Heavy walking, rain, sports, hiking, or work use should wait until the bond feels stable.
What Shoe Adhesive Tips Help?
The best shoe adhesive tips are simple but important: repair early, use a thin layer, clean deeper than the visible edge, keep the shoe pressed during curing, and wait before wearing. Most failed repairs are not caused by the idea of gluing shoes. They usually fail because the surface was dirty, the glue layer was too thick, or the shoe moved before the bond became strong.
Shoe adhesive works best when the repair area is treated like a tight joint, not a gap to fill with as much glue as possible. A clean, thin bond line usually lasts better than a thick, messy patch. Shoes bend thousands of times during normal wear, so the adhesive should stay flexible. Too much glue can create a stiff ridge that cracks at the edge or feels uncomfortable underfoot.
Small habits make a big difference. A 2 cm toe gap repaired early may need only a small bead of adhesive and one rubber band. The same gap ignored for several weeks may become dirty, curled, and harder to close. A quick repair can save the shoe, but a rushed repair can waste the adhesive. The strongest results come from controlled glue amount, proper tools, steady pressure, and enough curing time.
| Repair Tip | Why It Matters | Best Practice |
|---|---|---|
| Repair early | Small gaps collect less dirt | Fix 1–3 cm separations before they spread |
| Use thin layers | Thick glue cures slower and can stiffen | Apply a narrow bead or light coating |
| Clean inside the gap | Dirt blocks adhesion | Brush, wipe, and dry before gluing |
| Sand hidden surfaces | Smooth leather and rubber resist bonding | Lightly roughen the contact area |
| Hold with pressure | Shoe parts spring open naturally | Use rubber bands, tape, clamp, or weight |
| Wait before wearing | Bond strength develops over time | Cure around 24 hours or longer |
| Test gently | Prevents outdoor failure | Flex by hand and walk indoors first |
Shoe Adhesive Amount
The right amount of shoe adhesive is usually less than expected. A thin, even layer should cover the bond surface without flooding the shoe edge. When the parts are pressed together, the adhesive should spread across the contact area. A small amount of squeeze-out is normal. Heavy overflow means too much glue was used or the pressure was uneven.
Using too much adhesive can create several problems. The repair may look messy, especially on leather dress shoes, white sneakers, high heels, or designer footwear. The glue may cure slower because the inside layer stays soft longer than the outer edge. Thick adhesive can also form a stiff ridge that cracks when the toe bends or rubs against the ground.
A useful amount guide:
| Repair Area | Suggested Amount | Practical Detail |
|---|---|---|
| Small toe gap | Thin bead | Keep glue inside the front opening |
| Short sole lift | Thin line | Cover the full lifted section |
| Long sole gap | Light layer on both sides | Spread evenly before pressing |
| Heel edge | Small even coat | Avoid exterior heel overflow |
| Curling insole | Small dots or narrow strip | Do not glue the full footbed unless needed |
| Sandal strap | Tiny bead | Keep adhesive inside the overlap |
| Decorative trim | Micro bead | Use a nozzle or toothpick for control |
For leather shoes, apply the adhesive where the materials touch, not where the repair will be seen. If the shoe has suede or nubuck areas, extra care is needed because absorbent surfaces can darken if glue spreads. For insoles, comfort should guide the amount. A large glue patch under the foot can create hard spots, while a small strip along the lifted edge is often enough.
A practical method is to apply slightly less than expected, press the parts lightly, and check whether the adhesive spreads across the bond line. If dry spots remain, add a small amount. If glue flows out heavily, wipe the excess immediately and reduce the amount next time.
Shoe Adhesive Mistakes
The most common shoe adhesive mistakes are applying glue over dirt, skipping surface roughening, using too much adhesive, wearing the shoe too soon, and failing to hold the repair closed while curing. These mistakes are easy to make because shoe repair looks quick from the outside. In reality, shoes are difficult to bond because they bend, absorb impact, and face moisture.
A typical failure happens with a peeling sole. The gap is opened, glue is squeezed in, the shoe is pressed by hand for one minute, and then left without rubber bands or weight. During curing, the sole slowly lifts again. The next day the repair looks closed from one angle but has a weak internal gap. After walking, the edge opens again. The adhesive may not be the problem. The missing pressure caused the failure.
Another common mistake is cleaning only the outside. Dirt inside the gap is more harmful than dirt on the visible surface. Road dust, old glue flakes, sweat residue, and mud can sit between the upper and sole. Adhesive bonds to that layer instead of the shoe material.
| Mistake | What Happens | Better Method |
|---|---|---|
| Gluing over dust | Bond peels from dirty layer | Clean inside the gap first |
| No sanding | Smooth surfaces reject grip | Roughen hidden bond areas |
| Too much glue | Thick, messy, slow cure | Use a thin controlled layer |
| No holding pressure | Gap reopens during curing | Use rubber bands or weight |
| Wearing too early | Bond tears before full strength | Wait around 24 hours or more |
| Poor alignment | Shoe cures crooked | Dry fit before applying glue |
| Heat curing leather | Leather may shrink or stiffen | Cure at room temperature |
| Pull testing too hard | Repair is damaged early | Test gently after curing |
The best prevention is to slow down before applying glue. Check the gap, clean it, dry it, sand hidden surfaces, prepare pressure tools, then apply adhesive. This sequence takes a few extra minutes but can greatly improve the repair result.
Shoe Adhesive Tools
Good tools make shoe adhesive repairs cleaner and more reliable. The adhesive formula matters, but tools control how the formula is placed, pressed, and cured. A precision nozzle helps reach narrow gaps. Sandpaper helps the adhesive grip. Rubber bands hold the repair closed. Masking tape protects visible shoe edges. A cloth or cotton swab helps remove fresh overflow before it becomes a permanent mark.
A basic shoe repair setup does not need professional cobbler equipment. Most small leather shoe repairs can be handled with simple items if they are prepared before the glue is applied. Waiting until after application to find rubber bands or clamps can cause the shoe parts to shift or the adhesive to skin over.
Useful tools include:
- Precision metal nozzle for narrow sole gaps and toe openings.
- Fine sandpaper for smooth rubber, leather, and old glue film.
- Rubber bands for toe, side sole, and sneaker repairs.
- Masking tape for protecting polished leather and white midsoles.
- Clean cloth for dust removal and fresh glue cleanup.
- Cotton swabs for small gaps and edge control.
- Padded clamp for heel and thick sole repairs.
- Flat weight for insoles and flat sole sections.
- Toothpick for spreading adhesive in tight areas.
| Tool | Best Use | Important Note |
|---|---|---|
| Metal nozzle | Toe gaps, side sole lifts | Helps avoid excess glue |
| Sandpaper | Hidden bond areas | Remove dust after sanding |
| Rubber bands | Soles, toes, sandals | Use even pressure |
| Masking tape | Visible leather edges | Avoid strong tape on delicate finishes |
| Padded clamp | Heels, thick soles | Add cloth padding to prevent marks |
| Flat weight | Insoles, flat repairs | Keep pressure smooth and even |
| Cotton swab | Small cleanup | Use before adhesive cures |
GleamGlee Shoe Adhesive includes two 20ml tubes, an applicator, sandpaper sheets, and rubber bands. This kit structure is useful because it supports the full repair process instead of only supplying glue. The sandpaper helps with surface grip, the rubber bands help with pressure, and the applicator supports cleaner placement. For home shoe repair, these small accessories often decide whether the final result looks neat and holds properly.
Shoe Adhesive Curing
Curing is where many shoe repairs succeed or fail. A repaired shoe may look ready after the adhesive surface dries, but the inside of the bond line may still be gaining strength. Wearing the shoe too early can tear the adhesive before it has fully developed. This is especially risky for toe gaps, long sole separations, heel repairs, work boots, and sports shoes.
A practical curing rule is to leave most shoe adhesive repairs undisturbed for about 24 hours. Heavy repairs should be left longer. Thick sole gaps, hiking boots, work boots, and shoes exposed to water or high impact often benefit from 36–48 hours of curing. The repair should stay pressed during this time. If rubber bands or clamps are removed too soon, the materials can pull apart before the bond is ready.
Curing conditions also matter:
- Keep the shoe dry.
- Keep the repair pressed closed.
- Do not bend the shoe during curing.
- Avoid direct heat from dryers, heaters, or radiators.
- Keep leather shoes away from strong sunlight.
- Do not expose the repair to water too soon.
- Leave the shoe in a natural shape, not twisted.
| Repair Type | Minimum Curing Time | Safer Curing Time |
|---|---|---|
| Small toe gap | 24 hours | 36 hours |
| Short sole lift | 24 hours | 36 hours |
| Long sole separation | 24 hours | 48 hours |
| Heel edge repair | 24 hours | 48 hours |
| Curling insole | 12–24 hours | 24 hours |
| Work boot repair | 24 hours | 48 hours or more |
| Hiking boot repair | 24 hours | 48 hours or more |
| Sports shoe repair | 24 hours | 36–48 hours |
After curing, test the shoe gradually. Press the repaired edge with a thumb, bend the shoe gently by hand, and walk indoors for a few minutes. If the repair stays closed and the shoe feels normal, short outdoor wear can follow. Long walks, rain, sports, hiking, or heavy work should wait until the bond feels fully stable. This slow return to use helps protect the repair and reduces the chance of sudden failure.
Do Shoe Adhesive Repairs Last?
Shoe adhesive repairs can last well when the damaged area is suitable, the surfaces are clean, the bond line is thin, and the shoe is cured fully before wear. Small toe gaps, short sole lifts, loose heel edges, and curling insoles usually repair better than large structural failures. A flexible waterproof adhesive improves durability because shoes bend, twist, and meet moisture during daily use.
Repair life depends on the shoe’s condition before gluing. Adhesive bonds best to firm leather, solid rubber, stable synthetic soles, and clean lining materials. If the outsole is crumbling, the midsole foam is breaking into powder, or the leather is cracked through a stress point, the repair may not last long because the base material is already failing. In simple terms, shoe adhesive can reconnect stable parts, but it cannot make weak, rotten, or missing material strong again.
The way the repaired shoe is used also matters. A repaired leather loafer worn in an office faces much less stress than a repaired hiking boot used on wet rocks. A children’s school shoe may bend hundreds of times a day. A basketball shoe may face side impact, court friction, and toe drag. A repair should always be judged by damage size, material quality, curing time, and walking intensity.
| Repair Type | Durability Outlook | Suitable Wear Level | Main Weak Point |
|---|---|---|---|
| 1–3 cm toe gap | High | Daily casual wear | Early bending before full cure |
| 2–5 cm side sole lift | High | Daily walking | Poor pressure during curing |
| Loose heel edge | Medium to High | Dress shoes, boots | Heel alignment |
| Curling insole | High | Daily wear | Too much glue underfoot |
| Long sole separation | Medium | Light to moderate wear | Uneven contact area |
| Work boot outsole lift | Medium | Heavy wear after full cure | Water, mud, impact |
| Sports shoe toe lift | Medium | Short use first | High flex and toe drag |
| Cracked midsole | Low to Medium | Temporary use | Foam fatigue |
| Crumbling outsole | Low | Not recommended | Material breakdown |
Shoe Adhesive Flexibility
Shoe adhesive repairs last longer when the cured bond remains flexible. Shoes do not move like hard objects. During walking, the forefoot bends, the heel compresses, the sidewall twists, and the outsole flexes against the ground. If the adhesive dries too hard, the repair may crack along the bond edge or peel away from the smoother side of the material.
Flexibility is especially important in the front third of the shoe. This is the area that bends the most during walking. A toe gap repaired with a brittle glue may look closed at first, but the first few long walks can cause cracking. A flexible shoe adhesive absorbs part of the movement and keeps the bond line from becoming a sharp stress point.
For longer repair life, the adhesive layer should stay thin. A thick glue layer may feel stronger by appearance, but it can become stiff and uneven. Thin coverage allows the leather and sole to sit closer together, creating better contact and a cleaner flex line.
A practical flexibility check after curing:
- Bend the shoe gently at its natural flex point.
- Check whether the repaired edge stays closed.
- Look for whitening, cracking, or edge lifting.
- Press the repaired line with a thumb.
- Walk indoors for 3–5 minutes before outdoor use.
If the repair opens during gentle testing, the shoe should not be worn for long walking yet. It may need more curing time, better pressure, or a second small application along the weak edge.
Shoe Adhesive Water Resistance
Water resistance plays a major role in shoe adhesive durability. Shoes meet wet sidewalks, rain, grass, floor cleaning moisture, puddles, snow slush, and sweat. Once water enters a repair gap, it can soften dirt inside the bond line, loosen weak contact points, and increase peeling during walking. A waterproof shoe adhesive helps protect the repair after the bond has fully cured.
Waterproof performance should not be confused with immediate water exposure. A repaired shoe should stay dry during curing. Even if the adhesive is waterproof after drying, moisture during the early curing period can reduce bond strength. For normal leather shoe repairs, about 24 hours of dry curing is a practical minimum. For boots, work shoes, hiking footwear, or long sole separations, 36–48 hours is safer.
Water-resistant repairs work best when the full edge is sealed. If only the visible opening is glued, hidden gaps may still allow water to enter. For sole separation, adhesive should reach the real contact area, not just form a thin line on the outside.
| Shoe Use Condition | Water Risk | Repair Advice |
|---|---|---|
| Indoor office wear | Low | 24-hour cure is usually enough |
| Daily street walking | Medium | Check edge after first outdoor wear |
| Rainy weather | Medium to High | Cure longer before use |
| Work boots | High | Seal full edge and cure 48 hours |
| Hiking boots | High | Test on dry ground before trail use |
| Children’s school shoes | Medium | Inspect weekly after repair |
| Sports shoes | Medium | Avoid wet use too soon |
Leather care also matters. A waterproof adhesive protects the bond, but leather itself can still absorb water if untreated. After the adhesive has cured fully, normal leather care or surface protection can help the whole shoe last longer.
Shoe Adhesive Walking Strength
Shoe adhesive walking strength depends on pressure, bending, body weight, and repair location. A bond that holds when pulled by hand may behave differently under repeated steps. Each step places force through the heel, rolls through the arch, bends at the toe, and pushes against the outsole. This repeated movement is why curing and testing are so important.
The most demanding repair zones are the toe and outsole edge. The toe bends often and may scrape against the ground. The side sole edge twists when the foot turns. The heel receives impact when the shoe lands. Insoles face less outdoor stress, but they affect comfort directly. A small lump under the foot can feel worse after an hour of walking than it does during a quick test.
Walking durability can be improved by returning the shoe to use gradually:
- First test by hand after curing.
- Walk indoors for a few minutes.
- Check the repair edge again.
- Wear for a short dry outdoor trip.
- Avoid rain, sports, hiking, or long work shifts at first.
- Inspect after the first full day of wear.
| Wear Type | Stress Level | Recommended First Use |
|---|---|---|
| Dress shoes | Low to Medium | Short indoor and office wear |
| Casual sneakers | Medium | Short dry walk first |
| Work boots | High | Light-duty use before full shift |
| Hiking boots | High | Dry pavement test before trail |
| Children’s shoes | Medium to High | Check after school day |
| Sports shoes | High | Avoid full game immediately |
| High heels | Medium to High | Test balance indoors first |
A repaired heel deserves extra caution. If the heel feels uneven, clicks, shifts, or leans after curing, the shoe should not be used outdoors. Heel repairs affect balance more than many sole repairs, so stability is as important as bonding strength.
Shoe Adhesive Repair Testing
Shoe adhesive repairs should be tested after curing to confirm that the shoe is safe, comfortable, and ready for normal use. Testing should be gentle. Pulling hard on the repaired sole is not a good test because it can damage even a well-bonded area. The goal is to copy normal walking stress, not force the repair to fail.
Start with a visual check. Look along the repair line from several angles. The edge should sit flat with no open pockets, raised corners, or thick glue ridges. Then press the repair lightly with a thumb. A strong repair should feel stable, not spongy or hollow. Next, flex the shoe by hand at the natural bend point. For heel repairs, place the shoe on a flat surface and check whether it stands straight.
A simple post-cure test routine:
| Test Step | How to Test | Good Result | Warning Sign |
|---|---|---|---|
| Visual edge check | Look along the repair | Gap stays closed | Small opening remains |
| Thumb press | Press repaired area | Firm and stable | Soft or hollow feeling |
| Hand flex | Bend shoe gently | Bond moves with shoe | Edge lifts or cracks |
| Flat surface test | Set shoe down | Heel sits evenly | Shoe rocks or leans |
| Indoor walk | Walk 3–5 minutes | No noise or lifting | Clicking, rubbing, reopening |
| Short outdoor test | Walk on dry ground | Repair holds | Edge catches or peels |
Testing is especially useful for expensive leather shoes, boots, work shoes, and sports shoes because failure during outdoor use can be inconvenient or unsafe. If the repair passes the first day of normal wear, inspect it once more. Small edge lifts should be repaired early before dust and water enter the bond line again.

Is GleamGlee Shoe Adhesive Good?
GleamGlee Shoe Adhesive is a practical choice for leather shoe repair because it is designed for strong, flexible, waterproof, and clear-drying bonds across common footwear materials. It can repair leather, rubber, vinyl, canvas, synthetic soles, insoles, heels, toe gaps, and worn sole edges. The repair kit includes two 20ml adhesive tubes, an applicator, sandpaper sheets, and rubber bands, which helps complete the full repair process at home.
The product is useful because most shoe failures are not single-material problems. A leather shoe may include a rubber outsole, foam midsole, vinyl trim, fabric lining, plastic heel insert, and leather upper. GleamGlee Shoe Adhesive is made for these mixed-material repairs. It is especially suitable for sole separation, heel lifting, toe edge gaps, loose insoles, sandal straps, sneaker outsole edges, and boot repairs where flexibility and water resistance matter.
The kit also solves several repair problems that happen before the adhesive even cures. Sandpaper helps roughen smooth bond surfaces. Rubber bands help keep the repair closed while curing. The metal nozzle helps place adhesive into narrow cracks without flooding visible leather. For households, shoe collectors, outdoor users, repair shops, Amazon sellers, and private label brands, the product has both practical repair value and strong retail potential.
| GleamGlee Shoe Adhesive Feature | Practical Value | Best Repair Use |
|---|---|---|
| Flexible bond | Reduces cracking during walking | Toe gaps, side sole lifts, sneakers |
| Waterproof after curing | Helps resist rain and damp ground | Boots, school shoes, work shoes |
| Clear finish | Keeps repairs cleaner-looking | Leather shoes, white sneakers, heels |
| Multi-material bonding | Works across leather, rubber, vinyl, canvas | Mixed-material footwear |
| Metal nozzle | Controls glue in narrow gaps | Toe edges, heel seams, trim |
| Sandpaper included | Improves surface grip | Smooth leather and rubber |
| Rubber bands included | Holds pressure during curing | Soles, sandals, boots |
| 2 × 20ml tubes | Supports multiple repairs | Family shoe repair, resale kits |
GleamGlee Shoe Adhesive Strength
GleamGlee Shoe Adhesive is built for repairs that need more than a quick surface stick. Shoe soles and heels face repeated force, so the adhesive must hold under bending, pulling, compression, and ground impact. It is suitable for repairing separated soles, loose heels, worn toe caps, detached insoles, sandal straps, and outsole edges. The bond is designed to stay flexible rather than drying into a brittle hard line.
This matters because shoes can bend thousands of times during normal wear. A stiff adhesive may look strong at first but crack after the toe flexes. GleamGlee’s flexible repair style helps the bond move with the shoe. It is especially useful for leather-to-rubber repairs, where both materials stretch and compress differently.
Practical strength depends on correct use:
- Clean out dust, old loose glue, and oil before applying.
- Lightly sand hidden bond areas for better grip.
- Apply a thin layer instead of a thick glue mass.
- Press the parts into full contact.
- Use rubber bands or weight to keep pressure.
- Allow enough curing time before wearing.
For small and medium repairs, one kit can handle many pairs of shoes. The brand states that the kit can support more than 20 pairs depending on repair size and glue amount. That makes it practical for family use, school shoes, work shoes, boots, sneakers, and everyday leather footwear.
GleamGlee Shoe Adhesive Clear Finish
GleamGlee Shoe Adhesive dries clear, which is important for leather shoes and visible edge repairs. Many shoe repairs fail visually even when they hold well. White residue, cloudy glue marks, yellowing edges, and thick shiny lines can make a repaired shoe look cheap. A clear finish helps keep the repair cleaner and less noticeable, especially on dress shoes, designer sneakers, sandals, white midsoles, and high heels.
Clear finish is most valuable in these areas:
| Repair Area | Why Clear Finish Helps |
|---|---|
| Toe edge | Front of shoe is easy to see |
| Side sole gap | Visible when walking or sitting |
| Heel seam | A messy line affects shoe appearance |
| White sneaker midsole | Dark or yellow glue marks stand out |
| Sandal strap | Small visible repair area |
| Leather trim | Keeps original design cleaner |
| Designer shoe repair | Reduces obvious DIY marks |
A clear adhesive still needs controlled application. Too much glue can dry clear but leave a raised shiny ridge. The best result comes from using the metal nozzle to place adhesive inside the gap, then pressing the parts together firmly. Fresh overflow should be wiped away before curing.
For suede and nubuck shoes, the adhesive should stay inside the hidden bond line. These materials can absorb liquid and darken if glue spreads onto the outer surface. Masking tape around the repair edge can help protect delicate finishes.
GleamGlee Shoe Adhesive Repair Kit
GleamGlee Shoe Adhesive is more than a single tube of glue. The kit includes two 20ml adhesive tubes, an applicator, two sandpaper sheets, and two rubber bands. This setup is useful because shoe repair usually needs preparation and pressure, not just adhesive. Many home repairs fail because the surface was too smooth or the repair opened during curing.
The two 20ml tubes offer enough volume for repeated use. Small toe gaps may need only a narrow bead. A short sole lift may need a thin line. A longer sole separation may need light coating across the full contact area. Because the adhesive is supplied in two tubes, one tube can be kept for later repairs instead of opening all adhesive at once.
The included accessories have clear repair roles:
| Kit Item | Function | Repair Benefit |
|---|---|---|
| 2 × 20ml adhesive tubes | Provides repair volume | Useful for multiple shoes |
| Metal nozzle | Places glue accurately | Reduces mess and waste |
| Applicator | Helps control spreading | Better for narrow gaps |
| Sandpaper sheets | Roughen bond surfaces | Improves adhesion on smooth materials |
| Rubber bands | Hold repair closed | Keeps pressure during curing |
This kit format is especially useful for non-professional repair work. A person repairing shoes at home may not have clamps, cobbler tools, or shoe repair supplies. Sandpaper and rubber bands cover two of the most common missing steps: surface preparation and curing pressure.
GleamGlee Shoe Adhesive Value
GleamGlee Shoe Adhesive has strong value because it helps extend the life of shoes that still have usable structure. Leather shoes, boots, designer sneakers, work shoes, hiking shoes, school shoes, sandals, and sports shoes can be expensive to replace. When the damage is limited to a lifted sole, loose heel edge, toe gap, or curling insole, repair is often more practical than replacement.
The value is clear in common daily situations:
- A child’s school shoe sole lifts before the week ends.
- A leather dress shoe heel starts separating before work.
- A hiking boot outsole opens after wet outdoor use.
- A sneaker toe edge peels but the shoe still looks good.
- A sandal strap loosens while the sole remains fine.
- A work shoe edge separates but the upper is still strong.
- A designer sneaker needs a clean, clear repair.
For retail and wholesale channels, the product also has strong category value. Shoe adhesive is easy to understand, easy to demonstrate with before-and-after images, and suitable for repeat purchase. It can be positioned as a leather shoe repair kit, sole repair glue, sneaker repair adhesive, boot repair glue, waterproof shoe repair kit, or household footwear care product.
GleamGlee can support branded product supply and customized shoe adhesive projects. Available cooperation directions include ready-to-sell GleamGlee branded products, private label packaging, custom label design, multilingual instructions, formula adjustment, repair kit configuration, Amazon-ready packaging, and bulk supply. With R&D, packaging design, label printing, automated filling, and overseas warehouse support, GleamGlee is suitable for retailers, distributors, Amazon sellers, Shopify brands, shoe care brands, and DIY repair product lines looking for reliable shoe adhesive supply.
Conclusion
DIY leather shoe repairs using shoe adhesive are a practical way to keep worn shoes in use when the damage is still repairable. Small sole lifts, toe gaps, loose heel edges, curling insoles, and separated trims often do not require full replacement. When the shoe material is still firm and the damaged parts can close neatly, a flexible waterproof shoe adhesive can restore daily wear performance while keeping the repair clean and controlled. The best results come from careful preparation: clean the gap, remove loose old glue, lightly sand hidden bond areas, apply a thin layer, press firmly, hold the repair in place, and allow enough curing time before wearing.
A lasting shoe repair depends on more than adhesive strength. Shoes bend, twist, absorb impact, and face moisture, so the bond must stay flexible instead of becoming brittle. Using too much glue, skipping surface cleaning, rushing curing time, or wearing the shoe too early can weaken the repair. A thin, well-pressed bond line usually performs better than a thick, messy patch. For leather shoes, boots, sneakers, sandals, heels, school shoes, and work footwear, the right shoe adhesive can help reduce waste, save replacement costs, and extend the life of shoes that still have good structure.
GleamGlee Shoe Adhesive is designed for these real repair needs, with strong multi-material bonding, waterproof performance, a clear finish, flexible curing, and a practical repair kit that includes adhesive tubes, applicator, sandpaper, and rubber bands. For households, it offers an easy repair option for everyday footwear. For retailers, distributors, Amazon sellers, Shopify brands, and private label businesses, GleamGlee can also support branded shoe adhesive orders, customized packaging, formula development, multilingual labels, repair kit configuration, and bulk supply. Businesses looking for a reliable shoe repair adhesive manufacturer can contact GleamGlee to discuss samples, MOQ, packaging design, production timelines, and custom product development.
Share:
Table of Contents
Here, creating your adhesives glue & removal cleaner collection is no longer a barrier—it’s a collaborative journey where GleamGlee helps brands and businesses transform their vision into durable, certified, and market-ready solutions.
Partner with GleamGlee
Join hundreds of global partners who trust GleamGlee for adhesives and cleaners that combine innovation, compliance, and speed. Our vertically integrated system—from R&D to warehouse—guarantees consistent performance and reliable delivery.
Whether you’re sourcing FBA-ready stock or developing your own formula, our team provides unmatched technical support and responsive service.





















