 Skip to content
DIY Floral Arrangements Using Adhesive : A Complete Guide
Your trusted adhesives glue & cleaner manufacturer

A handmade flower arrangement can look beautiful on the table, in the mirror, or in the first photo. The harder part is keeping it that way. Fresh flowers shift. Ribbon edges lift. A small accent flower falls forward. A flower crown looks perfect until someone wears it for ten minutes. A corsage can lose its shape before the event starts. Many people think the problem is lack of skill, but very often the real problem is weak support at small contact points. This is where adhesive becomes useful.
DIY floral arrangements using adhesive are handmade flower projects built with a clear, flexible glue that helps secure fresh flowers, artificial flowers, greenery, ribbon, foam, stems, petals, and small decorative pieces. The right adhesive makes bouquets, corsages, boutonnieres, flower crowns, centerpieces, wreaths, gift boxes, and home decor cleaner, steadier, and easier to finish.
For many home crafters, floral adhesive is not about making the whole design “stronger” in a heavy, stiff way. It is about small control. A tiny dot behind a petal can hold the angle of a bloom. A thin line under ribbon can stop it from curling. A clean bond between a flower and a backing can make a corsage feel secure without bulky wire. Once people understand that adhesive is a detail tool, floral design becomes less stressful and much more enjoyable.
What Are DIY Floral Arrangements?
DIY floral arrangements are handmade flower designs created with fresh flowers, dried flowers, preserved flowers, artificial blooms, greenery, ribbons, vases, foam, boxes, wreath bases, and small decorative materials. They can be made for home tables, weddings, birthdays, holiday gifts, memorial pieces, shop displays, photo props, and handmade craft projects. Adhesive is used to hold small details in place, especially where wire, tape, or pins may look too bulky.
The main value of DIY floral arrangements is control. A person can choose the color, size, flower type, shape, and finish instead of buying a fixed design. A small table arrangement may need only 6–12 stems. A flower box may use 10–25 flower heads. A corsage may need only 2–4 small blooms, but every angle matters because it is worn close to the body. Adhesive helps keep these small parts stable without making the design look heavy.
Good DIY floral work is not just about putting flowers together. It is about balance, freshness, surface contact, and clean finishing. The flowers need enough support, the visible side should look natural, and the hidden structure should stay neat. A clear floral adhesive helps with the final stage: fixing loose petals, holding ribbon edges, securing small greenery, attaching dried flowers, and making delicate details stay where they should.
What Makes DIY Floral Arrangements Easy?
DIY floral arrangements become easier when the project is small enough to control and the materials are prepared before assembly. Many beginners struggle because they start gluing or tying flowers before deciding the final shape. A better method is to choose the base first, place the main flowers without adhesive, check the color balance, then add greenery and small accents. Adhesive should be used after the shape looks right, not before. This reduces messy repairs and makes the finished piece look more natural. For most home projects, the easiest designs are not the largest ones. A small flower box, simple corsage, mini wreath, gift decoration, or table vase teaches the same basic skills without wasting too many flowers.
● Start with 2–3 flower colors instead of too many shades.
● Use one main flower type, then add greenery and small filler flowers.
● Keep the first project under 30–45 minutes to avoid rushing.
● Place flowers dry first, then glue only hidden contact points.
● Use a clear adhesive for pale flowers, ribbons, and gift packaging.
| Easy Project | Suggested Materials | Flower Amount | Adhesive Use |
|---|---|---|---|
| Mini table vase | Fresh flowers, greenery, vase | 6–10 stems | Fix loose leaves or small accents |
| Gift box decor | Dried flowers, ribbon, paper box | 5–15 pieces | Attach flowers to lid or ribbon |
| Simple corsage | Small blooms, ribbon, backing | 2–4 blooms | Hold layers and ribbon loops |
| Mini wreath | Faux flowers, leaves, wreath base | 10–20 pieces | Secure light flowers and leaves |
| Flower card | Pressed flowers, cardstock | 3–8 pieces | Tiny dots behind petals |
Which Flowers Fit DIY Floral Arrangements?
Many flowers can fit DIY floral arrangements, but the best choice depends on the project size, handling time, and how much movement the arrangement will face. Firm flowers are easier for beginners because they tolerate light pressure and hold their shape better. Roses, carnations, daisies, small chrysanthemums, eucalyptus, baby’s breath, and silk flowers are common choices. Delicate flowers such as orchids, ranunculus, thin dried petals, and preserved blooms need gentler handling. If the project will be worn, carried, or moved, choose flowers with stronger bases and lighter heads. If the project will sit still on a table or in a frame, more fragile materials can be used because they face less stress.
● Use roses, carnations, and daisies for beginner-friendly fresh arrangements.
● Use baby’s breath and eucalyptus for light filler and natural texture.
● Use silk flowers for practice, wreaths, crowns, and reusable decor.
● Use dried flowers for cards, frames, gift boxes, and keepsakes.
● Use heavier blooms only when the base has wire, foam, or stem support.
| Flower Type | Best For | Handling Level | Adhesive Tip |
|---|---|---|---|
| Rose | Bouquets, corsages, centerpieces | Medium | Glue near the base, not the soft petal edge |
| Carnation | Crowns, table decor, gift boxes | Easy | Small dots work well between firm layers |
| Baby’s Breath | Crowns, bouquets, cards | Medium | Bond small stem clusters instead of tiny tips |
| Eucalyptus | Wreaths, bouquets, table decor | Easy | Glue the leaf stem or hidden back side |
| Orchid | Corsages, hair flowers, boutonnieres | Medium to hard | Avoid glue on the front petal surface |
| Dried Flower | Cards, frames, gift packaging | Medium to hard | Use tweezers and very small adhesive dots |
| Silk Flower | Wreaths, crowns, displays | Easy | Glue inside flower head joints or stem cups |
Are DIY Floral Arrangements Good for Beginners?
DIY floral arrangements are good for beginners when the first project is realistic. A beginner should not start with a full wedding arch, a large bridal bouquet, or a heavy hanging flower wall. These need stronger structure and more planning. It is better to begin with a small arrangement that can be finished in one sitting. Small projects allow people to learn flower spacing, glue control, color matching, and drying time without pressure. Adhesive makes beginner work easier because it can correct small weak points: a loose ribbon end, a tilted flower head, a small gap in greenery, or a dried flower that will not stay flat. The key is to use adhesive lightly and let each section rest before moving on.
● Best beginner projects: flower cards, mini wreaths, gift boxes, small vases, simple corsages.
● Best practice material: artificial flowers, because they can be adjusted more easily.
● Best first fresh flower project: a small table arrangement with firm flowers.
● Biggest beginner mistake: using too much glue instead of improving placement.
● Best habit: test the layout before applying adhesive.
| Beginner Question | Practical Answer |
|---|---|
| How many flowers should I start with? | 6–12 stems for a small vase, or 2–4 blooms for a corsage |
| Should I use fresh or artificial flowers first? | Artificial flowers are easier for practice; fresh flowers look more natural |
| How much adhesive should I apply? | Start with a tiny dot or thin line, then add more only if needed |
| How long should I let it rest? | Small details need at least 10–30 minutes; wearable pieces need more time |
| Where should glue be placed? | Behind petals, under ribbon, near stems, or inside hidden contact areas |
| What should I avoid? | Wet surfaces, thick glue blobs, front-facing glue marks, and heavy unsupported flowers |
Which Adhesive Works Best?
The best adhesive for DIY floral arrangements is a clear, flexible floral adhesive that can bond fresh flowers, artificial blooms, damp stems, ribbon, floral foam, silk, plastic, glass, ceramic, and fabric without heat. It should dry neatly, stay slightly flexible after curing, and allow small, controlled application. In floral work, the adhesive must hold well, but it also needs to protect the look of the flower.
Many common glues can stick materials together, but flowers need a more delicate balance. Fresh petals can bruise, stems may hold moisture, ribbons can show stains, and artificial flowers may have smooth plastic parts that are harder to grip. A good floral adhesive should solve these problems without creating new ones, such as thick glue marks, stiff spots, cloudy drying, or a clogged tip.
For most DIY floral projects, adhesive should be used as a precision support tool. Wire, tape, foam, clips, and stems still handle the main structure, while adhesive secures small details and hidden contact points. This method works better for bouquets, corsages, boutonnieres, flower crowns, centerpieces, gift boxes, wreaths, and preserved flower crafts because it keeps the design stable without making it look heavy.
| Adhesive Type | Best Use | Strength | Finish | Risk |
|---|---|---|---|---|
| Floral adhesive | Fresh flowers, corsages, crowns, bouquets | High | Clear and neat | Needs controlled amount |
| Hot glue | Faux wreaths, large artificial decor | Medium to high | Can look bulky | Heat may damage petals |
| White craft glue | Paper, cards, light dried flowers | Low to medium | May dry cloudy | Slow drying |
| Super glue | Hard small parts | High | Can leave marks | Often too brittle |
| Floral tape | Stems and structure | Medium | Visible if exposed | Not enough for small details |
| Wire | Heavy flowers and shape | High | Needs hiding | Can look bulky |
Which Adhesive Holds Fresh Flowers?
Fresh flowers need an adhesive that bonds without heat, dries clear, and stays flexible enough to move with petals, leaves, and stems. A floral adhesive is usually the best choice because it is made for delicate flower materials and small hidden contact points. Fresh flowers are not dry craft parts. Their surfaces may be slightly damp, soft, curved, or uneven. If the adhesive is too thick, too hot, too brittle, or too slow to dry, the result can look messy or fail during use. A strong hold on fresh flowers comes from correct placement, not from using a large amount of glue.
● Blot damp stems before applying adhesive.
● Apply glue near the flower base instead of the softest petal edge.
● Use tiny dots for petals and short thin lines for stems or ribbon.
● Let glued sections rest before lifting or turning the arrangement.
● Add wire, tape, or foam support for heavy blooms before gluing.
| Fresh Flower Part | Best Adhesive Placement | Amount to Use | Common Mistake |
|---|---|---|---|
| Petal | Hidden back or base area | Tiny dot | Gluing the front surface |
| Stem | Dry contact area after blotting | Thin short line | Applying on wet stem |
| Leaf | Back side or central vein | Small dot | Gluing fragile leaf edge |
| Small bloom | Base of flower head | Tiny dot or two | Pressing too hard |
| Greenery | Stem cluster or hidden back | Small dot | Gluing loose tips only |
| Ribbon with flowers | Under fold or contact point | Thin line | Using a thick blob |
For roses, carnations, orchids, baby’s breath, eucalyptus, and small accent flowers, the best result comes from gluing the strongest hidden area. A rose petal may need only one tiny dot behind the curl. A boutonniere bloom may need support behind the flower head. A corsage may need adhesive between the flower base and ribbon backing. When the glue is placed correctly, the arrangement looks natural while the weak point becomes more secure.
Is Floral Adhesive Better Than Hot Glue?
Floral adhesive is better than hot glue for most fresh flower projects, especially corsages, boutonnieres, flower crowns, wedding bouquets, and close-up arrangements. Hot glue can be useful for artificial wreaths, foam props, and large faux flower decorations, but it has clear limits around fresh and delicate materials. The heat can damage petals, the glue can cool into thick lumps, and thin glue strings can stick to flowers or ribbon. On a piece that will be photographed or worn, these marks are easy to notice.
Floral adhesive gives more control for detailed work. It can be placed in smaller amounts, hidden under petals or ribbon, and allowed to dry without the hard raised look often caused by hot glue. It also avoids the risk of burning fingers or melting artificial silk and plastic details. For wearable pieces, floral adhesive is usually more comfortable because it can dry with a more flexible feel.
● Use floral adhesive for fresh flowers, ribbon details, corsages, and crowns.
● Use hot glue only for non-delicate artificial structures when heat will not cause damage.
● Avoid hot glue on thin petals, soft leaves, sheer ribbon, and visible front areas.
● Combine adhesive with wire or tape when the flower is heavy.
● Test artificial flowers first because some materials may melt or deform.
| Project | Floral Adhesive | Hot Glue |
|---|---|---|
| Fresh corsage | Better choice | Risk of heat damage |
| Boutonniere | Better choice | Can look bulky |
| Flower crown | Better choice | May feel stiff |
| Bridal bouquet ribbon | Cleaner finish | Can leave raised marks |
| Artificial wreath | Good for details | Useful for larger parts |
| Foam prop | Good for small flowers | Useful for structure |
| Gift box flowers | Cleaner on visible areas | May show lumps |
| Dried flower card | Better with tiny dots | Usually too thick |
A simple rule works well: if the flower is fresh, delicate, worn on the body, held in photos, or placed near pale ribbon, floral adhesive is safer. If the project is a large artificial craft base and the glue will not be visible, hot glue may still be practical. The best-looking floral work often uses different support methods instead of forcing one glue to do every job.
What Adhesive Dries Clear?
A clear-drying floral adhesive is the best option for DIY floral arrangements where the glue area may be seen from close range. Wedding flowers, corsages, boutonnieres, flower crowns, centerpieces, greeting cards, gift boxes, glass domes, preserved flower frames, and artificial flower repairs all need a clean finish. Clear drying matters most on white flowers, pale pink petals, cream ribbon, glass surfaces, and transparent packaging. Even a small cloudy or yellow mark can make the design look less refined.
However, clear adhesive still needs careful use. If too much glue is applied, it can dry as a shiny raised spot even if the formula is transparent. The cleanest results come from using a tiny amount and hiding it between natural contact points. A precision nozzle is helpful because floral work often needs a 1–2 mm dot rather than a large squeeze of glue.
● Choose clear adhesive for visible floral projects.
● Use less glue on white, cream, blush, and pastel flowers.
● Hide adhesive behind petals, leaves, ribbon folds, or flower bases.
● Let the glue dry fully before taking close-up photos.
● Avoid wiping wet glue across petals because it can spread shine.
| Surface | Clear Finish Need | Application Tip |
|---|---|---|
| White flowers | Very high | Use tiny hidden dots |
| Satin ribbon | Very high | Apply thin line under fold |
| Glass vase | High | Keep adhesive away from front view |
| Dried flowers | High | Use tweezers and minimal glue |
| Artificial silk flowers | Medium to high | Glue from the back side |
| Floral foam | Medium | Cover glue area with moss or greenery |
| Gift packaging | Very high | Test on paper before full use |
| Acrylic frame | Very high | Use controlled dots only |
A clear floral adhesive such as GleamGlee floral glue is useful because it supports both fresh and decorative flower projects. It helps the finished piece keep a natural look while still adding hidden hold. For handmade gifts and event decor, this clean finish can make the difference between a casual craft and a piece that looks carefully made.
Which Adhesive Stays Flexible?
A flexible floral adhesive is best for arrangements that move, bend, or get handled. Bouquets are carried. Corsages move with the wrist. Boutonnieres shift with fabric. Flower crowns bend around the head. Centerpieces may be transported before display. If the adhesive dries too hard, the bond may crack, pull away, or make the flower sit unnaturally. Flexibility helps the glued area move slightly with the materials instead of breaking at the first sign of pressure.
Flexible adhesive is especially important when bonding flowers to ribbon, fabric, stems, leaves, silk petals, plastic flower parts, and foam. These materials do not behave like wood or metal. They bend, compress, and shift. A stiff adhesive may feel strong on the table but fail during real use. A flexible hold gives better results for wearable and event pieces because it supports movement while keeping the arrangement neat.
● Choose flexible adhesive for corsages, crowns, boutonnieres, and bouquets.
● Avoid brittle glue on wearable flowers.
● Use structural support first when the flower is heavy.
● Let flexible adhesive set before testing movement.
● Keep glue away from areas that rub directly on skin.
| Project | Why Flexibility Matters | Better Bonding Method |
|---|---|---|
| Corsage | Wrist movement can loosen flowers | Glue layers to backing, then rest |
| Boutonniere | Fabric bends during wear | Support stem with tape, then glue bloom angle |
| Flower crown | Crown bends around head | Use wire base plus small glue dots |
| Bouquet | Handle wrap and accents shift | Glue ribbon edge and light details |
| Centerpiece | Transport can move fillers | Reinforce foam and decorative pieces |
| Wreath | Door movement may shake decor | Use adhesive plus wire for heavy parts |
| Gift box | Handling can lift flowers | Glue flat contact points firmly |
| Artificial flower repair | Plastic joints can twist | Glue inside stem cup or flower head |
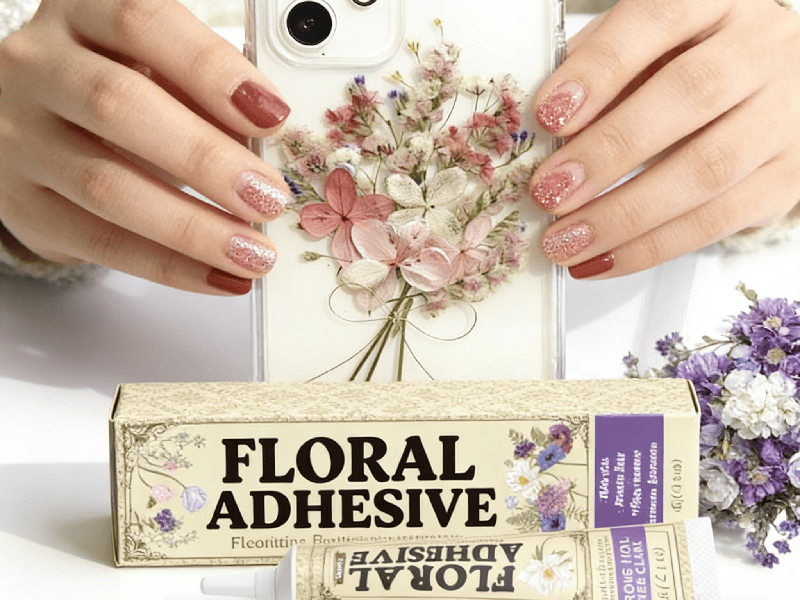
GleamGlee floral adhesive is designed to provide a strong yet flexible hold for fresh flowers, artificial blooms, foam, ribbon, stems, silk, plastic, and craft surfaces. This makes it useful for projects that need both stability and a natural finish. The goal is not to freeze the arrangement in place, but to help it stay beautiful while being worn, carried, displayed, or moved.
How Do You Build DIY Floral Arrangements?
Building DIY floral arrangements starts with a clear plan, clean materials, and the right order of work. The safest process is simple: prepare the flowers, test the layout without glue, build the main structure, apply small amounts of adhesive to hidden points, let each section rest, then check the finished piece from the front, side, and top before moving it.
The most common problem is not weak glue. It is poor contact. If a flower barely touches the base, if a ribbon is under tension, or if a stem is too wet, extra adhesive will not solve the issue neatly. Better results come from trimming stems, removing damaged petals, drying damp contact points, and placing flowers at an angle where they naturally sit. Adhesive should lock a good position in place, not force a bad position to hold.
A clean arrangement usually follows a layered build. The base holds the shape. The main flowers create the design. Greenery fills empty spaces. Smaller flowers soften the edges. Adhesive secures the details that tend to move: ribbon ends, loose petals, light filler flowers, dried accents, artificial flower heads, and decorative pieces. This keeps the design stable without making it stiff or messy.
| Build Stage | What to Do | Adhesive Role | Common Mistake |
|---|---|---|---|
| Prepare | Trim stems, clean surfaces, sort flowers | None yet | Gluing before checking materials |
| Layout | Place flowers without glue | None yet | Fixing flowers too early |
| Structure | Add foam, wire, tape, ribbon, or base | Light support only | Expecting glue to hold all weight |
| Detail | Add small flowers, leaves, ribbon, accents | Main adhesive stage | Using too much adhesive |
| Rest | Let glued areas set | Improves hold | Moving the piece too soon |
| Check | View from all visible angles | Add tiny touch-ups | Only checking from one side |
How Do You Start DIY Floral Arrangements?
Start DIY floral arrangements by deciding where the piece will be used and how much handling it will face. A table centerpiece can be heavier and more structured because it stays still. A bouquet must feel comfortable in the hand. A corsage needs a flat, secure backing. A flower crown must bend naturally. A gift box decoration should stay neat during handling or packaging. This first decision affects the flower type, base, adhesive amount, drying time, and support method. Before using adhesive, arrange all materials on the table and separate them by size: main flowers, filler flowers, greenery, ribbon, and small decorations. This makes the process smoother and prevents rushing.
● Choose the project type before choosing the glue points.
● Use firm flowers for the first fresh arrangement.
● Keep the first design simple: 1 main flower type, 1 filler, 1 greenery.
● Place everything dry before applying adhesive.
● Take a quick photo of the layout before gluing.
| Project Type | First Step | Best Beginner Base | Adhesive Timing |
|---|---|---|---|
| Small vase | Trim stems and check height | Vase or jar | After flowers sit correctly |
| Corsage | Prepare backing and ribbon | Wristband or fabric backing | After base layer is placed |
| Boutonniere | Choose main bloom direction | Wrapped stem | After tape structure is done |
| Flower crown | Measure head size first | Wire or vine base | After flower positions are tested |
| Gift box | Check lid space and closure | Paper box or ribbon | After layout is balanced |
| Wreath | Mark top and center point | Wreath ring | After main sections are placed |
A good start also includes removing weak material. Damaged petals, broken leaves, dusty artificial flowers, and wet ribbon edges can make the final arrangement look messy. Fresh flowers should be trimmed with clean scissors or floral shears. Artificial flowers should be checked for loose heads or bent plastic stems. Dried flowers should be handled gently with tweezers if they are thin or brittle.
How Much Adhesive Should You Use?
Use the smallest amount of adhesive that creates contact between two surfaces. In floral work, a tiny dot is often better than a large squeeze. Too much adhesive can dry slowly, show through pale flowers, make ribbon look stained, add weight to small petals, or squeeze out onto visible areas. The amount depends on the material. A petal may need only a 1–2 mm dot. A ribbon edge may need a thin short line. A loose artificial flower head may need small dots inside the stem cup. Floral foam or wreath bases may need slightly more, but heavy parts should still be supported with wire, clips, stems, or tape.
● Use tiny dots for petals, dried flowers, and small leaves.
● Use thin lines for ribbon, stem wraps, and fabric details.
● Use hidden glue points instead of front-facing glue.
● Add a second small dot only after checking the first hold.
● Avoid thick glue blobs on pale flowers and satin ribbon.
| Material | Suggested Amount | Best Placement | Risk of Too Much |
|---|---|---|---|
| Fresh petal | Tiny dot | Back or base of petal | Bruising, shine, visible marks |
| Fresh stem | Thin short line | Blotted contact area | Weak hold on wet surface |
| Green leaf | Small dot | Back side or central vein | Curling or messy edges |
| Ribbon | Thin line | Under fold or tail | Stain, raised glue line |
| Dried flower | Tiny dot | Back of flower or stem | Breakage, visible shine |
| Silk flower | Small dots | Inside joint or hidden back | Thick buildup |
| Floral foam | Small dots or short lines | Surface contact point | Slow drying, messy surface |
| Wreath base | Dots plus support | Under flower or leaf layer | Heavy pieces may still fall |
A simple test is to press the flower gently after applying adhesive. If glue squeezes out around the edge, too much was used. If the piece slides immediately, the contact point may be wrong or the surface may be too wet or dusty. For controlled work, a precision metal nozzle is helpful because it allows smaller dots and cleaner lines. This is especially useful for corsages, boutonnieres, crowns, gift packaging, and flower cards where the glue area is viewed closely.
How Do You Keep DIY Floral Arrangements Neat?
DIY floral arrangements stay neat when the visible side is protected and the hidden side does the technical work. Glue should usually sit behind petals, under ribbon folds, inside flower bases, or between layered materials. If adhesive is placed on the front surface, even a clear formula can leave shine or texture. Clean hands also matter. A small amount of glue on fingers can transfer onto petals, glass, ribbon, or packaging. Work on a clean table, keep a cloth nearby, and avoid touching visible flower faces after applying adhesive. For fresh flowers, handle the stem and base more than the soft petal surface.
● Hide adhesive under petals, leaves, ribbon, or backing.
● Work in layers instead of gluing everything at once.
● Let each section rest before adding the next piece.
● Remove damaged petals before assembly.
● Check the arrangement under bright light before final use.
| Neat Finish Goal | Good Method | What to Avoid |
|---|---|---|
| Clean flower face | Glue from the back side | Glue on front petals |
| Smooth ribbon | Apply thin line under fold | Thick dot on satin surface |
| Balanced shape | Place flowers before gluing | Random glue placement |
| Natural look | Leave some soft movement | Over-gluing every petal |
| Clean hands | Wipe tools and fingers often | Touching flowers with glue residue |
| Better photos | Inspect in bright light | Checking only in dim room |
For bouquets and centerpieces, neatness also depends on spacing. If flowers are packed too tightly, adhesive may smear when the design is adjusted. If flowers are too far apart, glue may be forced to bridge a gap, which creates weak bonding and visible lines. A good arrangement allows flowers to touch naturally at small points. Adhesive then reinforces those points. For wearable pieces, such as corsages and flower crowns, the inside surface should also be checked. No hard glue lumps should rub the wrist, hair, or skin.
How Long Should Adhesive Dry?
Adhesive drying time depends on the amount used, flower type, surface material, room temperature, humidity, and how soon the arrangement will be moved. Small dots on petals, ribbon, or artificial flowers may become stable sooner than thicker glue on foam, plastic, or damp stems. Even when the adhesive feels set, important pieces should rest longer before transport, wearing, or packaging. A corsage that is moved too soon may shift on the backing. A flower crown may lose shape if handled before the glue settles. A centerpiece may look fine on the table but loosen during car transport if it was packed immediately.
● Let small flat projects rest at least 10–30 minutes.
● Give corsages, boutonnieres, and crowns more resting time before use.
● Allow centerpieces to settle before carrying or packing.
● Use less adhesive when the project must be finished quickly.
● Test cold or humid conditions before making many event pieces.
| Project | Light Handling Time | Better Rest Time | Extra Note |
|---|---|---|---|
| Flower card | 10–20 minutes | 30 minutes | Use a flat surface while drying |
| Gift box decor | 15–30 minutes | 1 hour | Check box closure before packing |
| Corsage | 20–40 minutes | 1–2 hours | Test wrist movement gently |
| Boutonniere | 20–40 minutes | 1–2 hours | Check bloom direction before pinning |
| Flower crown | 30–60 minutes | 2 hours | Flex gently after drying |
| Small centerpiece | 30–60 minutes | Several hours | Inspect after transport |
| Wreath | 1 hour | Overnight if heavy | Add wire for large decorations |
| Bouquet accents | 30–60 minutes | Same-day early prep | Keep flowers properly hydrated |
For fresh flower projects, drying time should be planned together with flower care. Fresh flowers still need hydration, cool storage, and gentle handling. Do not leave delicate flowers in heat just because the adhesive needs time. For wedding or event work, make a simple schedule: build early, rest, inspect, pack carefully, then touch up at the venue if needed. A small tube of floral adhesive in the setup kit is useful for final fixes, especially for ribbon edges, loose greenery, or small accents that move during transport.
What DIY Floral Arrangements Can You Make?
DIY floral arrangements using adhesive can include bouquets, corsages, boutonnieres, flower crowns, centerpieces, wreaths, gift boxes, greeting cards, flower frames, candle decorations, table name cards, artificial flower repairs, and seasonal home decor. Adhesive works best on small details that need clean fixing: loose petals, ribbon edges, small flower heads, dried flowers, lightweight greenery, foam covers, and decorative accents.
The easiest projects are usually flat or lightly handled pieces, such as flower cards, gift boxes, small wreaths, and vase accents. Medium-level projects include bouquets, corsages, boutonnieres, flower crowns, and table centerpieces because they must stay neat while being carried, worn, moved, or photographed. Large floral backdrops, arches, car flowers, hanging wreaths, and outdoor installations need more structure, so adhesive should be used together with wire, clips, ties, tape, or frames.
A good project choice depends on three things: flower weight, movement, and viewing distance. If the piece will be viewed close up, clear drying matters more. If it will be worn, flexibility matters more. If it will be transported, hidden reinforcement matters more. If it uses fresh flowers, the adhesive should avoid heat and should be applied in tiny amounts on stronger contact points.
| Arrangement Type | Skill Level | Flower Amount | Adhesive Use | Better Support |
|---|---|---|---|---|
| Gift box flowers | Easy | 5–20 small pieces | Fix dried flowers, ribbon, accents | Flat lid or paper backing |
| Greeting card | Easy | 3–10 pressed pieces | Hold petals and leaves flat | Tweezers, light weight |
| Mini wreath | Easy to medium | 10–30 pieces | Secure leaves, ribbon, faux flowers | Wreath base, thin wire |
| Bouquet | Medium | 12–35 stems | Finish ribbon, petals, small accents | Tape, ribbon wrap |
| Corsage | Medium | 2–5 blooms | Bond flower layers and ribbon | Wrist base, wire |
| Boutonniere | Medium | 1–3 blooms | Fix bloom angle and stem wrap | Pin, tape, wire |
| Flower crown | Medium | 15–40 small pieces | Hold flowers along the base | Wire, vine, floral tape |
| Centerpiece | Medium | 10–45 stems | Secure foam cover, fillers, ribbon | Vase, foam, frame |
| Wedding arch | Hard | 80+ pieces | Small surface flowers only | Frame, ties, clips |
| Flower wall | Hard | 100+ pieces | Detail fixing and repairs | Grid panel, clips, zip ties |
What Adhesive Helps Bouquets?
Adhesive helps bouquets most when the main stem structure is already finished and the bouquet needs a cleaner final shape. A bouquet should not depend on glue to hold all the stems together. The stems should be arranged, tied, taped, or wrapped first. Adhesive is then used for small weak spots: a loose ribbon end, a tilted accent flower, a lifting petal, a small dried flower that keeps sliding, or a decorative pearl that needs to stay near the handle. For fresh bouquets, clear and flexible adhesive is better because the flowers are handled during photos, ceremonies, transport, and display. A bridal bouquet may be photographed from the front, side, and handle, so glue marks should stay hidden.
● Use adhesive after the bouquet shape is already balanced.
● Fix ribbon tails with a thin line under the fold.
● Use tiny dots behind loose petals or small blooms.
● Avoid gluing the main stems together too heavily.
● Let the bouquet rest upright after adhesive is applied.
| Bouquet Area | Common Problem | Adhesive Fix | Amount |
|---|---|---|---|
| Handle ribbon | Ribbon tail lifts | Thin line under final fold | Short line |
| Small bloom | Flower turns sideways | Dot near hidden base | Tiny dot |
| Loose petal | Petal curls out | Dot behind petal edge | Tiny dot |
| Dried accent | Piece slides out | Dot to nearby stem or ribbon | Small dot |
| Greenery | Leaf moves forward | Dot to stem cluster | Small dot |
| Decorative trim | Pearl or lace loosens | Thin line on hidden side | Thin line |
A bouquet usually needs adhesive in only 5–10 small points. Using too much can make the handle stiff, stain ribbon, or leave shiny areas in photos.
Are Adhesive Corsages Easier?
Adhesive makes corsages easier because corsages are small, layered, and worn close to the body. Every flower, leaf, ribbon loop, and decorative accent must sit in the right position. Wire and tape can create support, but too much of either can make the corsage bulky or uncomfortable. A clear floral adhesive helps attach small flowers and greenery to the wrist base without making the front look crowded. It is especially useful for orchids, mini roses, carnations, baby’s breath, eucalyptus, ribbon bows, lace, and small pearls. Since a corsage moves with the wrist, the adhesive should stay flexible after drying. A stiff glue may crack or loosen when the wrist bends.
● Build corsages in layers: backing, greenery, main flower, small accents, ribbon.
● Keep glue away from areas that touch skin directly.
● Use adhesive behind flowers, not on front petals.
● Test the wrist movement before the event.
● Add wire support for heavier flowers before gluing.
| Corsage Part | Best Method | Adhesive Placement | Check Before Use |
|---|---|---|---|
| Wrist base | Prepare first | Top surface only | No wet glue near skin |
| Greenery | Add before blooms | Stem or hidden leaf back | Leaves face outward |
| Main bloom | Support from behind | Base of bloom | Flower does not tilt |
| Filler flowers | Add after main bloom | Hidden stem cluster | No loose tips |
| Ribbon loops | Shape before fixing | Under ribbon fold | Loops stay even |
| Accent pieces | Add last | Back of accent | No sharp edges |
A simple corsage can use 2–4 flowers and 3–6 greenery pieces. Most adhesive points should be hidden under petals, leaves, or ribbon layers.
Do Flower Crowns Need Adhesive?
Flower crowns often need adhesive because they must look soft while staying stable around the head. A crown bends, moves, and may be worn for photos, weddings, parties, festivals, baby showers, birthdays, or handmade product shoots. Wire, vine, or flexible headband material should create the base first. Adhesive then holds small flowers, leaves, ribbon ends, and loose artificial flower heads in the correct direction. Fresh flower crowns need lighter flowers because heavy blooms can pull the crown down or twist the base. Baby’s breath, mini roses, daisies, small carnations, eucalyptus, silk flowers, and preserved greenery are easier to control. Large roses, peonies, or heavy artificial flowers usually need wire support before adhesive is added.
● Measure the crown base before adding flowers.
● Place all flowers around the crown before gluing.
● Keep heavier flowers balanced from side to side.
● Use tiny glue dots behind blooms and leaves.
● Let the crown rest before wearing or packaging.
| Crown Style | Flower Choice | Adhesive Use | Wearing Concern |
|---|---|---|---|
| Fresh half crown | Baby’s breath, eucalyptus, mini roses | Secure small blooms | Keep weight low |
| Full fresh crown | Small carnations, daisies, greenery | Hold layered flowers | Needs even balance |
| Artificial crown | Silk flowers, faux leaves | Repair and secure heads | Check hard edges |
| Bridal crown | Soft blooms, pearls, ribbon | Hide detail points | No visible glue front |
| Child crown | Lightweight faux flowers | Small hidden dots | Soft inside surface |
| Photo prop crown | Larger faux flowers | Reinforce position | Add wire for large blooms |
A flower crown may need 15–40 small flowers or leaves depending on fullness. Adhesive works best when each piece already touches the base naturally.
Which Centerpieces Need Adhesive?
Centerpieces need adhesive when flowers, greenery, ribbon, moss, foam covers, candle accents, gift tags, shells, beads, faux berries, or decorative pieces must stay neat during display or transport. A centerpiece may look still on the table, but it is often moved several times before anyone sees it: from the worktable to the box, from the box to the car, from the car to the venue, and from the venue cart to the table. Small pieces can shift during each step. Adhesive helps hold lightweight details in place, especially around foam edges, vase rims, candle rings, flower boxes, and low table arrangements. Heavy flowers should still be supported by stems, foam, wire, or a stable container.
● Use adhesive to finish details, not to hold heavy blooms alone.
● Cover visible floral foam with moss, leaves, or small flowers.
● Secure ribbon around vases with thin hidden lines.
● Keep glue away from candle flames and food-contact areas.
● Check centerpieces again after transport.
| Centerpiece Type | Adhesive Helps With | Main Support Needed | Practical Tip |
|---|---|---|---|
| Floral foam design | Moss, fillers, small blooms | Wet or dry foam | Glue after main stems are placed |
| Glass vase decor | Ribbon, light flowers, tags | Vase shape | Avoid front-facing glue marks |
| Candle ring | Faux flowers, leaves, berries | Ring base | Keep flowers away from flame |
| Flower box | Top layer, dried accents | Foam insert | Check lid and side view |
| Holiday table piece | Ornaments, pinecones, ribbons | Tray or base | Wire heavy items first |
| Restaurant decor | Small artificial flowers | Stable container | Choose easy-clean surfaces |
| Wedding table piece | Lace, pearls, greenery | Foam, vase, frame | Inspect under bright light |
For small table centerpieces, 10–25 stems may be enough. Large banquet pieces may use 30–60 stems. Adhesive should be placed only where movement or visible gaps need correction.
Is GleamGlee Adhesive Good?
GleamGlee floral adhesive is suitable for DIY floral arrangements because it is made for clear, flexible, controlled bonding on fresh flowers, artificial blooms, floral foam, ribbon, damp stems, silk, plastic, ceramic, glass, and fabric. It works well for projects that need clean detail work, such as bouquets, corsages, boutonnieres, flower crowns, centerpieces, wreaths, gift boxes, and flower craft decorations.
A good floral adhesive should not only hold flowers together. It should also protect the look of the arrangement. Flowers are often photographed, worn, gifted, or placed on tables where every visible mark is easy to notice. GleamGlee floral glue is designed to dry clear, reduce messy over-application through a precision metal nozzle, and form a flexible bond that moves better with flowers, ribbon, and lightweight decorative materials.
It is especially practical for people who want one adhesive for several flower projects instead of keeping different glues for fresh flowers, silk flowers, foam, and craft materials. For small home projects, it helps reduce loose petals and ribbon lifting. For weddings and events, it helps secure delicate details before use. For craft shops, flower studios, and online product lines, it fits well into floral kits, wreath kits, wedding DIY supplies, gift packaging sets, and seasonal decor products.
| Need | GleamGlee Floral Adhesive Feature | Real Use Value |
|---|---|---|
| Clean flower finish | Clear-drying formula | Less visible glue on pale flowers and ribbon |
| Better control | Precision metal nozzle | Small dots and thin lines for detailed work |
| Fresh flower use | No heat required | Safer for delicate petals than hot glue |
| Wearable pieces | Flexible bond | Better for corsages, crowns, and boutonnieres |
| Damp stems | Waterproof formula | Useful for fresh stems and floral foam |
| Mixed materials | Bonds silk, plastic, fabric, glass, ceramic | More project options with one tube |
| Outdoor decor | Performs in chilly conditions | Useful for winter and outdoor arrangements |
| Repeated work | Controlled application | Less waste when making many small pieces |
Is GleamGlee Adhesive Clear?
GleamGlee floral adhesive is designed to dry clear, which is one of the most important details in flower work. DIY floral arrangements are often seen from a close distance, especially corsages, boutonnieres, flower crowns, bridal bouquets, gift boxes, greeting cards, and table centerpieces. A glue mark on a white petal, cream ribbon, glass vase, or preserved flower frame can make the whole piece look less polished. Clear drying helps the arrangement keep a natural look, but the amount still matters. A large blob of any adhesive can leave shine or raised texture. The best finish comes from using small dots, placing adhesive behind visible surfaces, and allowing the glue to dry before handling the piece again.
● Use tiny dots on pale flowers, dried petals, and small accents.
● Apply thin hidden lines under ribbon folds or fabric edges.
● Avoid wiping wet adhesive across petals, because it can spread shine.
● Check the arrangement under bright light before taking photos.
● Let clear adhesive dry fully before packing gift boxes or event pieces.
| Surface | Clear Finish Importance | Best Placement |
|---|---|---|
| White roses | Very high | Behind petal base |
| Satin ribbon | Very high | Under the final fold |
| Glass vase | High | Back or side area away from front view |
| Dried flowers | High | Back of petal or stem |
| Silk flowers | Medium to high | Inside flower head or hidden back |
| Floral foam | Medium | Covered by moss, leaves, or small flowers |
| Gift box lid | Very high | Under dried flowers or ribbon trim |
Does GleamGlee Adhesive Hold Well?
GleamGlee floral adhesive is made to provide a strong, flexible hold for fresh flowers, greenery, damp stems, artificial flowers, silk blooms, plastic parts, ribbon, fabric, and floral foam. It is most useful on small points that often fail first: ribbon tails, light filler flowers, loose petals, artificial flower heads, corsage layers, boutonniere wraps, and decorative pieces on centerpieces or gift boxes. Strong hold does not mean using large amounts of glue. In floral work, strength comes from clean surface contact, proper support, and enough resting time. Heavy flowers still need wire, tape, stems, foam, or a stable base. Adhesive should lock the final position and stop small details from shifting.
● Blot damp stems before gluing so the adhesive contacts the surface better.
● Use wire or tape first for heavy blooms, then add adhesive for detail hold.
● Let wearable pieces rest before testing movement.
● Apply adhesive where two surfaces naturally touch.
● Add a second small dot only if the first contact point is not enough.
| Project | Where Hold Matters Most | Better Method |
|---|---|---|
| Bouquet | Ribbon edge, small accents, loose petals | Tie and wrap first, glue details after |
| Corsage | Flower base, greenery, ribbon loops | Build in layers and rest between steps |
| Boutonniere | Bloom angle and stem wrap | Tape stem first, then glue hidden areas |
| Flower crown | Small flowers along the base | Wire or vine base plus glue dots |
| Centerpiece | Foam cover, fillers, ribbon, moss | Insert main stems first, glue finish details |
| Wreath | Leaves, ribbon, light flowers | Add wire for heavy pieces |
| Gift box | Dried flowers and ribbon trim | Use flat contact points and let dry before packing |
Is the Adhesive Nozzle Precise?
The precision metal nozzle is a major advantage for floral arrangements because flower work usually needs very small adhesive points. A wide glue opening can release too much product, creating visible marks, slow drying, and messy squeeze-out. A metal nozzle gives better control when placing adhesive behind a petal, under ribbon, inside an artificial flower head, along a stem wrap, or onto a small dried flower. This is useful for beginners because it reduces the chance of applying too much glue. It is also useful when making repeated pieces, such as several corsages, boutonnieres, gift boxes, or workshop crafts, because each glue point can stay more consistent.
● Use the nozzle tip to place glue directly on hidden contact points.
● Keep the tube angle low when applying thin lines to ribbon.
● Wipe the nozzle after use to reduce dried buildup.
● Recap the tube tightly so the tip stays cleaner between projects.
● Do not squeeze hard; controlled pressure gives cleaner dots.
| Detail Area | Why Precision Matters | Suggested Application |
|---|---|---|
| Petal repair | Too much glue can show | 1 tiny hidden dot |
| Ribbon fold | Thick glue can stain or raise fabric | Short thin line |
| Corsage backing | Small flowers need accurate placement | Small dots in layers |
| Boutonniere stem | Front view must stay clean | Glue behind stem wrap |
| Dried flower card | Fragile pieces break easily | Dot placed with nozzle or tweezers |
| Artificial flower head | Glue must reach inside joint | Small amount inside stem cup |
| Glass decor | Marks are easy to see | Back-side controlled dot |
Can Adhesive Work for Events?
GleamGlee floral adhesive can work well for event flowers when it is used with proper structure and enough resting time. Weddings, birthdays, memorial pieces, hotel displays, restaurant tables, stage flowers, car decorations, and outdoor arrangements all place stress on floral designs. Pieces may be moved, touched, worn, packed, photographed, or exposed to cool air. Adhesive helps secure the small details that often loosen during these steps. It is especially helpful for corsages, boutonnieres, flower crowns, bouquet ribbon wraps, table centerpieces, wreaths, and photo backdrop details. For large arches or hanging pieces, adhesive should be paired with clips, wire, ties, or a frame.
● Prepare wearable flowers early enough to rest before use.
● Carry adhesive in the event kit for quick ribbon or greenery touch-ups.
● Test fresh flowers and surfaces before making many pieces.
● Use structural support for heavy flowers, outdoor decor, and hanging designs.
● Check the finished piece after transport, not only before packing.
| Event Piece | Adhesive Use | Extra Support Needed | Check Point |
|---|---|---|---|
| Corsage | Flower layers and ribbon loops | Wrist base, wire if needed | Wrist comfort and flower angle |
| Boutonniere | Bloom direction and stem wrap | Pin, floral tape | Front view and fabric movement |
| Bridal bouquet | Ribbon tail and small accents | Tied stem structure | Handle finish and loose petals |
| Flower crown | Small blooms and ribbon ends | Wire or vine base | Fit, balance, inner comfort |
| Centerpiece | Foam cover, fillers, small decor | Vase, foam, tray | Side view after transport |
| Wreath | Leaves, ribbon, faux flowers | Wire for heavier parts | Hanging strength |
| Outdoor decor | Light flowers and accents | Clips, ties, frame | Wind and cold exposure |
| Gift table decor | Dried flowers and labels | Flat base or ribbon | Glue marks under bright light |
How Do You Choose Floral Adhesive?
Choosing floral adhesive starts with the project, not the glue name. A small pressed-flower card, a wrist corsage, a bridal bouquet, a table centerpiece, and a winter wreath all need different levels of hold, flexibility, drying clarity, and surface control. The right adhesive should match the flower type, the base material, the amount of movement, and how closely the finished piece will be viewed.
For DIY floral arrangements, the most useful adhesive is clear, flexible, fast-drying, waterproof, and easy to apply in tiny amounts. It should bond fresh flowers, damp stems, artificial blooms, floral foam, ribbon, silk, plastic, fabric, ceramic, and glass without heat. A precision nozzle also matters because most flower projects do not need a large glue line. They need a clean dot hidden behind a petal, leaf, ribbon fold, or flower base.
A good selection process is simple: check the material, check the movement, check the finish, then check the drying time. If the piece will be worn, flexibility matters. If it will be photographed, clear drying matters. If it will be transported, hold strength matters. If it uses fresh stems or floral foam, moisture resistance matters. When these details match, the arrangement is easier to finish and more likely to stay neat.
| Check Point | Why It Matters | Better Choice |
|---|---|---|
| Flower type | Fresh, dried, and artificial flowers react differently | Floral adhesive made for mixed materials |
| Drying color | Glue marks can show on pale petals and ribbon | Clear-drying formula |
| Flexibility | Corsages, crowns, and bouquets move during use | Flexible bond after drying |
| Moisture resistance | Fresh stems and foam may be damp | Waterproof adhesive |
| Nozzle control | Floral work needs tiny dots | Precision metal nozzle |
| Surface range | Projects may include foam, ribbon, glass, ceramic, silk, plastic | Multi-surface floral glue |
| Drying speed | Event pieces often need same-day handling | Fast-drying formula |
| Final use | Worn, carried, shipped, or displayed pieces need different support | Choose by project stress level |
What Should You Check First?
The first thing to check is how the finished arrangement will be used. A flower card sits flat and needs only light bonding. A corsage moves with the wrist and needs flexibility. A boutonniere is pinned to fabric and needs a clean hidden hold. A centerpiece may be transported and viewed from several sides. A flower crown bends around the head and should not feel stiff or scratchy. Once the use is clear, it becomes easier to judge the adhesive. For fresh flowers, choose no-heat floral adhesive. For pale flowers and ribbon, choose clear drying. For damp stems or foam, choose waterproof performance. For small details, choose a fine nozzle.
● Check whether the piece will be worn, carried, moved, shipped, or kept still.
● Check whether the material is fresh, dried, preserved, silk, plastic, or mixed.
● Check whether the glue area will be visible in photos.
● Check whether the arrangement needs flexibility after drying.
● Check whether the project includes damp stems, foam, or outdoor use.
| Project Situation | Main Need | Adhesive Feature to Prioritize |
|---|---|---|
| Fresh bouquet | Clean finish and light detail hold | Clear, flexible, no-heat glue |
| Wrist corsage | Movement and comfort | Flexible adhesive with hidden bonding |
| Boutonniere | Small front-facing design | Precision nozzle and clear drying |
| Flower crown | Bendable structure | Flexible bond, low bulk |
| Gift box flowers | Clean packaging look | Clear drying and small dot control |
| Centerpiece | Stability during transport | Strong hold plus moisture resistance |
| Wreath | Layered decorative hold | Adhesive plus wire for heavier pieces |
| Dried flower card | Fragile surface bonding | Tiny dots and slow pressure |
A simple test before full use is helpful. Apply a tiny amount to one spare flower, ribbon piece, or surface sample. Let it dry, then check color, shine, stiffness, and hold. This small test is especially useful for white flowers, satin ribbon, glass, acrylic, preserved petals, and artificial silk flowers.
Which Projects Need Stronger Hold?
Stronger hold is needed when the arrangement will face movement, handling, weight, moisture, or transport. A flat greeting card does not need the same hold as a flower crown or wedding bouquet. A corsage may move for several hours. A bouquet may be held during photos and ceremonies. A centerpiece may be packed, carried, and placed at a venue. A wreath may hang on a door where it shakes whenever the door opens. These projects need adhesive that does more than stick lightly. It should bond cleanly, stay flexible, and work with other support methods when the flower or decoration is heavy.
● Use stronger hold for wearable flowers, bouquets, wreaths, and transported centerpieces.
● Add wire, tape, clips, foam, or ties before adhesive when the flower is heavy.
● Use adhesive to lock the final position, not to carry all the weight alone.
● Give high-movement pieces more drying time before use.
● Check the piece after gentle movement, not only while it sits flat.
| Hold Level | Suitable Projects | Adhesive Role | Extra Support |
|---|---|---|---|
| Light hold | Cards, gift tags, pressed petals | Keep flat pieces in place | Tweezers, flat drying surface |
| Medium hold | Gift boxes, small wreaths, vase ribbon | Hold decorative details | Ribbon, paper backing, wreath base |
| Strong hold | Corsages, crowns, boutonnieres, bouquets | Secure moving flower parts | Wire, floral tape, backing |
| Reinforced hold | Arches, backdrops, car decor, hanging wreaths | Fix small surface details | Clips, zip ties, frame, wire |
| Moisture-resistant hold | Fresh stems, floral foam, outdoor pieces | Resist damp contact points | Blotted stems, stable base |
More glue does not always mean stronger results. Thick glue may dry slowly, show on the surface, or peel away if the flower is pulling from the wrong angle. Better hold comes from better contact. Trim the stem, adjust the flower angle, press two surfaces together naturally, then use a controlled amount of adhesive at the hidden contact point.
What Finish Looks Professional?
A professional-looking finish is clean, balanced, and natural. The glue should not be the first thing people notice. Flowers should face the right direction, ribbon should lie flat, small accents should look intentional, and visible glue marks should be avoided. In floral work, appearance matters as much as hold because many arrangements are used for photos, gifts, table settings, weddings, and close-up handmade pieces. A clear adhesive helps, but clean application matters even more. Use small dots, hide the glue under petals or ribbon folds, and avoid touching wet adhesive with fingers. Bright light can reveal marks that are hard to see on a worktable, so final checking is important.
● Hide glue behind petals, leaves, ribbon folds, or flower bases.
● Use thin lines for ribbon instead of thick dots.
● Check pale flowers and satin ribbon under bright light.
● Let the adhesive dry before taking photos or packing the piece.
● Remove damaged petals before gluing, not after.
| Finish Issue | What Causes It | Better Fix |
|---|---|---|
| Shiny glue spot | Too much adhesive on visible surface | Use tiny hidden dots |
| Stained ribbon | Thick glue line under thin fabric | Apply a thin line only at the fold |
| Stiff flower crown | Too much glue or brittle adhesive | Use flexible adhesive and fewer glue points |
| Messy corsage | Gluing all layers at once | Build layer by layer |
| Visible foam | Gaps around centerpiece base | Cover with moss, leaves, or small flowers |
| Loose artificial flower head | Weak plastic joint | Glue inside the stem cup |
| Crushed petals | Pressing too hard | Press at the flower base, not the soft face |
A clean finish also depends on timing. Moving the arrangement too soon can shift flowers and smear adhesive. For small cards or gift pieces, a short resting time may be enough. For wearable pieces and event arrangements, allow more time before use. If the project will be packed, shipped, or moved to a venue, check the finish again after transport.
Conclusion
DIY floral arrangements using adhesive are easier to build when the glue is treated as a detail tool, not the only source of structure. Stems, foam, wire, ribbon, and bases still create the main shape, while floral adhesive helps secure the parts that often move: loose petals, ribbon ends, small blooms, dried flowers, greenery, artificial flower heads, and decorative accents. A clear, flexible adhesive gives the finished piece a cleaner look, especially for bouquets, corsages, boutonnieres, flower crowns, centerpieces, gift boxes, wreaths, and home decor projects that are viewed up close or photographed.
GleamGlee floral adhesive is designed for these real DIY flower needs, with a clear finish, flexible hold, waterproof performance, and a precision metal nozzle for cleaner application. It works on fresh flowers, damp stems, floral foam, ribbon, silk, plastic, fabric, glass, ceramic, and other craft surfaces, making it useful for home crafters, wedding preparation, event decor, flower workshops, and seasonal handmade projects. Customers can order GleamGlee branded floral adhesive for daily use, while brands and sellers can contact GleamGlee for private label packaging, formula customization, sample testing, bulk production, and market-ready floral adhesive solutions.
Share:
Table of Contents
Here, creating your adhesives glue & removal cleaner collection is no longer a barrier—it’s a collaborative journey where GleamGlee helps brands and businesses transform their vision into durable, certified, and market-ready solutions.
Partner with GleamGlee
Join hundreds of global partners who trust GleamGlee for adhesives and cleaners that combine innovation, compliance, and speed. Our vertically integrated system—from R&D to warehouse—guarantees consistent performance and reliable delivery.
Whether you’re sourcing FBA-ready stock or developing your own formula, our team provides unmatched technical support and responsive service.





















