 Skip to content
Ceramic Glue for East Fork Mug Repair: A Careful Guide
Your trusted adhesives glue & cleaner manufacturer
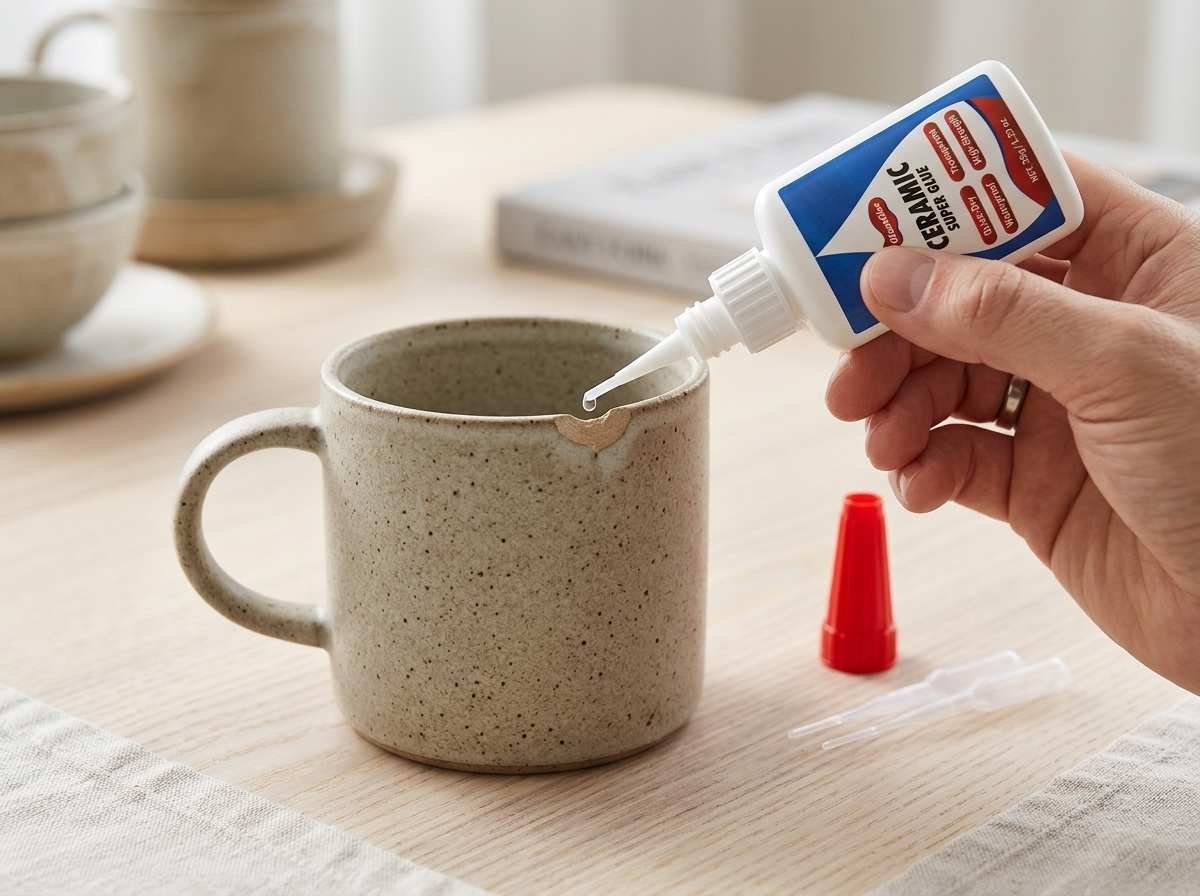
An East Fork mug often feels different from an ordinary kitchen cup. It has weight, texture, glaze color, and a handmade-style character that makes people reach for it again and again. That is why a broken handle, a small chip near the base, or a thin crack along the side can feel surprisingly frustrating. The mug may not be expensive enough to send away for professional restoration, but it may be too meaningful, too beautiful, or too useful to throw away after one accident at the sink.
Ceramic glue for East Fork mug repair is used by cleaning the broken ceramic surface, drying it fully, test-fitting the pieces, applying a thin layer of clear ceramic adhesive, pressing the parts together for several seconds, wiping away excess glue, and allowing the repair to cure before gentle use. For safer results, repaired mugs should be hand-washed, kept out of the microwave, and used carefully if the damage is near the rim, inner wall, or handle.
The key is knowing what kind of repair you are really doing. A small chip on the base is mostly cosmetic. A broken handle is structural. A crack that reaches the inside of the cup may affect hygiene and hot-liquid safety. These are not the same repair. A good ceramic glue can make the mug look whole again, but the best result comes from careful judgment before opening the tube. Think of the repair like setting a tiny bone: clean contact, accurate alignment, light pressure, and enough rest matter more than using a large amount of glue.
What Is Ceramic Glue for East Fork Mug Repair?
Ceramic glue for East Fork mug repair is a clear repair adhesive used to reconnect broken ceramic pieces, reattach mug handles, secure small chips, and stabilize minor cracks on ceramic drinkware. It works best when the broken parts still fit closely together, the surface is fully dry, and the repaired area is allowed to cure before washing or reuse.
For an East Fork mug, the repair decision should start with the damage type, not the glue tube. A small chip near the base is very different from a cracked drinking rim. A clean handle break is different from a missing handle joint with crushed ceramic powder. Ceramic glue can help many mug repairs look clean and feel stable, but it performs best when the repair has enough surface contact, low movement, and limited heat or water stress after curing.
The most practical way to understand ceramic glue is to see it as a precision repair material. It can save a favorite mug from being thrown away, but it should be used with judgment. A repaired mug may still be useful for coffee, tea, dry storage, desk use, or display, depending on where the damage is and how strong the repaired area becomes after curing.
Why ceramic glue for East Fork mug repair?
Ceramic glue for East Fork mug repair is useful because many broken mugs do not need to be discarded immediately. A mug may slip from a hand, hit the sink edge, or fall from a dish rack, leaving a clean handle break or small chip while the main body remains intact. When the broken piece is still available and fits back neatly, ceramic glue gives the mug a realistic second chance. For people who use the same mug every morning, the value is not only the price of replacement. It is the feel of the mug, the color, the weight, and the small daily habit attached to it.
A good ceramic glue should solve several real repair problems at the same time: it should hold firmly, dry clear, flow into small contact areas, and avoid making the mug look messy. East Fork-style ceramic mugs often have simple shapes and visible glaze surfaces, so a thick white glue line can make the repair look worse than the break. A thin clear adhesive is better because it helps the repaired area stay visually quiet.
✦ It helps avoid waste: one broken handle or chip does not always mean the mug has reached the end of its life.
✦ It protects sentimental value: a favorite mug, gift, or discontinued color may be hard to replace.
✦ It supports cleaner home repair: a precision nozzle allows better control than general household glue.
✦ It can reduce replacement cost: small repair jobs often need only a few drops of adhesive.
✦ It works for more than mugs: the same ceramic glue can often repair vases, planters, figurines, ornaments, plates, and small household ceramic pieces.
For the best result, ceramic glue should be used before the damage spreads. A small chip is easier to repair than a chip that keeps flaking. A clean break is easier than a break contaminated with coffee, dish soap, or dust. The sooner the pieces are collected, cleaned, dried, and aligned, the better the repair usually looks.
What damage can ceramic glue fix?
Ceramic glue for East Fork mug repair works best on damage where the broken parts still match closely. The repair surface should have enough contact area for the adhesive to grip. A detached handle with clean contact points, a small base chip, or a broken decorative fragment usually has a better repair outlook than a crushed rim or a crack running through the inside of the cup. Before applying glue, place the broken piece back into position without adhesive. If it sits flat, follows the original shape, and does not need force, the repair is more likely to be clean and stable.
A simple damage check can prevent a lot of disappointment. Some repairs are suitable for careful daily use after curing, while others are better for display or dry storage. The mug may still be worth saving even if it should no longer hold hot drinks.
| Damage Area | Repair Outlook | Main Concern | Better After-Repair Use |
|---|---|---|---|
| Clean broken handle | Good to moderate | Load-bearing pressure | Light use, support mug body |
| Small base chip | Good | Appearance and rough edge | Careful daily use or display |
| Outer wall chip | Good | Visible glue line | Careful use if not through wall |
| Thin outside crack | Moderate | Crack may spread | Display or dry storage |
| Inner cup crack | Risky | Liquid and hygiene concerns | Dry storage or decoration |
| Drinking rim chip | Risky | Mouth contact and sharp edge | Avoid drinking use |
| Missing ceramic pieces | Limited | Gaps and weak bond | Display repair |
| Shattered mug body | Poor | Hard alignment | Keepsake or mosaic project |
✦ Best repair candidates: clean handle breaks, small outer chips, decorative fragments, base chips, and cracks that do not reach the inside of the mug.
✦ Higher-risk repairs: rim chips, cracks inside the cup, cracks connected to the handle, and repairs where pieces must be forced together.
✦ Poor repair candidates: missing fragments, powdery ceramic edges, badly shattered bodies, or areas that will touch lips or hot liquid directly.
For handle repairs, check both attachment points. If the handle broke at the top and bottom, both ends must align at the same time. If one end fits but the other end floats away from the mug body, the handle may cure under tension and break again. For chips, check whether the edge becomes smooth after the piece is placed back. If a repaired chip leaves a sharp ridge near the mouth, it should not return to drinking use.
When is ceramic glue not enough?
Ceramic glue for East Fork mug repair is not enough when the mug has lost structural ceramic, when the break touches a high-risk drinking area, or when the repaired part must carry heavy stress every day. Glue can bond surfaces together, but it cannot replace missing ceramic strength in every situation. A repaired handle is still a repaired handle. A crack through the inner wall is still a weak path where moisture and heat may cause problems. A rim repair may look neat but still feel rough, collect residue, or touch the mouth.
The main issue is not whether the adhesive is strong in the tube. The real issue is what the repaired mug will face afterward. Hot coffee adds heat. Washing adds water and detergent. A dishwasher adds heat, spray pressure, vibration, and long moisture exposure. Lifting a full mug by the handle adds pulling force. If the repair is placed in one of these stress zones, the user should be more careful.
✦ Do not rely on glue alone if the handle joint is crushed. Powdery or missing ceramic gives the adhesive less solid material to grip.
✦ Do not use the mug for drinking if the repair touches the rim. A repaired rim may create roughness, hygiene concerns, or direct adhesive contact.
✦ Do not treat a repaired crack like new ceramic. Thin cracks may continue to move with heat, water, or impact.
✦ Do not microwave a repaired mug. Heat can stress the glue line and any hidden crack path.
✦ Do not place repaired mugs in the dishwasher. Repeated heat, detergent, and spray pressure can shorten repair life.
A repaired East Fork mug can still have a useful second life. If the damage is too risky for hot drinks, the mug can become a pen cup, small planter, tea bag holder, spoon holder, brush cup, shelf piece, or keepsake. That is often better than throwing it away. The right repair goal is not always “make it new again.” Sometimes the better goal is “make it stable, clean, and worth keeping.”
Which Ceramic Glue for East Fork Mug Repair Works Best?
The best ceramic glue for East Fork mug repair should dry clear, bond tightly to ceramic, resist water after curing, handle normal kitchen heat, and allow controlled application in small broken areas. A fine-tip nozzle is especially useful because mug handles, chips, and cracks need a small amount of glue placed accurately, not a thick layer spread across the glaze.
A good choice should match the repair type. A handle needs strength and close surface contact. A base chip needs clean drying and edge coverage. A thin crack needs controlled flow. A rim chip needs extra caution because it may touch the mouth. No single glue feature solves every repair problem, so the safest option is a ceramic glue that balances strength, clarity, precision, water resistance, and storage convenience.
For East Fork mug repair, the glue should also help the mug keep its original look. A favorite mug is often repaired because it feels worth saving, not because it is just another cup. A bulky glue line, cloudy stain, or rough edge can make the repair feel disappointing. The right ceramic glue should make the repair stable while keeping the mug’s color, shape, and hand feel as natural as possible.
Clear ceramic glue for East Fork mug repair
Clear ceramic glue for East Fork mug repair is usually the best choice when the damage is visible. East Fork-style mugs often have rich glaze colors, clean curves, and a simple shape. A white, yellow, or cloudy glue line can stand out quickly, especially around a handle joint or outer chip. A clear adhesive helps the repair look quieter, especially when the broken pieces fit tightly and only a thin layer is used.
The clearest repair comes from two things working together: a transparent glue formula and careful glue control. Even clear glue can look messy if too much is applied. A thick bead around the handle may catch light and feel rough under the fingers. A small smear on the glaze may look shiny from certain angles. For visible repairs, less glue often creates a cleaner result.
- Choose clear-drying glue for colored ceramic. It reduces the chance of a visible repair line on glazed mugs.
- Use a thin layer instead of a thick blob. Close ceramic contact makes the repair neater and often stronger.
- Avoid glue that dries cloudy or rubbery. These finishes can make small chips look larger than they are.
- Wipe tiny excess before it cures. A wooden toothpick or clean paper edge can help remove squeeze-out without spreading it.
- Do not smear glue with fingers. Skin oil and wide smearing can leave a dull or glossy mark around the repair.
A clear finish is especially helpful for handle breaks, base chips, side fragments, figurines, ornaments, and other decorative ceramic repairs. GleamGlee ceramic glue is designed to create a crystal-clear bond for pottery, porcelain, mugs, cups, plates, vases, and small ceramic pieces. For a mug repair, that clear finish matters because the goal is not only to make the mug hold together, but also to keep it looking worth using or displaying.
| Glue Finish | Visual Result on Mug | Better For |
|---|---|---|
| Crystal clear | Less visible repair line | Handles, chips, decorative pieces |
| White | Obvious line on colored glaze | Hidden base repairs only |
| Yellowish | Aged or stained appearance | Not ideal for visible ceramic |
| Thick glossy | Raised repair mark | Rough repairs, not fine mugs |
| Cloudy | Dull patch around crack | Poor choice for display pieces |
Waterproof ceramic glue for East Fork mug repair
Waterproof ceramic glue for East Fork mug repair is important because mugs are exposed to water even when they are used carefully. A repaired mug may be rinsed, hand-washed, wiped with a damp cloth, or placed near steam and kitchen moisture. If the adhesive weakens after contact with water, the repaired chip or handle can loosen over time.
Water resistance is especially useful for mug handles and outer chips because these areas are often touched during washing. Still, waterproof glue does not mean the repaired mug should be soaked for hours or placed in a dishwasher. A repaired mug has a glue line, and that glue line is more vulnerable than unbroken ceramic. Gentle hand washing protects the repair much better than hot dishwasher cycles.
- Waterproof glue helps with light washing. It is useful for mugs that need gentle hand cleaning after repair.
- Avoid long soaking. Water can sit inside cracks, handle joints, or tiny gaps around the repaired area.
- Avoid dishwashers after repair. Heat, detergent, spray pressure, and vibration can shorten the repair life.
- Dry the mug soon after washing. Do not leave water sitting around the handle joint or crack line.
- Use mild soap and a soft cloth. Harsh scrubbing can damage the glue line or expose the repaired edge.
For a repaired East Fork mug, the safest cleaning method is simple: wash by hand, use mild dish soap, avoid abrasive pads, rinse quickly, and dry with a towel. If the repair is near a handle, do not pull on the handle while washing. Hold the mug body instead. If the repair is near a crack, avoid water pressure directly on the crack line.
GleamGlee ceramic glue is designed with waterproof performance, making it suitable for ceramic mugs, cups, plates, vases, planters, soap dishes, bathroom accessories, and garden ornaments. That matters because many ceramic repairs live in damp spaces, not only dry shelves. A mug may become a toothbrush holder, small planter, or spoon cup after repair, and water resistance helps it stay useful in those new roles.
| Cleaning Situation | Safe for Repaired Mug? | Better Habit |
|---|---|---|
| Light hand wash | Yes, after full cure | Use mild soap and soft sponge |
| Quick damp wipe | Yes | Dry immediately |
| Long soaking | No | Clean quickly instead |
| Dishwasher | Not recommended | Hand wash only |
| Hot rinse after cold storage | Not ideal | Avoid sudden temperature change |
| Scrubbing repaired edge | Not recommended | Clean gently around glue line |
Heat-resistant ceramic glue for East Fork mug repair
Heat-resistant ceramic glue for East Fork mug repair matters because mugs are used around hot drinks, warm water, kettles, and kitchen heat. A glue that cannot handle heat may soften, weaken, or become brittle when the mug is exposed to warm conditions. For mug repair, heat resistance gives the bond more practical value than ordinary craft glue.
At the same time, heat-resistant glue should not be misunderstood. It does not automatically make a repaired mug safe for microwave use. A repaired mug has a damaged ceramic path, a glue line, and sometimes tiny hidden gaps. These areas may react differently when heated quickly. If moisture is trapped inside a crack, heat can expand it and place pressure on the repair. That is why repaired mugs should be kept out of microwaves even when the original mug was safe before damage.
- Heat resistance helps with normal kitchen exposure. It is useful near warm drinks, warm water, and daily handling.
- It does not mean microwave-safe after repair. The repaired crack or glue line changes how the mug handles heat.
- Avoid boiling-hot stress tests. Do not fill a newly repaired mug with very hot liquid immediately after curing.
- Watch repaired handles closely. Heat plus liquid weight can increase pressure on the joint.
- Avoid sudden temperature changes. Do not move from cold storage to boiling water or from hot liquid to cold rinsing.
The repair location should guide how much heat exposure is acceptable. A small base chip has lower heat risk than an inner wall crack. An outer decorative chip may handle gentle use better than a repaired drinking rim. A handle repair may look fine but still should not be trusted too quickly with a full mug of hot coffee.
| Repair Location | Heat Risk | Suggested Use |
|---|---|---|
| Base chip | Low to medium | Careful hand washing, light use |
| Outer wall chip | Medium | Avoid sudden heat changes |
| Handle repair | Medium to high | Support mug body when filled |
| Inner crack | High | Avoid hot liquid use |
| Rim repair | High | Avoid drinking contact |
| Crack through wall | Very high | Display or dry storage |
GleamGlee ceramic glue is designed to be heat-resistant and waterproof, which makes it practical for many household ceramic repairs. For East Fork mug repair, those features are most valuable when paired with careful habits: full curing, no microwave, no dishwasher, no long soaking, and gentle hand use after repair. The glue should help save the mug, not encourage risky use.
How to Apply Ceramic Glue for East Fork Mug Repair?
Ceramic glue for East Fork mug repair should be applied slowly, lightly, and accurately. The basic process is simple: clean the broken ceramic, dry it fully, test-fit every piece, apply a thin layer of glue, press the parts together for several seconds, remove small excess glue, and let the repair cure before washing or using the mug again.
The most common repair failure does not come from the glue itself. It usually comes from wet ceramic, too much adhesive, poor alignment, or early use before the bond has cured. A mug handle, for example, may feel attached after a few seconds, but it should not be trusted with hot coffee right away. A chip may look fixed, but washing too soon can weaken the repair line.
For an East Fork mug, the goal is a clean repair, not a heavy repair. Use the smallest amount of glue that covers the broken contact area. Keep the glue away from the drinking rim and inner cup surface whenever possible. If the damage is near the mouth or inside the mug, the repaired piece is safer as a display mug, pen cup, planter, or keepsake instead of a hot-drink mug.
Step 1: Clean before ceramic glue repair
Before using ceramic glue for East Fork mug repair, the broken ceramic must be clean enough for the adhesive to touch the real surface. A mug break often carries more than visible dust. Coffee oil, tea stain, milk residue, dish soap film, hand grease, and tiny ceramic powder can sit on the edge. If glue is applied over these layers, the bond may look fine at first but fail later because it is attached to residue instead of ceramic.
Start by collecting every broken piece and checking the fit before washing. If the mug broke into two or three clean parts, place them together gently to understand the original shape. Do not force the pieces. If a chip does not sit flat or a handle does not line up naturally, the repair may need support during curing.
Use a soft cloth, dry brush, or cotton swab to remove loose ceramic dust. If the area has drink residue, clean it lightly with mild soap and water, then rinse carefully. After rinsing, dry the pieces with a lint-free cloth and leave them to air dry fully. Ceramic can hold moisture inside rough broken edges, so a surface that looks dry may still be damp inside the crack.
- Remove loose ceramic powder before using water.
- Use mild soap only when coffee, tea, milk, or grease is present.
- Rinse away all soap because soap film can weaken the bond.
- Let the mug dry longer if it broke while holding liquid.
- Avoid touching the cleaned broken edge with fingers before gluing.
A simple preparation check can help:
| Check Point | Ready for Glue | Not Ready Yet |
|---|---|---|
| Broken edge | Dry, clean, powder-free | Damp, dusty, oily |
| Handle joint | Fits without force | One side floats or twists |
| Chip piece | Sits flush with mug | Leaves a wide gap |
| Crack area | No visible moisture | Dark wet line remains |
| Surface smell | No soap or drink smell | Coffee, milk, or detergent odor |
If the broken area is still cool, slick, darkened, or scented with soap, wait longer. Good cleaning takes extra minutes, but it can save the whole repair.
Step 2: Test-fit the East Fork mug pieces
Before applying ceramic glue for East Fork mug repair, test-fitting is necessary because glue gives little time for correction once the parts touch. A test-fit means placing the broken pieces back together without adhesive and checking whether the shape, angle, and contact points are correct. This step is especially important for mug handles because the top and bottom joints must line up at the same time.
For a handle repair, hold the mug body in one hand and place the handle into its original position with the other hand. Look at both attachment points. The handle should sit naturally, not pulled upward, twisted sideways, or pressed hard into place. If one end touches but the other end leaves a gap, do not glue immediately. A handle cured under tension is more likely to break again.
For chips, test whether the broken piece sits flush with the outer surface. A small base chip may fit neatly. A rim chip may fit but still leave a sharp edge near the mouth. If the repaired area will touch lips or hot liquid, think carefully before returning the mug to drinking use.
- Match the broken piece before opening the glue.
- Check the mug from the front, side, and top.
- Make sure the handle angle feels natural in the hand.
- Prepare tape, rubber bands, or soft support before gluing if the piece slips.
- Do not force pieces together if ceramic is missing.
A useful alignment guide:
| Repair Type | What to Test | Good Sign |
|---|---|---|
| Broken handle | Top and bottom joints | Both ends touch evenly |
| Small chip | Surface level | Piece sits nearly flush |
| Base chip | Mug stability | Mug still sits flat |
| Side fragment | Outer curve | Shape follows original line |
| Thin crack | Crack closure | Edges meet without pressure |
Once the test-fit feels right, place the pieces nearby in the same direction they will be glued. This small habit prevents panic during application. Keep paper towel, cotton swab, toothpick, painter’s tape, or rubber bands ready before the adhesive is opened.
Step 3: Apply ceramic glue lightly
When using ceramic glue for East Fork mug repair, less glue usually gives a cleaner result. The adhesive should form a thin layer between two ceramic surfaces, not a thick cushion that pushes them apart. Too much glue can squeeze out, leave a shiny ridge, make the handle sit unevenly, or create a visible line around a chip. A favorite mug deserves a neat repair, not a heavy patch.
Use the precision nozzle to place a small amount of glue only on the broken contact area. For a tiny chip, one small dot may be enough. For a handle joint, use a thin line or light coat across the contact surface. The surface should look lightly wet, not flooded. If glue starts running down the mug, too much has been applied.
GleamGlee ceramic glue includes precision nozzles, which help control the amount placed into small cracks, narrow chips, and curved handle joints. This matters because East Fork-style mugs usually have visible glaze surfaces. Glue that spreads onto the glaze may dry as a shiny mark even if the adhesive itself is clear.
- Apply glue to the broken edge, not the outer decorative surface.
- Use a tiny dot for small chips and a thin coat for handle joints.
- Keep glue away from the drinking rim and inside cup surface when possible.
- Remove tiny squeeze-out before it hardens.
- Do not spread excess glue with fingers.
A practical glue amount chart:
| Repair Area | Suggested Amount | What to Avoid |
|---|---|---|
| Tiny chip | Pinhead-sized dot | Covering the whole visible chip face |
| Base chip | Thin line on contact edge | Glue pooling under the mug |
| Outer side chip | Light coat on broken surface | Smearing across glaze |
| Handle joint | Thin even layer | Thick mound in the center |
| Thin crack | Very small controlled line | Flooding the crack and surface |
After applying the glue, bring the pieces together slowly and directly. Avoid sliding the piece around because sliding spreads adhesive outside the joint. If a small amount squeezes out, lift it away with a toothpick or clean paper edge. The repair should close tightly, with only the thinnest glue line visible.
Step 4: Press and cure before daily use
After applying ceramic glue for East Fork mug repair, press the pieces together firmly for the first bond, then let the mug rest long enough for the repair to cure. GleamGlee ceramic glue is designed for quick bonding, and many small repairs can grab within seconds when the pieces are pressed together. Even so, quick hold is not the same as full repair strength.
For a small chip, press the piece into place with steady finger pressure for about 5–10 seconds. For a handle, press both attachment points into position and check alignment immediately. If the handle needs support, use painter’s tape, rubber bands, or soft padding. The support should hold the handle still, not pull it out of shape. If tape is used, avoid very strong tape that may leave residue on the glaze.
The mug should then be placed in a dry, stable area where it will not be bumped. Leave it untouched while the adhesive cures. Around 24 hours is a safer waiting period before washing or light handling, especially for handle repairs. Larger repair areas, cold rooms, or thicker glue lines may need more patience.
- Hold pieces steady during the first 5–10 seconds.
- Support handles so both joints stay aligned.
- Keep the mug away from sinks, steam, pets, and busy counters.
- Do not test the handle repeatedly during curing.
- Avoid washing, soaking, microwaving, or filling with hot liquid too soon.
A safe curing and reuse guide:
| Time After Gluing | What to Do | What Not to Do |
|---|---|---|
| First 5–10 seconds | Press firmly and hold still | Slide pieces around |
| First 10 minutes | Keep repair supported | Touch or adjust repeatedly |
| First few hours | Leave mug in a dry place | Wash or wipe the glue line |
| Around 24 hours | Inspect before light handling | Fill with hot coffee immediately |
| After full cure | Hand wash gently if suitable | Dishwasher or microwave |
After curing, inspect the repair carefully. The piece should not move under light touch. The glue should feel hard, not sticky. The handle should not flex. The repair line should not have sharp beads near the hand or mouth. For the first wash, use mild soap, a soft sponge, and lukewarm water. Dry the mug soon after washing. A repaired mug can last longer when it is treated gently from the first day after repair.
Is Ceramic Glue for East Fork Mug Repair Durable?
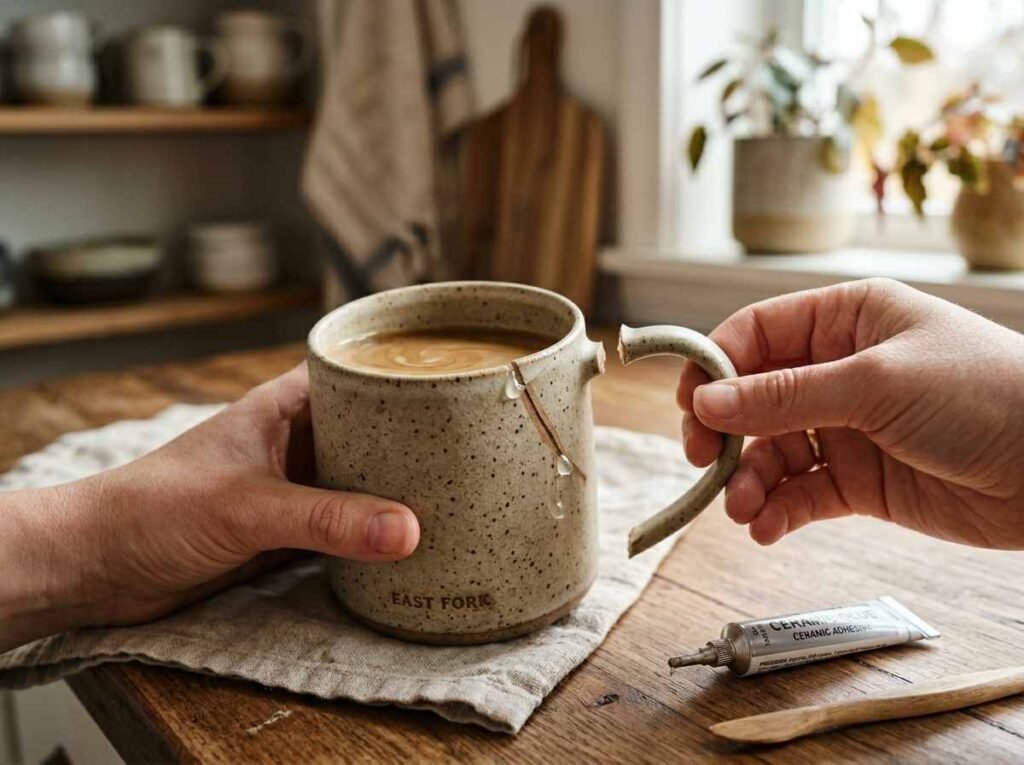
Ceramic glue for East Fork mug repair can be durable when the break is clean, the pieces fit tightly, the glue is applied in a thin layer, and the mug is left to cure before use. It performs best on small chips, decorative breaks, base damage, and clean handle joints. Durability becomes weaker when the repair area touches the rim, inner cup wall, dishwasher heat, microwave heat, or heavy handle pressure.
The repaired mug should not be treated exactly like a new mug. Even a strong ceramic adhesive has to work around an old break line. Hot drinks, washing, hand pressure, and small impacts can all stress the repair. A base chip may last well with gentle hand washing, while a handle repair needs more caution because it carries the full weight of the mug and liquid.
For the best long-term result, think about where the damage is and how the mug will be used afterward. A repaired East Fork mug may return to light use if the repair is away from the mouth and inside wall. If the crack reaches the drinking area, the safer choice is to use the mug as a desk cup, plant pot, spoon holder, or display piece.
Ceramic glue for mug handles
Ceramic glue for East Fork mug repair can hold a broken mug handle when the break is clean and both contact points fit well. A handle repair is harder than a small chip because it is a load-bearing repair. When the mug is empty, the handle may feel secure. When the mug is full of hot coffee, the same joint carries extra weight and pulling force. That is why handle repairs need careful surface cleaning, accurate alignment, thin glue application, firm pressing, and enough curing time.
A handle usually breaks at the top joint, the lower joint, or both. If only one joint is damaged and the other remains attached, alignment is easier. If both joints break, both ends must sit naturally against the mug body at the same time. If one end needs to be forced, the handle may cure under tension and later break again.
| Handle Break Type | Durability Outlook | Main Risk | Better Use After Repair |
|---|---|---|---|
| One clean joint break | Good | Pulling force during use | Light use with body support |
| Two clean joint breaks | Moderate | Alignment and pressure | Careful use after full cure |
| Missing ceramic at joint | Weak | Not enough contact area | Display or dry storage |
| Powdery broken edge | Weak | Glue bonds to loose ceramic | Avoid lifting by handle |
| Handle flexes after cure | Unsafe | Bond is not stable | Do not use for drinks |
For daily use, it is safer to hold the mug body instead of trusting only the repaired handle. If the mug is filled with hot liquid, support it from the bottom. Do not swing it by the handle, place it in a crowded sink, or test the repair by pulling hard. A repaired handle can be useful, but it should be treated as a careful repair, not as new ceramic.
Ceramic glue for small chips
Ceramic glue for East Fork mug repair is usually more dependable on small chips than on large cracks or handles. A chip does not always carry weight. If the chipped piece is still available and fits back into place, a clear ceramic glue can make the mug look much cleaner and help protect the exposed ceramic edge. Small chips near the base, lower side, or outer wall are often the best repair candidates.
The repair quality depends on how well the chip fits. If the piece sits flush, the glue line can stay thin and neat. If part of the ceramic is missing, the glue may fill a gap but the repair will be more visible and less stable. A small chip is also easier to press into place because the user does not need to manage two handle joints or long crack lines.
- Small base chips are often low-stress repairs because they do not touch the mouth or hold liquid directly.
- Outer wall chips can be repaired neatly when the piece is saved and the glaze surface lines up well.
- Chips near the rim need caution because the repaired area may touch lips, hot liquid, or cleaning tools.
- Missing fragments may leave rough edges even after gluing, so the mug may be better for display.
- A thin clear glue line usually looks better than a thick repair layer.
| Chip Location | Durability Outlook | Drinking Use After Repair |
|---|---|---|
| Foot ring or base | Good | Often possible with care |
| Lower outer wall | Good | Possible if crack does not reach inside |
| Decorative outer surface | Good | Usually better for light use or display |
| Upper wall near rim | Moderate to risky | Use caution |
| Drinking rim | Risky | Not recommended for mouth contact |
| Inside cup surface | Risky | Better for dry storage |
If the chip repair is away from the drinking area, gentle hand washing and careful handling can help it last. If the repaired chip is near the lip, do not use that edge for drinking. A mug can still be valuable as a keepsake or organizer even when it is no longer ideal for hot drinks.
Ceramic glue for thin cracks
Ceramic glue for East Fork mug repair can stabilize some thin cracks, but cracks are less predictable than chips. A crack may look small on the outside while extending deeper through the ceramic wall. It may also continue under the glaze where the eye cannot see it. When hot liquid, washing water, or temperature changes reach the crack, the damaged area can expand, darken, leak, or open again.
A thin outer crack that does not go through the wall may be suitable for careful repair. The glue should be applied in a very small amount, using a precision nozzle. The goal is to reduce movement and stop the crack from spreading, not to flood the mug surface. Too much glue on a crack often leaves a shiny line and does not improve strength.
A crack that reaches the inside of the cup is a different case. Liquid can enter the fracture line. Coffee, tea, milk, and detergent can collect inside the crack. Heat from hot drinks can also increase stress around the repaired area. For this reason, cracks inside the mug should usually be treated as display or dry-use repairs.
| Crack Type | Repair Difficulty | Durability Concern | Safer Use |
|---|---|---|---|
| Short outer crack | Medium | May spread if bumped | Display or careful dry use |
| Crack near base | Medium | Water may enter from washing | Hand wash only if stable |
| Crack through wall | High | Possible leaking or reopening | Avoid drink use |
| Inner cup crack | High | Liquid and residue contact | Dry storage |
| Crack near handle | High | Pressure can reopen crack | Do not lift by handle |
| Rim crack | Very high | Mouth contact and sharpness | Display only |
After repairing a crack, inspect it regularly. If the crack line becomes darker, wider, rougher, or damp after washing, stop using the mug for liquids. A crack repair can keep a mug together visually, but it may not restore full liquid-safe performance.
Ceramic glue after washing
Ceramic glue for East Fork mug repair can last longer when the mug is washed gently by hand. Washing is one of the biggest tests for repaired ceramic because it combines moisture, temperature, soap, rubbing, and movement. Even when the glue is waterproof after curing, the repaired area should not be soaked, scrubbed hard, or placed in a dishwasher.
Dishwashers are especially hard on repaired mugs. They use hot water, detergent, spray pressure, vibration, and drying heat. These conditions can weaken a glue line over time, especially around a handle, crack, or chip edge. A repaired East Fork mug should be washed separately and gently, not buried under heavy plates and utensils in a sink.
- Wait until the glue has fully cured before the first wash.
- Use mild dish soap and a soft sponge or cloth.
- Wash quickly instead of soaking the mug.
- Dry the repaired area soon after rinsing.
- Avoid abrasive pads around the glue line.
- Keep repaired mugs out of the dishwasher and microwave.
| Washing Habit | Effect on Repair | Better Choice |
|---|---|---|
| Gentle hand wash | Lowest stress | Recommended after cure |
| Damp cloth wipe | Very low stress | Good for display mugs |
| Long soaking | Weakens crack areas | Avoid |
| Dishwasher cycle | High heat and pressure | Avoid |
| Abrasive scrubbing | Can roughen glue line | Use soft sponge |
| Sudden hot-cold rinse | Adds thermal stress | Use mild temperature changes |
For a repaired handle, hold the mug body during washing rather than pulling on the handle. For a repaired crack, do not aim running water directly into the crack line. For a repaired chip, avoid scraping the edge with a sponge or brush. These small habits make a real difference. A durable repair is not only created when the glue is applied; it is protected every time the mug is cleaned and used.
What Mistakes Hurt Ceramic Glue for East Fork Mug Repair?
Most ceramic glue for East Fork mug repair fails because of small preparation mistakes, not because the mug is impossible to fix. Damp ceramic, soap residue, too much glue, poor alignment, and early washing can all weaken the repair. A mug handle may look attached after a few seconds, but the bond still needs clean contact, steady pressure, and enough curing time before it can handle movement.
The repaired mug also needs realistic use afterward. A glued handle should not be treated like new ceramic. A rim chip should not be used against the mouth if the surface feels rough or the adhesive may touch lips. A crack inside the cup should not be trusted with hot coffee. Good repair means choosing the right glue, but it also means avoiding the habits that quietly ruin the bond.
Using ceramic glue on wet ceramic
Using ceramic glue for East Fork mug repair on wet ceramic is one of the easiest ways to create a weak bond. A broken mug often gets rinsed right away because there may be coffee, tea, milk, or dust on the broken edge. Cleaning is helpful, but gluing too soon is risky. Ceramic break lines can hold moisture inside tiny pores, rough edges, and hairline cracks. Even when the surface looks dry, the inner edge may still be damp. If glue sits on moisture instead of dry ceramic, the repair may hold at first and then loosen later during washing or use.
The same problem happens with soap residue. If dish soap remains on the broken edge, the adhesive cannot grip the ceramic cleanly. Hand grease can also reduce bond strength, especially if the cleaned break is touched repeatedly before gluing.
- Let rinsed pieces air dry fully before applying glue.
- Use a lint-free cloth to remove surface water, then wait longer for hidden moisture.
- Avoid applying glue to a cool, darkened, or slick broken edge.
- Rinse away soap completely if the mug was cleaned with detergent.
- Handle cleaned pieces by the outside glaze, not the broken contact surface.
| Surface Condition | Repair Risk | Better Action |
|---|---|---|
| Dry, clean ceramic edge | Low | Ready for glue |
| Damp crack line | High | Wait longer before gluing |
| Soap smell remains | Medium to high | Rinse and dry again |
| Coffee or milk residue | High | Clean lightly, rinse, dry |
| Loose ceramic powder | Medium | Brush away before gluing |
| Oily fingerprints | Medium | Wipe and avoid touching edge |
A good rule is simple: if the broken ceramic edge looks darker than the surrounding area, feels cool to the touch, or has any smell of soap or drink residue, it is not ready. Waiting an extra hour is much easier than repairing the same mug twice.
Adding too much ceramic glue
Adding too much ceramic glue for East Fork mug repair can make the repair weaker, messier, and more visible. Ceramic pieces bond best when they fit closely together with a thin layer of adhesive between them. A thick blob of glue can push the broken parts apart, leaving a raised gap instead of a tight repair line. This is especially noticeable on mug handles and side chips, where the repaired area is often touched or seen every day.
Excess glue also squeezes out when the pieces are pressed together. Once it spreads onto the glaze, it may dry as a shiny patch, rough bead, or cloudy edge. On a favorite East Fork mug, that can be frustrating because the repair may hold but still look careless. More glue does not mean more strength. Accurate glue placement is usually more important than volume.
- Use a tiny dot for small chips and a thin coat for handle joints.
- Apply glue only to the broken contact area, not the visible glaze.
- Stop applying once the surface looks lightly wet.
- Remove small squeeze-out before it hardens.
- Avoid using fingers to wipe glue, because it spreads adhesive and adds skin oil.
| Repair Area | Better Glue Amount | Too Much Glue Looks Like |
|---|---|---|
| Tiny chip | Pinhead-sized dot | Glue halo around chip |
| Base chip | Thin edge line | Pooling under the mug |
| Outer wall chip | Light coat | Shiny smear on glaze |
| Handle joint | Thin even layer | Bulging glue around joint |
| Thin crack | Very small line | Long glossy streak |
A precision nozzle helps prevent this mistake. It lets the glue reach narrow areas without flooding the surface. If extra glue appears, use a wooden toothpick, cotton swab tip, or clean paper edge to lift it carefully before curing. The repair should look closed, not coated.
Rushing the ceramic glue cure
Rushing the cure can ruin ceramic glue for East Fork mug repair even when the application looked perfect. Many ceramic glues grab quickly, so the handle or chip may feel attached within seconds. That first hold is only the beginning. The adhesive still needs time to develop strength inside the joint. If the mug is moved, washed, filled, or lifted too soon, the glue layer can shift before it has fully set.
This mistake often happens because the repair looks finished from the outside. A handle may stay in place, so the user tries lifting the mug. A chip may not move, so the mug gets washed. A crack may look sealed, so hot tea is poured in. These early actions can create tiny stress points that later become loosened edges, visible gaps, or complete failure.
- Press the pieces firmly during the first 5–10 seconds.
- Keep the mug still after the first bond forms.
- Do not test a repaired handle repeatedly during curing.
- Avoid washing the mug on the same day if possible.
- Allow about 24 hours before gentle handling or cleaning.
| Time After Repair | Safe Action | Avoid |
|---|---|---|
| First 5–10 seconds | Press and hold steady | Sliding pieces around |
| First 10 minutes | Leave supported | Touching or adjusting |
| First few hours | Keep dry and still | Washing or wiping |
| Around 24 hours | Inspect gently | Hot drinks or dishwasher |
| After full cure | Hand wash carefully | Heavy handle stress |
A repaired handle needs the most patience because it will later carry weight. Put the mug somewhere stable and out of the way while curing. The less the repair is touched during this time, the better the bond can form.
Reusing the mug too soon
Reusing the mug too soon is a different mistake from rushing the cure. Even after the glue has cured, the repaired mug should return to use slowly. A repaired East Fork mug has an old break line, and that area may remain more vulnerable than the rest of the ceramic. The first few uses should be gentle, especially if the repair is on the handle, rim, or cup wall.
A repaired handle should be tested empty first. Then, if it feels stable, the mug can be tested with a small amount of room-temperature water while supporting the body from underneath. Do not immediately fill the mug with boiling coffee and carry it by the handle. If the handle fails under hot liquid, the result can be dangerous.
Rim and inner-wall repairs need even more caution. If the repair touches the mouth, feels rough, or may contact liquid, the mug should not return to drinking use. It can still be valuable as a dry storage cup, pen holder, small planter, spoon cup, or display piece.
| Repair Location | First Use After Cure | Long-Term Care |
|---|---|---|
| Base chip | Gentle hand wash | Avoid scraping repaired edge |
| Outer wall chip | Light handling | Keep away from hard impacts |
| Handle repair | Test empty first | Support mug body when full |
| Inner crack | Avoid liquid use | Use for dry storage |
| Rim chip | Avoid mouth contact | Display or non-drinking use |
| Decorative piece | Wipe gently | Best for display |
- Start with light handling, not full daily use.
- Hold the mug body instead of relying only on a repaired handle.
- Avoid microwave use after repair.
- Avoid dishwasher cycles, soaking, and abrasive scrubbing.
- Stop using the mug for drinks if the repair line opens, darkens, leaks, or feels rough.
A repaired mug can still be a useful, beautiful object. The goal is not to pretend the break never happened. The goal is to keep the mug stable, clean, and safe for the role it can still perform.

What Tips Make Ceramic Glue for East Fork Mug Repair Work Better?
Ceramic glue for East Fork mug repair works better when the repair is clean, thin, controlled, and realistic. The best results usually come from careful preparation, not from using more glue. Keep the adhesive on the broken ceramic contact area, avoid the drinking rim and inner cup surface, allow enough curing time, and do not let the repaired area touch food or beverages unless the product is clearly approved for direct food contact.
A repaired mug should be treated as a saved item, not a brand-new mug. Ceramic glue can help restore shape, hold broken pieces together, and make the mug useful again in the right situation. But for safety and long-term durability, avoid microwave use, dishwasher cycles, long soaking, and direct contact between adhesive and food, lips, or hot drinks. If the damage is close to the drinking area, the safer use is display, dry storage, or decoration.
Use less ceramic glue for cleaner repair
Using less ceramic glue for East Fork mug repair often gives a better result than using more. A thick glue layer may look stronger at first, but it can push the broken pieces apart and leave a raised, shiny edge. Ceramic repairs usually work best when the pieces sit tightly together with only a thin layer of adhesive between them. This is especially important for East Fork-style mugs because the shape and glaze are part of the mug’s appeal. A messy repair line can make a small chip look much larger than it really is.
Before applying glue, test-fit the pieces and decide exactly where the adhesive needs to go. For a tiny chip, a pinhead-sized dot may be enough. For a handle joint, use a thin coat only on the broken contact surface. The glue should not run down the mug or spread across the glaze.
- Apply glue only where ceramic touches ceramic.
- Use a fine nozzle for cracks, chips, and handle joints.
- Stop applying once the surface looks lightly wet.
- Remove small squeeze-out before it hardens.
- Do not use fingers to wipe glue across the mug surface.
| Repair Area | Better Glue Amount | What to Avoid |
|---|---|---|
| Tiny chip | Very small dot | Covering the visible glaze |
| Handle joint | Thin even coat | Thick glue mound |
| Thin crack | Narrow controlled line | Flooding the crack area |
| Base chip | Light edge coverage | Glue pooling under the mug |
| Side fragment | Thin contact layer | Large shiny smear |
A clean repair should look controlled, not overloaded. The less unnecessary glue on the mug surface, the more natural the repair will look after curing.
Keep ceramic glue away from food contact
Ceramic glue for East Fork mug repair should not directly touch food, drinks, lips, or the inside drinking surface unless the adhesive is clearly labeled as safe for direct food contact after full cure. This point matters because mugs are used around hot beverages, saliva, washing water, and repeated daily handling. Even if the glue is strong, clear, waterproof, or heat-resistant, those features do not automatically mean it is suitable for direct food-contact surfaces.
For safer repair, keep adhesive on exterior cracks, outside chips, base chips, decorative areas, and handle joints. If the crack reaches the inside of the cup, or the chip is on the drinking rim, the mug should not return to normal drinking use. It can still be repaired, but the safer purpose is dry storage or display.
- Do not apply glue inside the cup bowl if the mug will hold drinks.
- Do not use repaired rim areas against the mouth.
- Do not let dried adhesive sit where coffee, tea, or soup will touch it.
- Do not assume waterproof means food-safe.
- Turn risky repairs into non-drinking uses instead.
| Damage Location | Food-Contact Risk | Safer Choice |
|---|---|---|
| Outer handle joint | Low | Careful use after curing |
| Base chip | Low | Hand wash gently |
| Outer side chip | Low to medium | Use if crack does not go inside |
| Inner wall crack | High | Dry storage or display |
| Drinking rim chip | High | Avoid drinking use |
| Crack through mug wall | High | Display or non-liquid use |
A mug with a repaired rim can become a pen cup, brush holder, small planter, tea bag holder, spoon cup, or shelf piece. The repair still saves the mug, but it avoids unnecessary contact risk.
Protect the mug surface while repairing
Ceramic glue for East Fork mug repair should be applied in a way that protects the mug’s glaze and shape. The repaired area should be clean, but the surrounding surface should stay untouched as much as possible. Glue smears, strong tape residue, scratches from tools, or rough wiping can damage the look of the mug even if the actual break is fixed.
Set up the repair area before opening the glue. Place the mug on a soft cloth so it does not roll or scratch. Keep cotton swabs, a wooden toothpick, painter’s tape, and paper towel nearby. If the piece needs support, use low-tack painter’s tape instead of strong packaging tape. If a rubber band is used for a handle, place it carefully so it does not pull the handle out of alignment.
- Work on a soft towel or cloth to prevent scratches.
- Use painter’s tape rather than aggressive tape.
- Use toothpicks for small excess glue, not metal tools.
- Keep glue away from decorative glaze areas.
- Do not scrape cured glue from glazed surfaces with sharp blades unless you are willing to risk marks.
| Repair Tool | Better Use | Caution |
|---|---|---|
| Painter’s tape | Holding chips or handles | Remove gently after cure |
| Wooden toothpick | Lifting small glue excess | Do not gouge the glaze |
| Cotton swab | Cleaning tiny wet smears | Use lightly, avoid spreading |
| Soft cloth | Protecting work surface | Keep cloth away from wet glue |
| Rubber band | Supporting handle | Do not pull handle crooked |
| Metal blade | Not preferred | May scratch glaze |
The repair should not create new damage. A slow setup makes the process easier and helps keep the mug’s surface clean.
Let ceramic glue cure without stress
Ceramic glue for East Fork mug repair needs quiet curing time. Even if the adhesive grabs quickly, the repair should not be washed, heated, filled, or lifted by the handle right away. Early movement can weaken the glue line before the bond has fully developed. This is one of the main reasons handle repairs fail after looking successful at first.
After pressing the pieces together, place the mug somewhere dry and stable. Avoid the sink area, stovetop, windowsill, or crowded kitchen counter. If the repair is on a handle, support the handle so both joints stay aligned. Do not keep picking up the mug to “check” whether it is strong. Every small pull can disturb the early bond.
- Allow about 24 hours before gentle handling or hand washing.
- Keep the repaired area dry during curing.
- Do not test the handle while the adhesive is setting.
- Avoid heat, steam, and direct sunlight during curing.
- Give larger or load-bearing repairs extra rest time.
| Time After Repair | Better Action | Avoid |
|---|---|---|
| First 5–10 seconds | Press firmly and hold still | Sliding the pieces |
| First 10 minutes | Keep supported | Adjusting repeatedly |
| First few hours | Leave dry and untouched | Washing or wiping |
| Around 24 hours | Inspect gently | Hot drinks |
| After cure | Hand wash carefully | Dishwasher or microwave |
Curing is not wasted time. It is the part of the repair that gives the bond a better chance to survive handling, cleaning, and light use.
Use the repaired mug gently afterward
After ceramic glue for East Fork mug repair has cured, the mug still needs gentle habits. The repaired area is stronger than it was when broken, but it is not the same as unbroken ceramic. A clean base chip repair may handle light use well. A handle repair needs more care. A repaired crack near the inside wall should not be used for hot drinks.
Hand washing is the best cleaning method. Use mild soap, a soft sponge, and lukewarm water. Do not soak the mug. Do not place it in the dishwasher. Do not microwave it. Do not pour boiling liquid into a mug with a repaired crack or handle until the repair has been carefully tested and judged safe for that use.
- Hold the mug body instead of relying only on a repaired handle.
- Wash gently and dry soon after rinsing.
- Avoid sudden hot-cold temperature changes.
- Keep repaired mugs away from crowded sinks.
- Stop using the mug for drinks if the repair darkens, opens, leaks, or feels rough.
| After-Repair Habit | Recommended? | Reason |
|---|---|---|
| Gentle hand wash | Yes | Protects the glue line |
| Dishwasher | No | Heat and pressure stress the repair |
| Microwave | No | Repaired cracks may react poorly to heat |
| Long soaking | No | Moisture can enter weak areas |
| Supporting mug body | Yes | Reduces handle stress |
| Drinking from repaired rim | No | Food-contact and rough-edge concern |
The safest repair plan is simple: fix the mug carefully, let it cure fully, keep glue away from food-contact areas, and match the mug’s new use to the repaired area. That approach gives the East Fork mug a better second life without pushing the repair beyond what it should do.
Conclusion
Ceramic glue for East Fork mug repair can give a favorite mug a careful second life when the damage is clean, limited, and realistic. A small chip, detached handle, outer crack, or decorative break can often be repaired well if the ceramic is fully dry, the pieces fit tightly, the glue is applied in a thin layer, and the mug is left to cure without movement. The best repair is not the one with the most glue, but the one with the cleanest contact, neatest alignment, and safest aftercare.
After repair, the mug should be treated more gently than new ceramic. Avoid microwave use, dishwasher cycles, long soaking, and direct contact between glue and food, lips, or hot drinks. If the damage is near the rim, inner wall, or a deep crack, the mug may be better used as a pen cup, small planter, spoon holder, or display piece. GleamGlee ceramic glue helps make these repairs cleaner and easier with a clear bond, precision nozzles, waterproof and heat-resistant performance, and practical storage for future ceramic repair needs.
Share:
Table of Contents
Here, creating your adhesives glue & removal cleaner collection is no longer a barrier—it’s a collaborative journey where GleamGlee helps brands and businesses transform their vision into durable, certified, and market-ready solutions.
Partner with GleamGlee
Join hundreds of global partners who trust GleamGlee for adhesives and cleaners that combine innovation, compliance, and speed. Our vertically integrated system—from R&D to warehouse—guarantees consistent performance and reliable delivery.
Whether you’re sourcing FBA-ready stock or developing your own formula, our team provides unmatched technical support and responsive service.





















