Skip to content


Sewing a patch so the stitches almost disappear is less about finding one secret stitch and more about controlling several small details at the same time. The patch must suit the garment, the needle must enter in the right place, the thread should blend with the area where it emerges, and the tension must be firm enough to hold without puckering the surrounding fabric. A clean result also depends on deciding whether the patch is decorative, structural, embroidered, folded, raw-edged, or hidden behind a damaged area.
For most ordinary fabric patches with a clean folded edge, a blind or slip-style stitch is the most practical starting point. Embroidered badges often need a different approach because their thick outer border can hide stitches more effectively than a folded-edge technique. Repair patches may be placed inside the garment so both the patch and stitches become less noticeable. The goal should be nearly invisible during normal wear, rather than promising a repair with literally no visible thread under close inspection.
From a textile-adhesive and garment-repair perspective, the best repair usually changes the original fabric as little as necessary while still giving enough support for real-world wear. Thread provides flexible mechanical reinforcement, while a compatible fabric adhesive can sometimes help position a difficult patch or supplement a low-stress repair. Neither approach should be used automatically. The correct method depends on fabric structure, patch backing, movement, wash frequency, garment value, and the strength of the textile surrounding the damaged area.
1. What Is the Best Way to Sew a Patch Without Visible Stitches?
A useful first rule is to choose the stitch according to the construction of the patch, not according to the name of a popular tutorial. If a soft fabric patch has an edge that can be folded inward, a blind or slip stitch lets the needle catch only a tiny amount of garment fabric before travelling through the folded patch edge. Most of the thread remains physically hidden inside the fold, so the visible surface shows only very small attachment points.
A ladder stitch is often described online as an “invisible stitch,” but it is especially well suited to two folded edges facing one another, such as the opening of a cushion, soft toy, lining, or seam. A patch lying flat on one continuous garment surface has different geometry. In that situation, a blind or slip-style stitch can often hide the thread more naturally because only one folded edge needs to be joined to the garment below it.
An embroidered badge presents another situation entirely. Thick embroidery already creates raised texture and shadows around the outer border. Instead of trying to fold the edge or passing thread through the main artwork, the needle can catch the underside or lower part of the embroidered border. When the thread color is close to the border, the stitches disappear into the embroidery texture far more effectively than a visible thread line crossing logos, lettering, or colored artwork.
Choose the hidden method by patch construction
| Patch or repair situation | Best starting method | Main visual advantage | Important limitation |
|---|---|---|---|
| Fabric patch with folded edge | Blind or slip stitch | Most thread stays inside the fold | Edge must be clean enough to fold or catch |
| Thin appliqué | Blind appliqué/slip stitch | Very small garment bites | Loose raw edges may need preparation |
| Embroidered badge | Hidden border stitch | Embroidery texture disguises thread | Dense backing may resist a hand needle |
| Merrow-edge patch | Catch underside of border loops | Raised edge hides attachment | Placement must remain close to the border base |
| Inside repair patch | Small matching reinforcement stitches | Patch itself stays mostly hidden | Surrounding textile must still be strong |
| Two facing folded edges | Ladder stitch | Thread runs between the two folds | Not ideal for every flat patch |
| Raw-edge repair patch | Whip, blanket, or suitable edge stitch | Controls fraying more reliably | More visible than a blind stitch |
A nearly invisible repair does not require every individual thread point to disappear under magnification. Fabric weave, patch thickness, thread diameter, lighting, and color differences make absolute invisibility unrealistic in many garments. A more useful test is whether the patch looks clean and deliberate from normal viewing distance and whether the small amount of visible stitching blends naturally into the patch edge or garment texture.
Evidence chain placed with this decision:
- Technique reference – Slip Stitch: Professor Pincushion explains the slip stitch as a hand-sewing technique designed to conceal most of the thread inside a folded edge.
- Video – Five garment hand stitches: Useful for comparing running, back, slip, blind and catch-style stitches before choosing a patch method.
- Video – Hand-sewn blind hem: Although demonstrated on a hem, the video clearly shows the principle of taking a very small bite of visible garment fabric.
Blind stitch, slip stitch, and ladder stitch are related but not identical
Beginners are often told these terms mean the same thing, which can make the actual needle path confusing. In practical garment work, the important distinction is not vocabulary but where the thread travels. A slip or blind-style stitch places much of the thread inside one folded edge while taking tiny bites of the underlying fabric. A traditional ladder stitch alternates between two opposing folds, creating horizontal “rungs” that disappear when the opening is gently closed.
If your patch is flat and only the patch edge can be folded, copying a two-sided ladder-stitch tutorial exactly can make the work awkward. Instead, think about the hiding space available inside the patch edge. If the patch has no fold but does have a thick embroidered rim, use the rim. If the repair patch sits behind torn fabric, use the garment texture itself to camouflage small reinforcement stitches.
The most reliable rule is therefore simple: hide the longest sections of thread inside a structure the viewer cannot easily see, and expose only the smallest practical amount required to hold the patch securely. That structure might be a folded edge, embroidered border, garment reverse, seam allowance, or inner repair layer.

2. What Should You Check Before Sewing the Patch?
Good patch work begins before the needle is threaded. Many disappointing repairs result from choosing the stitch first and examining the materials later. A patch that looks simple while lying on a table may behave very differently once the garment bends around a knee, elbow, shoulder, sleeve, pocket, or backpack corner. Before sewing, inspect the patch backing, fabric structure, stretch, thickness, location, wash frequency, garment value, and condition of the surrounding textile.
First decide whether the patch is decorative or structural
A decorative patch mainly changes appearance. It may display a logo, cover a small cosmetic mark, personalize a denim jacket, or add artwork to a bag. The patch remains visible, so the objective is normally to hide the attachment thread. In this situation, the patch border becomes the most important visual area, and thread color should usually blend with the outer edge where the needle enters.
A structural repair patch has a different job. It must support textile that has torn, worn thin, or developed a hole. The patch may need to extend beyond the visibly damaged area because the fibers directly beside the hole can already be weakened. A repair that looks clean but anchors stitches only into damaged yarns can tear again beside the stitch line, especially at knees, elbows, seat areas, cuffs, workwear panels, or other high-motion locations.
Examine the back of the patch
Turn the patch over before deciding where to sew. A plain fabric backing normally accepts hand sewing easily, while an iron-on adhesive layer, plastic stabilizer, rubber backing, thick embroidery base, or hook-and-loop panel changes needle penetration and flexibility. A patch sold as “iron-on” can often still be sewn, but the backing may be much harder than ordinary fabric and may require a different needle position near the border.
Common backing structures include:
- Plain woven textile
- Embroidery stabilizer
- Heat-activated iron-on layer
- Self-adhesive layer
- Hook-and-loop backing
- Thick polymer or plastic stabilizer
- Dense embroidery backing
- Leather or synthetic leather
- PVC or rubberized patch construction
If the backing feels unusually hard, test one hidden point near the border instead of pushing the needle through the center. When the needle begins bending, stop. More force is not a repair technique. Move to a thinner border location, choose a suitable stronger needle where appropriate, use a thimble correctly, consider machine sewing, or use professional installation if the material cannot be penetrated safely.
Check the garment for stretch, coating, thickness, and movement
A stable woven cotton shirt, heavy denim jeans, lightweight polyester lining, stretch legging, waterproof shell, and velvet jacket all react differently to puncture and tension. Material names alone do not tell the whole story. The repair should account for fabric structure, thickness, elasticity, surface coating, transparency, pile direction, and the amount of movement expected during use.
| What to inspect | Lower-risk example | Higher-risk example | Practical response |
|---|---|---|---|
| Structure | Stable woven cotton | High-stretch knit | Use a stretch-compatible repair |
| Thickness | Shirt-weight fabric | Heavy denim or several layers | Test penetration before sewing |
| Surface | Plain textile | Waterproof or coated fabric | Check manufacturer guidance first |
| Movement | Jacket back | Knee, elbow, cuff | Increase appropriate reinforcement |
| Garment value | Everyday casual clothing | Silk, tailored wool, vintage clothing | Consider professional repair |
| Patch backing | Flexible textile | Hard plastic or rubber layer | Avoid forcing a hand needle |
| Washing | Occasional laundering | Uniform washed frequently | Prioritize perimeter security |
A waterproof coating or laminated membrane deserves special caution. A needle creates holes, and an adhesive may interact with the coating. Even when the repair looks attractive, the original technical performance may not be restored. For protective, waterproof, flame-resistant, load-bearing, or certified clothing, consult the garment manufacturer or a specialist repair service instead of assuming a household patch technique restores the original function.
Select the needle for the fabric, not for convenience
A fine sharp hand needle works well on many woven fabrics because it can take small controlled bites without creating oversized holes. Heavy denim, canvas, or a dense embroidered border may require a stronger needle and a thimble. Stretch knits can be more sensitive to fiber damage and may need a different approach. The needle should move through the textile cleanly rather than forcing yarns apart with excessive pressure.
Evidence and tool chain placed at the needle-selection stage:
- University sewing reference: Utah State University Extension lists hand needles, straight pins, measuring tools, marking tools, fabric scissors, and thimbles among useful sewing supplies.
- Needle selection tool: SCHMETZ provides a fabric-and-application needle guide covering Universal, Jersey, Stretch, Jeans/Denim and other needle families.
- Video – Hand-sewing needle types and sizing: Useful before sewing thick, delicate, or unfamiliar patch materials.
Choose thread according to where the stitch will be seen
“Match the thread to the fabric” is incomplete advice because two fabrics are involved. For an embroidered patch with a black border on a tan jacket, black thread is usually less visible than tan thread because the stitch emerges within the black border. For a hidden repair patch behind faded jeans, thread matching the worn denim may be less noticeable than thread matching the backing patch.
Compare a single strand of thread with the repair area rather than judging the entire spool. Thread wrapped hundreds of times around a spool appears darker and more saturated than one strand stretched across fabric. Check the match in daylight and normal indoor lighting, then step back to normal viewing distance. Perfect laboratory color matching is rarely necessary if the needle path itself exposes very little thread.
Mark position before committing to the first stitch
A patch that moves only 3–5 mm during sewing can look obviously crooked when it sits beside a pocket, zipper, seam, stripe, printed graphic, or another patch. Establish a visual reference before sewing. This may be the garment center line, pocket edge, shoulder seam, cuff line, or a temporary removable mark. On a curved sleeve or trouser leg, check the position while the garment is in a natural shape instead of relying only on a flat tabletop view.
Downloadable file resource placed with preparation:
- USU Basic Sewing Supplies PDF: A printable reference for basic needles, cutting tools, marking tools, pins, measuring equipment, pressing tools and sewing accessories.
3. How to Sew a Fabric Patch with Nearly Invisible Stitches
The following method is most appropriate for an ordinary flexible fabric patch with a clean folded or finished edge on a stable garment. It is not intended as a universal procedure for safety clothing, waterproof membranes, very high-stretch sportswear, leather, or heavily coated technical fabric. If you have never used a blind or slip-style hand stitch, practice for a few minutes on scrap cloth first so you can see how little surface fabric the needle needs to catch.
Step 1: Prepare the garment surface
Clean the repair area according to the garment’s care instructions and allow it to dry fully. Remove lint, dust, and completely detached fibers without pulling yarns that remain connected to the garment. Place the garment on a firm, flat surface rather than a bed, sofa, or lap. A stable table makes it easier to keep the fabric relaxed and prevents accidental stretching while the patch is being aligned.
If you are repairing an existing hole, examine the surrounding material under good lighting. Fabric that looks intact from a distance may be thin, shiny, fuzzy, or partially broken near the damage. Do not place the final stitch line directly into weak yarns simply because they are close to the hole. Healthy surrounding fabric gives the patch a stronger anchor.
Step 2: Prepare the patch edge
For a homemade woven patch, fold raw edges toward the back so loose yarns are enclosed. If the garment and patch can safely be pressed, a controlled fold makes hidden sewing easier because the needle can travel inside the folded edge. Do not use heat simply because folding is convenient; the garment care label and fabric properties still control whether ironing is appropriate.
A patch used for structural repair should also follow the garment grain where practical. Aligning the patch grain with the original woven direction helps the two layers move more similarly and can make the repair visually calmer. A randomly rotated patch may stretch or drape differently from the garment, especially when the material has directional texture.
Evidence chain placed directly under patch preparation:
- iFixit/Patagonia fabric patch guide: Demonstrates measuring damage, selecting fabric by weave, fiber, weight, stretch and color, aligning grain direction, folding seam allowance and preparing patch corners.
Step 3: Position and stabilize the patch
Lay the patch over the intended area and confirm its position before making permanent holes. Check alignment with seams, pockets, stripes, printed patterns, and garment center lines. For a repair patch, make sure the coverage reaches healthy textile around the entire damaged area. For a decorative patch, check orientation carefully because a circular or symmetrical badge can rotate gradually during sewing without appearing obviously wrong until the work is almost complete.
When sewing a sleeve, trouser leg, shirt front, or other double-layer area, slide a clean piece of cardboard between the garment layers. This prevents the needle from accidentally sewing both sides together. It also gives you a firm backing surface while positioning the patch.
Evidence chain placed at positioning:
- iFixit hand-sewn patch guide: Shows patch positioning and the use of a cardboard layer inside a garment to prevent accidentally stitching through both sides.
- Video – Basic hand-stitch demonstration: Useful for beginners who need to see hand position, thread handling, knotting and simple stitch movement before working on the final garment.
Step 4: Hide the starting knot
Use a manageable length of thread instead of an extremely long strand that wraps around the patch and tangles. Secure the thread on the garment reverse or bring the needle upward between the garment and patch so the starting knot becomes enclosed underneath. The visible face should not contain a large knot, thread tail, or bulky cluster of repeated securing stitches.
A concealed knot is more than an appearance improvement. It is also protected from surface abrasion and snagging. On lightweight material, use a compact knot rather than several bulky knots stacked together because excess thickness beneath the patch can create a small raised point visible on the outer surface.
Step 5: Catch only a small amount of garment fabric
Insert the needle immediately beside the patch edge and take the smallest practical bite of garment material that still provides a secure hold. Avoid prescribing a fixed number of yarns because fabric density varies enormously. One or two yarns in coarse denim may represent more material than several yarns in a fine cotton shirting fabric.
The most common beginner mistake is pushing the needle too deeply because a large stitch feels stronger. Large surface bites create obvious horizontal thread marks and can pull lightweight material out of shape. Let the needle skim through a shallow layer near the surface instead. If the garment is weakened, move the bite farther into sound material rather than making a deeper stitch in damaged fibers.
Step 6: Enter the patch edge close to the garment bite
Bring the needle into the underside or folded edge of the patch immediately above the small garment bite. Allow it to travel a short distance inside the fold before coming out again. The majority of the thread is now enclosed inside the patch edge, while only the small garment attachment point remains potentially visible.
Think of the folded patch edge as a narrow fabric tunnel. Your needle enters this tunnel, travels within it, then exits a short distance away. If the patch is thin, work slowly so the needle does not accidentally pierce through the visible patch face. Once this movement becomes natural, the resulting thread line becomes much cleaner than a conventional stitch travelling over the patch edge.
Step 7: Keep stitch spacing consistent
Very small stitches are not automatically better if they are random or uneven. A patch with twenty extremely tiny stitches on one side and six widely spaced stitches on the other can pull unevenly and develop lifting edges. Aim for a consistent rhythm appropriate to the patch thickness and location. Corners, tight curves, or areas receiving extra movement may need additional support.
Complete several stitches, then stop and examine alignment before tightening everything aggressively. This short inspection cycle helps catch patch rotation, fabric distortion, or uneven tension early. It is much easier to correct four recent stitches than to remove half of a finished perimeter after discovering the patch has moved.
Step 8: Control tension with a “snug, not tight” rule
Thread tension should bring the patch edge into contact with the garment without drawing the garment upward toward the patch. If the surrounding cloth forms ripples or a gathered ring, the thread is too tight, the garment was stretched while sewing, or the stitches are taking unequal amounts of material.
Do not solve a visible gap by pulling harder until it disappears. First check whether the patch is too stiff for the garment curvature, whether the folded edge is bulky, or whether the patch is positioned across a natural bend. Excess tension can make the repair look flat for a few minutes while storing stress that later causes puckering, curling, broken thread, or tearing beside the stitch.
Step 9: Treat corners and curves carefully
At a square corner, add enough support close to the direction change so the point cannot lift. Avoid one long diagonal stitch crossing the corner because it will be both visible and mechanically inconsistent with the surrounding edge. A circular patch should be followed progressively with short stitches instead of several long chords cutting across the curve.
If the patch edge includes several layers at a folded corner, reduce bulk before sewing where the construction allows. Mitered or carefully trimmed corners on homemade patches can prevent a hard lump. The needle will then pass through a more consistent thickness, helping the final perimeter remain flat.
Step 10: Hide the final knot and inspect the repair
Finish the thread on the garment reverse or beneath the patch edge. Trim the excess thread without cutting so close that the knot can immediately slip open. Remove cardboard, pins, clips, and temporary positioning aids. Let the garment lie naturally for a few minutes before judging the result because material held under hand tension may relax slightly after sewing.
Inspect the patch at two distances. First look closely for loose loops, missed edges, puckering, or unsecured corners. Then step back to the distance from which someone would normally see the garment while it is worn. The practical objective is a clean, stable patch whose attachment does not immediately attract attention.
Video chain placed directly under the complete how-to:
- Video – Hand and machine patch methods: Useful for comparing perimeter hand sewing with machine attachment and understanding where stitches are typically placed around a patch edge.
- Reference – Professor Pincushion Blind Stitch: Useful when you want a closer explanation of hiding most thread within a garment structure.
4. How Do You Hide Stitches on Embroidered and Thick Patches?
Commercial embroidered patches are often much denser than homemade fabric patches. Their center may contain several layers of embroidery thread, lettering, logos, stabilizer, heat-activated backing, or a rigid internal layer. Trying to push a needle repeatedly through the thickest center section can damage the design, bend the needle, hurt your fingers, and create highly visible stitches. The outer embroidered border is usually the better attachment zone.
Use the embroidered border as camouflage
Inspect the patch edge closely. Many embroidered badges use a thick satin-stitched or merrowed border around the perimeter. This raised structure naturally creates shadows and texture, providing an ideal place to hide small attachment stitches. Bring the needle through the garment near the patch edge, catch the underside or lower portion of the border, then return through the garment.
Avoid crossing the main artwork unless the patch construction leaves no reasonable alternative. A thread line through a smooth white letter, small emblem, face, or logo becomes far more noticeable than the same thread disappearing into a thick border. The objective is to make the border carry the attachment while leaving the design undisturbed.
Match thread to the border, not automatically to the garment
If the patch has a black border, black thread normally disappears more effectively than thread matching a beige jacket underneath. A white border needs white or a suitable off-white. If the patch contains multiple colors but the entire edge is navy, navy thread is usually the logical first choice. The relevant color is the color surrounding the stitch, not the color covering the largest area of the garment.
For patches without a distinct border, select a thread close to the local patch background where the needle emerges. When two possible colors both look acceptable, choose the one with lower visual contrast from normal viewing distance rather than trying to achieve an exact colorimetric match.
Sew a merrow edge from the underside
A merrow edge is the thick overlocked border commonly seen around embroidered patches. Instead of taking a large stitch over the outer rim, catch the underside or base of the edge loops. When the thread is pulled gently, the attachment point sits beneath the raised border and becomes difficult to see from above.
Do not place stitches so far inward that they cross the patch design, and do not pull the edge down so tightly that the border begins to roll inward. The patch should rest on the garment naturally. The stitch secures it; the stitch should not reshape it.
Use a thimble for thick material, but do not force a bending needle
A thimble allows controlled pressure on the back end of a hand needle and can make thick fabric considerably easier to manage. Push from the needle end rather than using a bare fingertip against the sharp point. If the needle becomes visibly curved or requires extreme force, stop. A bent needle can suddenly slip sideways and may also produce oversized or irregular holes.
Consider moving the stitch point closer to a thinner border section, choosing a suitable stronger needle, or moving to machine sewing. Very hard plastic-backed, rubberized, leather, or multi-layer patches may not be good candidates for delicate hand sewing.
Evidence and download chain placed with thick-patch handling:
- SCHMETZ Needle ABC PDF: Detailed downloadable needle reference covering fabric applications and needle families, useful when moving from hand sewing to machine reinforcement.
- Video – Singer machine patch demonstration: Useful when a patch is too large, thick, frequently washed, or time-consuming for reliable hand attachment.
Consider machine sewing for large or frequently washed patches
A machine is not automatically stronger in every situation, but it can provide more consistent stitch spacing and speed around a long perimeter. Large jacket back patches, workwear badges, uniform patches, and multiple identical patches may be more efficient to attach by machine when the garment construction allows access.
Before sewing the final item, test a similar stack of fabric and patch material. Confirm needle type, thread, stitch length, and tension. Sew slowly around curves. At a corner, stop with the needle in the fabric, raise the presser foot, turn the garment, then continue. Check underneath before starting so a lining, pocket bag, or hidden garment layer does not become accidentally trapped.
5. How Do You Make a Repair Patch Less Noticeable?
Decorative patches are intended to be seen, but a patch used to repair a hole often has a different visual goal. The wearer may want the original jeans, trousers, shirt, or jacket to keep its familiar appearance without a large contrasting badge. In these cases, stitch visibility is only one part of the problem. The patch itself, its stiffness, grain direction, thickness, color, and position all affect how noticeable the repair becomes.
Place the patch behind the damage when appropriate
An inside patch can support torn fabric while leaving most of the original garment surface visible. This is useful for denim, trousers, shirts, workwear, and other repairs where a large external patch would change the appearance more than the wearer wants. The patch sits behind the weakened area, while small reinforcement stitches connect the original material to the support below.
An internal patch is not automatically invisible. If the backing color strongly contrasts through a large open hole, it may still be seen. Choose a patch color, weave, and texture that blend reasonably with the garment. In thin or translucent material, even a perfectly matching color can create a visible outline if the patch is much heavier than the original textile.
Match weight, weave, stretch, and drape before perfect color
The physical behavior of the patch matters as much as color. A heavy canvas patch attached behind a lightweight stretch fabric forms a rigid island. The garment continues to stretch around it, concentrating movement at the patch boundary. A better repair uses reinforcement that behaves more like the original textile in thickness, flexibility, weave, fiber structure, and stretch.
For woven garments, align the patch grain with the garment grain where practical. When warp and weft directions run differently, the two layers may resist bending in different directions. This can produce a repair that feels stiff or twists slightly even when the color match looks excellent.
Give the repair enough healthy overlap
A useful measurable reference from the iFixit/Patagonia patch approach is to extend the finished patch at least 1/2 inch, about 13 mm, beyond the measured damaged area in every direction. In practical terms, a 40 mm × 25 mm damaged area would need a finished patch of at least roughly 65 mm × 50 mm before any extra material needed to fold raw edges is considered.
This measurement should not be treated as a universal rule for every fabric. Very weak, frayed, stretch, or large damage may require more support. The important principle is to place stitches in healthy material beyond the visibly weakened zone rather than immediately at the torn boundary.
Make denim repairs blend with existing wear
Denim develops faded highs, darker lows, whiskering, abrasion lines, and directional texture. Matching the original factory indigo color can actually make a repair more visible if the garment has faded substantially. Compare patch fabric and a single strand of thread with the exact damaged area rather than with an unwashed hidden seam.
Thread lines can also follow the visual direction of the denim. Small reinforcement stitches placed in a direction compatible with the weave and existing wear often look calmer than random stitching. The best subtle denim repairs integrate into the surface pattern instead of creating a new high-contrast shape.
Evidence chain placed directly with denim repair:
- iFixit guide – Make a Jeans Patch Less Noticeable: Provides a dedicated visual approach for reducing the appearance of a denim repair.
Know when “invisible” should give way to stronger reinforcement
A knee, seat, elbow, pocket corner, or workwear panel may continue receiving substantial stress after repair. If the garment fabric surrounding the hole is broadly worn, making every stitch extremely tiny may not provide enough support. A wider backing patch, more distributed reinforcement, visible darning, machine stitching, or professional repair may last longer.
A durable repair that blends reasonably well is usually more useful than a nearly invisible patch that opens again after a few wears. Appearance should be balanced with the expected mechanical load.

6. How Do You Keep a Patch from Moving While You Sew?
Patch movement is one of the most common reasons an otherwise careful repair looks amateurish. A patch can rotate, slide sideways, or become slightly skewed while the sewer focuses on individual stitches. The change may be only a few millimeters, yet those few millimeters become obvious beside a pocket, zipper, center seam, stripe, printed design, or second patch.
Pins work well on ordinary stable fabrics
For many woven garments, fine pins are the simplest positioning method. Place them so they hold the patch flat without crossing the intended stitch path. Check the underside before sewing to make sure the pins have not caught additional garment layers. On small patches, too many pins can distort the edge, so two or three well-positioned points may be more useful than covering the entire patch with hardware.
Fine, delicate, coated, or high-value fabrics require more caution because pinholes can remain visible or damage surface treatments. Test a hidden area when uncertain.
Clips help at accessible edges
Fabric clips can stabilize thick patches without creating needle holes, but they work only where the patch edge is accessible and may interfere with perimeter sewing. Remove and reposition clips gradually as you work. Do not use unnecessarily strong household clamps on delicate fabric because concentrated pressure can leave shine, compression marks, or permanent creases.
Temporary basting gives very precise control
A few large removable basting stitches can hold the patch securely while the permanent hidden stitches are added. Basting is especially useful when working with delicate fabric, exact badge placement, curved areas, or several layers. Use a contrasting basting thread that is easy to see and remove, but avoid stitching through decorative artwork unnecessarily.
Once the permanent perimeter is secure, carefully remove the basting thread rather than pulling it aggressively through the finished patch.
Can fabric glue help position a patch before sewing?
A compatible fabric adhesive can help when a patch repeatedly moves, pins distort a small edge, or a curved location makes precise positioning difficult. The important distinction is between a removable basting adhesive and a permanent textile adhesive. If a permanent glue is used, it becomes part of the finished construction. Compatibility, flexibility, wash performance, application amount, and curing time therefore matter.
For a permanent adhesive, more glue is not automatically better. Excess adhesive can penetrate lightweight cloth, squeeze beyond the edge, stiffen the repair, or make later needle penetration difficult. A thin controlled layer or small positioning amount is usually more appropriate when sewing will provide the main perimeter reinforcement.
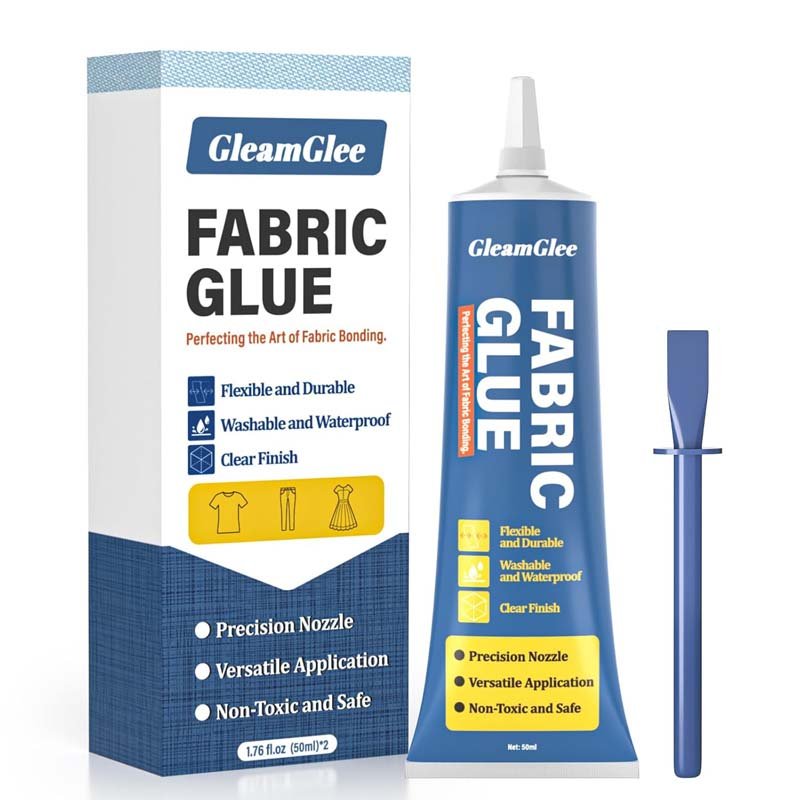
GleamGlee Fabric Glue is designed for textile applications including fabric patches, cotton, denim, polyester, canvas, felt, lace, ribbon, and related clothing or craft materials. Its product information describes a clear-drying flexible bond after full cure, precision application, washable use after complete curing, and iron-safe performance when the garment itself also permits ironing. The reference timing is approximately 6–10 minutes for initial positioning and about 24 hours for complete curing.
This means a patch that appears to stay in place after ten minutes should not automatically be treated as fully cured. If the adhesive is part of the final repair, allow the stated full cure period before normal stretching, washing, or ironing.
Evidence chain placed directly with adhesive positioning:
- External fabric-adhesive application reference: JOANN’s fabric adhesives guide covers common textile bonding uses and provides general background on fabric adhesive applications.
- Suggested static page download: “Patch Positioning Before Sewing Checklist.pdf” should include patch orientation, garment reference points, backing type, pin/basting choice, hidden compatibility test, and a reminder to distinguish permanent glue from removable basting adhesive.
Check curved garments in a natural shape
A sleeve, knee, hat, or trouser leg changes shape during wear. A patch can look centered while the garment lies completely flat but shift visually once the body fills the garment. Temporarily position the patch, then check the garment in a natural three-dimensional shape when practical. Avoid stretching the textile artificially just to make the patch appear perfectly flat.
For multiple patches, plan all positions before permanently attaching the first one. Use a paper template to test spacing and orientation without repeatedly handling the real patches. A consistent center line or seam reference prevents the final design from drifting as each patch is added.

7. Why Are My Patch Stitches Still Visible?
A repair can remain visually obvious even when the user follows an “invisible stitch” tutorial. Usually the stitch name is not the problem. Visible thread comes from where the needle travels, how much garment fabric is caught, thread color, tension, patch thickness, or poor stabilization. Identifying the specific symptom before changing the sewing method prevents unnecessary extra stitches.
| Problem | Common cause | Better correction |
|---|---|---|
| Thread bars visible on garment | Needle catches too much surface fabric | Take a shallower garment bite |
| Thread crosses patch face | Needle enters too far from border | Move into folded edge or embroidered border |
| Fabric puckers | Excess thread tension | Relax tension and flatten garment |
| Patch rotates | Weak positioning | Reposition and stabilize before continuing |
| Edge lifts | Spacing too wide or patch too stiff | Add appropriate perimeter support |
| Patch curls | Uneven tension | Correct affected stitches |
| Needle bends | Backing too dense | Stop and change needle or method |
| Knot shows | Start/finish placed outside | Hide knot beneath patch or on reverse |
| Fabric tears beside patch | Stitch line sits in weak textile | Increase overlap into healthy material |
Visible thread usually means the needle path is too exposed
Look closely at the exact thread sections you can see. If short horizontal bars appear on the garment, reduce the amount of visible fabric caught by each stitch. If thread crosses the patch itself, move the entry point closer to the folded edge or embroidered border. Thread color helps, but color cannot fully disguise a large exposed stitch placed in the wrong location.
Correct placement first; improve color matching second.
Puckering usually means excess tension
A patch should lie on the garment, not pull the garment toward itself. If the cloth forms radial wrinkles or a gathered ring, stop tightening the thread. Allow the textile to relax on a flat surface. A few stitches may need to be removed and resewn with gentler tension.
Do not try to iron a tension problem flat. Heat can temporarily flatten some fabric while leaving the stitch tension unchanged, and heat-sensitive synthetic materials may develop shine or distortion. Repair the cause rather than hiding the symptom.
A crooked patch usually moved during sewing
Round or symmetrical patches are particularly easy to rotate without noticing. Place a removable mark at the top before sewing and check it every few stitches. On rectangular patches, monitor the distance to nearby seams or pockets instead of judging only one edge.
If the patch has already moved substantially, correcting the error early is usually easier than forcing the final section into alignment.
Lifting edges indicate a mismatch between attachment and movement
If a patch lies flat while the garment is stationary but lifts when a knee or elbow bends, the problem may be patch stiffness, insufficient perimeter support, or a location receiving more movement than the original method can tolerate. Pulling the same edge tighter is not always the answer.
Consider a softer patch, more appropriate stitch spacing, flexible reinforcement, machine attachment, or a different location if the patch is decorative.
A bending needle is a warning, not a challenge
Hard embroidery backing, plastic film, several fabric layers, leather, dried adhesive, and rubberized patch materials can all resist a fine hand needle. If the needle flexes strongly, stop. Choose a more appropriate tool or method rather than increasing force.
The goal is controlled penetration, not maximum hand pressure.
Video and resource chain placed directly under troubleshooting:
- Video – Machine blind hem comparison: Useful for understanding how hidden stitches can leave only tiny attachment points on the visible side, even though this example uses a machine rather than a patch.
- Static printable resource suggestion: “Invisible Patch Troubleshooting Card.pdf” can show six side-by-side examples: correct tiny bite, oversized bite, correct tension, puckering, hidden knot, and exposed knot.
8. How Do You Keep a Sewn Patch Secure After Wearing and Washing?
The last stitch is not the final durability test. Real performance begins when the garment bends, rubs against other surfaces, becomes wet, goes through laundering, or is repeatedly worn. A lightly used decorative patch on the back of a jacket has very different requirements from a school uniform badge, workwear patch, knee repair, or backpack corner. The finished attachment should match actual use rather than chasing the smallest possible stitch at any cost.
The least visible stitch is not automatically the strongest
A fine thread, tiny garment bite, and wide stitch spacing can create a beautiful low-stress decorative finish. The same combination can be insufficient for heavy movement or frequent washing. A high-use patch may need closer perimeter support, stronger thread, machine reinforcement, a backing patch, or a more visible edge stitch.
Whip stitches and blanket stitches are more visible than blind stitches, yet visibility does not make them technically inferior. When a raw patch edge needs control or the repair requires flexible mechanical support, a visible stitch can be the more responsible choice.
The useful question is not “Which stitch disappears the most?” It is “Which stitch provides enough security while remaining as visually discreet as this application allows?”
Follow the garment care label after repair
A patch does not cancel the original care limits of the clothing. If a garment says “Do Not Iron,” adding an iron-safe patch or an adhesive that tolerates ironing does not make the garment safe to iron. If the garment is dry-clean-only, a washable patch does not convert the whole item into a machine-washable product.
The repaired item now contains several materials with potentially different care limits: original garment fabric, thread, patch material, patch backing, and possibly adhesive. Follow the most restrictive relevant instruction unless the manufacturer provides validated guidance for the complete repaired system.
Authority chain placed directly with washing and ironing guidance:
- FTC Care Labeling guidance: Explains U.S. requirements covering garment washing, drying, ironing, bleaching and necessary warnings.
- GINETEX care-symbol PDF: International reference covering washing, bleaching, drying, ironing and professional textile-care symbols.
- American Cleaning Institute Laundry Basics: Practical consumer reference for sorting, laundering and following garment-care information.
Inspect the patch before the first wash
Do not assume a patch is wash-ready simply because it looks finished. Check the entire perimeter, knots, corners, garment fabric, and any adhesive component first. A loose corner can catch against another garment or drum surface and develop into a much larger failure during laundering.
A conservative first-wash checklist includes:
- Confirm all sewing is complete.
- Check the starting and finishing knot.
- Inspect every corner and curved edge.
- Remove all pins, clips, cardboard and temporary materials.
- Read the garment care label.
- Read separate patch-care instructions when supplied.
- Confirm any permanent adhesive has reached its full cure.
- Close zippers and sharp fasteners that could scrape the patch.
- Turn the garment inside out when appropriate.
- Recheck the patch only after the garment has dried completely.
When GleamGlee Fabric Glue is used as part of a combined patch installation, the documented reference is approximately 24 hours for complete curing. Washing or ironing should wait until the adhesive is fully cured, and the garment’s original care restrictions still remain in force.
Reduce avoidable friction during early laundering
If the care label allows machine washing, turning the garment inside out can reduce direct abrasion against the patch face. A laundry bag can provide another layer of protection for some garments. Avoid washing a newly repaired patch against items with exposed hooks, rough metal hardware, open zippers, or abrasive surfaces when practical.
These steps reduce mechanical stress; they do not compensate for poor attachment. A patch that is already lifting should be repaired before washing rather than relying on a laundry bag to keep it in place.
Inspect again after the first complete wash-and-dry cycle
The first wash provides useful diagnostic information. Check corners, curves, high-motion edges, thread tension, surrounding fabric, and any sign that the patch has become stiffer or more distorted. A tiny lifting corner is easier to correct than a patch that is already half detached.
If surrounding textile begins tearing beside the patch, do not simply add more stitches immediately beside the new tear. The original patch may be too stiff, too small, or attached to broadly weakened fabric. Reassess the repair structure and increase support into healthier textile if appropriate.
Know when home patching should stop
Household patch sewing is excellent for many everyday garments, but some textile products involve functional requirements that cannot be verified visually. A closed hole does not prove restored waterproofness, flame resistance, seam strength, reflectivity, protective performance, or load capacity.
Professional or manufacturer-approved repair should be considered for:
- Certified protective clothing
- Flame-resistant garments
- Waterproof membrane garments where needle holes matter
- Climbing or fall-protection textile equipment
- Load-bearing straps and harness components
- High-value silk, bridal, tailored or vintage garments
- Large tears crossing structural seams
- Repeated failures after previous repair
- Damage with substantial missing fabric
- Patches too hard to penetrate safely
A note for users who need a fabric-adhesive solution
Some patch projects are primarily sewing jobs; others are better suited to textile adhesive, and many low- or moderate-stress projects can use both methods for different purposes. A fabric adhesive should stay flexible enough for clothing, dry cleanly, and be applied in a controlled amount so the garment does not become unnecessarily stiff.
GleamGlee Fabric Glue is available as a 50 mL textile adhesive designed for common fabric repairs, patches, hems, craft work and decorative attachment. It dries clear, is designed to remain flexible after curing, and is intended for washable textile applications after full cure. Its precision application format can be useful around narrow patch edges where uncontrolled glue spread would create visible residue.
For professional users, clothing accessory brands, repair kits, craft suppliers or private-label programs needing different packaging or textile-adhesive formats, customized product and packaging development can also be discussed rather than forcing one consumer-size format into every application. This commercial option should remain secondary to choosing the repair method that actually suits the textile.
Conclusion
Sewing a patch without visible stitches is not one isolated hand-sewing trick. It is a sequence of practical choices. Start by deciding whether the patch is decorative or structural, inspect the backing, assess the garment fabric and movement, choose thread for the location where it will actually appear, and select a needle suitable for the material. Once sewing begins, hide the starting knot, take small garment bites, route the thread through a folded edge or embroidered border, and control tension so the patch sits naturally rather than pulling the garment out of shape.
For a soft fabric patch with a foldable edge, a blind or slip-style stitch is usually the most useful starting method. For an embroidered badge, the raised border provides a better hiding place than the center design. For a repair patch, placing reinforcement behind the damaged garment can reduce both patch and stitch visibility. Large, thick, frequently washed, or high-stress patches may need stronger or more visible reinforcement rather than the smallest possible stitch.
Fabric adhesive can support this workflow when precise positioning is difficult or when a compatible textile repair benefits from combined bonding and sewing. It should be used deliberately, in a thin controlled amount, with enough curing time and respect for the garment’s care limits. Whether you sew, bond, or combine the two methods, the most successful repair is the one that remains flat, flexible, secure, washable within the garment’s care requirements, and visually appropriate for the clothing long after the first day.
Frequently Asked Questions
1. What stitch is best for sewing a patch without visible stitches?
For a flat fabric patch with a clean edge that can be folded inward, a blind or slip-style stitch is usually one of the best options because most of the thread travels inside the patch fold while the needle catches only a small amount of garment fabric. An embroidered patch often benefits from a hidden border stitch instead. A traditional ladder stitch is especially useful when two folded edges face each other, so it should not automatically be treated as the best technique for every flat patch.
2. Can I use a ladder stitch to sew on a patch?
Yes, but only when the patch construction gives the ladder stitch a suitable path. A ladder stitch works best between two opposing folded edges, where the thread forms alternating horizontal rungs before being drawn closed. A flat appliqué patch normally provides only one folded edge, making a blind or slip-style stitch more natural. If the patch has a thick embroidered border, catching the underside of that border can be simpler and visually cleaner than trying to recreate a classic ladder-stitch geometry.
3. How do I sew an embroidered patch without thread showing?
Match the thread to the patch’s outer embroidered border, hide the starting knot on the garment reverse, and catch the underside or lower portion of the raised border rather than crossing the main artwork. Keep each stitch short and use gentle tension so the border does not curl inward. Thick embroidery naturally creates texture and shadow, so carefully placed matching thread can become difficult to notice from normal viewing distance even if tiny attachment points remain visible during close examination.
4. Should my thread match the patch or the clothing?
Match the area where the thread will actually be seen. For a black-bordered embroidered patch on a light jacket, black thread usually disappears more effectively because the stitch emerges in the black border. For an inside repair patch, small thread points are more likely to appear on the garment surface, so matching the garment becomes more important. With faded denim, compare a single thread strand against the exact worn area rather than choosing thread based on the original dark denim color or the appearance of a full spool.
5. Can I use fabric glue to hold a patch before sewing it?
Yes, provided the adhesive is compatible with the fabrics and you understand whether it is temporary or permanent. A small controlled amount of permanent fabric adhesive can stabilize a patch that moves while sewing, but it becomes part of the final repair and therefore needs adequate curing time. Avoid saturating the fabric, particularly on lightweight or absorbent textiles. When using a permanent product such as GleamGlee Fabric Glue, allow the documented full curing period before demanding wear, washing or ironing.
6. How can I sew a patch onto jeans so the repair is less noticeable?
Consider placing a compatible patch behind the damaged denim rather than on top. Match the reinforcement for weight, weave, stretch, grain direction and local color. Extend the patch into healthy denim rather than stitching immediately beside weakened fibers. Choose thread resembling the faded repair zone and keep reinforcement visually aligned with the denim texture where practical. Large knee, seat or crotch damage often needs broader structural support than a narrow line of tiny invisible stitches, even when appearance is important.
7. How do I stop a sewn patch from coming off in the wash?
Start with adequate patch overlap and secure the perimeter into healthy fabric. Reinforce corners and high-motion areas appropriately, hide and secure thread ends, and follow both garment and patch care instructions. If permanent fabric adhesive is also part of the repair, wait for its full cure before laundering. Turn the garment inside out when appropriate, reduce contact with sharp hardware, and inspect the entire repair after the first complete wash-and-dry cycle. Repeated lifting usually signals a problem with material compatibility, patch stiffness, overlap, location, or attachment method rather than a simple need for more thread.